When you click on links to various merchants on this site and make a purchase, this can result in this site earning a commission. Affiliate programs and affiliations include, but are not limited to, the eBay Partner Network.
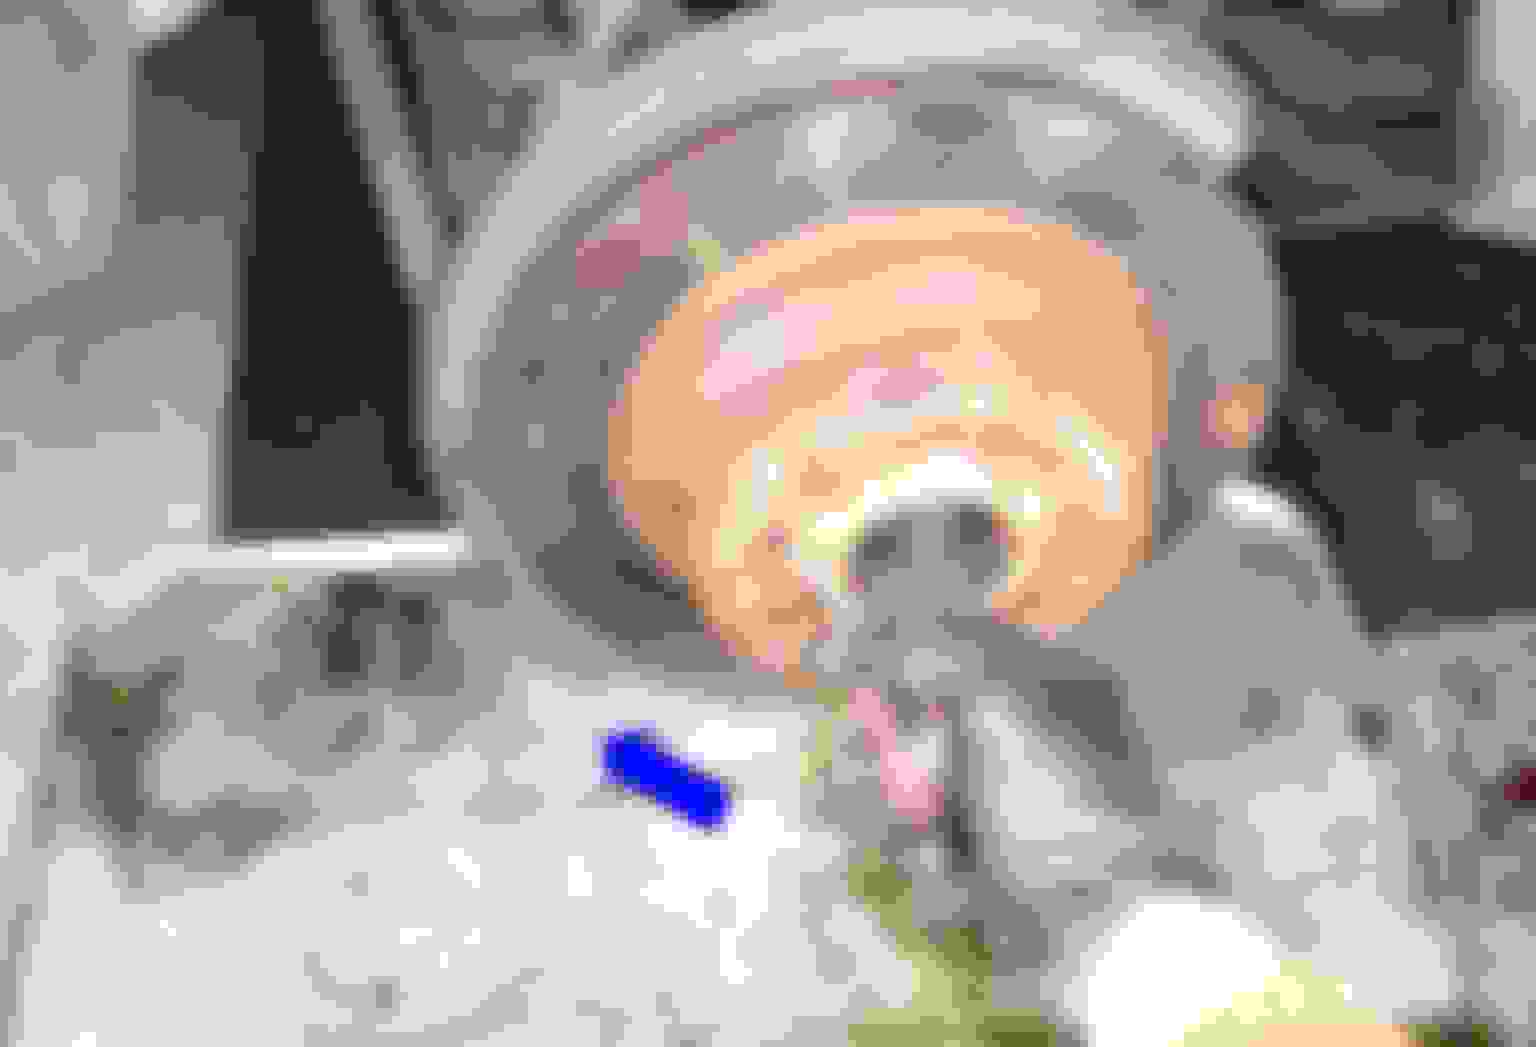
Rear Brake Rotor: There is a chance the brake rotor may not come off because of a lip on the inner part of the rotor from rubbing against the parking brake shoes. You may need to adjust the parking brake shoes inward to be able to remove the brake rotor. Rotate the brake rotor until the brake fastener hole is between approximately the 9 and 10 o'clock position. Insert a flat head screwdriver into the hole and insert it into the gears on the parking brake adjustment pawl. Lever in the direction of the blue arrow to retract the pawl adjustment and allow the pads to come inward. Now it should be much easier to remove the brake rotor from the hub.
I hope you removed the set screw?
Looks like rust is holding the rotor on. If you are replacing them, don't hesitate to give it good smack with sledge.
If you want to save them, spray PBlaster for couple of days on the hub.
E brake pads might hold it from removal, but that after you start sliding the rotor out, so you will see the difference.
The adjusting screw is not easy to see via bolt hole, but it is there. From what I remember one side had it at 10 o'clock, the other at 2.
Search youtube for trick how to push the rotor out using bolts in calipers.
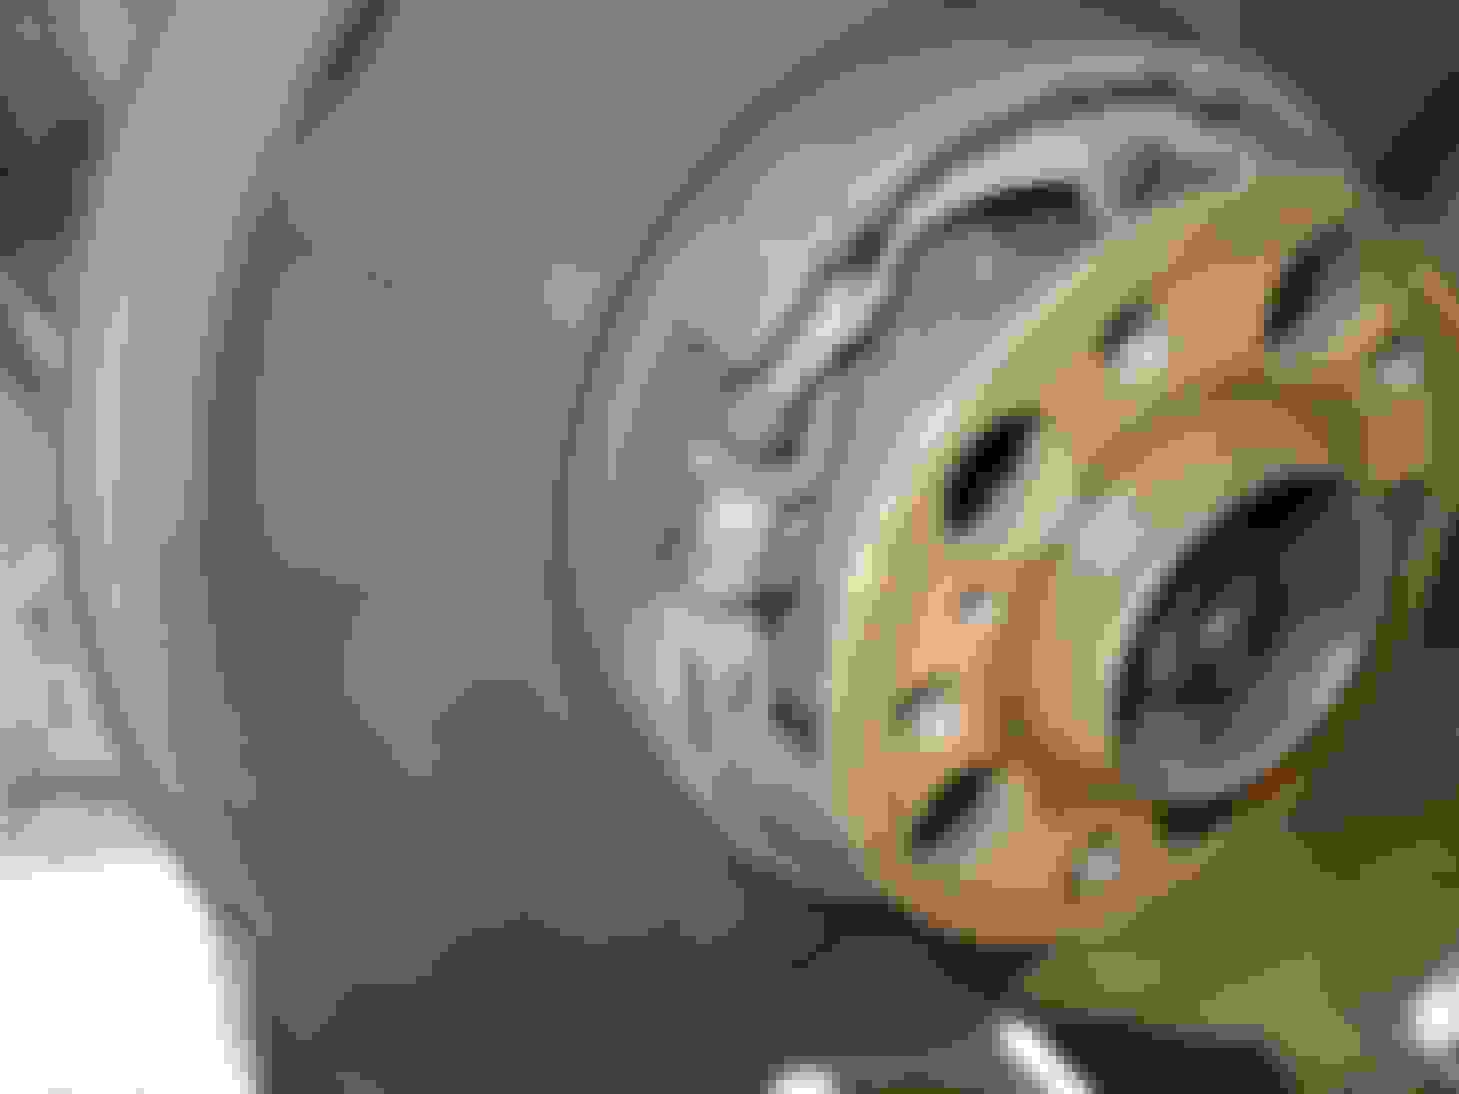
Like Kajtek said, ensure there is no retaining bolt holding the rotor to the hub. Next, release the parking brake by inserting a screwdriver through the threaded hole where the lug bolt inserts; it may take a bit to get the shoes backed off. In my case, one rotor pulled off by hand; the other side, I had to beat on it for 10 minutes using a 4-pound shop hammer. Good thing I was planning on replacing the disc because I beat the crud out of the old rotor. (In the photo you can see the small-diameter threaded hole where the rotor retention bolt was located.)
If the rotor did not move at all, it is not the caliper holding it. Rust fused it to the hub, rear rotors last very long before they need replacement so rust is doing a nasty job. As Kajtek mentioned I used 2 bolts screwed in the bracket for the caliper to push the rotor off. I remember there was something weird about those bolts, maybe the thread was an unusual M9 that I had to cut from a M10
bird, kajtek (pl?) and gafitanu, thank you for all the info. What a wealth of knowledge!
I am sure the retaining bolt was taken off (the torx one) (I have vented rotors by the way). I chose to re use the old (OEM) rotors instead of the Chinese-eum ones I was going to get on ebay.
I did not have spare rotors , and was not able to get them to budge. I left the old rotors on for now and just replaced the pads for now. Next time I will try more PB blaster and a bigger sledge hammer. For now, I just used sand paper on the "lips" of the worn rotors.
Thank you all!
Gafitanu: great idea you are proposing: So you use the original caliper bracket and use screws to "push" the rotor off from twisting force? Great idea. I will try and visualize this next time I have everything off
It was the only solution that worked after hammering and swearing. Use 2 screws in both holes and screw-in in small increments alternatively. At some point it will look like the knuckle is bending. I learned in time that on these jobs I soak it in PB blaster the night before to let it penetrate. Other people have used 3 jaw pullers.

 10-01-2018, 11:19 AM