When you click on links to various merchants on this site and make a purchase, this can result in this site earning a commission. Affiliate programs and affiliations include, but are not limited to, the eBay Partner Network.
This was done on a 2009 E550 w/ Sport Package
I have researched an abundance of videos and forums online about removing/pressing the lower ball joint that is connected to the knuckle itself and have failed to find a method that worked. Some have succeeded with generic ball joint presses but from my personal experience, even with a helper holding/resisting the leverage of the generic press, the press would still not budge. Another method a different user used is raising the car high enough so you could get an impact wrench over the generic press. However, doing this job on the floor is quite the challenge, and my jack would not raise the car high enough to do so.
For those of you who are still puzzled with how to get this thing off, here is what I did:
If you only want to replace the lower ball joint then only read the parts that are "required"
Tools
-Basic tools, i.e. hammer, socket sets from Costco, etc.
Required:
-Impact Gun. Either air or electric is fine. Would not recommend chicago tools (Harbor Freight) impact gun as it failed on me doing other projects.
I have this one (So far it has been very reliable with lots of reviews)
-Socket set of 21mm, 22mm, 24mm. Must be impact compatible. My set is from Harbor freight. Works fine
-Grease. Absolutely required. would recommended silicone grease, or some thicker grease as opposed to the liquid/low viscosity ones.This is what I used:
-Inverted Torx set that has E10. You will be using this to remove the brake pad wear sensor on the passenger side caliper.
Optional:
If you're replacing the sway bar too, you need this because of the 12mm allen socket. Most allen wrenches only come up to 10mm. If you have a 12mm allen or allens socket, then no need to purchase this:
Parts
All parts were purchased from FCP Euro. Add your car on their website to confirm parts are correct. For the purpose of this DIY, the control arm near the front of the car, I will be referring to as the Thrust Arm, and the control arm which houses the shock, sway bar link will be referred to as the Control Arm.
If you are just replacing the ball joint, my total cost was $41.38.
However, since you're in there I would recommend replacing the control arms, thrust arm, and upper ball joint since those will be exposed. Control arm is just 3 bolts away, thrust arm is just 1 bolt away and upper ball joint is only 3 small nuts and bolts, all very easy to access.
-Mercedes Sway Bar Link - Lemforder 2113203989 (optional. replacing this involves removing the shock, which is only 3 upper bolts, 2 connectors. If you're replacing the control arm, you're already unbolted the bottom bolt/nut) https://www.fcpeuro.com/products/mer...ink-2113203989
-Mercedes Sway Bar Link - Lemforder 2113203889, (optional. replacing this involves removing the shock, which is only 3 upper bolts, 2 connectors. If you're replacing the control arm, you're already unbolted the bottom bolt/nut) https://www.fcpeuro.com/products/mer...ink-2113203889
How I did it: Note- Car should be jacked up from the middle front jack pad and jack stands should be placed underneath jack points. Front wheels should be taken off, parking brake on, and also back wheels should be chocked with wheel chocks or wood. Front wheels should be placed underneath car for further safety. Safety should be your number 1 priority.
1. Remove speed sensor/speed sensor bracket using 8mm allen. Hang the speed sensor aside. Speed sensor housing
2. Remove E10 bolt on Caliper. Brake pad wear sensor (if applicable) should be removed from the pads. Hang the sensor aside. Bolt looks like this:
Brake Pad Wear Sensor Bolt
3. Remove Brake pads. Instructions may vary for those without the sport package. For me, it was hammer the pins out (shown on the pic) and pull out the brake pads. Once everything was removed(another image attached)
4. Remove Brake Caliper from Rotor. Mine was held in with 2 18mm bolts. They are the two bolts shown in above on the green towel. Hang the caliper by the upper control arm shown in the picture below
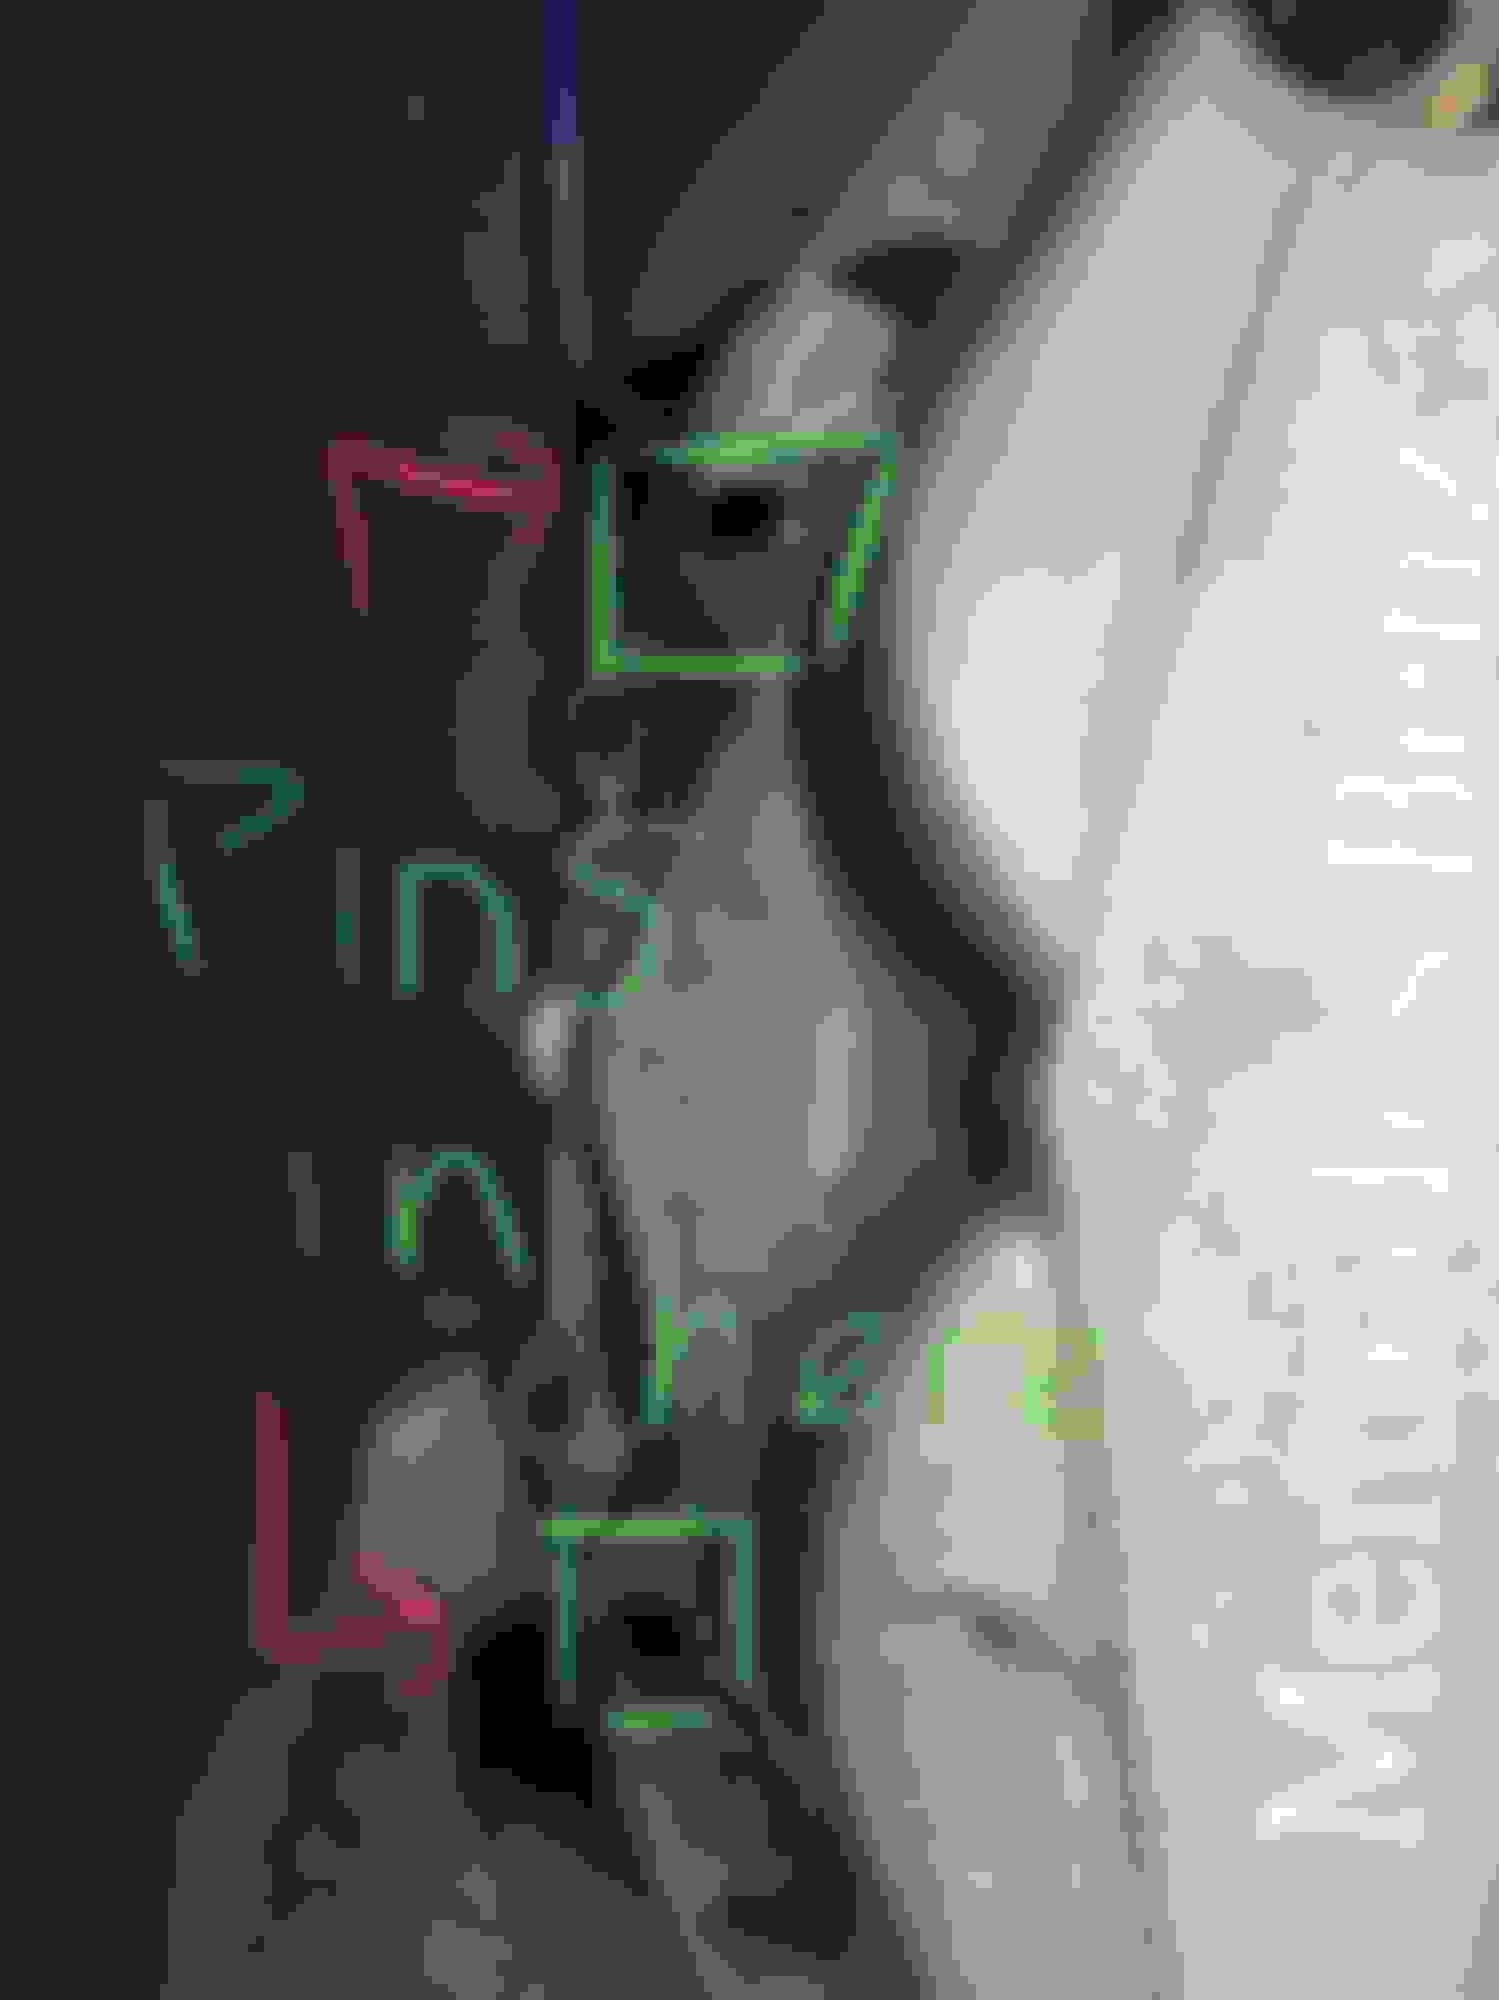
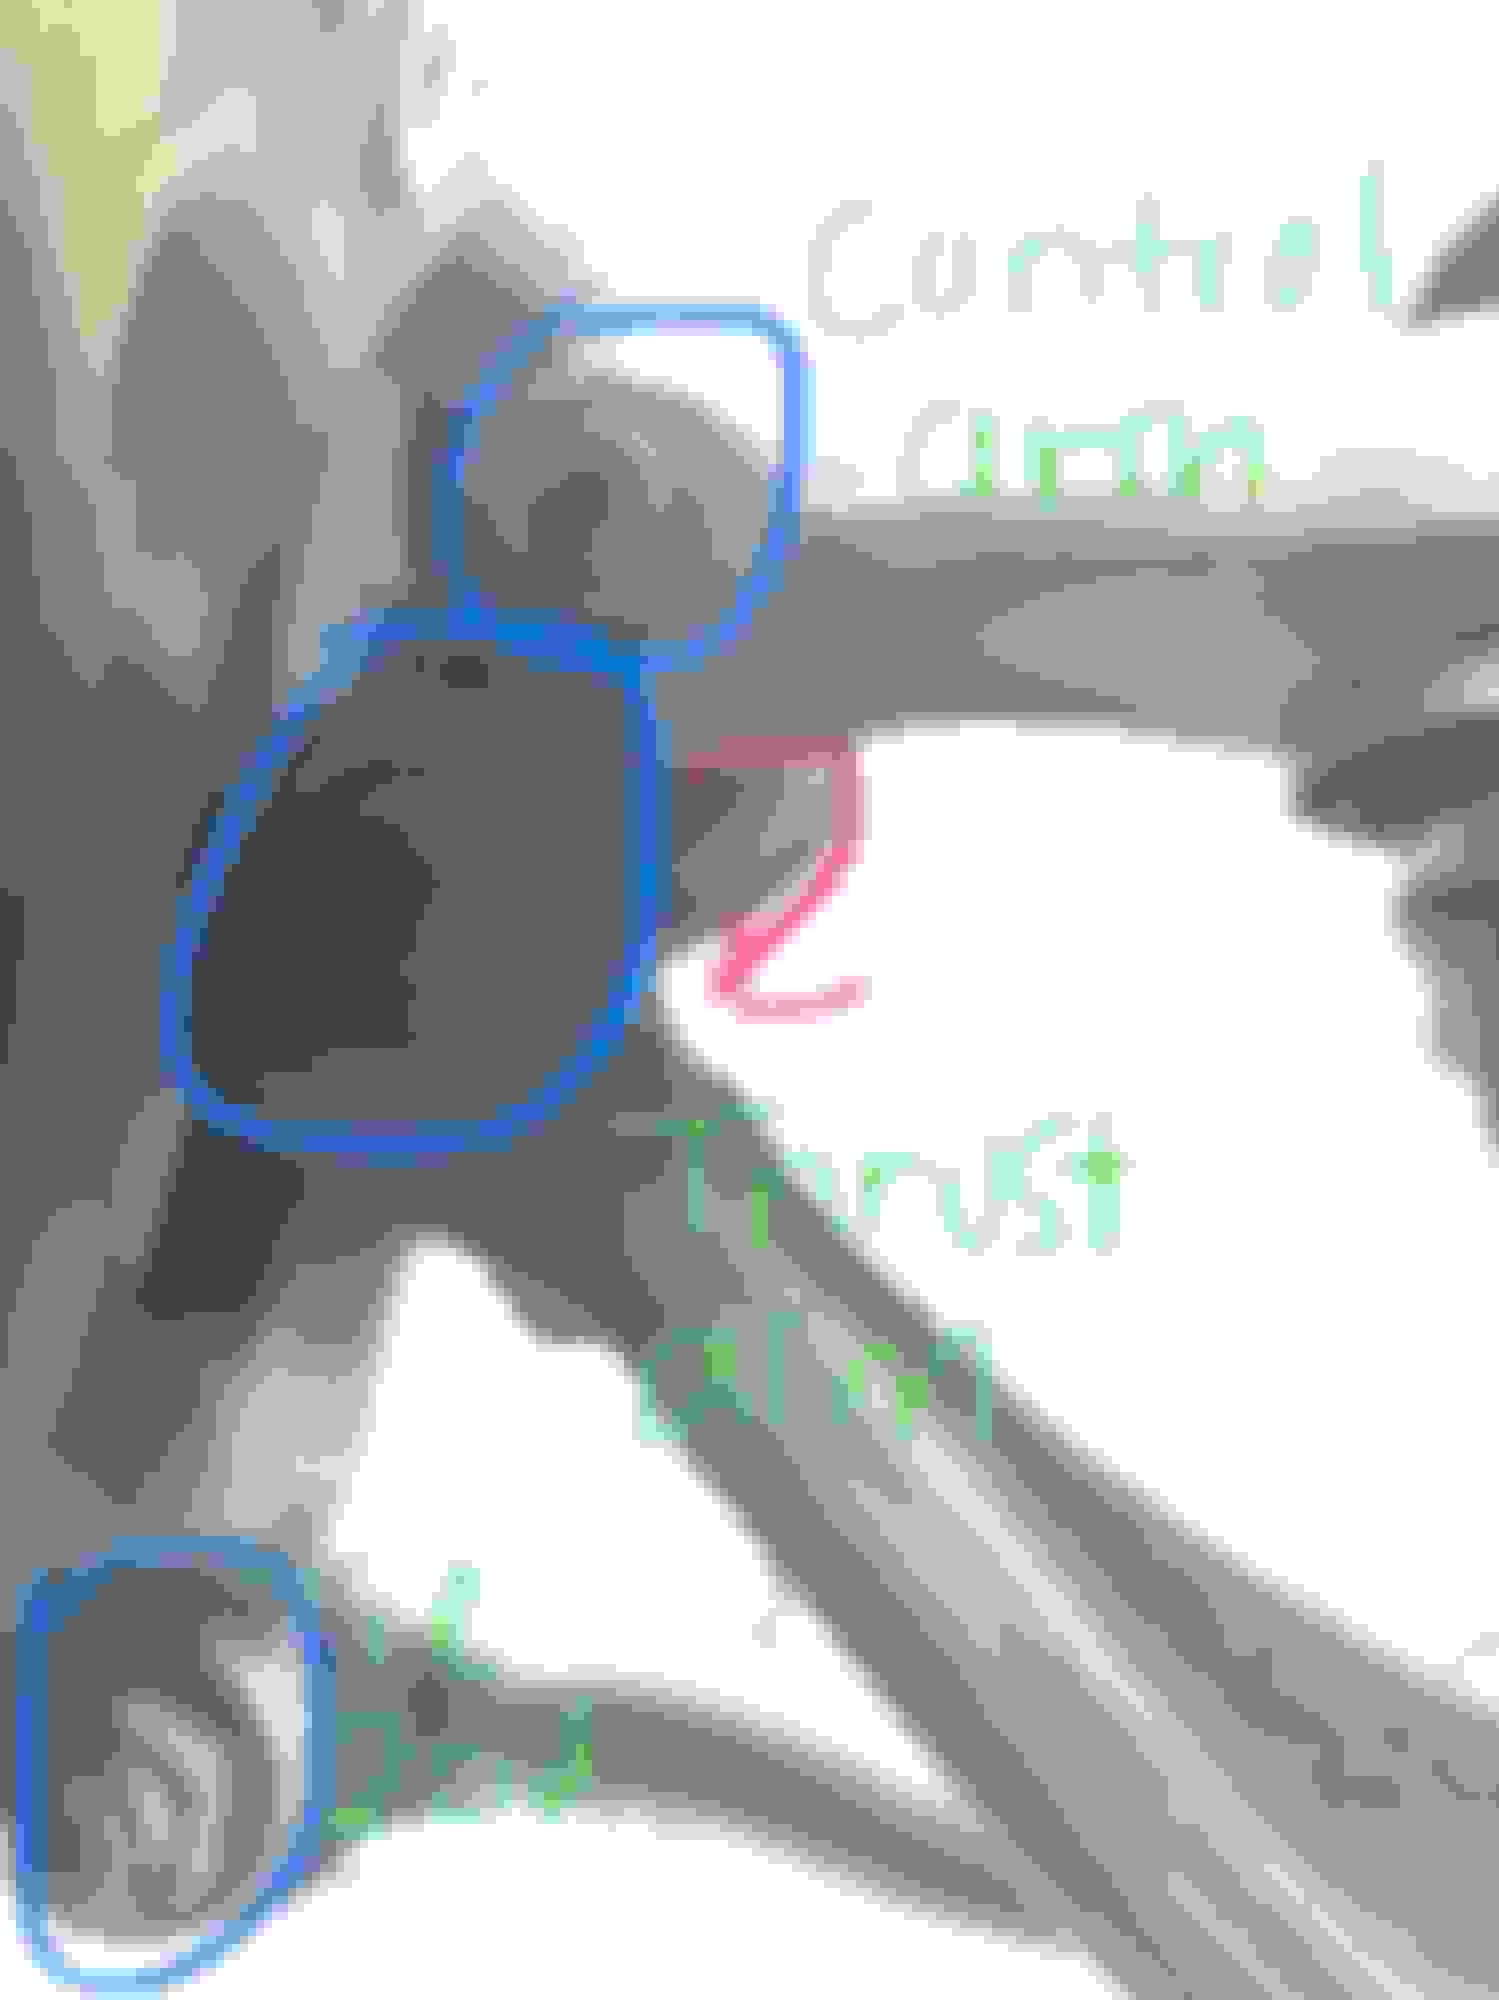
5. Remove all 3 21mm nuts holding the Thrust arm, Control arm, and Tie Rod End. -Blue is where the 21mm nuts are located. The red arrow indicates the nut is on the opposite side.
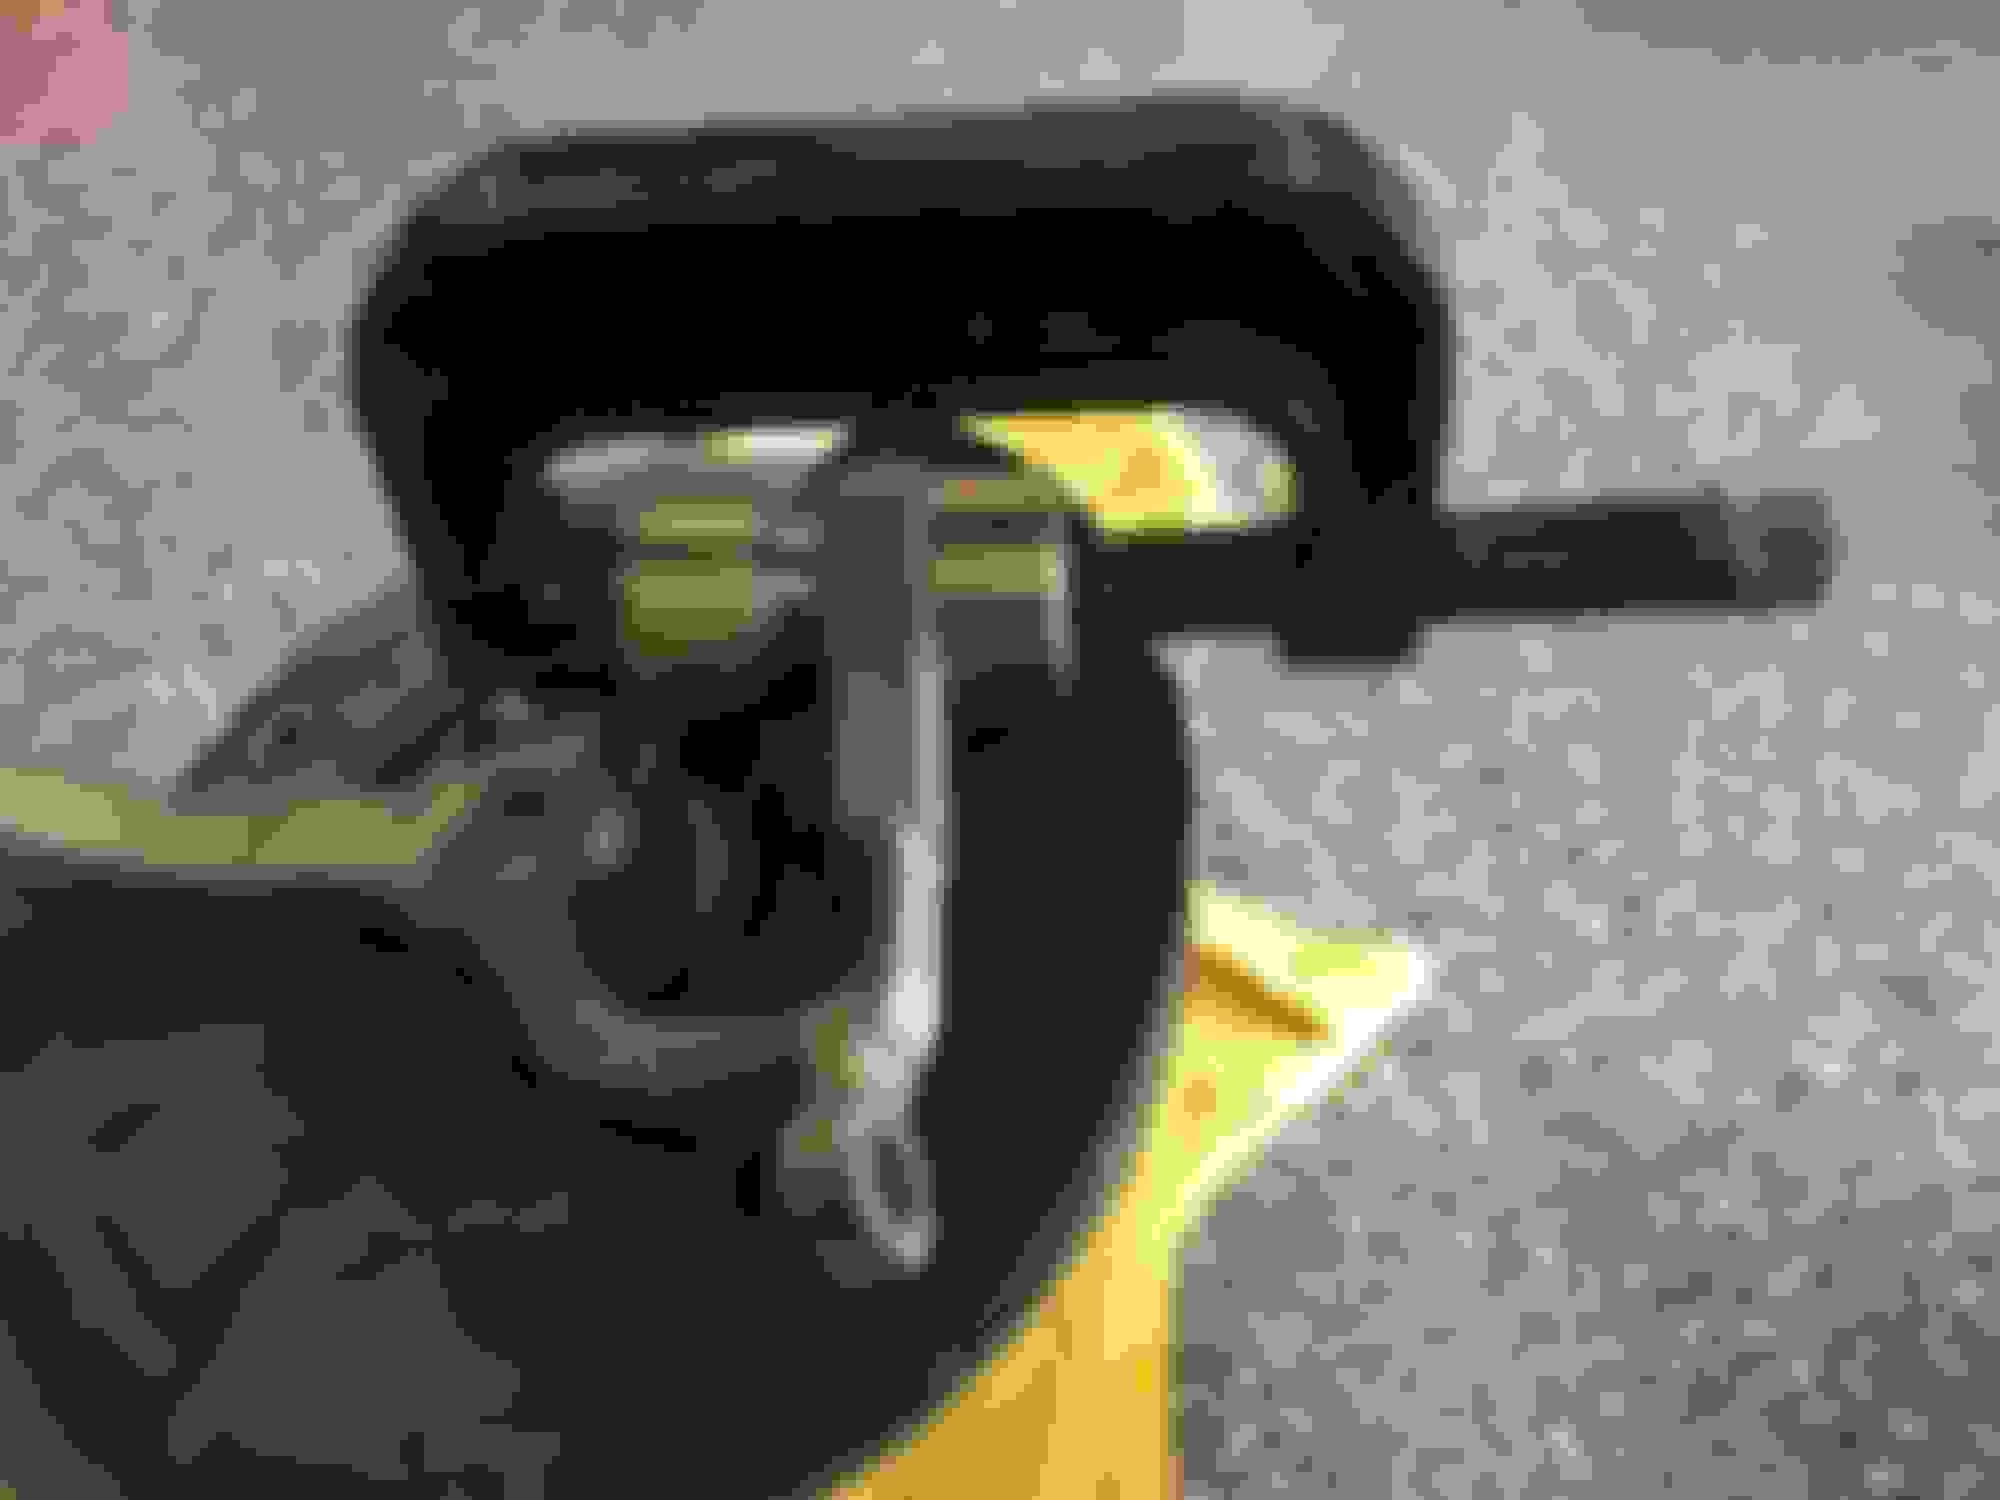
6. Hearing protection highly recommended Using Ball joint Separator (NOT BALL JOINT PRESS), Separate all 3 ball joints. Use a Rubber Mallet (if applicable) if you can't get the separator on the ball joint. Should look something like this:
Ball Joint separator
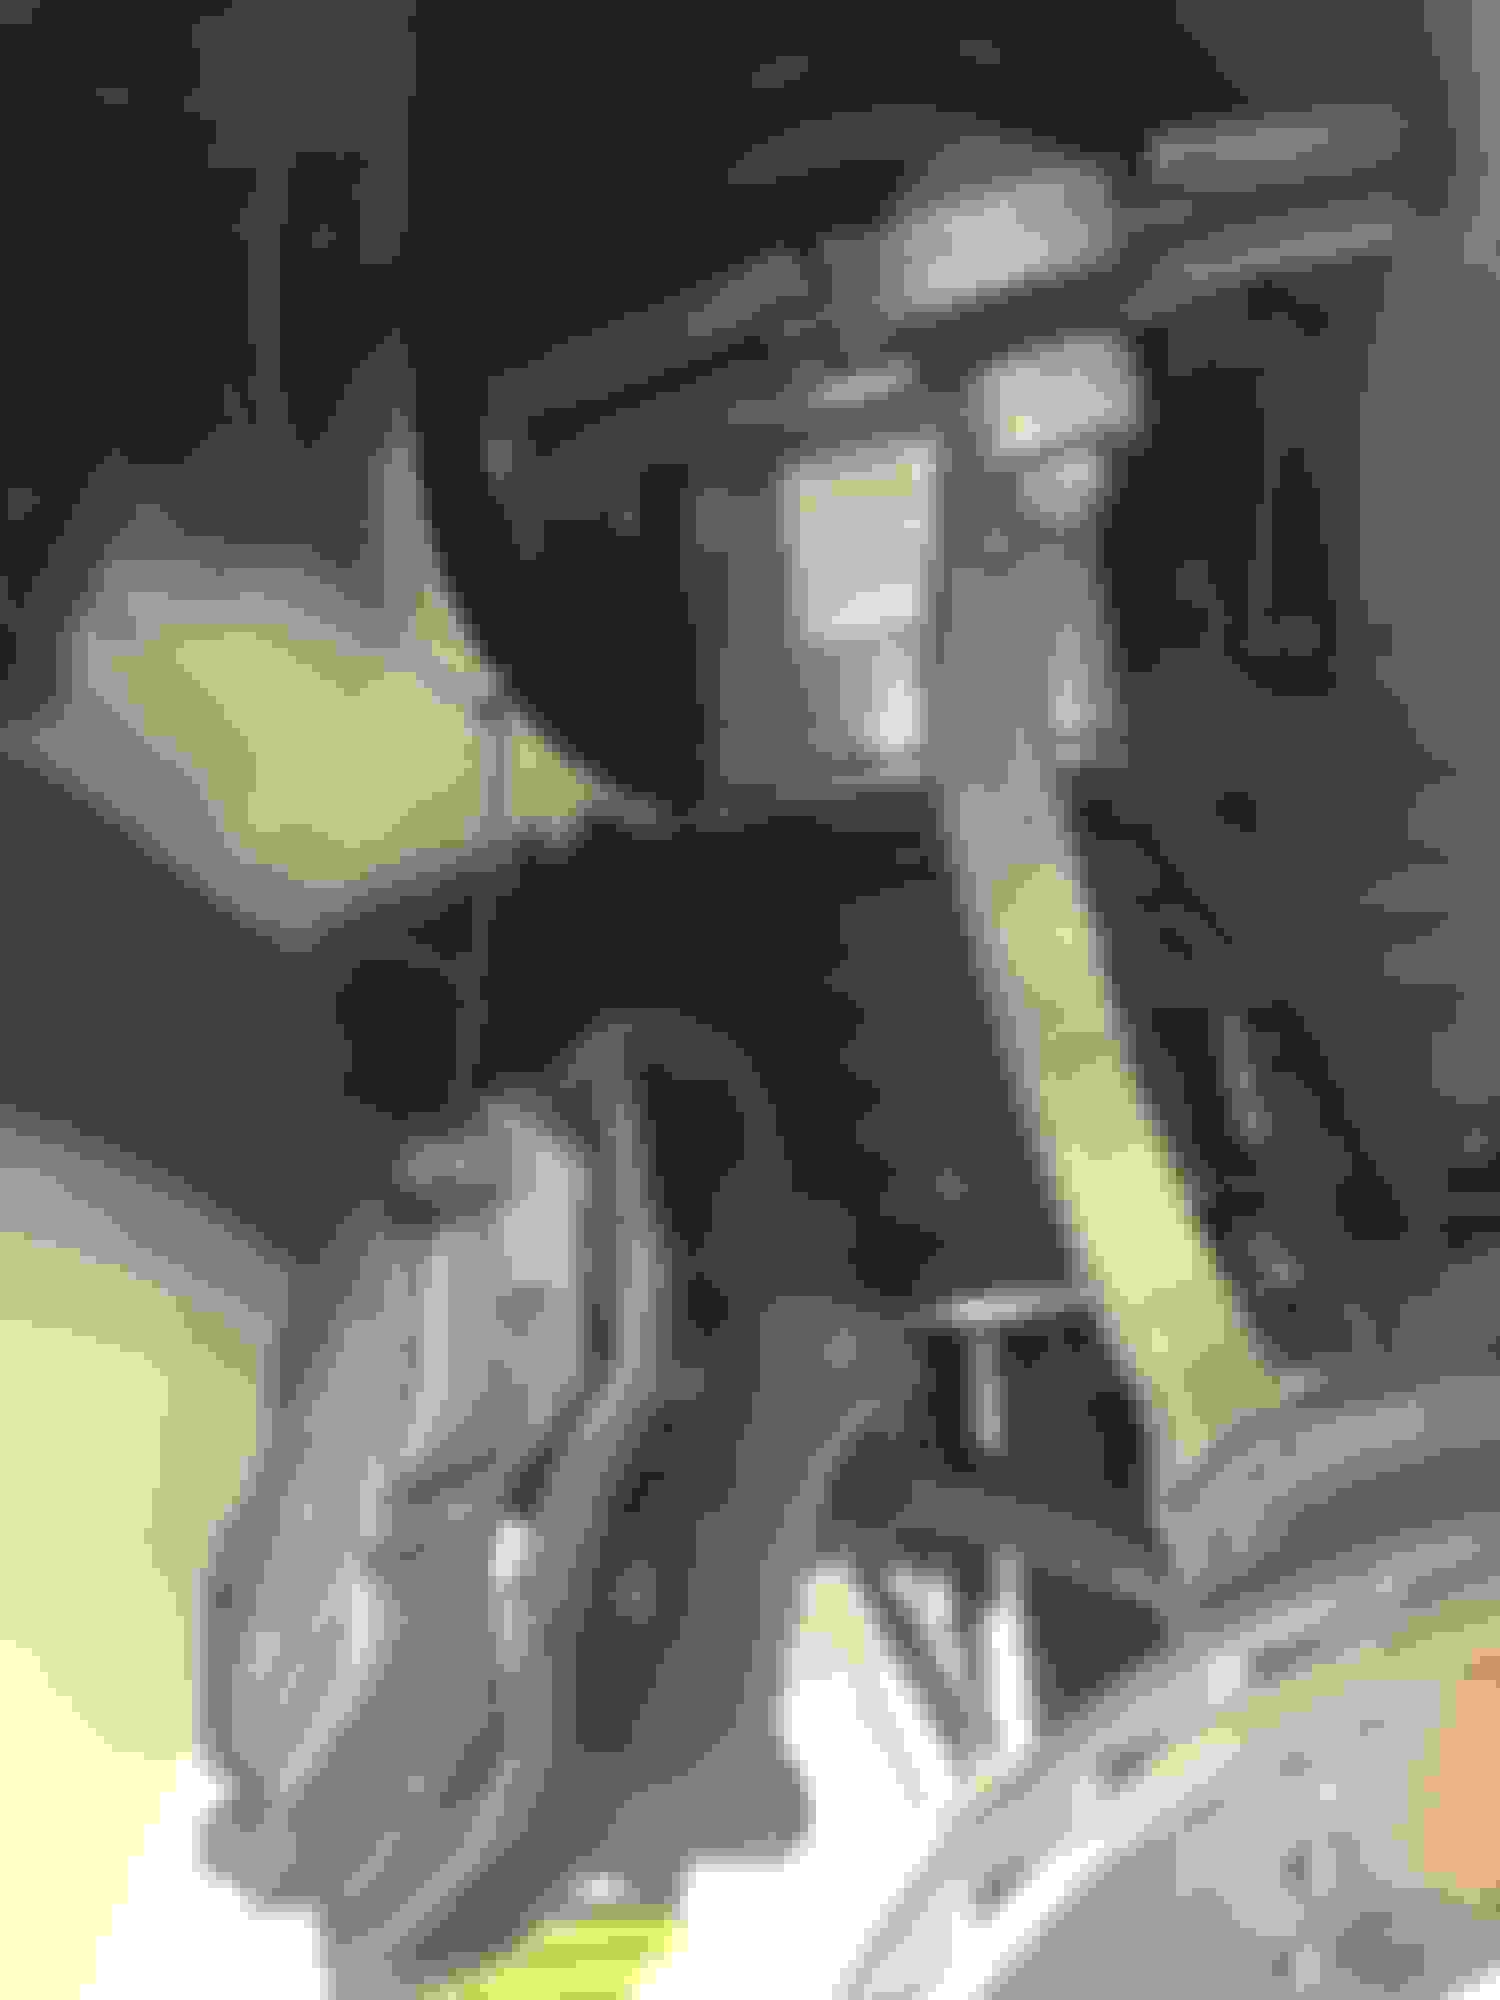
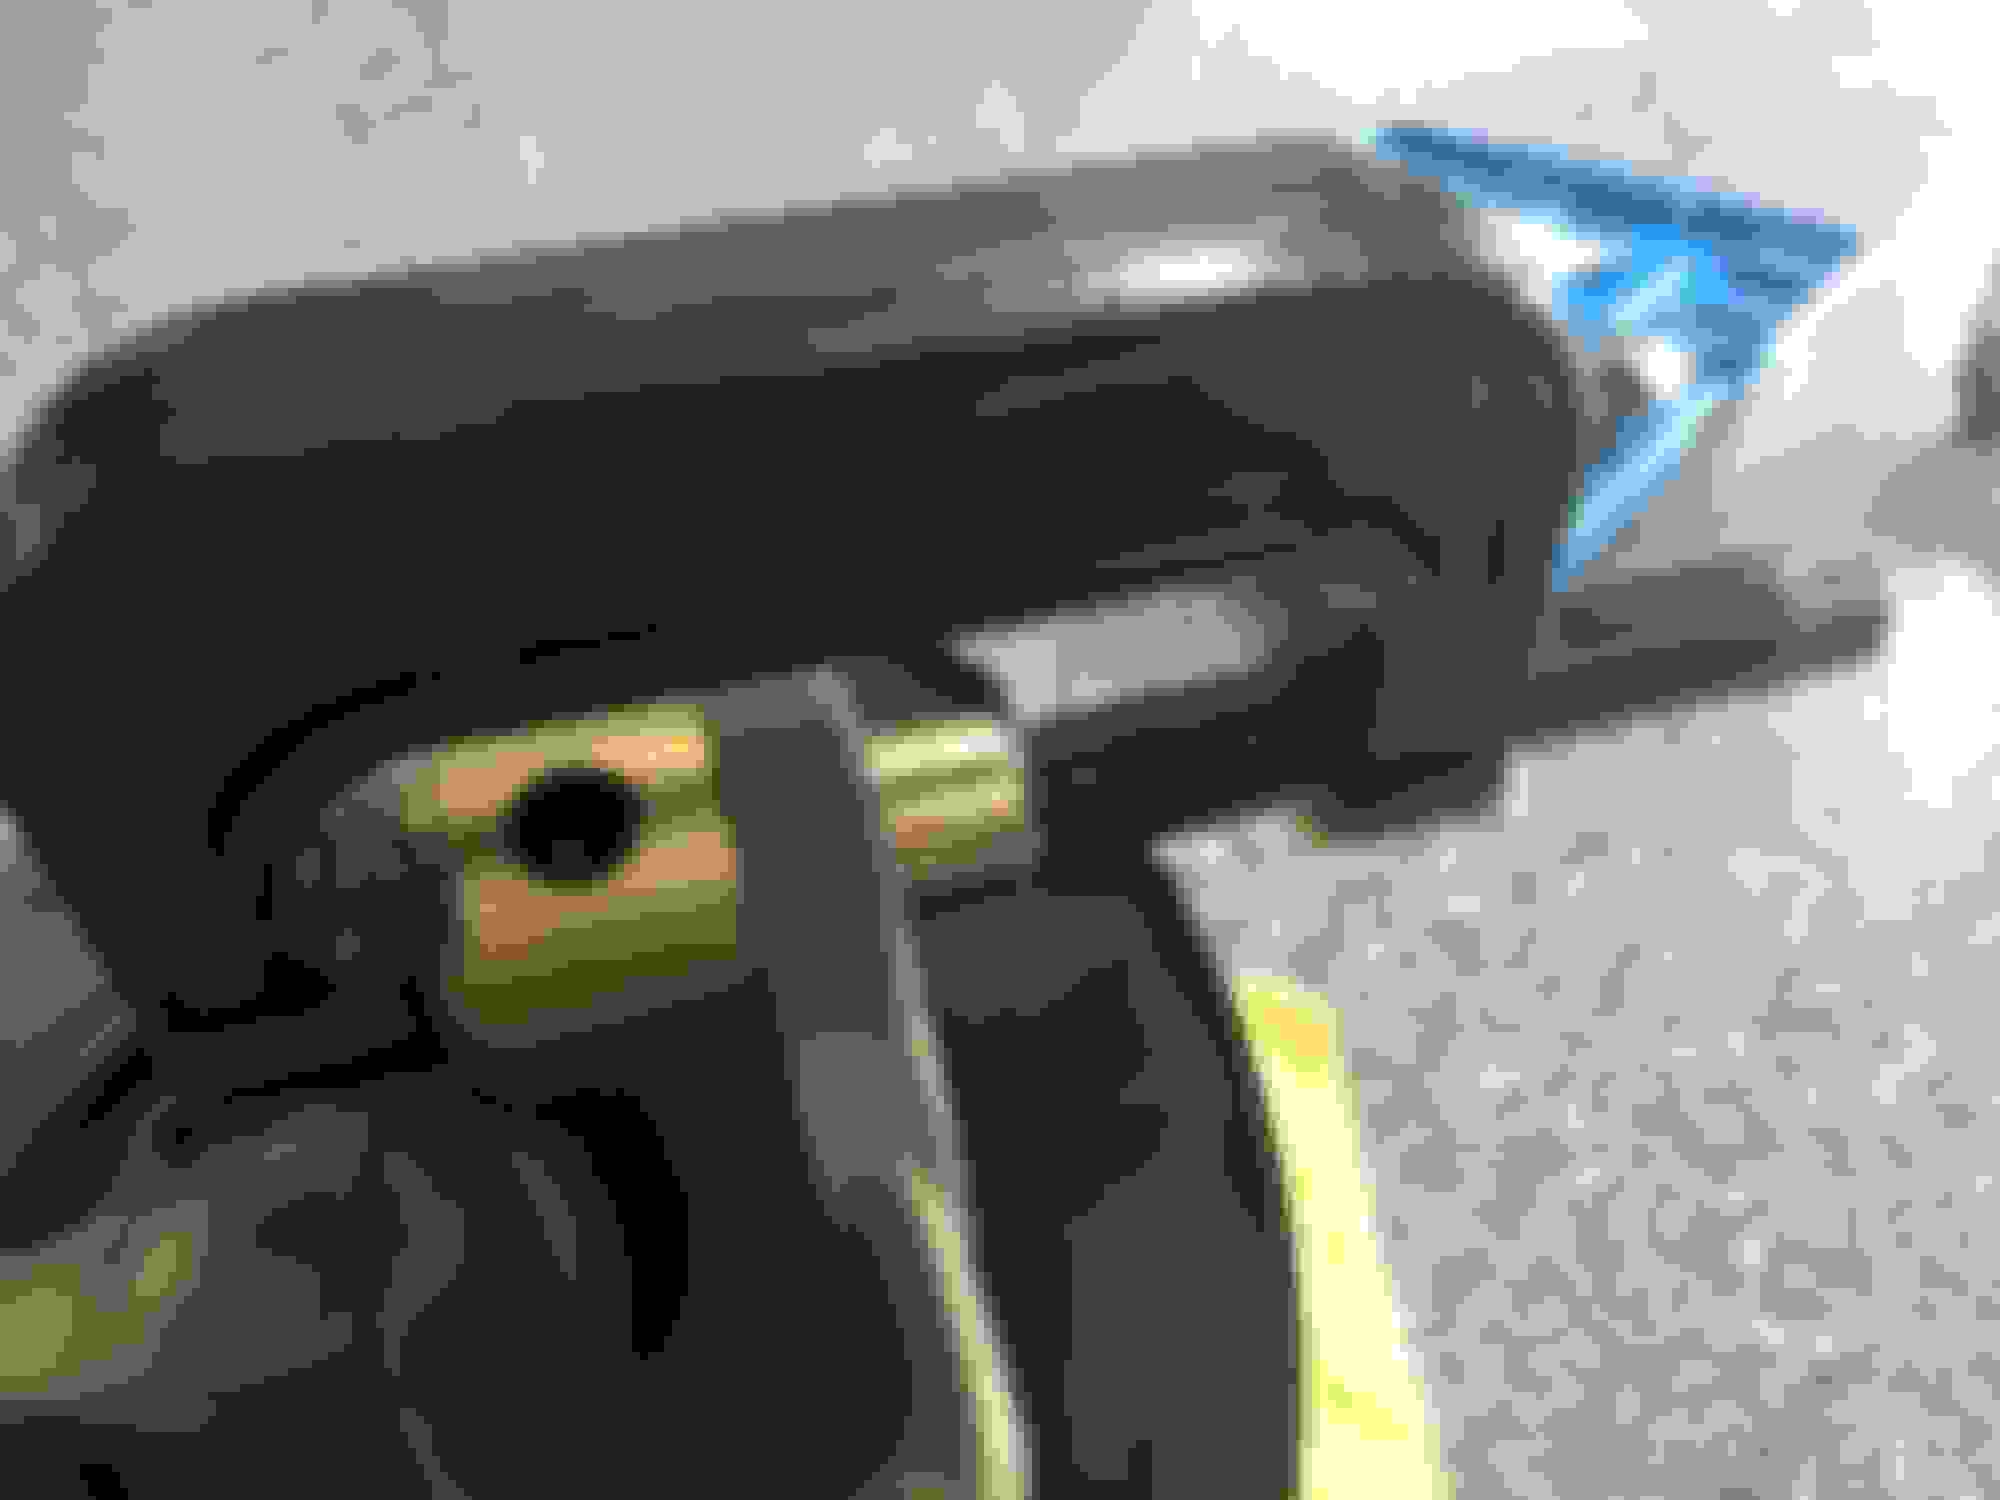
7. Hearing protection highly recommended Using a jack/jack stands, or a helping hand to support the bottom since all ball joints were popped on the bottom. Leave at least 1 nut slightly threaded to lower control arm. This is so the entire knuckle assembly does not drop to the ground and damage rotor. Then remove the nut on the knuckle connection to the upper control arm. Using ball joint separator, separate the knuckle from the upper control arm. This is the connection:
8. While having someone holding the upper knuckle, hand remove the bottom control arm nut you slightly threaded. Wiggle and remove all the lower joints from their respective control arm, thrust arm, and tie rod. Entire Knuckle assembly should now be easily removed. Set the assembly on the ground. Preferably set it on a towel to prevent scratching of the assembly or rotor.
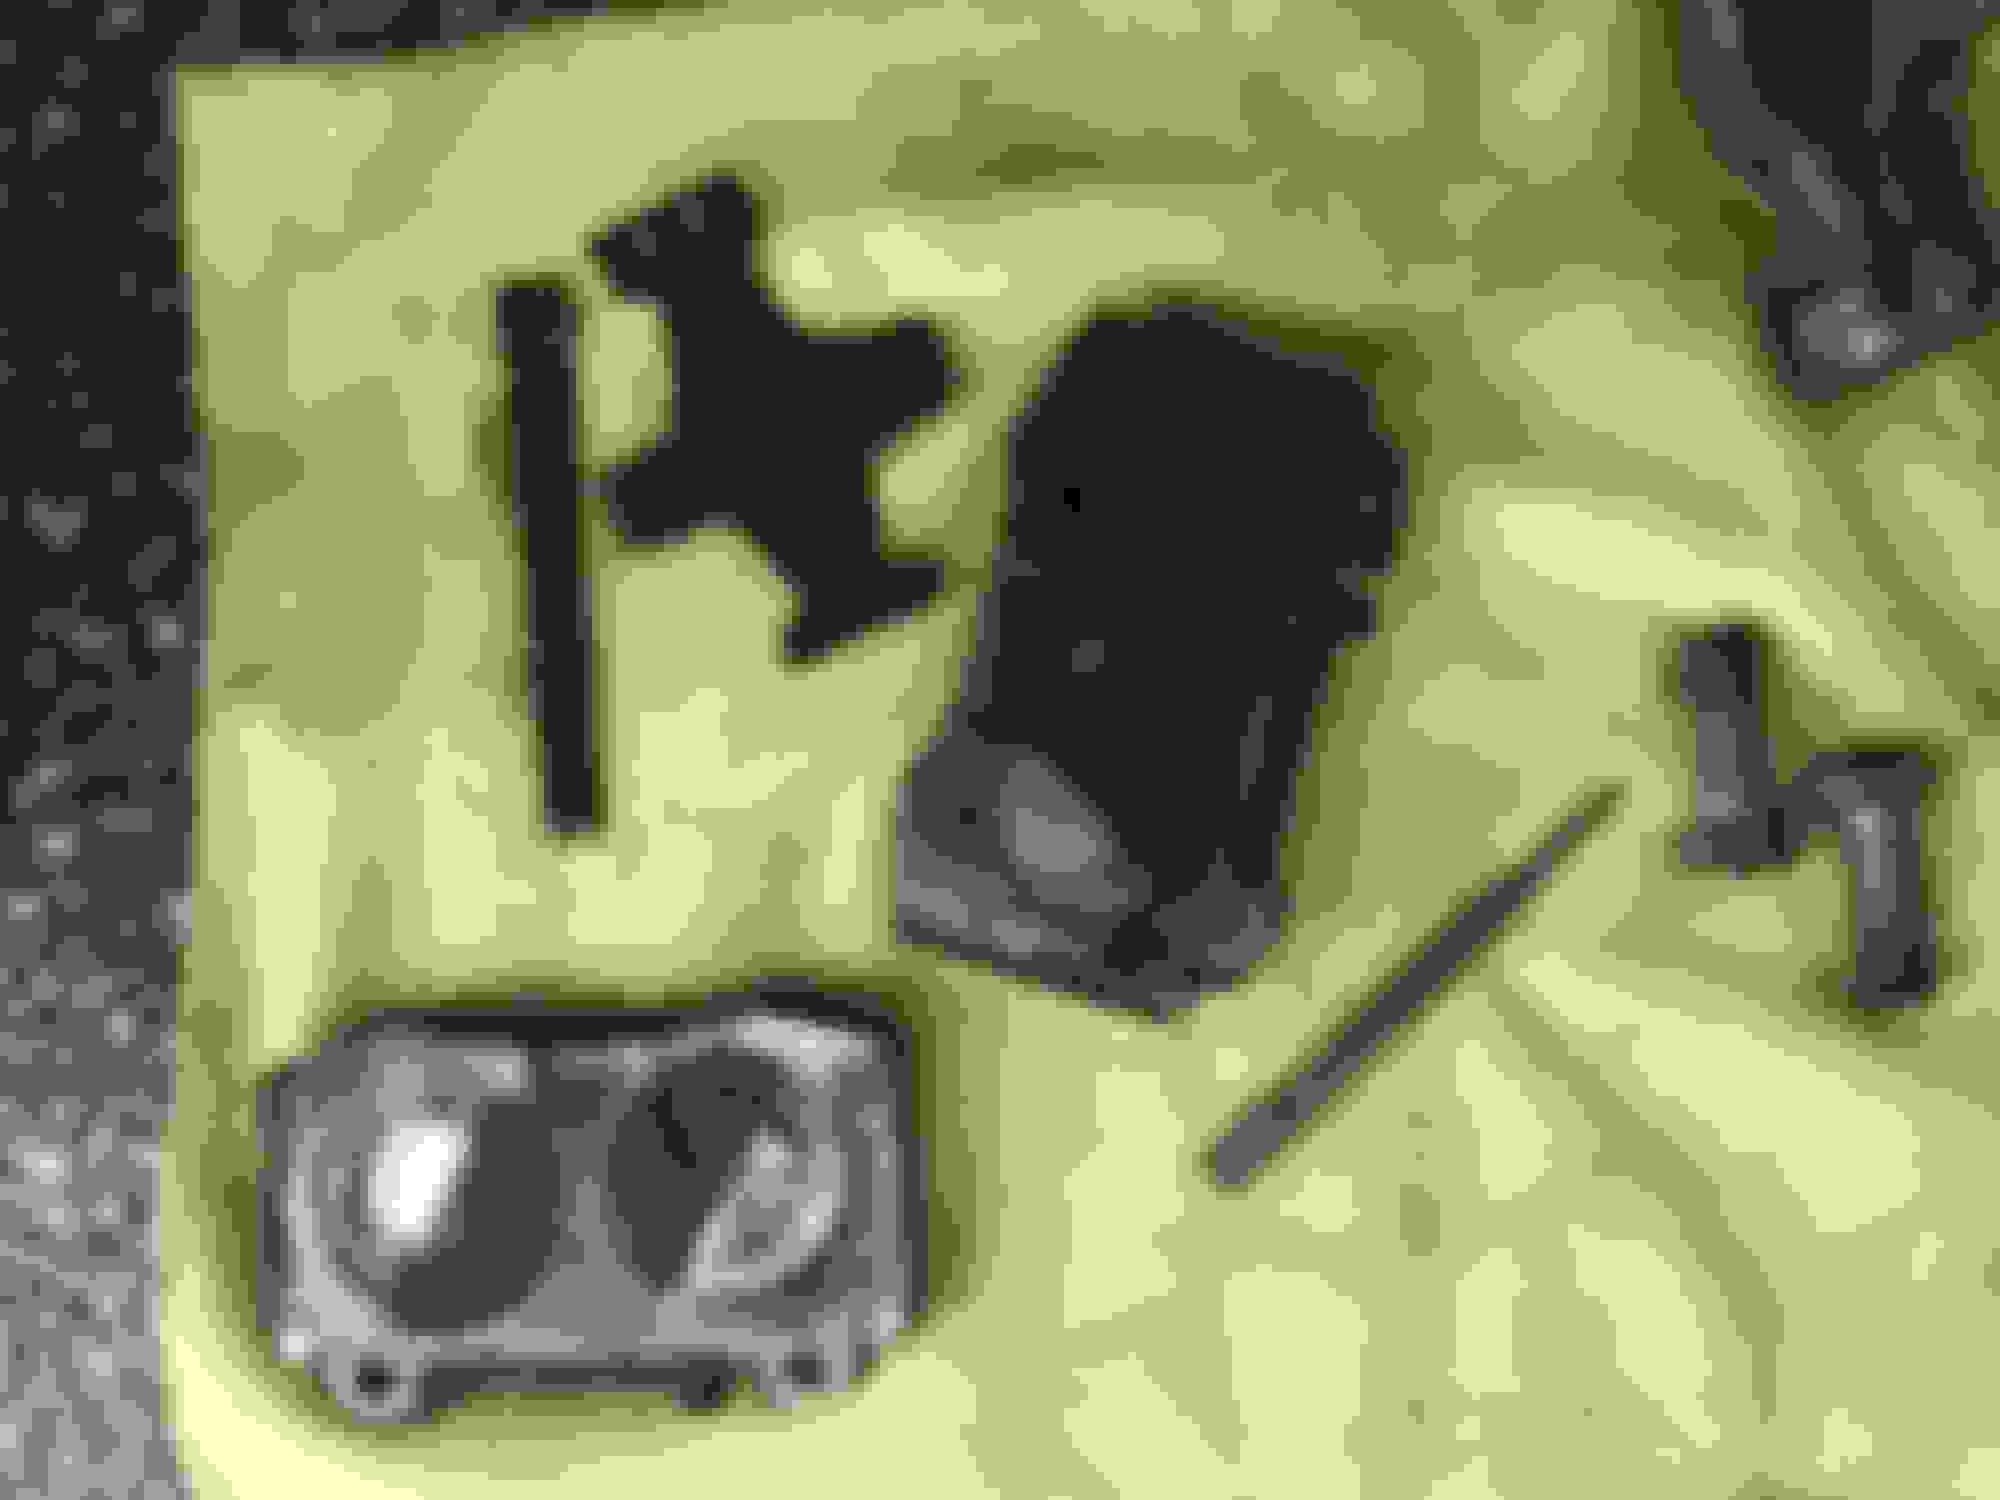
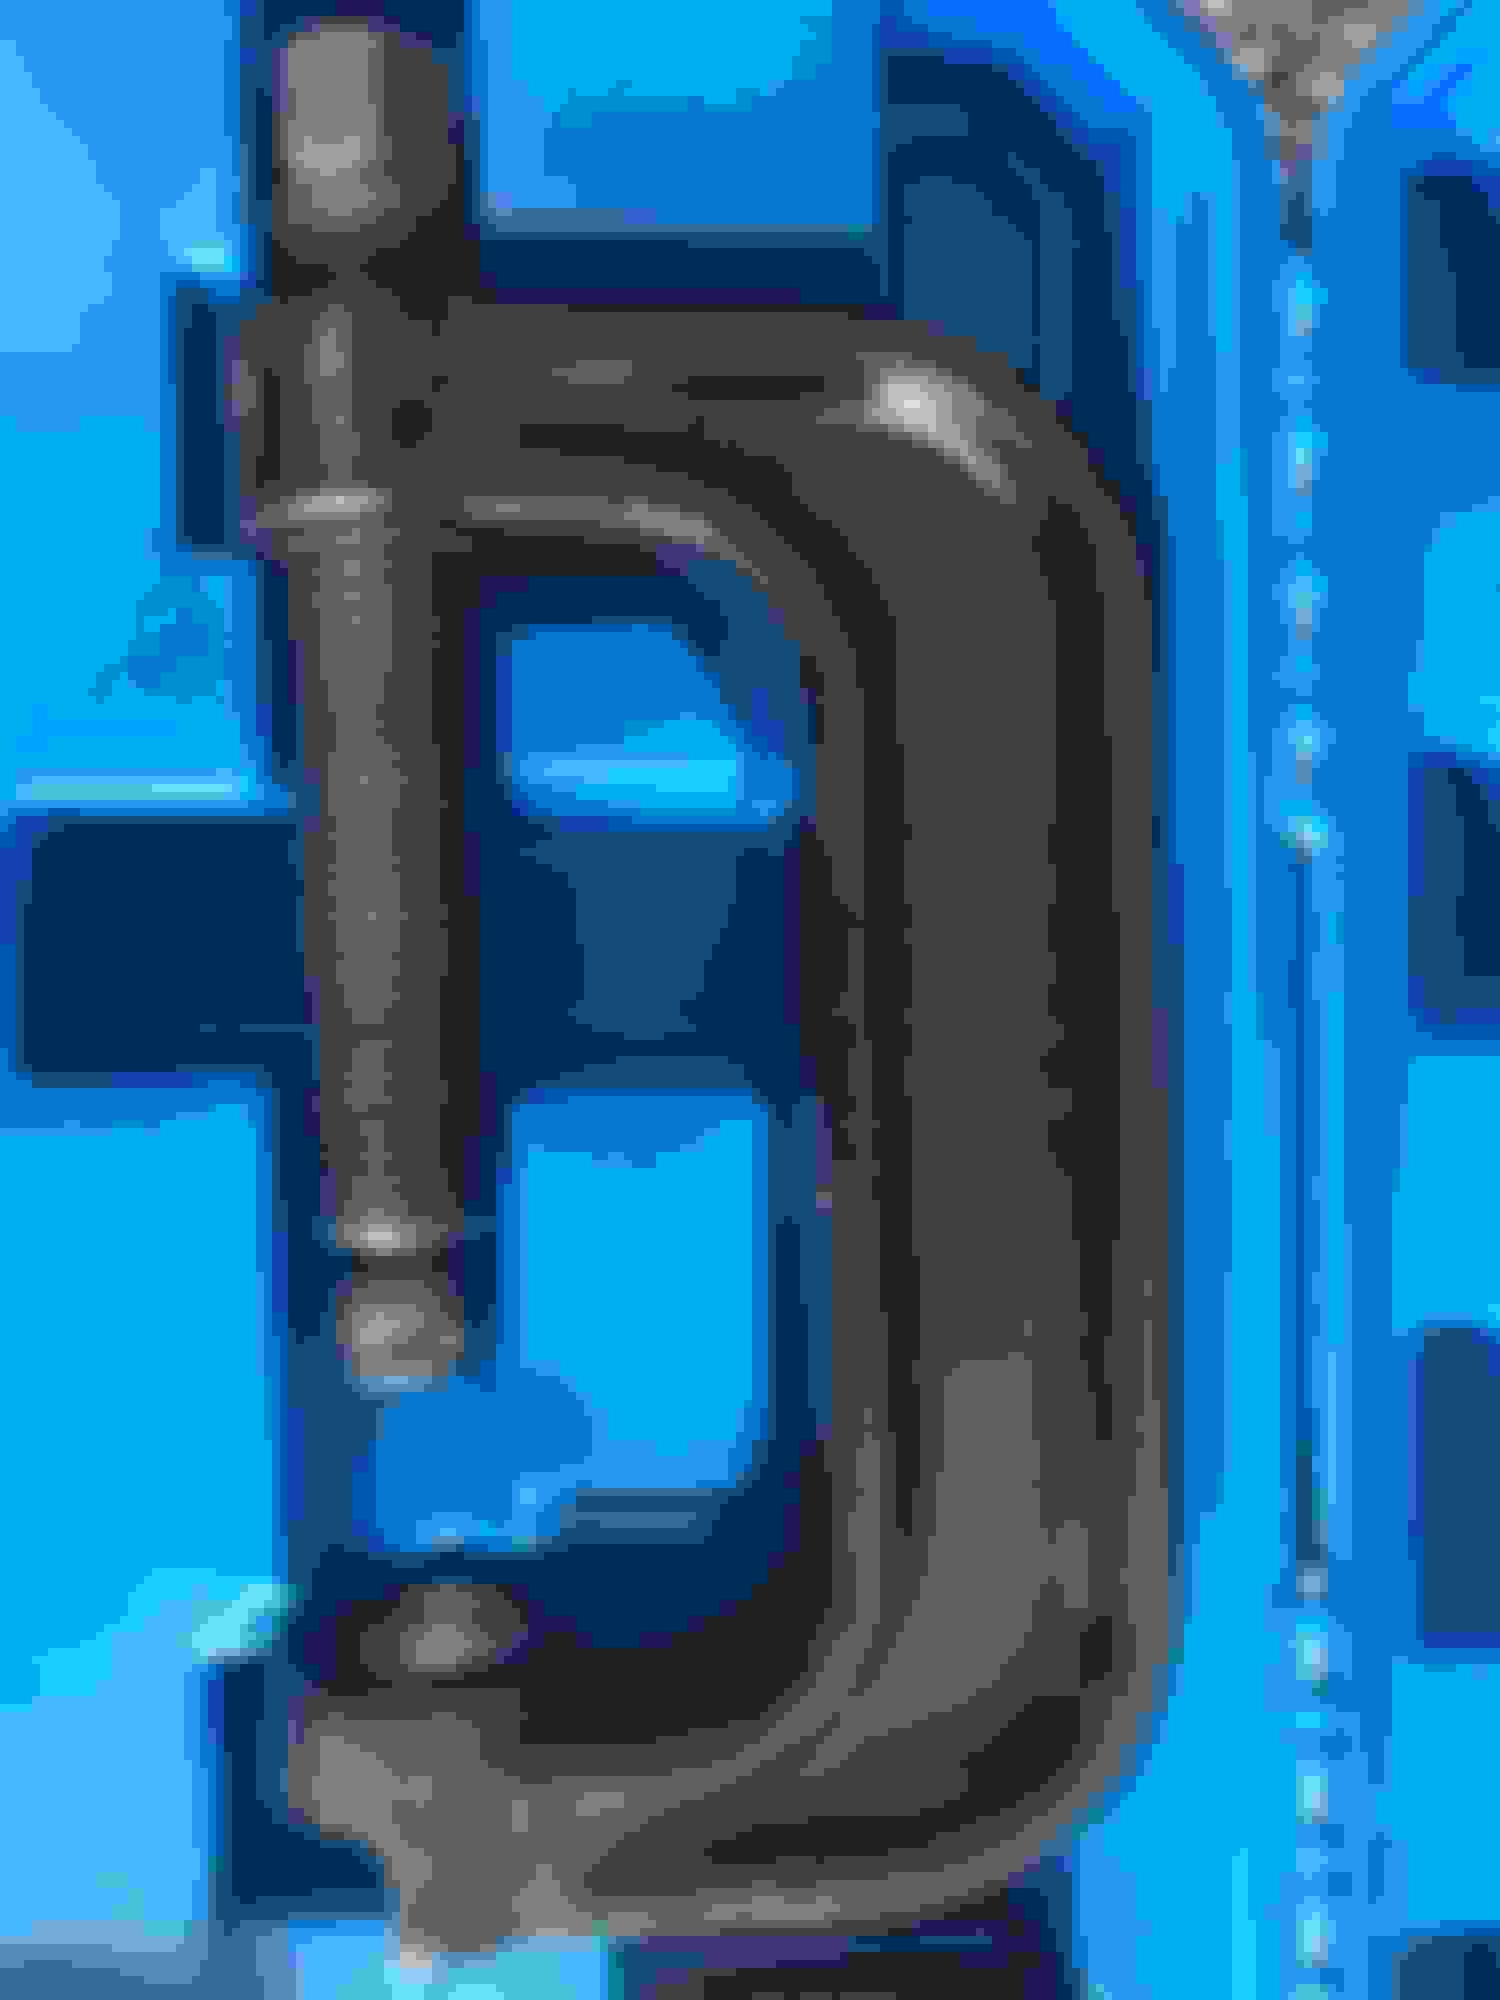
Now the fun part: 9. Open the Ball Joint Press Kit and take the C Clamp out. Grease all the threads of the screw. It should look like this. should not drip or be messy.
10. Hearing Protection Recommended Using items shown in red in the image below, Assembly the C clamp over the old ball joint. Press out the ball joint (Video linked below). Have someone hold the assembly down while you press the ball joint out using the impact gun. Does not require much force to hold the knuckle down. 24mm socket is required. https://www.youtube.com/watch?v=7o6P...ature=youtu.be
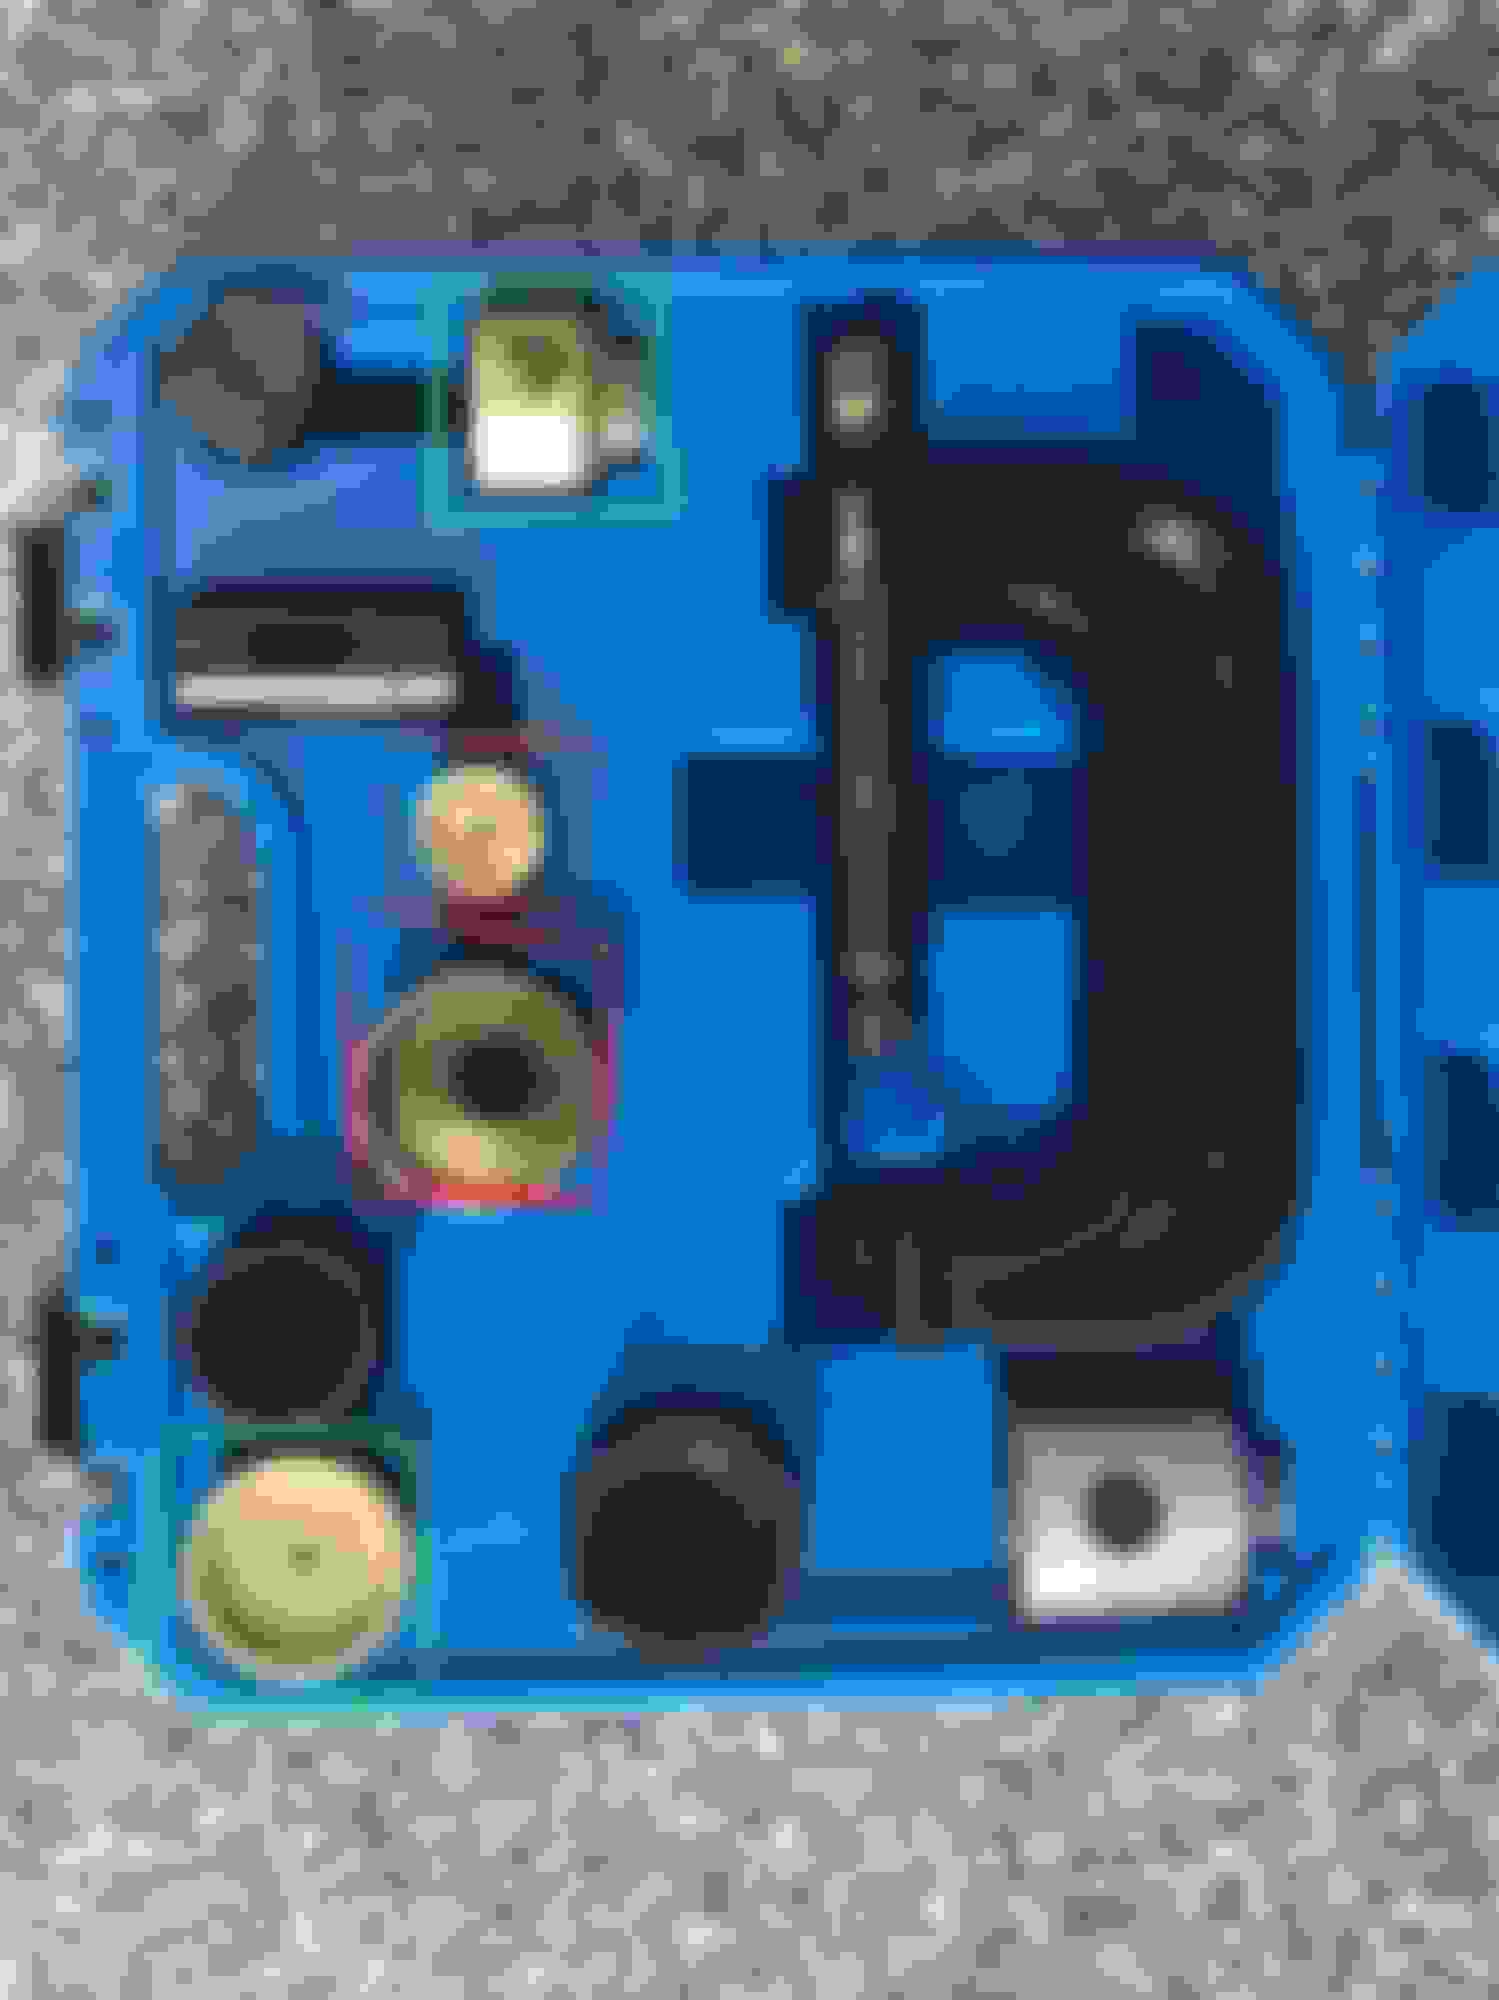
11. Hearing Protection Recommended Place new ball joint into items shown in green in the above picture. Align ball joint into hole. Assembly should be like this (Image below) Video is also linked with how to press it back in: https://www.youtube.com/watch?v=lXcX...ature=youtu.be
Pressing ball joint in This is a good time to replace the control arm, thrust arm, and upper control arm ball joint, if you decide to. Also, if sway bar links are replaced, shock needs to be removed.
Reverse steps and install knuckle back onto car. Tighten all nuts and bolts.
 03-27-2019, 03:19 PM