When you click on links to various merchants on this site and make a purchase, this can result in this site earning a commission. Affiliate programs and affiliations include, but are not limited to, the eBay Partner Network.
Recently solved my Balance Shaft issue on my 2006 E350 and wanted to share with the rest of the community the decisions made and steps taken to finally resolve this. Total time was about 3 weeks, mainly because I was waiting on parts to be delivered during the beginning of the Covid pandemic.
Background:
So I had been getting Camshaft Adjustment codes for quite a while. Reading the MBWorld forums here (Thank you Everyone who's posted helpful content!!) regarding these codes and the engine in this year model, I didn't want to admit it, but I knew where this was likely heading.
So, I'll just clear the codes and mosey on down the road and pretend that nothing's wrong...
I have been clearing the codes on these for about 5 years/50,000 miles now. Codes first showed up at about 100,000 miles. After overcoming a spell of denial, I decided to ride it out all the way to the end- well almost. I think that the end would've meant a tow back to the house due to a No-Start timing issue, which I felt like was imminent, so it was time to deal with it. Time for the big dirty.
In hindsight, maybe I got more life out of it than others did who started getting the balance shaft codes, not sure.. From other (older) W211 balance shaft posts it seemed like mostly, people were getting the dealers fix and trying to get Benz to compensate them for the work paid for.
Benz did offer compensation for this so long as:
Vehicle is under 10 years from production date,
AND has less than 125,000 miles,
AND Repairs were performed before May 13, 2015.
Reimbursement rate was pro-rated based on mileage of vehicle.
None of these applied in my case, likely yours either.
Decision to make:
Keep car and rebuild engine
-OR-
Keep car and replace engine entirely
-OR-
Hock this at a used lot for another model, essentially sand-bagging the next guy - a major dick move.
Decision made:
Keep car and replace engine with one that's newer, with lower mileage--if one could be found at the right price.
Reasons:
I went with replace over rebuild because I did not want to deal with the complexity of the timing. And if I was going to go that far into it (rebuild), then I would've rebuilt every part of it (heads, bearings, rings etc..) The replacement part cost plus the timing complexity did not win me over the replace option. The engine has to come out regardless of whether I rebuild or replace, so why not replace with a younger one. I did consider that swapping the engine could lower the value of the vehicle, but the book value versus personal value aren't even close- they never are.
I love this car and over the years have sorted out every large/small issue that it has had. Everything works on this car, so why hock it for another that one has likely been poorly maintained if even maintained at all.. $2,000 budget to replace engine on a chassis that is tip-top, or drop $5,000-10,000 for a newer model just to have to fix all of the suspension and/or other issues.
Let's start the show:
Code P0016:1208
From 2015-2020 the codes are becoming more and more frequent.
They used to pop randomly every 7,000-10,000 miles.
Then they started showing up after 2000-3000 miles.
Then they started showing up after 500-700 miles.
As of January 2020 they're popping at around 50 miles (after clearing them).
Looks like this is starting to get serious.. Life expectancy of engine dwindling.
Code P0016
Code P0017:1200
Codes now appearing after about 20 miles (per last reset). Conclusion: Yep, this one's boned.. Time to take evasive action.
2008 model year M272
Engine shopping.. Found a suitable contender out of a smashed 2008 CLK350.
2008 M272 with extra parts!
And it comes with spare parts?!?! (Alternator, Power Steering Pump/reservoir, AC Compressor, starter, coils, oil cooler, motor mount, torque converter) $1,600? Oh Hells yeah!
Now it's real!
Dirty Bubba (Ford) with recently shipped/acquired 2008 CLK engine, just picked up from freight dock. Fortunately, the eBay seller worked with me so that i could pick it up at the freight dock since I did not have a business address and tow motor to offload from semi-truck.
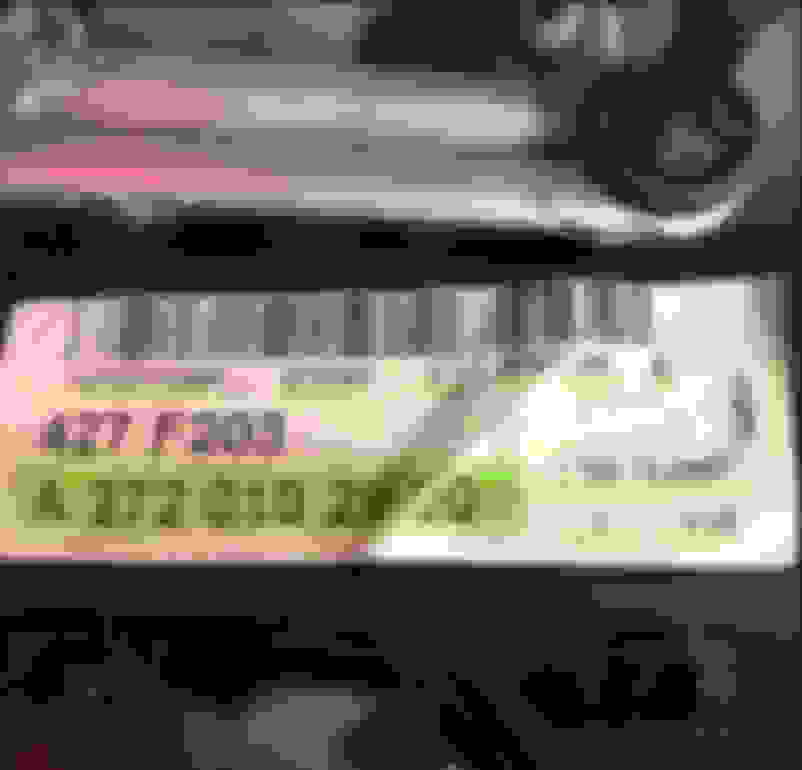
Production Numbers and dates
New engine production Year 2007 not 2004-2006.. Out of defective balance shaft range.
If I'm understanding correctly, the defective balance shaft ranges for the M272 were determined to be any build number before the fixed build number (30 468993) starting at the 30 part of the engine number: 272xxx 30 468993
My 2006 Engine Number: 272964 30 071996 = Fail
The 2008 engine: 272960 30 781729 (as shown under bar code in image above.)
Important!
If you are considering buying a 2005-2007 E350 (C350, CLK350, ML350, SLK350 etc..), then get the VIN and do a VIN search to find the production engine number. If you have the VIN, then a CarFox or make a quick call to a dealers service dept. they may clue you in to any previous balance shaft repairs which may have occurred. Or, learn from what I did below so you can replace yours too.
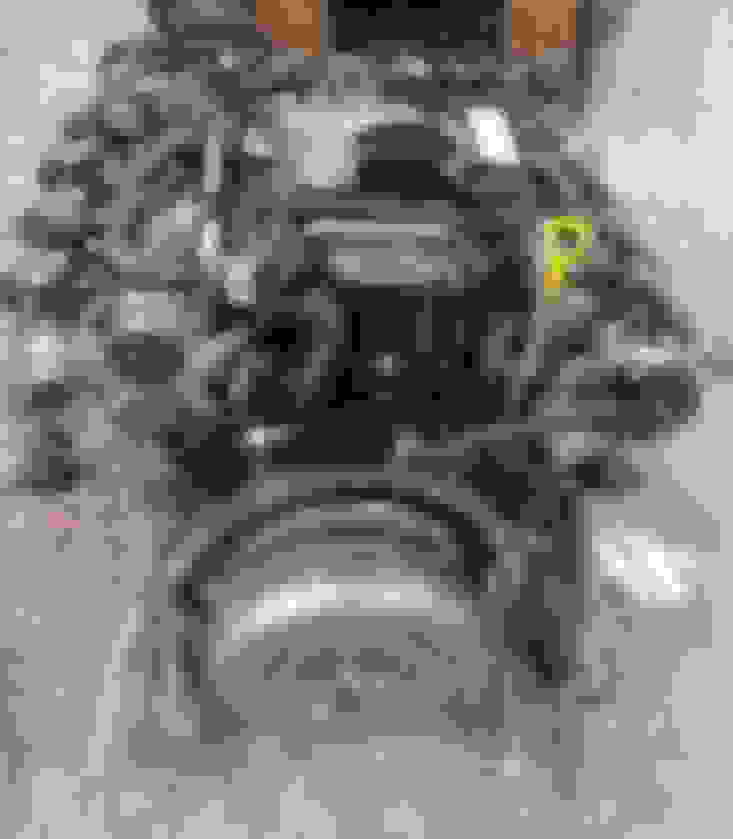
On the stand
New engine loaded on to the stand. I think the bell housing bolts to mount to stand were: M10 1.5x75mm. Lowes has a pretty good selection of metric bolts in their bins.
Extra parts that came with engine are still bolted on at this point.
Exhaust Cam impulse wheel stamp
Before taking the original engine out, I have to verify that the new engine's timing is good. It wouldn't make good sense to pull an engine out and not check its replacement to see if it has the same issues.
Checking the Timing marks of the new engine:
Crankshaft at 305 degrees..
Survey says: Right side Exhaust cam dead center!
I couldn't get the iFruit phone to get a good non-blurry pic of both impulse wheel timing stamps, so 2 separate pics it is.. They may not appear to be centered but they were.
Intake cam impulse wheel stamp
Checking the Timing marks of the new engine: Crankshaft at 305 degrees..
Survey says: Right side Intake cam dead center!
Boys: We have a good one.. Time for the big dirty!
Disconnecting it all
Starting to remove all of the connection parts of the original 2006 engine.
This was the first Euro/German car I have worked on. Previously owning American and then Japanese vehicles, I was impressed with how easy it was to get bolts loosened and get this guy out. It was literally three nights in the garage (after the pesky day job).
The exhaust flanges broke upon separation, but I guess that's to be expected on a car's exhaust system that hadn't been touched in 15 years and whose life started out in Chicago.
Mmmm
Mercedes-Benz radiator blood. Tastes like the real thing!
Disconnecting Mid-ships
Disconnecting everything - continued... I think this is where the exhaust flanges broke on me.
Ausgehen!
Old 2006 M272 hoisted out. I used 2-3 pieces of cardboard to protect the fan/radiator from accidental collision- luckily it wasn't needed, there was actually plenty of room. Better safe then sorry. (note the 2x2 as a pry/guide bar)
Torque converter did not want to slip off of flywheel and almost came all the way off off while separating and spilled about a quart of precious transmission blood all over my protective cardboard.
But it's out! The big dirty part 1 = DONE!
Important!
Disconnect the speed/steering wire from the rack & pinion and cover it with something to protect it (a shop rag zip tied around it in my case) you do not want to break that guy.. Not cheap.
Note:
The Transmission cooling lines to the radiator were left in place, but heavily zip tied to the left & right to get them off of the lip of the oil pan. This was a chore- I had to check every half inch when raising via the hoist to make sure that they were going to clear and not get hung up and cause a radiator+transmission disaster.
Breathing easier now..
It's out! It's done...
Mounting stand plate to bell housing
Bolting engine stand mount to old engine. There would have to be some part swapping between the two.
New & Old
Left: New to me 2008 M272 (after thorough cleaning) Right: Wounded 2006 M272 (dirty as is)
Motor & Transmission Mounts:
A box of new Bilstein motor and transmission mounts. I want it to be cushy and smooth when it roars back to life. I kept the old ones since they weren't leaking (yet). 15 years on OEM mounts, not leaking, not bad.
Tensioner Pulley:
New Tensioner and Idler Pulley (not shown) acquired and installed as preventative maintenance.
Exhaust Manifolds:
I switched exhaust manifolds and slapped on new exhaust manifold gaskets, since I do not want to have to ever touch those while the engine is in the car. Exhaust manifold on the 2008 engine came with a courtesy broken bolt in the left side flange.
Oil cooler off:
I replaced the gasket on Oil Cooler, as preventative maintenance.
Water Pump Off:
Will replace Water pump, as preventative maintenance.
Don't buy the wrong water pump! Lesson learned:
Don't buy the wrong water pump.. Apparently there were 2 kinds of water pumps for the 2008 model. Part number from 2008 CLK350 water pump (R2722010601)
The Idler Pulley would've been out of alignment as the replacement (wrong) pump had a raised section for it to sit on and the water pump pulley and the idler were about 1/8" off from each other.
Gasket would've failed
On closer examination, I noticed that the inlet is shaped differently from the old pump. Aligning the gasket shows what a failure this would've been as the gasket indent doesn't even touch the surrounds in that one part.
Closer scrutiny of the other water pump model/gasket online shows the correct shape. (correct water pump for me was a Graf 241027)
Note:
Pay close attention to the shape of the water inlet to the pump (gasket alignment part in image). Make sure yours matches what you see online at FCP Euro/Pelican Parts/AutohauzAZ etc., or this will set you back a week like it did me. I did not capture it in the pics, but you can see the inlet shape in the online store pics as well as on your motor now that you know what to look for.
Water pump replaced with correct one.
Oil cooler and new gasket installed.
New oil (0w-40 Mobil1 synthetic) and Liquid Moly additive poured in. Engine was shipped empty, so I did examine what little oil was left in it and the filter too- they both looked brand new. Like not even a month old of engine time.
I added a squirt of Marvel Mystery oil via syringe into each cylinder and manually cranked engine a few turns with plugs removed. I did this because I really do not know how long the engine has been sitting before I became the new owner. Better to lube it a little than turning it over all dry and scratchy.
The big empty
This was before I took a good hour or two and cleaned out the empty engine bay and AC compressor of all of the leaked power steering fluid from months/years gone by. A few cans of brake part cleaner later and it looked new again.
Torque Converter:
I topped off torque converter with the same amount of transmission blood (fluid) that was lost when pulling engine out, stuck it back on.
I used Keg Lube (home-brew/kegging food-grade petrol gel/grease) on the guide pins and flywheel center so that torque convert and transmission would hopefully just slip right on there. It did not.
2008 CLK wiring Harness Wiring harness issue sorted out:
Where's the plug for the Power Steering pump...? Damn the harnesses are different..
I thought the wiring harness would be a 1-to-1 and I would keep/retain the newer 2008 harness, but apparently the CLK350 did not have the speed sensitive steering cable included that plugs into the rear of the power steering pump. I had to swap wiring harnesses, but luckily, it did not take much longer than an hour. That was the only difference in the whole harness. I discovered this as I was test fitting the power steering pump and counting down the outstanding items before hoisting it off the stand and over to the car...
Note:
If you replace the same M272 engine, but from a different car line, don't assume that all or any parts will be a direct swap. More fails on this to come..
Hooking it all back up
Engine dangling on hoist:
Transmission:
Engine suspended on a hoist, bottle jack under crank pulley and floor jack under transmission, and I finally got it to all slip together. Snugged bolts up enough that it would not separate , would torque to spec later.
Sorting out the engine mount fail Issues:
I kept the CLK350 engine mount brackets attached to the engine and put the shiny new motor mounts on it. This turned out to double fail. Apparently, the CLK350 engine mount bracket is about 10-15 degrees forward from where the W211 is, so the mounts were about an inch off (forward) of the cup on the frame where they were supposed to sit in. This was about an hour between trying left, then right going back to the left and coming to the realization that the engine mount brackets are not the same.. Fail.
What? Buy a special $20 wrench specifically for motor mounts from FCP Euro/Pelican Parts? Nope,..Hell nah, hold muh beer... Fail. Fail.
Lifted engine up just enough to take it all off and switch out engine mounts (first) then motor mounts (second) and it fit proper.
Fun fact:
Did you know there is literally 1" on the drivers side for both your hand and a wrench to loosen/tighten the engine mounts?
Almost there...
It's in!!!!
Everything is where it's supposed to be. Time to start hooking up all of the peripherals.
Power Steering Pump:
The o-ring between the pump and reservoir leaked in the old setup, so I replaced this and the copper banjo bolt o-rings too.
Hooked up AC Compressor, Alternator, Starter, transmission cooling lines, exhaust, all other cables in their finger lacerating wire looms, vacuum hoses, water hoses, fuel line, ECU, Belt, Add/top off fluids, Aux Battery and finally, the trunk Battery cable.
Moment of truth:
Put the key in the dash. Turn over and sputters- no ignition. Try again, more sputtering and a rough start. Try again and it fires up! It works!
I Had to clear out all of the old codes stored in the ECU from the old engine, but working!
New engine does not have that chain slap mechanical clatter on start up,.. Maybe I won't miss that..
I definitely do not miss that.
She's Alive!
Pulled back in the garage after the maiden voyage around the neighborhood.
Next step:
Get exhaust fixed because it sounds like a 350Z with a fart can on it, not like a Benz.
Aft Exhaust
Several days later, I pulled the exhaust off and carried outside to cut off the old flanges. Cutting these off with a sawz-all while standing, is way way better than trying to do it lying on your back under the car with hot metal flakes raining down in your face.
Important life lesson was learned here. Take the it off and take it outside.
Resonator Flanges
Old pipes cut away and new male flanges ready to tack weld.
I decided to only tack weld these in case of issues with the angle of the engine side. This way I could still bend them to fit as needed or at worst, grind off the tack weld and start over.
Getting the fit right
Fit as needed:
After the tack weld of the resonator side, I took the aft exhaust back inside and re-mounted them in order to set the engine side and get everything exactly where it needed to be.
You might say that I could just make alignment marks (which I did) and do this in one shot. But the chance for this to go according to plan and my current span of luck, it just didn't feel right.
I used the floor jack set the height of the resonator and aft exhaust then loosened the exhaust manifold flange bolts to get the engine side set just right. Flanges mock-clamped together and ratchet strap used to pull everything together tight, I tacked 3 welds to each of the engine side flange so it couldn't move while wrestling it out from under the car.
Took the aft exhaust off of the rubber hangers and back outside for final welding.
Took the engine side of the exhaust (left & right) off and outside for final welding.
I welded all flanges with a mostly reliable Flux Wire welder from Harbor Freight. Got about 80% through the welds when the spool/feeder stopped feeding correctly, but made it though to the end. Will troubleshoot that later.
Double Ugly!
Left = Front/Engine side Right = Resonator/Aft side
As advertised, the welds aren't pretty but it's done, sealed and holding.
Black Sunshine
Finished Product. No codes. No issues. Done.
Last edited by Innova801; Jun 11, 2020 at 01:41 PM.
I hope you replaced all 4 cam solenoids before determining that your engine was bad. Those particular codes are most often caused by faulty solenoids, which cost around $100 for all 4.
No, I did a test that was cheaper than that: Crank at 305 degrees and pull off the magnets and the stamps looked like googly eyes in there. Edit: Added a pic of the exhaust cam mark with crank sitting at 305 degrees. Believe me, if I wouldn't have had to change the entire engine, and cam magnets were the cure, I would've went that route.
Last edited by Innova801; Jun 11, 2020 at 02:44 PM.
Thanks!
Right on! I had the auto dimming helmet and practiced on some of the cut off pieces. It's possible that I could've had better results with a faster wire speed, but it was turned all the way down as I was trying to very carefully weld together and not burn holes through it- which I seemed better at doing in the past. More practice and/or better welding gear would possibly help.
I did come up with the idea that I could use cardboard- taped around the weld spots to keep the splatter off of everything else that was not a part of the intended weld area. That seemed to help quite a bit, but yeah, I wish it was prettier. However, after all of the transplant, that is the only thing that looks/came out home brew on the whole project.
I took the angle grinder and put a brush wheel on it and ran all over the exhaust pipe while I had it out and shined it all up. I was pretty impressed that the pipe material that Benz used was just barely surface rusted on a car that was 15 years old. Better ingredients,... better car?
So the flanges- When I was undoing everything in the beginning, the bolts were fused to the doughnut (proper name unknown to me) and hitting them with some PB Blaster and a multi-tool to try and break the rust death grip was all but useless. Those things were Titanic rusted. Once I had broken one bolt, then the ugly of the split doughnut manifested itself. Three of the four doughnut rings were cracked in half. If only the they had been on the quality level of the piping, then maybe I wouldn't have had to home brew the exhaust back together.
When I do light gauge welding I use a TIG torch, not a wire welder (MIG). And what wire type did you use? Stainless ? Here is a good video on TIG welding.
That was a pretty sweet video and super informative. I do not have a TIG welder but will admit that I am eyeing them as a future shop upgrade despite the price. The finish product seems worth the cost alone. Thanks for all of the info in the video, I will fully admit ignorance when it comes to that metal types and what may be needed for proper fusing. I have only ever used a welder out of desperation and not creative intent, so apparently I have lots to learn.
What I used (label on spool): Gasless Flux corded wire E71T-GS alloy .035 - On a Harbor freight 90 amp flux wire welder
Thanks Innova801!
I am embarking on changing the balance shaft, got all the parts ready from MB and others. I will be starting on Monday but I have still have one question mark about the tranny and engine. Although I did it some years ago, I've forgotten if it is absolutely necessary to unbolt the Torque Converter from the flywheel or not while taking the engine out. According to WIS I should get the engine + gearbox out together. So my 2 questions are:
1/ I would rather take the engine out alone as you did. It seems that there is enough room to do that. How was it for you? What are the issues taking the engine out alone VS. engine + tranny?
2/ What would be the issue if I do not unbolt the TC from the flywheel as requested on WIS?
If you don't unbolt the torque converter from the flywheel, it is going to pour out the contents of the torque converter out when you begin separating the two. The flywheel has a very tight fitting cup that the torque converter nestles into (I generously greased this before reassembly) . I had problems getting them separated at first and had to refill the torque converter the amount that I lost. My 06 W211/722.9 torque converter did not have a drain/refill plug on it. So that is the route that I went.
The engine actually came out easier than any of the GM cars that I have had in the past. The top bellhousing bolts are the hardest because there is no room from the top, so I put together about 2 feet of 1/2" extensions with a wobble joint and after it broke loose, it was finger tight. Matter of fact, just about every bolt was finger tight after breaking them loose- I never had that joy with a Ford or GM.
Something to note; I do not have enough height in my basement/garage to get the lift high enough to have taken out both engine and transmission. Remember, the front of the car is going to come up about 4-6-8 inches with no motor sitting in it, it may rise even more with no tranny sitting in it. This became a problem for me, as I had to lower the car down almost tp the floor to have enough room to swing the engine over the front of the radiator.
Thanks for that! Very nice of you. I will therefore take the engine out without the gearbox and try to get the TC to remain on the tranny. All the best.
I am about to undertake an e350 engine swap and need to clear a question up. Did you have to use the ecu from your w211 car that was with the original motor or the ecu with the replacement engine?
Hey Johnson,
Yes, I swapped the ECU off of the top of the intake manifold as one of my last steps before moving the engine back into the car.
I am not a Benz mechanic and do not have easy access to one, but as far as I understand, the ECU is VIN mapped to a ton of components in the car and would be significant re-programming by Benz dealer if you were to try an use another ECU.
Thanks so much for taking the time to reply, if you need any parts for the w211 I'd be happy to gift them your way for free for helping me out. I have 2 sitting here doing nothing and happy to help someone who has helped me.
Mercedes SLR McLaren 722 S Is Extremely Rare Example Modified by McLaren
Slideshow: A one-of-one U.S.-spec Mercedes-Benz SLR McLaren Roadster became even rarer after a factory-backed transformation at McLaren's headquarters.