When you click on links to various merchants on this site and make a purchase, this can result in this site earning a commission. Affiliate programs and affiliations include, but are not limited to, the eBay Partner Network.
If you're referring to the picture I posted, the one with the gray pot looking things, those are the engine mounts and yes, there was a big improvement with engine vibration, especially at idle.
No , the picture right below it , with what it looks like 2 air strut mounts.
No , the picture right below it , with what it looks like 2 air strut mounts.
Unless im mistaking lol
I see now. That's the rear engine suspension mount or transmission mount. In my particular case it's a 4matic mount, that's why it looks like that. On rear wheel drive cars it is a simpler design and easier to replace.
This needs changing when you have excessive vibration at idle or very slow speed while in drive or reverse. If the vibration goes away when you put your car in neutral or park then this is your culprit. If it doesn't, then you need to look at the front two engine mounts as well(I've also found them referred to as engine vibration dampeners or engine suspension mounts). Mine needed all 3 mounts replaced, they usually go bad after 80-90k miles, sometimes sooner.
Oh , thank you very much for a detailed description.
It all made sense.
Btw. So for motor mounts is the same thing as with tranny right? If it vibrates at idle or low speed it could be it ? Motor mounts nor tranny mounts wouldnt cause vibration at highway speeds?
Last edited by belarus27; Sep 20, 2017 at 01:07 PM.
Oh , thank you very much for a detailed description.
It all made sense.
You're welcome. The rear mount isn't very difficult to replace, I would recommend doing it yourself if you think that's the broken one. Just make sure you've ticked all the work safety boxes before getting under the vehicle. MB quoted me around 500 $ for replacing it. I did myself for 125$ (MB original part) and 1 beer, AFTER the job was done.
Motor mounts will cause vibrations at idle as well, regardless if your vehicle is in park, neutral or drive. Basically, if you have vibrations which don't change after you go from P to D or N, at idle, the the most probable cause are the engine mounts. Also, engine suspension vibrations will be noticeable at highway speeds, usually in the footrest area, but it will be less intense than at idle. That's how it felt on mine, and it went away after replacing the engine mounts.Other causes for vibrations might also be knock(due to bad fuel, but this should be audible at least from outside the vehicle or with the windows down), rough idle caused by an improper operation of the throttle body, vacuum leaks, intake manifold improper operation (this can be caused by a broken shaft of the intake flaps actuator) and a few more.
Usually, with the above issues, you'll have some sort of change in engine RPM at idle. If your RPMs are constant but you still have vibrations I would check the engine suspension (mounts) first.
You're welcome. The rear mount isn't very difficult to replace, I would recommend doing it yourself if you think that's the broken one. Just make sure you've ticked all the work safety boxes before getting under the vehicle. MB quoted me around 500 $ for replacing it. I did myself for 125$ (MB original part) and 1 beer, AFTER the job was done.
Not yet , mine are still okay i guess. I was just trying to eliminate that as an option of my highway vibration. I put it in neutral while freeway cruisin , so in my case it isnt rhe mount but something suspension/wheel related. Hopefully to have a beer after whenever i fix this.. maybe even a shot of henny lol
Not yet , mine are still okay i guess. I was just trying to eliminate that as an option of my highway vibration. I put it in neutral while freeway cruisin , so in my case it isnt rhe mount but something suspension/wheel related. Hopefully to have a beer after whenever i fix this.. maybe even a shot of henny lol
Maybe you have a out of balance tire/rim or a worn out rubber flex disk( although if the vibration goes away when you put it in N while highway cruising it might not be it).
Apparently, with the 4matics there are some bearing issues in the transfer box which can cause vibration, but again, they wouldn't ever go away, they'd be noticeable regardless if you're doing 40 or 70, in D or N.
Also, warped brake rotors will cause vibrations too and the W212 E550s are notorious for having that issue( apparently only with the OE rotors). Mine have been replaced by MB only 8k miles ago and are now warped again and it's noticeable when applying the brakes.
Update:
I replaced my front rotors and pads with Brembo ones, and the dreaded braking judder is gone. The car also feels smoother all round. I took it for a bedding in drive and forgot about how mad I was for spending another 300$ on it this month. This car never fails to put a big smile on my face.
Now the only issue with the car is the rear rims, they are severely bent. I took them to a tire balancing shop and the service guy asked me if I drove over something big, like a baby . Apparently there's an option for refurbishing them for 250$ each. Have any of you succesfully done that?
8Nm Torque for retightening the pad wear sensor bracket and 115Nm for the 18mm caliper bolt fasteners which should be replaced every time since they are TTY
What exactly are they doing when they refurbish them? I've had mine fixed, but they were $115 per wheel. Places that will redo the finish is another $100. So if they're doing both, that's probably about the going rate, but if they're just going to take the dent out, call around and find some other shop. I went to one tire shop and they mentioned another guy that fixes bent rims for $120. Went with the $115 guy because he was closer and a little cheaper.
What exactly are they doing when they refurbish them? I've had mine fixed, but they were $115 per wheel. Places that will redo the finish is another $100. So if they're doing both, that's probably about the going rate, but if they're just going to take the dent out, call around and find some other shop. I went to one tire shop and they mentioned another guy that fixes bent rims for $120. Went with the $115 guy because he was closer and a little cheaper.
Thanks, I'll have to ask them. They rims don't need any refinishing, at least not in my opinion. The tire shop guy said they work with a company which makes the rims look like new, so I'm thinking they balance them, take the bends out and respray them. I would be very happy with just the taking the bends out part (my wallet would too) since I'm not that fond of visual perfection, I'm more interested in the internal works, for now.
My biggest problem is I'm in the middle of nowhere for the time being so there aren't a lot of choices available.
I actually found the guy I used on yelp. He had some decent reviews and he did a decent job, or at least the vibration was gone afterwards. Took about an hour per wheel as he had to dismount and remount the tire and balance it.
It's been awhile since I posted anything worthwhile on this thread and there are a few things I wanted to share with forum members in hope that it might be of use to them in the future as the W212 chassis adds more years under it's belt.
NO. 1 - High beam Assist inoperable, headlight turns off ( on bi-xenon models)
Symptoms are:
1.High beam Assist error message pops up on dash while driving at night with the automatic assist on, message says something like "High Beam Assist inoperable, consult owners manual"
2. If you stop the vehicle and step outside you will see that the offending headlight has the hi/low beam projector turned off but there's no warning of that on the dash, except for the HBA error message. At the same time, the other headlight unit is working perfectly fine (unless you're very unlucky and they both fail at the same time)
3. Error might go away next time you start the vehicle but it will happen more often as time progresses until it will become permanent.
4. If scanned, the error code is 9033/90XX "The actuator motor for right/left light distribution is faulty"
A few of you guys had this happen to them ( Bachree, Fisch, Mud was saying something at some point if I remember correctly) and the fix was replacing the entire headlight unit with a new one. Depending on other options fitted on the car, this could amount to 2000$ just in parts, without the control unit or D1S bulbs. A little too much for my taste considering what's causing the issue.
A few months ago I got a pair of headlights from our member Bachree, he had the exact same issue but on the driver's side headlight. Upon opening that unit, I saw that the shutter sitting in front of the xenon bulb was hard to turn and had a wear mark towards the middle. The working headlight didn't have this wear mark and was spinning freely with little effort.
The reason for this happening is bad casting from Hella, the shutter had pockets of carbon inside and that allowed bending over time and temperature variations. Eventually, the shutter becomes so difformed that it touches on the projector frame and causes a power surge which in turn causes the stepper motor control unit to cut off power to the entire projector unit. When this happens the low/high beam goes dark and the adaptive features are turned off even in the working headlight ( no more adaptive cornering or ride height related adjustments).
The fix for this is relatively easy, all you need is a dremel tool with the diamond cutting wheel, some bathroom silicone and a few wrenches and screwdrivers.
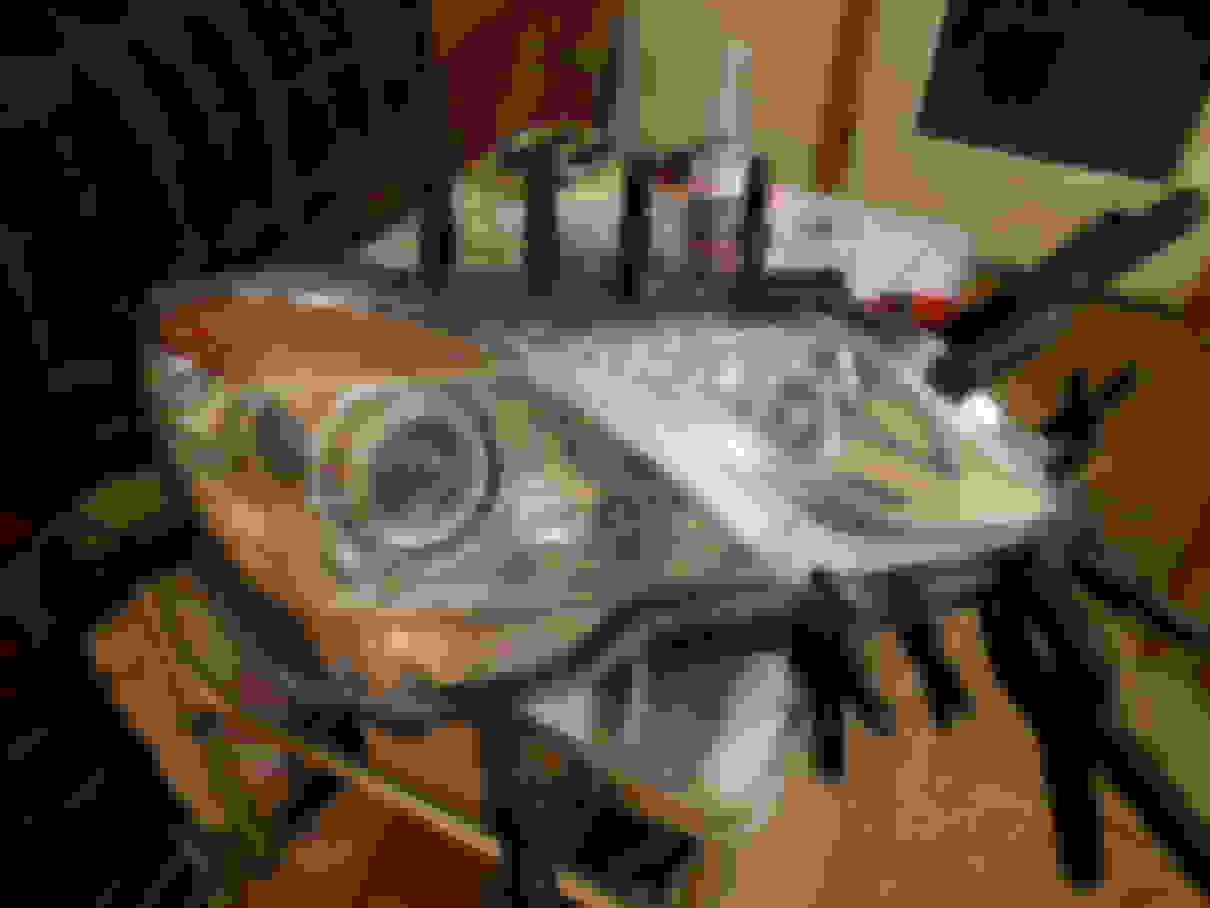
First, I removed the front bumper so I could get to the headlight unit ( thanks again to Konigstiger for posting the pdf detailing the procedure - I'll link that here so it's easier for others to find), there's a total of 8 bolts holding it on the frame.
Next comes the headlight, only 3 bolts for that one, two short and one long.
That was the easy part. The next thing I had to do was figuring out a way to separate the lens from the headlight body. In most cars the sealant used for weather ingress protection is a butyl rubber compound, it's relatively easy to deal with, all one needs to do is pop the headlight in the oven at 220F for 10 minutes and the lens should come apart easily. Mercedes (Hella) decided to make this challenging , they use Permaseal which is a very sturdy black silicone. I tried using the heat method and ended up melting the body of the headlight slightly with no visible effect on the Permaseal. If anything it made it angrier. After days of trying to figure out different ways of being gentle and non invasive I decided to use the Dremel and cut along the edge where the lens sticks to the body of the headlight. This is a little messy and requires concentration but it's doable if you are comfortable using a Dremel cutting tool.
After separating the lens from the body, I inspected the shutter and all the connections inside the headlight and then proceeded to masking the inside of the mirror lens with kitchen Aluminum foil to prepare it for dremeling (I didn't want metal shavings all over the inside of the headlight or stepper motors).
After shaving the excess off the shutter and testing for smooth operation I painted the exposed metal black so I don't get unwanted reflections inside the projector mirror housing ( the shutter is painted matte black to begin with).
At this point a test would have been in order but I was very sure that the problem was fixed and got to the next step , which was sealing the headlight. For this I used a GE Point and Seal Clear silicone I got from Lowes ( I made sure it's water resistant and holds up to at least 212F temps - mine says it's good from -60F to 400F) which allowed me to have better control over the bead I was laying down. I put two 4mm beads on the lens and housing and then sandwiched them together using plastic clamps. Alignment is very important, but it was easy to achieve since the lens fell back onto the grooves created when cutting it. The silicone cures in 24h so I would suggest letting it do that and then some ( I left mine inside the house where the humidity is less than 50% so that there is no moisture left in the housing). Depending on how it looks after it cures it should be easy to spot areas where it's not sealing properly and plug them. Also, I left the caps off while the sealant was curing so that the moisture from the silicone would have a way to get out of the headlight.
Lastly, putting everything back together should be easy, reversing what you did for dismantling.
I can now report that the headlight is working perfectly, no moisture inside but I still have to drive it through the elements for a few months just to make sure.
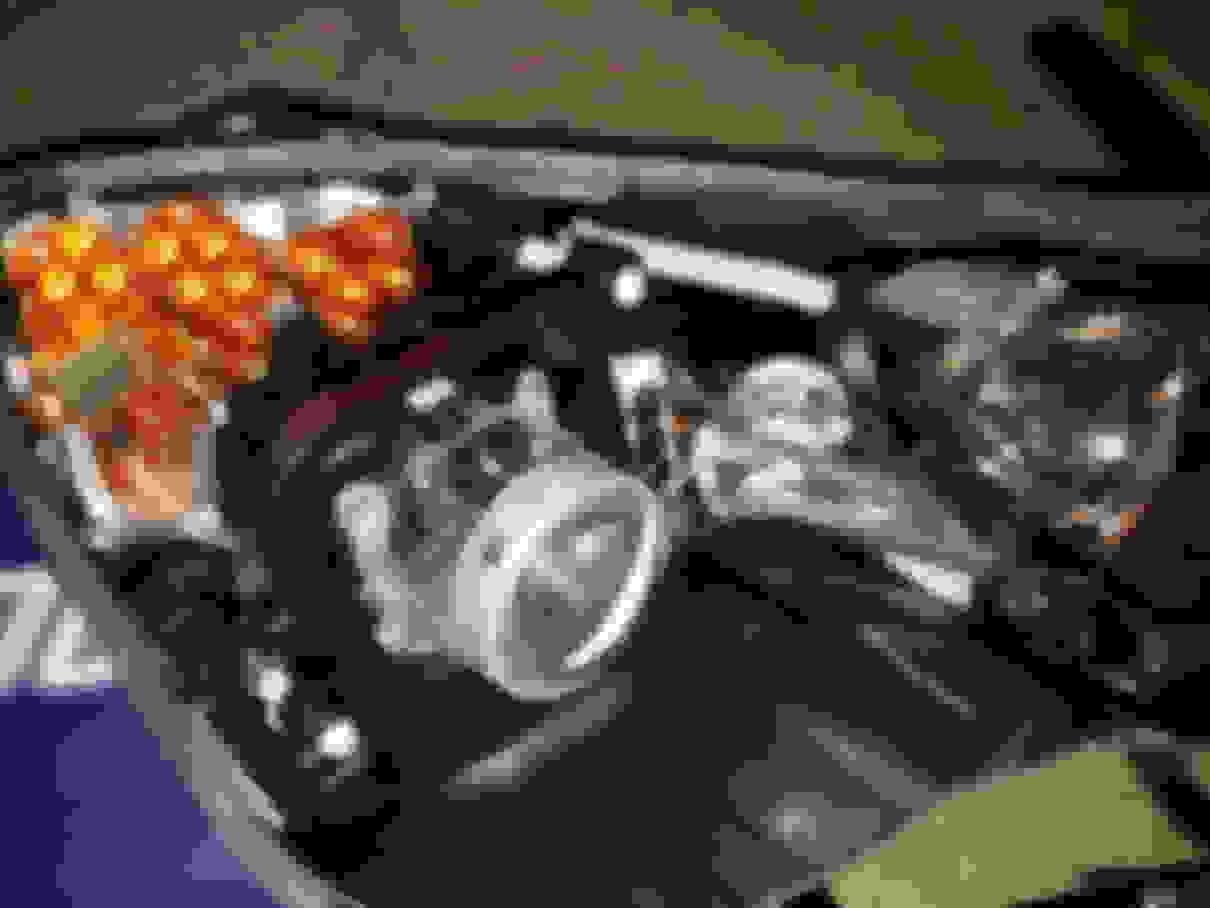
The shiny part on the matte black shutter is what's causing the error (bachree's headlight)
Housing without lens
Wear mark on my headlight - before dremeling
Dremel shaving
This is what the night vision projector looks like
NO. 2 - Sound deadening
I always thought the W212 is a bit noisy at highway speeds so I decided to buy some Noico butyl sound insulation pads and install them in the back wheel arches, spare wheel trunk area and underside of the vehicle. Additionally I used 3M sound deadening spray rubber on the front wheel arches ( the plastic fender liners - inside and out) and the underside protective panels that run from the front to the back of the car. All of this got me a 2dB reduction in cabin noise, not worth the amount of money and labor spent IMO. Next time I'll just spend the extra money and get an S Classe.
After
Before
NO. 3 - 1 person job Brake fluid flush
It is recomended to do this procedure every 2-3 years and this is by far the easiest way of doing it.
Tools and supplies needed:
1. Pressure bleeder ( mine is a 3l Schwaben and it comes with the brake reservoir cap adapter)
2. 1l of MB DOT4+ fluid ( I had 2 1l bottles but 1 would have sufficed)
3. 8 or 10mm wrench for the bleeding screw - I can't remember the size exactly
4. Brake bleed catch bottle with 90 nipple and adjacent hoses (less than 10$ at Wally World)
Put the fluid in the pressure bleeder,build up the pressure to 1.7 (make sure it never gets under 1.2 bar as it pumps fluid) bar and enjoy a clean, fast and easy flush while saving at least 100$ in labor at the stealership.
Start at the rear right wheel, then rear left, front right and lastly front left. Keep the bleeding screw open until the fluid coming out is clear.
This little bleeder is awesome, I used it for filling up the transmission as well.
In the end I'd like to say thank you to Bachree, Mud, The King and all of you (except crank yankers) who actively participate in making this forum a useful tool and a nice platform to exchange ideas and learn things.
Well done on those headlights, I know they were a challenge!
I agree on minimal effect from the soundproofing, I had a small reduction in resonance from doing the spare tire well and trunk area. It's a good addition but it still seems these cars are prone to noise permeating into the interior.
Nice to see that the lighting work was successful, you must have had a steady hand with that dremel.
Wow! This was an awesome thread to read. I am not a DIYer myself and you are very talented in making this older car like brand new. Congrats. I really wanted all those options (especially cool seats, pano, and P2 lights) but I opted for lower mileage when I bought my son a 2010 E350 Sport. 43k Miles.
Well done on those headlights, I know they were a challenge!
I agree on minimal effect from the soundproofing, I had a small reduction in resonance from doing the spare tire well and trunk area. It's a good addition but it still seems these cars are prone to noise permeating into the interior.
Nice to see that the lighting work was successful, you must have had a steady hand with that dremel.
I don't know about the steady hand ) but at least the plastic cover is hiding my handy work. It's amazing to have a working high beam again, it was starting to annoy me. I had to drive 200miles at night with only one working headlight, it was tiring.
You could always consider Avery or 3M film to cover the wood trim if you really get tired of it. All sorts of choices.
Those solenoids must have had a substantial hangup as I remember when I used E55 solenoids for the CV headlight conversion I mentioned to you; they really snapped vigorously when energized.
After having that headlight issue, it is so great to see someone tackle it. If the part was easier to access (lens easier to remove and reseal), I would definitely let my dremel take a rip. Did you ever look into some of the used headlamps online?
Btw, I've gotten used to my faded wood too. Not worth putting to much $$ into that for me.
It wasn't that difficult to get to, I was expecting dropping the front bumper to be more challenging but it was very easy and might I say, relaxing, to do. Dremeling is just a dirty job but by no means difficult. The resealing part is the one you have to pay more attention to.
I bought a pair of used headlights but since mine have the IR projectors inside the wiring is different. There aren't a lot of night vision enabled, used headlights online, none actually, at least I didn't find any.
The main reason I decided to tackle this was the simplicity of the failure, a 1$ cast metal part that requires a 2000$ replacement, that to me is unacceptable and needed a different approach, other than throwing parts at it.
You could always consider Avery or 3M film to cover the wood trim if you really get tired of it. All sorts of choices.
Those solenoids must have had a substantial hangup as I remember when I used E55 solenoids for the CV headlight conversion I mentioned to you; they really snapped vigorously when energized.
If the trim becomes cracked I'll definitely give that a try. For now it's fine, it faded evenly on all visible surfaces so there's no eyesore unless you know what the original should have looked like. I do like the knotty cancerous texture of the walnut wood though, I wouldn't want to cover it just yet and honestly, for the first few months of ownership I didn't even know it was faded, I thought it was supposed to look like that.
Regarding the solenoids, the W212s don't use them anymore. They now have fine movement adjusting stepper motors with very fine position sensing capabilities, they call them ISMs. I opened one up, each module has a two coil/armature motor design and they're all PWM controlled via integrated LIN and CAN bus signal. They're not particularly strong motors anymore, they rely on fine movement since they have to continuously adjust their position ( they do that even when you brake or accelerate to compensate for the chassis tilt).
This is a very interesting read, and explains why they cost as much as they do. They still should last at least 10 years IMO, if not more. https://www.hella.com/techworld/us/T...eadlights-663/
The main reason I decided to tackle this was the simplicity of the failure, a 1$ cast metal part that requires a 2000$ replacement, that to me is unacceptable and needed a different approach, other than throwing parts at it.
NO. 2 - Sound deadening
I always thought the W212 is a bit noisy at highway speeds so I decided to buy some Noico butyl sound insulation pads and install them in the back wheel arches, spare wheel trunk area and underside of the vehicle. Additionally I used 3M sound deadening spray rubber on the front wheel arches ( the plastic fender liners - inside and out) and the underside protective panels that run from the front to the back of the car. All of this got me a 2dB reduction in cabin noise, not worth the amount of money and labor spent IMO. Next time I'll just spend the extra money and get an S Classe.
Oda112
I hope that you buy a W222 and lead us to the promised land of affordable S class ownership through DIY.
I hope that you buy a W222 and lead us to the promised land of affordable S class ownership through DIY.
An S Class is definitely on my next car list but I like the W221 chassis more than the new one. The interior in the new one is really nice and all the tech makes it safer and more comfortable to drive but I don't like how the outside looks like a stretched C Class. I like to think I can tell the difference between the different series but sometimes it takes me awhile to figure out if it's a C, E or S.
I did the math the other day and I saved close to 7000$ on labor in 1year and 5 months of owning the E550 by DIY-ing, so that's 7k going towards the S Class fund.
Mercedes SLR McLaren 722 S Is Extremely Rare Example Modified by McLaren
Slideshow: A one-of-one U.S.-spec Mercedes-Benz SLR McLaren Roadster became even rarer after a factory-backed transformation at McLaren's headquarters.


 . Apparently there's an option for refurbishing them for 250$ each. Have any of you succesfully done that?


 ) but at least the plastic cover is hiding my handy work. It's amazing to have a working high beam again, it was starting to annoy me. I had to drive 200miles at night with only one working headlight, it was tiring.


