When you click on links to various merchants on this site and make a purchase, this can result in this site earning a commission. Affiliate programs and affiliations include, but are not limited to, the eBay Partner Network.
It felt like it was intentionally designed to be a problem for DIY. Following instructions from an MB video, once I removed the two screws (one is mischievously hidden) I pulled the trim down and immediately two small plastic clips broke. I replaced the filter and then spent over an hour trying to put the rectangular cover back (check the image below). I don't know if it is just me but this thing wouldn't go back where it is supposed to be.
Anyone had this problem? Is there a specific way this cover needs to be put back?
Thanks,
This gentleman is quite correct, once you get the coverings etc. off and you are down to removing the filter then you meet the 800 pound gorilla in the job. Taking the filter apart to get to it is fairly easy, but, putting in the new filter requires nothing but brute strength. The new replacement filter is slightly oversized and you really do need to "muscle" it in by exerting a lot of force on the bottom cover with the large tab that slides over the bottom of the filter to close it. I've changed this filter on my old W212 which took all of five minutes and when I bought my W213 (2019) I assumed this job would be just as easy, not so.
One last thing, I did read a post from a man that advised to not refer to any Youtube videos or the MB shop manual but rather he recommended that you remove the scuff plate before you start to take the bottom glove box cover apart etc., IMO having done this job twice, I have never removed the scuff plate and I have never broken anything while doing this job. The trick to taking the glove box cover off is simple, there is a plastic hook on it and when you pull it down, just remember to pull the cover down to about a 120 degree angle which puts the bottom of the glove box cover at the proper angle which will allow you to remove it without breaking the hook on the cover which sits at the back of the panel. Of course if you wish to do it his way or any other way that is of course your choice, personally I took a good long look at the MB shop manual before I started to do anything and it worked out fine for me. Best of luck to all that tackle this bi-annual "pain".
One last thing, I did read a post from a man that advised to not refer to any Youtube videos or the MB shop manual but rather he recommended that you remove the scuff plate before you start to take the bottom glove box cover apart etc., IMO having done this job twice, I have never removed the scuff plate and I have never broken anything while doing this job.
I didn't advise to remove the scuff plate.. I clearly said to remove the plastic trim next to the scuff plate.
Originally Posted by 1guitar
The trick to taking the glove box cover off is simple, there is a plastic hook on it and when you pull it down, just remember to pull the cover down to about a 120 degree angle which puts the bottom of the glove box cover at the proper angle which will allow you to remove it without breaking the hook on the cover which sits at the back of the panel.
I was unable to do this with out removing the plastic trim next to the scuff plate as there is a long tab from the footcover plastic trim holding it from being pulled downwards. It took me more than 45mins to figure this out and was wondering why it would not pull down.
I suspect there is a difference in the later models. I've got 2018 June model and no matter what you do, you will NOT be able to remove the footcover plastic trim without removing the plastic trim next to the scuff plate without breaking anything. It is physically impossible. Hence that particular Youtube video I posted also shows to make sure to remove the plate.
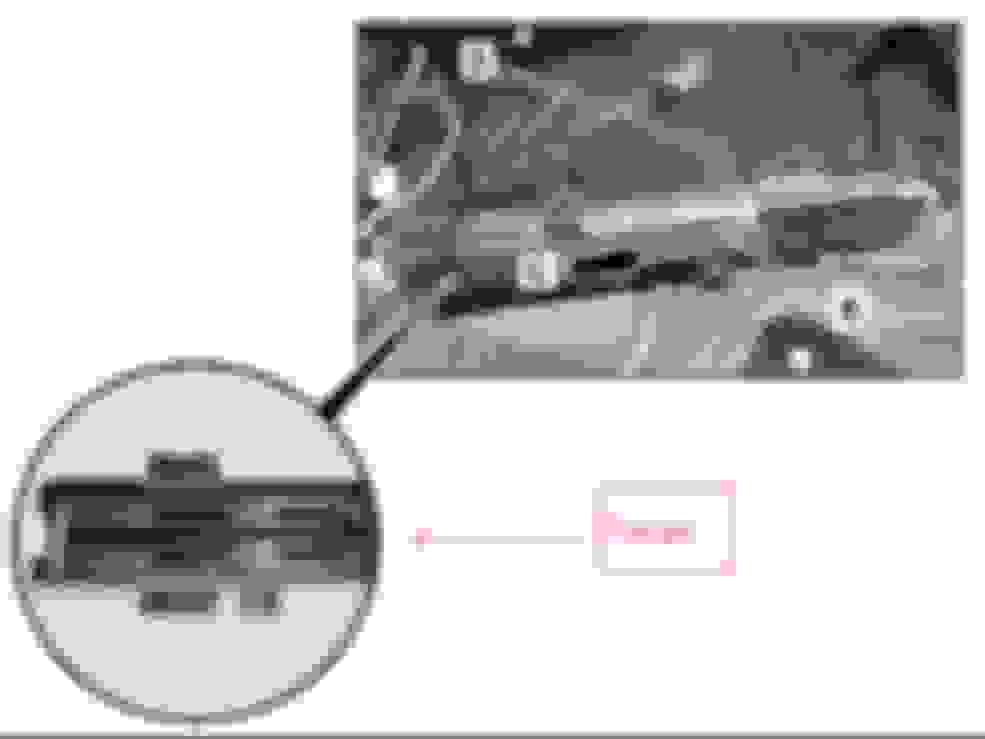
Just have a look at many of the Youtube videos on how to change the Cabin air filters on W205/W213.. The below is just many of one of the examples on how people are giving out false instructions without any warnings. I've circled the part where it shows the broken bit.
It felt like it was intentionally designed to be a problem for DIY. Following instructions from an MB video, once I removed the two screws (one is mischievously hidden) I pulled the trim down and immediately two small plastic clips broke. I replaced the filter and then spent over an hour trying to put the rectangular cover back (check the image below). I don't know if it is just me but this thing wouldn't go back where it is supposed to be.
Anyone had this problem? Is there a specific way this cover needs to be put back?
Thanks,
When replacing the interior combination air filter the most difficult thing is holding the removable cover on the bottom of the filter housing. If you get yourself a small �bottle Jack� and use some wood pieces or a couple of old telephone books to take up the extra space between the Jack and the filter cover of the housing than you can use the bottle Jack to keep the filter cover on the bottom of the filter housing in place so that you can slide the filter cover locking mechanism in place without having to �muscle it� in place. Good luck.

 09-27-2020 | 08:15 AM