When you click on links to various merchants on this site and make a purchase, this can result in this site earning a commission. Affiliate programs and affiliations include, but are not limited to, the eBay Partner Network.
Happy to announce that I've been selected to join the Diode Dynamics Ambassador's Program!
The fit was natural as I've been using both their SSC2 Sport's in White/Red Flood lights for my Reverse/Rear Fog and their SSC2 Pro's in Yellow/Yellow Fog Lights for my front fogs for about a year now. They've been great and are a significant improvement over the OE setup.
I fully documented my entire design/build process for retrofitting the Diode Dynamics Elite Series Type F2 Fog Lights to the W463.
Quick 90 second Instagram Reel about the process:
I'll have a longer-form video on Youtube after getting some night time driving shots to highlight the difference while in motion.
Some pictures of the results:
Type F2 lights assembled into the retrofit brackets. No hardware visible front the front which makes them look really OEM.
Took a few tries to get the brackets and the light mounting parts dialed in.
Removing the SSC2 Pro's that have worked great for the past year. Quite a difference in look, although the performance of the 2 is supposed to be pretty similar.
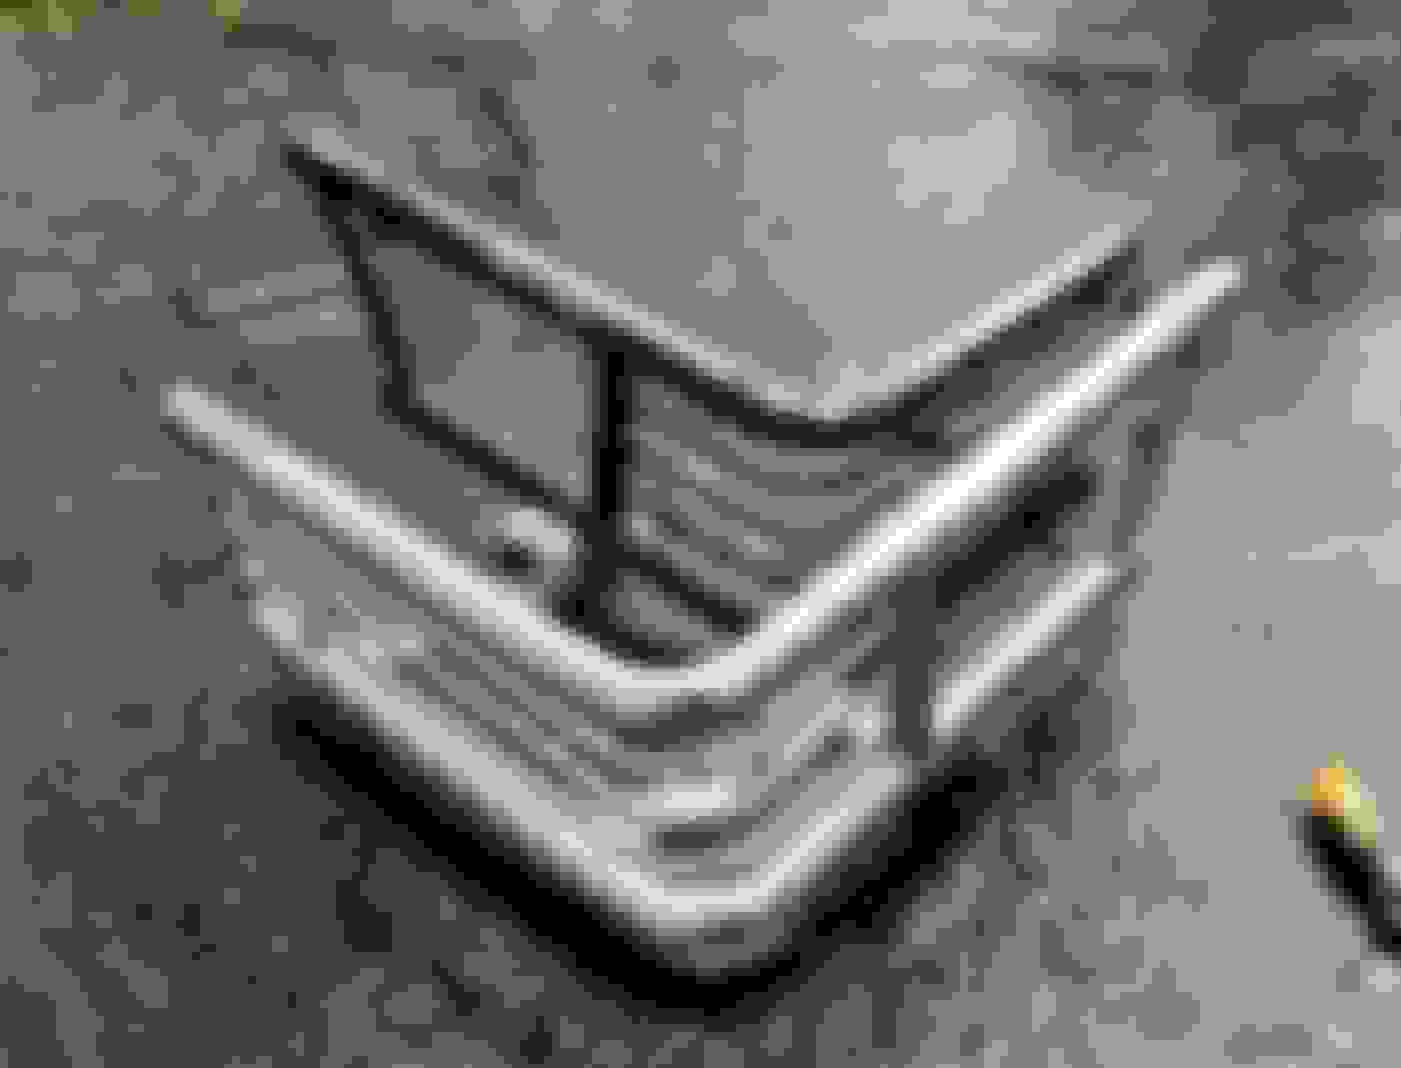
Closeup of how the Elite Series F2 lights fit in the OEM front fog light position with the OE surround (now sadly discontinued also)
Front view with both lights installed. They look OEM for the most part - very similar to the OEM lights (with 10x the light output)
I found a pretty cool bull internal reflection when looking at a specific angle. This is the amber backlight only - a pretty cool look. They are not as bright as the backlights on the SSC2 Pro's but do provide a cool accent for DRLs.
Light output is a lot sharper/thinner than the SSC2 Pro's close up, but while driving it is pretty close - major improvement for light output, especially near-field lighting up everything within 50ft. I do need to adjust the light angles a little bit as the right side is aimed a little bit higher (somehow)
If anyone is interested in retrofitting these or any of the other DD products I've designed things for, feel free to reach out here or send an email to shiann.builds@gmail.com. Happy to discuss anything G related!
Thanks for the tip! I saw the cable holder on the latch side but didn't see a tension adjustment - will have to take it all apart and look closer. Good chance the cable came loose on the latch side at some point and someone (maybe me) just tried to adjust the cable tension to fix it.
I am dreading taking apart the center console to get to the TC Module. I hope that's not the case as mine is a 2005 and the early issues should have been fixed, but alas old MB electronics aren't the best. I've just been living with the "TC in Neutral" error lately but now that the weather is warmer, I don't really have an excuse to not try and fix it.
First, really nice fog lamps. I plan to refresh mine in the future so I will have to ping you when I get to it. Much lower down on my TODO list right now, though!
Back to your door latch. Here is a marked up version of the door with the card on. Hope you don’t mind that I was too lazy to not pull the card off without having a real need to do so. 😉
#3 is the holder that you are familiar with - the bit that attaches to the interior latch pull.
#1 is the other end of the cable holder. It is on the interior side of the door skin, so you will have to reach in and feel for it. When you do, it is really rather obvious.
Anyone coming to this thread later - it is the two cable hold ends that creates the tension on the cable pull. It makes the cable length itself rather irrelevant.
#2 is the tension adjustment point. You may see a threaded section sticking out. If you do not, then the tension is set to as loose as possible. To increase the tension you unscrew the tensioner. Why this happens is because unscrewing the tensioner makes the rubber bit covering the cable longer, which will make the interior door latch pull feel firmer. It makes more sense when actually fiddling with it.
Tip: I have learned that screwing the tensioner all the way in makes reattaching the pull cable to the holder/handle easier, then I simply unscrew it afterwards to make the pull feel firmer.
Haven't reported in a while, but of course that doesn't meen things haven't been moving along. ~2k miles since April, so time to catch up on the past few months.
I dug out the front turn signal and rear tail light guards and cleaned them up using goo-gone and a pressure washer. I had plasti-dipped these in black back in 2020 and had them on the G for a year or 2, then in storage since. I'll be putting these up for sale soon as I don't imagine putting them back on.
Looking back, I would not plastidip these (or anything for that matter) since it's so annoying to remove.
I also sold the extra rear 2/3 seat that I bought from a pre-MBSUA G. It's been sitting around in my garage, then office for the better part of 3 years now and I won't use it for my previously planned projects. Sold to a cool LR restoration expert out in the hamptons who tinkers with G's from time to time. Good to see this go to a good home finally. If anyone was ever wondering, yes, you can fit a 2/3 seat in the back cargo area between the wheel wells. If you can find a way to fix it securly to the flor, you can probably mount it to the floor and have a 3rd row, although you'd have to figure out seatbelts and such.
During normal G tinkering, I decided to replace the stripped out screws that held in the rear cargo door striker with new allen head flat stainless steel hardware. Flat heat M14 is the correct size. Looks much better and significantly easier to get these night and tight. I'll be doing the same for all the door strikers when they need adjusting.
The G has gotten more washes this past spring/summer than it has probably ever gotten. Between all the rain and pollen, it definitely needs a lot of cleaning since it is still an 'ouside car' (for now). Really liking the foam cannon and pressure washer setup that I wall mounted with a karcher cube and wall mounted pressure washer hose reel - so easy to use with no setup time. Less excuses to not wash.
I've been collecting some detailign supplies - new backing plates, heavier cutting pads, and busted out the old porter cable 7424XP. The thing worked well, but definitely showing its age. I'll pick up a Harbor Freight Hercules Direct Drive polisher when I have a window of time to polish the entire G and ceramic coat it.
Also finally got around to replacing the instrument cluster LCD panel. I picked it up off Amazon exactly 1 year ago and finally got to install it.
Total install time was about 15 minutes, most of which was getting a good view on how the ribbon cable connector worked. New screen is so much better and can be seen in daylight and during hotter temperatures. The only downside, as others have stated, is that you can't see the screen with polarized sunglasses. Not sure if there is a film you can put over the screen to fix this, but it is a minor annoyance as all of my sunglasses are polarized.
Also had my first encounter with water corrosion on a wire harness that I made. This was the harness I made for my Diode Dynamics light pods used in the reverse and rear fog positions. I thought that it would be enough that the connections were soldered and covered with shrink tubing. I started getting an error on the dash for my reverse lights, and found that they weren't lighting correctly. Inspected the lights and they worked perfectly. Went through the wiring harness and found an intermittent connection on the power side. Dug deper and found massive amounts of corrosion, enough to break the wire, and also enough to cause isseus on ~6in of wire. I cut out the whole section and replaced it, using solder-seal connectors this time.
Got everything fixed up and the reverse lights work perfectly now again. Significant improvement over the OE reverse candle.
Removed the center trim pieces to get a better look under the cosmetic panel. I eventually plan to 3D scan this panel and 3D print a replacement with an actual usable cup holder in place of the cubby hole, but that is a project for another day.
The main reason I removed all of the center console stuff was to fix the shift boot mounting pins. Mine were completely broken when I got the G back in 2020 so I've been constantly adjusting it every time I use the handbrake (which is all the time now since my Transfer Case still can't be calibrated). I'm sure that I could make new ball/pin mounts, but I just decided to bolt the shift boot frame to the outer trim piece. It does make installing it very difficult, but I don't envision removing this piece in the future unless I remove the entire console. Works like a charm!
What I'm thinking of when redesigning the center cosmetic trim panel with a large cup holder to hold things like the oversized water jugs most people use today. Just want to clean up how things are kept in the G and have dedicated places for all the things we use normally. Also want to get rid of the clip on cup holder afterthought that MB thought was actually a good idea.
In the other world of mounting things in permanent locations - I relocated my phone charger mount to the dash next ot the instrument cluster. Traced the dash contour with an profile finder and 3D printed a quick design to mount my (now ancient) iOttie iTap2. The placement is ok overall, but I need to find a lower profile wireless charger as I don't like how far away from the dash my phone sits. I could probably recess the whoel thing ~1in but will have to completely custom model the back part of the iTap2 and resolder the USB connector to be right angle. Possible, but a lot of custom work that may just all be obsolete soon. I think I'll just get a magsafe mount and adapt it to my bracket. Then run a magsafe to android case since I'm on team Android.
In the same toptic, I added a USB for charging in the glove box for the wife as we plan to take several multi-hour roadtrips this summer.
Which brings me to this monstrosity. Started with a simple idea to use a 12V->5V step-down converter that I had from another project, along with the terminal distribution blocks. Ordered some USB pigtails and came up with this web of wires that is mounted below the glove box. I have tons of USB powered things, so needed a lot of plugs. Then of course, I checked amazon and find they sell these things for $24 with fast charging and built in fuses. Great. I'll replace the crazy thing if I have any problems with it in the coming months.
So here is the current setup and all the things that need USB power:
1. Cell phone wireless charger mount
2. Android Navigation Screen
3. TPMS receiver
4. GPS tracker
5. Glovebox USB power
6. Rearview Dashcam/Screen
Also ended up breaking the rear camera wire that is mounted under my 3rd brake light. Too much flexing over time from poor mounting. Had to remove all of the rear door panels, so took the time to cover the plastic panels and flat metal sections of the rear door with butyl sound damping material. Haven't noticed yet if it has helped, but it definitely can't hurt. Tried repairing the cable but found it was broken in several places, causing an intermittent camera feed signal - so buttoned it all back up and ordered a new cable to be installed tomorrow.
These side and top plastic trim pieces rattle and squeak pretty badly, so adding some butyl and fabric tape on the mounting areas really tightens things up.
Really good idea on the dynamat @shiann When I had the driver's door apart to replace the lock, the thing that struck me was how little sound deadening material there was in there. I made a mental note to go through and pad up all the insides of all doors at some point in the future.
Really good idea on the dynamat @shiann When I had the driver's door apart to replace the lock, the thing that struck me was how little sound deadening material there was in there. I made a mental note to go through and pad up all the insides of all doors at some point in the future.
Agreed. I did the same when I went through all 4 other doors for my speaker upgrades. Took off the old (and crumbling) sound deadening in there and stuck on 2 layers of butyl and 1 layer of closed cell foam. I think I ended up covering ~75% of the inner door skin as some is impossible to reach without a lot more patience than I have. I *think* this had a pretty good noise-isolation factor for road noises bleeding through the doors, but it may just be confirmation bias due to the amount of work it took. I didn't cover the outer skin though, but may in the future.
The next major step here is to strip out the headliner and interior panels and add the same sound deadening treatment to the entire roof and cargo area, which I can hopefully get done this summer.
Just completed a trip to southerm MA and back for the weekend and it all went off without any issues.
Before leaving, my rear view mirror camera that I installed 3.5 years ago started giving me trouble. The rear camera started cutting out randomly, so i bought a replacement cable, and replacement camera. Both seemed to work, but the same problem came back a day later. Mostly when the temperature was really hot. So I purchased a Wolfbox 840s that was on sale on Amazon for just over $100.
No new fancy features here, pretty much exactly the same specs as the old Vantop H610 that I was replacing, with the exception of 4k front resolution. Didn't take any pictures of the install as I mounted everything an hour before we left, but install was painless and the video quality front and rear is much better than the previous. The only thing I'll have to modify is 3D printing a better mount for the rear camera mounted below the 3rd brake light - it wobbles too much.
I also replaced my USB monster with one built specifically for this. This model from Amazon I linked above, is a 9A model, so more power and smarter distribution controls also. I wired an old 12V socket to the plug I added so to not modify the USB power brick. All tucks away nicely under the glove box.
Made the obligatory stop at FCPEuro to drop off ~$350 worth of warranty returns.
Also got lucky and was able to snag a set of used G63 shocks off FB Marketplace from someone who worked at a dealership close to FCPEuro. They look like they're in pretty good condition for the claimed 90k miles on them, and they pressurize nicely. Rubber bushings and washers are also all intact and feel good. Picked them up for $120 so pretty happy to get them.
The purpose of getting these is to remove the Fox 2.0's from my G and rebuild them with all of the parts I purchased so long ago. Then the plan is probably to sell the Fox's as they're valved for a Jeep JK and they are backwards (Jeep JK rears on G front, and vice versa) to the Jeep crowd, or revalve them to the G specifications (if I can get the shims and correct order from Fox) and keep them. This is what Eurowise did to keep selling G kits back during 2020 when Fox discontinued the G-specific kits temporarily. I honeslty wish I had a better experience to talk about with the Fox 2.0 adjustables, but mine has been pretty bad all around from installation (you can read all about it earlier in this thread) to now where 3/4 of them are leaking badly and you can tell that they are doing very little for body control. The ride is incredibly bouncy, lots of weird rattles and chattering, even being set at setting 4/8 from soft.
In the long run, when I finally do install my +40mm lift springs from JackwagonOverlanding, I'll probably pick up a set of Koni Raid shocks to keep things simple.
Also picked one of these beasts up in anticipation for the shock swap - Dont want any chance of seized bolts causing issues. DCF900 with gobs of power. (I'm deep in the Yellow camp with my construction tools by a toss of a coin many moons ago, so no red M18 tools for me)
And at one part of our destination. Private beach time out in Southern MA. The G looked great out there. Wish I had grabbed a picture of the whole area blanketed by fog with a faint glimps of the G roofline, but was too busy trying not to suck at golf.
Ironically, after getting back from our 600 mile roadtrip, my wife was driving today and the accelerator pedal broke again. AGAIN!. 3rd time this has happened now. Not sure if it's specifically the MTC branded ones I have been buying from Amazon, but these things just don't last and the design is terrible. First one broke after I had the G for 1.5 years. Second one broke after 2.5 years. Third one has lasted just about 1 year.
So I ordered an electronic pedal replacement. The R170 model has the integrated kick-down switch, so no custom hacking required to fit the OE switch. All that I'll have to do is figure out how to mount it so it's easy to install. Others have installed the R230 model pedal, which also works fine but you hae to retrofit the kick-down switch. Also, this set came with the brake pedal cover, so they'll be matching. I didn't wan to have to spend another $40 on a brake pedal cover. I did find the R230 varient not too far way in NJ for sale on Ebay also, but shipping time (somehow) would take roughly the same amount of time, so now I wait.
Should get here in a few days. I'll take a look what kind of bracket I'll need to make. If it seems complex enough I'll 3D scan the pedal box and the pedal and design a 3D printed piece.
@shiann when you design and print a camera housing, look into the very latest 2025 G's design. They have the camera mounted by the license plate and I think that would be a good place for a camera housing, as long as camera has good field of view overall.
@shiann when you design and print a camera housing, look into the very latest 2025 G's design. They have the camera mounted by the license plate and I think that would be a good place for a camera housing, as long as camera has good field of view overall.
Absolutely will.
My second screen (Nav+info screen) has a back-up camera function that I plan to mount in the lower area by the license plate. I'll also pick up a OE replacement camera + camera housing as I do want to move my rear view camera outside the door. I now have the same wolfbox rear camera that you purchased a little while ago, so can get moving on the project now!
Accelerator pedal broke again in the same way. This is the MTC 3231/126-300-05-04 replacment pedeal I purchased on Amazon for ~$12. Low cost but annoying overall as it is very difficult ot drive with it broken.
I did receive the R170 pedal and it looks good. Will have to do some work on how to mount it as I don't want to drill a hole in the floor for a rivnut if I don't have to. Will probably be 3D Scanning the pedal and floor to design a bracket.
I also took off the rear shocks that I plan to put on the car, originally off a G63 wtith ~90k miles. The rear shocks look exactly the same. Same shock length, same body length, same exact internal bumpstops, etc. This i'm not too surprised about since the OE G55 and OE G63 springs are exactly the same. It's funny how my old G55 shocks actually have the same amount of miles on them compared to the much better condition G63 used shocks.
The new Wolfbox 840s has worked well. Low cost add for a lot of functionality. Highly recommended if you're still using the traditional mirror. Not really an upgrade from my previous system, but it works so I guess you can consider that an upgrade. Great field of view, clear picture, and very clear video.
I removed one of my front Diode Dynamics Elite Series Type F2 fog lights to install the new brackets to aim them lower. This is a shot of the old brackets that have been on the G for the past 3+ months. They still look perfect.
You can sort of see the angle change here. The light is aimed 1.5 degrees down to get them to shine in a better (lower) pattern.
Here are the lights installed. The bottom of the light is inset more than the originals, so do look slightly better IMO.
Here's another closeup of the lights and how they fit with the plastic surrounds. Both sides fit differently and that's not a surprise as the plastic surrounds don't fit that well to the bumper anyway.
I only installed the new brackets on the driver side, and you can very clearly see the difference here. G is only about 5ft from the garage door, but the light angle is significantly lower with just the 1.5 degree change. I think at this point the brackets are ready for sale. Will post on IG soon. If anyone is interested, feel free to reach out. Significant improvement in fog-light performance and much more OE looking than the SSC2 Pro pod lights that I used previously. Also a good amount less expensive, but still with very similar light output performance.
I have a similar dash cam setup and ended up printing a turret mount to be able to aim the camera where I need to
Very interesting. Did you mount it to the hitch to be able to use as a hitch camera to line up the trailer? Shiann and I have talked about the best way to do this and integrate it into a 3rd cabin camera channel of a smart mirror perhaps. Can you show us a pic of the feed of the camera as you are backing up or lining up your trailer?
I have a similar dash cam setup and ended up printing a turret mount to be able to aim the camera where I need to
Which reverse/dashcam are you using? Is this camera part of the 3rd channel?
I haven't ran my 3rd camera wire to the back yet due to lack of time, but a good project for the winter. I made an adapter to mount a small camera inside the hitch, but obviously that doesn't work for anyone wanting to use the hitch. I also have an extra separate camera input on my navigation screen, but everyone's setup is different. When I get some time I want to find a better spot down low by the license plate to mount this 3rd camera, a spot that is robust and won't get stepped on by myself, kids, etc.
As I have written about regularly in the past, my experience with the Fox 2.0 shocks over the past 4 years hasn't been that great. Yes, they are much more comfortable than my old G55 OE shocks, but one of them started leaking at around 9 months. Over the past 4 years and 60k miles, 3 out of 4 are leaking pretty badly, and body control has degraded significantly where I have to run them 5/8 clicks from soft or else the cabin just jostles around pretty badly (like having no shocks). That being said, my set may not be the norm, as I purchased my kit during the 2020 Covid shutdown where Fox decided to discontinue the W463 kit. My kit was sourced through Eurowise, and by the part numbers, I'm running Jeep JK rear shocks on the front of my G, and Jeep JK front shocks on the rear of my G. Most likely some mismatched valving in this application given the weight differences between the 2 vehicles and the front/rear shock flip. This of course doesn't account for the washer/spacer stack I needed to add to the rear to keep the shocks centered, and the front shock top eyelet rubber bushing/sleeves that I had to source myself for a proper installation.
Anyway, I picked up a used set of G63 shocks in great shape with ~90k miles on them. I knew that I would have to cut off the rear shock top nuts, so I wanted several hours of free time to get this done.
Fox setup on the rear. Lots of leaking going on here. Also, the shock was somehow also loose enough that it could rotate around, resulting in the reservoir mount hitting hte brake caliper and wearing a good amount away. Not ideal.
The rust on the rear spring/shock perch had also spread since I was last back here.
I took some time with a wire brush and knocked off all of the surface rust and flakes. Cleaned it up well by blowing it off and with a liberal soaking with brakleen. I then covered the whole thing with some rust-encapsulator/reformer.
I was also half-dreading all 4 lower shock bolts - due to being through several winters, salt, snow, etc. I purchased a Dewalt DCF900 in anticipation of having to do this job, and it was AMAZING. zipped all the bolts/nuts off without any issue in seconds.
For the rear shock top nuts, I used a dremel to cut a slot in them, slowly. I cut right through the top washer/bushing mount also to get the whole nut. After some careful cutting and a couple hits with a cold chisel, the nuts snapped open and were easy to remove.
Used G63 shocks installed. I couldn't find any bolt/nut torque specs, so just torqued to 100 ft/lbs and gave it a little bit more. Marked both upper and lower hardware with anti-vibration paint. Top shock towers aren't great, but the rust-encapsulator paint will help them last a little bit loner - or until I can do a proper refinishing.
Fronts were also just as easy. Lower hardware zipped right off with the DCF900.
And here's the condition of the Fox 2.0 shocks. All the mud/grime is all from leaking oil. I've also cleaned all 4 shocks somewhere around the 2 year mark, so this is all pretty fresh. Front right and Rear right are in the worst condition.
The ride with the used G63 shocks is definitely stiffer than the Fox's used to ride (when they were working as expected), but body control is significantly better. The G63 shocks also ride significantly better than the OE G55 shocks. Night and day. I would say, compared to the Fox's, Over the small stuff, they ride stiffer, but over the large/high speed stuff, they are pretty comparable. Body control overall is a lot better and I don't get a lot of the weird axle shaking that I used to get when going over really rough roads. The wife gave it the thumbs up, so that is a win. I'm still planning on installing softer lift springs, like Jack's +2in springs (that I already have) in the future along with a softer pair of shocks, probably Koni Raid's, but that's a problem for next year.
As I had everything open, I took my inspection camera and wanted to check out the CV boots on the front axle - not good.
Pretty sure I'm looking directly into the CV - so a complete boot tear. Although I don't have super milky grease leaking out of the hubs - nothing beyond what I've seen for a while now.
Same goes for the other side. Definite boot rip here.
All of this is not surprising. The general consensus is that in the 100k - 150k mile range is where the boots will start to fail. Mine is no exception. This is to say, I'll be putting very few miles on the G until the appointment so I don't destroy the CV's, but it's difficult to know how long these have been torn. Could have been a while now.
I've made my appointment at Wolfgang's later this month for a full assessment and will see how much damage this does to the wallet. I'm expecting someting in the $3-4k range, but I'd rather pay for this and not have to trial-and-error this over the whole winter - outside in the cold - covered in grease...
Will also make sense to have him try and fix my Transfer Case relearning issue at the same time also.
Which reverse/dashcam are you using? Is this camera part of the 3rd channel?
I haven't ran my 3rd camera wire to the back yet due to lack of time, but a good project for the winter. I made an adapter to mount a small camera inside the hitch, but obviously that doesn't work for anyone wanting to use the hitch. I also have an extra separate camera input on my navigation screen, but everyone's setup is different. When I get some time I want to find a better spot down low by the license plate to mount this 3rd camera, a spot that is robust and won't get stepped on by myself, kids, etc.
The one i'm using is an older Aukey rearview mirror with a built in front cam and a wired rear cam as a second channel. No third channel. Looks like it's discontinued so I can't send a link.
The G has moved very little given the state of both CV boots, but I've tried to keep busy with projects over the past few weeks.
Found a cheap car cover that I plan to use in the winter during heavy snow falls. I mosty want to avoid having to use harsh brushes to remove the snow that settles basically over the whole thing. Will see if this thing works int he winter. Fit isn't good, but it does what it needs to do I think.
Of course the cover didn't have any provisions for the rhino horn antenna, which ended up folding over and ripping.
I had been planning on removing it and sealing it up for a while now, but this made it necessary. Plug was something I already had from the pack of plugs I purchased and it fit perfectly. Added silicone on the top an bottom sides in hopes of keeping the water out.
Not too much of a difference, but no more rhino horn! The G is filthy unfortunately.
My wife and I recently switched over from our old Samsung Galaxy S20 and Note 20 Ultra to Google Pixel 9 Pro's, and I wanted to switch over to magsafe chargers. Found this charger that was basically the same thing that I designed for my last phone setup using an iOttie iTap2, except this one looks better, is lower profile, and the magnet is much better. Not the cheapest thing on Amazon, but fit was perfect for the G.
The phone location is slightly blocked by the steering wheel, but keeps it in a really good position. Close enough to still glance at if needed, and easy to reach if you need to swipe or anything.
Here's the full driver setup now. Rear view mirror/camera/dashcam up top, Navigation/Android Auto setup, Phone with magsafe charger, SingleDIN head unit with bluetooth, and TPMS, with everything powered by USB.
The day has come and I made the trek over to the East Coast G Doctor.
This place is pretty awesome. Got to chat with Wolfgang for a little bit about my G and some of my adventures figuring out how to do some of the mainentance items I've tackled in the past few years. A fun and informative conversation. I'm sure I could have talked to him and picked his brain for hours. Hoping there isn't any more damage in the axle than just needing new CV boots. Of course will be doing a whole axle rebuild with all new bearings, seals, etc while they are in there. The whole service is definitely not cheap. A lot more than I expected/quoted back in 2020, but that's the same with everything these days. At leats I know one of the best is doing the work and it will last for many years to come. This is also the first time someone else will be working on this G besides me since I purchased back in 2020, so not bad. Also hoping he can fix my transfer case issue as it would be nice to have that all sorted.
Walked all around this beauty too. Exterior was perfect, and the Rotiform wheels were an excellent choice. The best part I saw was the interior. It looks flawless. I do want to get a manual SWB one day, but that will have to be way down the line when there are more garage spaces.
All told, the service should take a few weeks. I didn't give a timeline since I'm in no real rush, but will check in a few weeks from now.
Got the G back around Thanksgiving and it's been great having it back.
I asked Wofgang to let me take the box of all the old parts. There are some miscellaneous items in the box, but most of the old bearings, seals, etc are in there.
My boots were both completely torn, but no other damage was done. Also replaced the brake lines on the front due to aging rubber cracking.
All in all, the bill was high, as expected. I had Woflgang tackle a few other things "while you are in there", so things added up.
Everything he did:
- Complete front axle rebuild - bearings, seals, CV boots, all new fluids, grease, oils.
- Flush out and bleed the differentials
- Replace the front brakes - pads and rotors (mine were nearing their end, and he had to do all the labor to remove them already, so just parts cost for OE MB parts)
- Replaced all the front brake lines
- Troubleshoot diagnose the transfer case motor not relearning.
- He wasn't able to fix the Transfer case P2213 issue of "distance too long/short". Not something he has seen before, but he tried an OE MB transfer case motor and had the same issue with my 2 different OE replacements from FCP. He guesses that there is something going on with with the selector fork/shaft. He probably could have fixed it, but that would involve a lot more time and cost to remove the TC. I'll figure this whole thing out in the spring when the weather warms up, and I get my own STAR/Xentry sytem.
If you want to know the total out-the-door bill, send me a PM.
In other good news, a buddy of mine who lives close by picked up this China Blue G55. Really nice overall condition and someone spent a lot of money restoring/repairing this thing. So expect more G content to come now that I have a G friend close by (who is probably an even bigger car nut than I am)
Last news, a recent trip to Legoland in 'upstate' New York State lead to bringing this little toy home. Need to carve out a lot of hours to build it though.
End of winter update. Not a ton of work has happened over the winter due to the cold weather and lack of a tall enough garage, but lots of G activites have happend for sure.
Found that I was consuming oil at a much faster rate than previously. Before it was 1-2 qts every oil change interval (5k miles), but recently it has been closer to 1qt every 1k miles, so I started digging and found a pretty messy sight below the oil fiter housing/oil cooler. Parts are ordered to replace all the o-rings in this area, along with the thermostat (stuck open) and power steering reservoir since they are all in the same area.
My buddy with the China Blue G found a great deal on a G63, so traded in the new-to-him G55 for a newer, better modified, and lower mile beaast. That means the OE bumper he previously sourced now needed a new home. It is quite surprising the number of subtle differences between the 2005 and 2008 G55 front bumpers, besides just the fog lights. All the brush guard brackets are much nicer and fit the bumper much better. The finish and condition of this one was also leaps and bounds better than mine, so this on will be going on my G soon.
Of course I can't leave 'good enough' alone, so I decided to 3D scan the front bumper and fog light mounting brackets in order to make my own adapters for the newer oval fog bumpers.
In this new configuration, I'll be running 2x sets of Diode Dynamics SS3 Pro's. Fogs on the outside, and Combo beams on the inside. The light output on these is going to be insane. The biggest difference between this setup and the previous setups I designed for the SSC2 Pro's and Elite F2's is that the exterior shroud/bezel will be integrated into the bumper - thus no more need for the OE bezels (the rectangular ones are NLA). Still need to purchase a set of SS3 Pro's in Combo beam, but this whole new bumper assembly (including brush guard and everything) will be going on in the coming weeks, after I can apply PPF to the whole thing.
Also picked up a set of OE locking pins for the front doors. Previous owner installed these flush pins, which are really nice, but made opening the locks impossible by hand. Kept the rear doors as flush pins so the kiddo's can't unlock and lock the doors.
My buddy showed up one day at my house after picking up his new G63. The thing is nuts. Lifted 4inches on a full Eurowise kit - springs, Koni Raid shocks, Eurowise extended radius arms, poly bushings everywhere, AlphaEquipt wheels (sadly out of business) on 35's, 911 Motorsports reverse rear mount, LED headlights, Frontrunner Roof Rack, Rinorack Sunseeker Awning, ORC Ladder, Baja Designs Onx6 40" light bar, Eurowise rear seat molle panels...
I of course couldn't pass up the opportunity to hop up on the roof. Winter cold had me lazy so the gut has grown. Need to fix that!
Got the chance to take a winter skiing trip to upstate NY. The G on KO2's did great in lots of slush, ice, freezing rain, and some good accumulation of snow.
Gotta love the lines of the G when it gets covered in snow.
After several hundred miles of pretty terrible conditions, the G got us all home safe and sound, but got a good covering of salt and road grime.
In other news, My buddy with the G63 decided it probably made sense to take off his roof rack + accessories to maybe be able to fit into his garage, but also into other parking structures, which meant he presented me with a deal I couldn't say not to (again). I told him I'll hold it for him if he ever wants it back! Got the wife's approval and we moved the rack over to my G.and it looks great. I left off the light bar and awning for now, but plan to add quick-disconnects for the awning later in the spring. Not really sure what we'll use the roof rack for, but that's something to figure out later.
Took a video of the whole process, which was pretty straight forward. Would have been much easier of we were both taller!
Also came with the ORC rear ladder. Haven't really installed this yet, but definitely is a beefy piece of kit. I want to polish and seal the paint behind the ladder first, as well as add some rubber on the clamping features. Possibly also remove the rear AMG badging, or just black it out.
Lots of upcoming things I need to do with the G.
- Replace Thermostat
- Replace Oil Filter Housing/Oil Cooler O-Rings
- Replace Power Steering Reservoir and flush system
- Change Rear Differential Fluid
- Flush Brake/Diff lock fluid system
- Install newer 2008 front bumper/brush guard
- Install switch panel for lights
- FINALLY replace the headliner - fully insulate the entire cabin with sound deadening material
- Build a new rear cargo drawer - lower profile
- Rebuild Fox 2.0 shocks and revalve them - (more to come later on this as I have a full list of parts to correctly valve my shocks to the W463 specific shocks)
- Install rebuilt shocks and +2" JWO springs
- Fix rust spots popping up all around the G
- Fix Transfer Case Issue
- Install 90 degree rear door check
- Install facelifted side mirrors
- Repaint all 4 fender flairs and rear bumper
- Polish and ceramic coat all the painted surfaces.
Lots of upcoming things I need to do with the G.
- Replace Thermostat
- Replace Oil Filter Housing/Oil Cooler O-Rings
- Replace Power Steering Reservoir and flush system
- Change Rear Differential Fluid
- Flush Brake/Diff lock fluid system
- Install newer 2008 front bumper/brush guard
- Install switch panel for lights
- FINALLY replace the headliner - fully insulate the entire cabin with sound deadening material
- Build a new rear cargo drawer - lower profile
- Rebuild Fox 2.0 shocks and revalve them - (more to come later on this as I have a full list of parts to correctly valve my shocks to the W463 specific shocks)
- Install rebuilt shocks and +2" JWO springs
- Fix rust spots popping up all around the G
- Fix Transfer Case Issue
- Repaint all 4 fender flairs and rear bumper
- Polish and ceramic coat all the painted surfaces.
It's going ot be a very eventful 2025 for sure!
Solid update and that's a great list for 2025! Any chance you can add LED headlight housing for 2007+ Gs to your list? And I can hardly wait to replicate your fog light setup on my G55!
Solid update and that's a great list for 2025! Any chance you can add LED headlight housing for 2007+ Gs to your list? And I can hardly wait to replicate your fog light setup on my G55!
For sure Greg! That's only the "what I need to do to my G" list, not the new development stuff I'll also be doing. Will keep you posted.
Months of time has passed, seems like the project completion rate has slowed down dramatically. Swamped at work and school-year-end festivities has really eaten up my time.
Did get a long afternoon do dig into some much needed maintenance. Those front-engine oil leaks were getting bad, so I geared up and purchased everything needed to replace lots of stuff on the front side of the engine.
Power steering reservior, hoses and gasket.
Thermostat
Heater Core Coolant Pump
Oil filler neck/Oil cooler seals
Oil Change with some oil additivies.
All parts from FCPEuro of course.
Heater Core Coolant pump wasn't terrible to replace, but did take a lot of cursing and twisting my arms. My pump apparently has been on the fritz for a long time now, and besides the errors in Xentry, the heating/cooling air temperature has been very poor lately, especially when cruising on the highway. Hope this fixes that issue. Of course, when you release either hose, you'll lose about 1 gallon of coolant, so be prepared with a wide pan to catch everything. I used a 5 gallon bucket and caught maybe half of it.
I bought the replacement power steering reservior a long time ago thinking there was a small leak, but I never was able find any signs of one. My steering creaks/groans here and there, but maybe that is more a function of the system itself and my larger tires, along with my wheel spacers. There was what seemed like a small leak at the bottom of the reservior, but hard to tell as it could have easily been from removing. Replaced the reservior and the seal for now. will tackle the hoses next time or when they start leaking.
With the heater core coolant pump replacement, I could also replace my thermostat. I was also getting random errors of my thermostat sticking, and Wolfgang also confirmed this saying my thermostat was stuck open. Didn't bother testing and just replaced it. I have been having cold-start stumbling over the past few months, so hopefully this is the culprit.
Replaced all of the 3 oil filter neck seals, as well as the door seal below on the blank cover. All this stuff is difficult to reach for sure, so if you're going to be in here doing all of these things, should just get it all done. Cost overall was very low for all of these parts, labor took maybe 4-5 hours of slow methodical work.
When looking all over the engine from under, I did notice more oil leaks coming from the RMS area, as well as a weird leak coming from the rear passenger side under the block exhaust port. Not sure what could be leaking here, but it looks like I'll be tackling an upper oil pan re-sealing job and RMS job. Will also do motor mounts and the oil level sender/sensor while I'm in there. Probably will combine with a full transmission filter change/flush. Definitely not looking forward to that job!
Spring came by quickly this year, and so did the local birds and their affinity/attraction to my rear view mirrors. This the typical mess that was left on the car EVERY DAY.
Absolutely disgusting.
Caught them in the act. I got in the habit of heading out 10 min early every time I was going to go somewhere, and rinsing all of the bird poop off both side mirrors, and anywhere else they happened to do their business with a pressure washer. The shear amount of bird poop was truely incredible though. Also this happend on both cars, so not a black car thing either. Thankfully as it is now June, this has basically stopped.
Got a chance to drive up to FCPEuro to return some things and also meet up with Mike Serpe to pick up a big box from him.
Contents secured. Great "mini pallet" and stout box. I didn't grab a picture of Mike or his G, but always a pleasure getting to see him. He has, for sure, forgotten more about the G than I know, and a true OG in the game.
Obtained as a spare/backup - used VG150e transfer case from a 2004 with ~36k miles on it. Price was too good to pass up and being somewhat local - no brainer for me. Will need a few wear items replaced, but nothing expensive or complicated. I got this as a backup in case I can't fix my transfer case and the P2213/P2214 codes I'm getting in STAR/Xentry not allowing the transfer case H/L relearn process from succeeding. Wolfgang suggested it may be an issue with the selector fork/spindle, but he couldn't get the relearn procedure to take either. We'll see when I get some time to dig into this issue later in the summer.
I haven't had a ton of time outside to work on the G, but I have had some "after the kids go to sleep" time.
I've had this design for F2 style fog lights (Ford F150) to fit onto the G for a while now. I've been running the Diode Dynamics Elite Series F2 Style lights and they have been great, but lately Diode Dynamics have been having a good amount of supply chain issues, with many of their lights (that I have used on my G and make adapters for) being backordered for 4-8 weeks. Another G owner turned me onto these F2 style (Ford) fog lights from Morimoto that are supposed to be really good upgrades as well. These are the Morimoto XB EVO+ fogs and they can be switched form white to yellow beams, which is pretty cool. I have yet to try them on my G, but will do so in the near future.
Fit and finish looks great and is very similar to the DD Elite Series F2 lights - OEM rectangular shape.
I redesigned the brackets to have an integraded leveling feature on the back. This design should work with both the Morimoto's and the Diode Dynamics lights. Will have to test them to confirm.
Speaking of fog light projects, I finally picked up a second set of Diode Dynamics SS3 Pro's in a Combo beam pattern. This setup will eventually go on the G with the newer 2008 front bumper. Hopefully soon! Will have to completely rewire everything, so planning this slowly with my Auxbeam 6 gang switch panel.
I also picked up a set of 2013-2018 replica side mirrors from Slava on Ebay. These weren't perfect, but good to replace my mirrors that have a cracked LED turn signal. Black was the same paint code as my G, and the price was right. I had to take them apart fully to figure out what each wire was connected to, as these were removed from a wrecked G previously.
Wired everything back up, tested both, and added in load resistors on both blinkers to avoid any Front SAM warning issues. Confirmed everything was functional by plugging into the G, so just waiting for a break in my scheudle to install. I was also delayed installing these due to the bird pooping issue above, so these have been just sitting in the garage, taking up space.
A few months back I got the opportunity to adventure down south in NJ on a bunch of offroad trails and sand dune pits with my G63 buddy's Porsche friends. Took my son and we had a ton of fun on the trails, playing on sand dunes, driving around the sand pits, using the G for what it was intended for.
I swear My g got a lot dirtier than this. But there were a good amount of puddles we had to get through. I have videos of the full day that I'll upload to YT.
This stance is a little bit exaggerated, but you can see the real height diffrence between his 4" lifted G63 on 35's vs my non-lifted G55 on 32" tires. Felt like his bumper was a foot taller than mine. Also the difference between wide aggressive wheels/tires vs my somewhat tame setup!
this shot lines up a lot better in terms of perspective. His G63 roof height with 4" lift and 35's is very close to my roof height at OEM G63 height on 32's and the Frontrunner roof rack with short legs.
Bad part about this offroading trip was that my transfer case dropped into N randomly when crawling around the sand. Same thing has happened once more since this offroad excursion. I think with the trasnfer case not knowing where it is in the H/N/L range, it can more easily fall out of gear into Neutral. Very easy to tell when it happens as you get a pretty good clunk from right where the TC is, and it is followed by a very clear sign of no drive to the wheels. It took a few tries, but the TC eventually went back into H after several restarts, but this is definitely an issue that I need to fix right away now that I have all the necessary tools, and non-freezing weather.
Mercedes SLR McLaren 722 S Is Extremely Rare Example Modified by McLaren
Slideshow: A one-of-one U.S.-spec Mercedes-Benz SLR McLaren Roadster became even rarer after a factory-backed transformation at McLaren's headquarters.