


'13 Bluetec hitch

Newbie
Joined: Jan 2016
Posts: 14
Likes: 0
2013 GLK250 Bluetec
PVBDLM...I am in the same position as you. I reached out to the Atlanta dealership previously mentioned and got no response (via phone or email). I used the hitch for my bike rack, so I haven't attempted to tow anything yet.
Here is wiring harness I found that is a bit easier:
https://www.etrailer.com/Custom-Fit-...leid=201344356
Additionally, I found this page with references the parts...of which I haven't been able to confirm what is/is not needed.
http://www.mbpartsworld.com/showAsse...roduct=8051602
Also, on another note...after installing my hitch, I have noticed rusting on the top of the tongue...hasn't anyone else experienced this? Any suggestions to protect against?
Any insight anyone has would be great!

Member
Joined: Nov 2015
Posts: 133
Likes: 11
From: Campbell, CA (San Francisco Bay Area)
2013 GLK250, 2022 Tesla MYLR, 1997 Correct Craft Ski Nautique
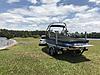
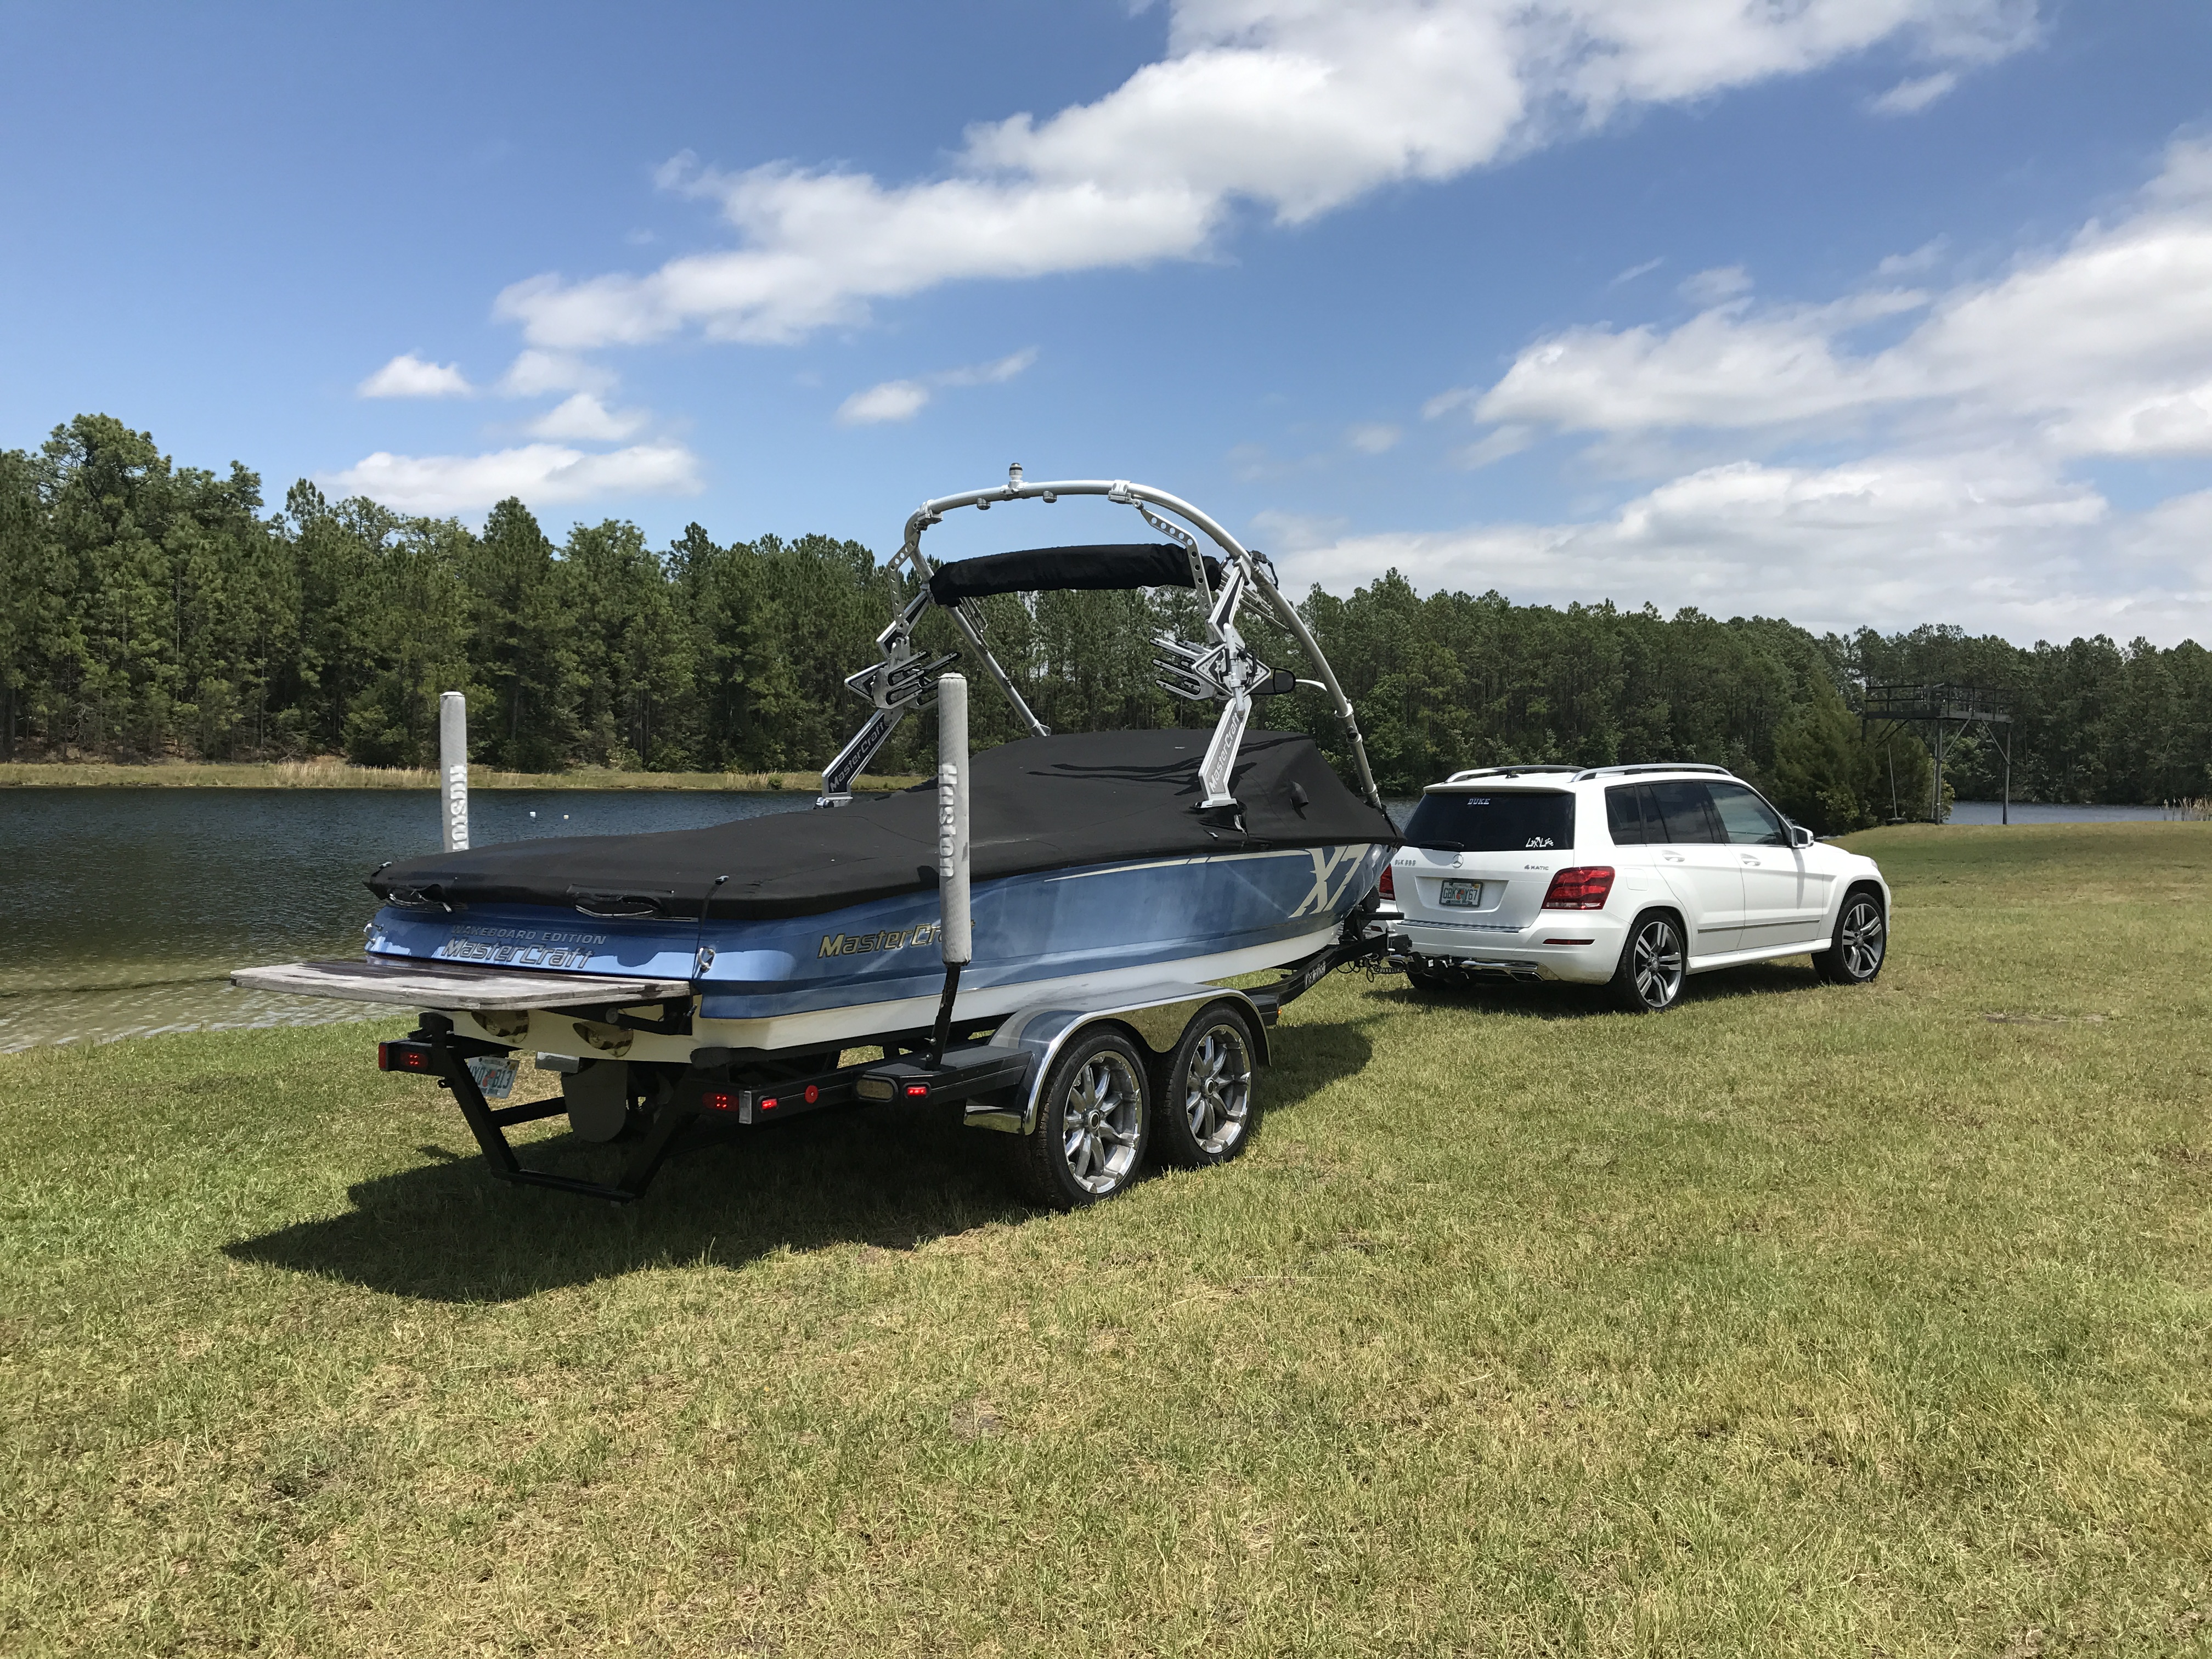
Did you finally get the wiring figured out? When we bought our "new to us" 2013, it had a hitch. We purchased the car unseen out of state, and I just assumed it was factory. When the car was delivered, it was a 2" receiver, not the 3500# version. I got underneath it to look. Long and short of it, the original owner went to a hitch shop in So Cal; that shop just made one and welded it in. So I couldn't remove it to put an OEM or anything else. I didn't think it was substantial enough, so I pulled the bumper and had a friend weld some major reinforcements onto it. I suspect I could put a 5000# trailer on it with no problem with the hitch. But my 3500# boat trailer already lowers the rear an inch or more with the full tongue weight on it, so I'm more concerned with that.
All that said, the GLK250 does a better job of pulling my boat than my Expedtion did (with a 7000# towing capacity). Love pulling the boat with the GLK (although I also only go 12 miles on level ground on the freeway to the launch ramp). It really takes off; love that diesel torque...

Quick question for everyone. How can you tell if you have the trailer towing package on the car since even with it, they don't come with the hitch? I want to know if there is an auxiliary transmission cooler with the towing package or not. I've looked around and haven't found where the tranny lines go to the front for the cooler. I don't know if it is integrated into the radiator, and if there is an external or additional tranny cooler for the towing package. If I could find the tranny fluid lines, I'd love to put in an auxilary cooler in (the bigger the better). Any suggestions? As I said, my GLK 250 doesn't work hard even when pulling the boat, and I rarely take it anywhere else where I'd be going up steep hills. But I'd rather put one in if there is easy access to the lines. Any suggestions on brands, etc. would also be appreciated.
Thanks,
Gordon
Member
Joined: Nov 2015
Posts: 133
Likes: 11
From: Campbell, CA (San Francisco Bay Area)
2013 GLK250, 2022 Tesla MYLR, 1997 Correct Craft Ski Nautique
Oh, I forgot to mention that I just purchased the light adapter from etrailer. I had to splice into the wiring, but this one had running lights, turn signals, brakes, and back up lights (I have surge brakes on my boat trailer and a lock out solonoid when I put it in reverse. I also installed back up lights on the trailer--don't ask me why...).
I liked the light adapter because it doesn't put any extra load on the car wiring because the power for the lights comes directly from the battery (you have to run power line up directly to the battery). Works great.
I liked the light adapter because it doesn't put any extra load on the car wiring because the power for the lights comes directly from the battery (you have to run power line up directly to the battery). Works great.
Newbie
Joined: Jan 2016
Posts: 14
Likes: 0
2013 GLK250 Bluetec
Circuit Protected Vehicle Wiring Harness
Oh, I forgot to mention that I just purchased the light adapter from etrailer. I had to splice into the wiring, but this one had running lights, turn signals, brakes, and back up lights (I have surge brakes on my boat trailer and a lock out solonoid when I put it in reverse. I also installed back up lights on the trailer--don't ask me why...).
I liked the light adapter because it doesn't put any extra load on the car wiring because the power for the lights comes directly from the battery (you have to run power line up directly to the battery). Works great.
I liked the light adapter because it doesn't put any extra load on the car wiring because the power for the lights comes directly from the battery (you have to run power line up directly to the battery). Works great.
https://www.etrailer.com/Custom-Fit-...leid=201344356
Kind of stinks not to use the 7 pin, but I highly doubt I will tow anything that has brakes built in the trailer and needs power.
Member
Joined: Nov 2015
Posts: 133
Likes: 11
From: Campbell, CA (San Francisco Bay Area)
2013 GLK250, 2022 Tesla MYLR, 1997 Correct Craft Ski Nautique
That isn't the same adapter. It was in the $80 range and with back up light wire, but I used an old computer to purchase it so I'll need to go into it so I can find the part number. Works great though.
Newbie
Joined: Nov 2016
Posts: 5
Likes: 5
2016 GL350, 2015 GLK350, 2005 CLK320, 2005 C230, 2000 ML320, 1972 350SL
The end of this story...OEM Wiring Harness
**** OEM Wiring Harness Instructions **** DO NOT TRY THIS AT HOME ****
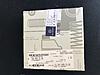
I was hoping my OEM hitch wiring harness would be a simple plug-n-play into the car and I would have lights; especially since my window sticker shows the "ESP Electronic Stability Program w/ Trailer Stabilization" option. But it wasn't plug-n-play or simple. I finally got desperate enough to go to the dealer parts counter and ask for help.
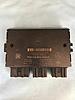
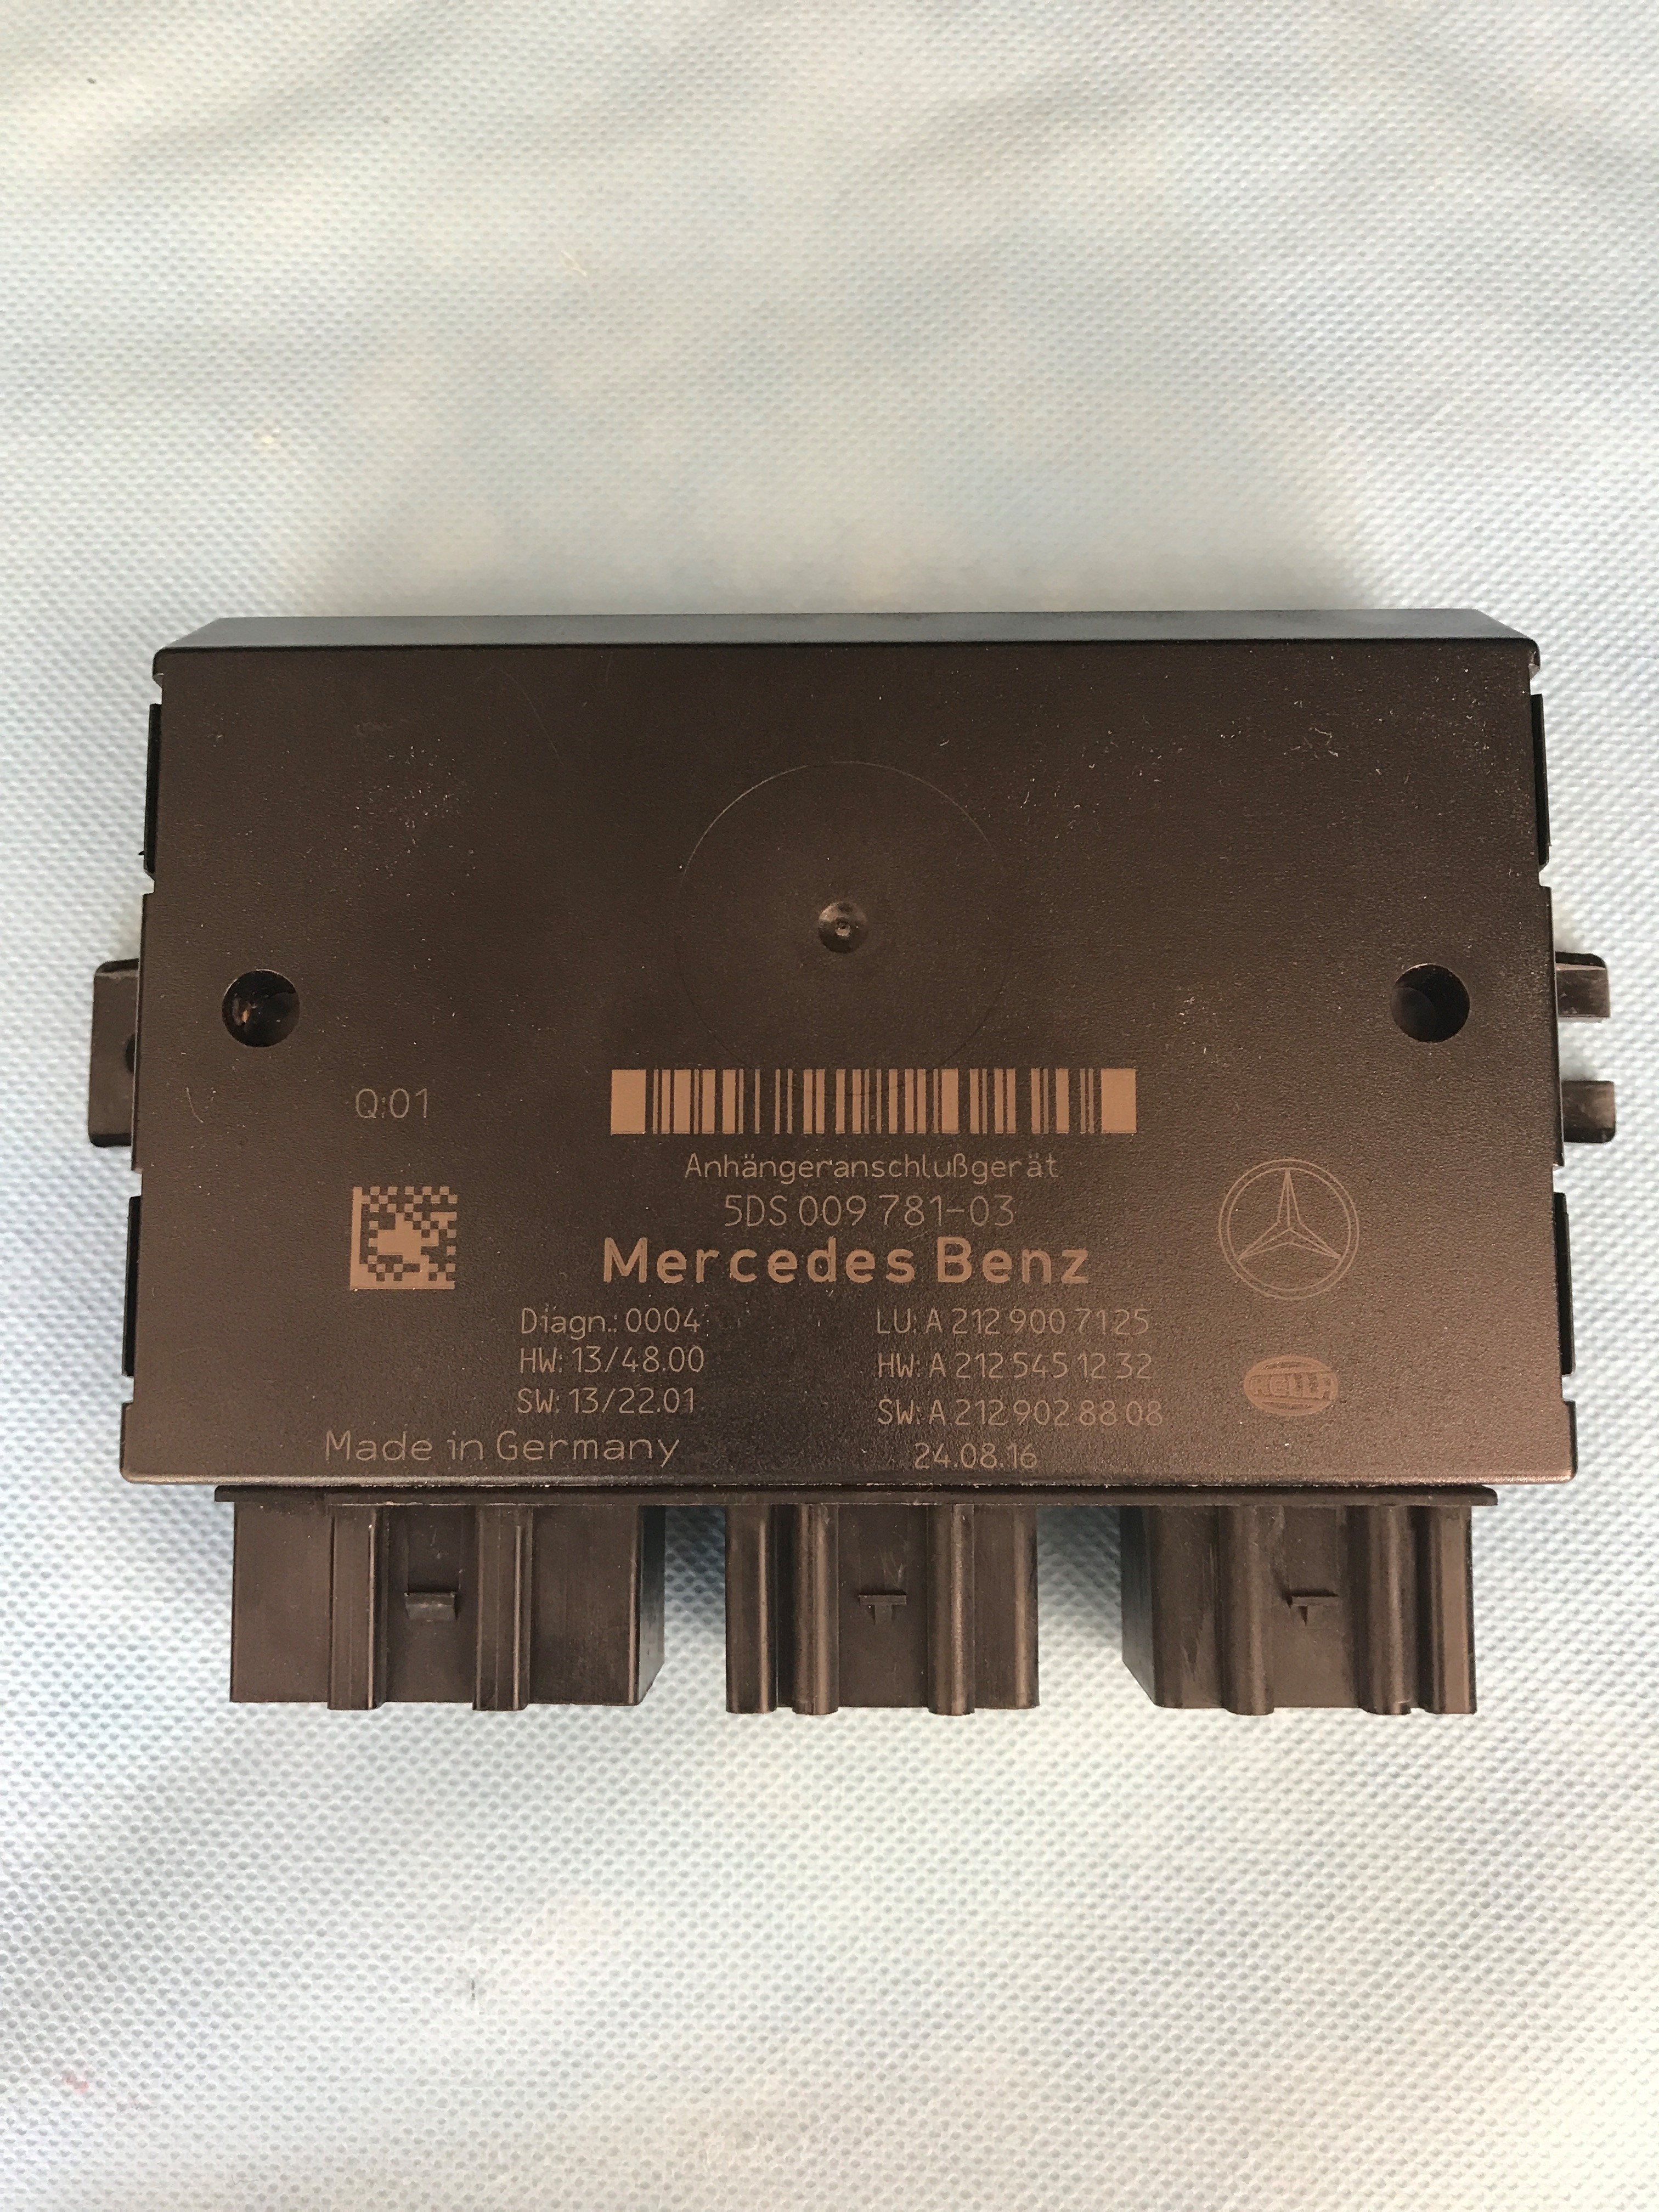
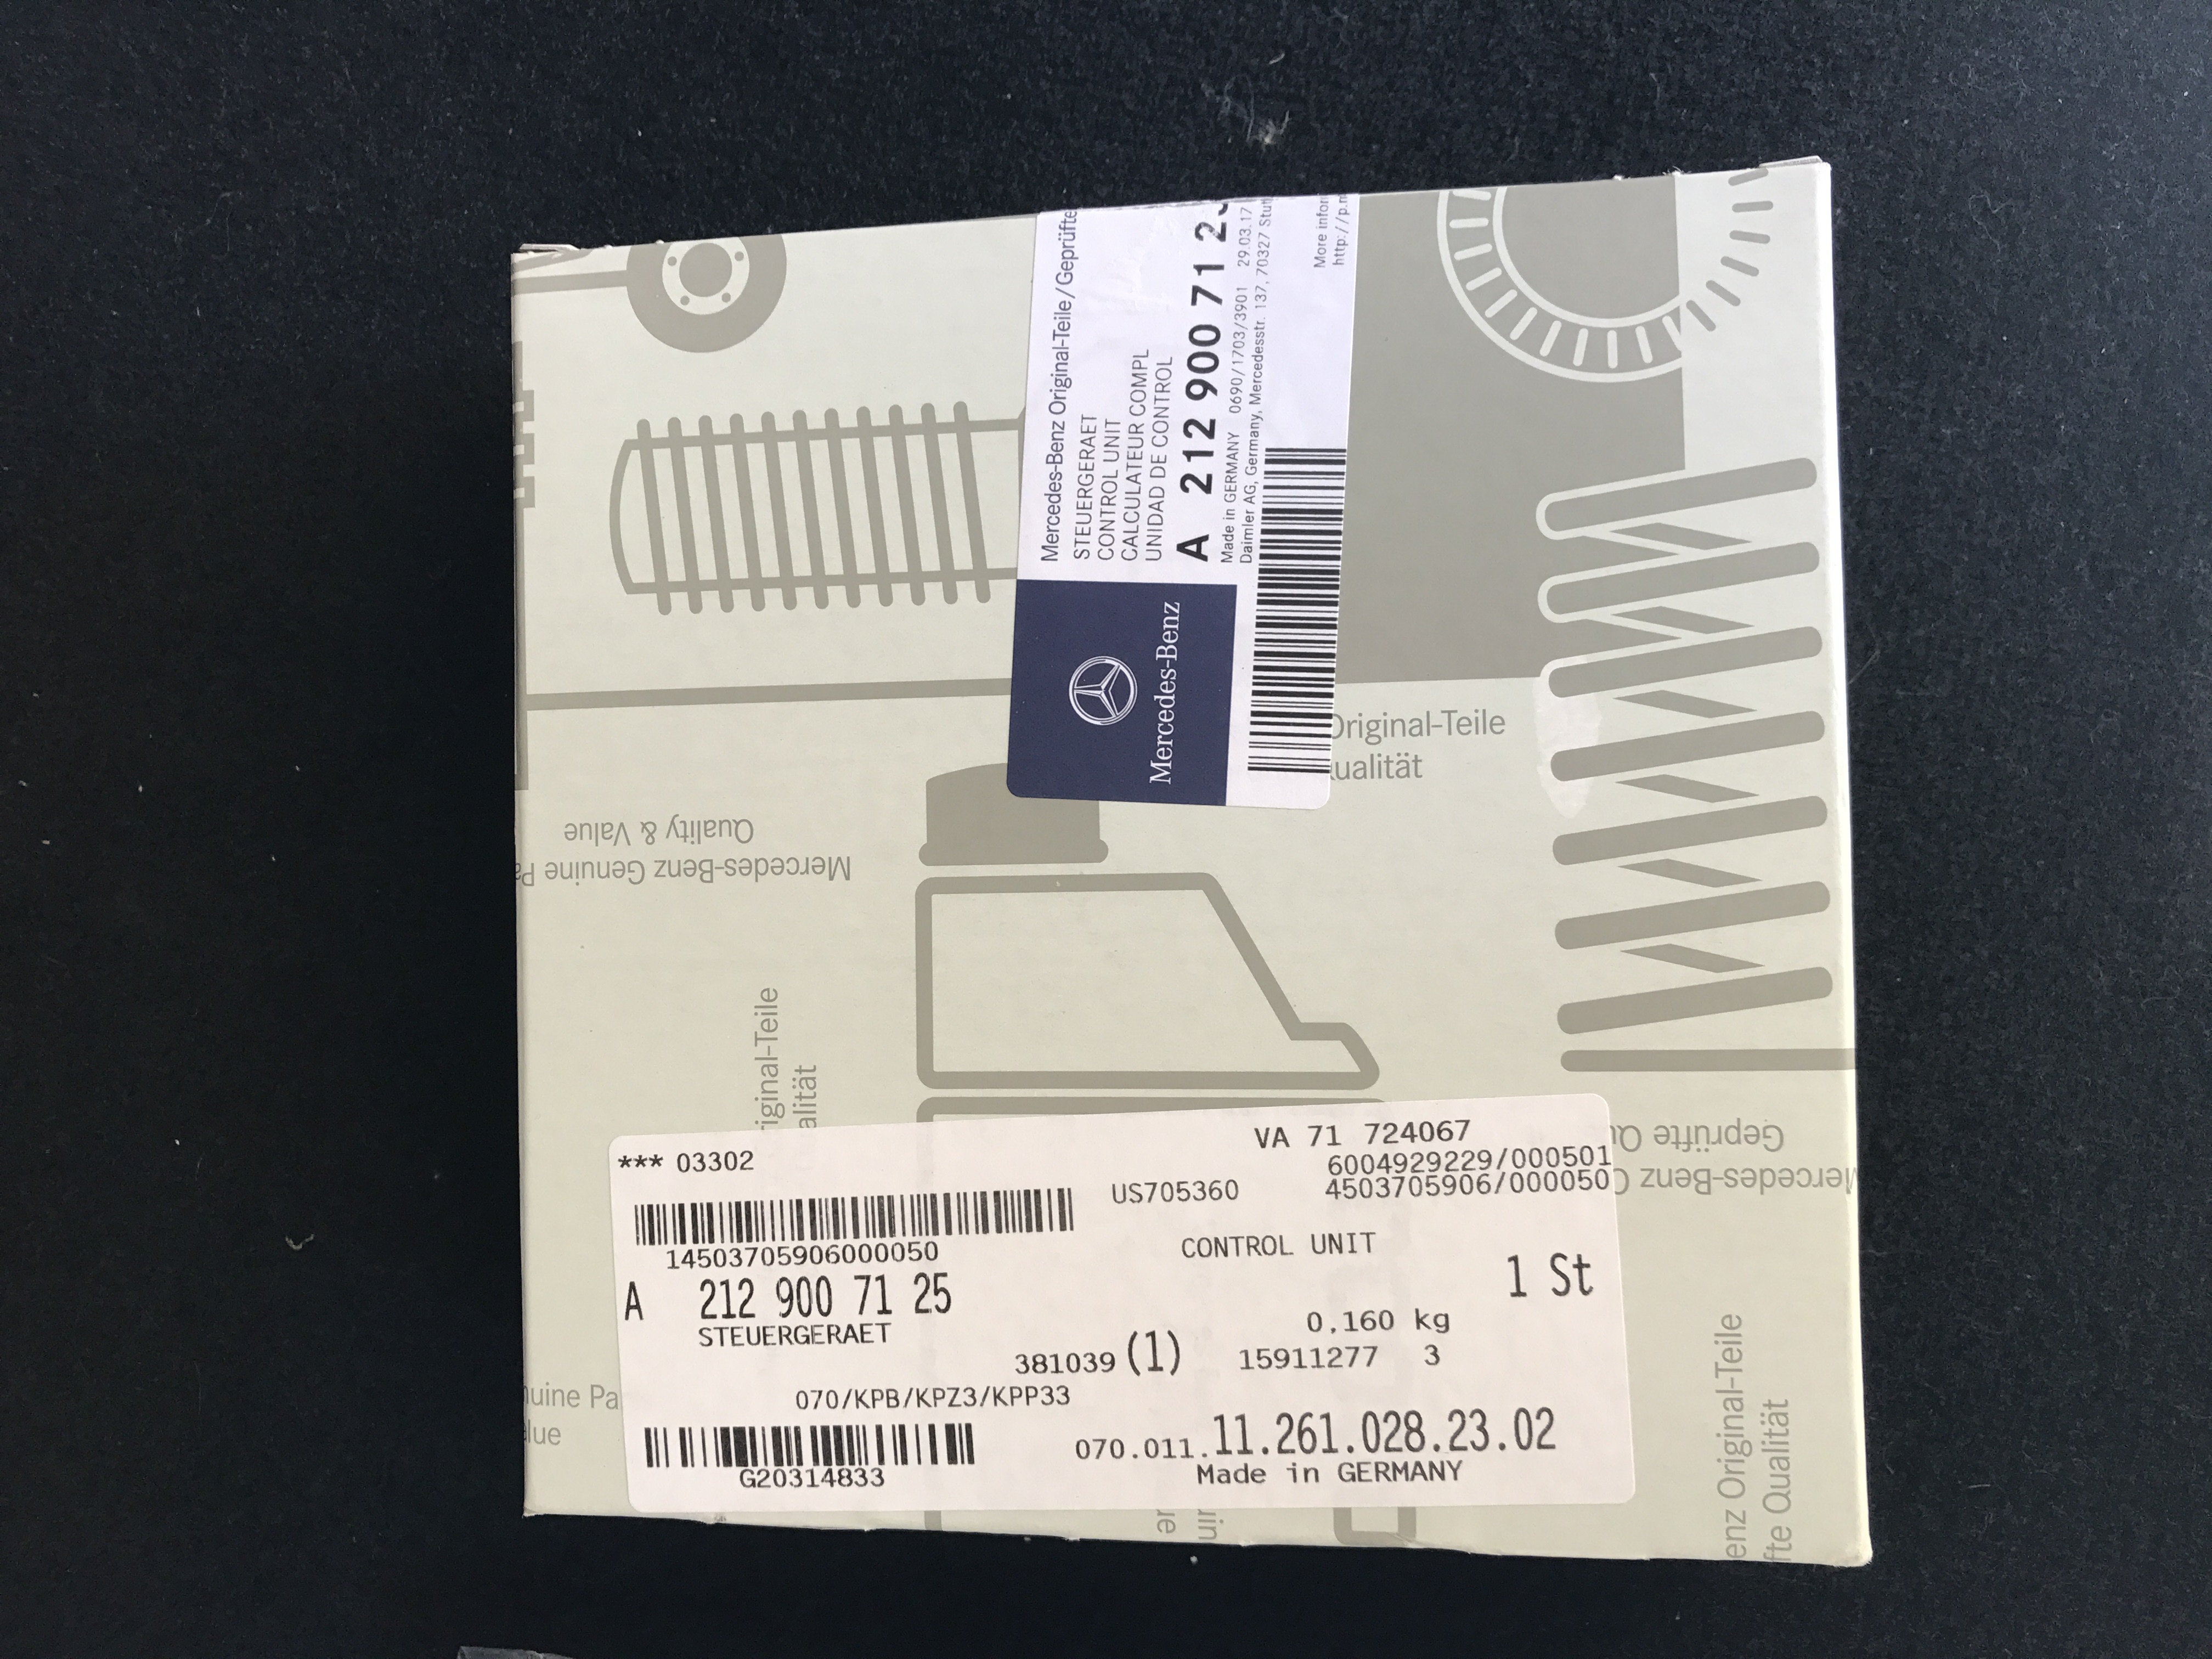
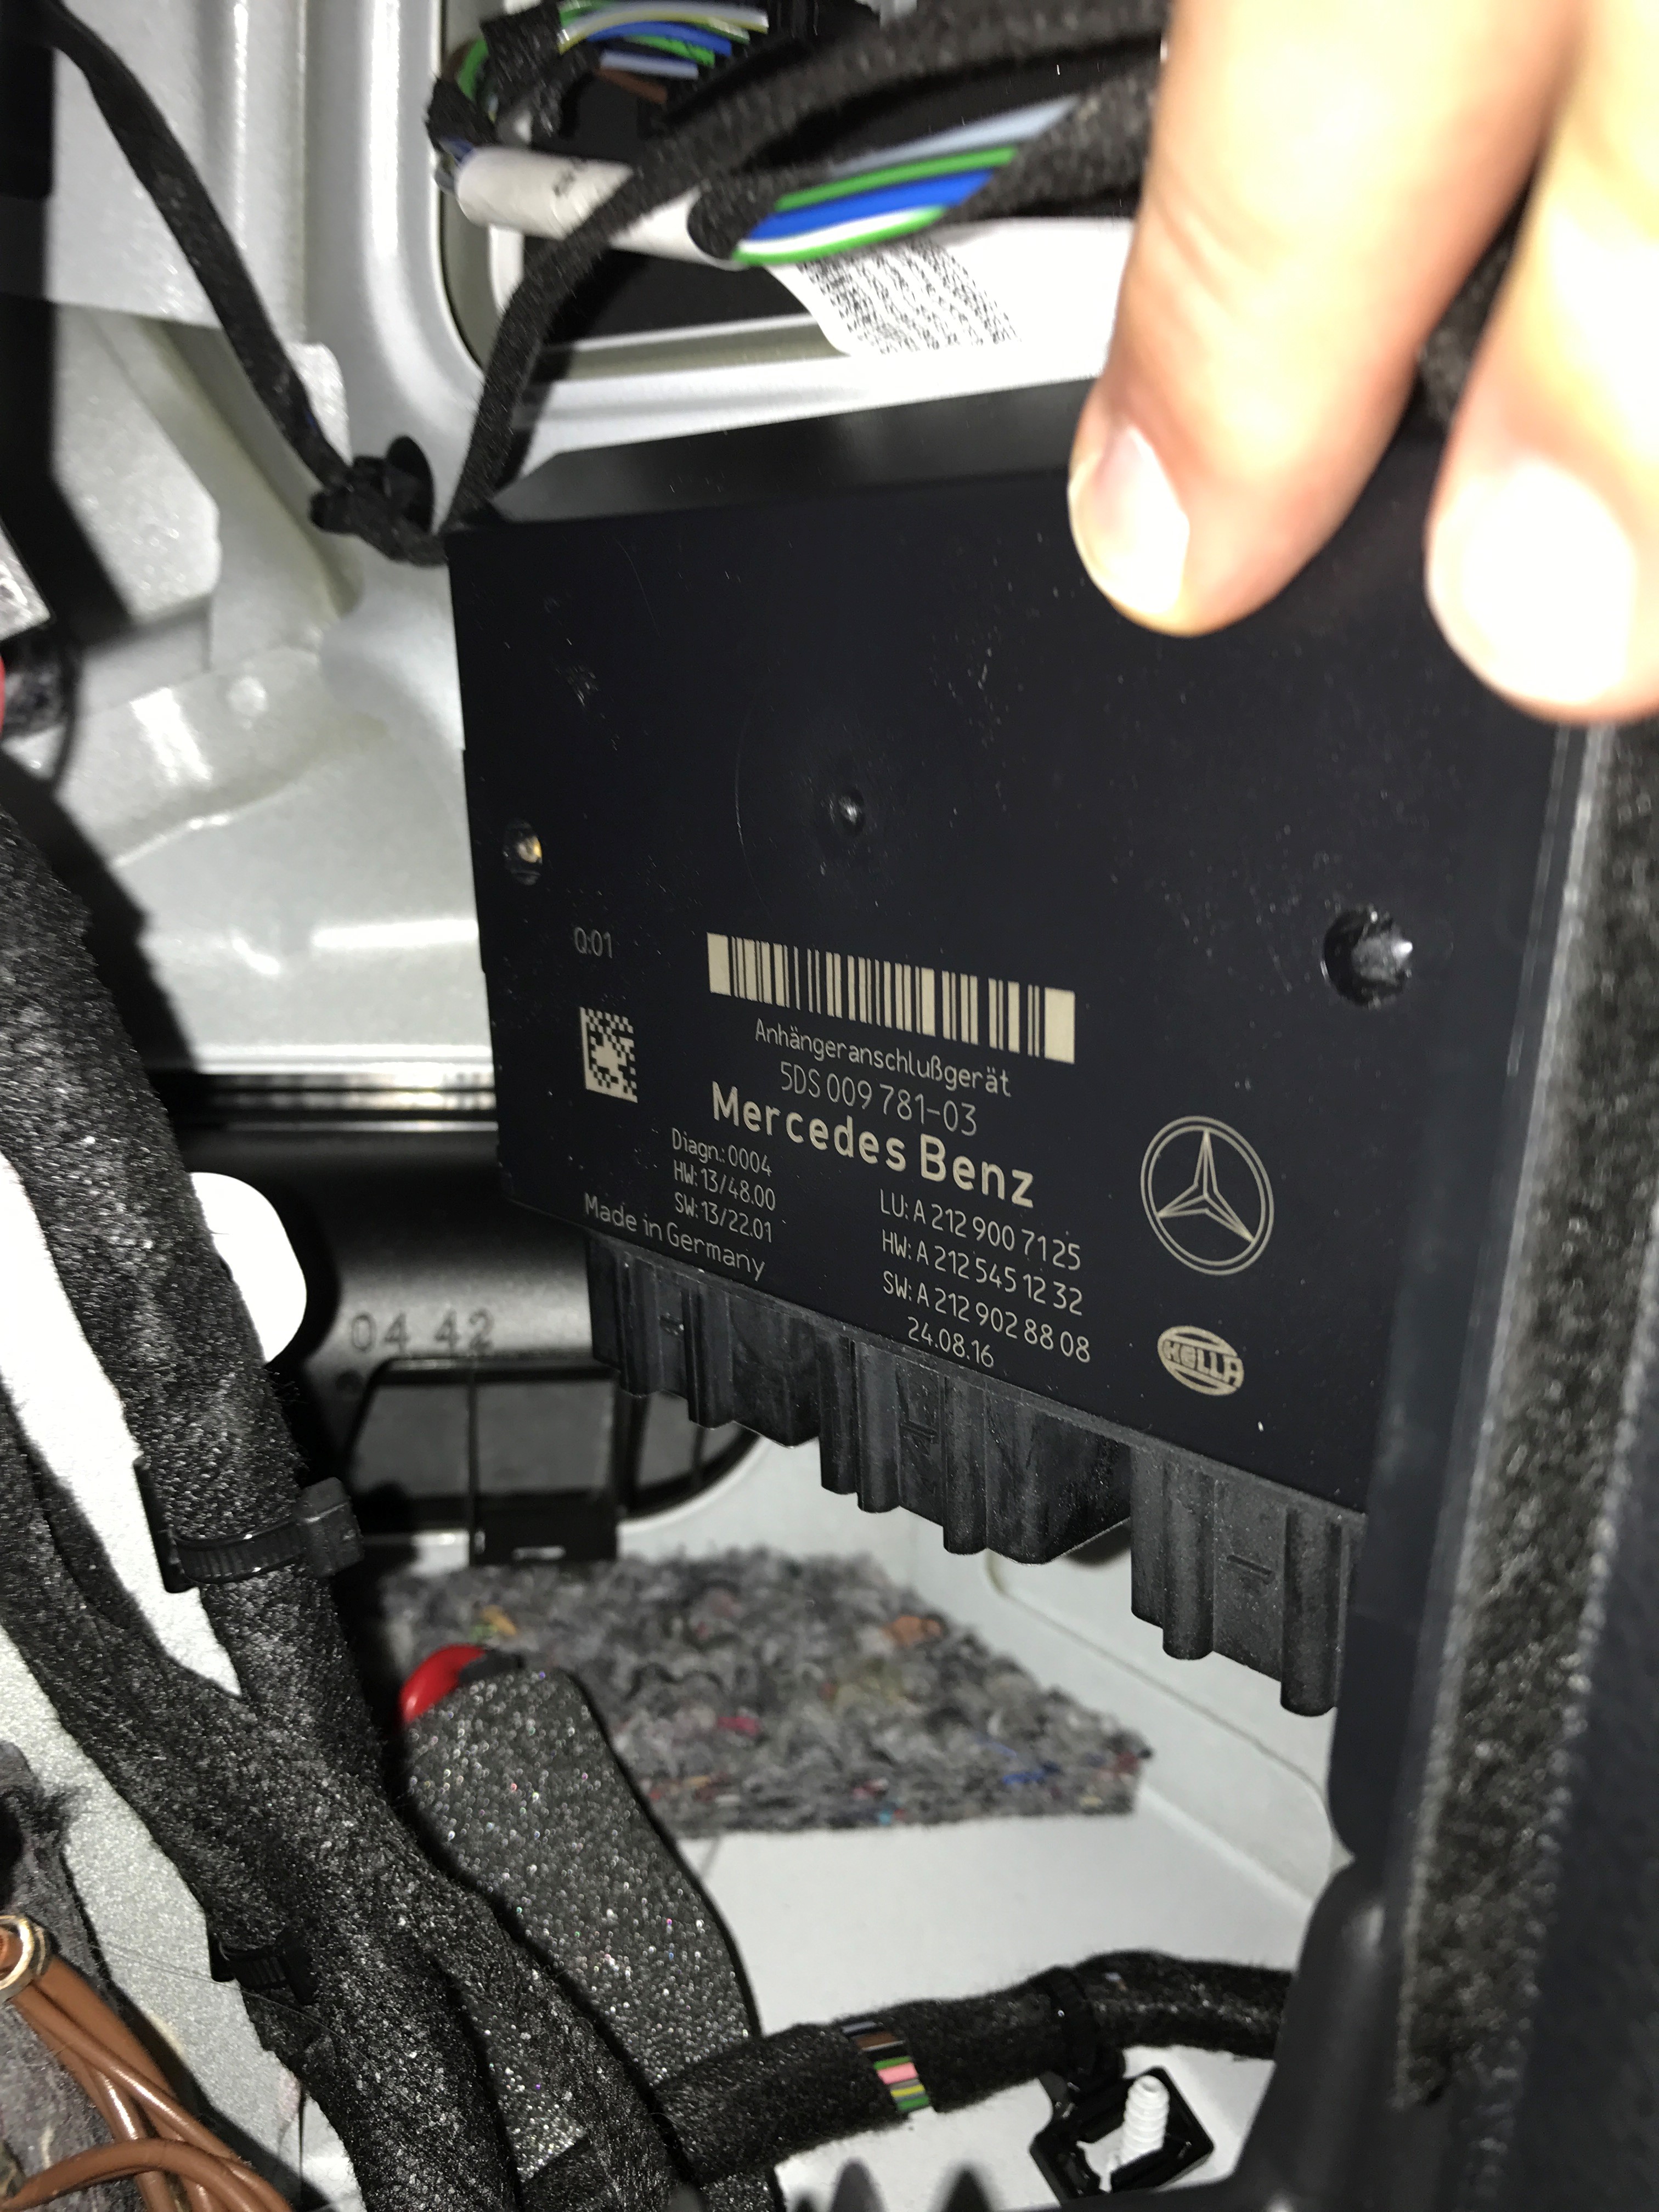
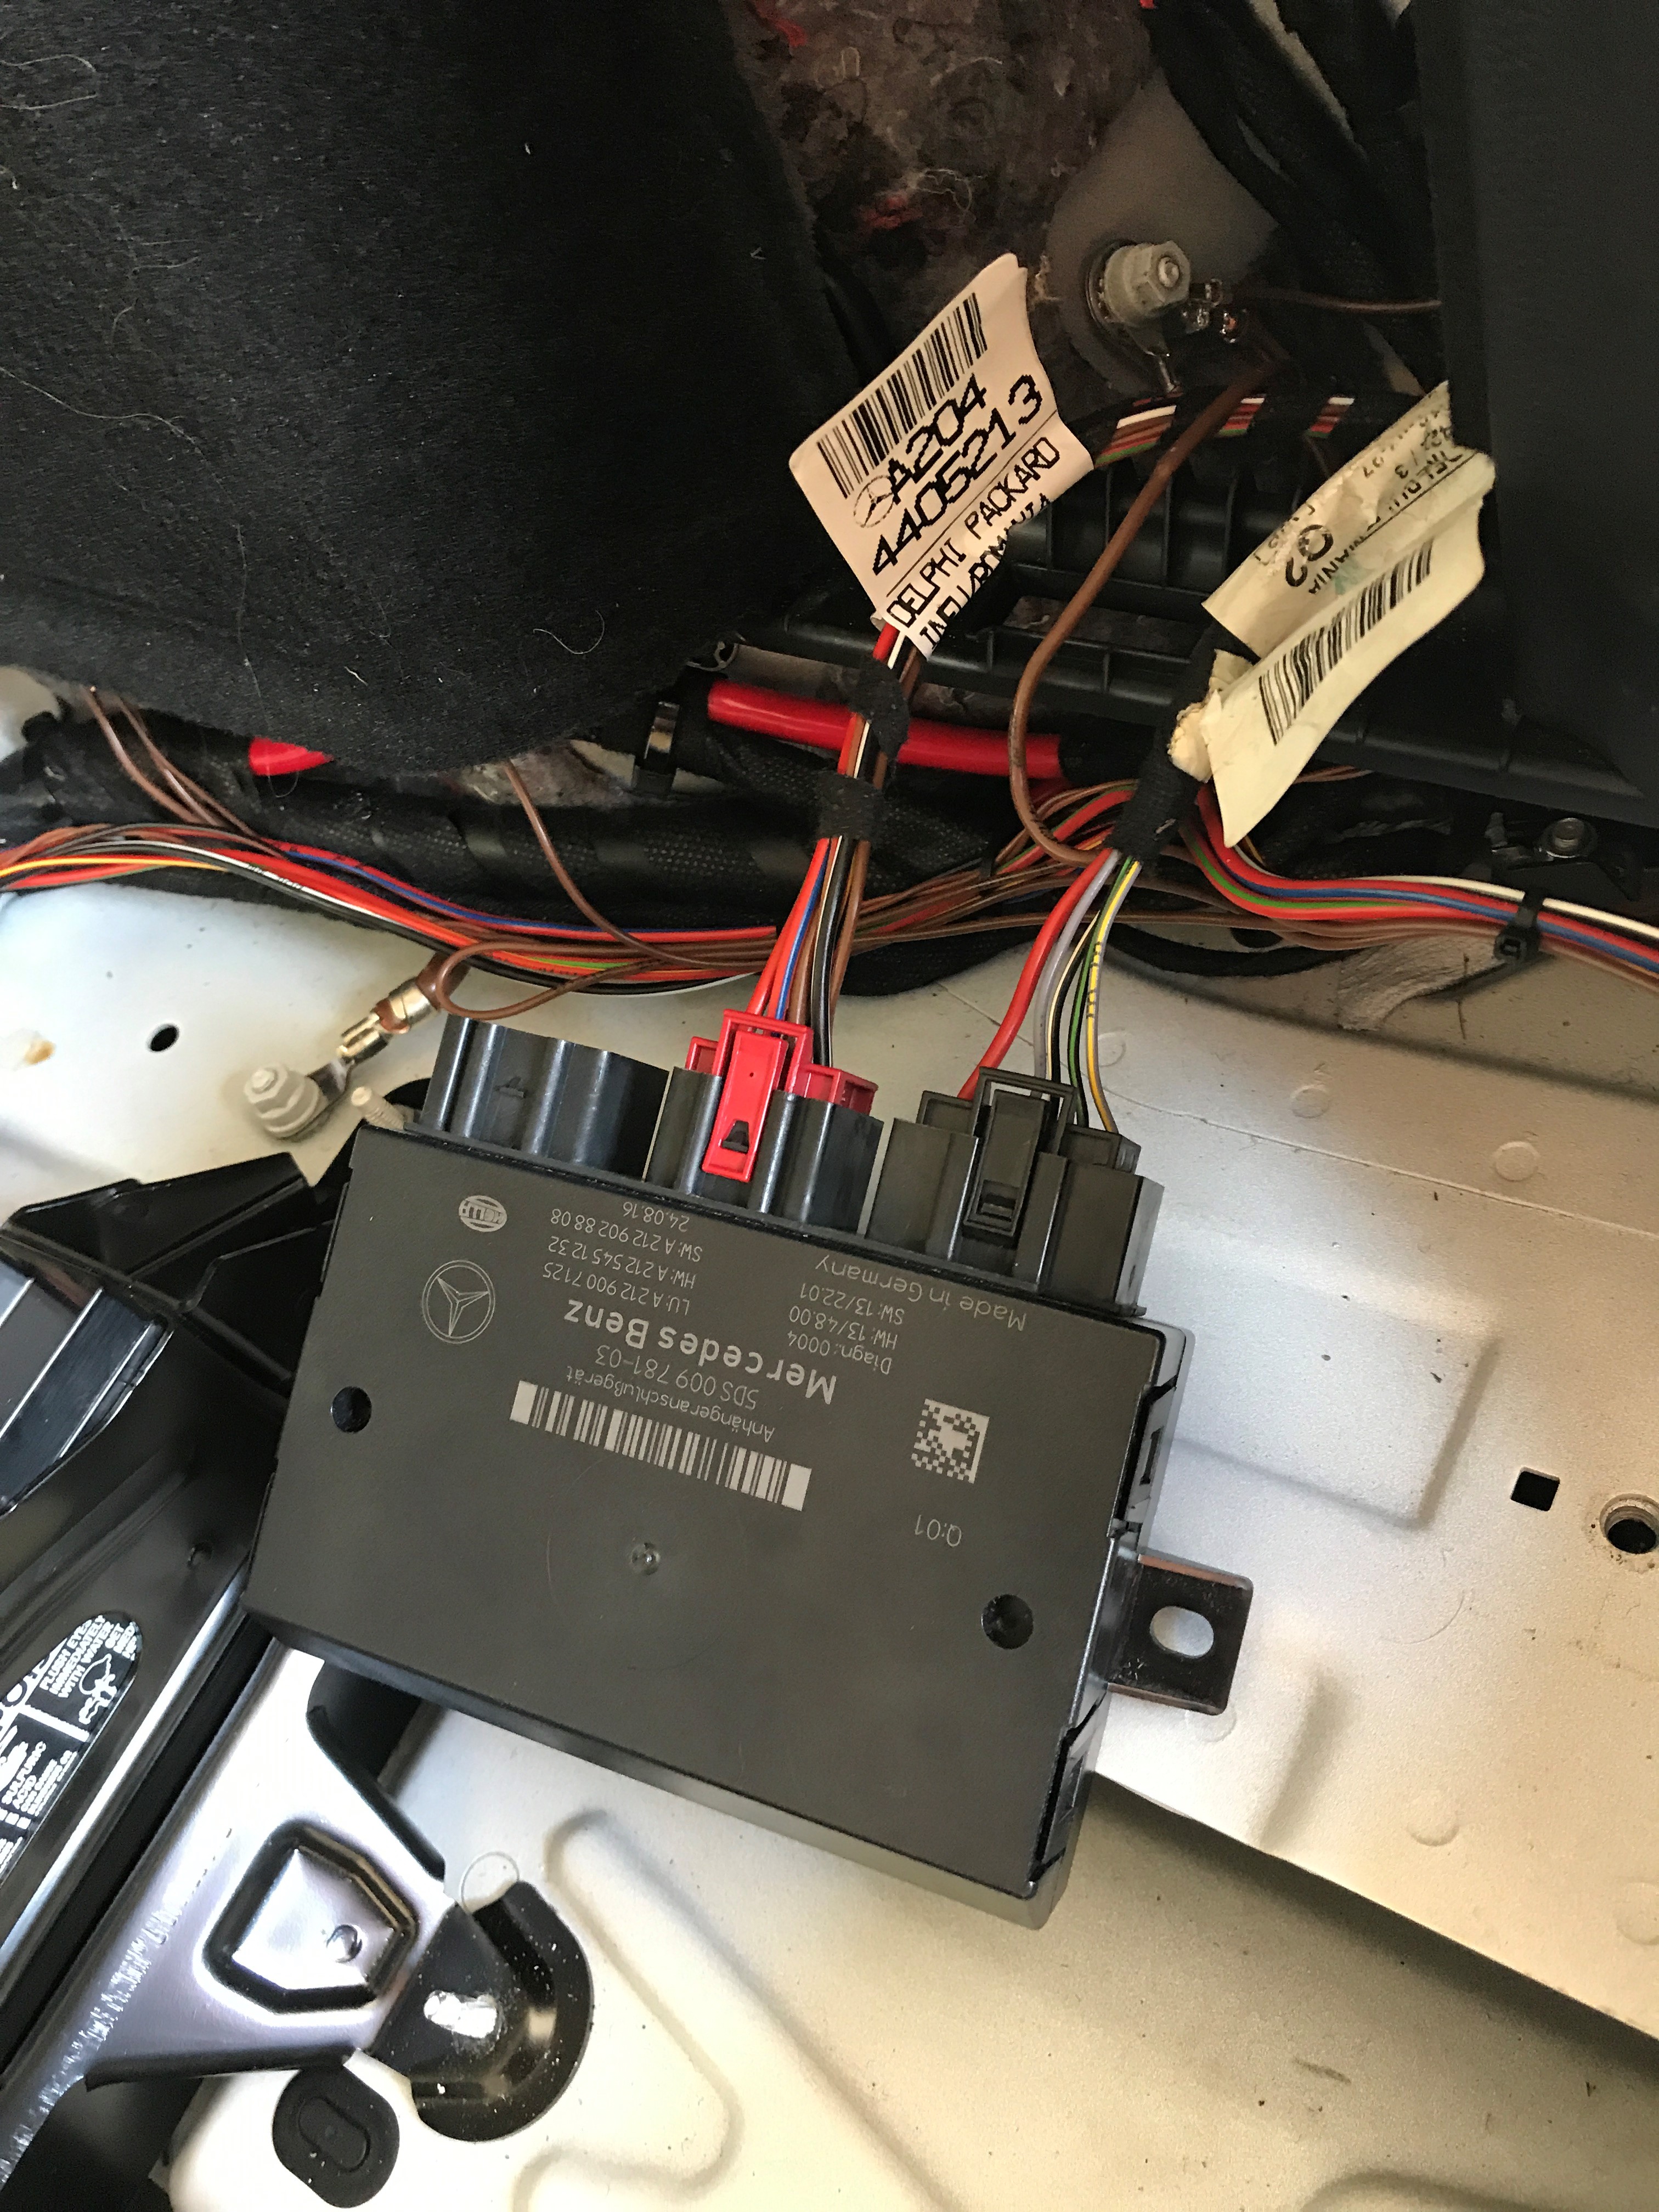
Here is what you need: Trailer Recognition Control Unit, part #A2129007125
(this is a newer part number that has superseded a couple older versions)
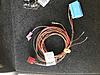
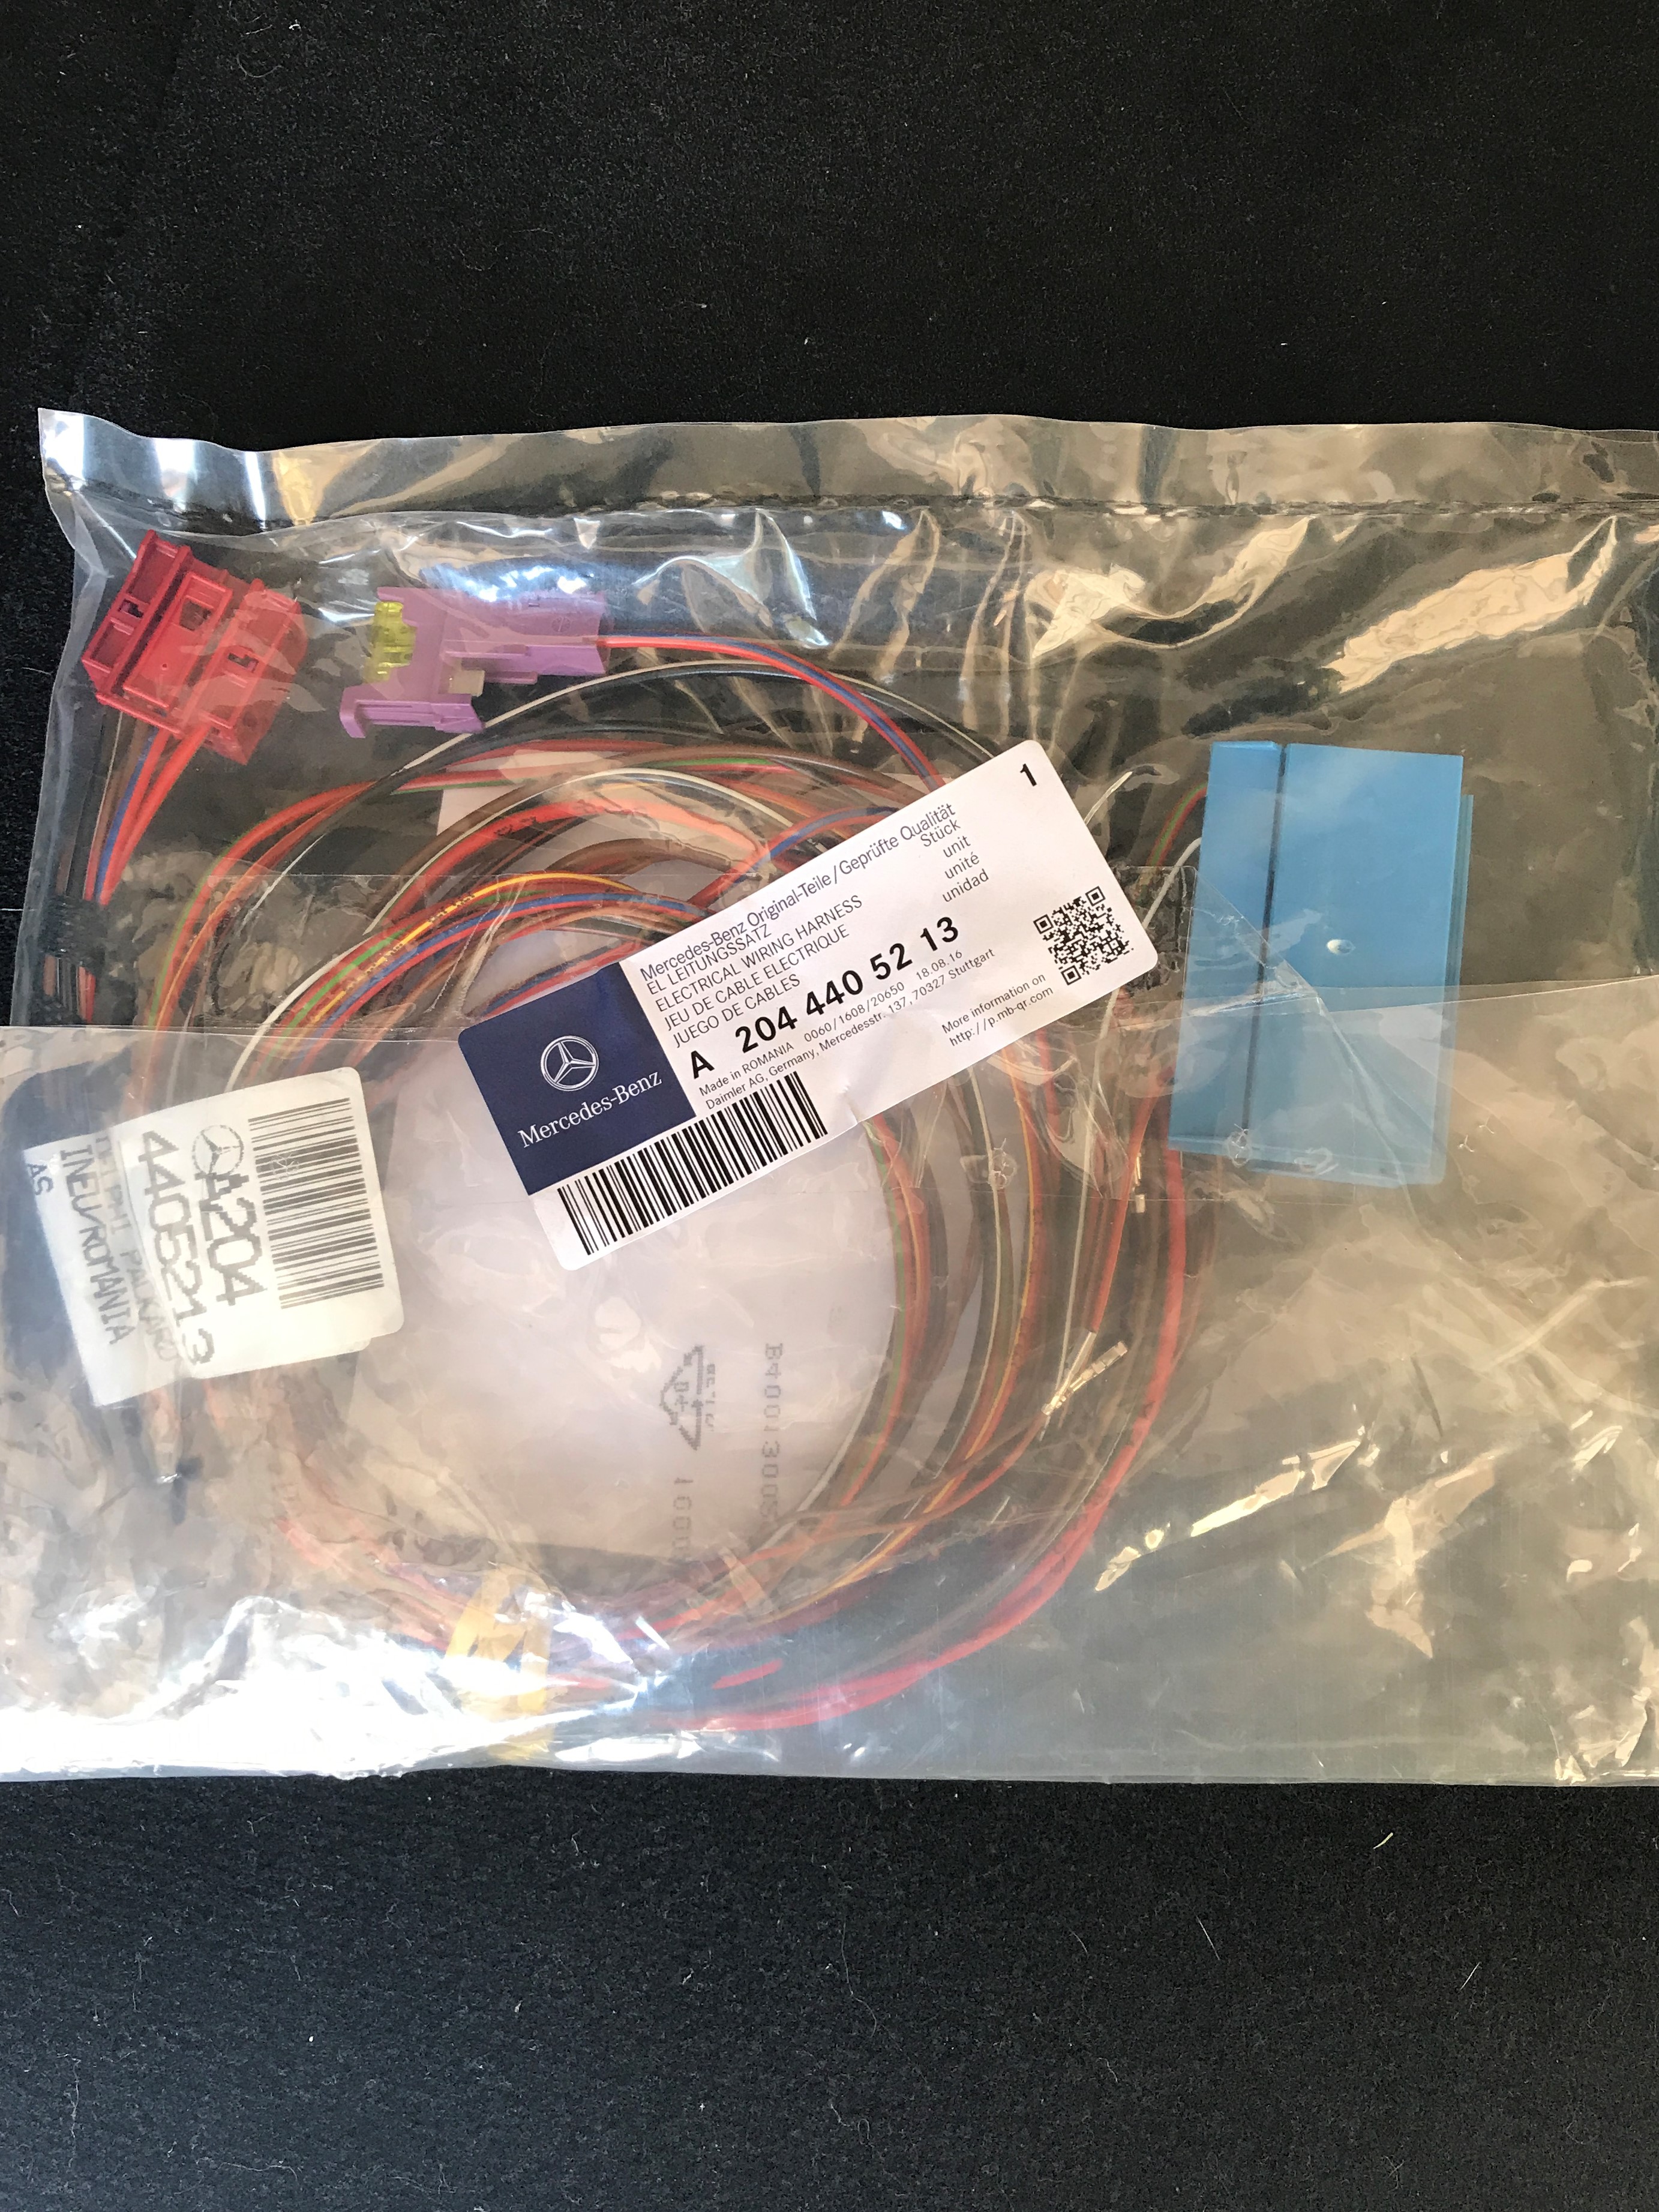
You also need this Control Unit Wiring Harness that goes from the control unit to the SAM: part #A2044405213
(Notice that there are (3) plugs; one red, one blue and one lilac, (2) ground wires and (2) long-skinny wire Pins...not a single, simple plug)
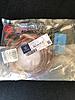
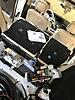
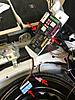
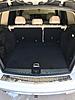
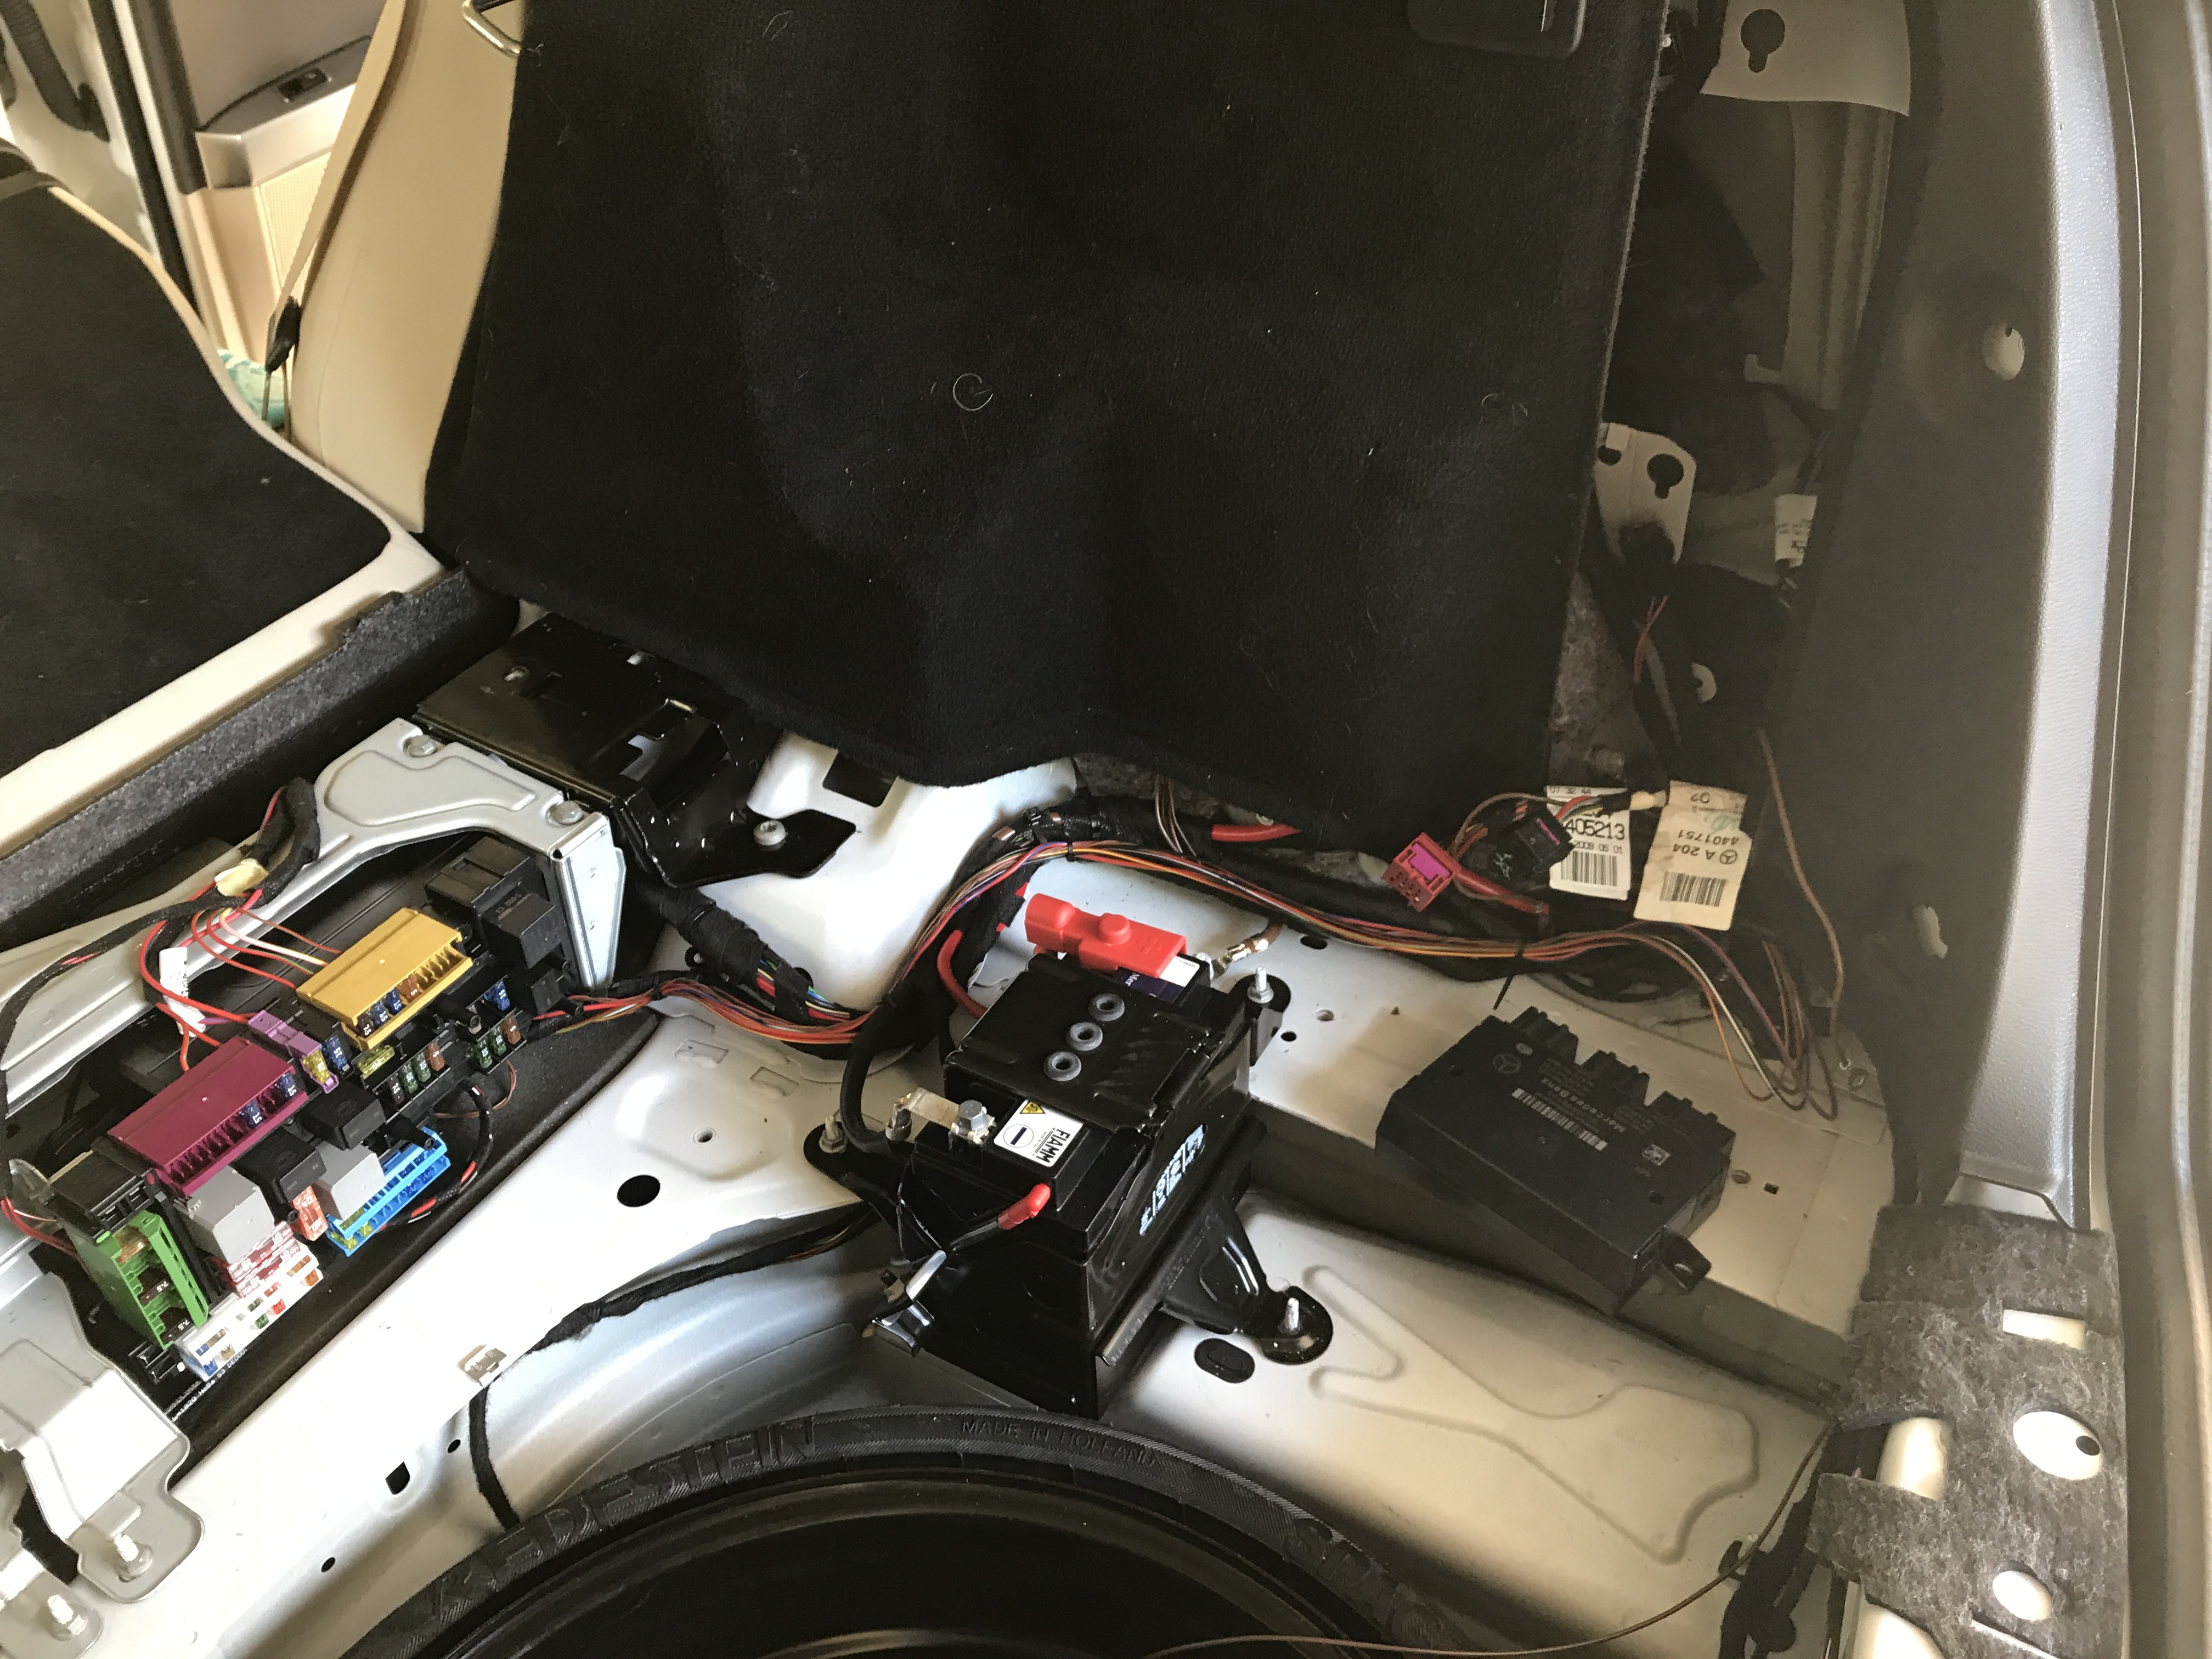
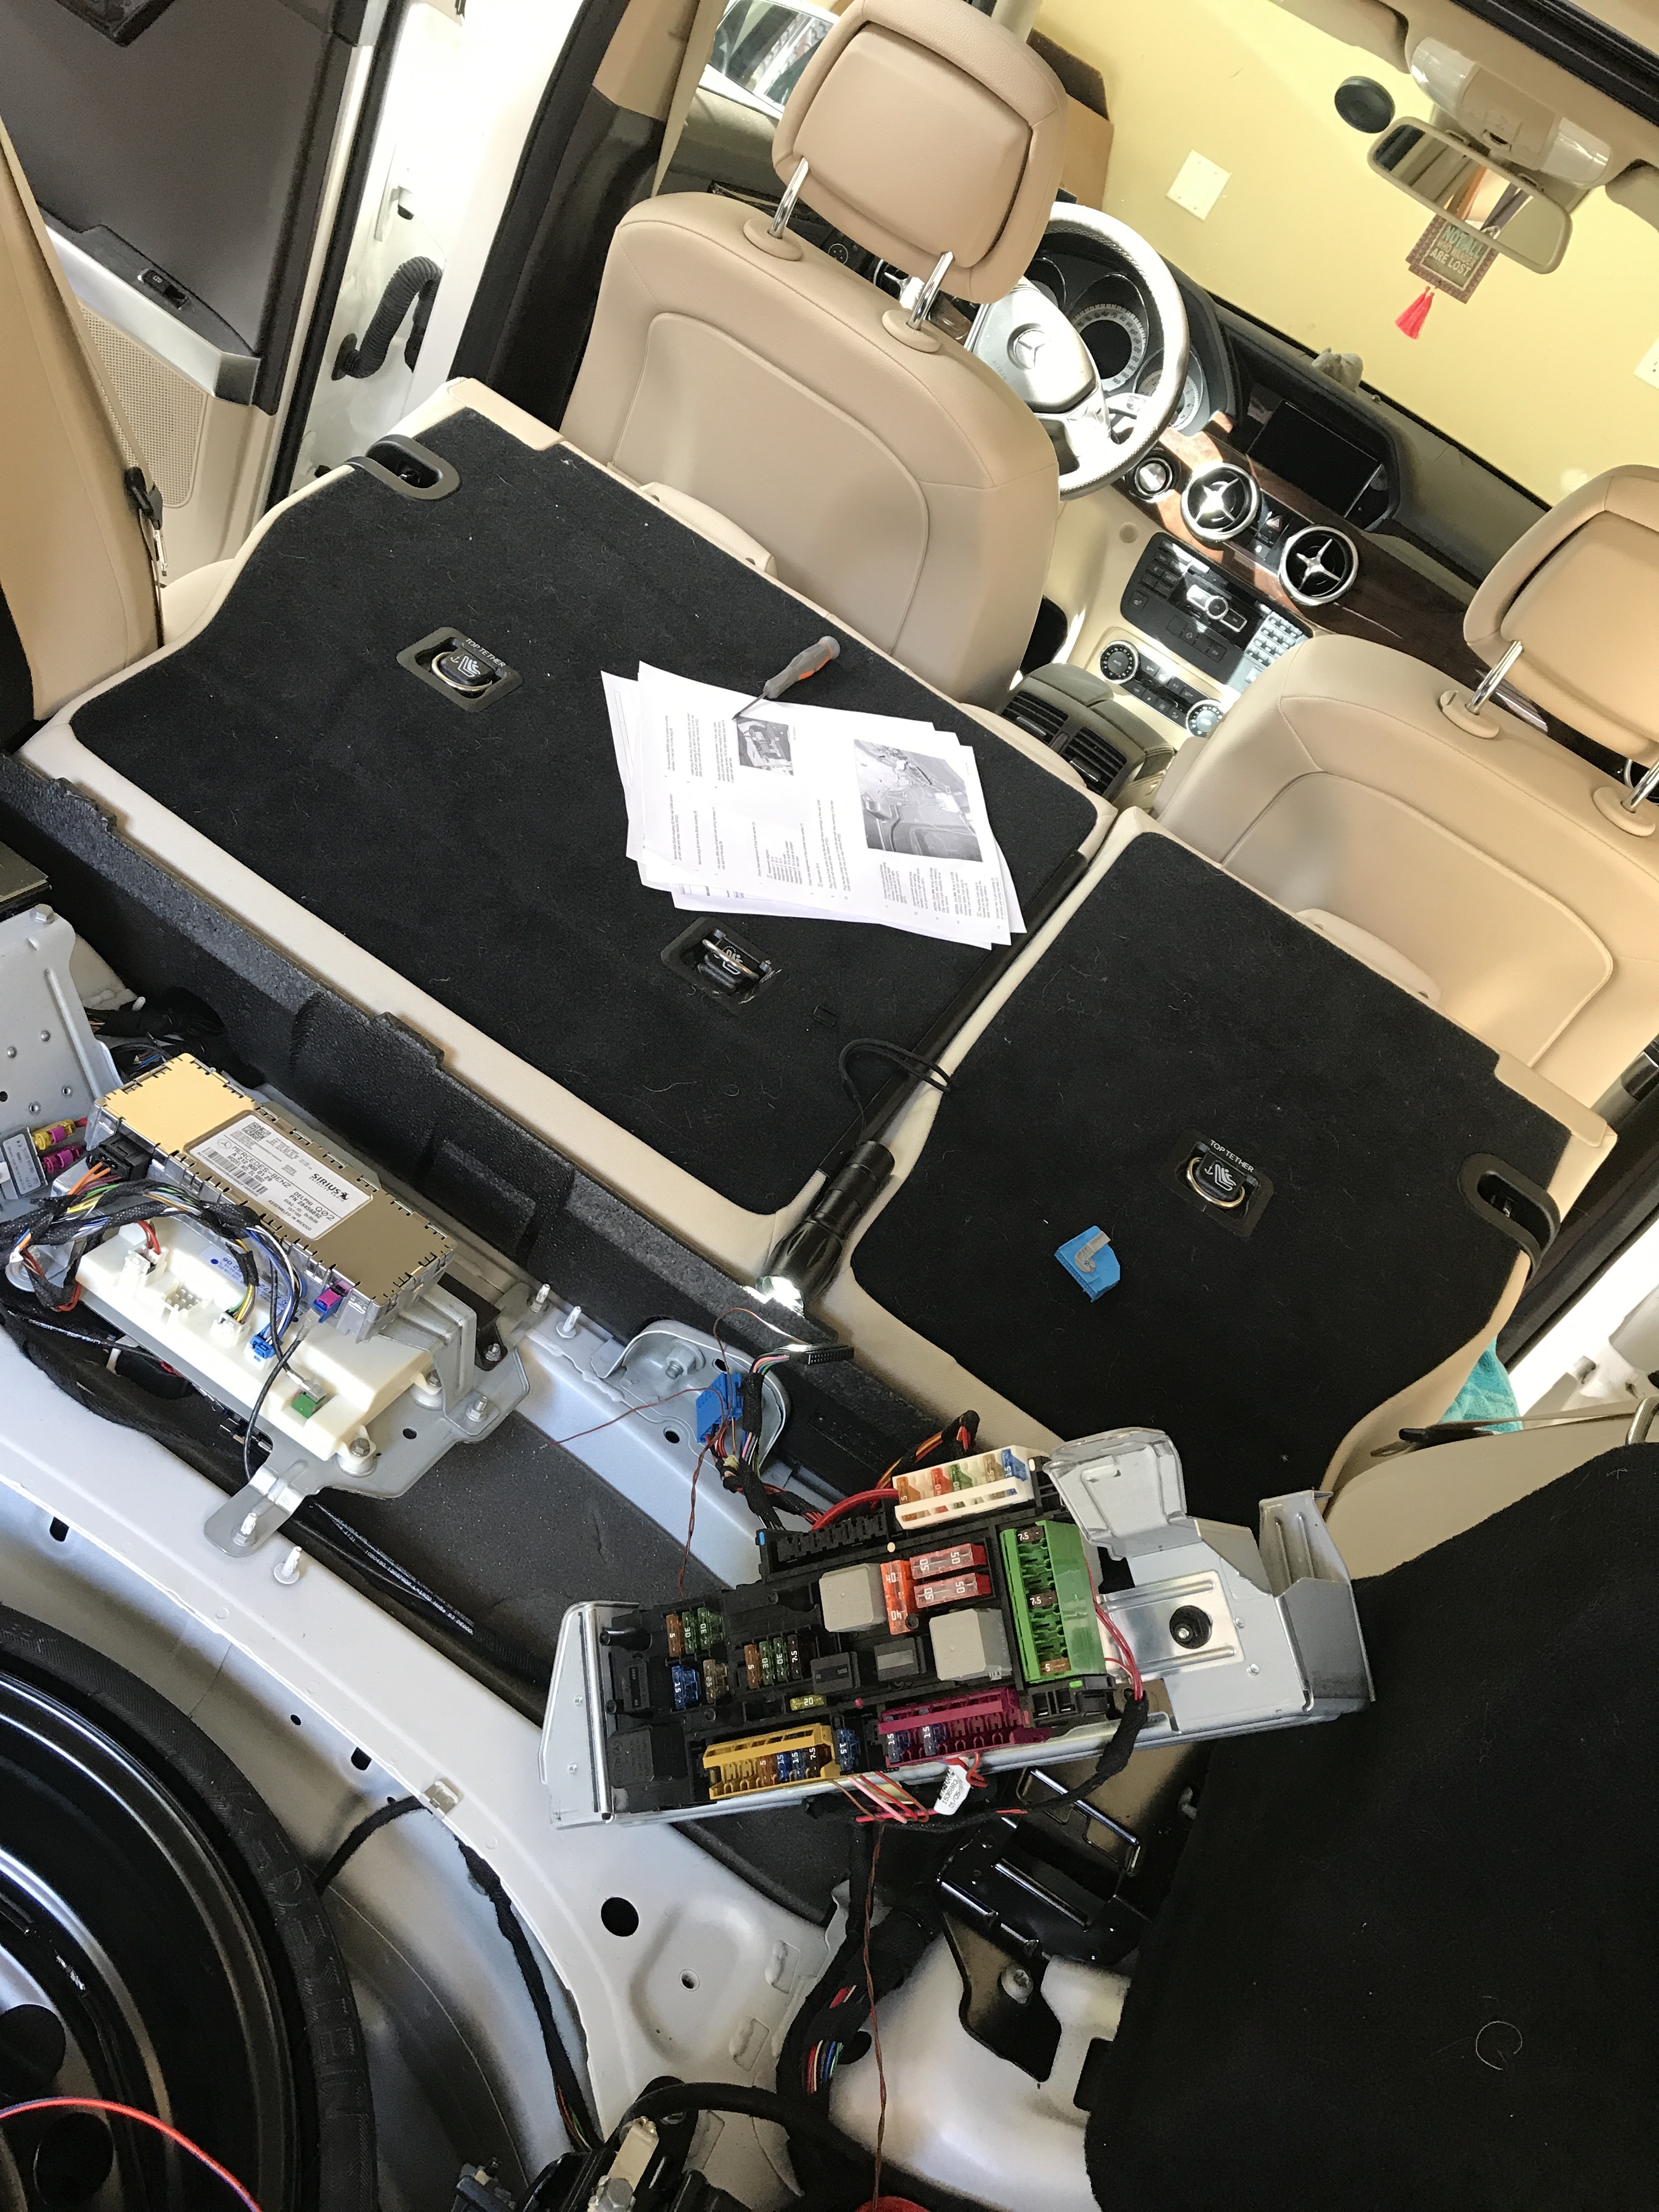
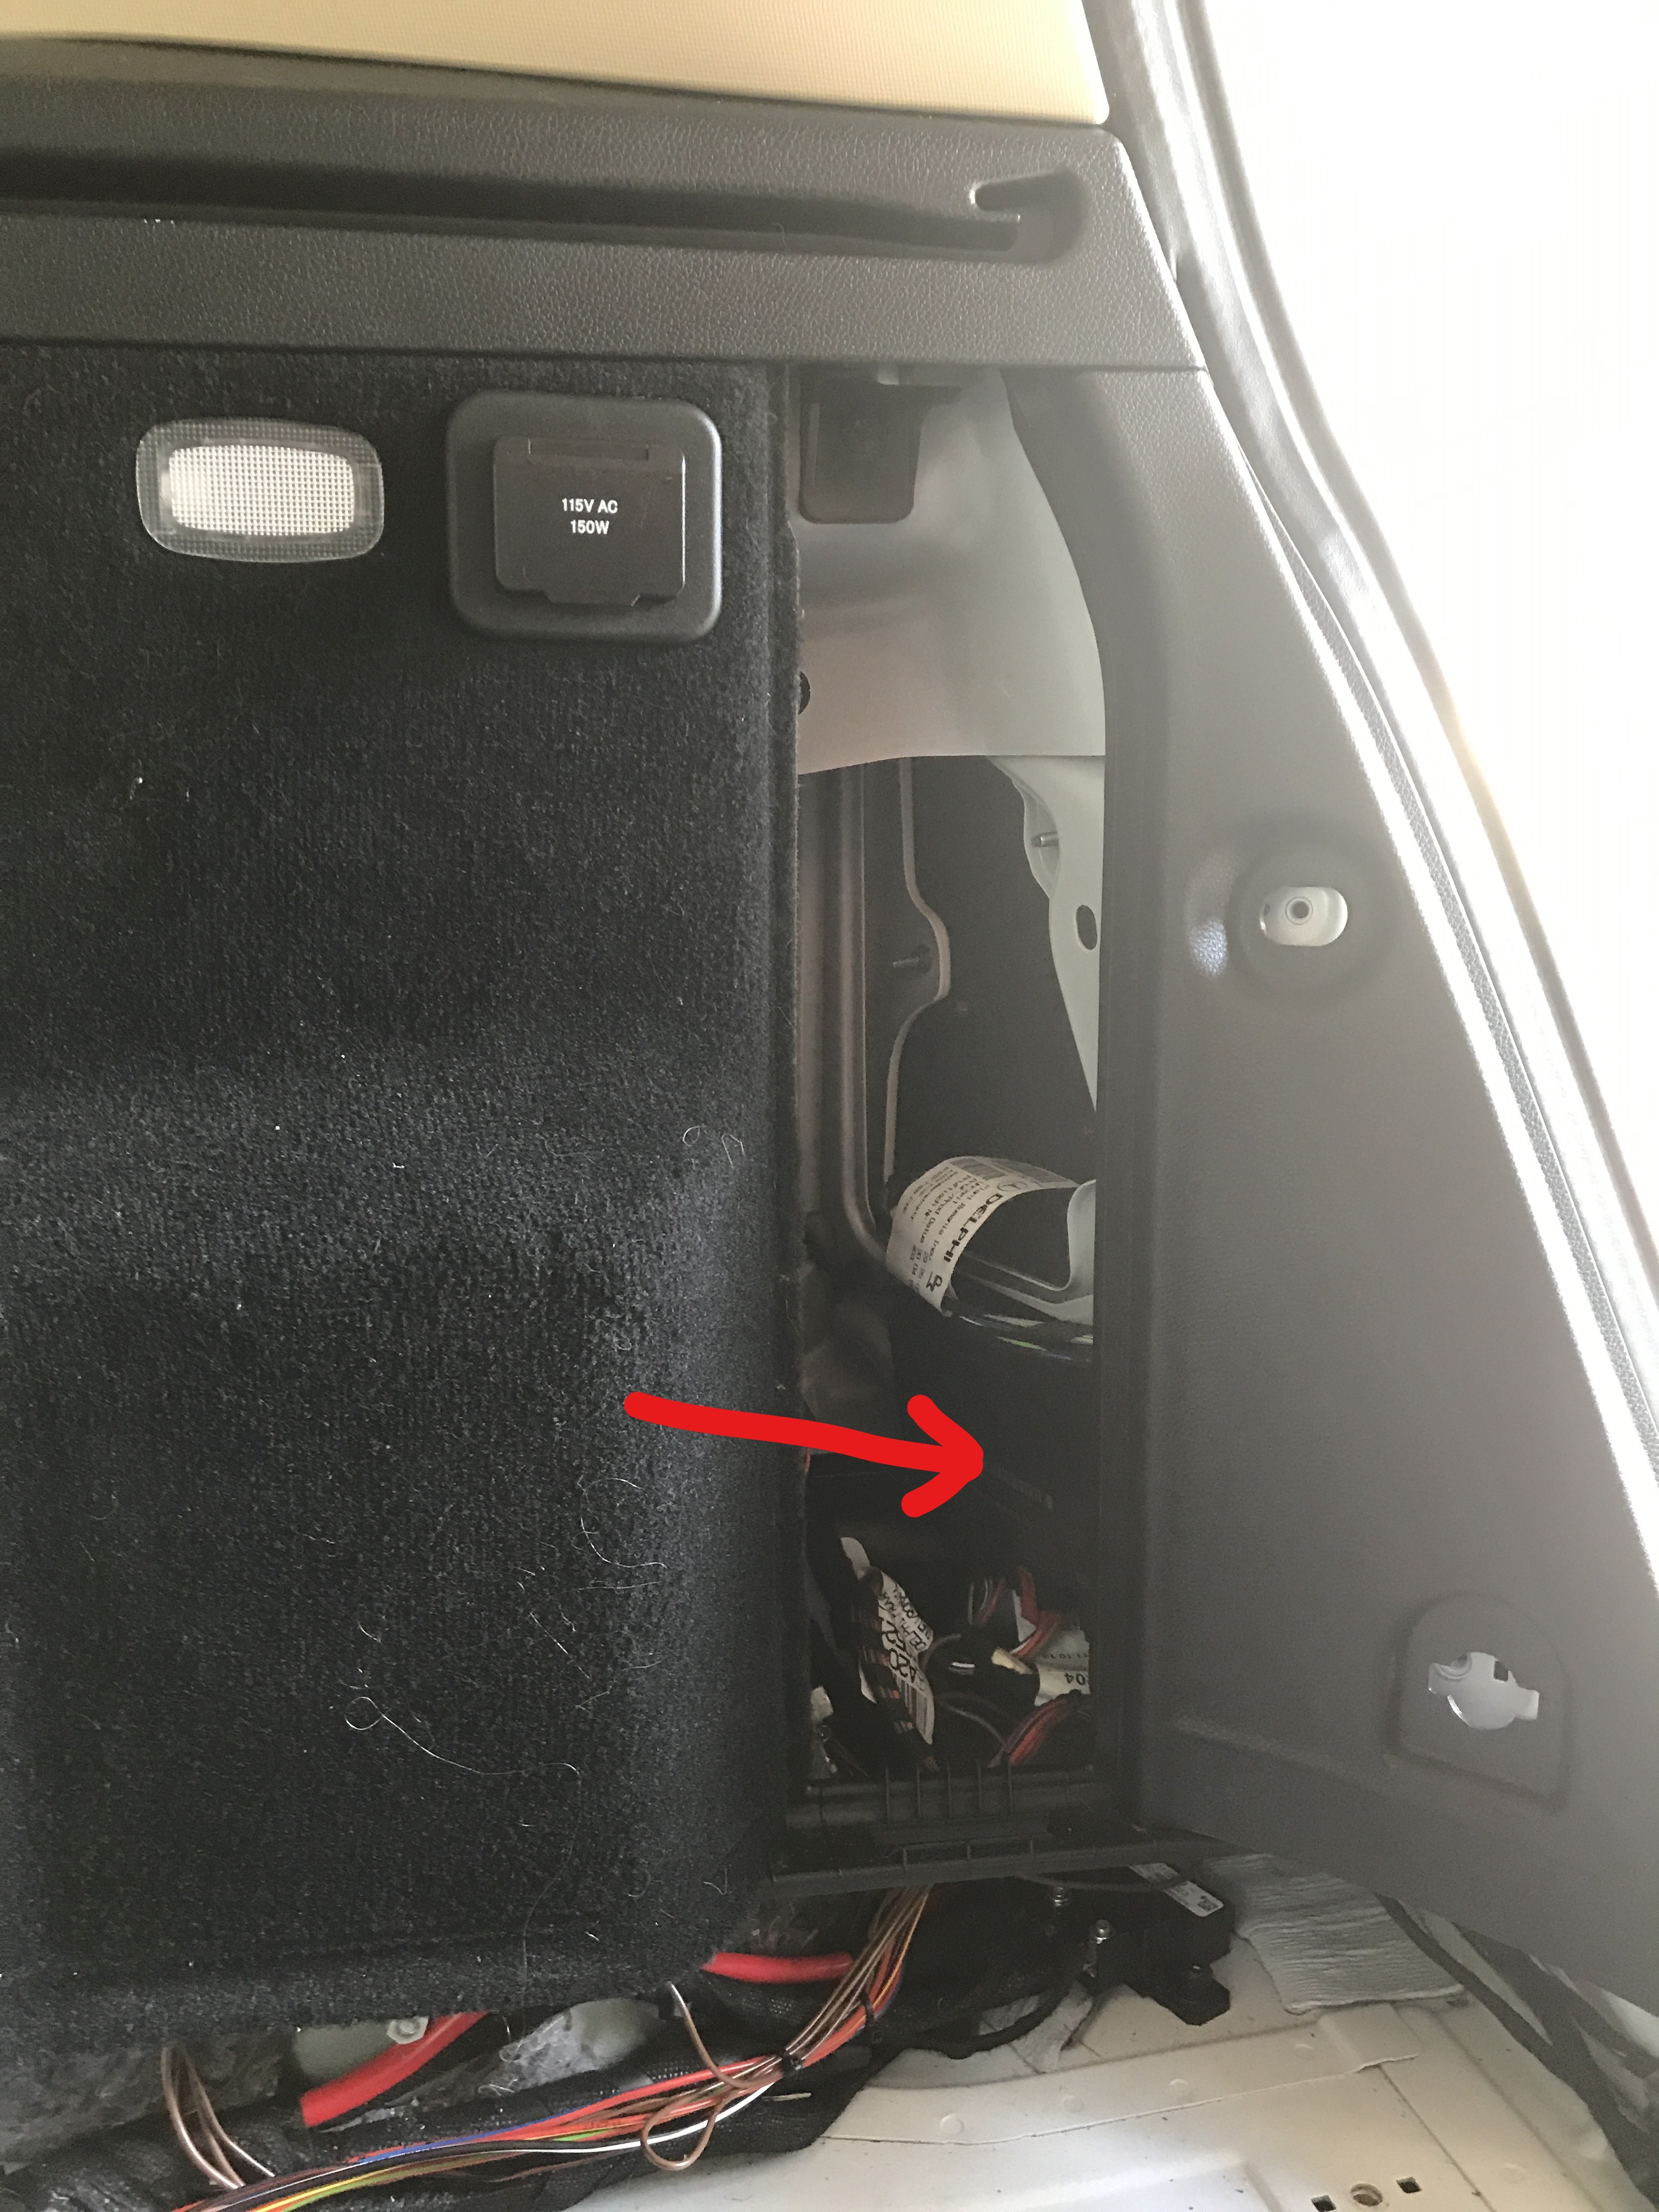
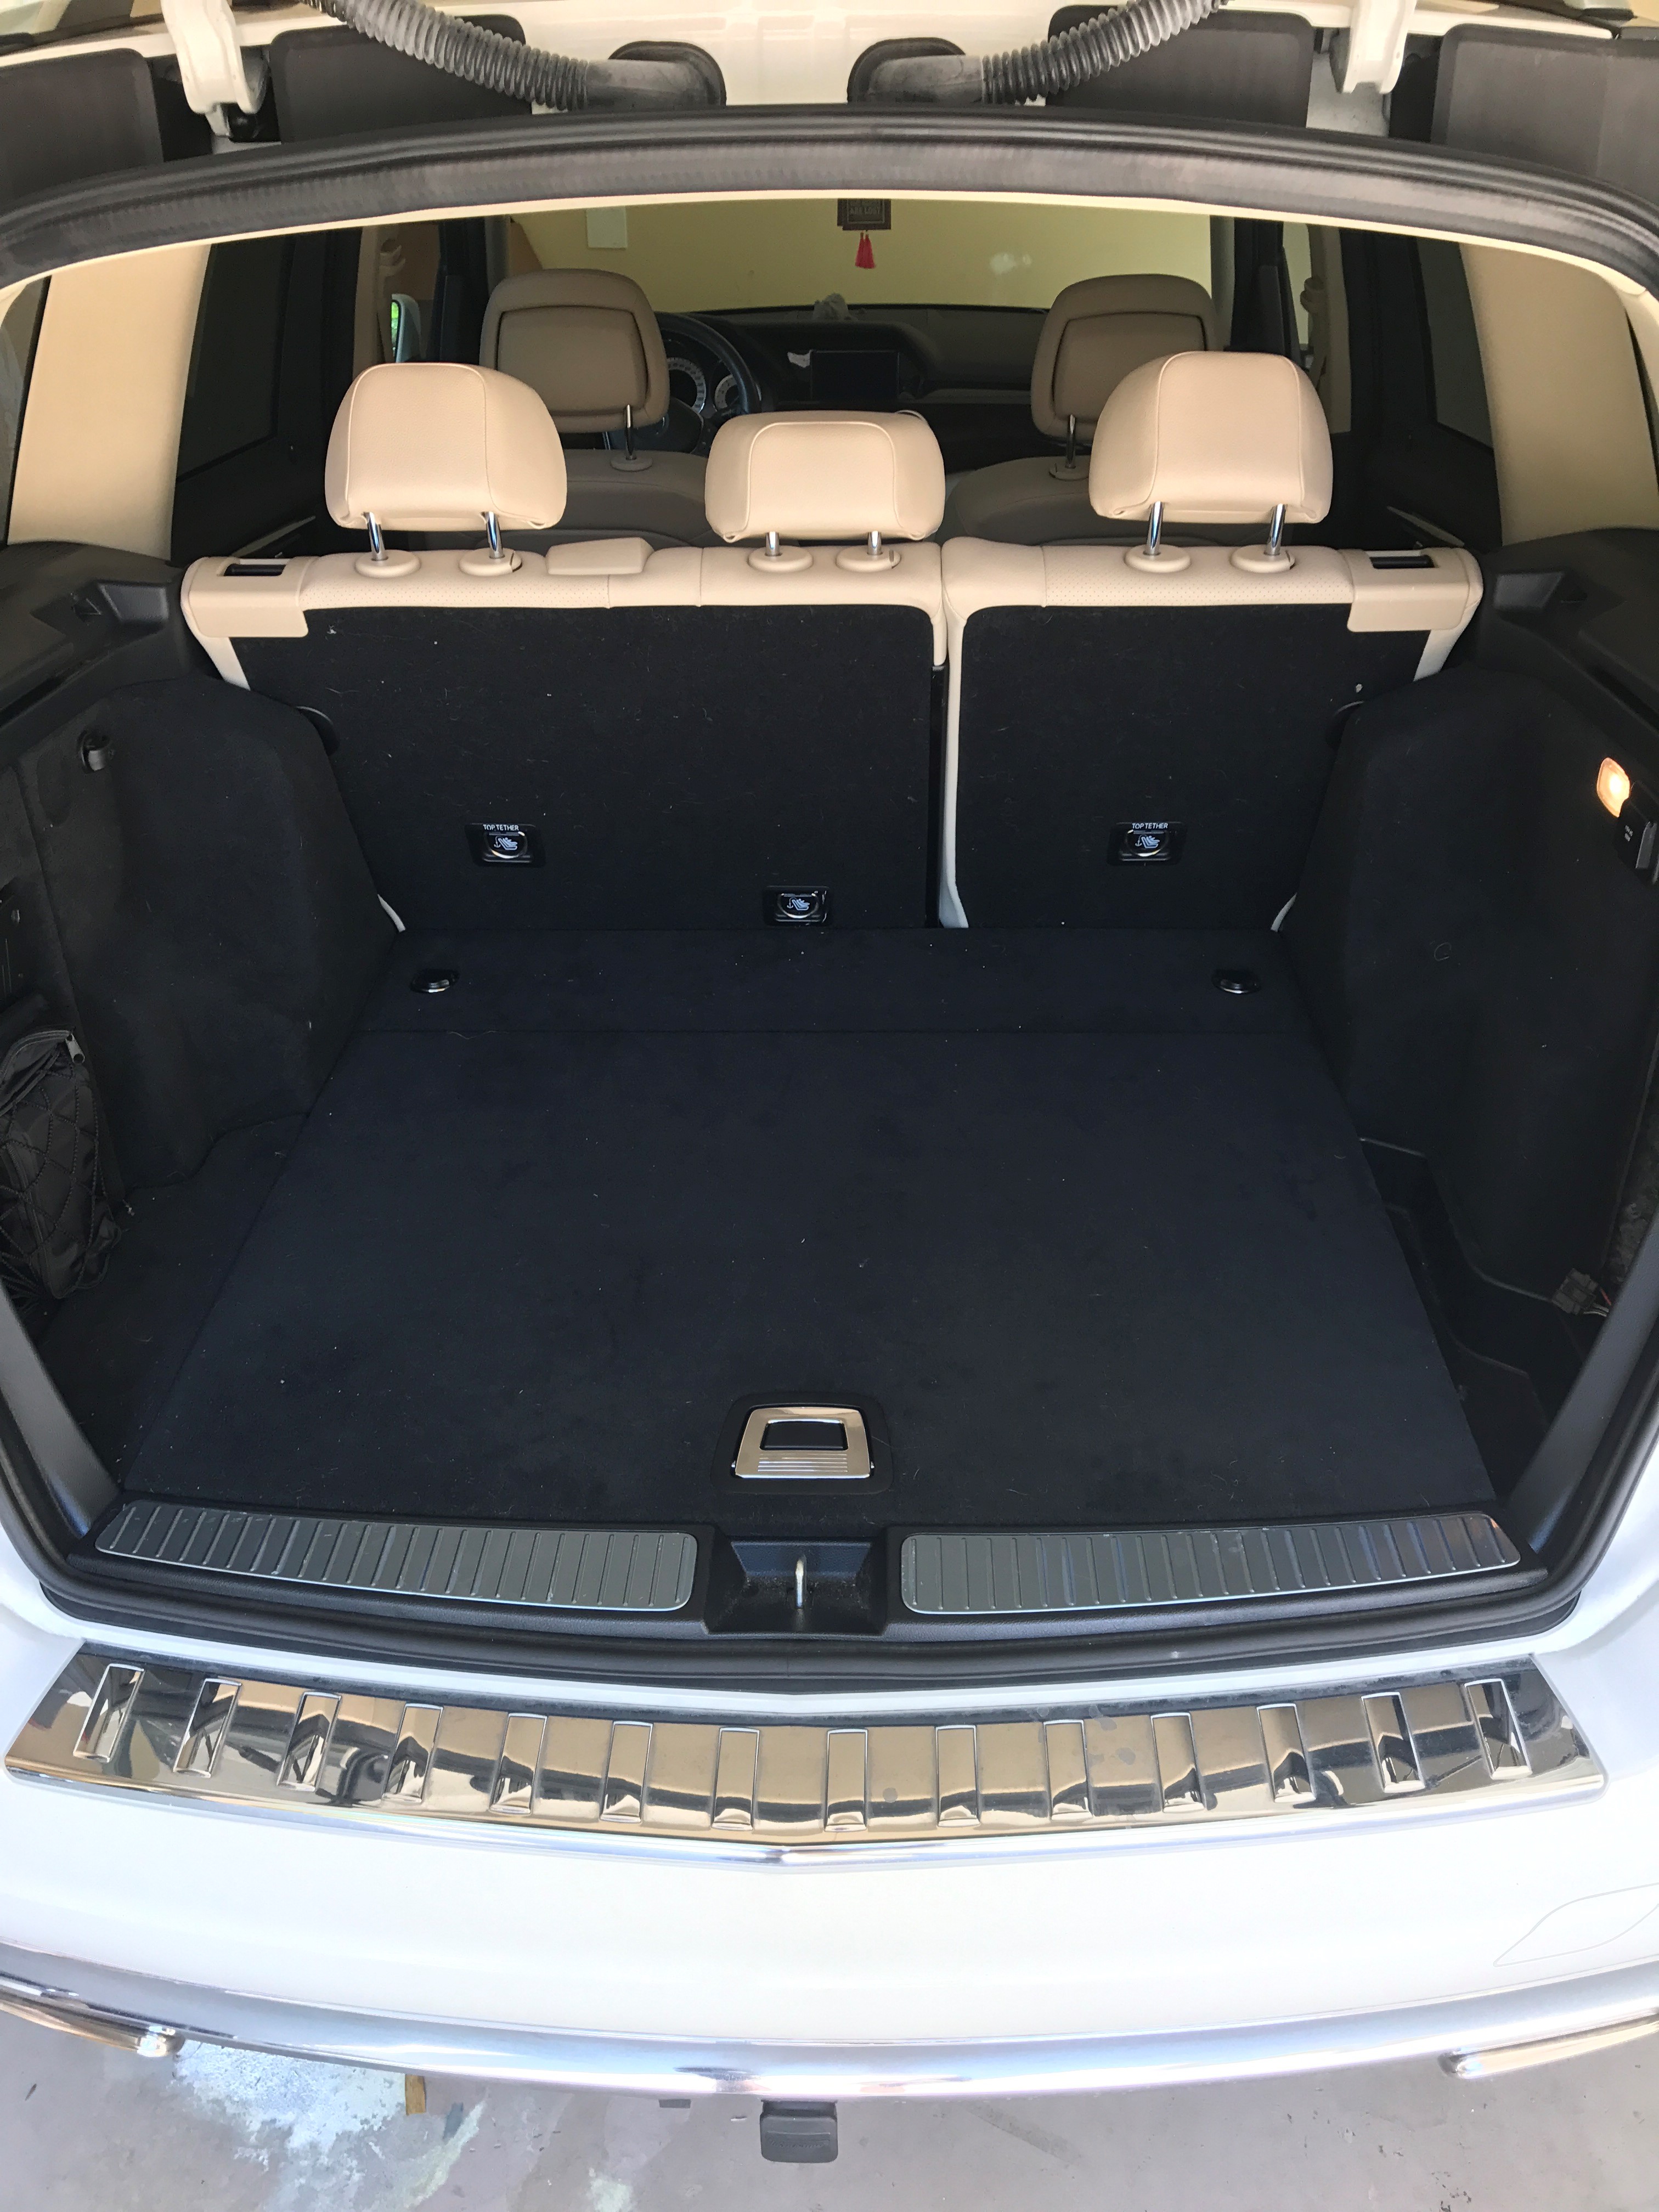
Start by removing everything from the trunk floor area...

...to expose the SAM unit and the side compartment behind the right-side taillight.

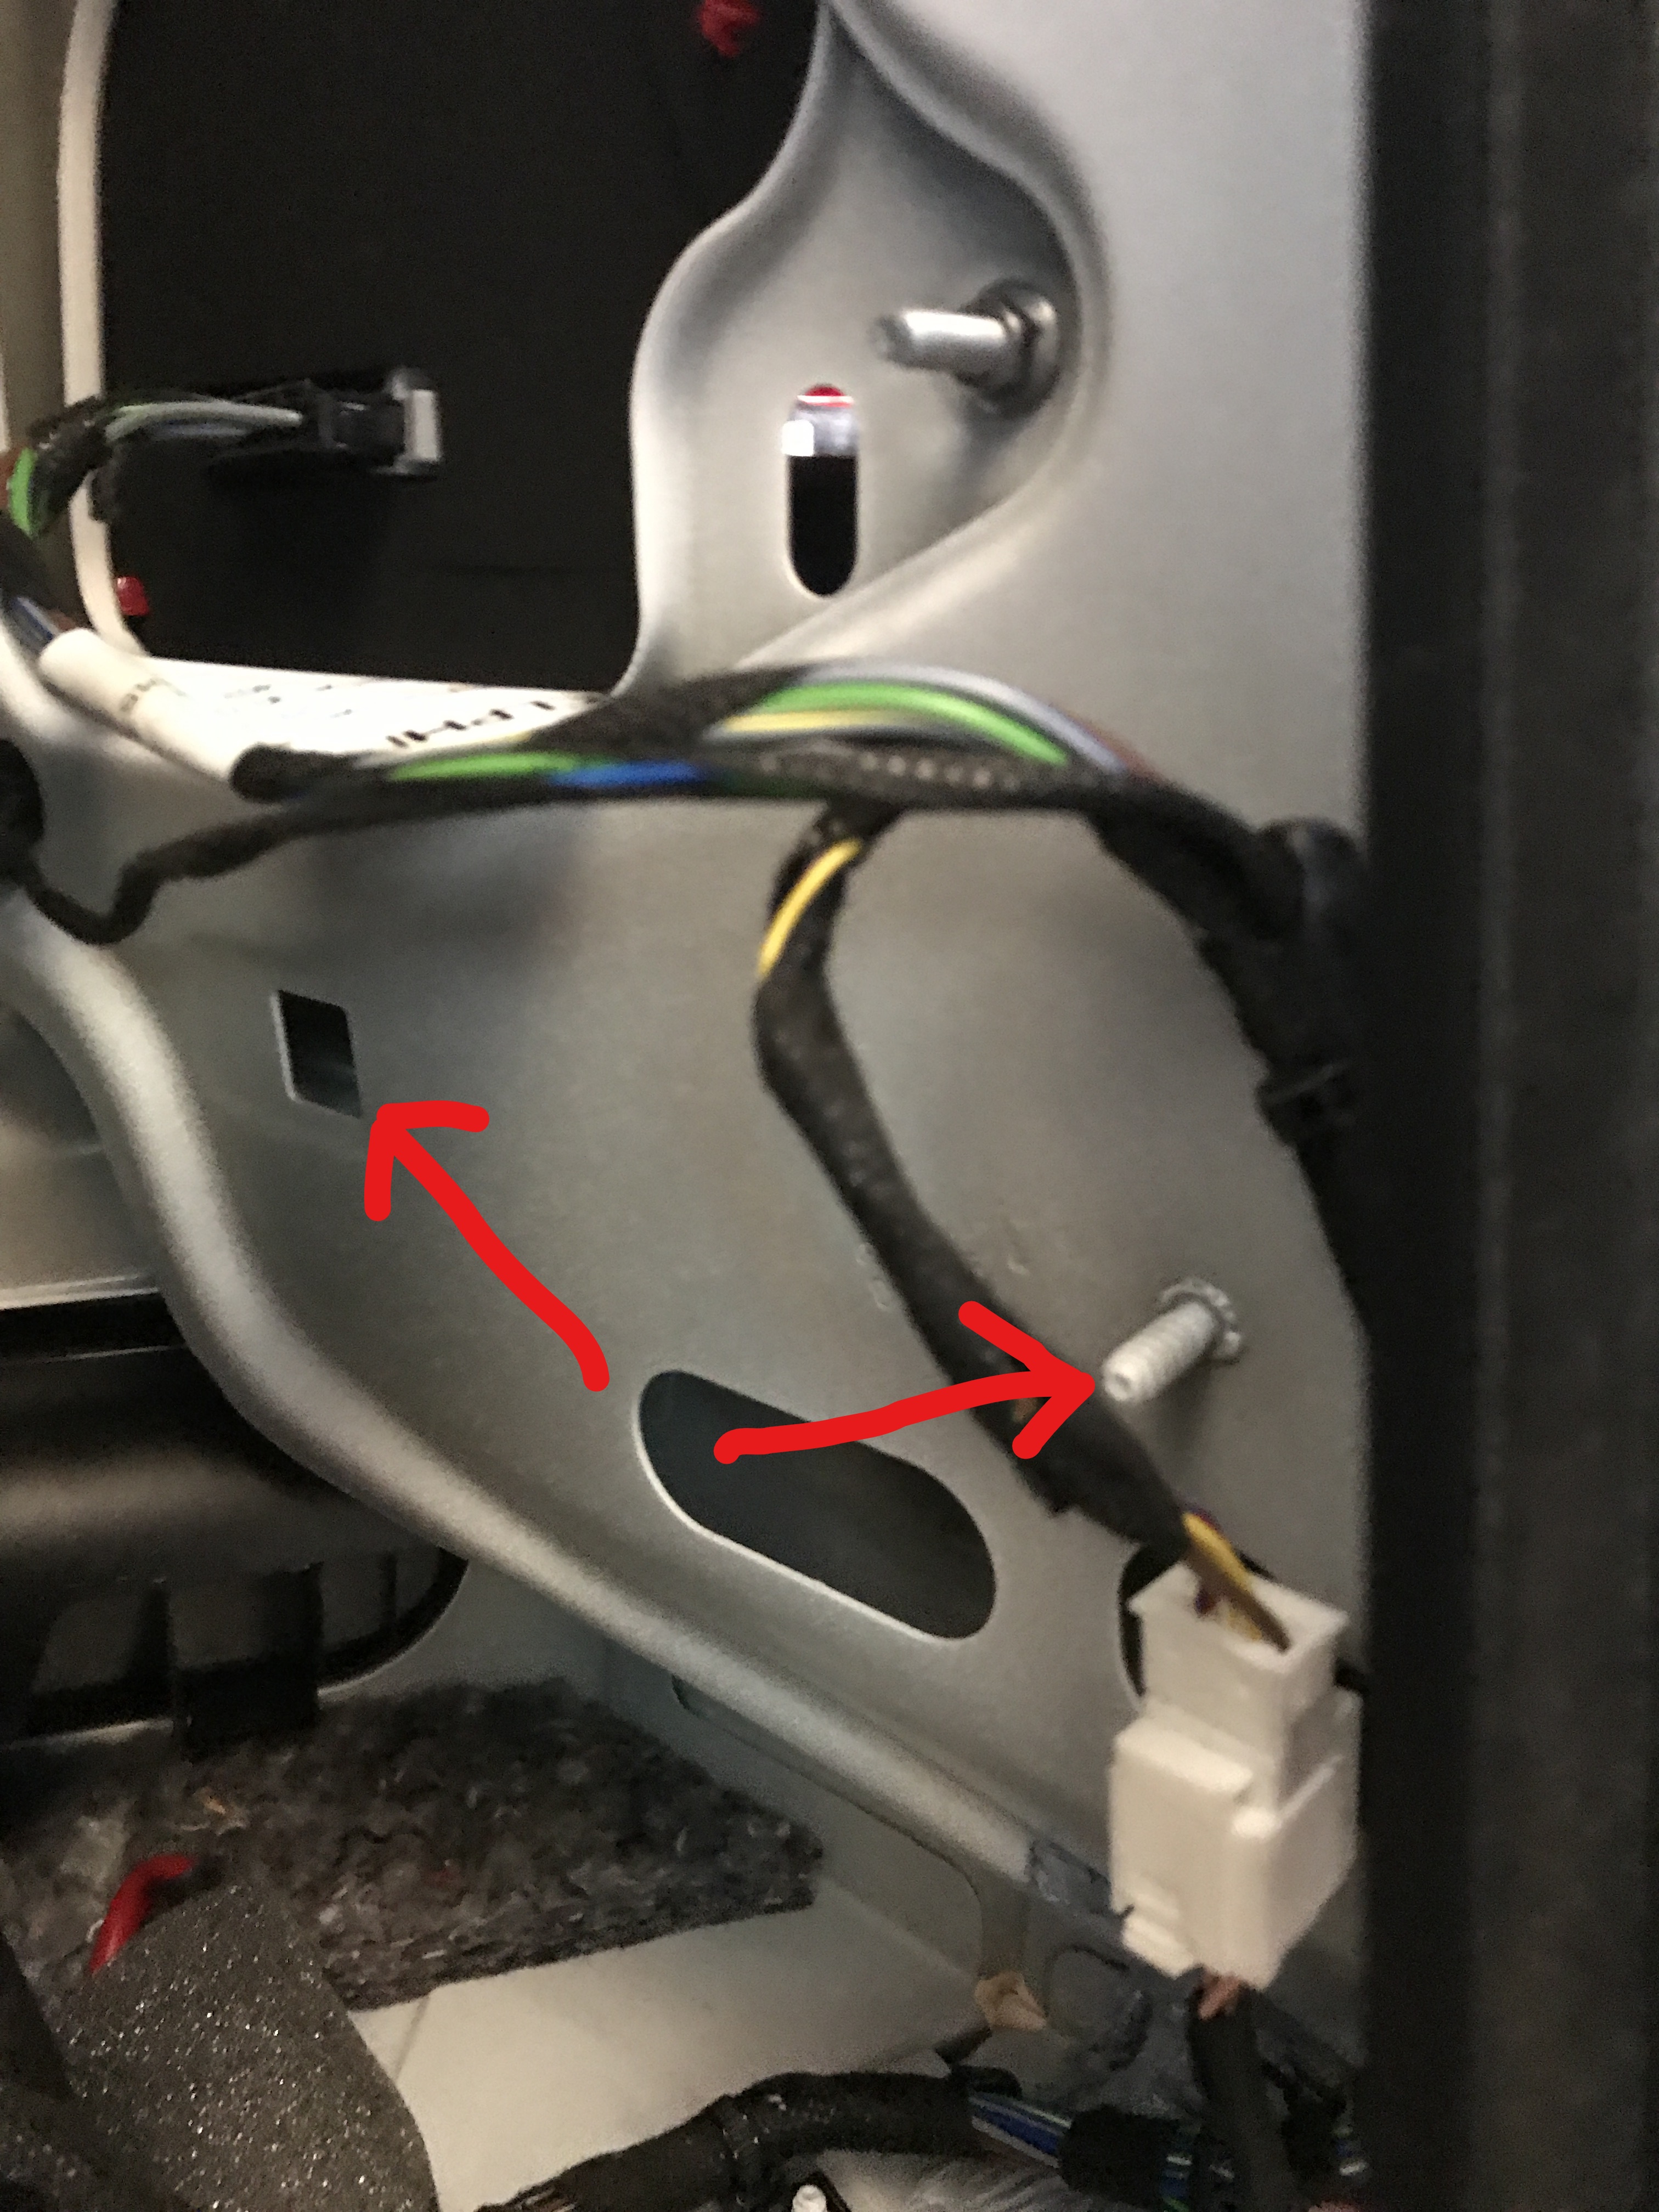
In front of and below the taillight is a stud and a square hole where you can attach the Control Unit. I had to go to the hardware store and find some nuts and a bolt and washer.
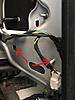
Here is the Control Unit in place below the taillight.
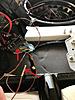
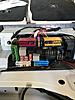
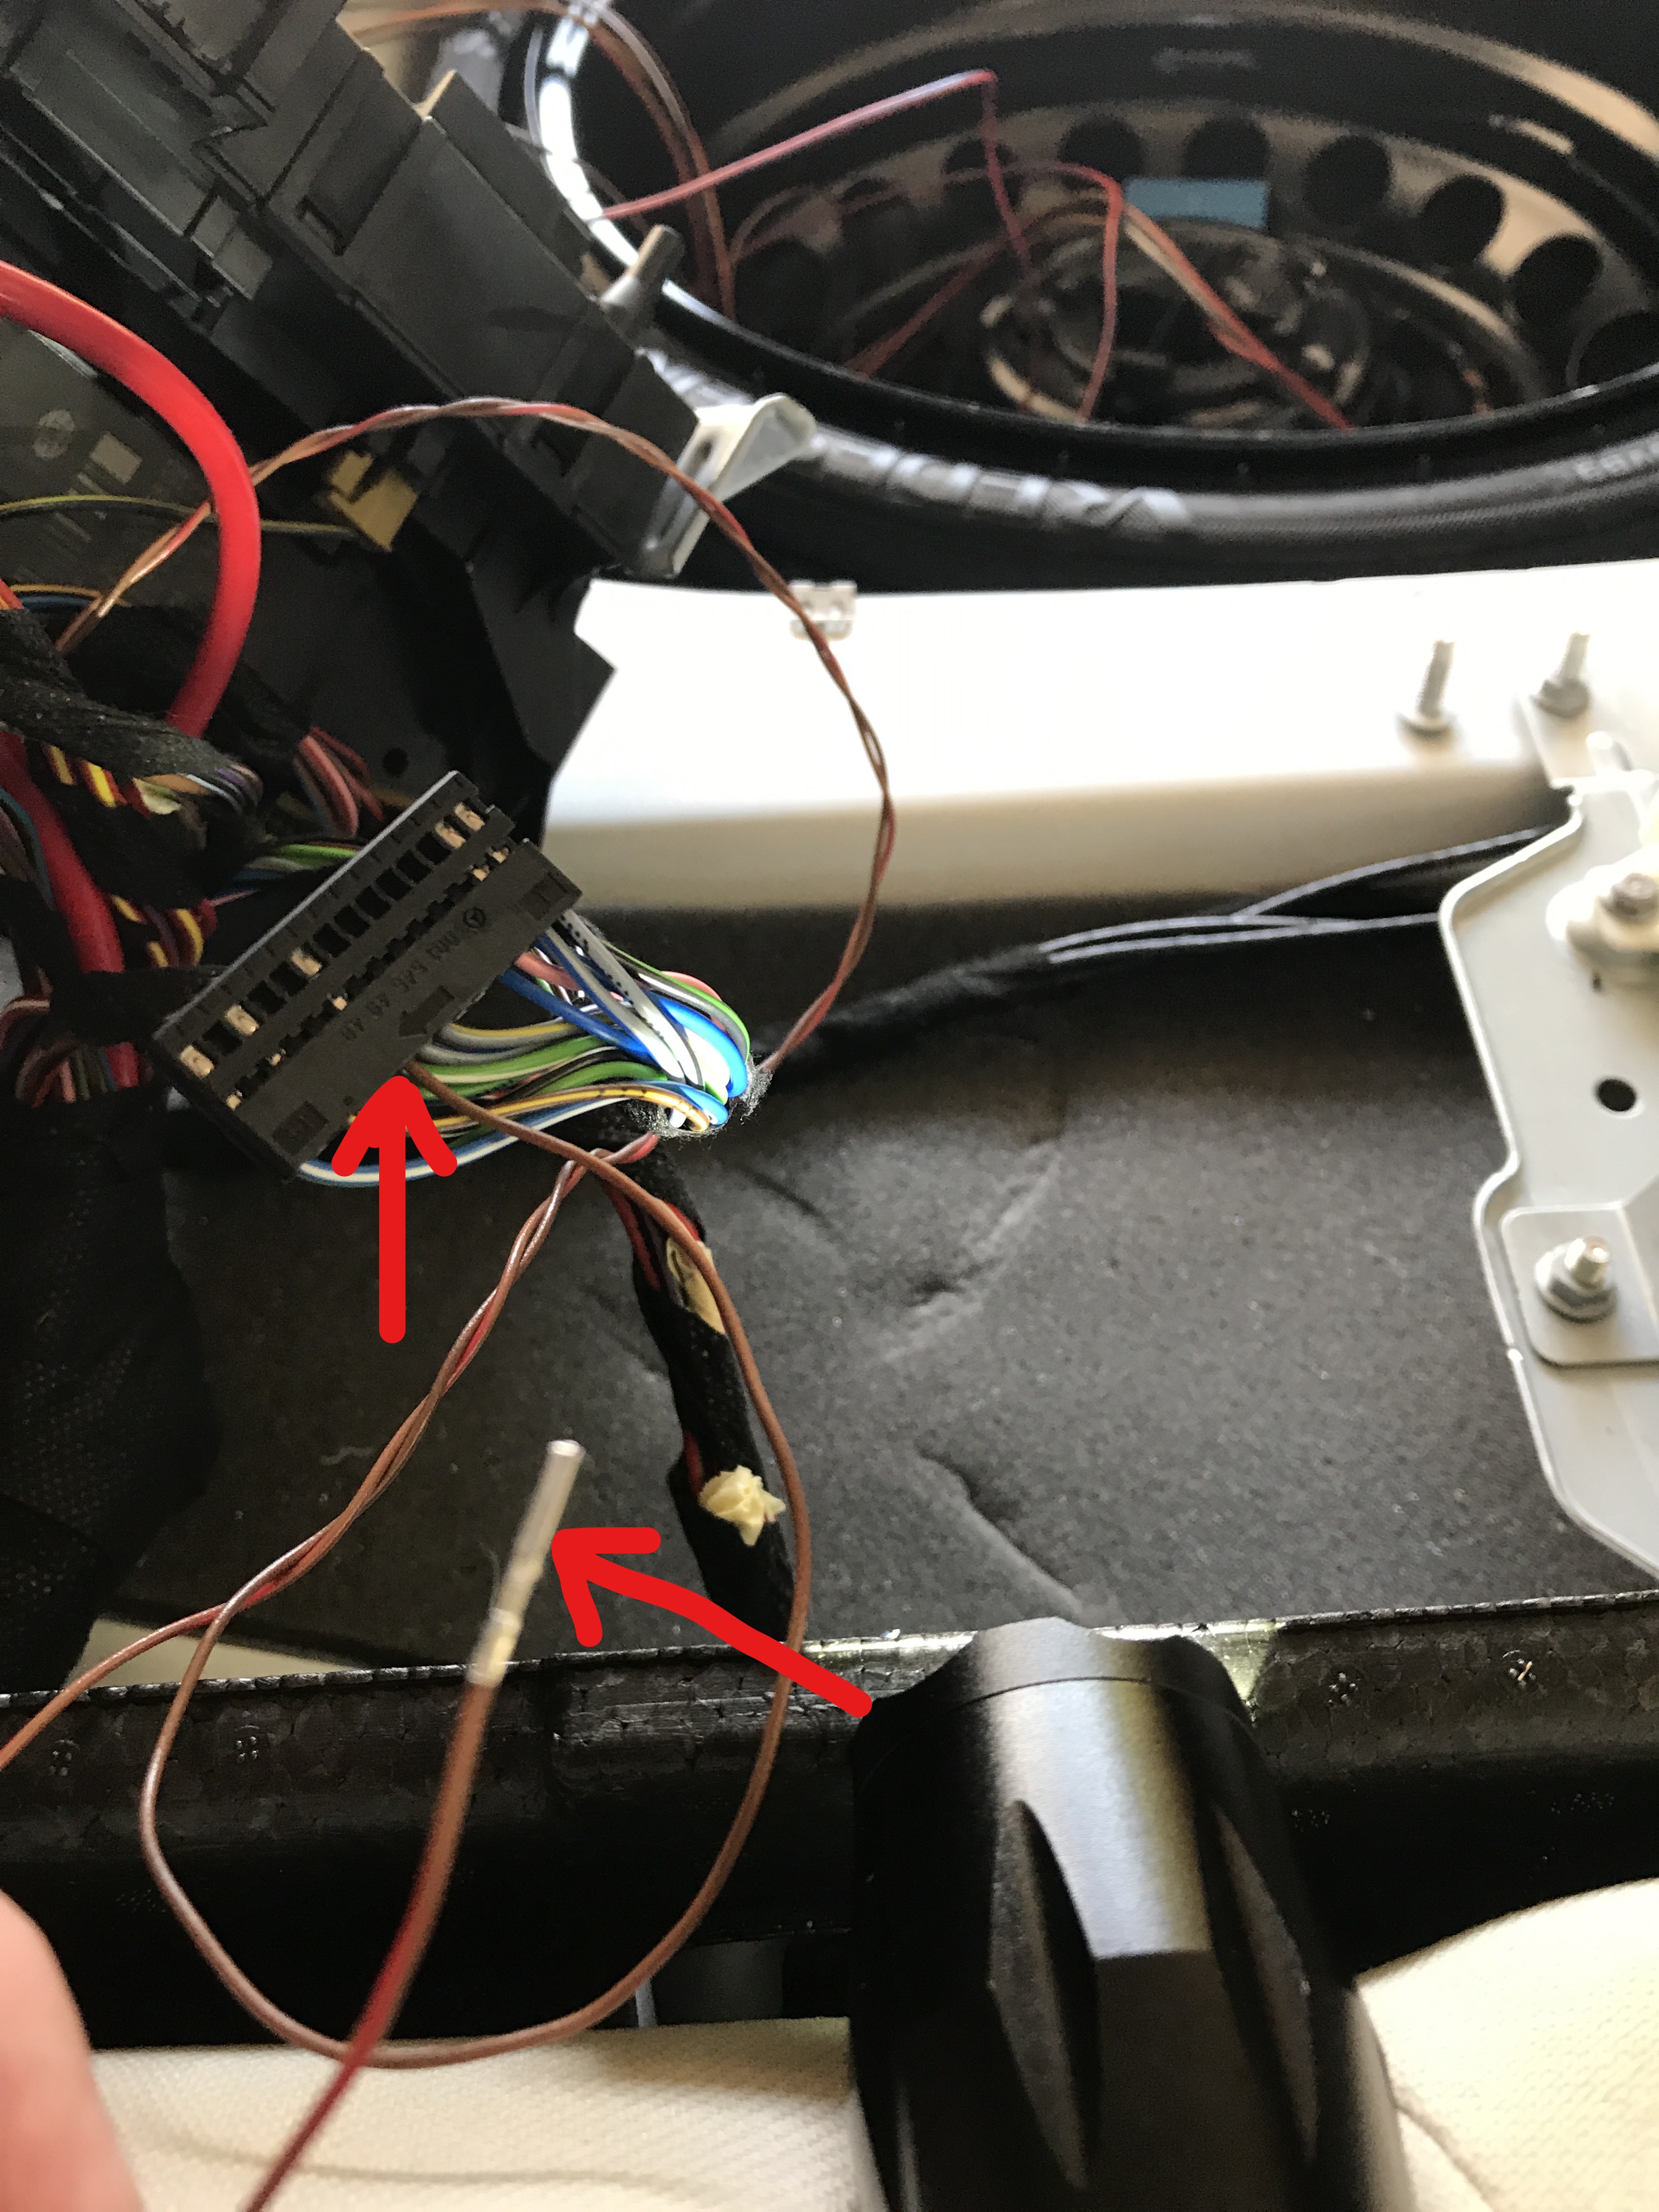
Now back to the SAM. I hoped I could just plug in the harness to the SAM but no such luck. The SAM must be unbolted so that you can rotate it and access the back of the SAM where the (2) wire Pins have to be added to an existing plug.
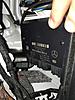
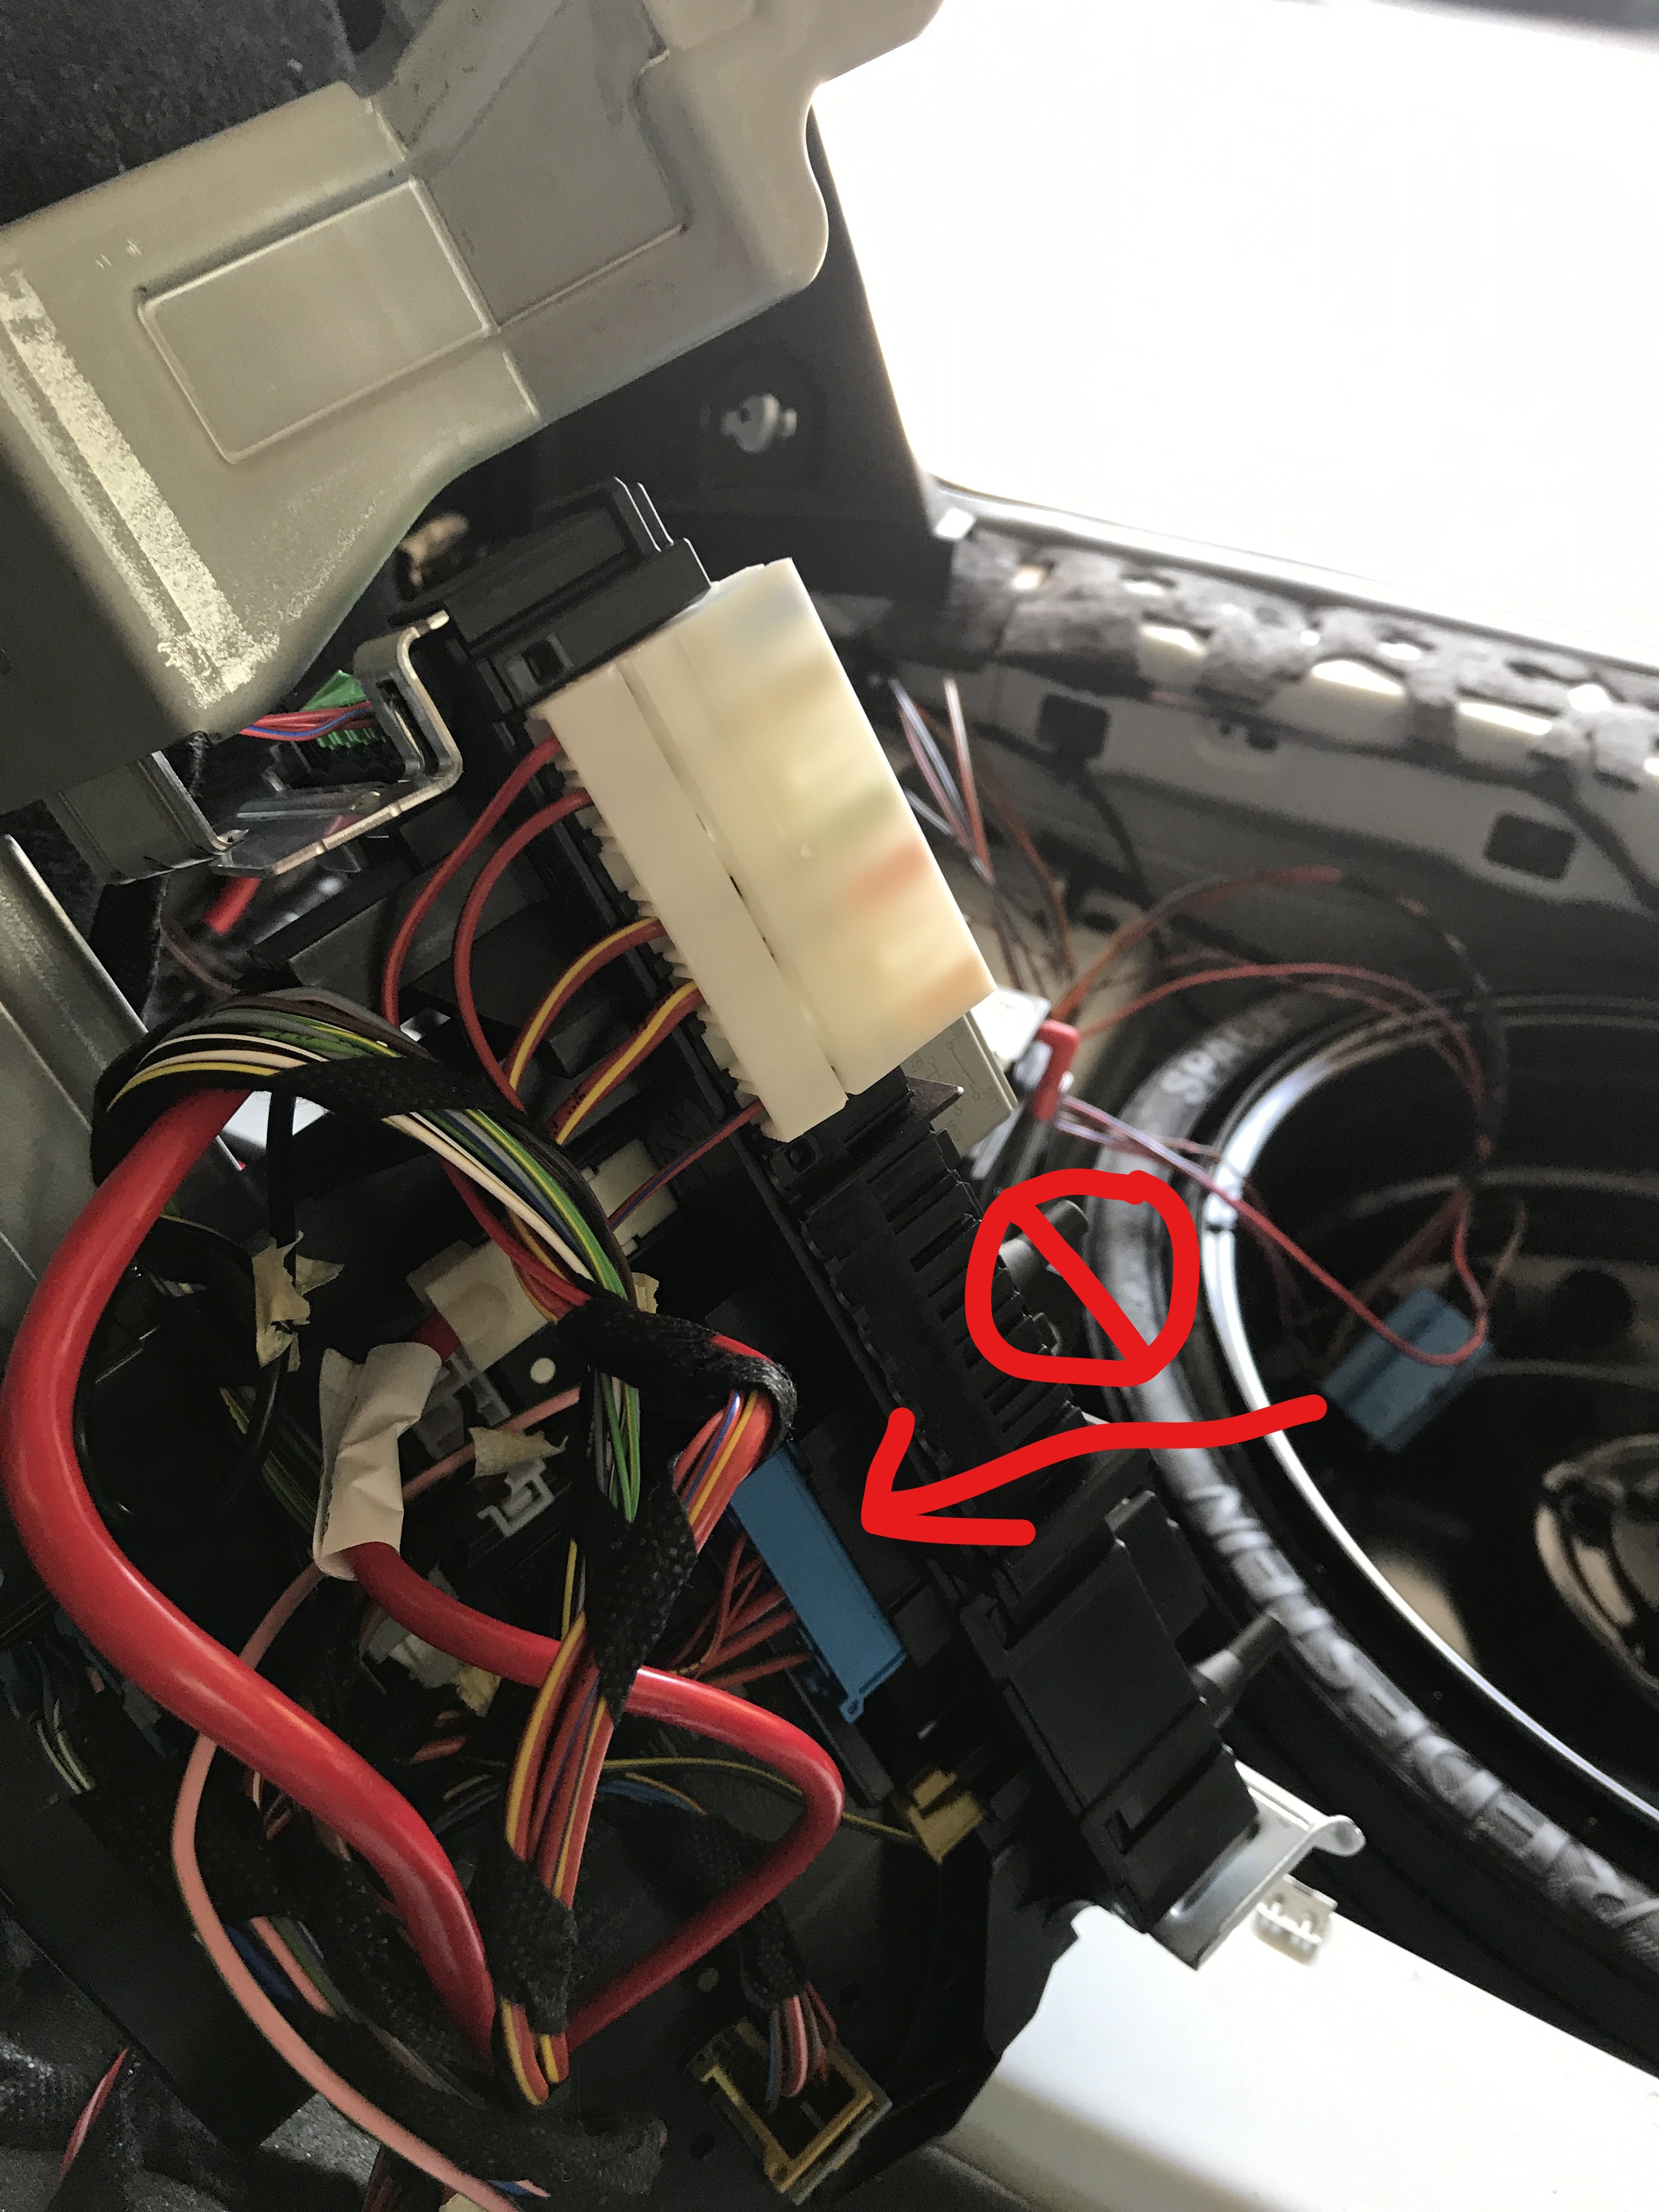
The (2) wire Pins go into a blue 28-pin plug. It is not this one...this is a 14-pin...keep searching.

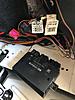
Here is the Blue half-round Connector that holds the 28-pin plug. This does not look like a plug to me, so I stared at it for a long time before I removed the blue connector and discovered the 28-pin plug and then removed the plug from the blue connector.
Here are the (2) wire Pins that are inserted into slot #9 and #10 of the 28-pin connector.
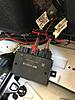
And here they are, both inserted into slot #9 and #10 of the 28-pin plug.
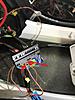
Reassemble the 28-pin plug into the blue half-round connector and plug it back into the rear of the SAM.
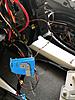
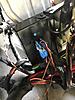
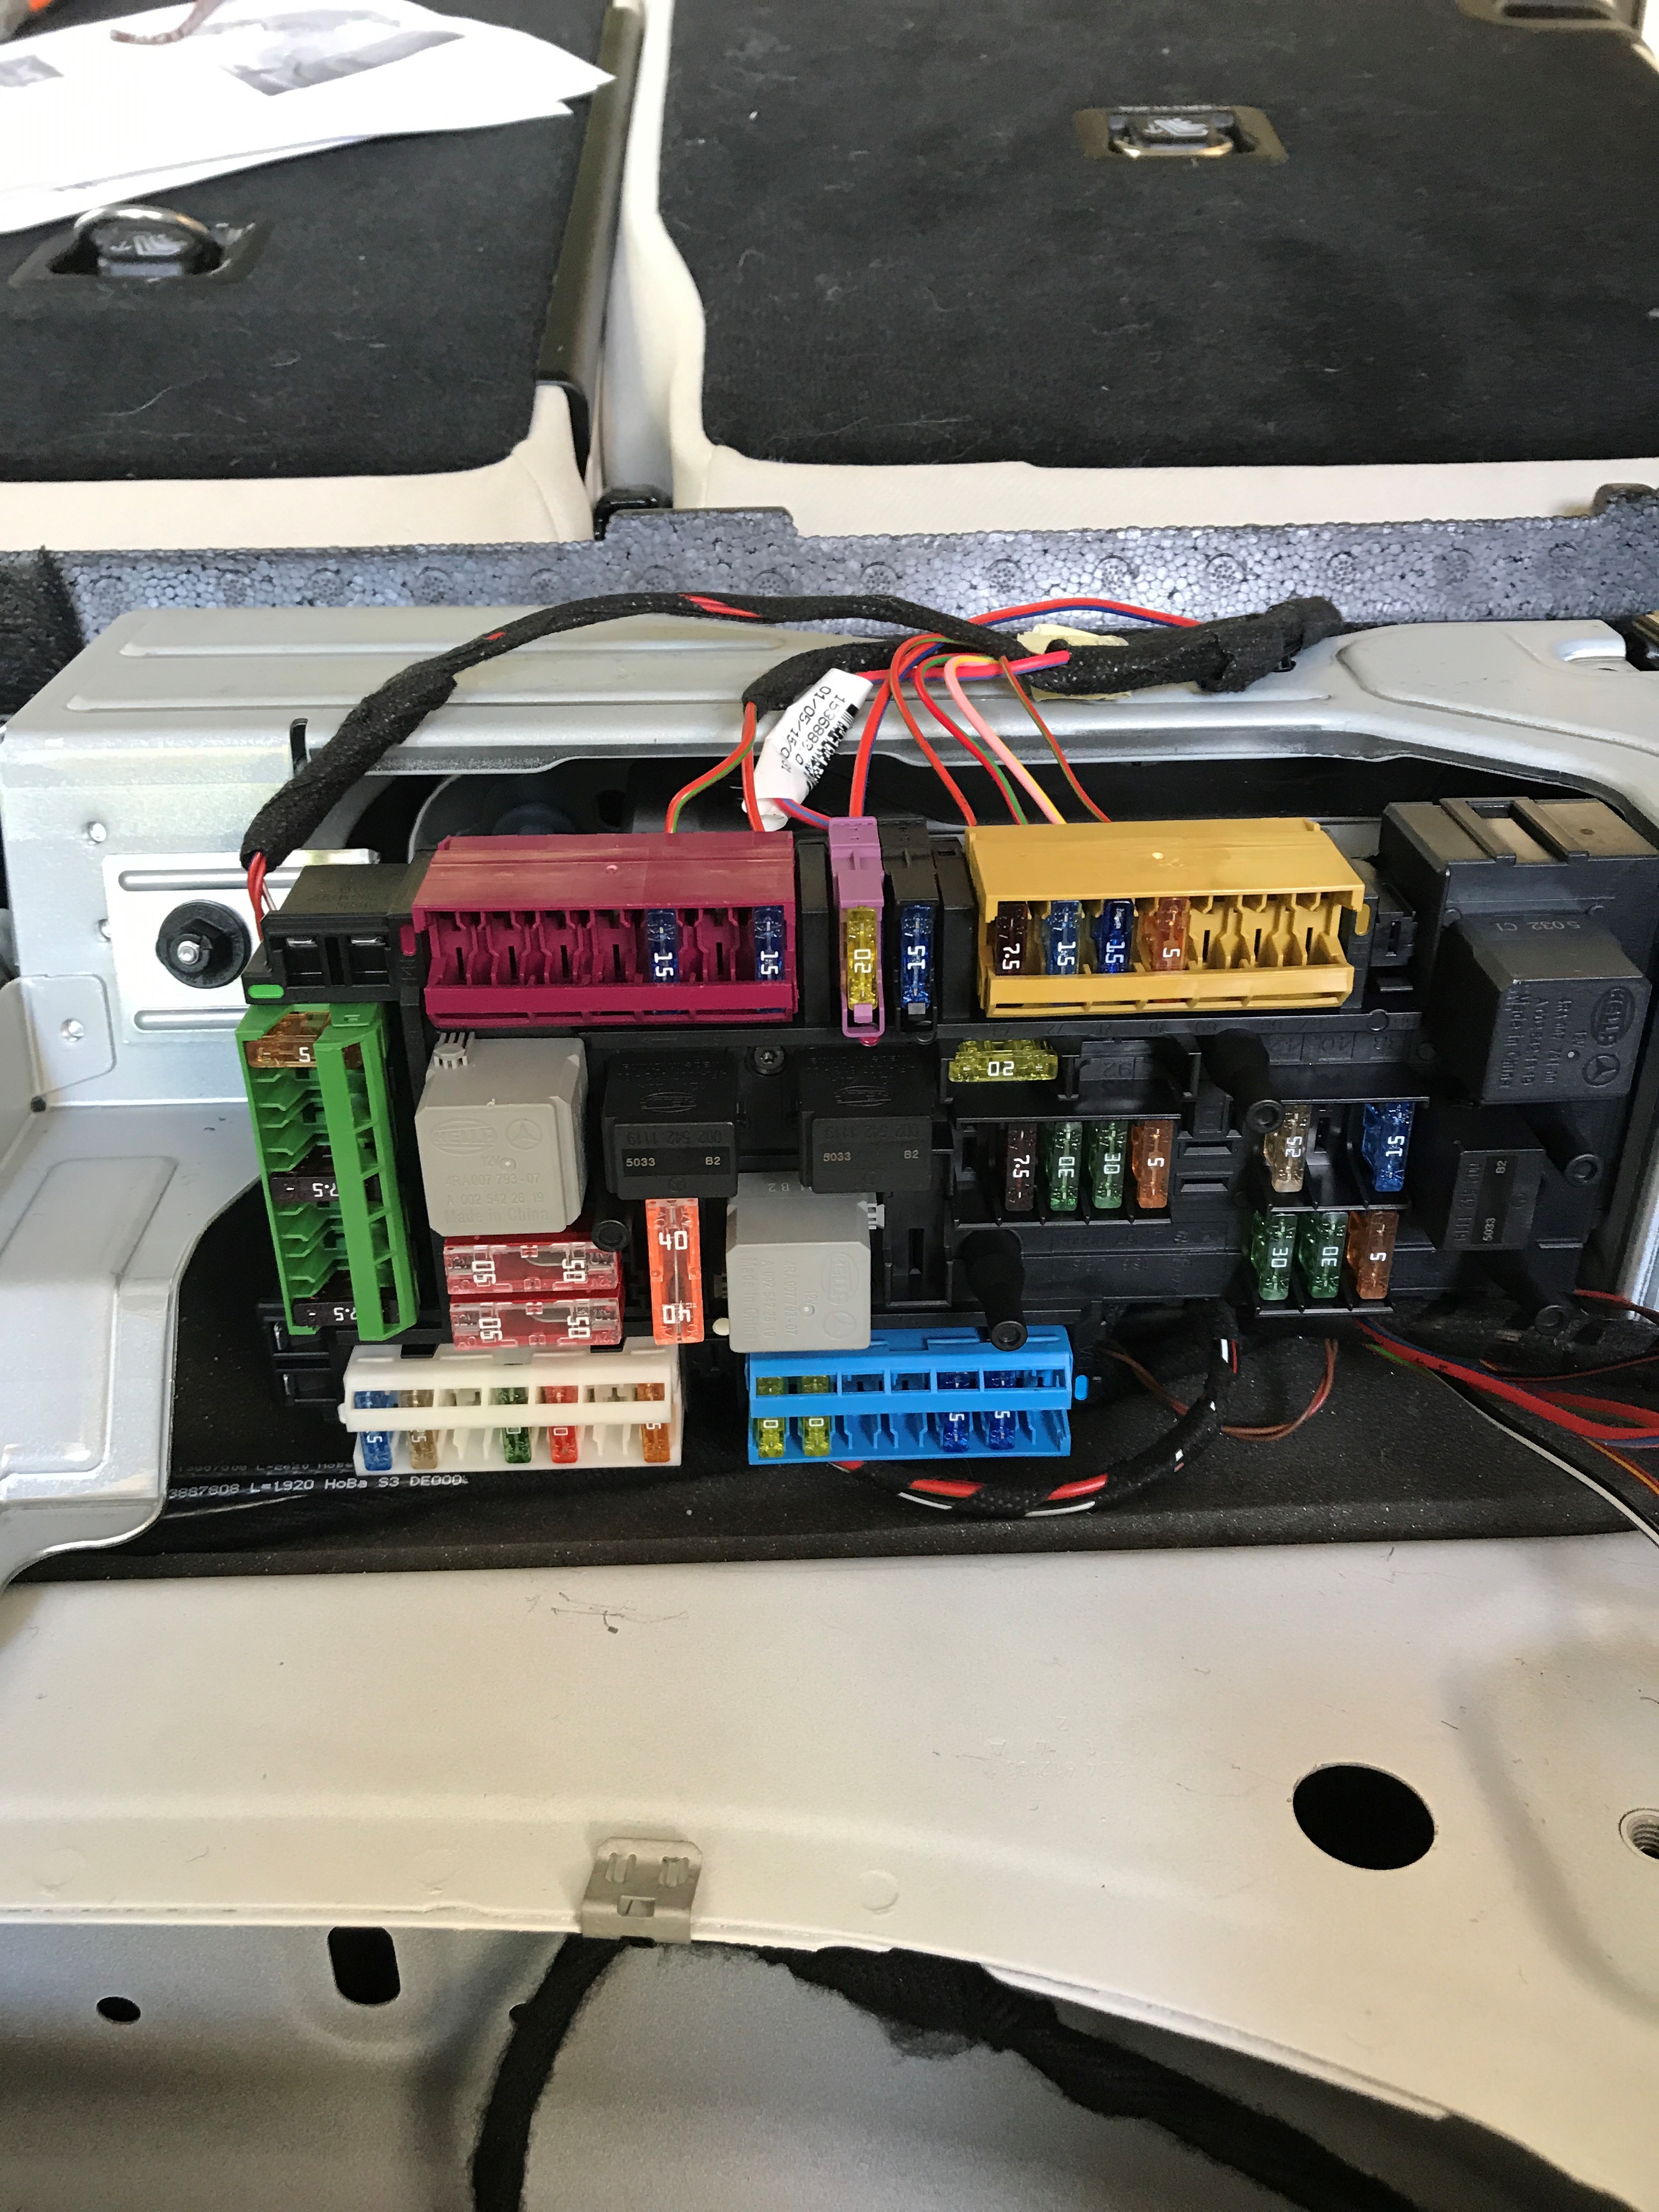
Next, from the front of the SAM plug in the blue and lilac fuse plugs, from the Control Unit harness, into the front of the SAM. There is a blue dot and a lilac dot on the SAM to help find the right locations.
Here is the front of the SAM again, reattached to the car, with blue and lilac fuse plugs in place.
Here is the red plug from the Control Unit harness and the black plug from the Trailer Hitch harness and the Control Unit.
Insert the plugs into the Control Unit...
Attach the Control Unit in the area behind the taillight...
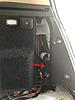
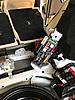
Put everything back together...
...and the finished product. LIGHTS !!!

And good news: I plugged in the trailer, got a "Check Left Trailer Lamp" message, pressed OK, got another message "Check Right Trailer Lamp", pressed OK and haven't received any more messages after that and everything is functioning as it should. I did not have to go to the dealer to reprogram the OBD !
Hope this helps.
DO NOT TRY THIS AT HOME ****I was hoping my OEM hitch wiring harness would be a simple plug-n-play into the car and I would have lights; especially since my window sticker shows the "ESP Electronic Stability Program w/ Trailer Stabilization" option. But it wasn't plug-n-play or simple. I finally got desperate enough to go to the dealer parts counter and ask for help.
Here is what you need: Trailer Recognition Control Unit, part #A2129007125
(this is a newer part number that has superseded a couple older versions)
You also need this Control Unit Wiring Harness that goes from the control unit to the SAM: part #A2044405213
(Notice that there are (3) plugs; one red, one blue and one lilac, (2) ground wires and (2) long-skinny wire Pins...not a single, simple plug)

Start by removing everything from the trunk floor area...

...to expose the SAM unit and the side compartment behind the right-side taillight.
In front of and below the taillight is a stud and a square hole where you can attach the Control Unit. I had to go to the hardware store and find some nuts and a bolt and washer.
Here is the Control Unit in place below the taillight.
Now back to the SAM. I hoped I could just plug in the harness to the SAM but no such luck. The SAM must be unbolted so that you can rotate it and access the back of the SAM where the (2) wire Pins have to be added to an existing plug.

The (2) wire Pins go into a blue 28-pin plug. It is not this one...this is a 14-pin...keep searching.
Here is the Blue half-round Connector that holds the 28-pin plug. This does not look like a plug to me, so I stared at it for a long time before I removed the blue connector and discovered the 28-pin plug and then removed the plug from the blue connector.
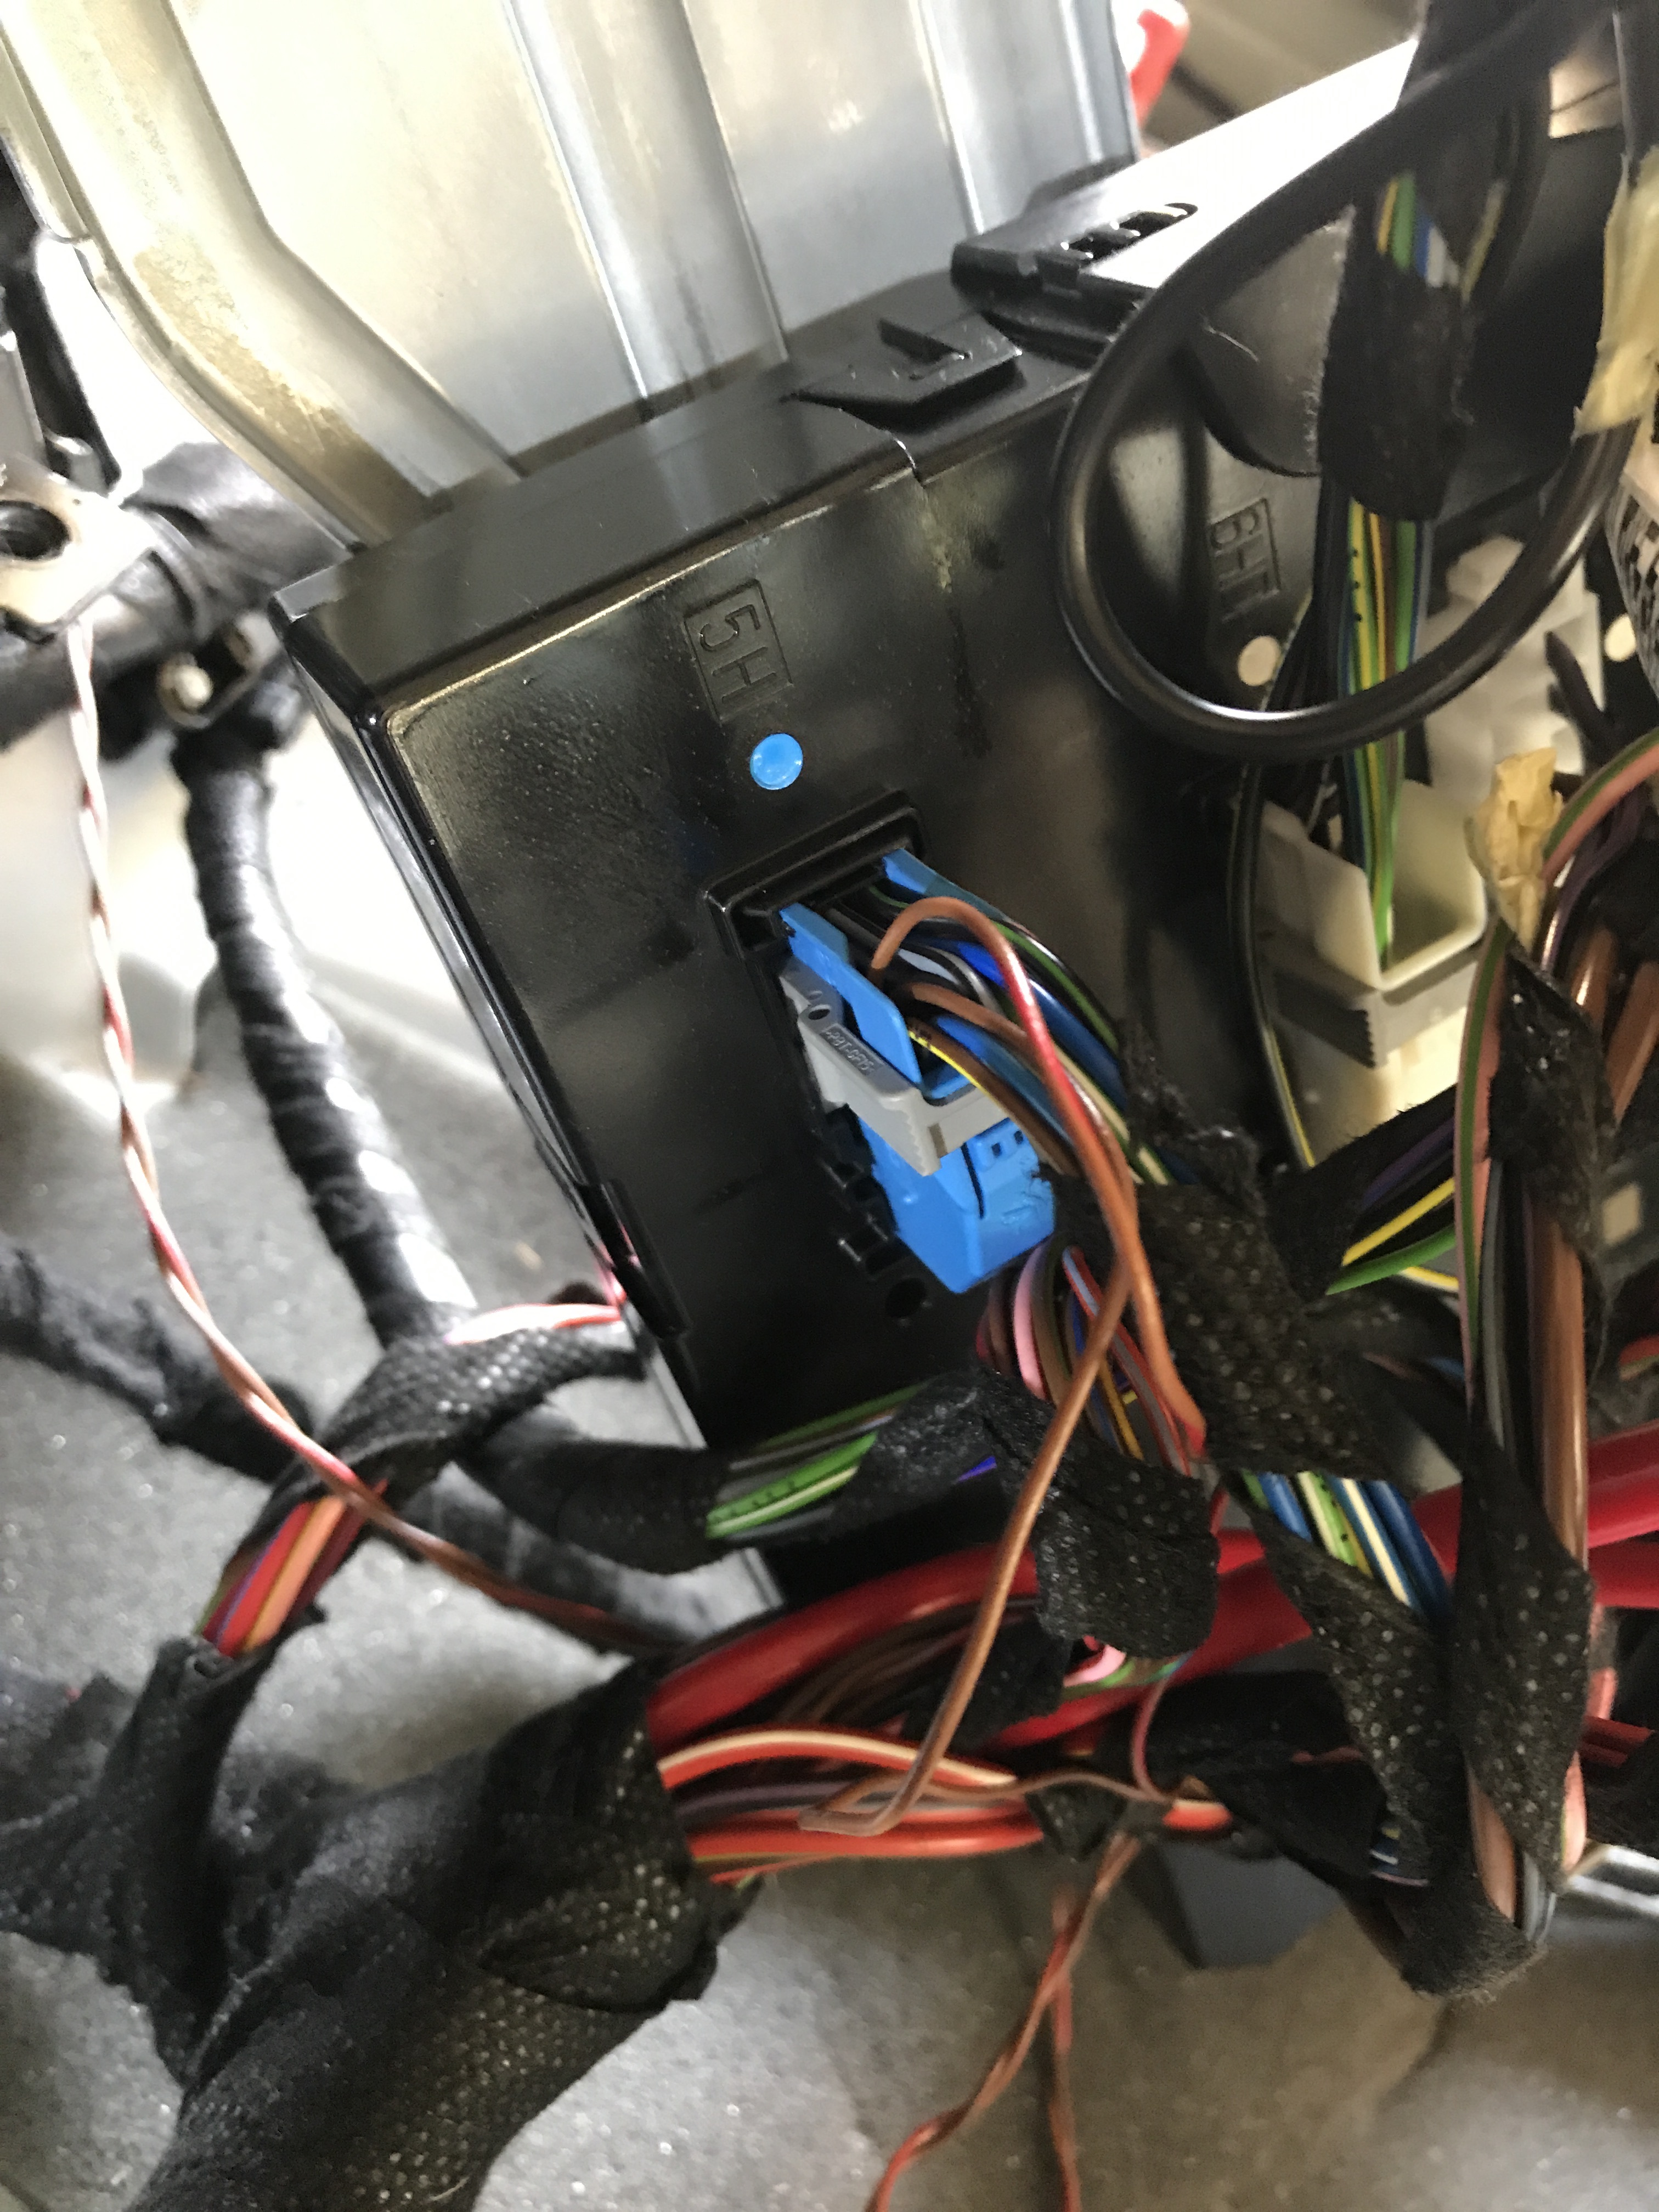
Here are the (2) wire Pins that are inserted into slot #9 and #10 of the 28-pin connector.
And here they are, both inserted into slot #9 and #10 of the 28-pin plug.

Reassemble the 28-pin plug into the blue half-round connector and plug it back into the rear of the SAM.

Next, from the front of the SAM plug in the blue and lilac fuse plugs, from the Control Unit harness, into the front of the SAM. There is a blue dot and a lilac dot on the SAM to help find the right locations.

Here is the front of the SAM again, reattached to the car, with blue and lilac fuse plugs in place.
Here is the red plug from the Control Unit harness and the black plug from the Trailer Hitch harness and the Control Unit.

Insert the plugs into the Control Unit...
Attach the Control Unit in the area behind the taillight...
Put everything back together...
...and the finished product. LIGHTS !!!

And good news: I plugged in the trailer, got a "Check Left Trailer Lamp" message, pressed OK, got another message "Check Right Trailer Lamp", pressed OK and haven't received any more messages after that and everything is functioning as it should. I did not have to go to the dealer to reprogram the OBD !
Hope this helps.
Last edited by PVBDLM; May 20, 2017 at 01:17 PM. Reason: changed full-size pics to small thumbnails.
MB World Stories
The Best of Mercedes & AMG

6 Mercedes Models That Did NOT Age Well (But Are Somehow Still Cool)
Verdad Gallardo
Manual Mercedes? 6 Times Sindelfingen Let Drivers Have All The Fun
Verdad Gallardo
Mercedes SLR McLaren 722 S Is Extremely Rare Example Modified by McLaren
Verdad Gallardo
8 Classic Boxy Mercedes Designs That Have Aged Like Fine Wine
Verdad Gallardo
Flawlessly Restored Mercedes 190E Evo II Heads to Auction
Verdad Gallardo
Electric Mercedes C-Class Unveiled: 11 Things You Need to Know
Verdad Gallardo
Mercedes EQS Gets A Major Update: Everything You Need to Know
Verdad Gallardo
5 Underrated Mercedes-Benz Models That Don't Get the Love They Deserve
Verdad Gallardo


