When you click on links to various merchants on this site and make a purchase, this can result in this site earning a commission. Affiliate programs and affiliations include, but are not limited to, the eBay Partner Network.
The ML350 is my daughter's so I don't see it (or her) as often as I'd like. She's had a "brake light out" warning for months, but all lights appeared to be functioning when I watched from behind as she stepped on the brake. Is that because there's a second bulb that lights when the first burns out?
I just had it at the dealership for an oil change and they said she has a brake light out, and it's not just a bulb, but that the whole bulb tray needs to be replaced at $200+. Turns out her inspection sticker had expired so I had them inspect the car and fail it, which gives me 30 days to get them fixed. I saw the inspection and sure enough the brake light is out (I saw the left light up at the top while the right lit up at the bottom.) I did some searching on this and other forums and it seems there are several brake light issues that W164 owners have dealt with. One thread recommended this
for under $20, part# 164 826 00 07, and another thread where a member just fiddled with the contacts and solved the problem. Would you think that's worth trying before ordering the repair kit(s)?
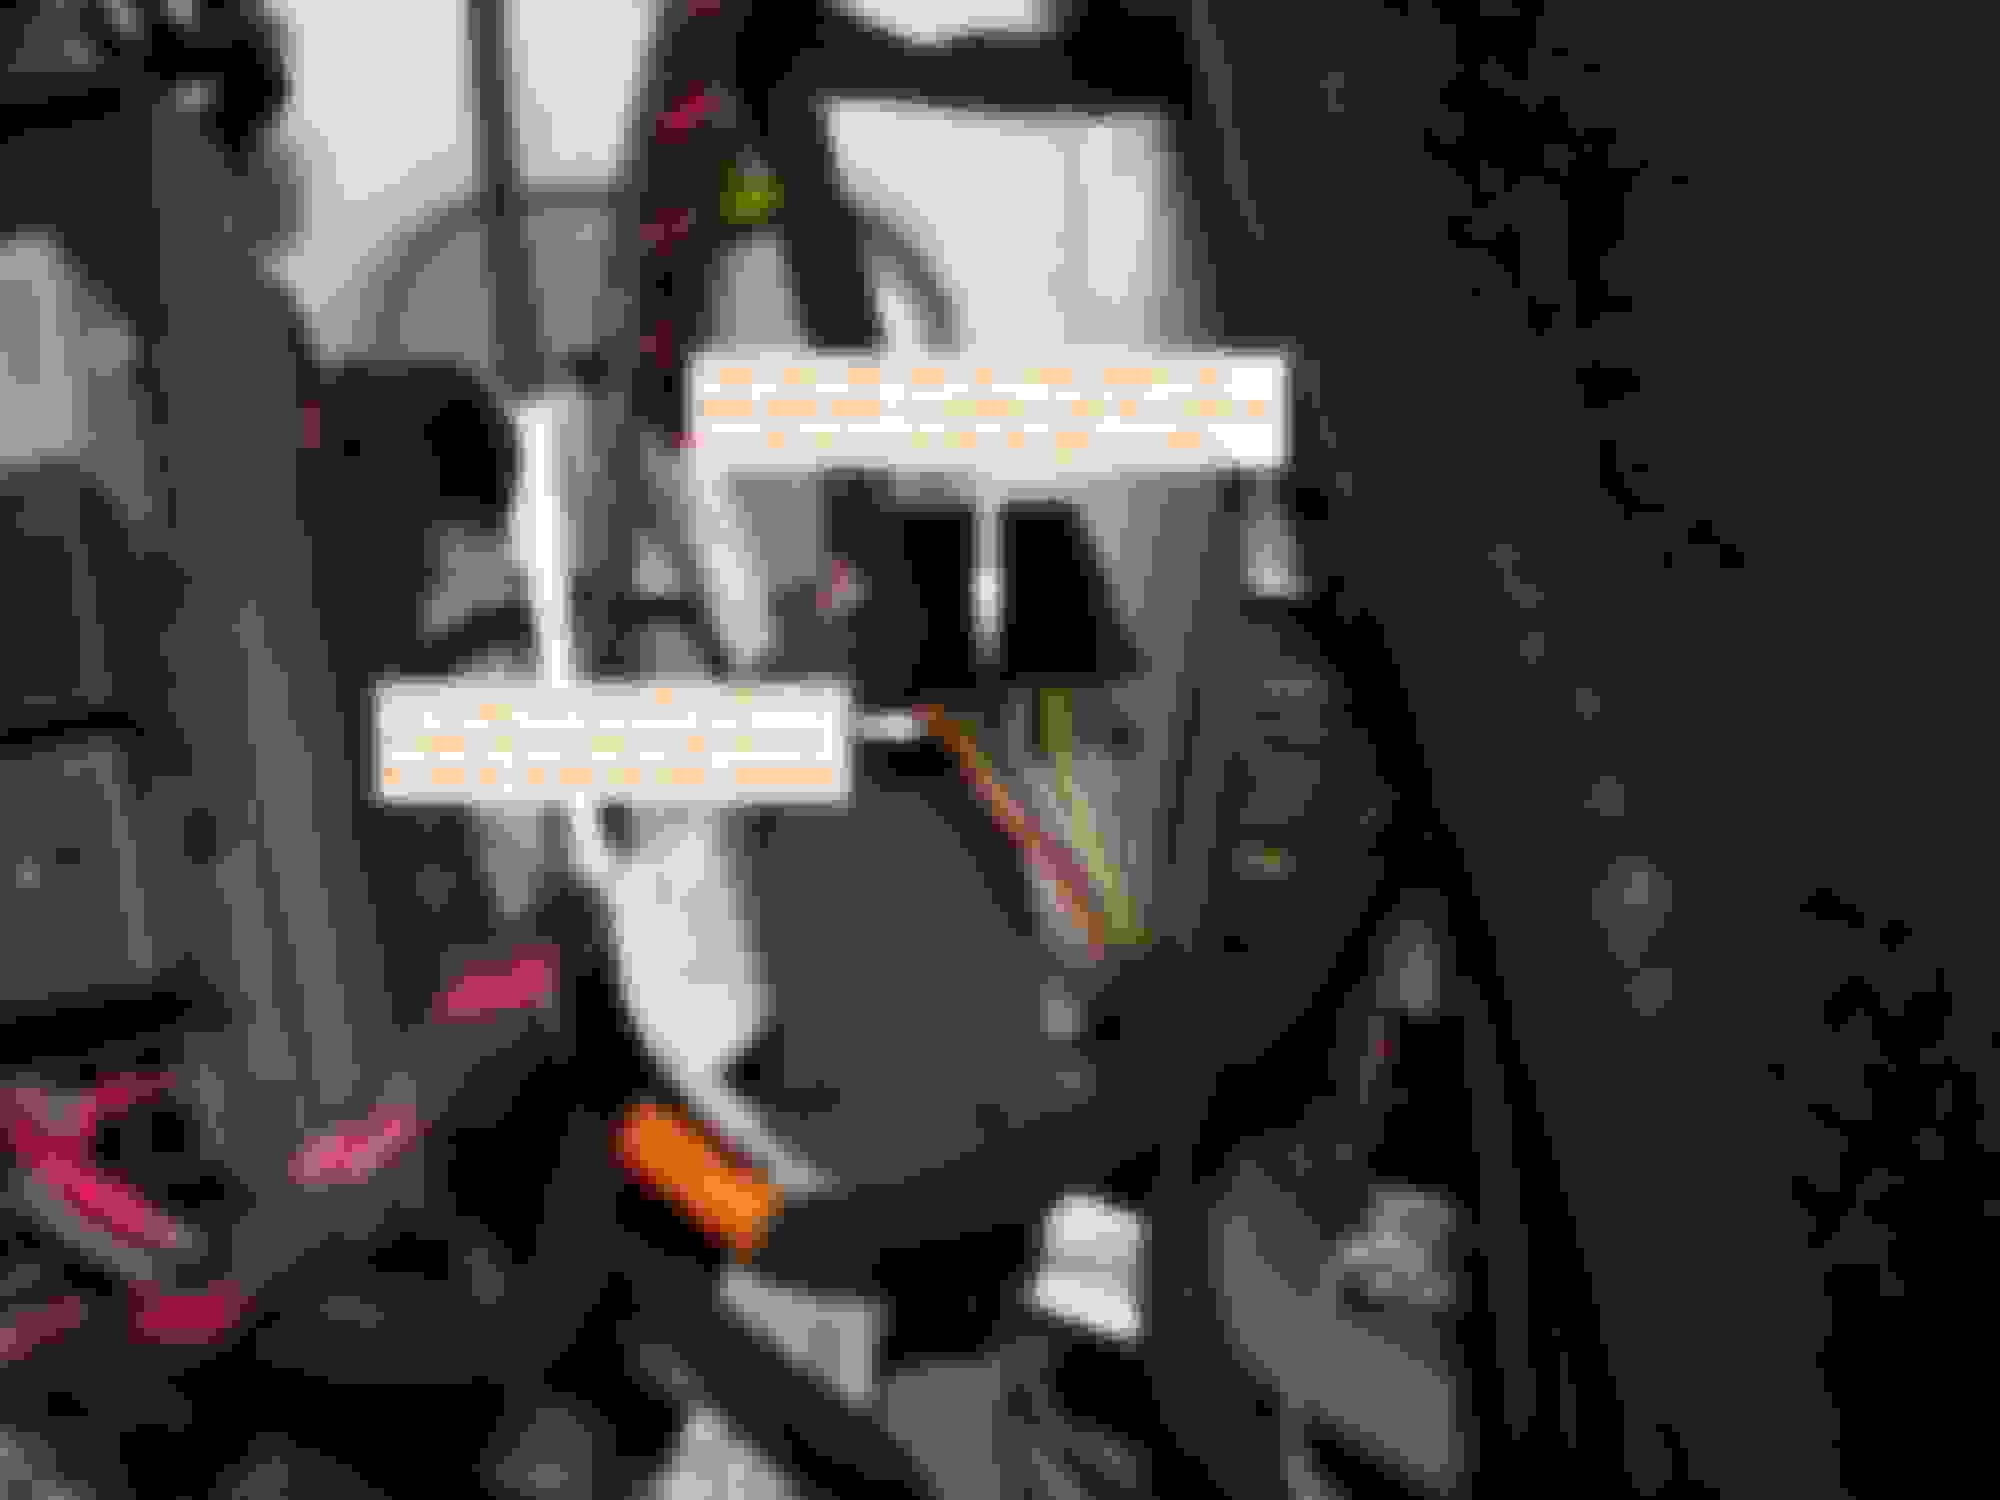
The repair kit does the trick. Do not cut and splice any wires to make things easier. Just follow instructions. You will need a thin pointed probe to extract the wires, see highlighted area in PDF.
Last edited by Maj. Dundee; Apr 11, 2018 at 04:42 AM.
...You will need a thin pointed probe to extract the wires, see highlighted area in PDF.
By "highlighted area", do you mean:
Note: Open locking catch otherwise the contacts may be irreparably damaged (AR00.19-0120-02B)?
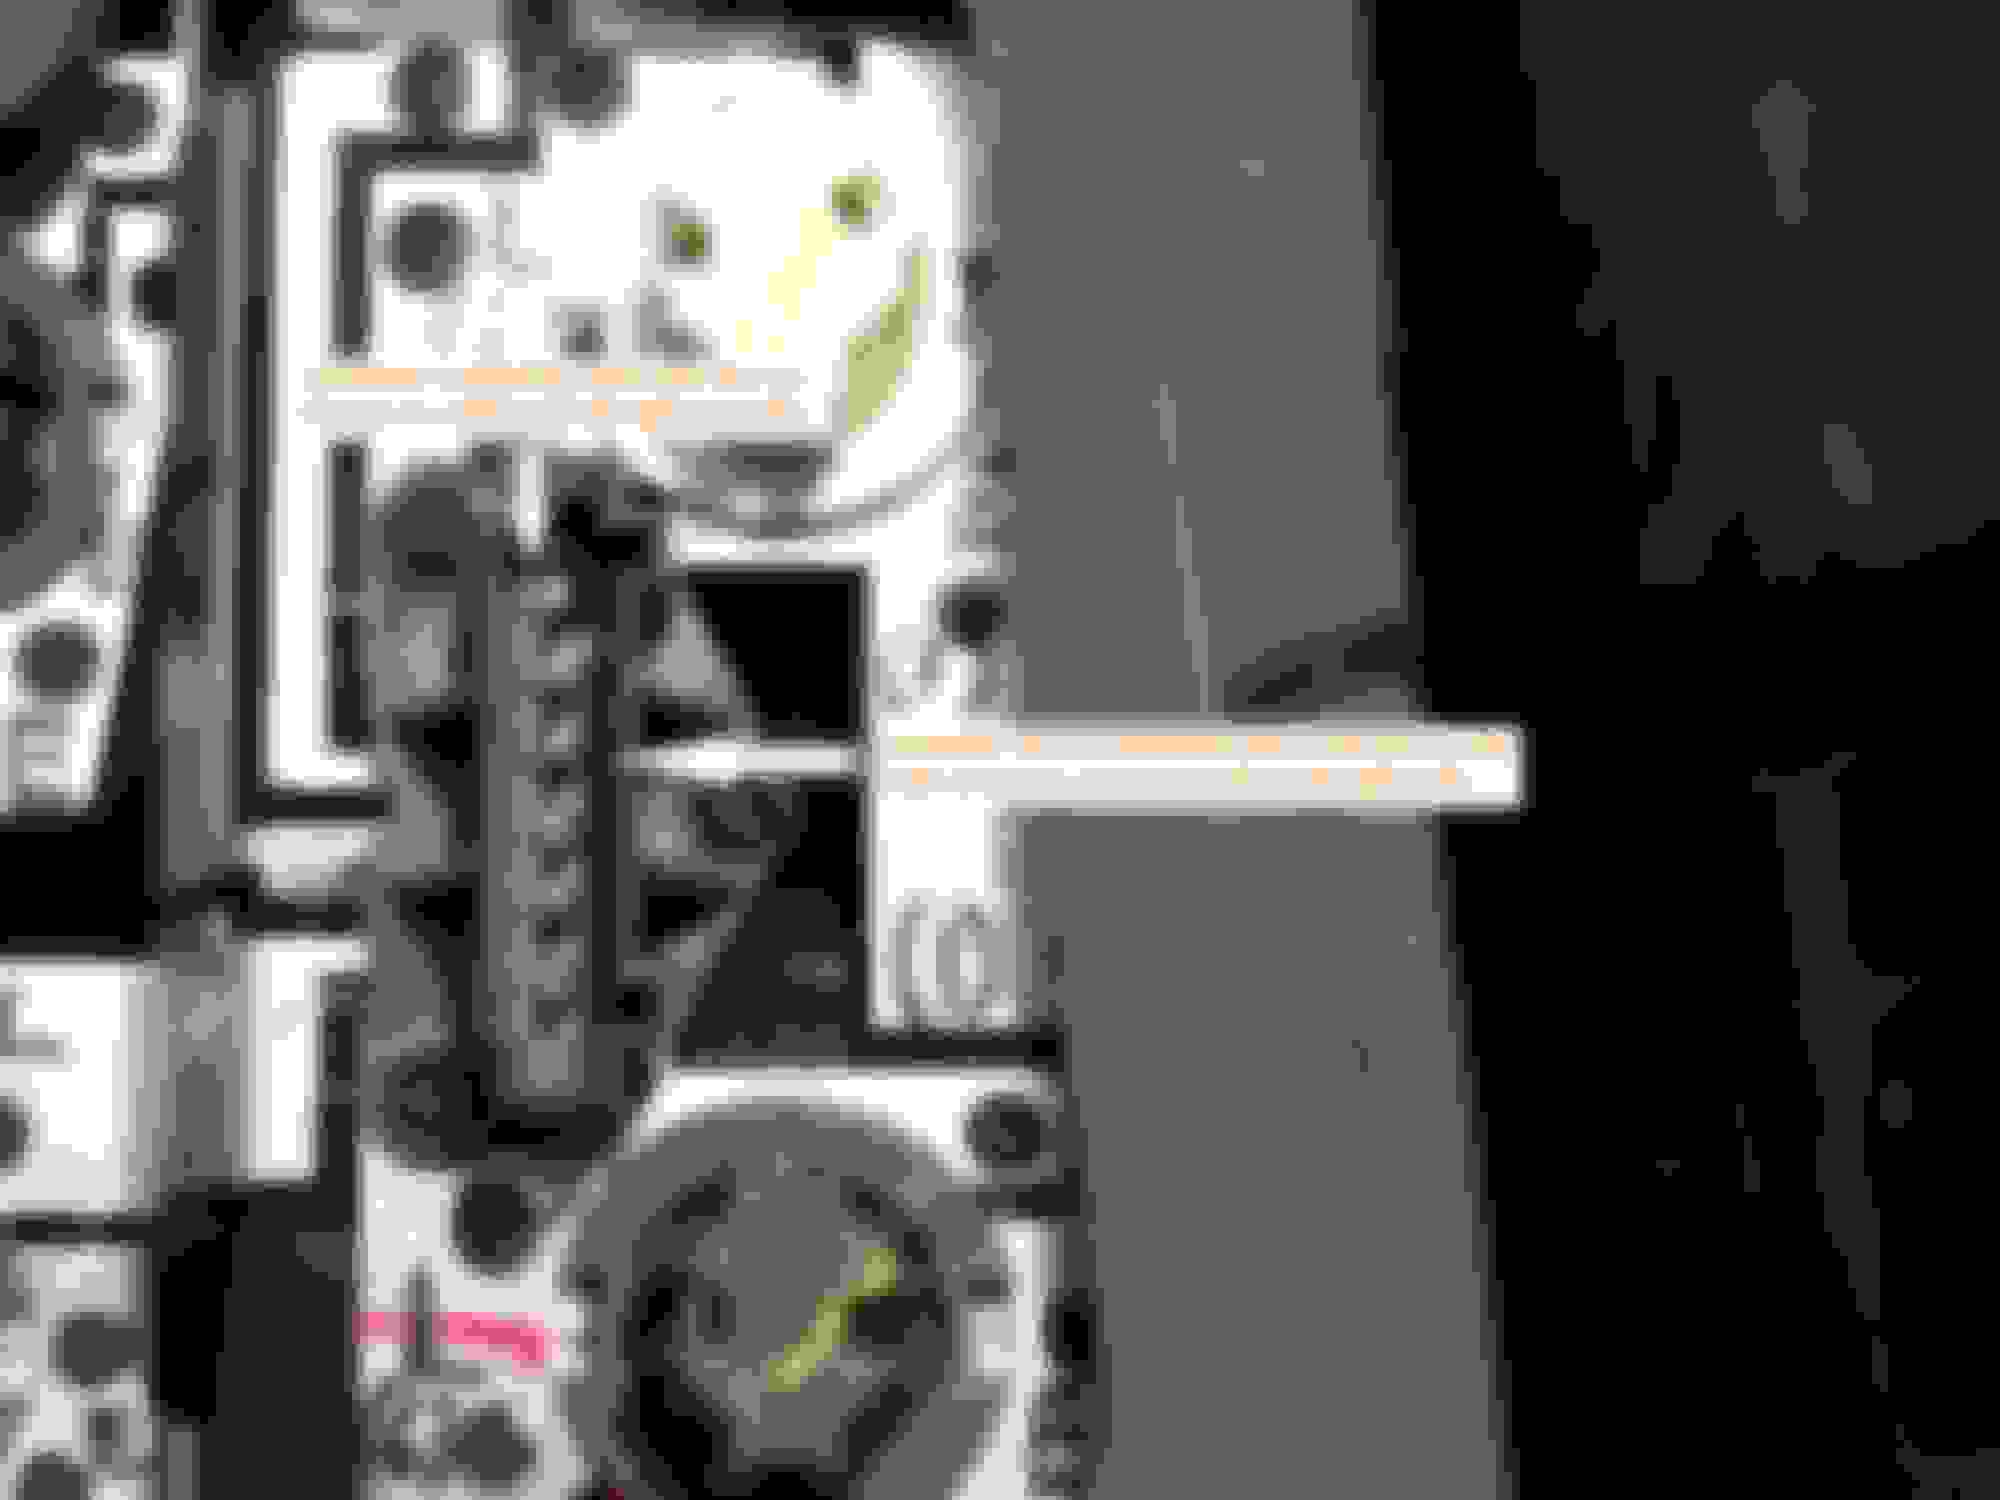
Also, I assume I need one repair kit for each socket that isn't working. Seems like the best way to begin is to replace bulbs to determine how many sockets are affected, no? And why does Figure 1 say "use pin 4 for right side/pin 3 for left side" while Figure 2 says "use pin 6 for left side/pin 1 for right side"?
'08 ML320 (W164), '05 Jeep Liberty CRD, '98.5 Ram2500 CTD
Timely thread... Yesterday I got the brake light warning right before pulling into the garage at home. Got my wife to observe, and sure enough, the right side was using a backup bulb (bottom light). Went to remove the faulty bulb, and noticed it was looking fine. Put it back in, tested it, and it was working again with no error. Drove to work this morning, and got the error after a lengthy red light session. Also smelled the smell of heated wire. As soon as it cooled down, started working again.
Thanks for the repair info!
Note: Open locking catch otherwise the contacts may be irreparably damaged (AR00.19-0120-02B)?
Also, I assume I need one repair kit for each socket that isn't working. Seems like the best way to begin is to replace bulbs to determine how many sockets are affected, no? And why does Figure 1 say "use pin 4 for right side/pin 3 for left side" while Figure 2 says "use pin 6 for left side/pin 1 for right side"?
Timely thread... Yesterday I got the brake light warning right before pulling into the garage at home. Got my wife to observe, and sure enough, the right side was using a backup bulb (bottom light).
Ahhh, so that's why I saw the left light up at the top while the right lit up at the bottom! Maybe I only need to repair the right side. Thanks Injuneer.
'08 ML320 (W164), '05 Jeep Liberty CRD, '98.5 Ram2500 CTD
Indeed. From what I gather, at least on my wife's ML320, the top lamp is "primary" and a bottom lamp (perhaps the rear fog light element?) is the "backup" (not to be confused with reverse ) lamp.
2017 AMG C 43 (W205); 2019 E 300 (W213); 2008 ML 320 CDI (W164)
"Left Brake Light error message on centre display" repair.
"Left Brake Light error message on centre display" repair.
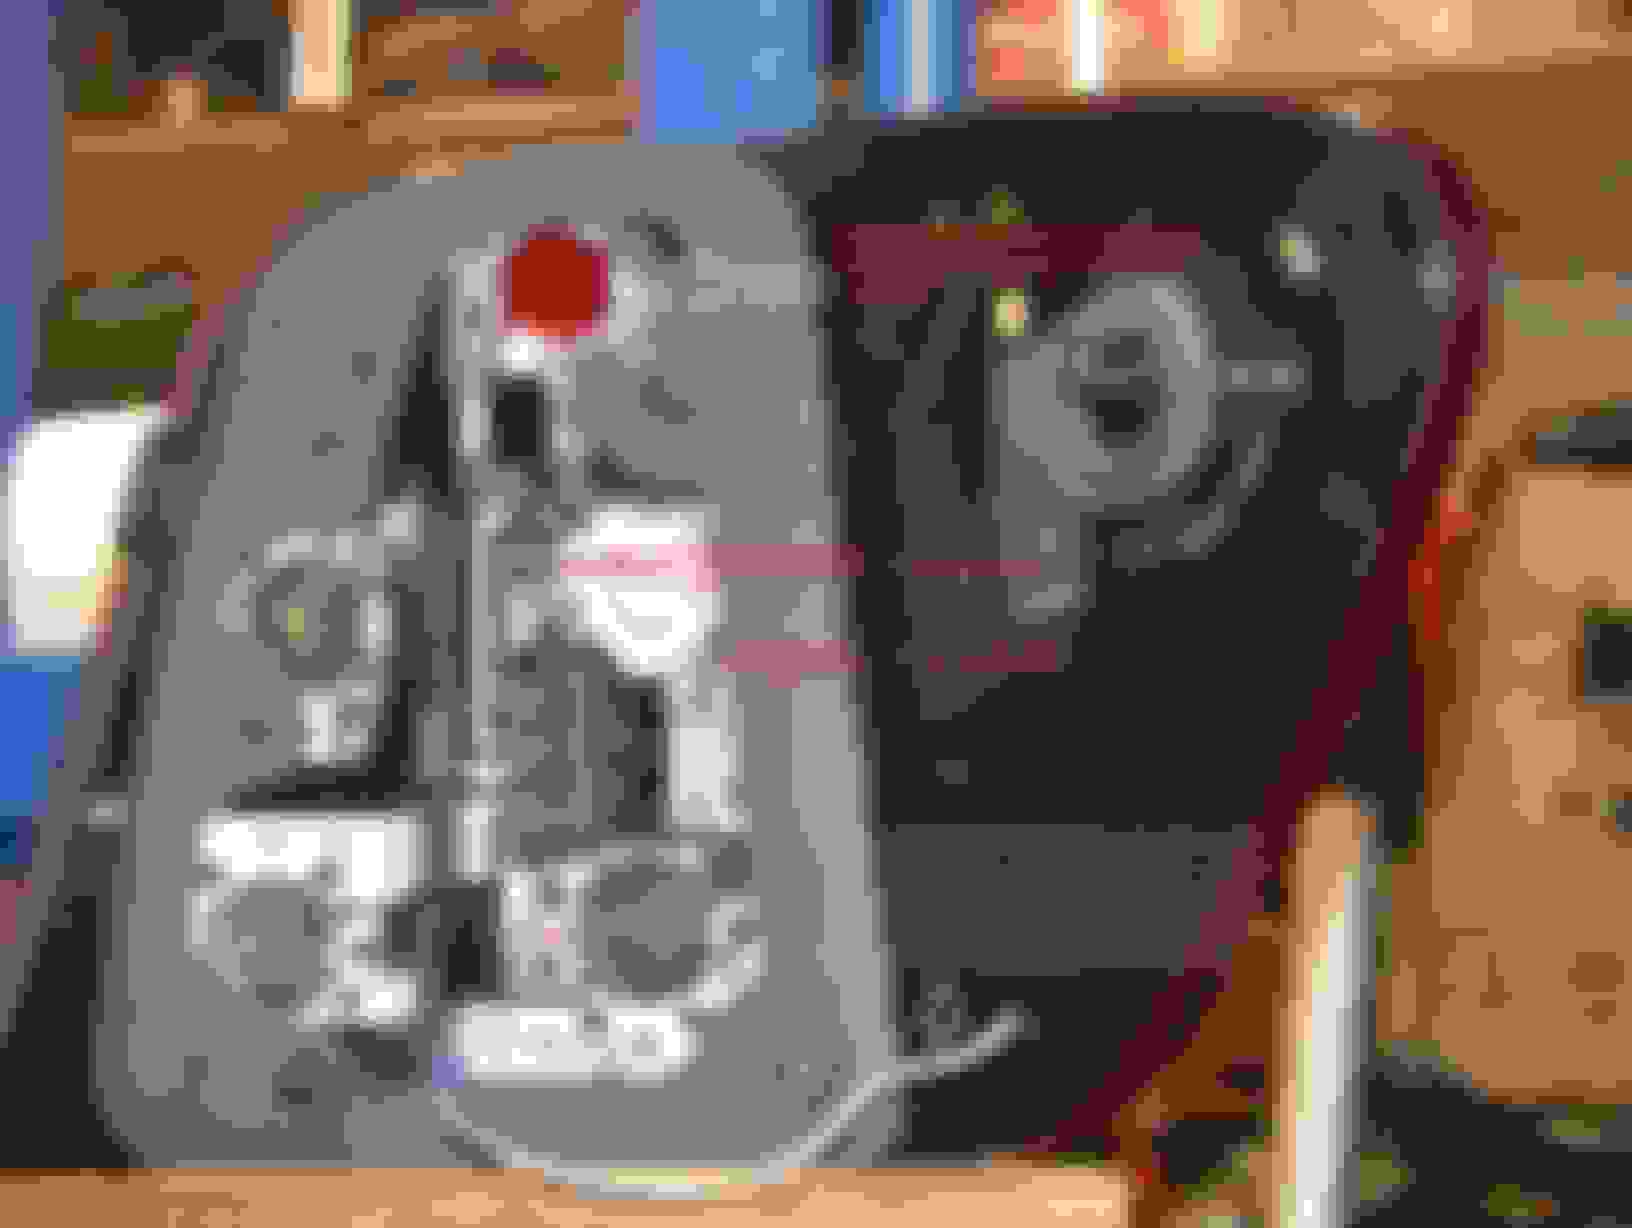
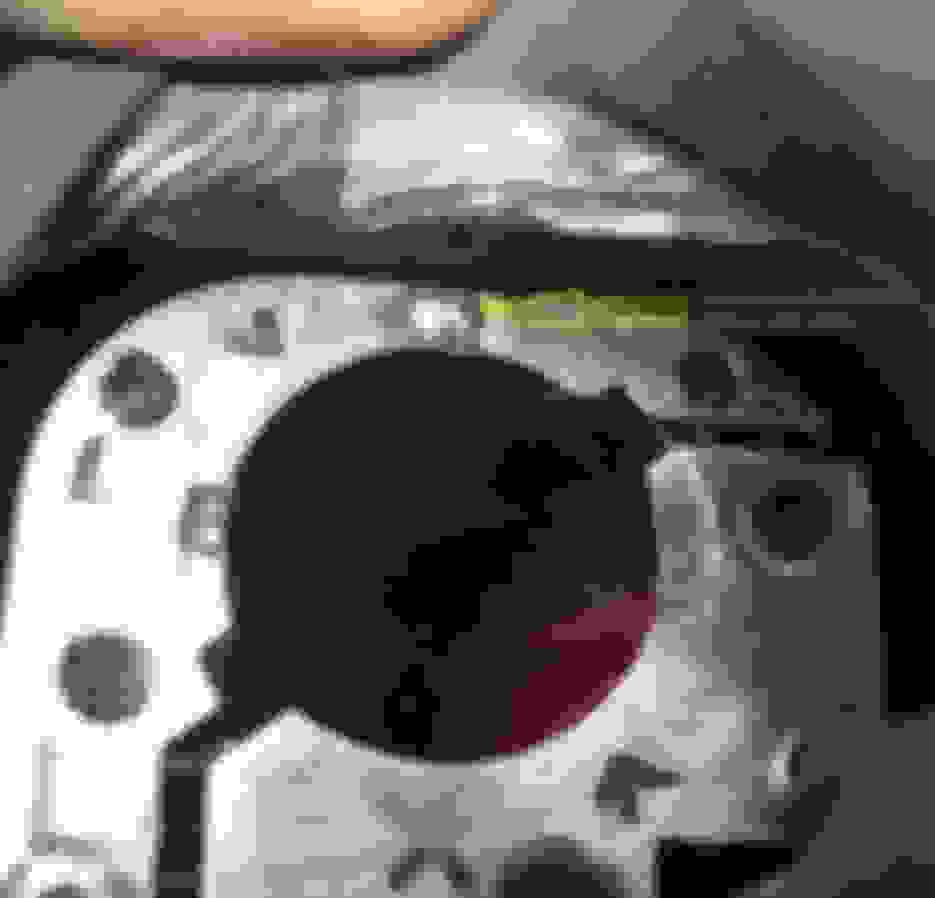
Left Hand side tail light assembly elevation. Brake light bulb holder (top) removed.
Locations where bulb holder tabs come to rest.
Corrosion pit marks which cause brake light malfunction.Bulb holder
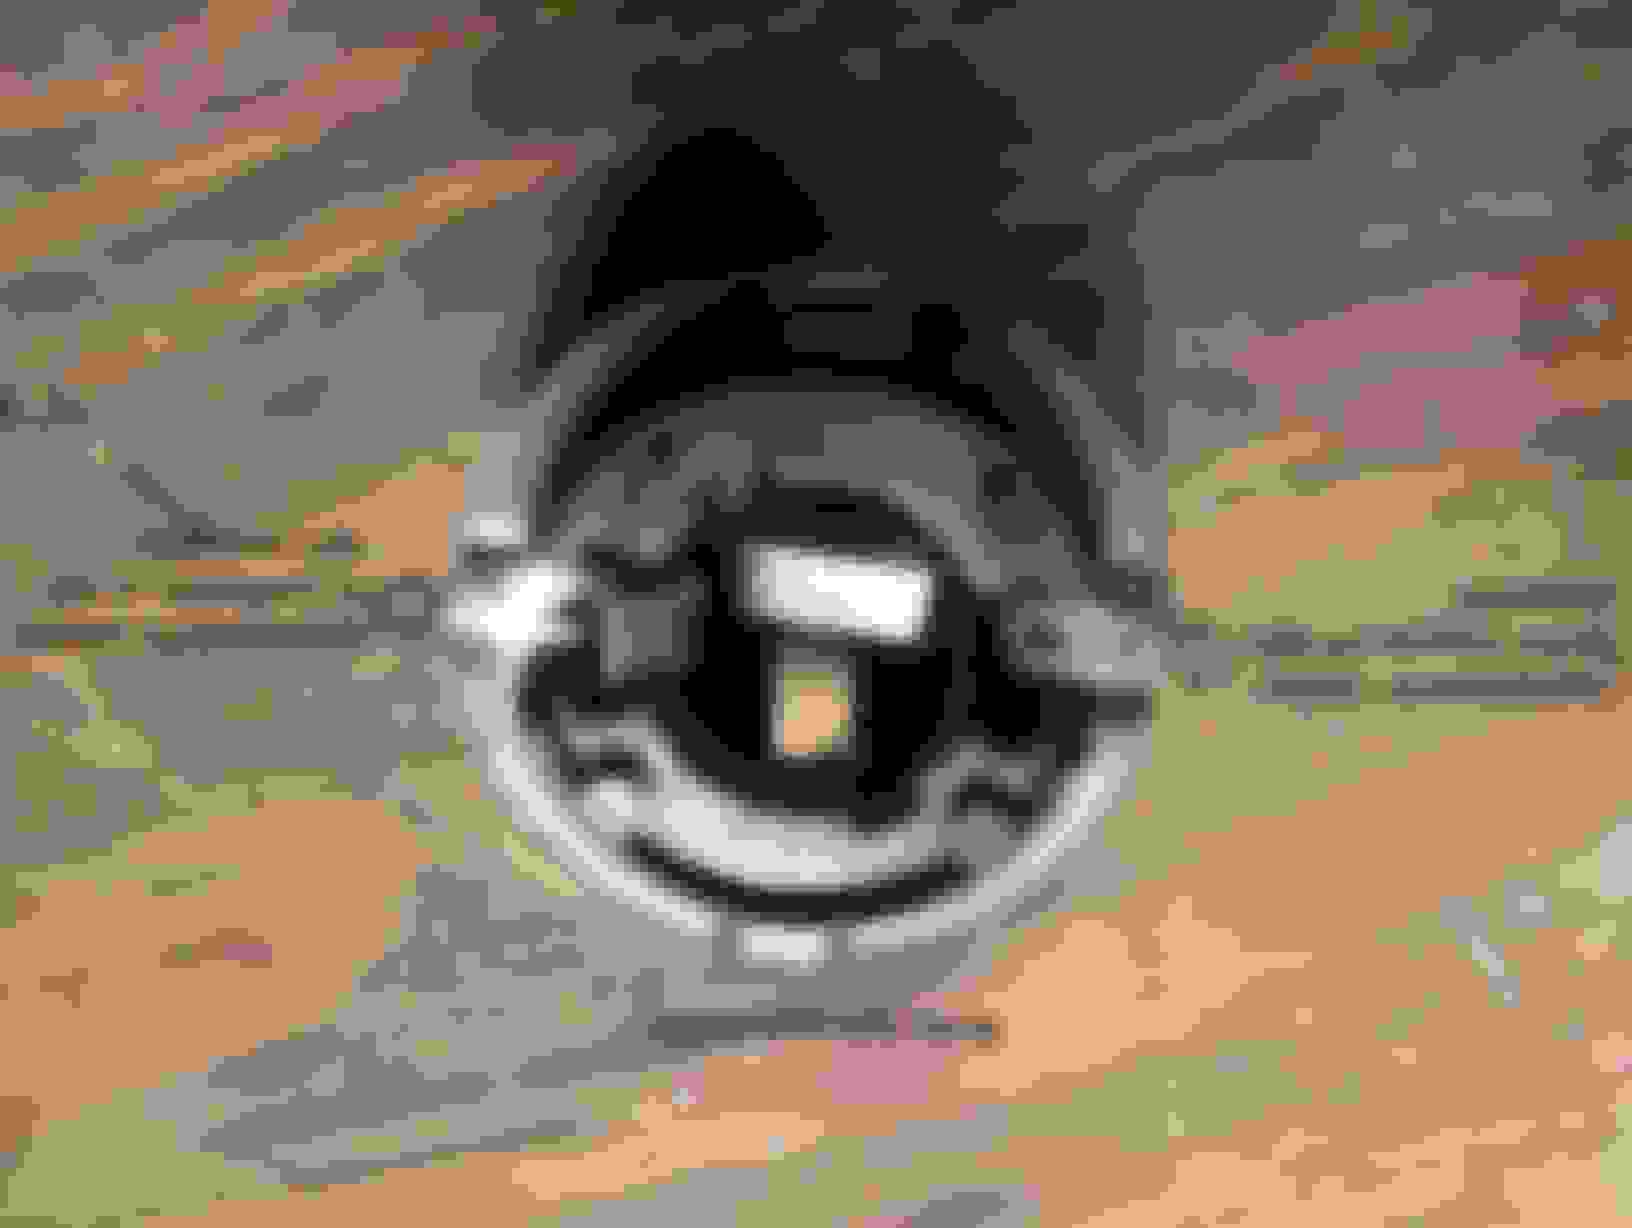
Bulb holder with bulb removed. (Not sure why this photo is upside down. This is not how it was posted.)
Pit mark slightly larger after cleaning with dremel.
Pit mark filled with solder.
Solder bump filed down to be almost flush with plate. Bump made smooth for bulb holder tab to easily slide into location.
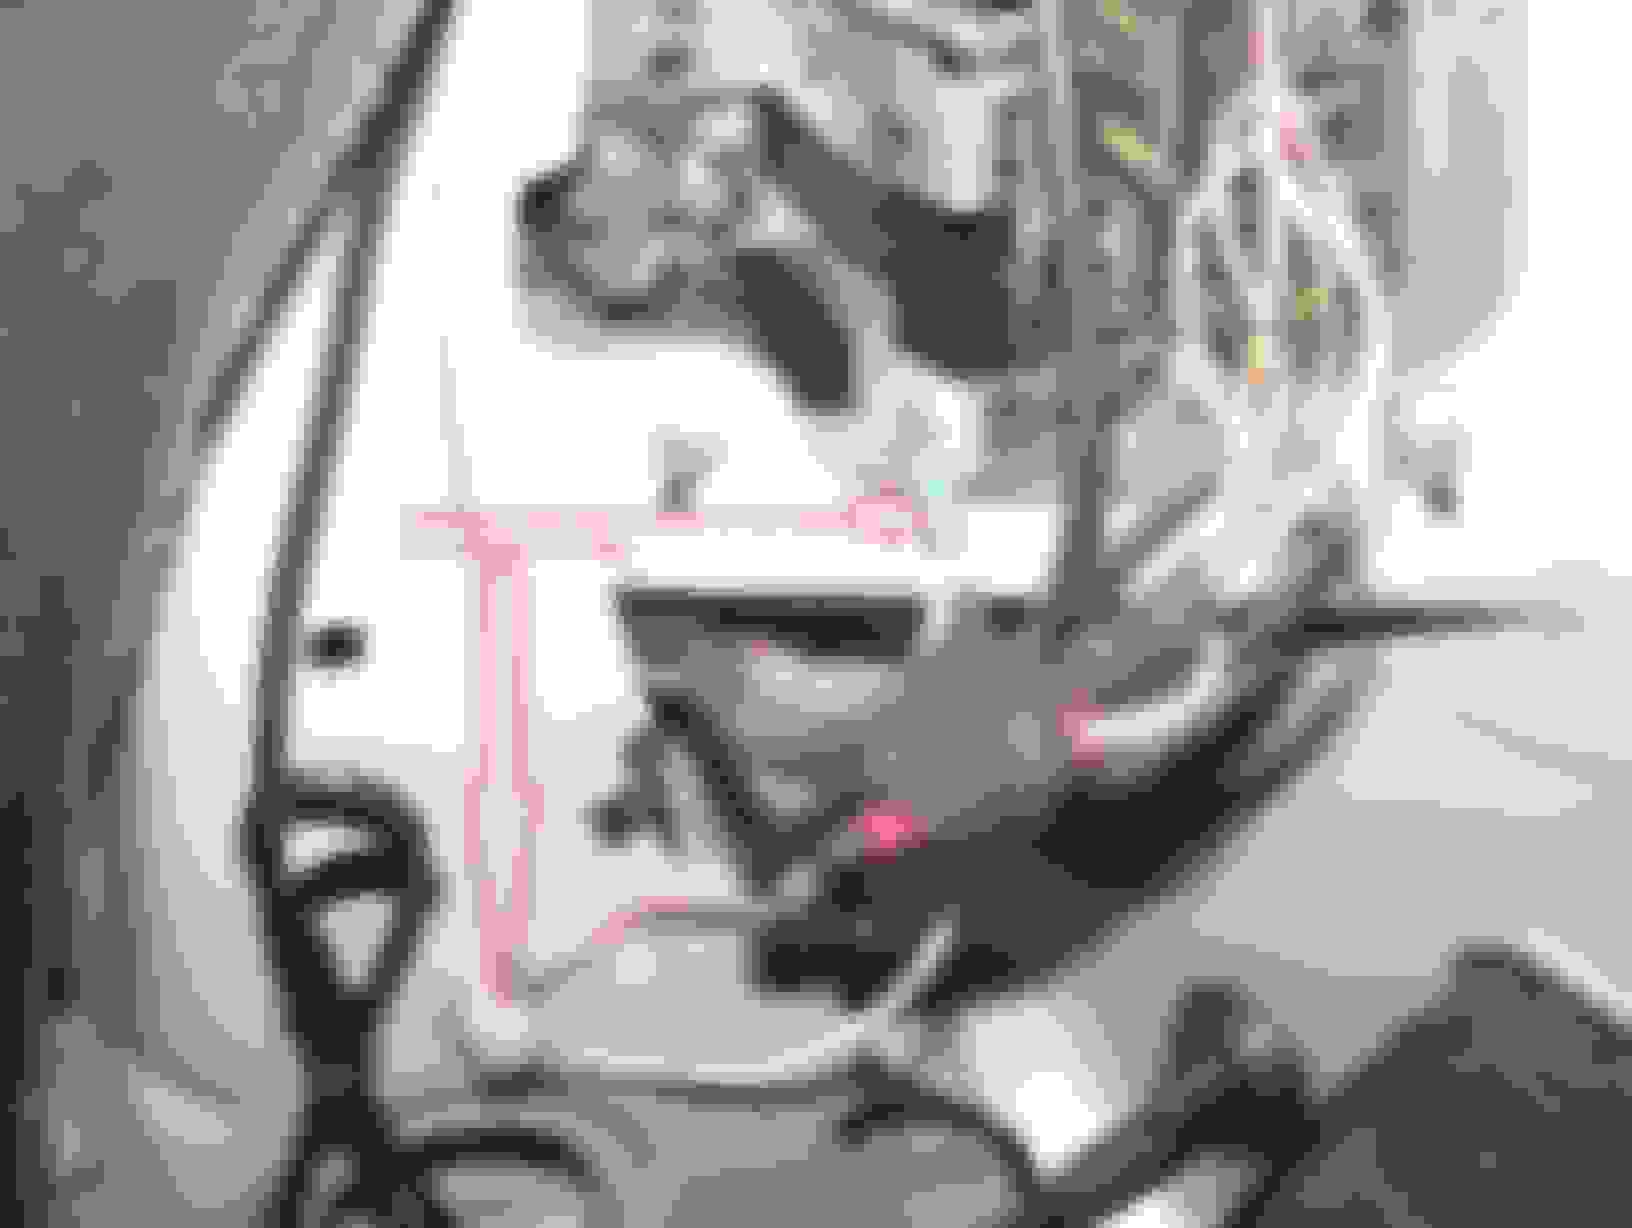
Inside view of left hand side tail light assembly installed. Additional earth wire installed.
Brake light (top light) working properly. When this light (top) doesn't light up when the brakes are applied, a portion of the bottom tail light will further brighten up instead. This photo shows the tail lights (bottom lights) in their usual brightness for when the brake light is working as it should.
2017 AMG C 43 (W205); 2019 E 300 (W213); 2008 ML 320 CDI (W164)
Tail light brightens up when brake light malfunctions
Brake lights on both sides working the way they should. Tail lights on both sides are evenly bright when the brake lights are working properly.
The left side brake light at the top is not working. To compensate for this brake light malfunction, the inside half of the left side tail light becomes brighter still when the brakes are applied. The brake light and tail light on the right side are operating normally.
2017 AMG C 43 (W205); 2019 E 300 (W213); 2008 ML 320 CDI (W164)
Tail Lamp Harness Repair Kit - A1648260007
Alternatively a Tail Lamp Harness Kit can be installed. The information below may be useful when installing the kit.
Brake Tail Lamp Repair Kit - 164 826 00 07.
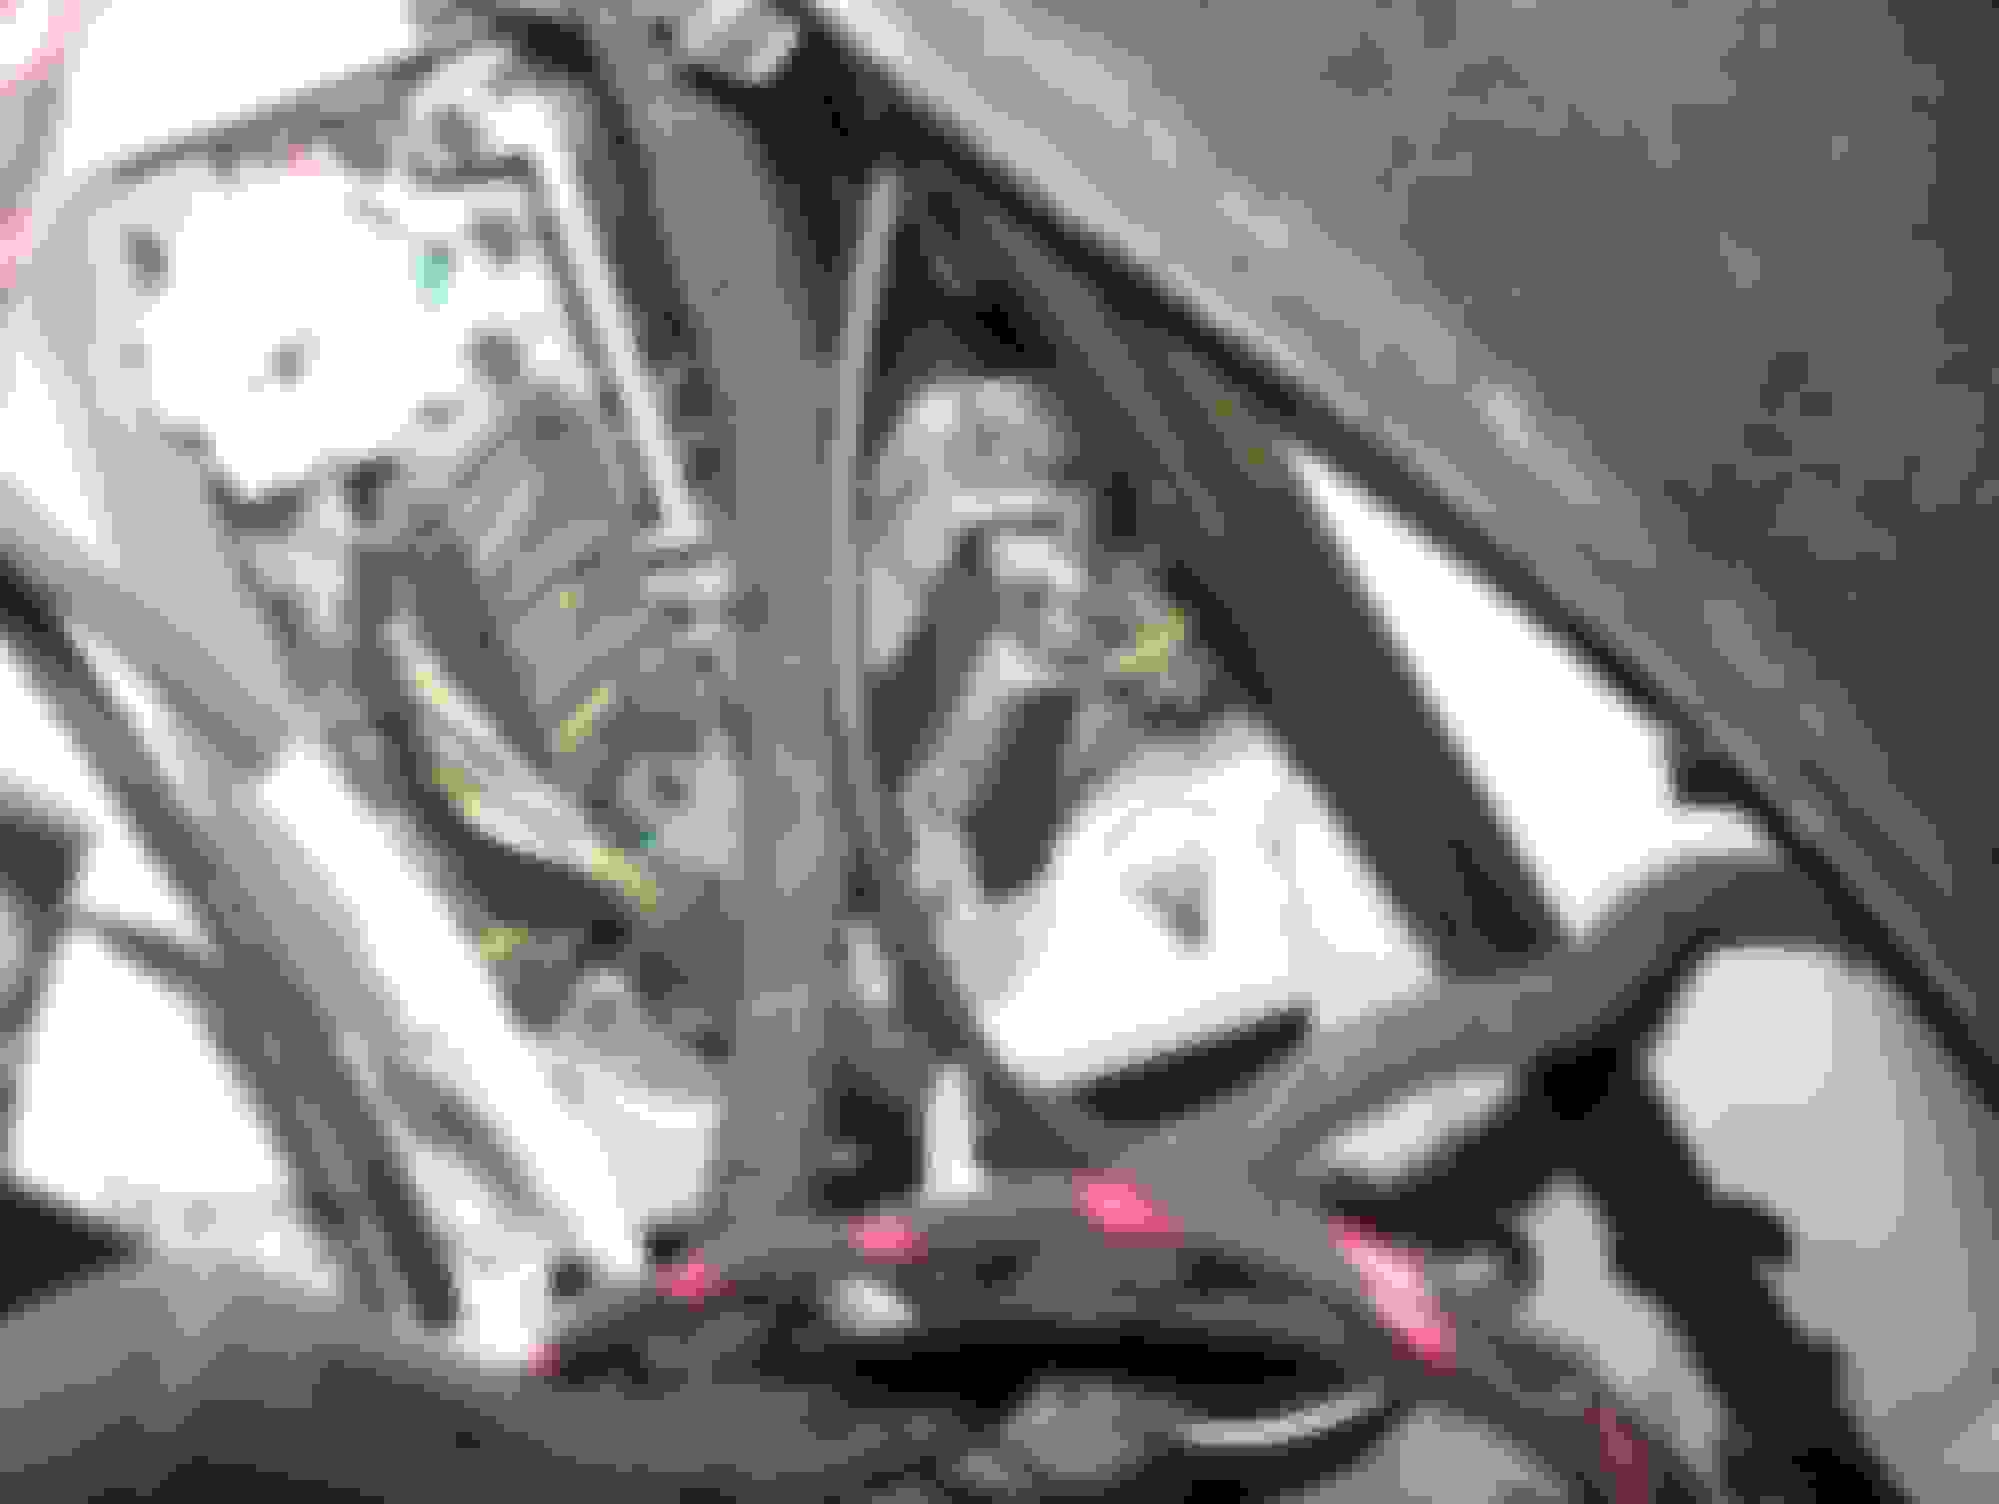
Left Hand side tail light assembly.
For Left Hand side tail light assembly.
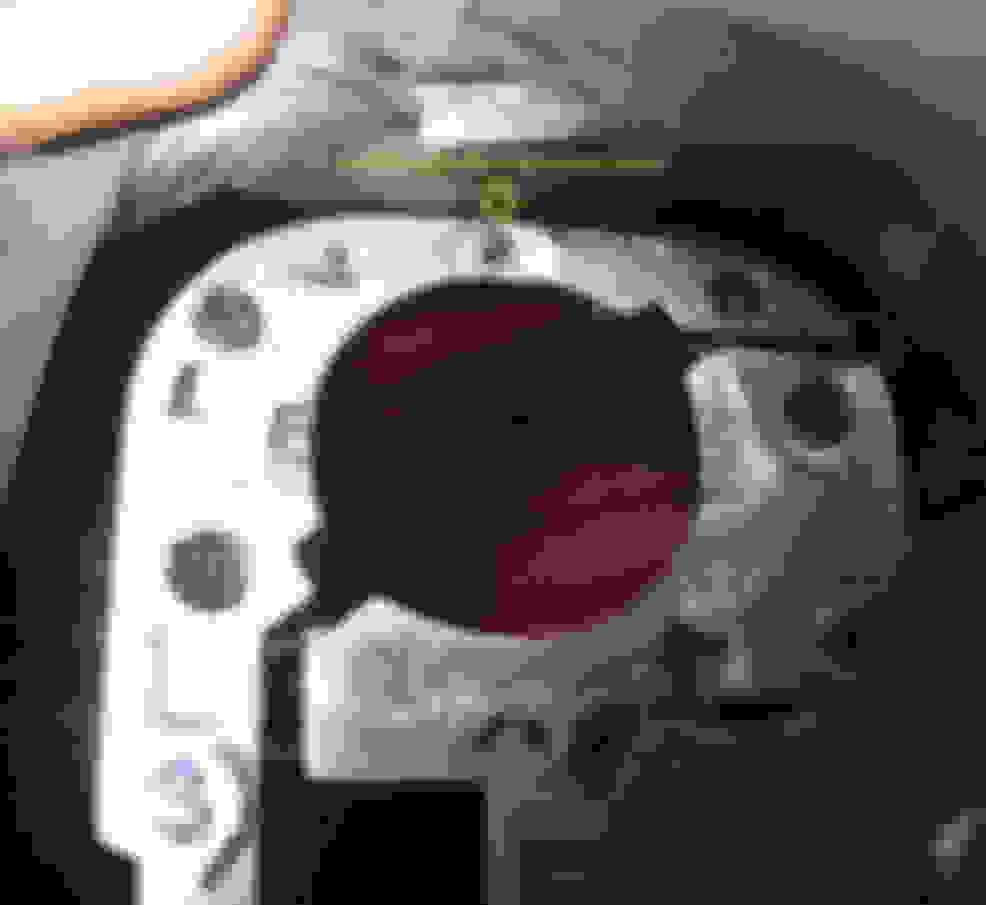
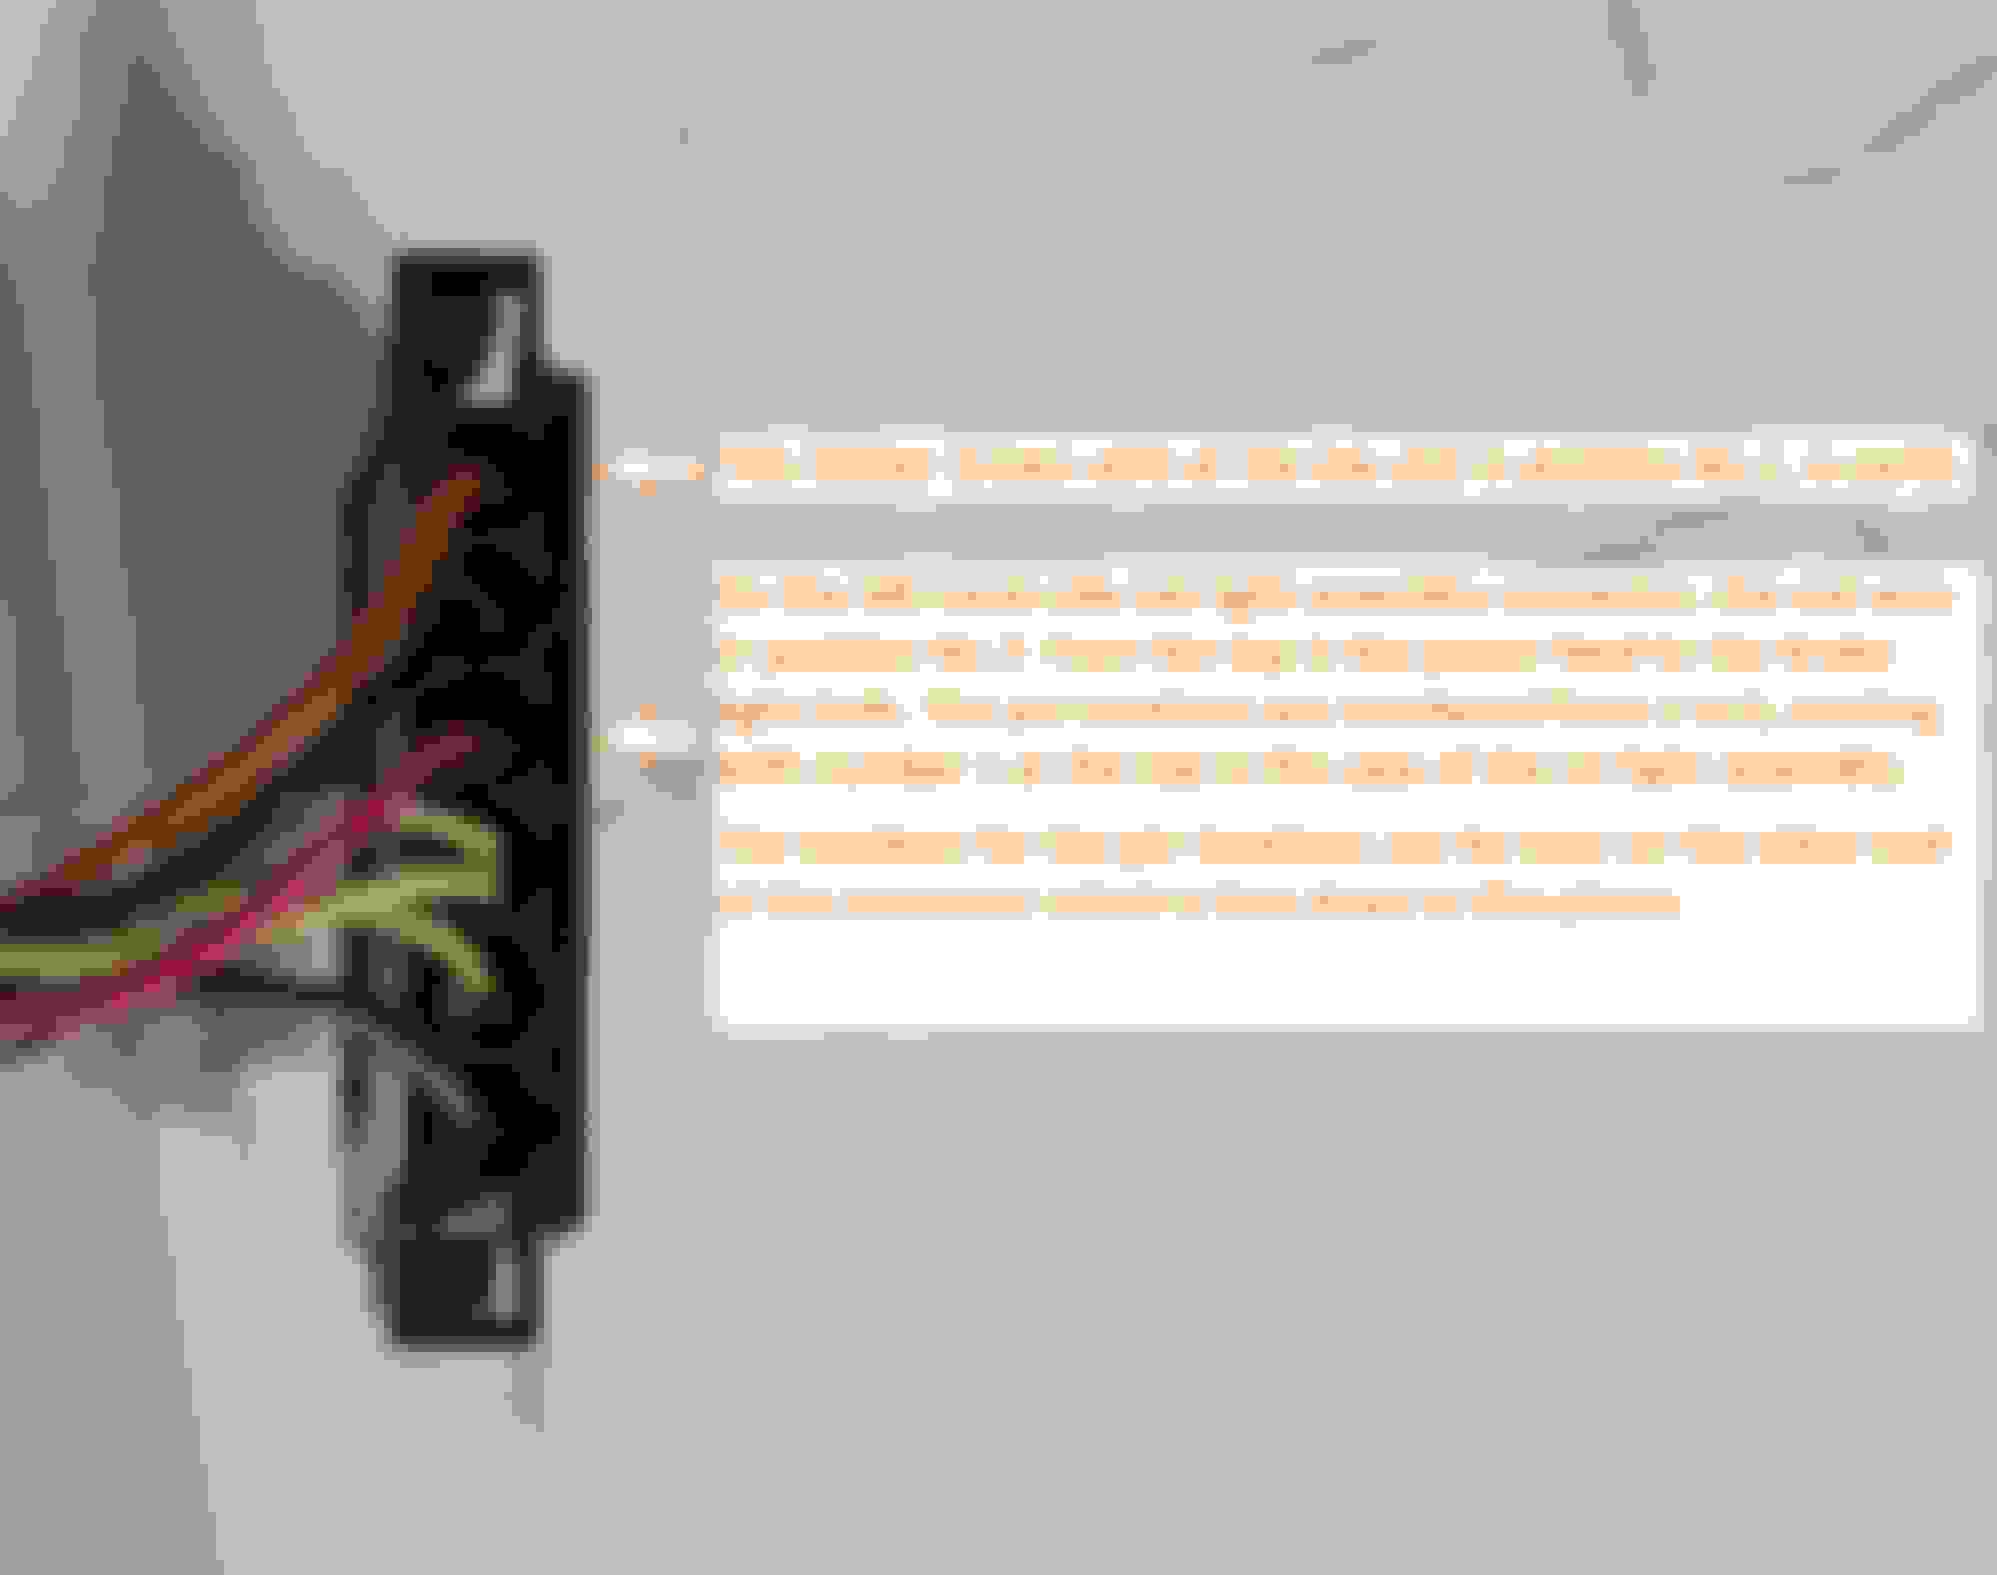
Left Hand side tail light assembly. Pin numbering 1 to 6, starting with No.1 at the top. The brake light pin is 3rd from the top, pin No. 3.
Right Hand side tail light assembly. Pin numbering 1 to 6 but starting with No.1 at the BOTTOM. The brake light pin is still 3rd from the top but the pin number is No.4.
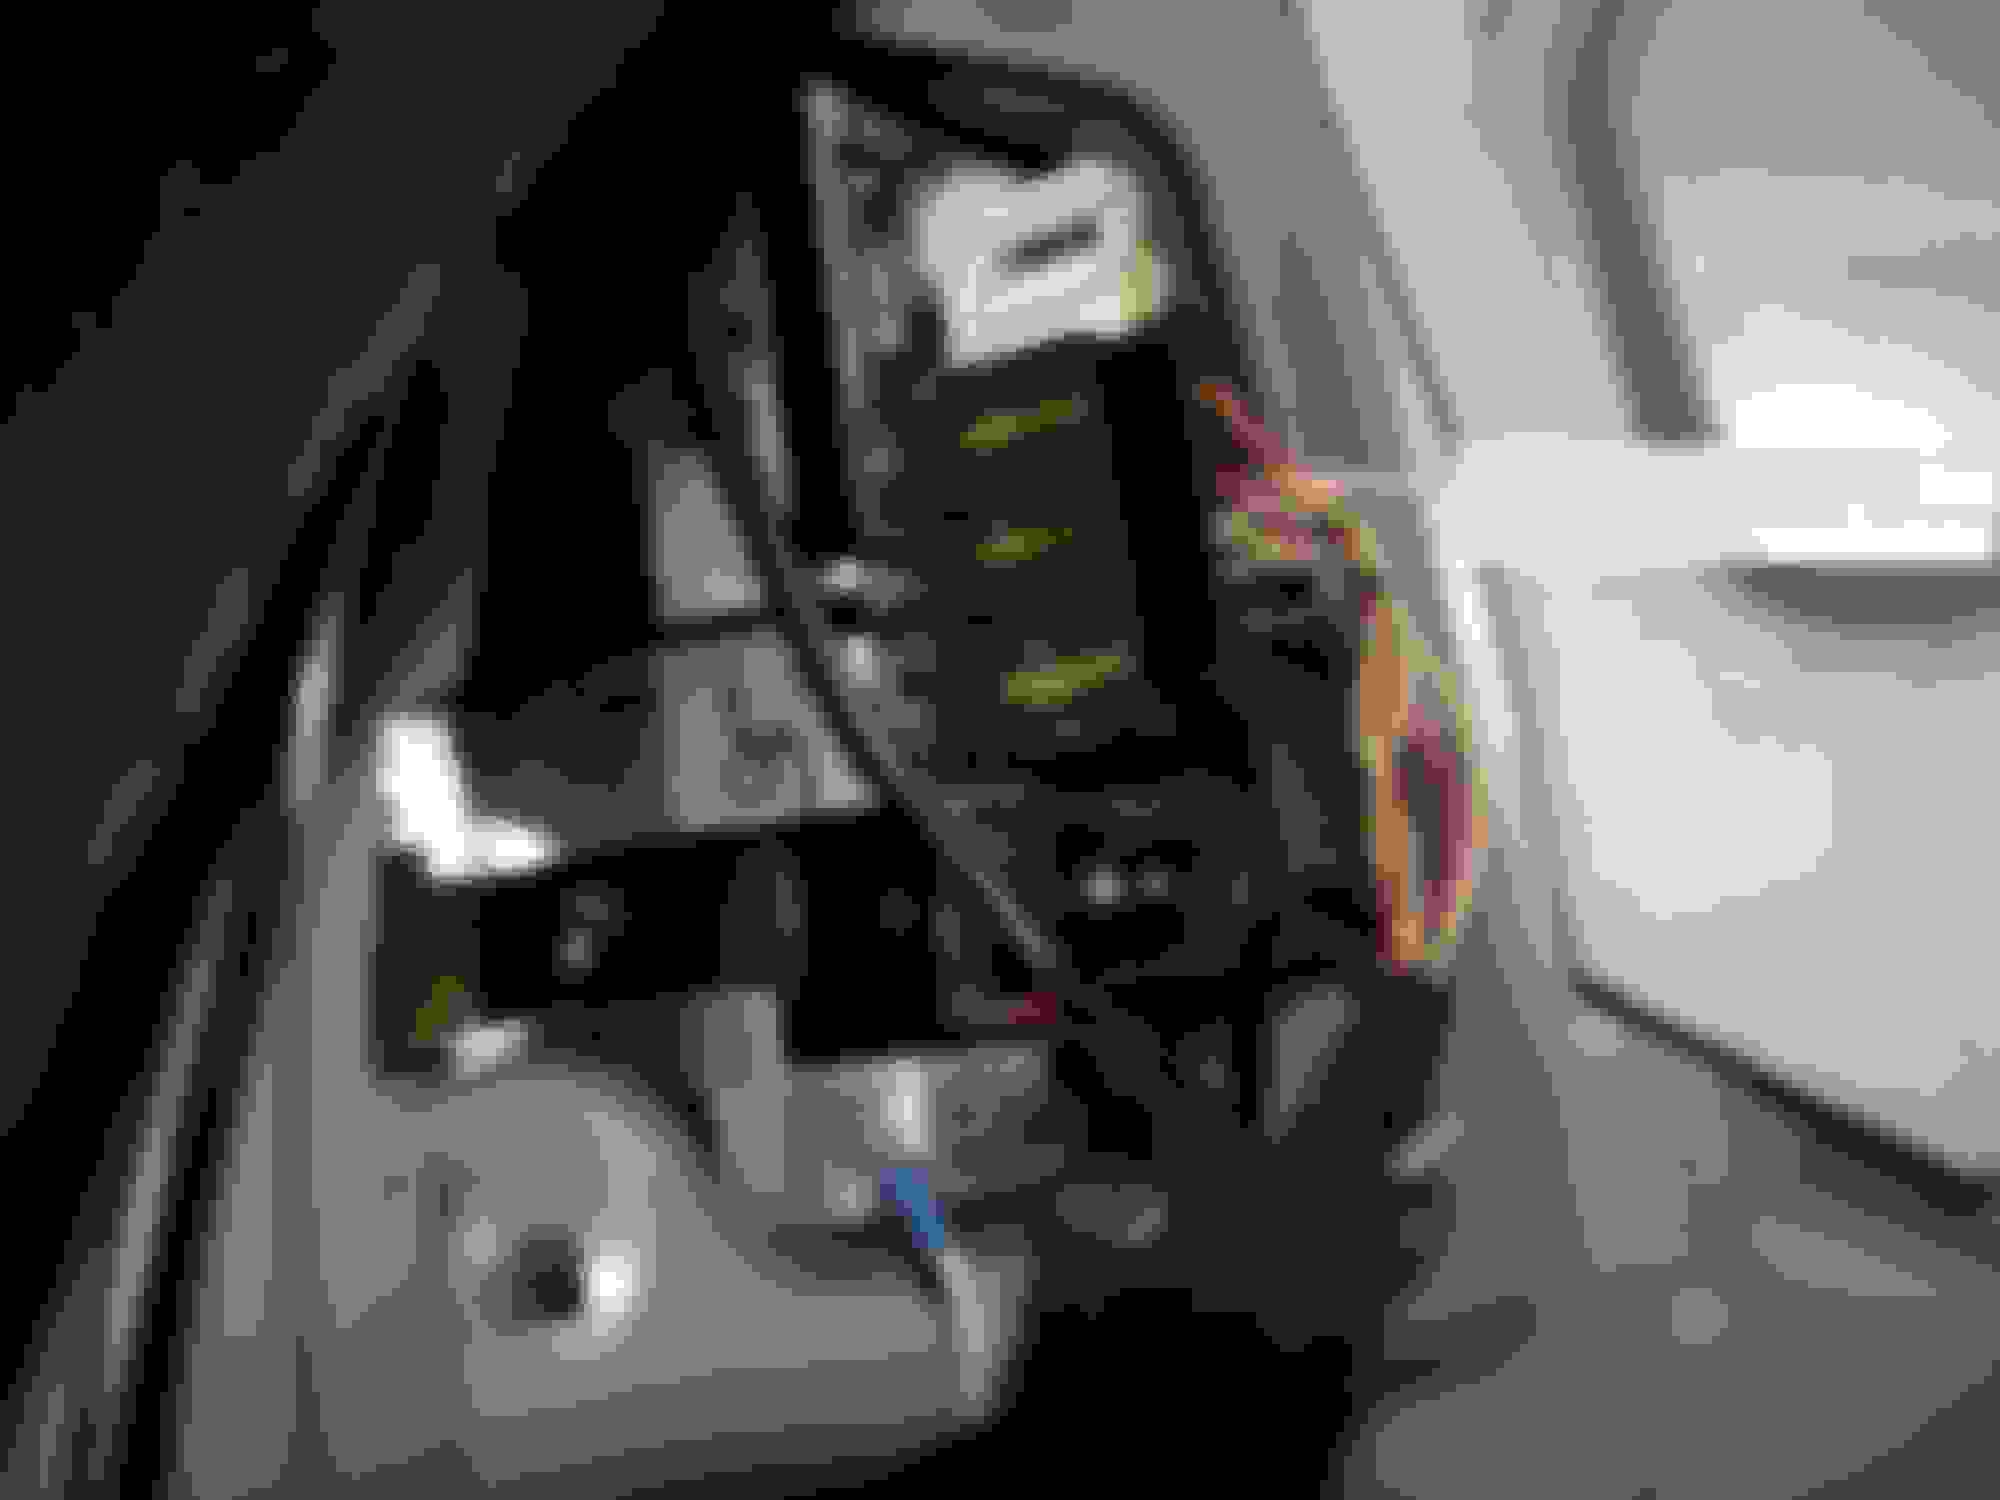
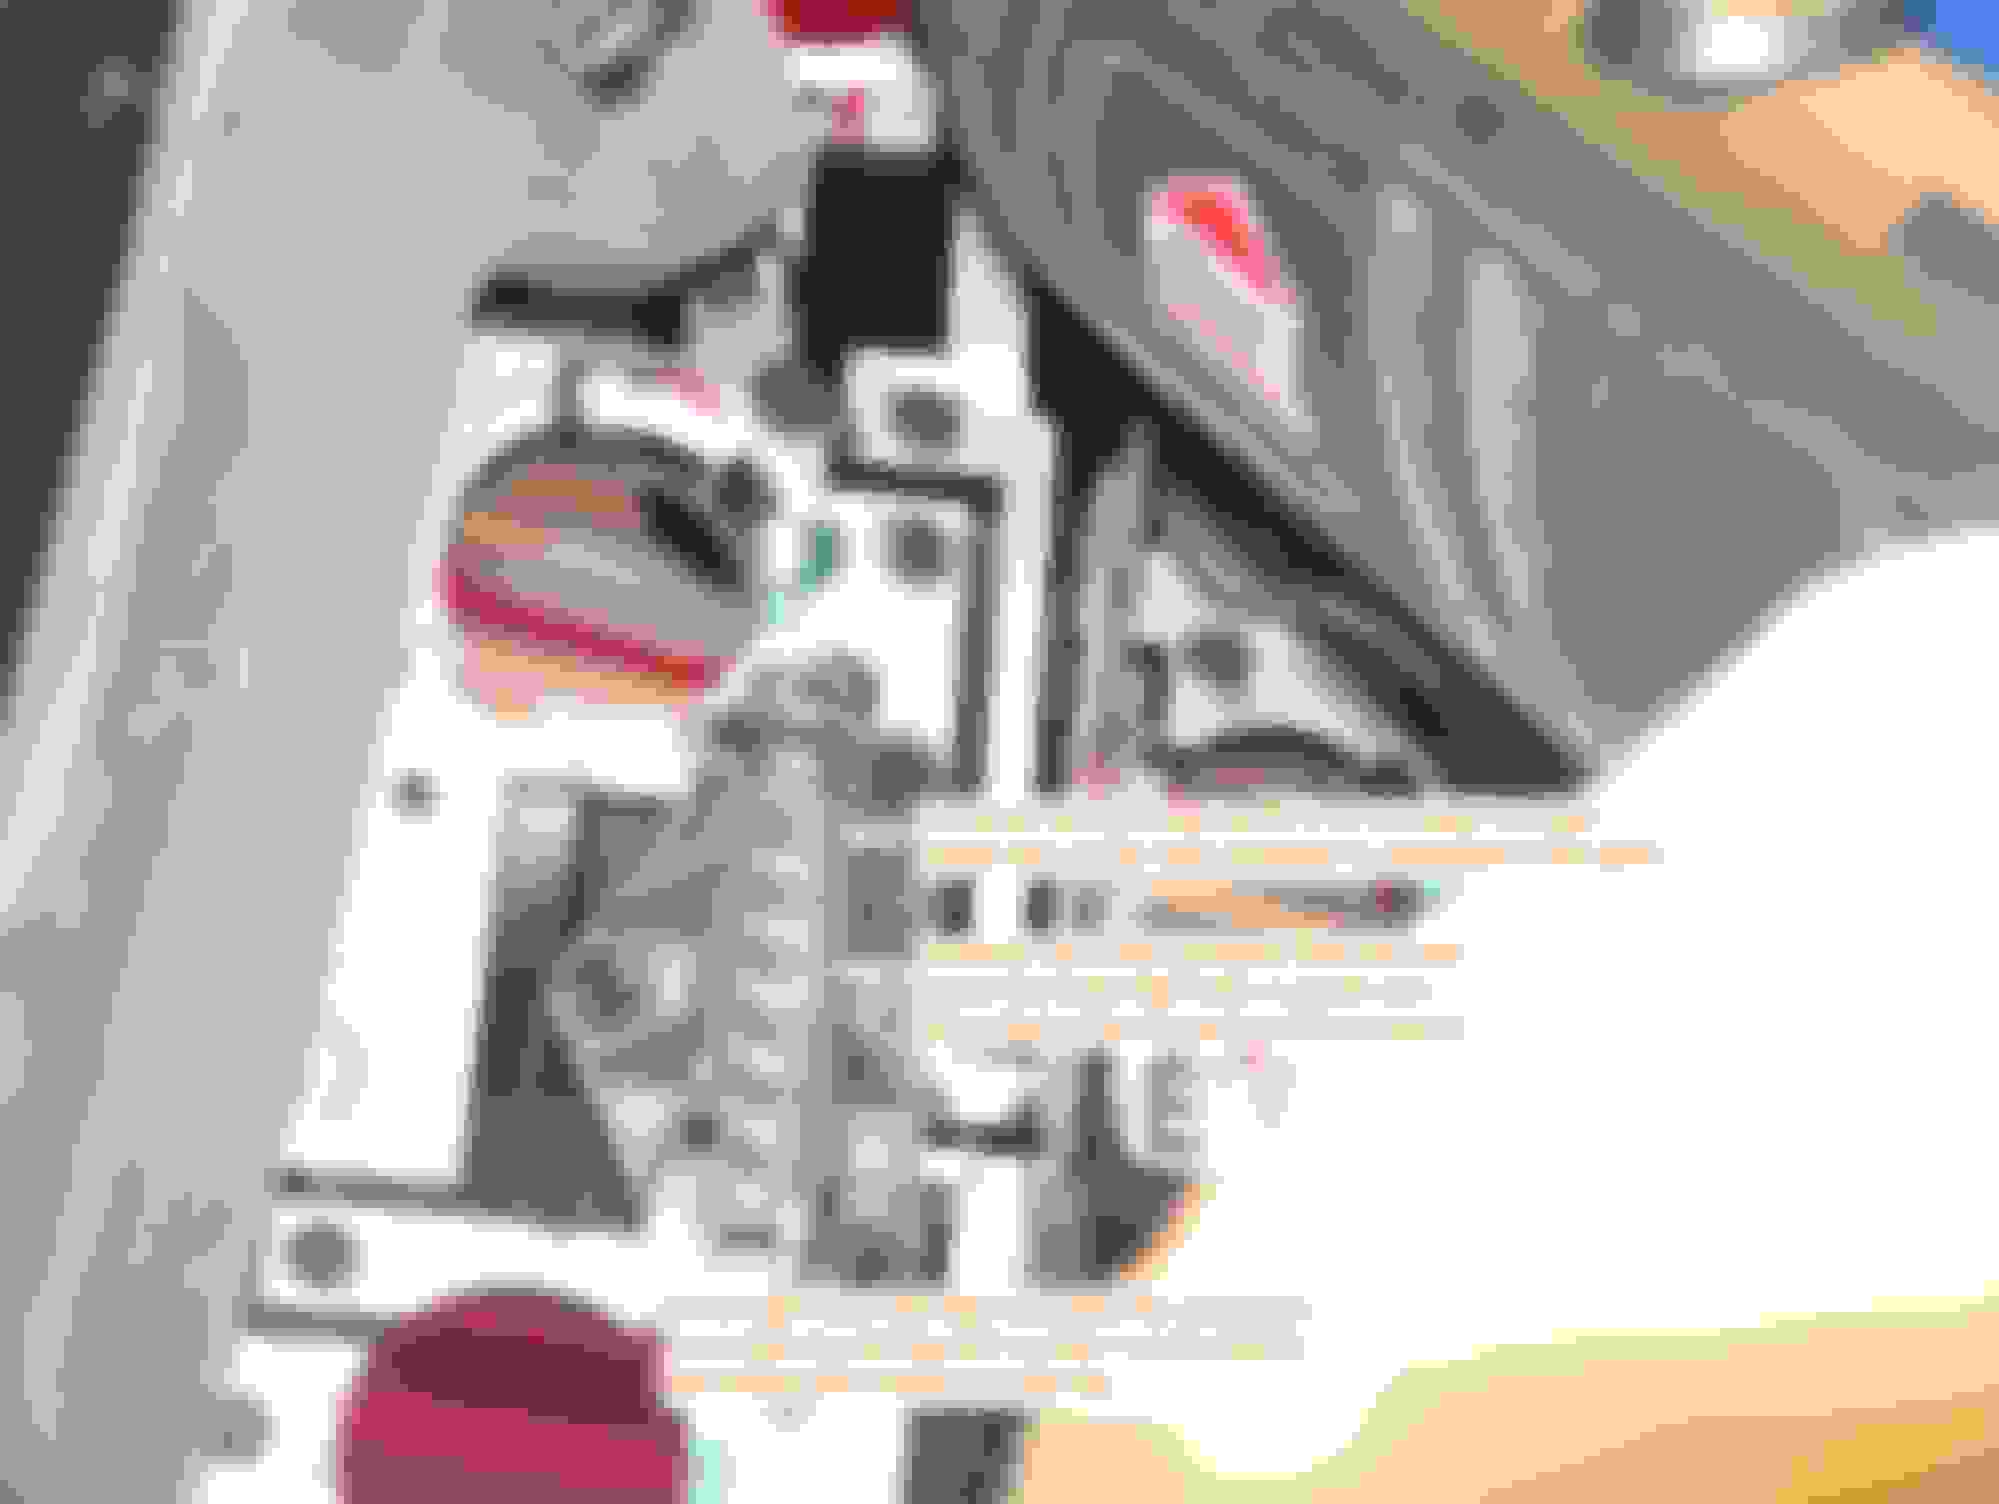
Right Hand side tail light assembly. Connector installed.
Right Hand side tail light assembly with connector pulled off in order to view the wires more clearly.
2017 AMG C 43 (W205); 2019 E 300 (W213); 2008 ML 320 CDI (W164)
If you fill the arc hollow with solder (a lead-tin alloy), the repaired spot should be a lot more resistant to arc corrosion than the original galvanized plate. If the repair was done by a dealership with a Tail Lamp Harness Repair Kit instead, then the arc hollow plays absolutely no role.
If you fill the arc hollow with solder (a lead-tin alloy), the repaired spot should be a lot more resistant to arc corrosion than the original galvanized plate. If the repair was done by a dealership with a Tail Lamp Harness Repair Kit instead, then the arc hollow plays absolutely no role.
i used the repair harness but i did it the old way and not the correct way of not splicing.
Thanks for the deets, 2008 ML 320 CDI!
You the man!
All sorts of weirdness with my ML350 today and I had to place an order for some things so thought I might as well get the harness (x2) to fix this lights, finally.
I took mine out ages ago and did what you did above including repairing and re-soldering the bulb socket tabs but I need the harness for ground.
Had to order a crankshaft position sensor connector too as the tab on mine broke today causing it to vibrate loose and kill my engine, just brilliant.
PS stay safe there in AB...bloody hot zone right now!
Alternatively a Tail Lamp Harness Kit can be installed. The information below may be useful when installing the kit.
Hey 2008 ML 320 CDI, great tutorial!
Am I oversimplifying it when I say:
1. Remove bad socket, discard
2. Install socket from Tail Lamp Harness Kit in that now empty spot
3. Remove red wire pin from factory harness and plug it into Tail Lamp Harness Kit slot
4. Attach ground wire and reassemble tail light assembly
Last edited by eddieo45; Oct 25, 2021 at 02:31 PM.
I have had this a few times and have found if you carefully wrap the terminals of the globe holder (where they arc on the galvanised plate) with thick aluminium foil (pie tray) the aluminium being softer seems to make a better connection than the steel terminals of globe holders. Done this on two ML's that had intermittent errors and both now fixed - been 2 years or so.
I have not taken the lights out to do this - just the globe holder - so quite easy - just had the logic that the original had two hard surfaces (steel) mating and if one was softer it would make a better conection.
been concerned about removing the arced material from the galvanised steel so as to minimise corrosion
I have had this a few times and have found if you carefully wrap the terminals of the globe holder (where they arc on the galvanized plate) with thick aluminum foil (pie tray) the aluminum being softer seems to make a better connection than the steel terminals of globe holders. Done this on two ML's that had intermittent errors and both now fixed - been 2 years or so.
So, your talking about just wrapping these parts of the socket where the arrows point with heavy foil?:
Originally Posted by wannawagon
I have not taken the lights out to do this - just the globe holder - so quite easy
Do you mean you simply accessed the panel by opening the felt fabric cover and left the light panel still bolted in place?
So, your talking about just wrapping these parts of the socket where the arrows point with heavy foil?:
YES BY MEMOERY I REMOVED THE STEEL CONTACTS SO I COULD WRAP THE FOIL DOWN PAST THE BEND A LITTLE SO IT STAYED IN POSITION - THEN RE INSTALL THE STEEL CONTACTS - I THINK IT WAS ONLY ONE WRAP SO NOT TO BE TOO THICK
Do you mean you simply accessed the panel by opening the felt fabric cover and left the light panel still bolted in place?
YES - I DID NO WORK TO THE ACTUAL ASSEMBLY - JUST THE GLOBE HOLDER
AS A POINT OF INTEREST THE SAME GLOBE HOLDERS (OR THEY FIT) ARE USED IN E36 BMW. THEY TOO HAD THE SAME PROBLEM
Hey, my daughter just came by with, like, no time to spare so I tried to do this task quickly but couldn't get the bulb socket out by hand. It should just turn to the left and pop out, no?
Mercedes SLR McLaren 722 S Is Extremely Rare Example Modified by McLaren
Slideshow: A one-of-one U.S.-spec Mercedes-Benz SLR McLaren Roadster became even rarer after a factory-backed transformation at McLaren's headquarters.


 ) lamp.