
Intake manifold R&R DIY


Thread Starter
MBWorld Fanatic!
Joined: Dec 2006
Posts: 4,949
Likes: 39
From: Clifton, NJ
96 and 08 911 turbos
Intake manifold R&R DIY
I know most of you guys won't need this, but hey, might help someone at some point:
M113 Intake Manifold removal:
Typical disclaimers: I’m not responsible if you blow something up. This assumes that you know your way around the engine and what various parts do. Ask questions before breaking anything.
1. Remove front engine cover by pulling up and then sliding forward. Remove intake tubes. Lift up air cleaner assembly at all 4 corners and remove.
2. Remove secondary air injection motor. 1 electrical connector, one E10 torx bolt with ground wire attached on an aluminum brace. One rubber hose from motor outlet at the top center of assembly must be removed. Tilt brace forward and down until it comes out, remove assembly
3. Remove 3 outlet rubber hose (the one that went to the SAI motor) from the two EGR vacuum assemblies.
4. Remove the vacuum lines from these assemblies and set aside
5. Remove MAF. Unplug electrical connector, use large flathead screwdriver to remove the ring clamp that snaps together and holds the maf to the intake. Use screwdriver to compress metal clip at the back of the maf and lift maf off the intake elbow.
6. Remove large breather hose from drivers side of the intake elbow.
7. Remove intake elbow by pressing down on a tab on the passenger side and pulling the elbow off. You will need good light to see the tab.
8. Remove the breather hoses from each valve cover (3 connections)
9. Undo the electrical connectors from each of the 8 coil packs, the 8 injectors, the vacuum switchover assembly (at the front of the intake by where the SAI was), and the EGR valve. A tip for the injectors is that if you remove the clip holding the injector to the rail, you can rotate the injectors outward to get at the spring wire tabs easier. Tip for the EGR…just remove the wire clip and reinstall later.
10. Remove wiring harness cover. One 8mm bolt for the clamp at the rear of the fuel rail, a few zip ties, and a bunch of tab clips.
11. Remove Fuel rail and injectors. First, replace any of the metal injector retaining clips you may have removed in step 9. Then, unscrew the Schrader valve cap on the passenger front of rail and insert Phillips screwdriver into Schrader valve to relieve pressure (keep towel handy for any fuel that comes out). Now, using a 17mm open ended wrench, remove the fuel line connection at the driver’s side rear of the motor. A fair amount of fuel will come out so be ready with towels or some sort of container. Remove 4 E10 bolts holding rail to intake and wiggle injectors out of intake. Remove rail and injectors as one piece.
12. Remove switchover vacuum valves at front of intake. One E12 bolt per side. There is a gasket and a metal press fit tube. You’ll need to wiggle these out by rocking and twisting gently.
13. Remove two vacuum lines at the front of the intake going to Map sensor and egr switchover valve.
14. EGR. Using a 22mm open ended wrench counter hold the EGR base nut, and use a 24mm wrench to loosen the pipe nut. Bend tube up a bit.
Remove one vac tube going to the back of the intake.
15. Now, remove the two engine lifting brackets. One E12 bolt per bracket
16. Remove brake booster vacuum line by pressing the two tabs on the black clip and pulling. you will see a red clip holding the line. Use pliers or a screwdriver to keep the red clip from sliding outward and then pull the tube out. The red clip is essentially a lock and when extended the tube can't be removed. Now remove the breather tube base and fuel vapor purge tube. Just wiggle upwards gently.
17. Remove 8 remaining intake manifold bolts…E12s all around
18. Lift up intake a little and unplug throttle body.
19. Double check that there is nothing still attached to the intake and lift and remove.
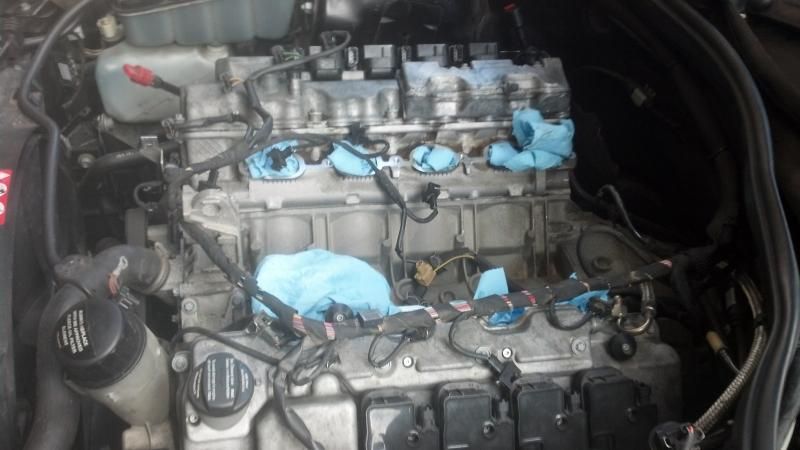
20. Obviously at this point you’ll want to plug or cover the intake ports on the heads.
21. Remove throttle body…4 t-40 torx bolts
22. Remove EGR tube, 2 E-10 bolts…you’ll need to twist the tube out as it has some bends in it.
Notes about reassembly:
The heads have no dowels, so I used 4 M8x1.25 70mm studs from home depot to thread into the bolt holes to align the intake gasket and keep it in place for reassembly.
Tighten bolts in a star pattern…torque specs are low, I believe about 9nm.
Lubricate fuel injector o-rings before reinstall
New intake manifold, EGR tube, Throttle body, and switchover gaskets
Umm…don’t drop any bolts
M113 Intake Manifold removal:
Typical disclaimers: I’m not responsible if you blow something up. This assumes that you know your way around the engine and what various parts do. Ask questions before breaking anything.
1. Remove front engine cover by pulling up and then sliding forward. Remove intake tubes. Lift up air cleaner assembly at all 4 corners and remove.
2. Remove secondary air injection motor. 1 electrical connector, one E10 torx bolt with ground wire attached on an aluminum brace. One rubber hose from motor outlet at the top center of assembly must be removed. Tilt brace forward and down until it comes out, remove assembly
3. Remove 3 outlet rubber hose (the one that went to the SAI motor) from the two EGR vacuum assemblies.
4. Remove the vacuum lines from these assemblies and set aside
5. Remove MAF. Unplug electrical connector, use large flathead screwdriver to remove the ring clamp that snaps together and holds the maf to the intake. Use screwdriver to compress metal clip at the back of the maf and lift maf off the intake elbow.
6. Remove large breather hose from drivers side of the intake elbow.
7. Remove intake elbow by pressing down on a tab on the passenger side and pulling the elbow off. You will need good light to see the tab.
8. Remove the breather hoses from each valve cover (3 connections)
9. Undo the electrical connectors from each of the 8 coil packs, the 8 injectors, the vacuum switchover assembly (at the front of the intake by where the SAI was), and the EGR valve. A tip for the injectors is that if you remove the clip holding the injector to the rail, you can rotate the injectors outward to get at the spring wire tabs easier. Tip for the EGR…just remove the wire clip and reinstall later.
10. Remove wiring harness cover. One 8mm bolt for the clamp at the rear of the fuel rail, a few zip ties, and a bunch of tab clips.
11. Remove Fuel rail and injectors. First, replace any of the metal injector retaining clips you may have removed in step 9. Then, unscrew the Schrader valve cap on the passenger front of rail and insert Phillips screwdriver into Schrader valve to relieve pressure (keep towel handy for any fuel that comes out). Now, using a 17mm open ended wrench, remove the fuel line connection at the driver’s side rear of the motor. A fair amount of fuel will come out so be ready with towels or some sort of container. Remove 4 E10 bolts holding rail to intake and wiggle injectors out of intake. Remove rail and injectors as one piece.
12. Remove switchover vacuum valves at front of intake. One E12 bolt per side. There is a gasket and a metal press fit tube. You’ll need to wiggle these out by rocking and twisting gently.
13. Remove two vacuum lines at the front of the intake going to Map sensor and egr switchover valve.
14. EGR. Using a 22mm open ended wrench counter hold the EGR base nut, and use a 24mm wrench to loosen the pipe nut. Bend tube up a bit.
Remove one vac tube going to the back of the intake.
15. Now, remove the two engine lifting brackets. One E12 bolt per bracket
16. Remove brake booster vacuum line by pressing the two tabs on the black clip and pulling. you will see a red clip holding the line. Use pliers or a screwdriver to keep the red clip from sliding outward and then pull the tube out. The red clip is essentially a lock and when extended the tube can't be removed. Now remove the breather tube base and fuel vapor purge tube. Just wiggle upwards gently.
17. Remove 8 remaining intake manifold bolts…E12s all around
18. Lift up intake a little and unplug throttle body.
19. Double check that there is nothing still attached to the intake and lift and remove.
20. Obviously at this point you’ll want to plug or cover the intake ports on the heads.
21. Remove throttle body…4 t-40 torx bolts
22. Remove EGR tube, 2 E-10 bolts…you’ll need to twist the tube out as it has some bends in it.
Notes about reassembly:
The heads have no dowels, so I used 4 M8x1.25 70mm studs from home depot to thread into the bolt holes to align the intake gasket and keep it in place for reassembly.
Tighten bolts in a star pattern…torque specs are low, I believe about 9nm.
Lubricate fuel injector o-rings before reinstall
New intake manifold, EGR tube, Throttle body, and switchover gaskets
Umm…don’t drop any bolts
Last edited by Quadcammer; Apr 7, 2014 at 09:31 AM.
Thread Starter
MBWorld Fanatic!
Joined: Dec 2006
Posts: 4,949
Likes: 39
From: Clifton, NJ
96 and 08 911 turbos
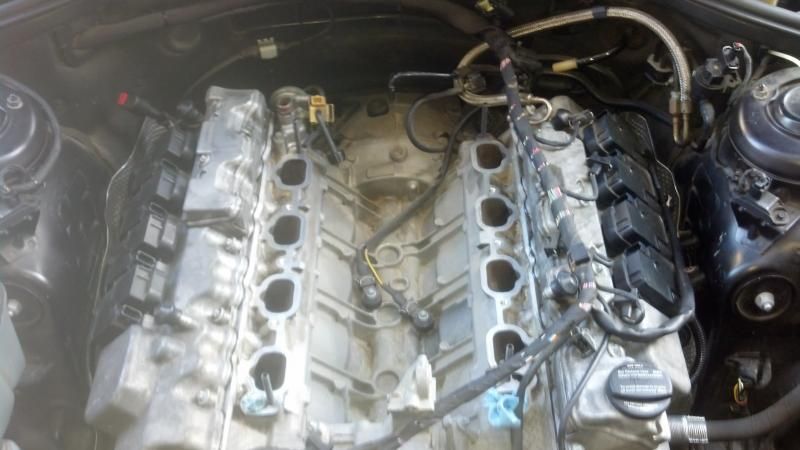
intake off
Cleaned up ready for reinstall
throttle body cleaned

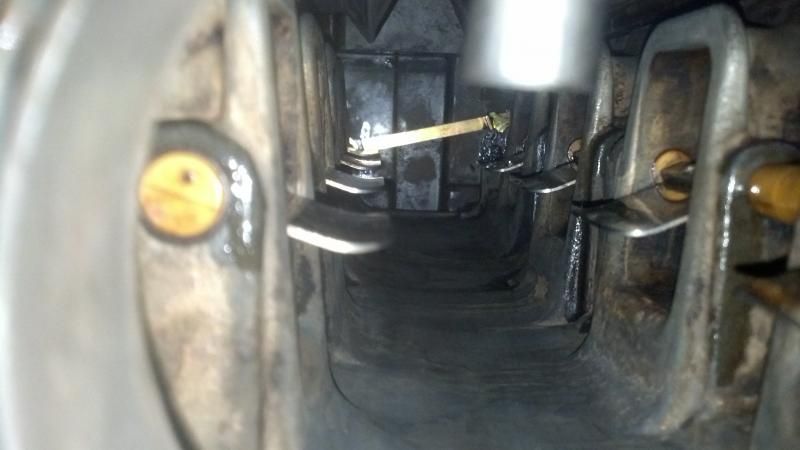
intake port cleaned
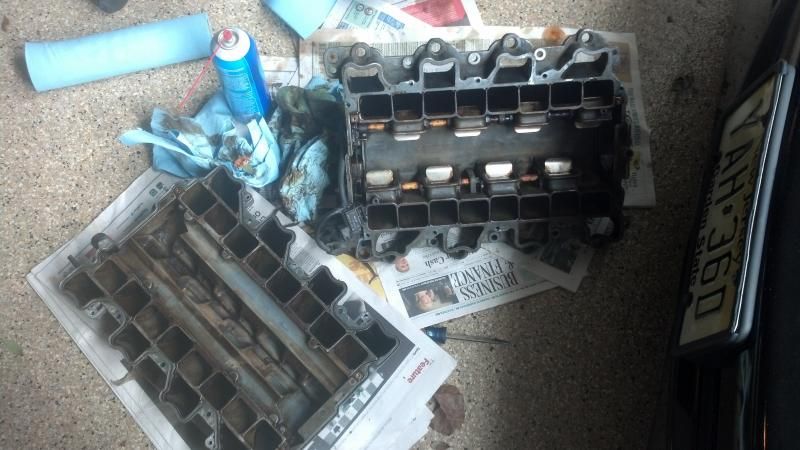
Intake split apart:
intake reassembled and clean
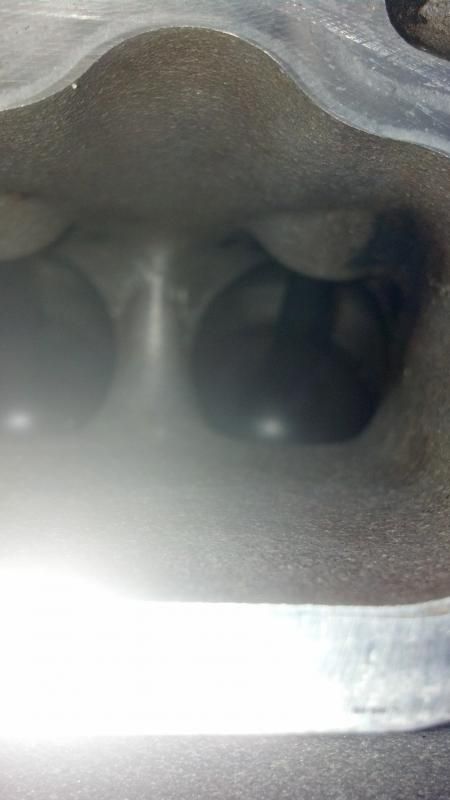
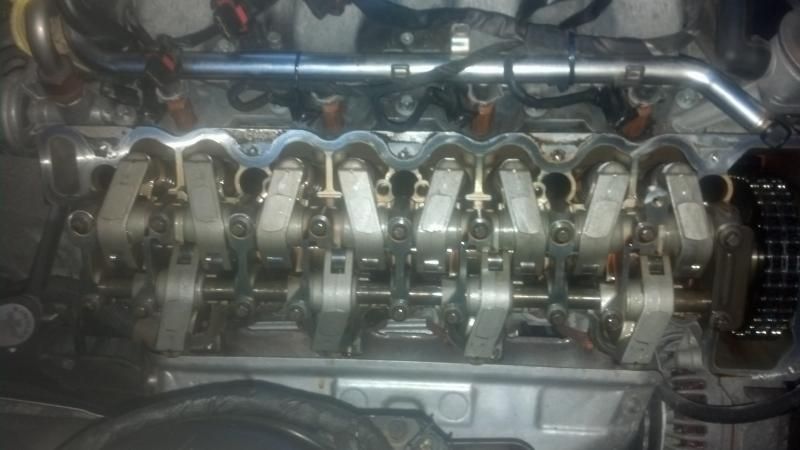
bonus shot of the valvetrain

Cleaned up ready for reinstall

throttle body cleaned

intake port cleaned

Intake split apart:

intake reassembled and clean

bonus shot of the valvetrain


Thread Starter
MBWorld Fanatic!
Joined: Dec 2006
Posts: 4,949
Likes: 39
From: Clifton, NJ
96 and 08 911 turbos
thanks guys.
this is a good site though shows how nasty these things can get
http://www.marcusfitzhugh.com/CLK/DIY/intakerepair.html
this is a good site though shows how nasty these things can get
http://www.marcusfitzhugh.com/CLK/DIY/intakerepair.html

Member


Joined: Mar 2005
Posts: 173
Likes: 34
From: Friendswood, TX
99 C43, 73 911 targa
Only comment, not a criticism by any means. Step one should be to remove the battery ground so all electrical / electronics are disabled. This is an important first step for many similar procedures. safety first.
Junior Member

Joined: Sep 2010
Posts: 64
Likes: 0
From: San Francisco, CA
'03 C240 and '05 C230
I know most of you guys won't need this, but hey, might help someone at some point:
M113 Intake Manifold removal:
Typical disclaimers: I�m not responsible if you blow something up. This assumes that you know your way around the engine and what various parts do. Ask questions before breaking anything.
1. Remove front engine cover by pulling up and then sliding forward. Remove intake tubes. Lift up air cleaner assembly at all 4 corners and remove.
2. Remove secondary air injection motor. 1 electrical connector, one E10 torx bolt with ground wire attached on an aluminum brace. One rubber hose from motor outlet at the top center of assembly must be removed. Tilt brace forward and down until it comes out, remove assembly
3. Remove 3 outlet rubber hose (the one that went to the SAI motor) from the two EGR vacuum assemblies.
4. Remove the vacuum lines from these assemblies and set aside
5. Remove MAF. Unplug electrical connector, use large flathead screwdriver to remove the ring clamp that snaps together and holds the maf to the intake. Use screwdriver to compress metal clip at the back of the maf and lift maf off the intake elbow.
6. Remove large breather hose from drivers side of the intake elbow.
7. Remove intake elbow by pressing down on a tab on the passenger side and pulling the elbow off. You will need good light to see the tab.
8. Remove the breather hoses from each valve cover (3 connections)
9. Undo the electrical connectors from each of the 8 coil packs, the 8 injectors, the vacuum switchover assembly (at the front of the intake by where the SAI was), and the EGR valve. A tip for the injectors is that if you remove the clip holding the injector to the rail, you can rotate the injectors outward to get at the spring wire tabs easier. Tip for the EGR�just remove the wire clip and reinstall later.
10. Remove wiring harness cover. One 8mm bolt for the clamp at the rear of the fuel rail, a few zip ties, and a bunch of tab clips.
11. Remove Fuel rail and injectors. First, replace any of the metal injector retaining clips you may have removed in step 9. Then, unscrew the Schrader valve cap on the passenger front of rail and insert Phillips screwdriver into Schrader valve to relieve pressure (keep towel handy for any fuel that comes out). Now, using a 17mm open ended wrench, remove the fuel line connection at the driver�s side rear of the motor. A fair amount of fuel will come out so be ready with towels or some sort of container. Remove 4 E10 bolts holding rail to intake and wiggle injectors out of intake. Remove rail and injectors as one piece.
12. Remove switchover vacuum valves at front of intake. One E12 bolt per side. There is a gasket and a metal press fit tube. You�ll need to wiggle these out by rocking and twisting gently.
13. Remove two vacuum lines at the front of the intake going to Map sensor and egr switchover valve.
14. EGR. Using a 22mm open ended wrench counter hold the EGR base nut, and use a 24mm wrench to loosen the pipe nut. Bend tube up a bit.
Remove one vac tube going to the back of the intake.
15. Now, remove the two engine lifting brackets. One E12 bolt per bracket
16. Remove brake booster vacuum line by pressing the two tabs on the black clip and pulling. you will see a red clip holding the line. Use pliers or a screwdriver to keep the red clip from sliding outward and then pull the tube out. The red clip is essentially a lock and when extended the tube can't be removed. Now remove the breather tube base and fuel vapor purge tube. Just wiggle upwards gently.
17. Remove 8 remaining intake manifold bolts�E12s all around
18. Lift up intake a little and unplug throttle body.
19. Double check that there is nothing still attached to the intake and lift and remove.
20. Obviously at this point you�ll want to plug or cover the intake ports on the heads.
21. Remove throttle body�4 t-40 torx bolts
22. Remove EGR tube, 2 E-10 bolts�you�ll need to twist the tube out as it has some bends in it.
Notes about reassembly:
The heads have no dowels, so I used 4 M8x1.25 70mm studs from home depot to thread into the bolt holes to align the intake gasket and keep it in place for reassembly.
Tighten bolts in a star pattern�torque specs are low, I believe about 9nm.
Lubricate fuel injector o-rings before reinstall
New intake manifold, EGR tube, Throttle body, and switchover gaskets
Umm�don�t drop any bolts
thanks for the lengthy write up. What product did you use to reseal the intake manifold?


