
GPS antenna replace for less than 20 USD

Thread Starter
Member
Joined: Aug 2013
Posts: 115
Likes: 4
2006 S500 base
GPS antenna replace for less than 20 USD
Back story. The pre amp in my sharkfin died leaving me without GPS. Investigating replacement from MB was a shock, to the tune of 600'ish USD. I don't use the cell phone portion of the sharkfin nor Tele-Aid so all I needed was GPS functionality.
"Egads" thought I ( paraphrased for publication ) "There has to be an alternative" And there is. This info is W220 specific, even more specifically the 03 to 06 models with the Nav unit in the trunk. I left the dead sharkfin in place just because I am too lazy to peel it off and try and reseal all the window rubbers and trim.
Heres what you need:
1. Antenna, if you have Tele-Aid as an option you have a splitter in the trunk on the right hand side. You will need an active GPS antenna with a WICLIC connector and no more than 3 M of cable.
You can Google for one or use my source
http://www.ebay.com/itm/like/151139174154?lpid=82If you want to go direct to the nav unit you will need an active GPS antenna with a blue FACRA C right angle connector as linked below
GPS Antenna Fakra C 5005 Bule SMB Female Right Angle 3M Cable MFD2 RNS2 RNS E | eBay
2. Installing the antenna.
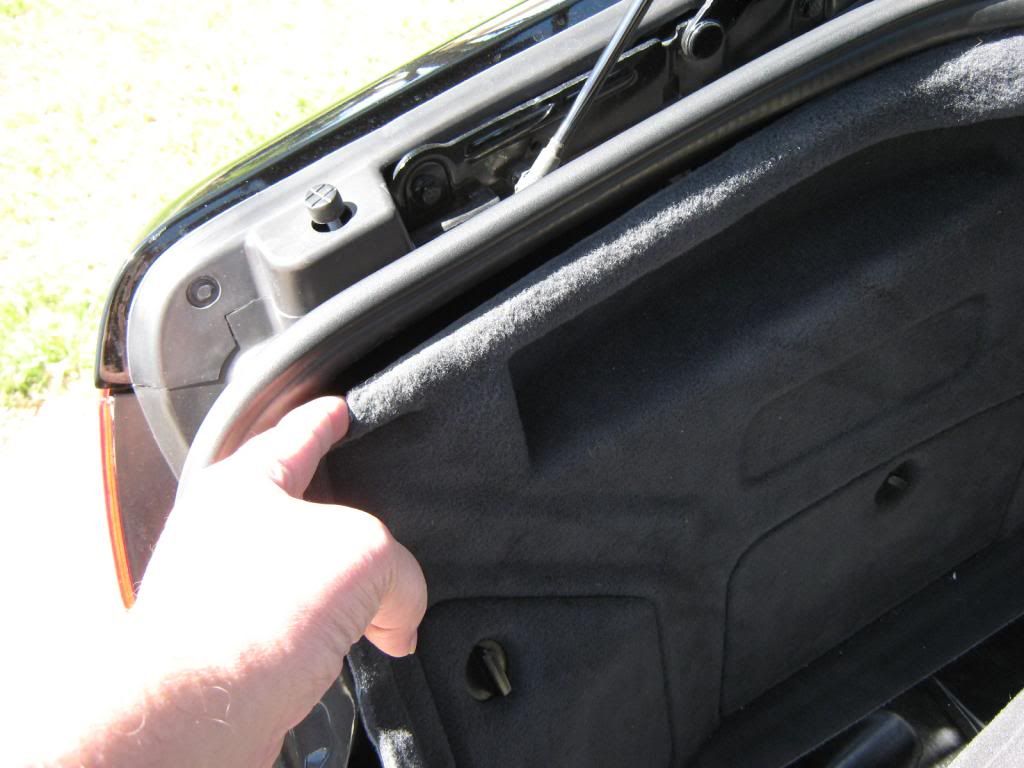
You will need to pull the plastic piece over the trunk lock and lip first. (pics 1-3 )
Its held in by several 2 piece plastic push clips as well as the 4 cargo net tie down points. A small slim screwdriver will deal with the push clips nicely
[IMG]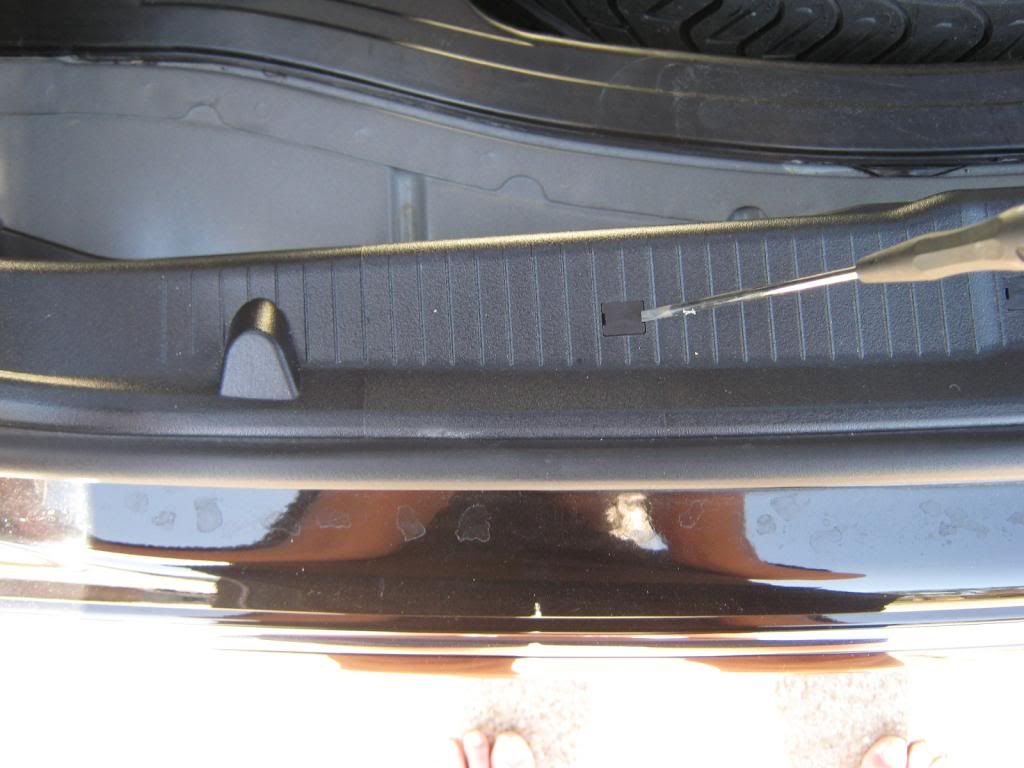 [/IMG]
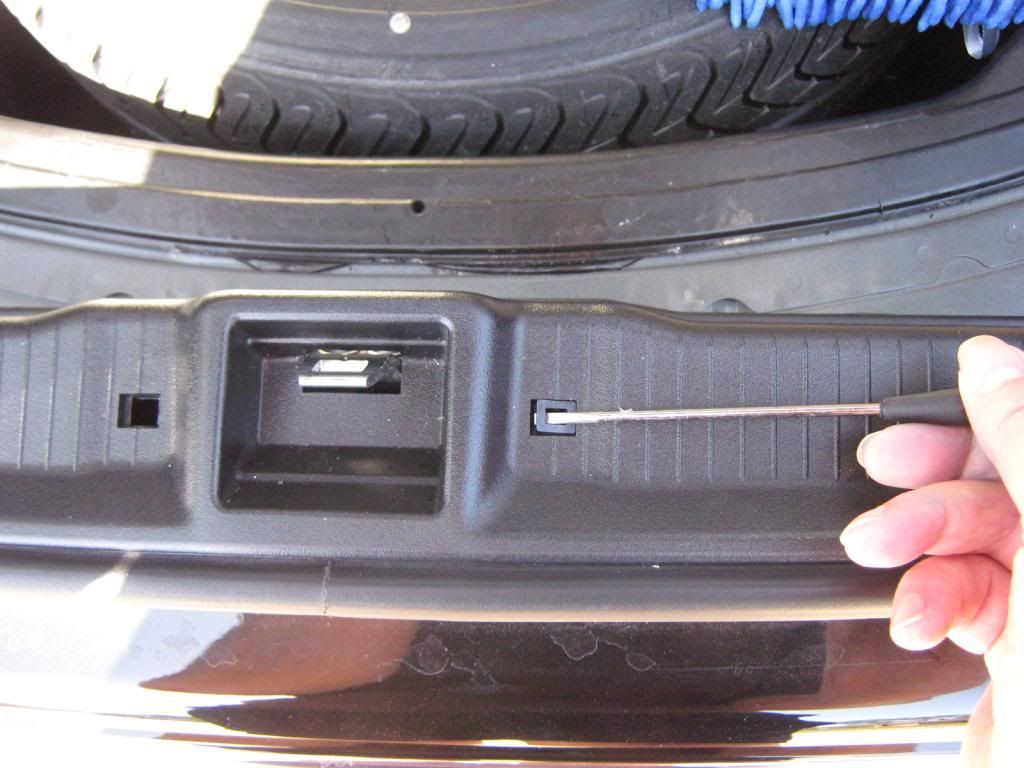
Use a Torx T-20 bit for the cargo net hold downs. 4 on the back plastic piece and 2 more on the trunk floor forward. After removing all the clips and hold downs, the piece should pull easily straight up.
There are large plastic hold downs under the tops of all the panels. GENTLY pry them out. Now remove the trunk floor mat, both side panels and the center front panel in that order. The right panel does need to GENTLY folded a bit to get it out.
The left panel is a bit easier. Just tuck a finger into the corner and GENTLY pull it out and towards you.
The center panel has 3 spring steel clips on the top edge.
GENTLY pull the panel off those and rotate it towards you a bit to get to the trunk lights (2 ) and pop those out of the panel.
Continue to rotate the back panel towards you and out of the trunk.

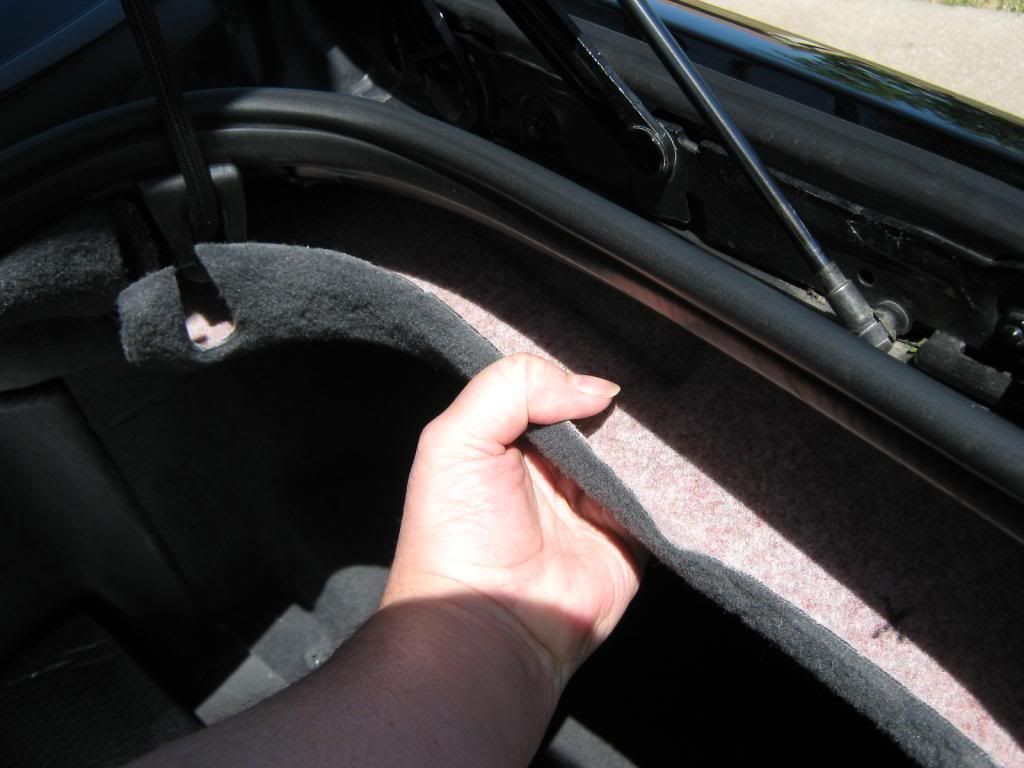
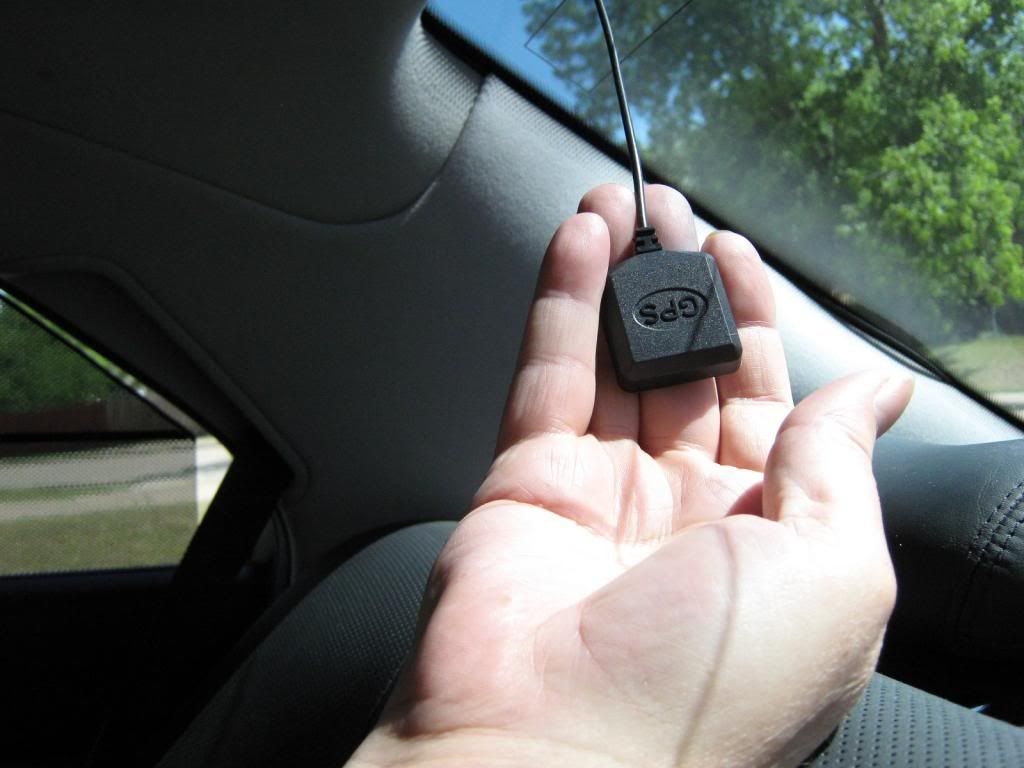
Now that the trunk has been stripped, we can take you new antenna into the back seat. There should be a black side and a printed side. Ensure the black side is up ! Also note that I have IR reflecting glass AND tinting. The IR coating stops about 4 inches from the top of the glass. The head liner actually extends over the glass an inch or 2 also. This allows completely hiding the antenna and still have a full view of the sky.
You are going to be pushing it under the lip of the headliner. In the pics you can see I am going in about 6 inches right of the center line of the back glass. With the coax pointing towards the C pillar.
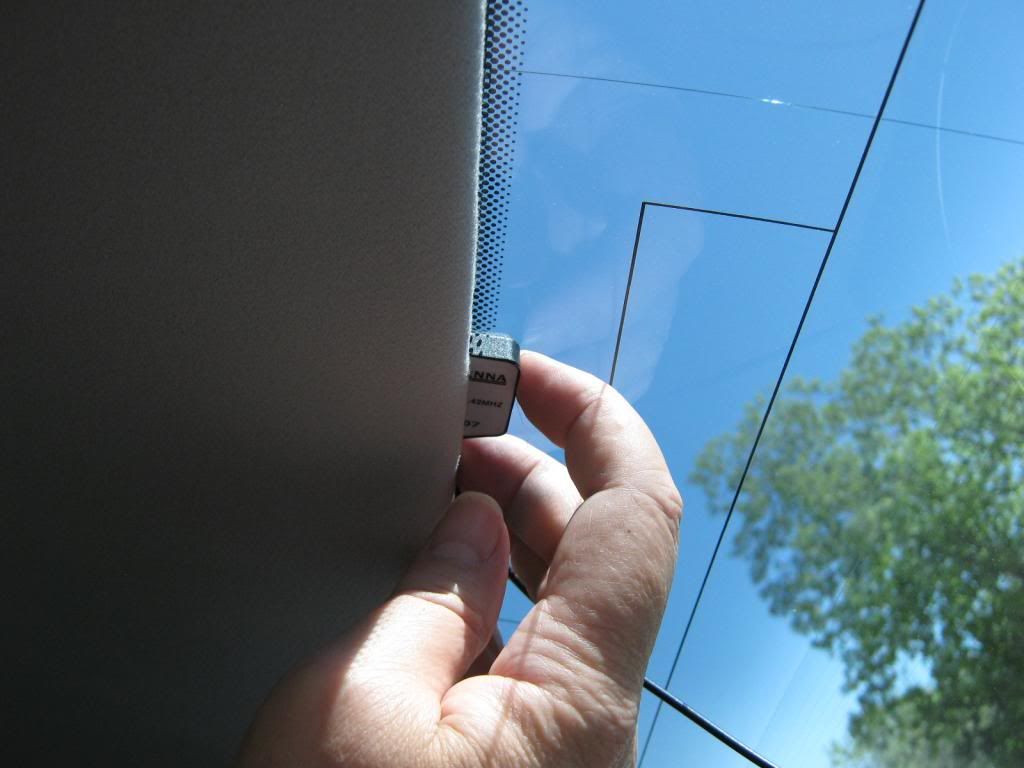
Push it in GENTLY and it should just disappear under the headliner. If it doesn't easily slide all the way in, jockey a bit left or right to ensure you are going between the arms of the overhead antenna amplifier.
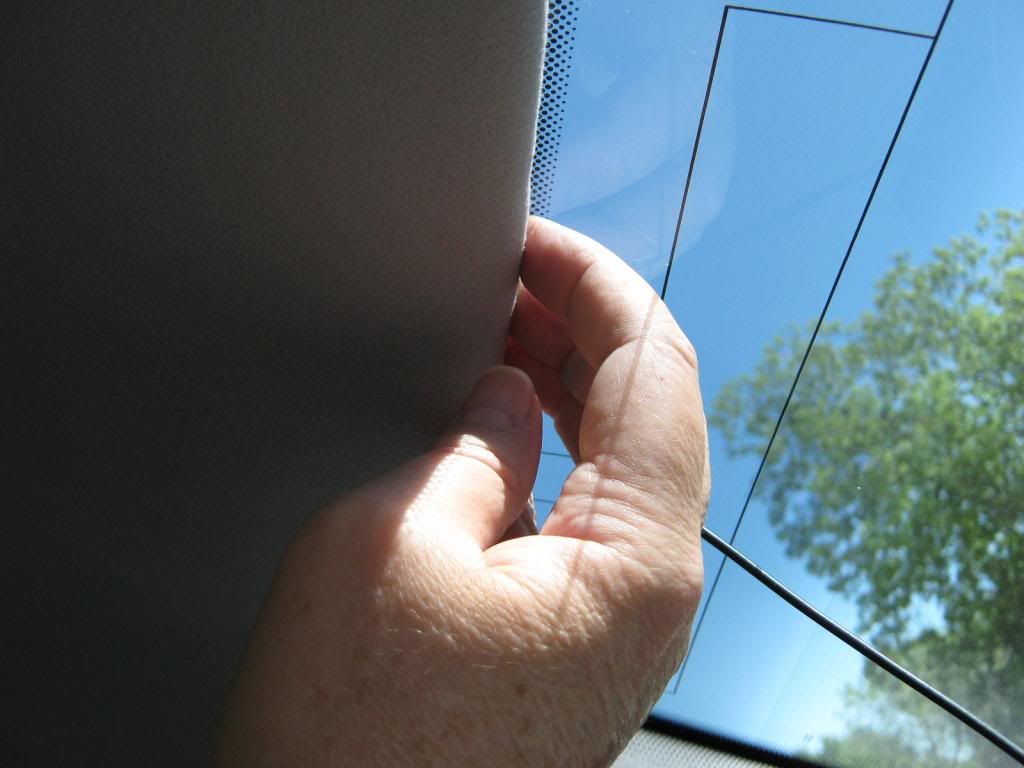
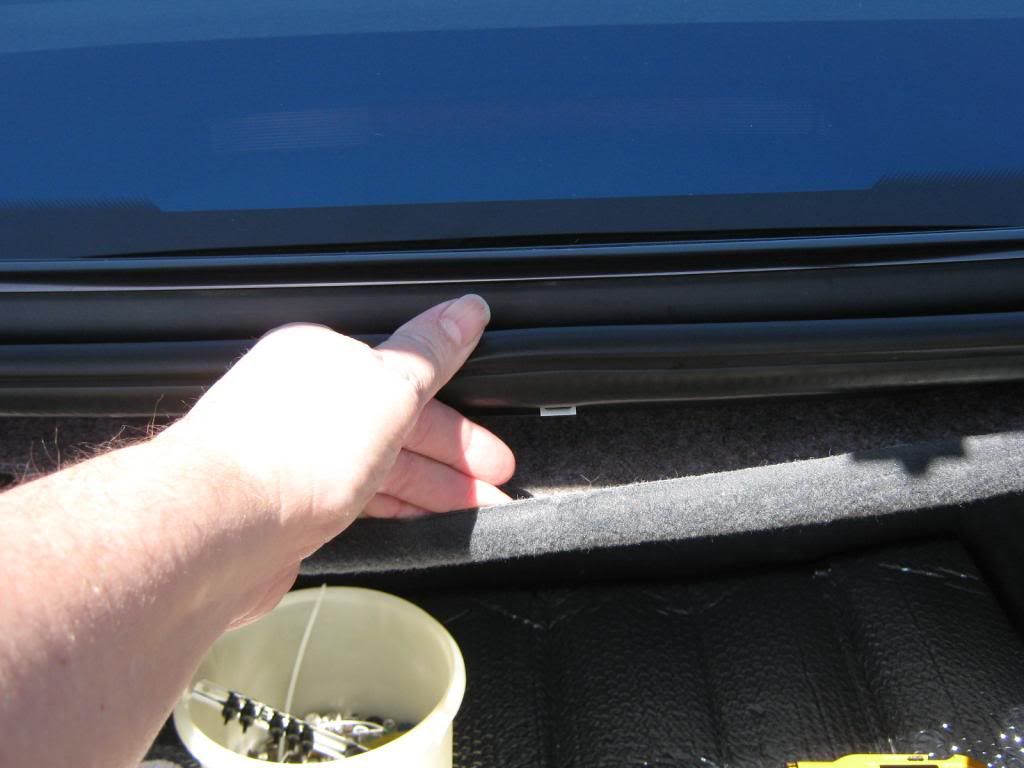
Now push the coax under the head liner also going towards the C pillar
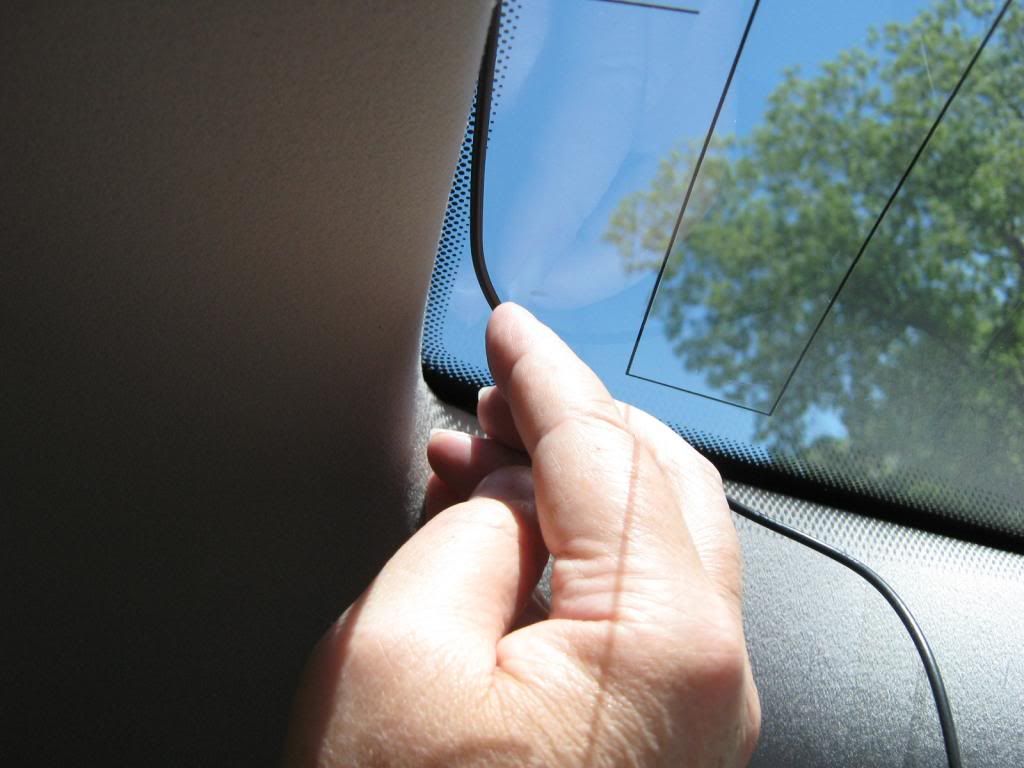
Keep pushing the coax behind the trim going along the back glass all the way down to parcel shelf.

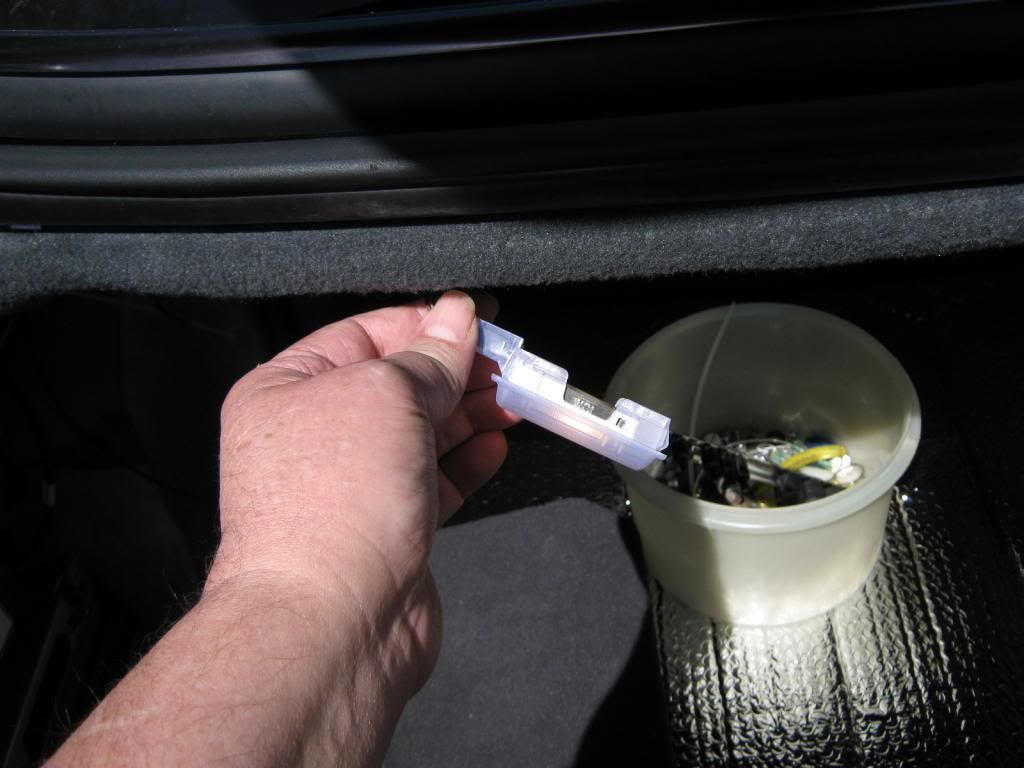
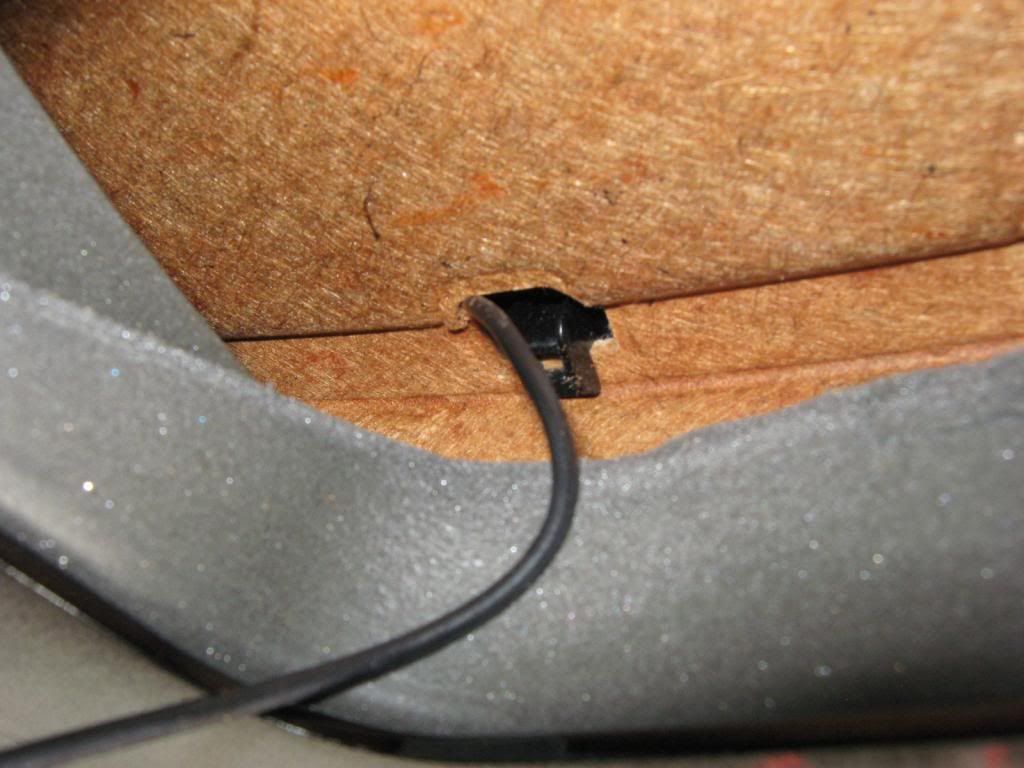
GENTLY pry up and set aside the third brake light from the parcel shelf. Drop
the connector end and the remaining coax thru the second slot as shown.
Dress the coax away from the fingers on the third brake light housing and press it back into place.
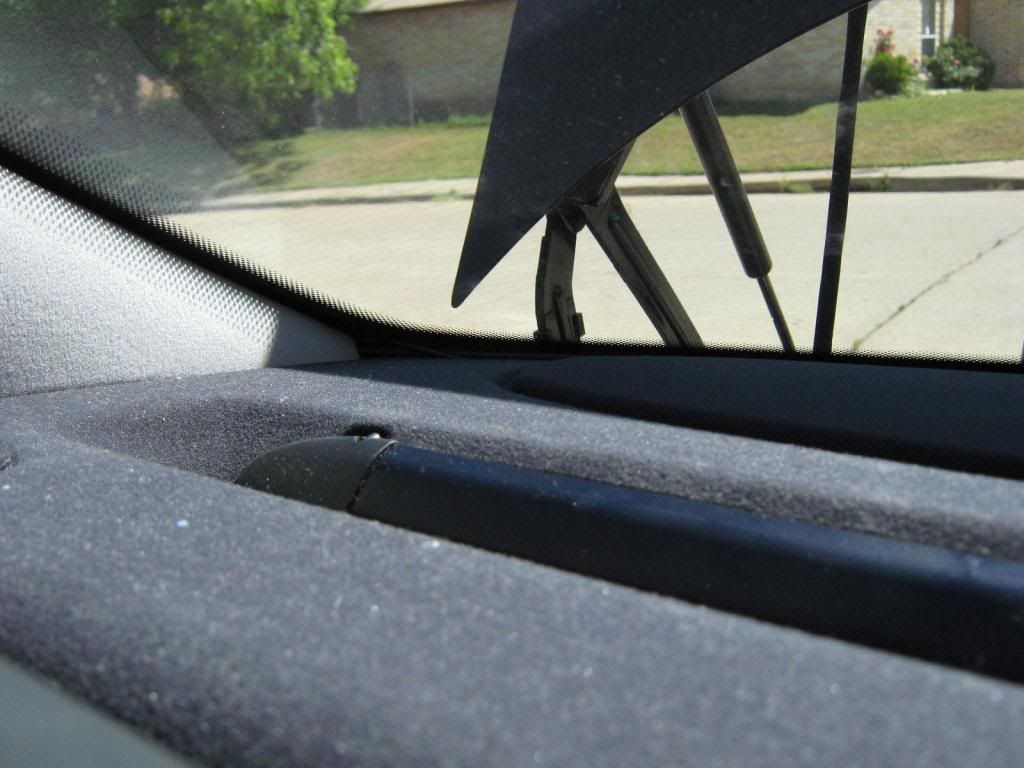
As you can see it all goes back together nicely hiding the coax virtually completely.
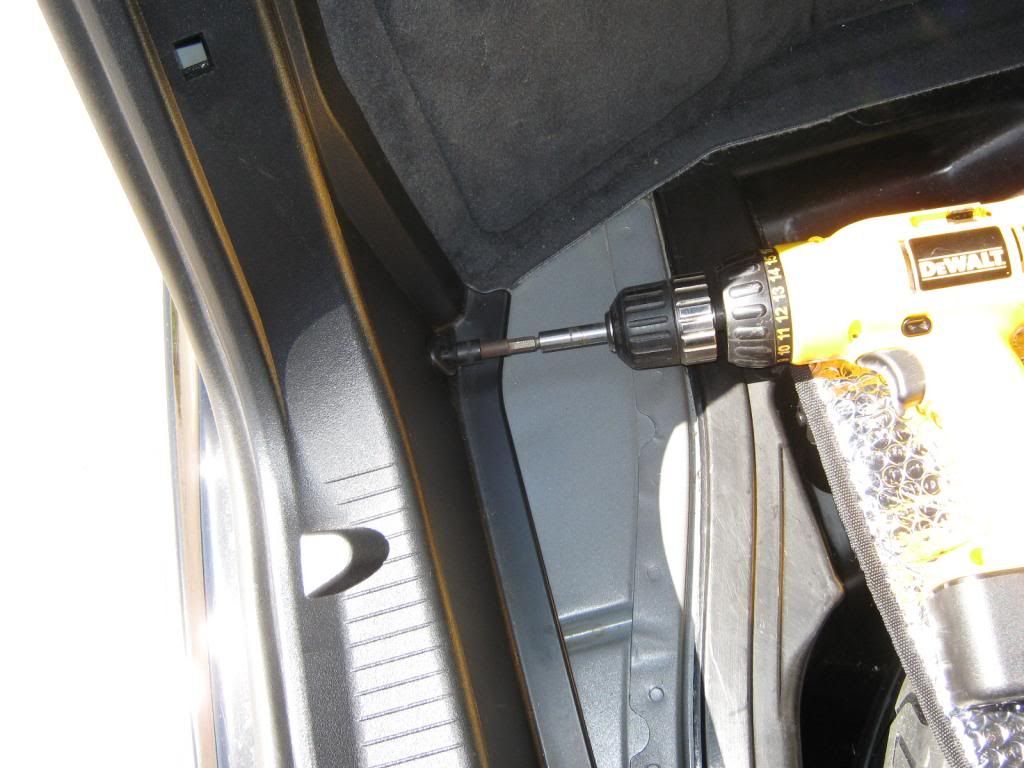
Now you get to climb into the trunk and pull the cable. Next pic is with me laying on my back, head on the gas tank and looking up at the parcel shelf thru a large oval hole MB was kind enough to place in a convenient spot.
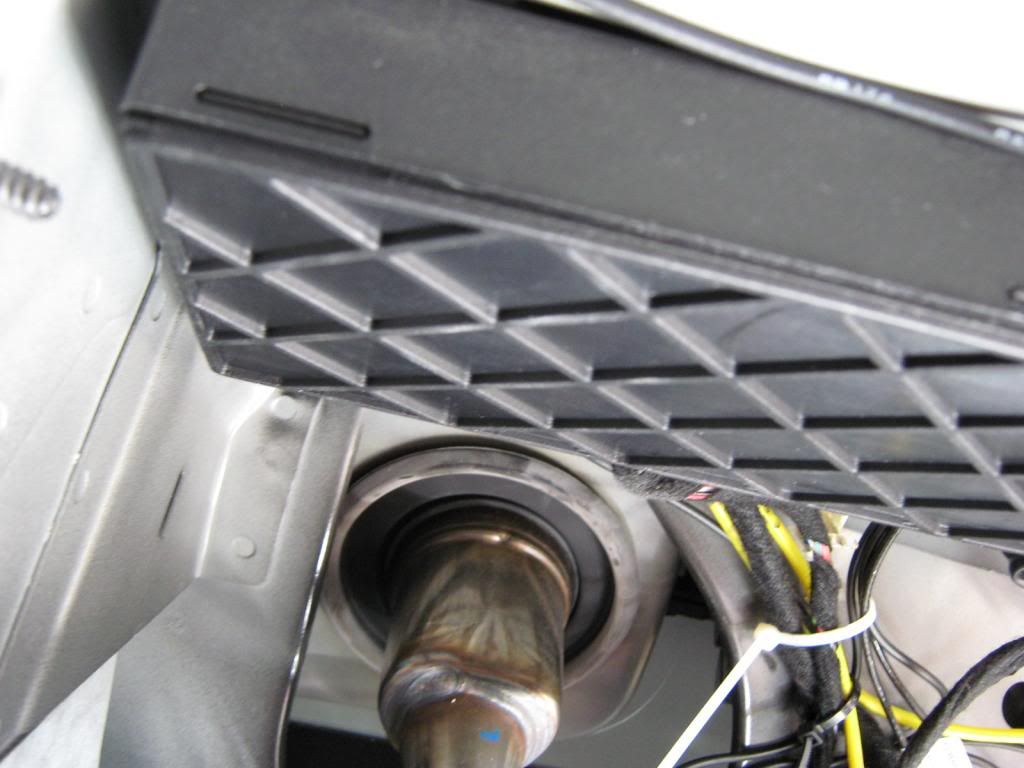
Run the coax along the side of the cable retractor box towards the front of the trunk. Going to want to stay out of the way of the trunk closing mechanicals.
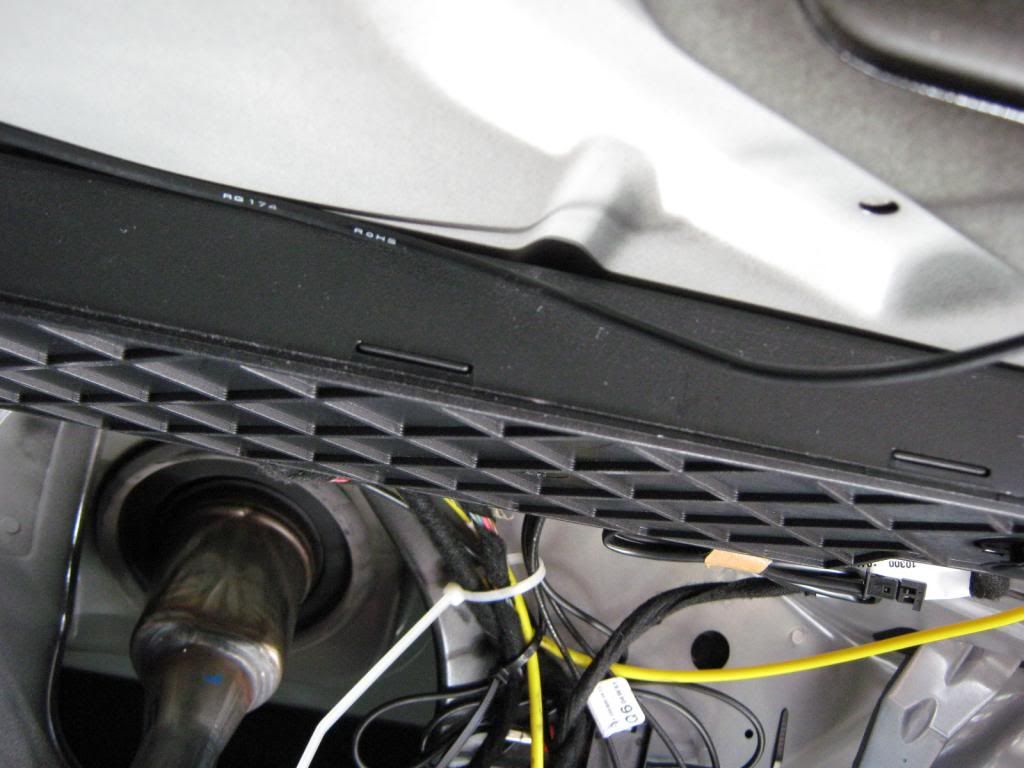
Then around the end of the cable retractor box to the cable bundle you see next to the gas filler neck.
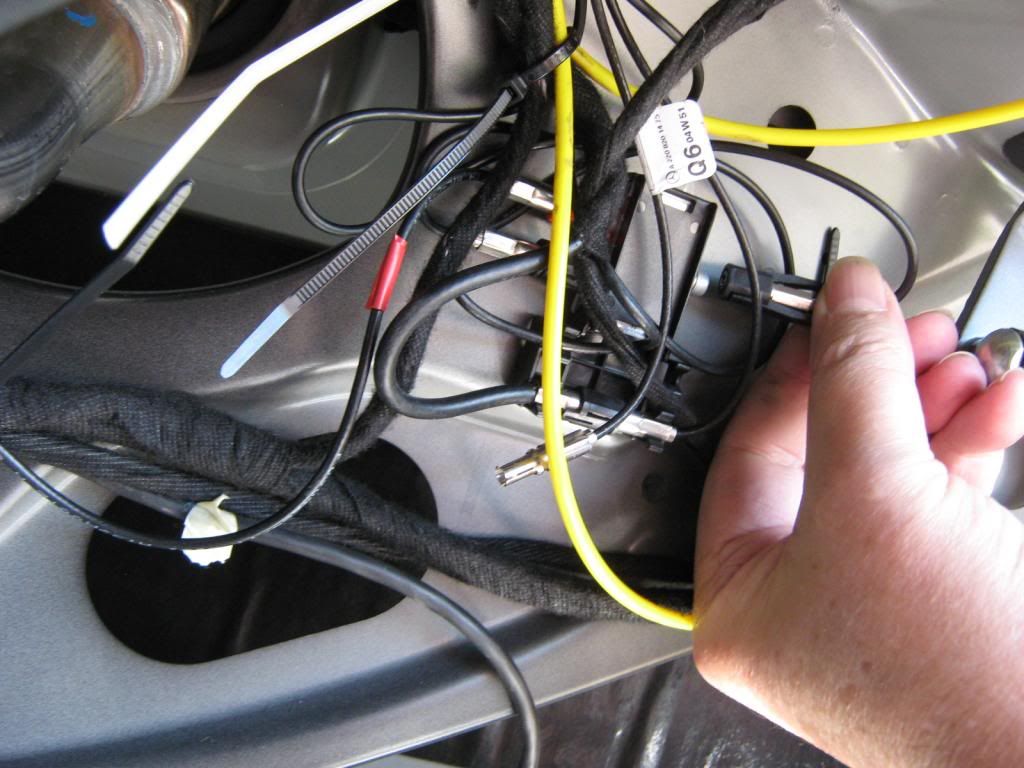
Cable tie the coax and any excess into that bundle, disconnect the old sharfin lead from the splitter on the single connection side and plug the new antenna in.
Now you can test it BEFORE you put the whole trunk back together. Hopefully you are doing this outside with a clear view of the sky. Fire up the car and check your satellite received number. With this set up I regularly get 6-7 and sometimes as many as 10.
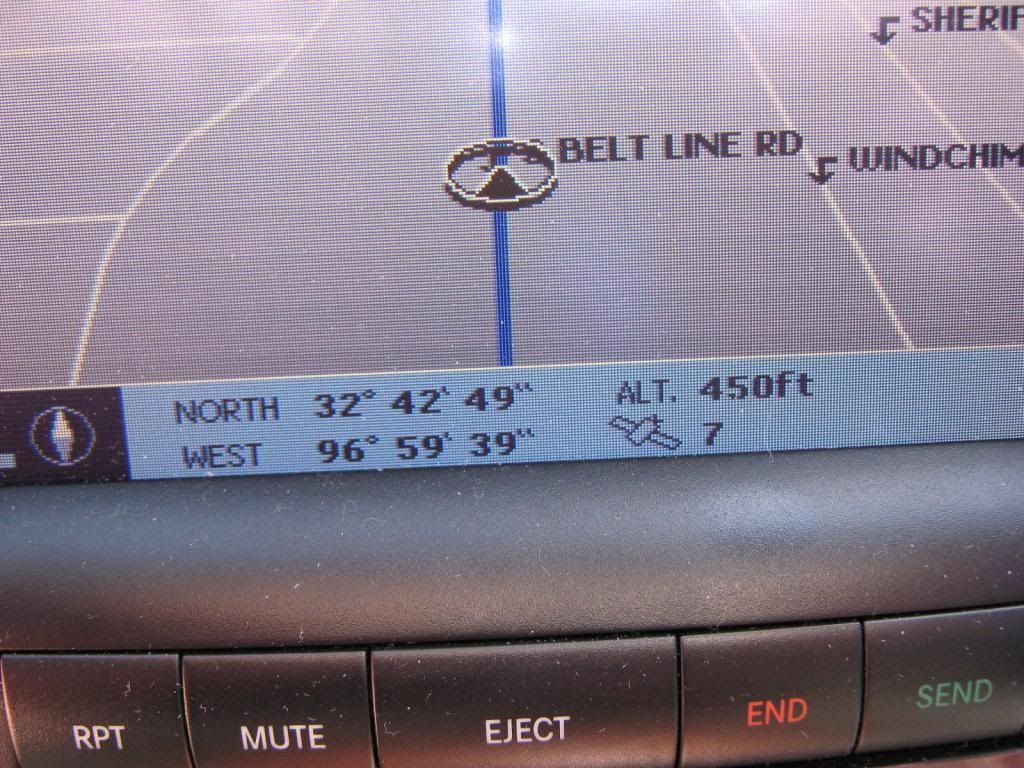
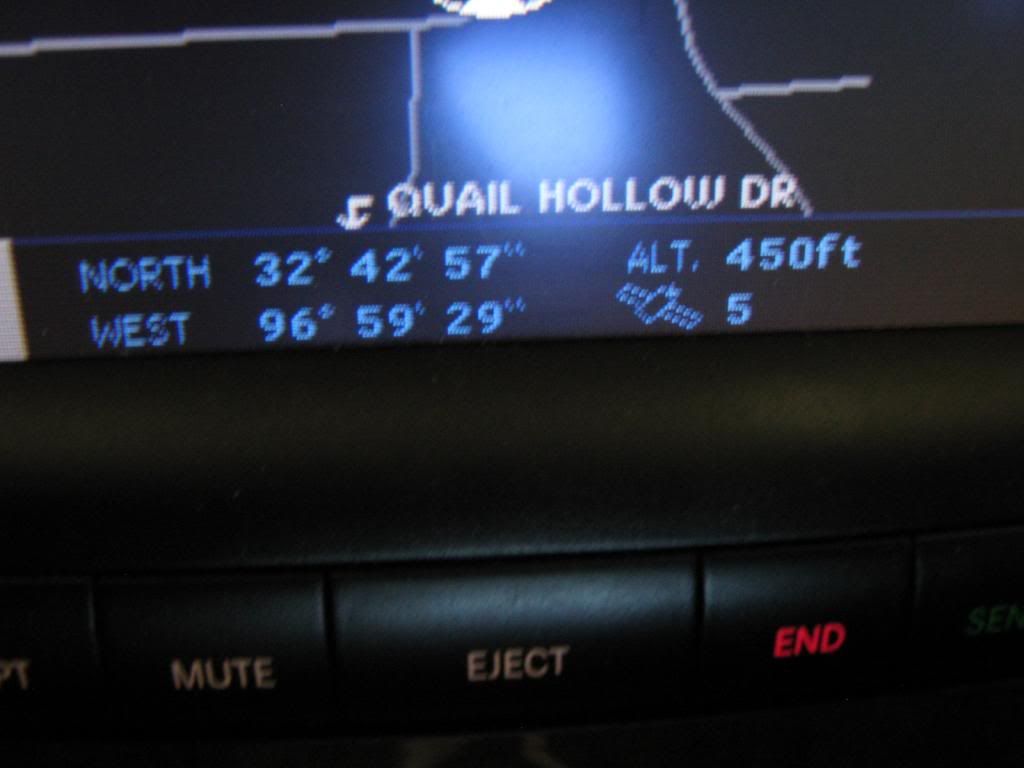
I even get 3-5 parked inside the garage. didn't before.
I should think that this will also work QUITE well for those wishing to add on an XM radio receiver with a cheap antenna, just run your Ebay XM antenna ( with blue FACRA connector ) to the left side of the trunk following the same basic procedure.
For those that want to by pass the splitter and plug directly into Nav unit, follow the same steps except slide your antenna in under the head liner 6 inchs or so to the left of center on the back glass and run coax down left C pillar into trunk ( nicely placed large hole in parcel shelf on that side also ) following the cable bundles into the electronics stack area. Pull Nav unit out, (couple of push clips on side of Nav unit need to be pressed to slide it out ) pull sharkfin antenna cable and plug in the new one.
So, there you go. A super cheap alternative to replacing your sharkfin for GPS.
"Egads" thought I ( paraphrased for publication ) "There has to be an alternative" And there is. This info is W220 specific, even more specifically the 03 to 06 models with the Nav unit in the trunk. I left the dead sharkfin in place just because I am too lazy to peel it off and try and reseal all the window rubbers and trim.
Heres what you need:
1. Antenna, if you have Tele-Aid as an option you have a splitter in the trunk on the right hand side. You will need an active GPS antenna with a WICLIC connector and no more than 3 M of cable.
You can Google for one or use my source
http://www.ebay.com/itm/like/151139174154?lpid=82If you want to go direct to the nav unit you will need an active GPS antenna with a blue FACRA C right angle connector as linked below
GPS Antenna Fakra C 5005 Bule SMB Female Right Angle 3M Cable MFD2 RNS2 RNS E | eBay
2. Installing the antenna.
You will need to pull the plastic piece over the trunk lock and lip first. (pics 1-3 )
Its held in by several 2 piece plastic push clips as well as the 4 cargo net tie down points. A small slim screwdriver will deal with the push clips nicely
[IMG]
 [/IMG]
Use a Torx T-20 bit for the cargo net hold downs. 4 on the back plastic piece and 2 more on the trunk floor forward. After removing all the clips and hold downs, the piece should pull easily straight up.

There are large plastic hold downs under the tops of all the panels. GENTLY pry them out. Now remove the trunk floor mat, both side panels and the center front panel in that order. The right panel does need to GENTLY folded a bit to get it out.

The left panel is a bit easier. Just tuck a finger into the corner and GENTLY pull it out and towards you.

The center panel has 3 spring steel clips on the top edge.

GENTLY pull the panel off those and rotate it towards you a bit to get to the trunk lights (2 ) and pop those out of the panel.

Continue to rotate the back panel towards you and out of the trunk.

Now that the trunk has been stripped, we can take you new antenna into the back seat. There should be a black side and a printed side. Ensure the black side is up ! Also note that I have IR reflecting glass AND tinting. The IR coating stops about 4 inches from the top of the glass. The head liner actually extends over the glass an inch or 2 also. This allows completely hiding the antenna and still have a full view of the sky.

You are going to be pushing it under the lip of the headliner. In the pics you can see I am going in about 6 inches right of the center line of the back glass. With the coax pointing towards the C pillar.

Push it in GENTLY and it should just disappear under the headliner. If it doesn't easily slide all the way in, jockey a bit left or right to ensure you are going between the arms of the overhead antenna amplifier.

Now push the coax under the head liner also going towards the C pillar

Keep pushing the coax behind the trim going along the back glass all the way down to parcel shelf.

GENTLY pry up and set aside the third brake light from the parcel shelf. Drop
the connector end and the remaining coax thru the second slot as shown.
Dress the coax away from the fingers on the third brake light housing and press it back into place.

As you can see it all goes back together nicely hiding the coax virtually completely.
Now you get to climb into the trunk and pull the cable. Next pic is with me laying on my back, head on the gas tank and looking up at the parcel shelf thru a large oval hole MB was kind enough to place in a convenient spot.

Run the coax along the side of the cable retractor box towards the front of the trunk. Going to want to stay out of the way of the trunk closing mechanicals.

Then around the end of the cable retractor box to the cable bundle you see next to the gas filler neck.

Cable tie the coax and any excess into that bundle, disconnect the old sharfin lead from the splitter on the single connection side and plug the new antenna in.

Now you can test it BEFORE you put the whole trunk back together. Hopefully you are doing this outside with a clear view of the sky. Fire up the car and check your satellite received number. With this set up I regularly get 6-7 and sometimes as many as 10.

I even get 3-5 parked inside the garage. didn't before.

I should think that this will also work QUITE well for those wishing to add on an XM radio receiver with a cheap antenna, just run your Ebay XM antenna ( with blue FACRA connector ) to the left side of the trunk following the same basic procedure.
For those that want to by pass the splitter and plug directly into Nav unit, follow the same steps except slide your antenna in under the head liner 6 inchs or so to the left of center on the back glass and run coax down left C pillar into trunk ( nicely placed large hole in parcel shelf on that side also ) following the cable bundles into the electronics stack area. Pull Nav unit out, (couple of push clips on side of Nav unit need to be pressed to slide it out ) pull sharkfin antenna cable and plug in the new one.
So, there you go. A super cheap alternative to replacing your sharkfin for GPS.


