
GROM Audio MB02 MST4 install


Thread Starter
Junior Member
Joined: Nov 2015
Posts: 42
Likes: 8
From: San Francisco Bay Area, California, USA
2005 S500 4Matic
GROM Audio MB02 MST4 install
I recently completed the installation of the GROM Audio MB02 version of their MST4 adapter to add Bluetooth phone functionality, USB Audio, and AUX analog stereo audio to my stock 2005 Mercedes S500 4MATIC.
I was disillusioned with the Dension Gateway 500, or the NavTV OPTI-1 device for replacing the factory Mercedes radio, mostly because of their cost and availability. The Dension Gateway starts at around $500, and has a number of reports that it is only partly-compatible with a W220. The OPTI-1 allows a copper-wired head unit to interface into the rest of the W220's audio system, and it costs around $600, not counting the cost of the replacement head unit you'll need.
I discovered the MST4 by GROM AUDIO after procuring and installing their similar TOYOU3 USB3 adapter in my brother's older Toyota Camry. It worked great, and when I discovered they had the MST4 for my Mercedes, I was pretty excited. It still costs nearly $400 if you add on the Bluetooth, USB, and AUX cables. Having created an account at GROM Audio's website to buy the Toyota adapter, I started receiving email notices of sales. They offer sales from time to time, especially on holidays. I was able to get the MB02 MST4 on a Thanksgiving sale for $246.49, the AUX adapter cable (which also has a USB cable pigtailed off it for charging purposes only) was $14.99, and the Bluetooth adapter and microphone kit was $49.99. This was a sale in November of 2017, so prices may be higher now. With tax, my total bill was just under $335.
It took me a long time to getting around to installing it. The main issue is that it goes in the fiber optic ring where the trunk-mounted CD-changer is. You have to work out how to get the cables from the MST4 to somewhere you can actually use them. The center console compartment seems like the obvious best-location to me. That means passing the wires from the trunk into the cabin and getting them to the center console. Obvious things in the way are the seats, the carpet, and the center console.
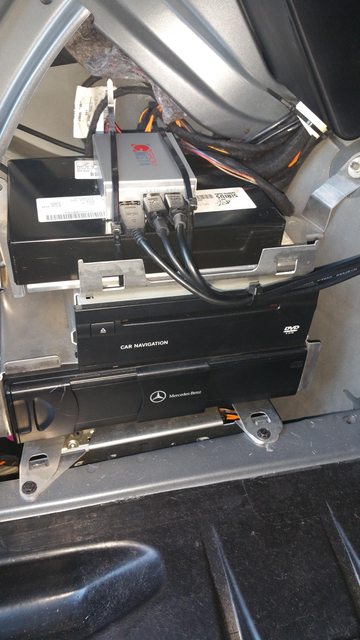
To begin with, I had to remove the carpeted trim in the trunk. I took off the piece on the driver-side covering the CD changer and other electronic gizmos in a stack there. I followed the instructions for unplugging the fiber-optics from the CD changer and plugging them into the MST4. I also had to tap a +12 volt line and a ground line, following instructions and using the taps provided.
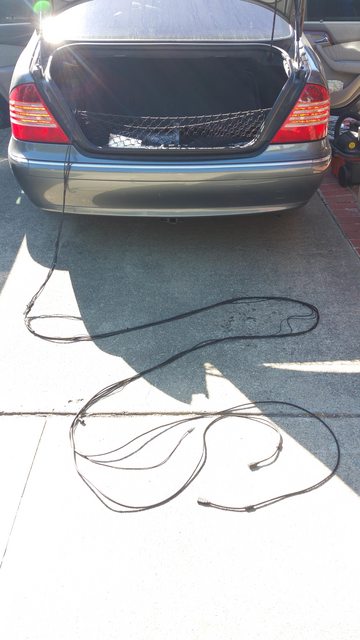
The next obvious problem is that the cables aren't long enough to reach the center console. The microphone cable is, but the USB audio, and AUX analog 1/8" stereo phone cable and charging USB pigtail are not. I ordered up two USB extension cables and an 1/8" stereo extension cable. I hooked them up and strapped the cables together in a bundle with nylon wire-ties about every 16 inches.
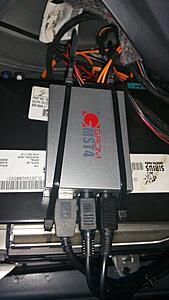
The device installed looks like this:
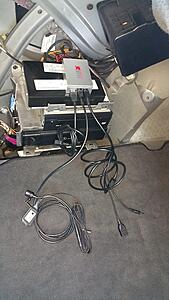
With the cable extensions:
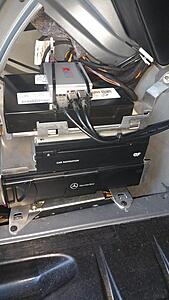
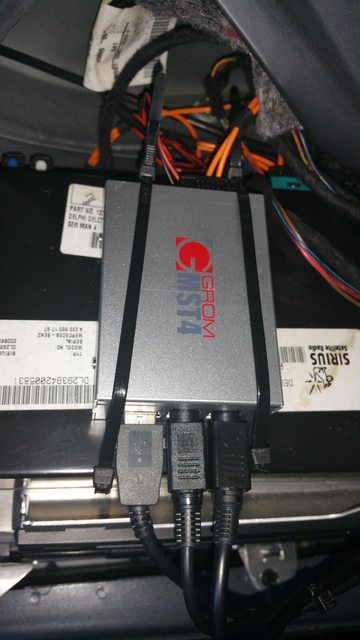
I strapped the MST4 to the stack with nylon wire ties:
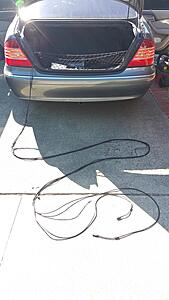
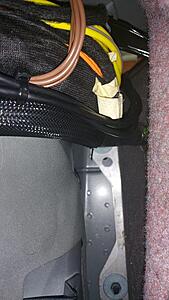
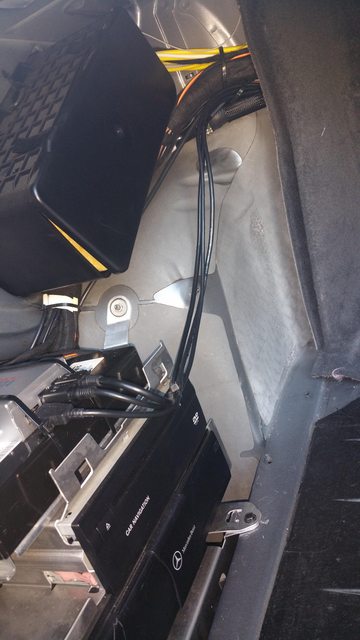
To pass the wires into the cabin, I followed the existing bundle of air-lines and cables through the driver's side passage behind the seat. There's another bundle that passes through on the passenger side, but that path is too long for the supplied microphone cable. I definitely recommend going through the driver's side. Here' the cable bundle going to the driver's side path:

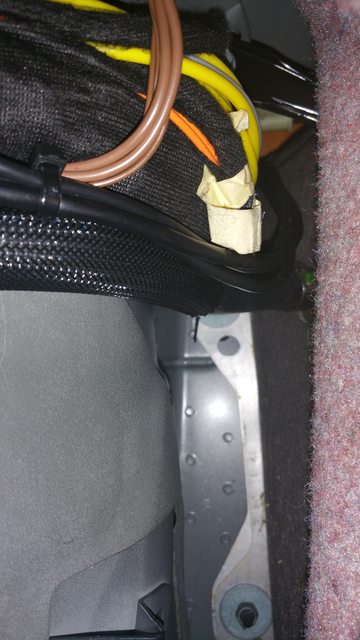
Close-up of the wires and air tubes going through the passage on the driver's side behind the rear seat:
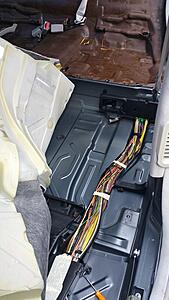
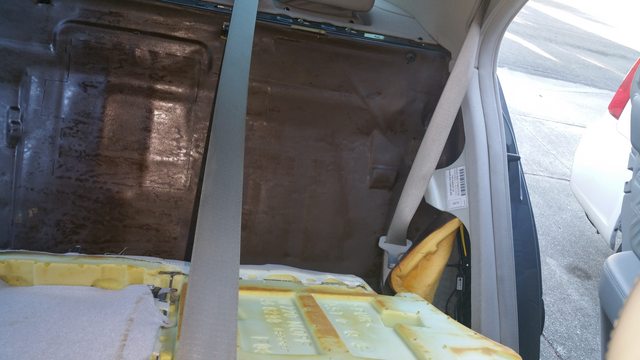
In this photo I have the rear seat backrest folded down, exposing the brown barrier sheet between the seat back and the gas tank. The right side has been pulled up to show the cable bundle, showing where the extension cable is connected to the AUX analog audio cable and the USB cables. I had a problem with my install: Tugging on the cables during the install pulled the AUX extension cable out slightly from the AUX plug, such that only the tip and ring contacts were making a connection, which led to an out-of-phase spacey audio sound with almost no vocals. I recognized this symptom for what it was and pulled this apart so I could snap that connection back together tightly, and I gave it a wrap of gaffer's tape to secure it for the future.

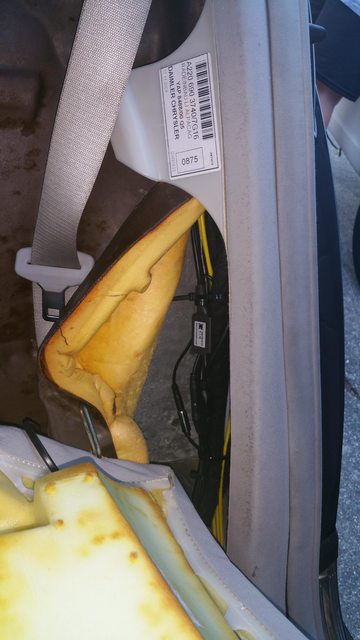
Closeup of the wire bundle behind the rear seat backrest:

I did my install with both the front and rear seats and the center console out of the car. Removal of the seats is covered elsewhere on the Internet, but on mine it involved removing two wiring connections, an airline, and a steel cable for the supplemental restraint system in addition to the usual bolts and seatbelts. With the seats removed, the wiring channel beneath the carpet on the driver's side could be exposed:
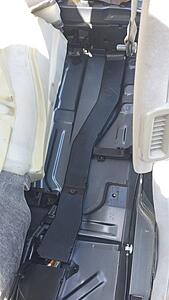
Wiring channel open, with my cable bundle installed:
My cable bundle exited the wire channel in an opening under the driver's seat, and I wrapped the cables in some split-loom tubing. I ran that up the side of the center console (there's an indent that's just perfect for it) and drilled a hole in the underside of the center console's main compartment to pass the cables through. I coiled the cable excess and laid it flat on the bottom of the center console compartment and covered them with the compartment's carpet-like floor piece. Admittedly low-tech, but functional:

I've tested it all out, and as far as I can tell, it works perfectly. The audio is loud and clear. I paired the Bluetooth with my Samsung Note4 (Android) cell phone and was able to place and make phone calls through the system, talking into the microphone and having the call audio go through the car's stereo. It's a bit of work to run the wires, but worth the trouble for a clean install.
I was disillusioned with the Dension Gateway 500, or the NavTV OPTI-1 device for replacing the factory Mercedes radio, mostly because of their cost and availability. The Dension Gateway starts at around $500, and has a number of reports that it is only partly-compatible with a W220. The OPTI-1 allows a copper-wired head unit to interface into the rest of the W220's audio system, and it costs around $600, not counting the cost of the replacement head unit you'll need.
I discovered the MST4 by GROM AUDIO after procuring and installing their similar TOYOU3 USB3 adapter in my brother's older Toyota Camry. It worked great, and when I discovered they had the MST4 for my Mercedes, I was pretty excited. It still costs nearly $400 if you add on the Bluetooth, USB, and AUX cables. Having created an account at GROM Audio's website to buy the Toyota adapter, I started receiving email notices of sales. They offer sales from time to time, especially on holidays. I was able to get the MB02 MST4 on a Thanksgiving sale for $246.49, the AUX adapter cable (which also has a USB cable pigtailed off it for charging purposes only) was $14.99, and the Bluetooth adapter and microphone kit was $49.99. This was a sale in November of 2017, so prices may be higher now. With tax, my total bill was just under $335.
It took me a long time to getting around to installing it. The main issue is that it goes in the fiber optic ring where the trunk-mounted CD-changer is. You have to work out how to get the cables from the MST4 to somewhere you can actually use them. The center console compartment seems like the obvious best-location to me. That means passing the wires from the trunk into the cabin and getting them to the center console. Obvious things in the way are the seats, the carpet, and the center console.
To begin with, I had to remove the carpeted trim in the trunk. I took off the piece on the driver-side covering the CD changer and other electronic gizmos in a stack there. I followed the instructions for unplugging the fiber-optics from the CD changer and plugging them into the MST4. I also had to tap a +12 volt line and a ground line, following instructions and using the taps provided.
The next obvious problem is that the cables aren't long enough to reach the center console. The microphone cable is, but the USB audio, and AUX analog 1/8" stereo phone cable and charging USB pigtail are not. I ordered up two USB extension cables and an 1/8" stereo extension cable. I hooked them up and strapped the cables together in a bundle with nylon wire-ties about every 16 inches.
The device installed looks like this:
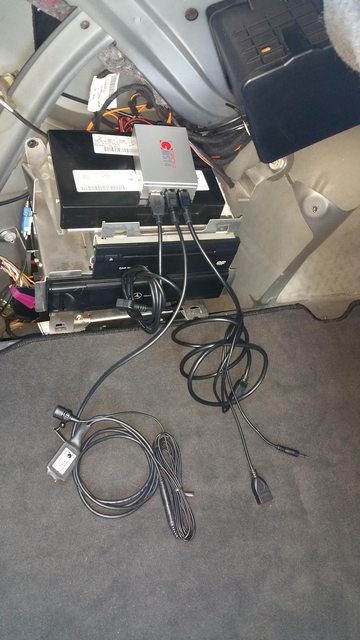
With the cable extensions:
I strapped the MST4 to the stack with nylon wire ties:
To pass the wires into the cabin, I followed the existing bundle of air-lines and cables through the driver's side passage behind the seat. There's another bundle that passes through on the passenger side, but that path is too long for the supplied microphone cable. I definitely recommend going through the driver's side. Here' the cable bundle going to the driver's side path:
Close-up of the wires and air tubes going through the passage on the driver's side behind the rear seat:
In this photo I have the rear seat backrest folded down, exposing the brown barrier sheet between the seat back and the gas tank. The right side has been pulled up to show the cable bundle, showing where the extension cable is connected to the AUX analog audio cable and the USB cables. I had a problem with my install: Tugging on the cables during the install pulled the AUX extension cable out slightly from the AUX plug, such that only the tip and ring contacts were making a connection, which led to an out-of-phase spacey audio sound with almost no vocals. I recognized this symptom for what it was and pulled this apart so I could snap that connection back together tightly, and I gave it a wrap of gaffer's tape to secure it for the future.
Closeup of the wire bundle behind the rear seat backrest:
I did my install with both the front and rear seats and the center console out of the car. Removal of the seats is covered elsewhere on the Internet, but on mine it involved removing two wiring connections, an airline, and a steel cable for the supplemental restraint system in addition to the usual bolts and seatbelts. With the seats removed, the wiring channel beneath the carpet on the driver's side could be exposed:
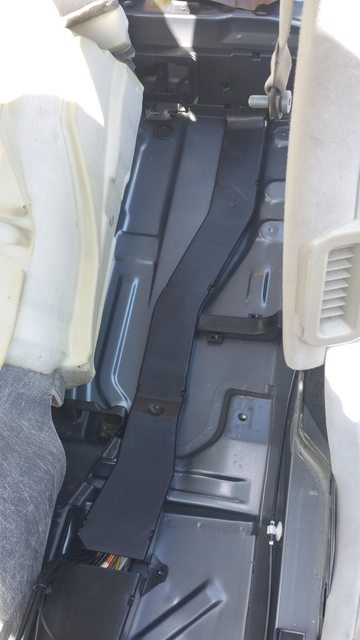
Wiring channel open, with my cable bundle installed:

My cable bundle exited the wire channel in an opening under the driver's seat, and I wrapped the cables in some split-loom tubing. I ran that up the side of the center console (there's an indent that's just perfect for it) and drilled a hole in the underside of the center console's main compartment to pass the cables through. I coiled the cable excess and laid it flat on the bottom of the center console compartment and covered them with the compartment's carpet-like floor piece. Admittedly low-tech, but functional:

I've tested it all out, and as far as I can tell, it works perfectly. The audio is loud and clear. I paired the Bluetooth with my Samsung Note4 (Android) cell phone and was able to place and make phone calls through the system, talking into the microphone and having the call audio go through the car's stereo. It's a bit of work to run the wires, but worth the trouble for a clean install.
Last edited by Bugsi; Aug 31, 2019 at 12:13 AM. Reason: Fixed typo


