When you click on links to various merchants on this site and make a purchase, this can result in this site earning a commission. Affiliate programs and affiliations include, but are not limited to, the eBay Partner Network.
Just curious...why are you replacing the steering wheel? Like the all black vs. wood?
Just for looks. Like the thicker sportier look along with the flat bottom. If you have any more questions send me a pm. Don't want to hijack this thread any longer ☹️
Hi there, I fixed pump/bladder issues on my '04 E55 and my '13 63wagon. When chasing my issue/s, the easiest thing for me to do was to blow in each hose/ bladder with my mouth and see which one leaked. Took about two minutes to identify. Additionally, there is a check valve that can allow the air to bleed back. There is one in the pump and valves within the controller on the seat that all the tubes plug into (think of it as a smart manifold) The pump can and will fail from the repetition. IF you can't find the specific bladder part number for sale, there are generic seat bladders available. I had no success with DIY repair of the damaged bladder, that lasted very long, though I tried.
Thanks for all the responses. So car stuff is on hold right now. My 91yo grandmother ended up in the hospital Monday and she's not going to be leaving alive. I've been in the hospital with her and family last couple days. I'm going to get to the seat as soon as I can, probably looking at Sunday or Monday before I can get the car out of the garage and get it fixed. Bear with me though, I'm not going to let this thread end without posting the repair.
Thanks for all the responses. So car stuff is on hold right now. My 91yo grandmother ended up in the hospital Monday and she's not going to be leaving alive. I've been in the hospital with her and family last couple days. I'm going to get to the seat as soon as I can, probably looking at Sunday or Monday before I can get the car out of the garage and get it fixed. Bear with me though, I'm not going to let this thread end without posting the repair.
I had a few minutes today before work, so I used them to distract me from other things.
Got the driver side leak figured out and temporarily rigged well enough to test. As the system powered and pumped up for initial testing, the hissing from the driver seat disappeared, but low and behold, a hissing from the passenger seat became evident! Batting a thousand here!
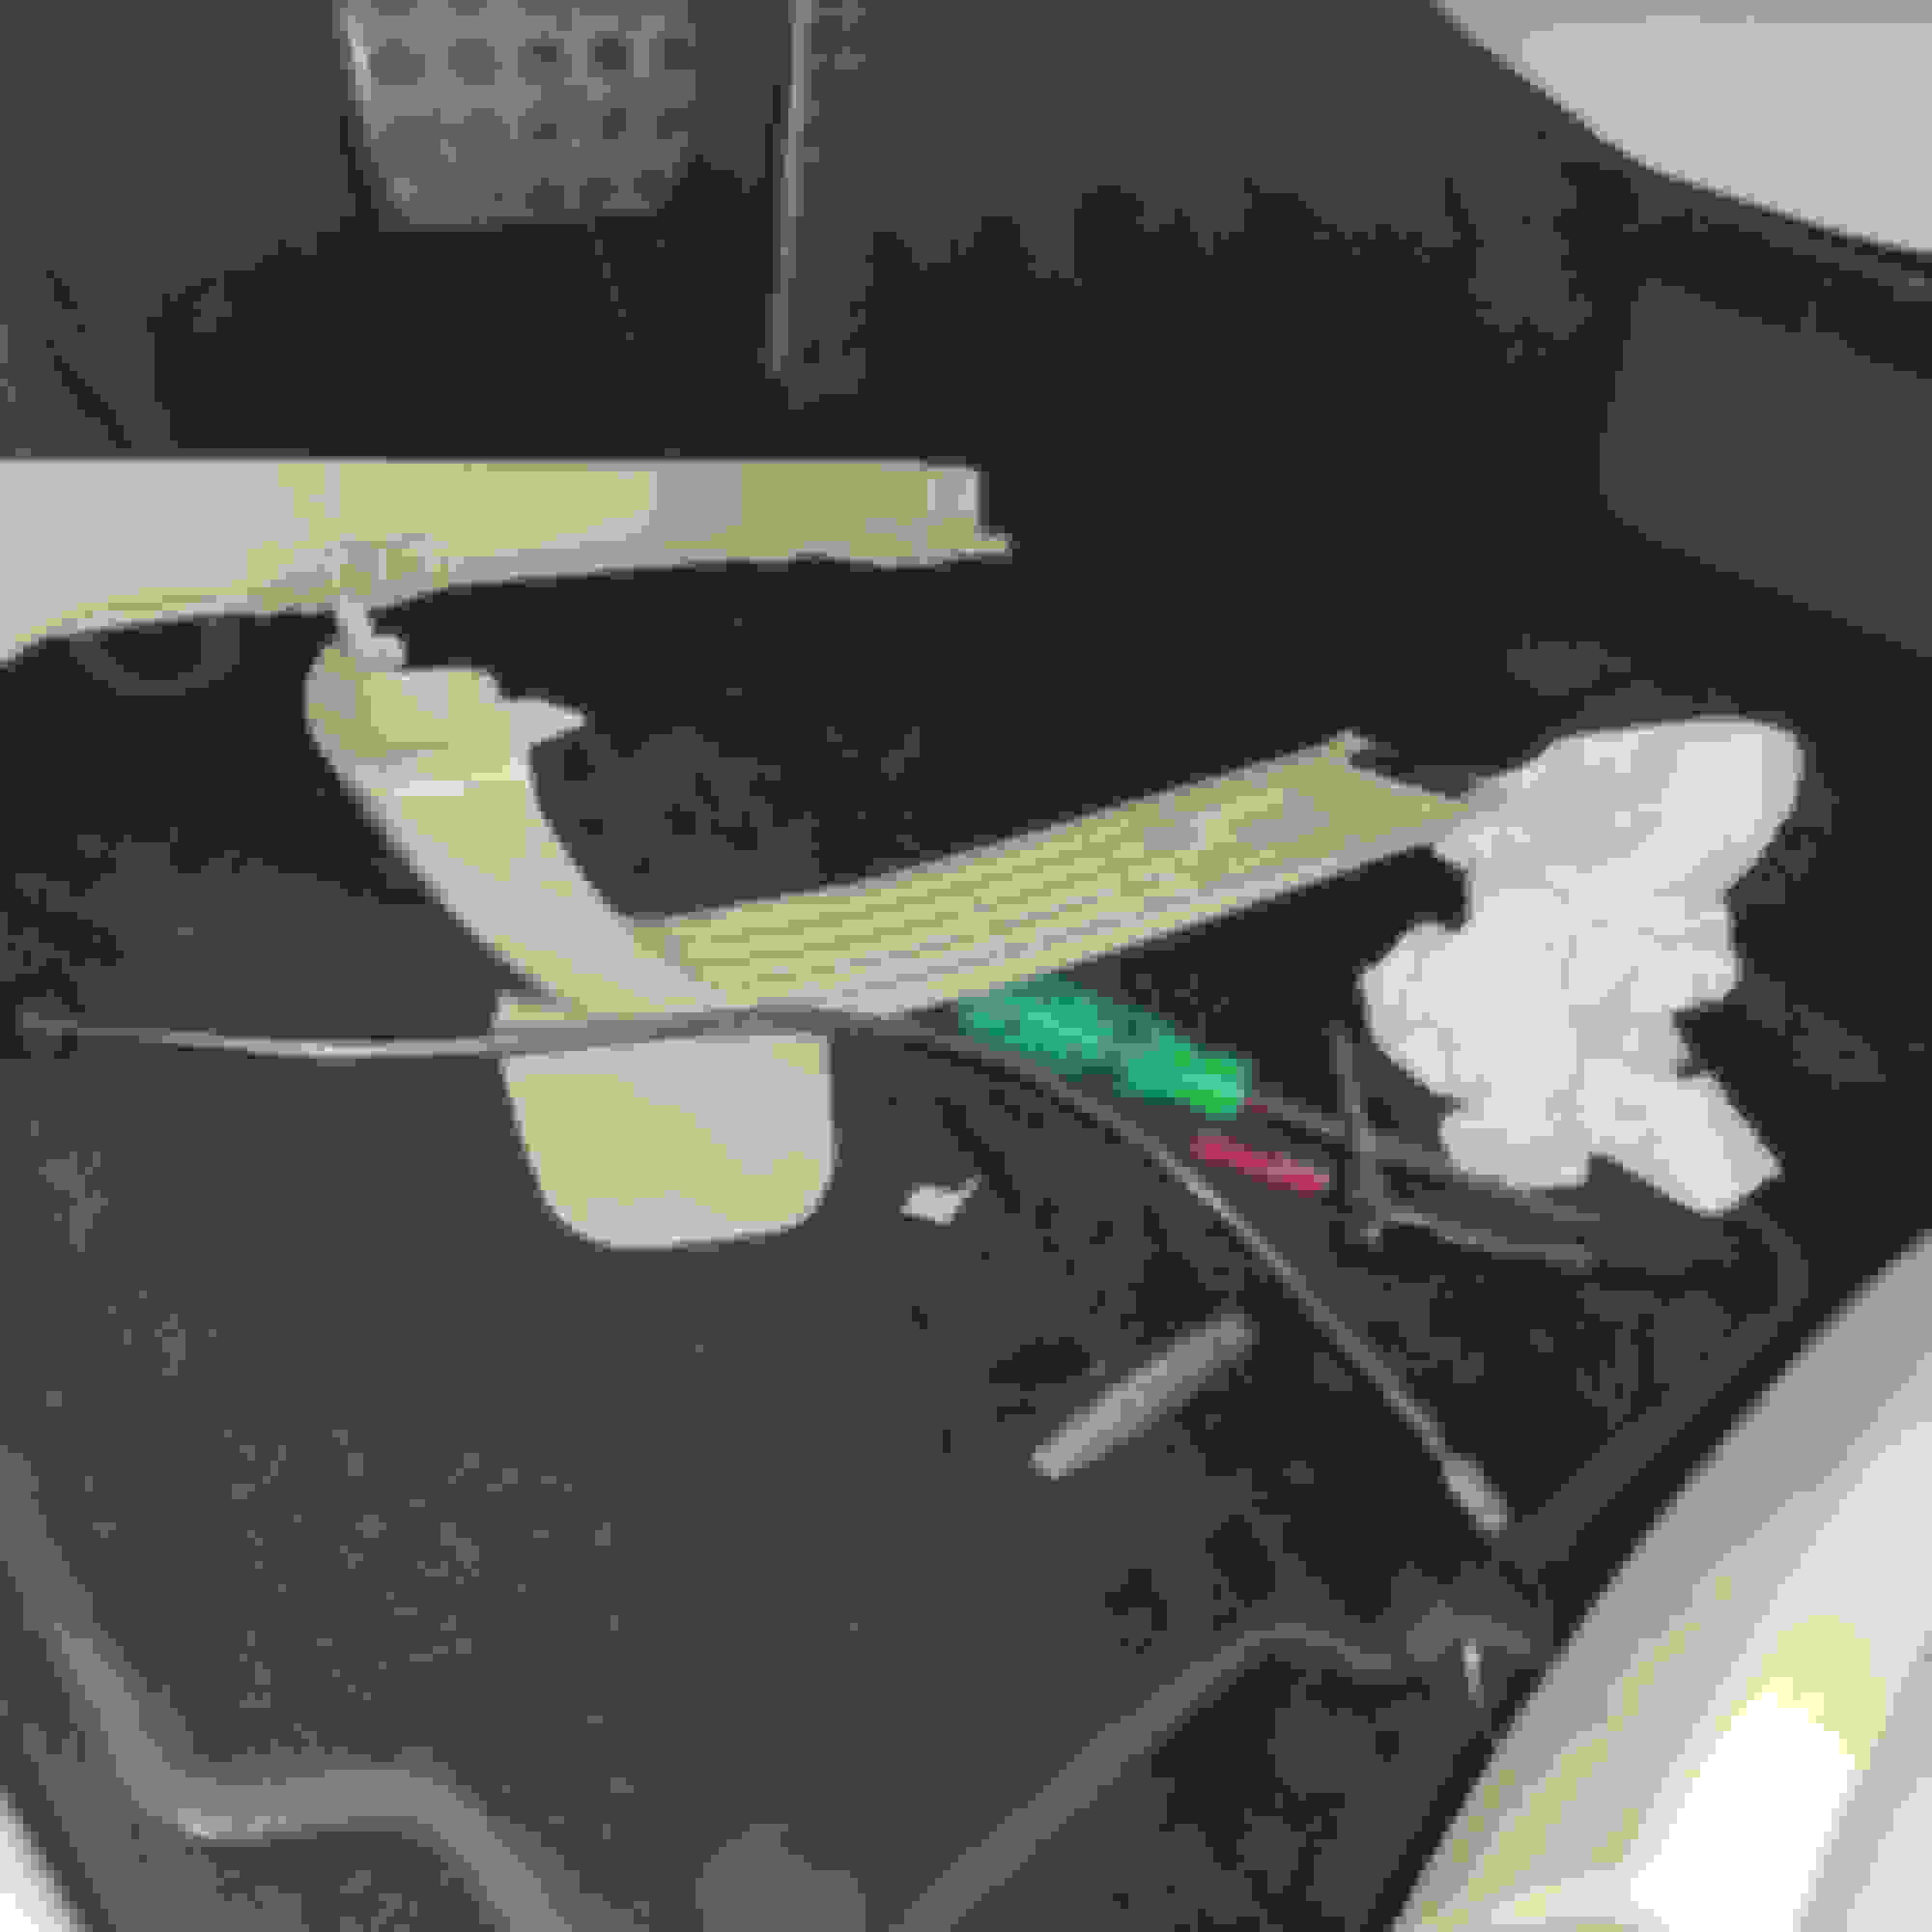
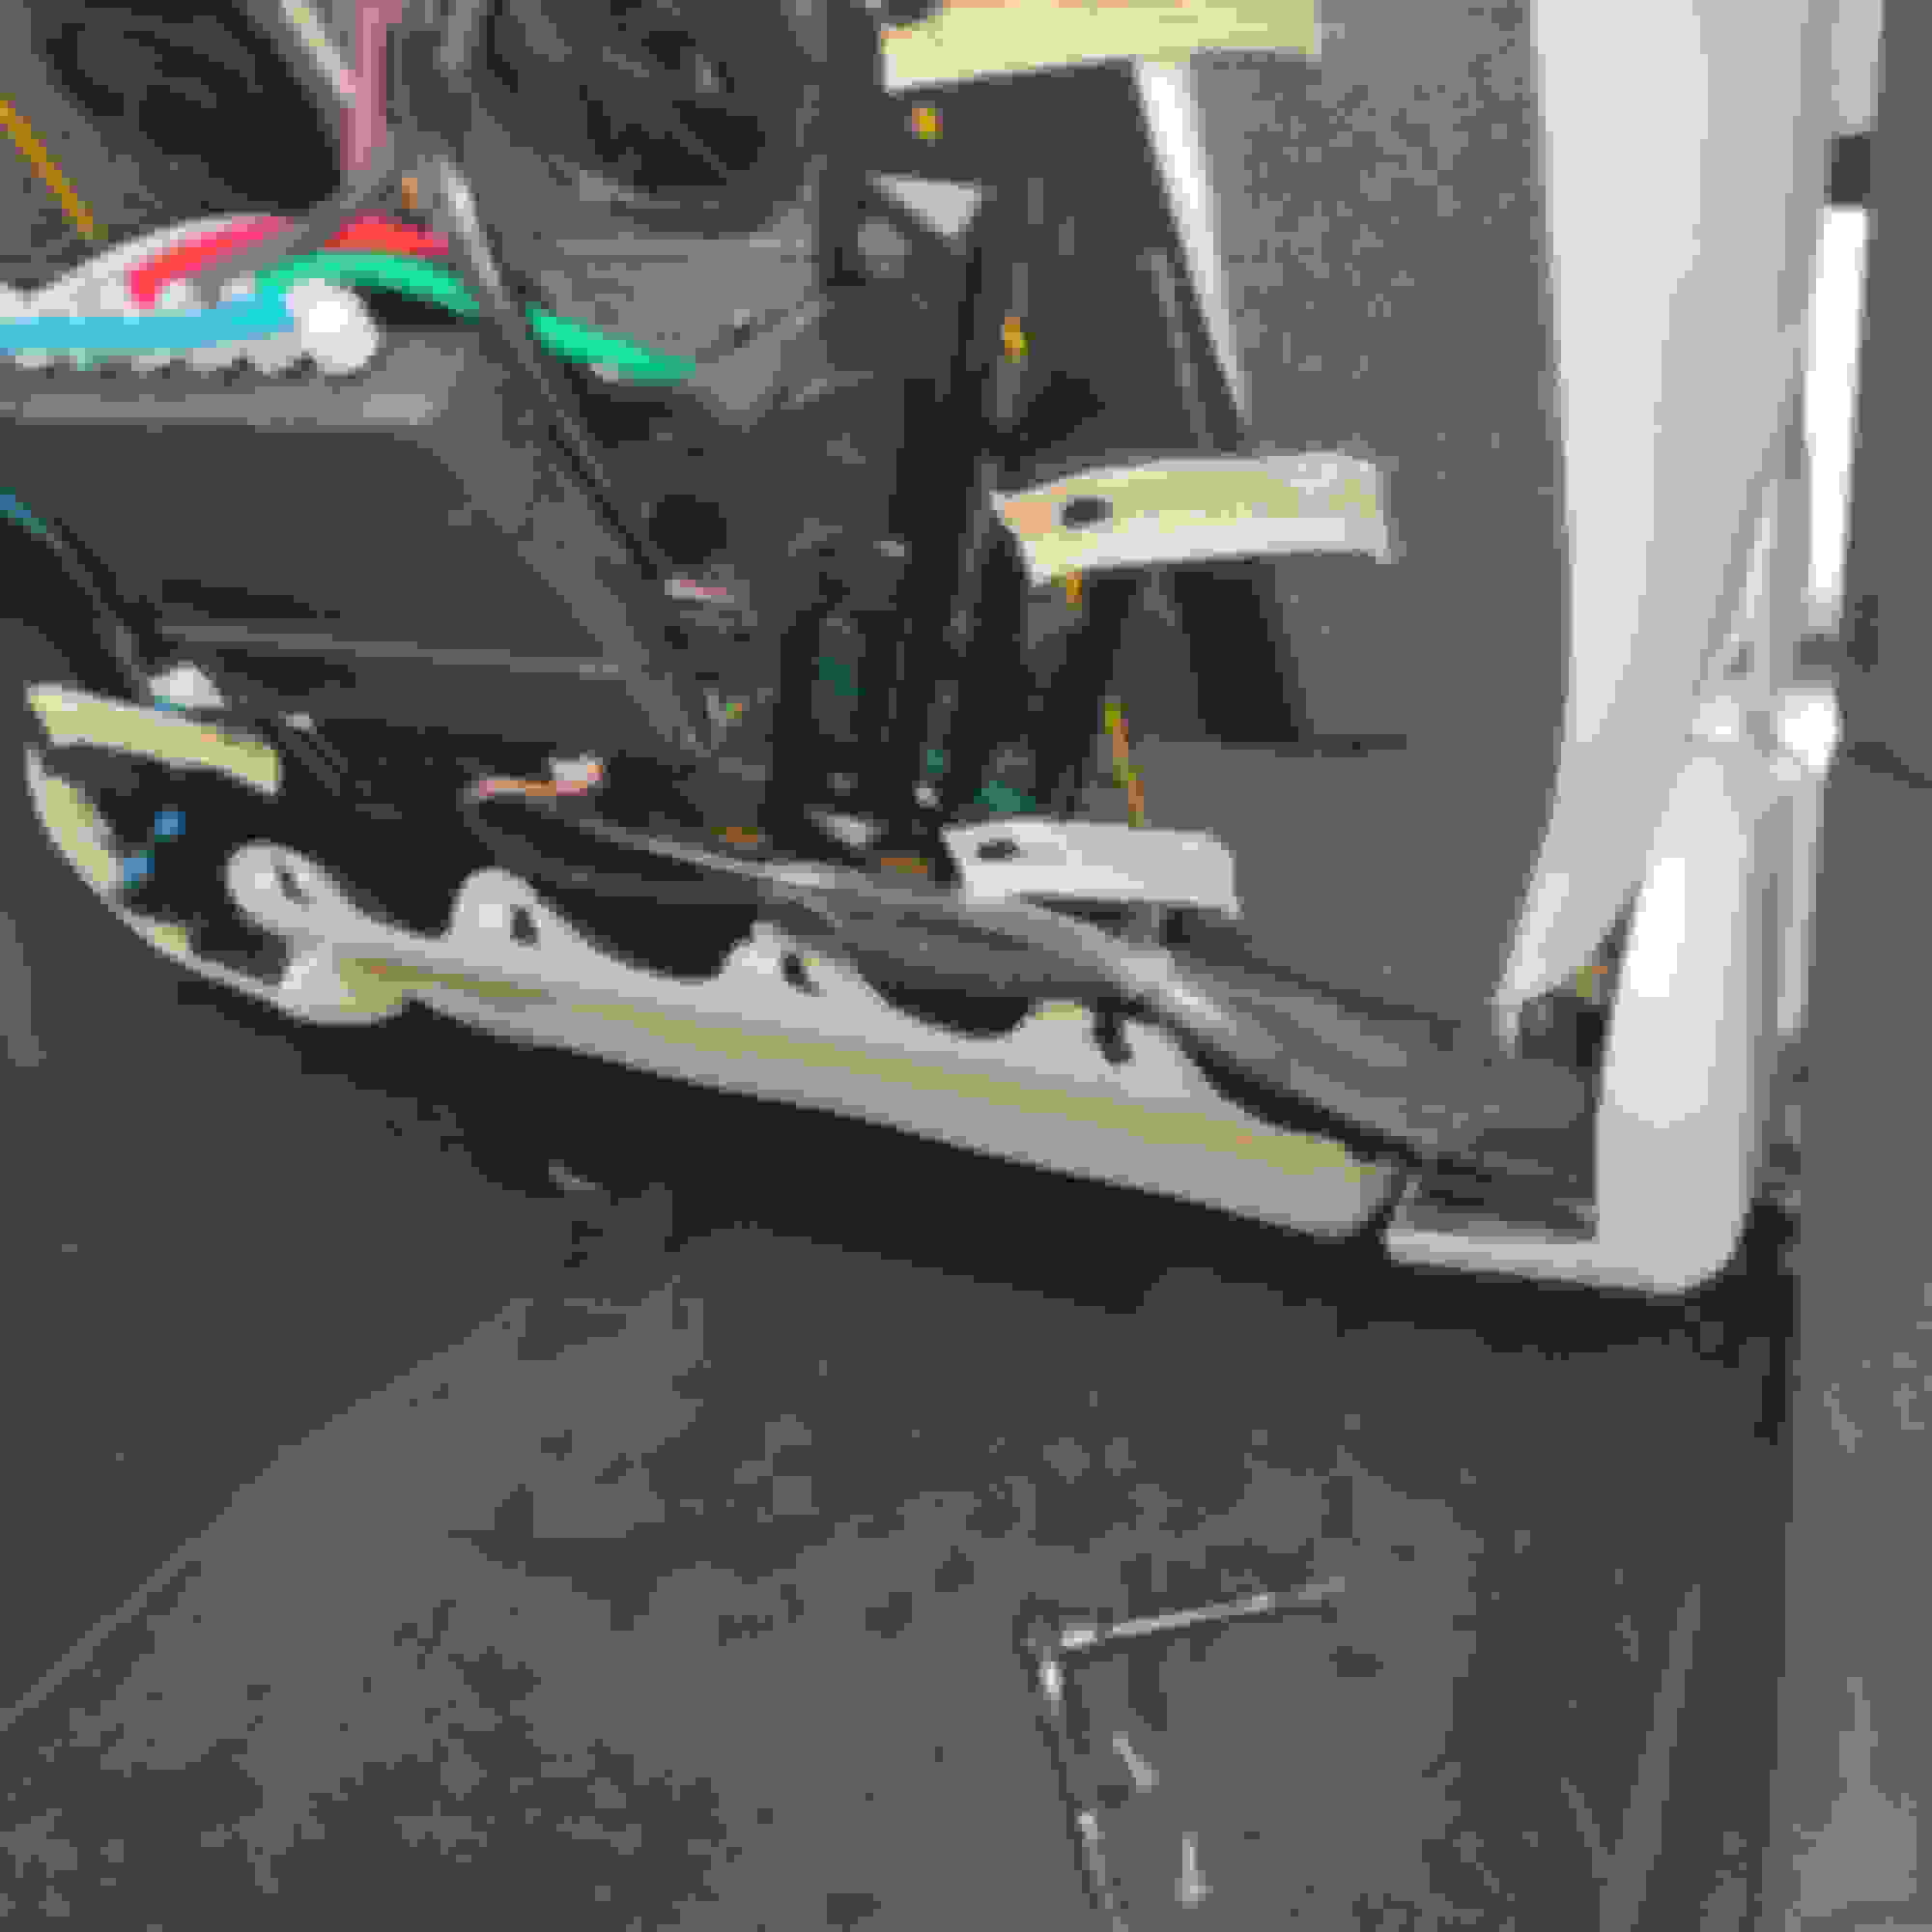
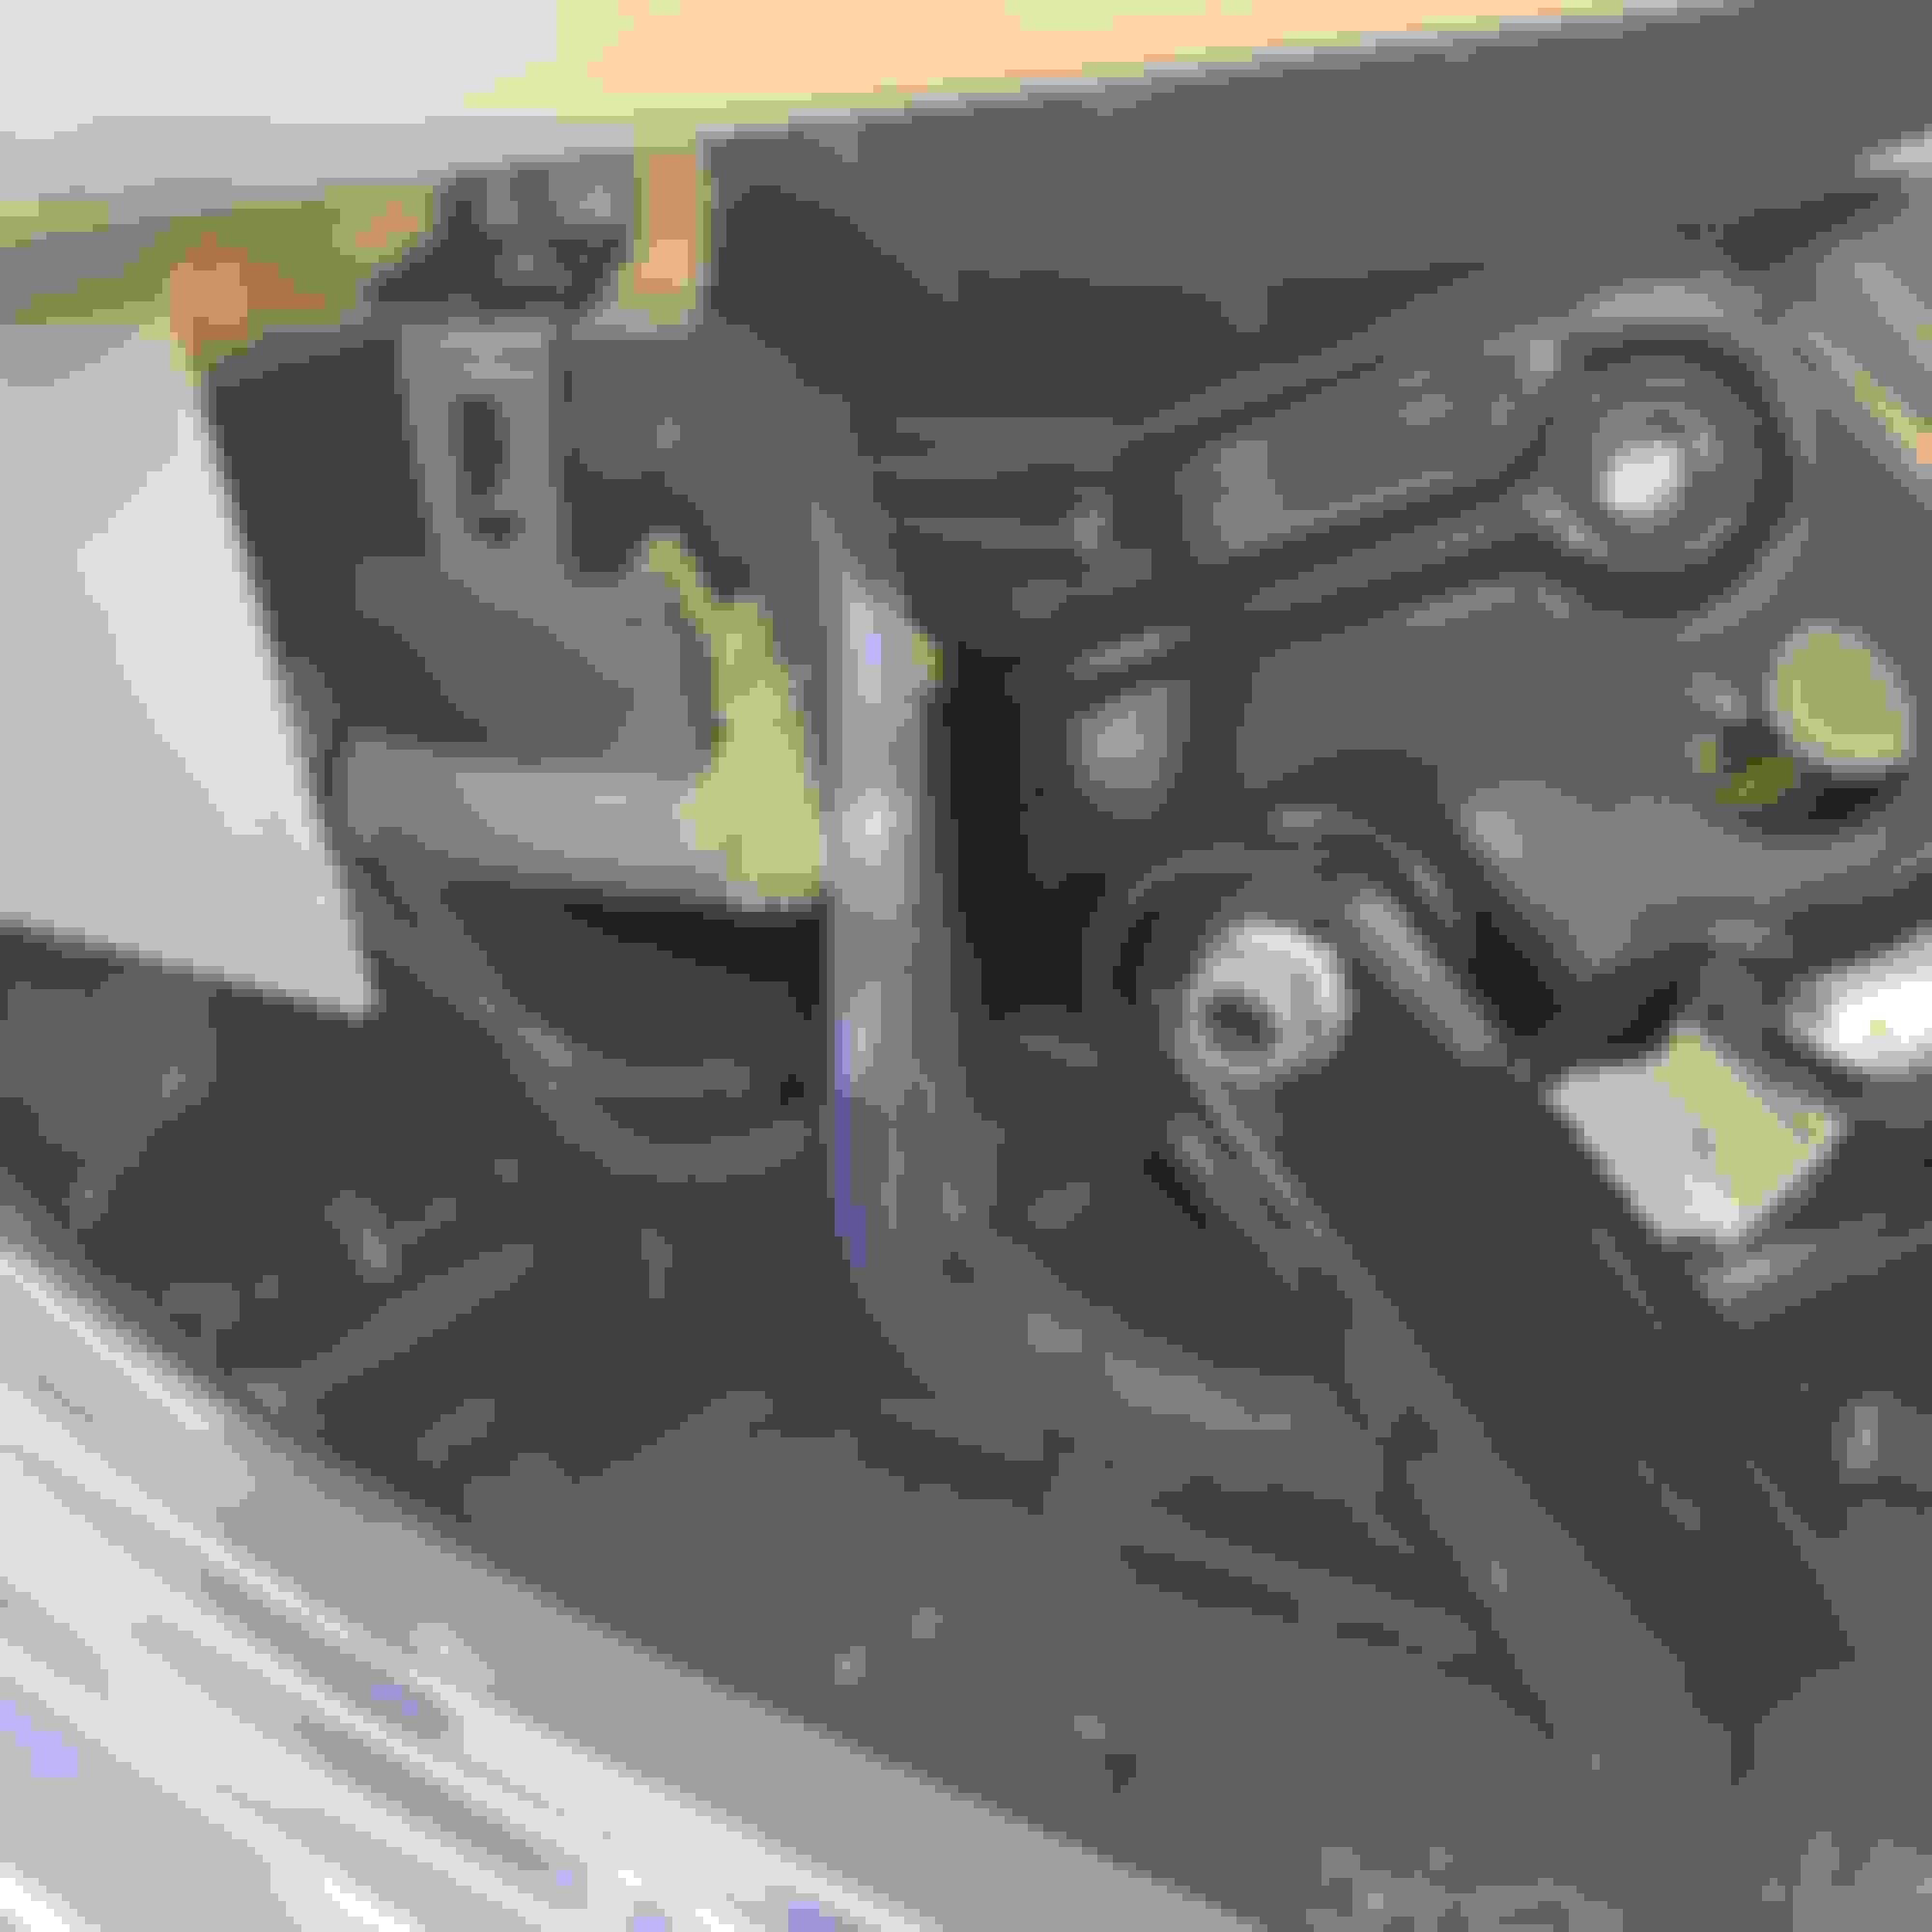
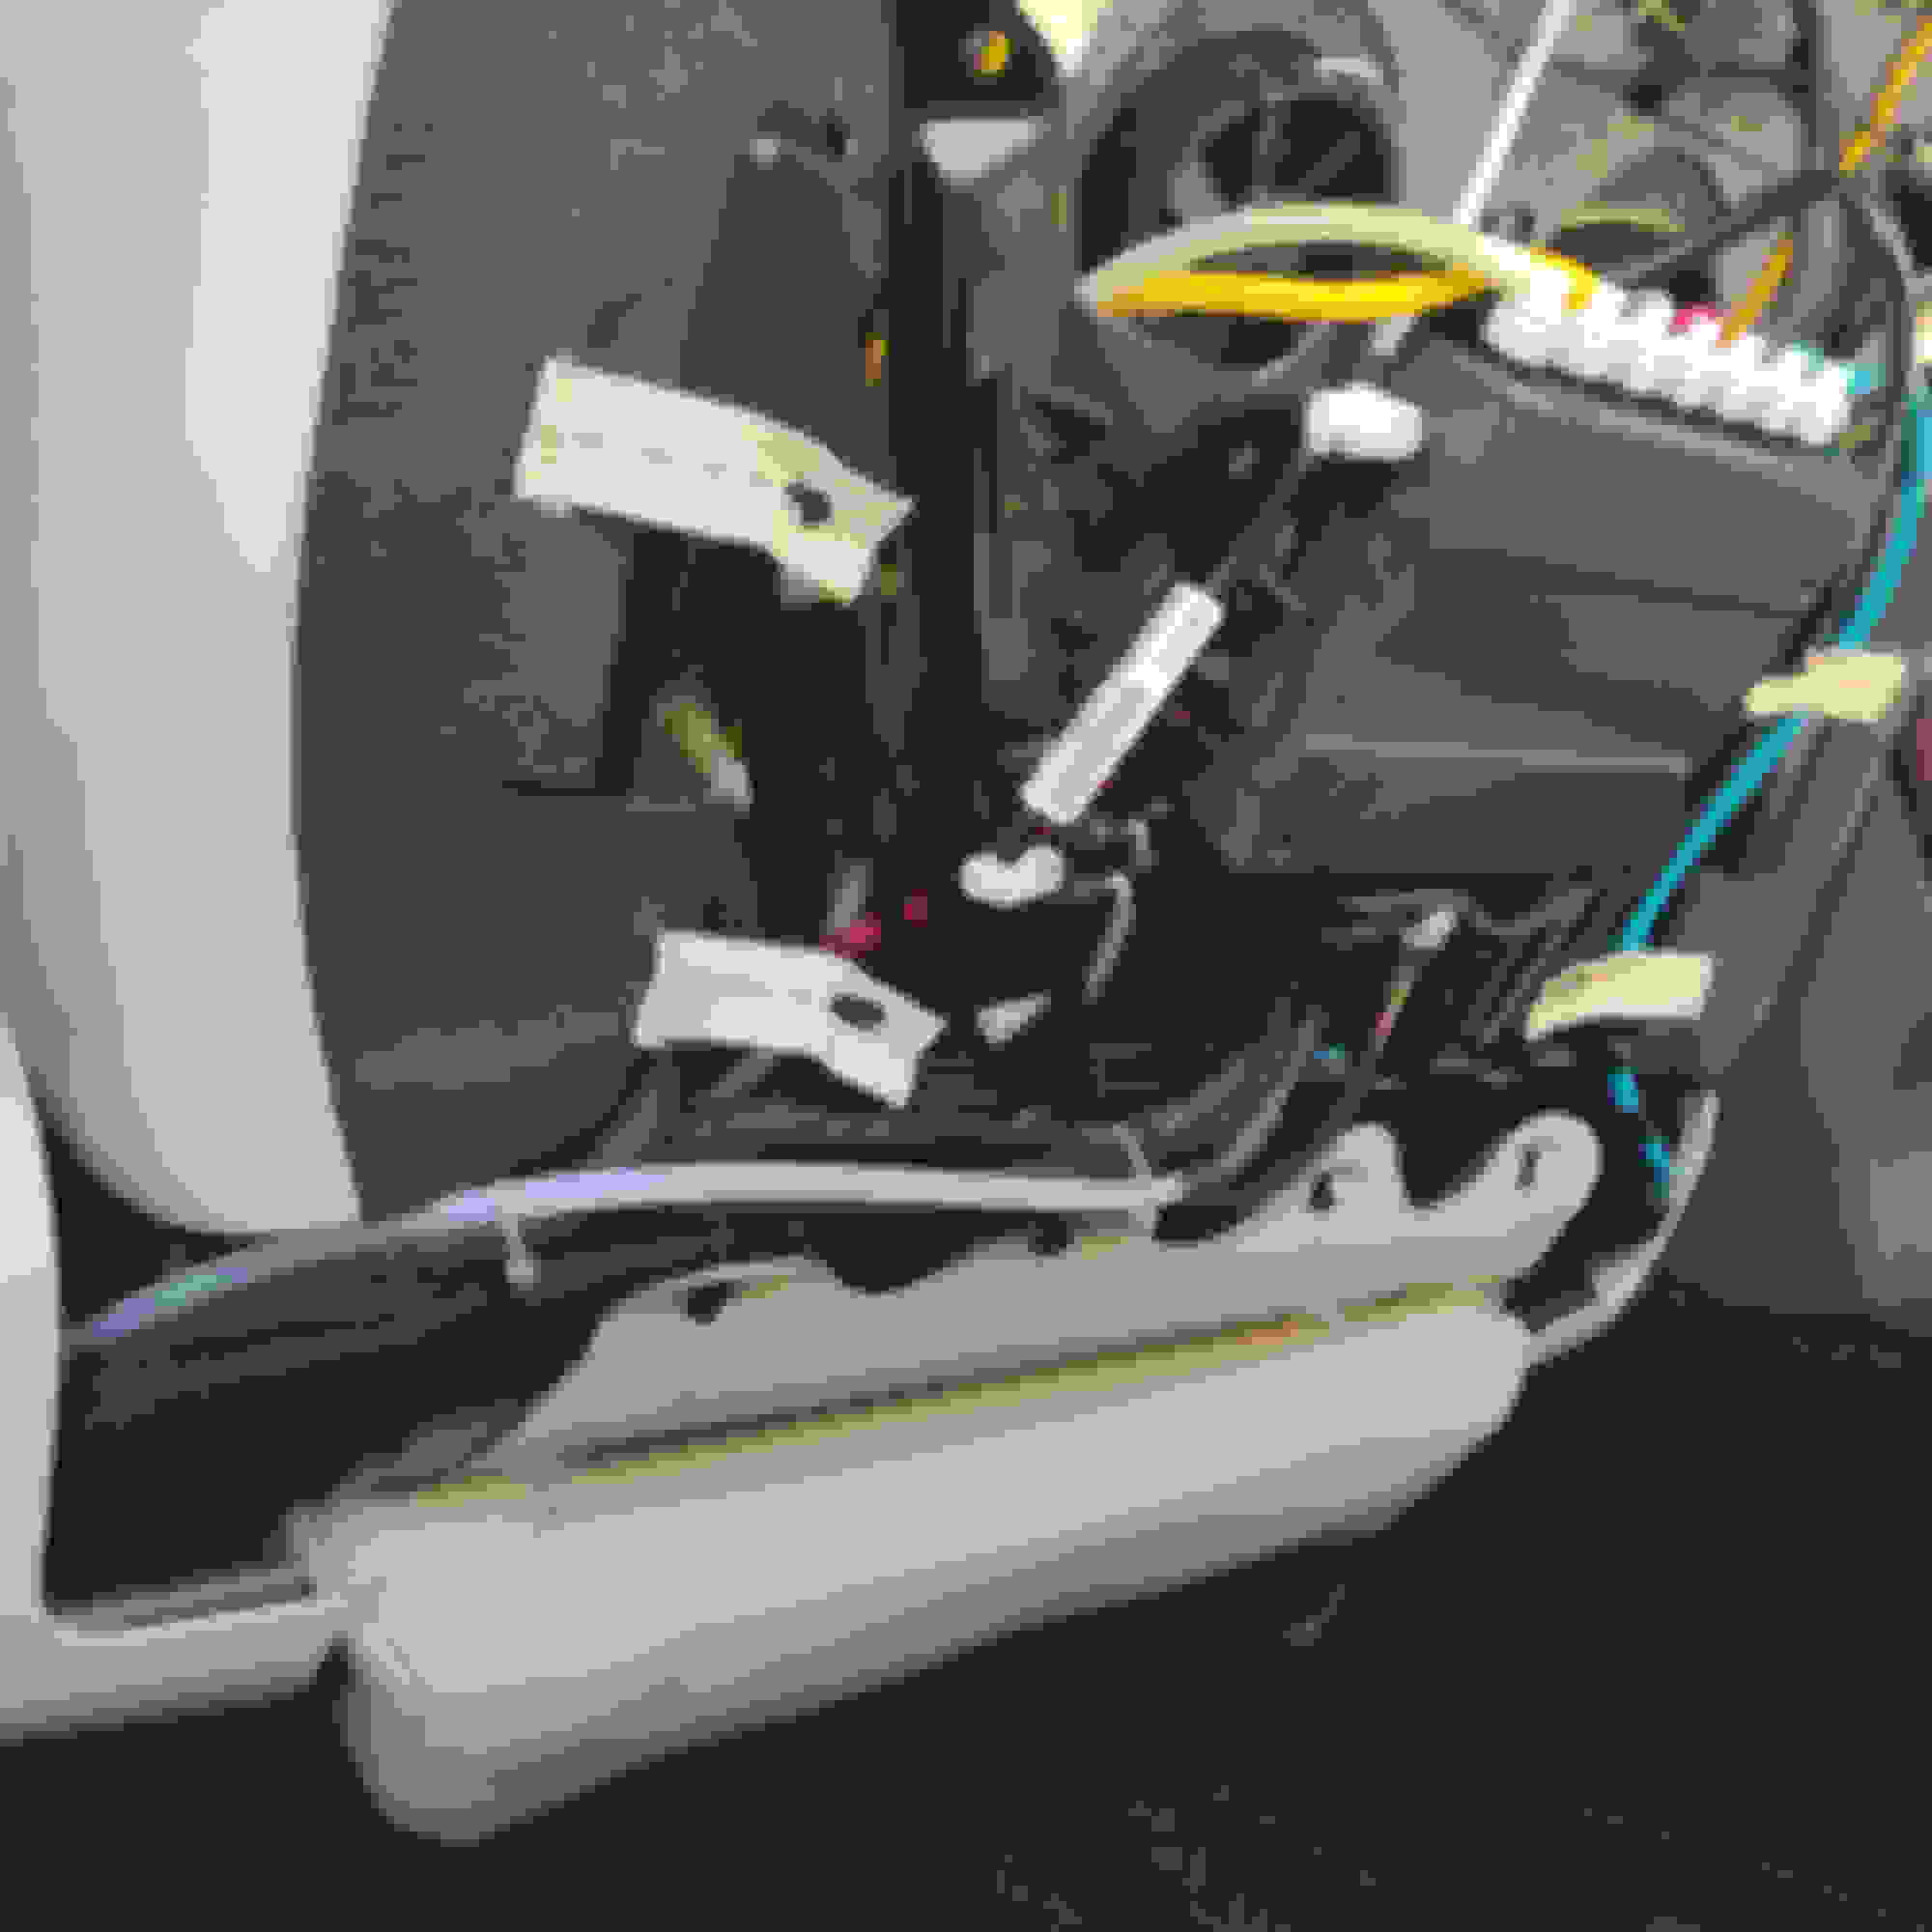
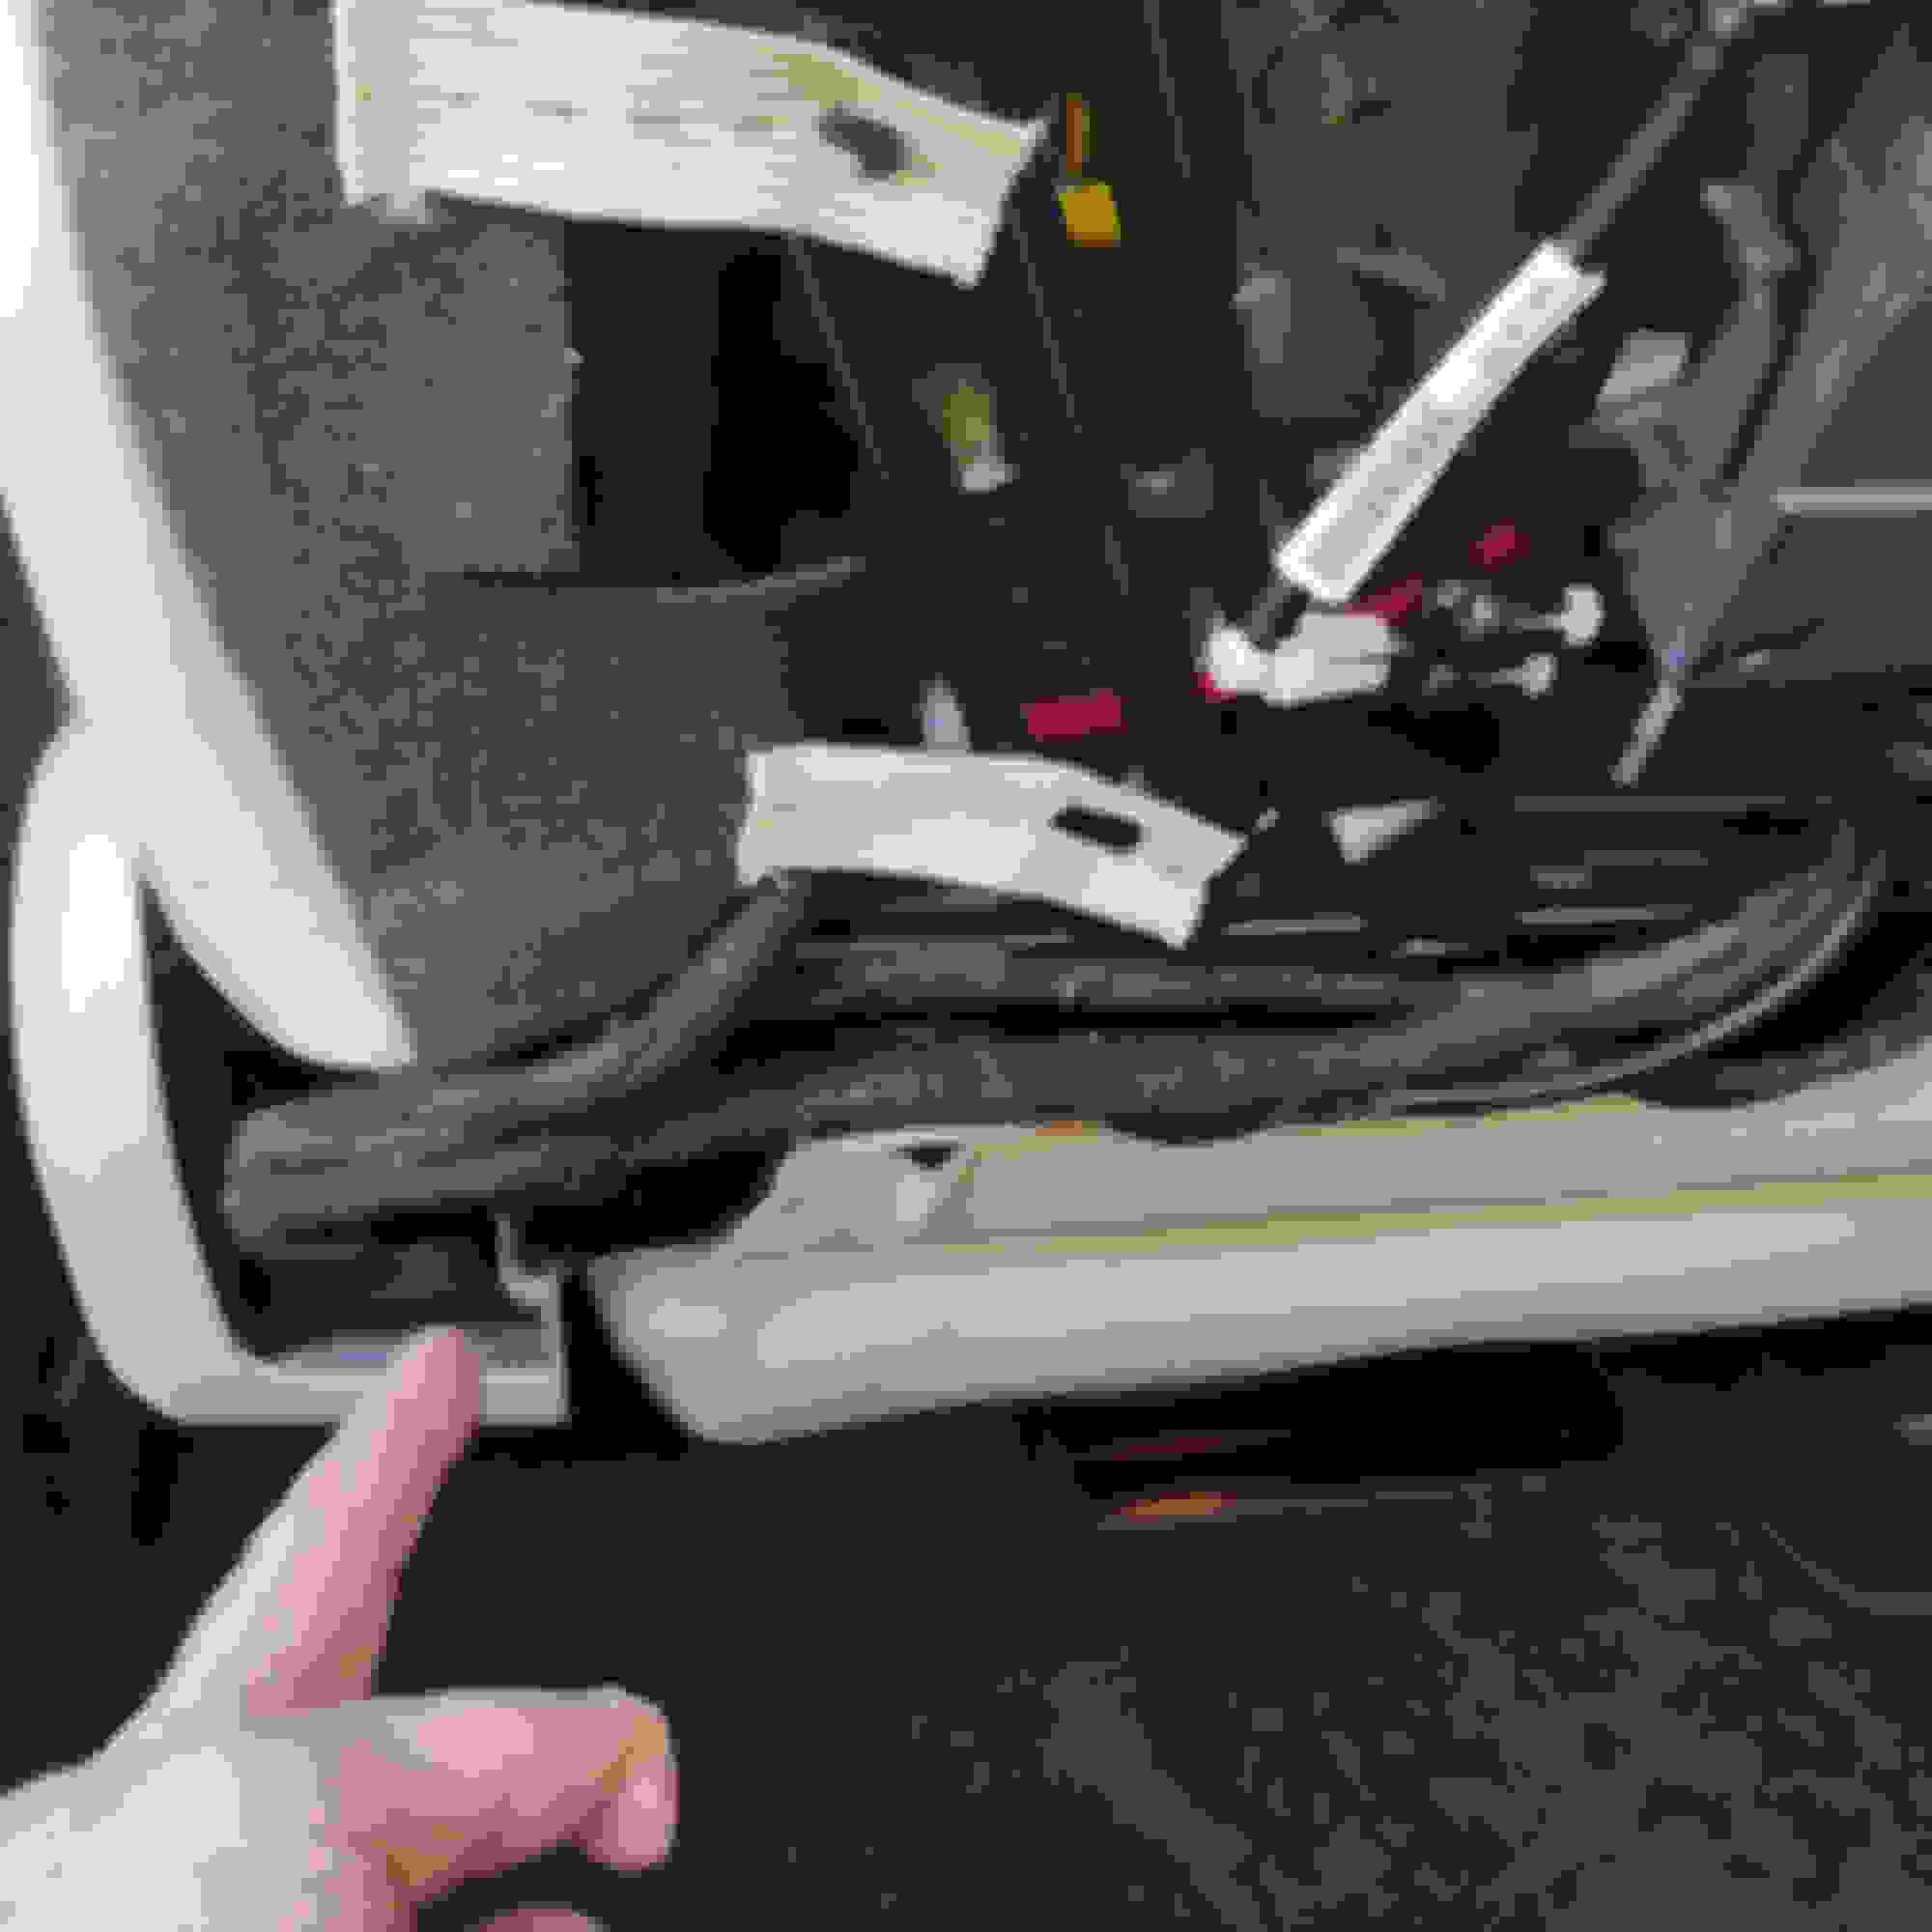
The hardest part of the driver seat repair was figuring out how to remove the front and side seat trim pieces. What a pain in the ***! I have WIS/EPC and although it helped, removal procedures were not 100% inclusive. I only broke a couple plastic thingys, so I'm pretty proud of myself! I'm not sure, but it looks like someone may even have already been under the seat to address a leak? A broken black plastic tab/thingy fell when I removed the front trim piece and I didn't touch anything black... Oh well, at least I didn't have to pull the seat entirely.
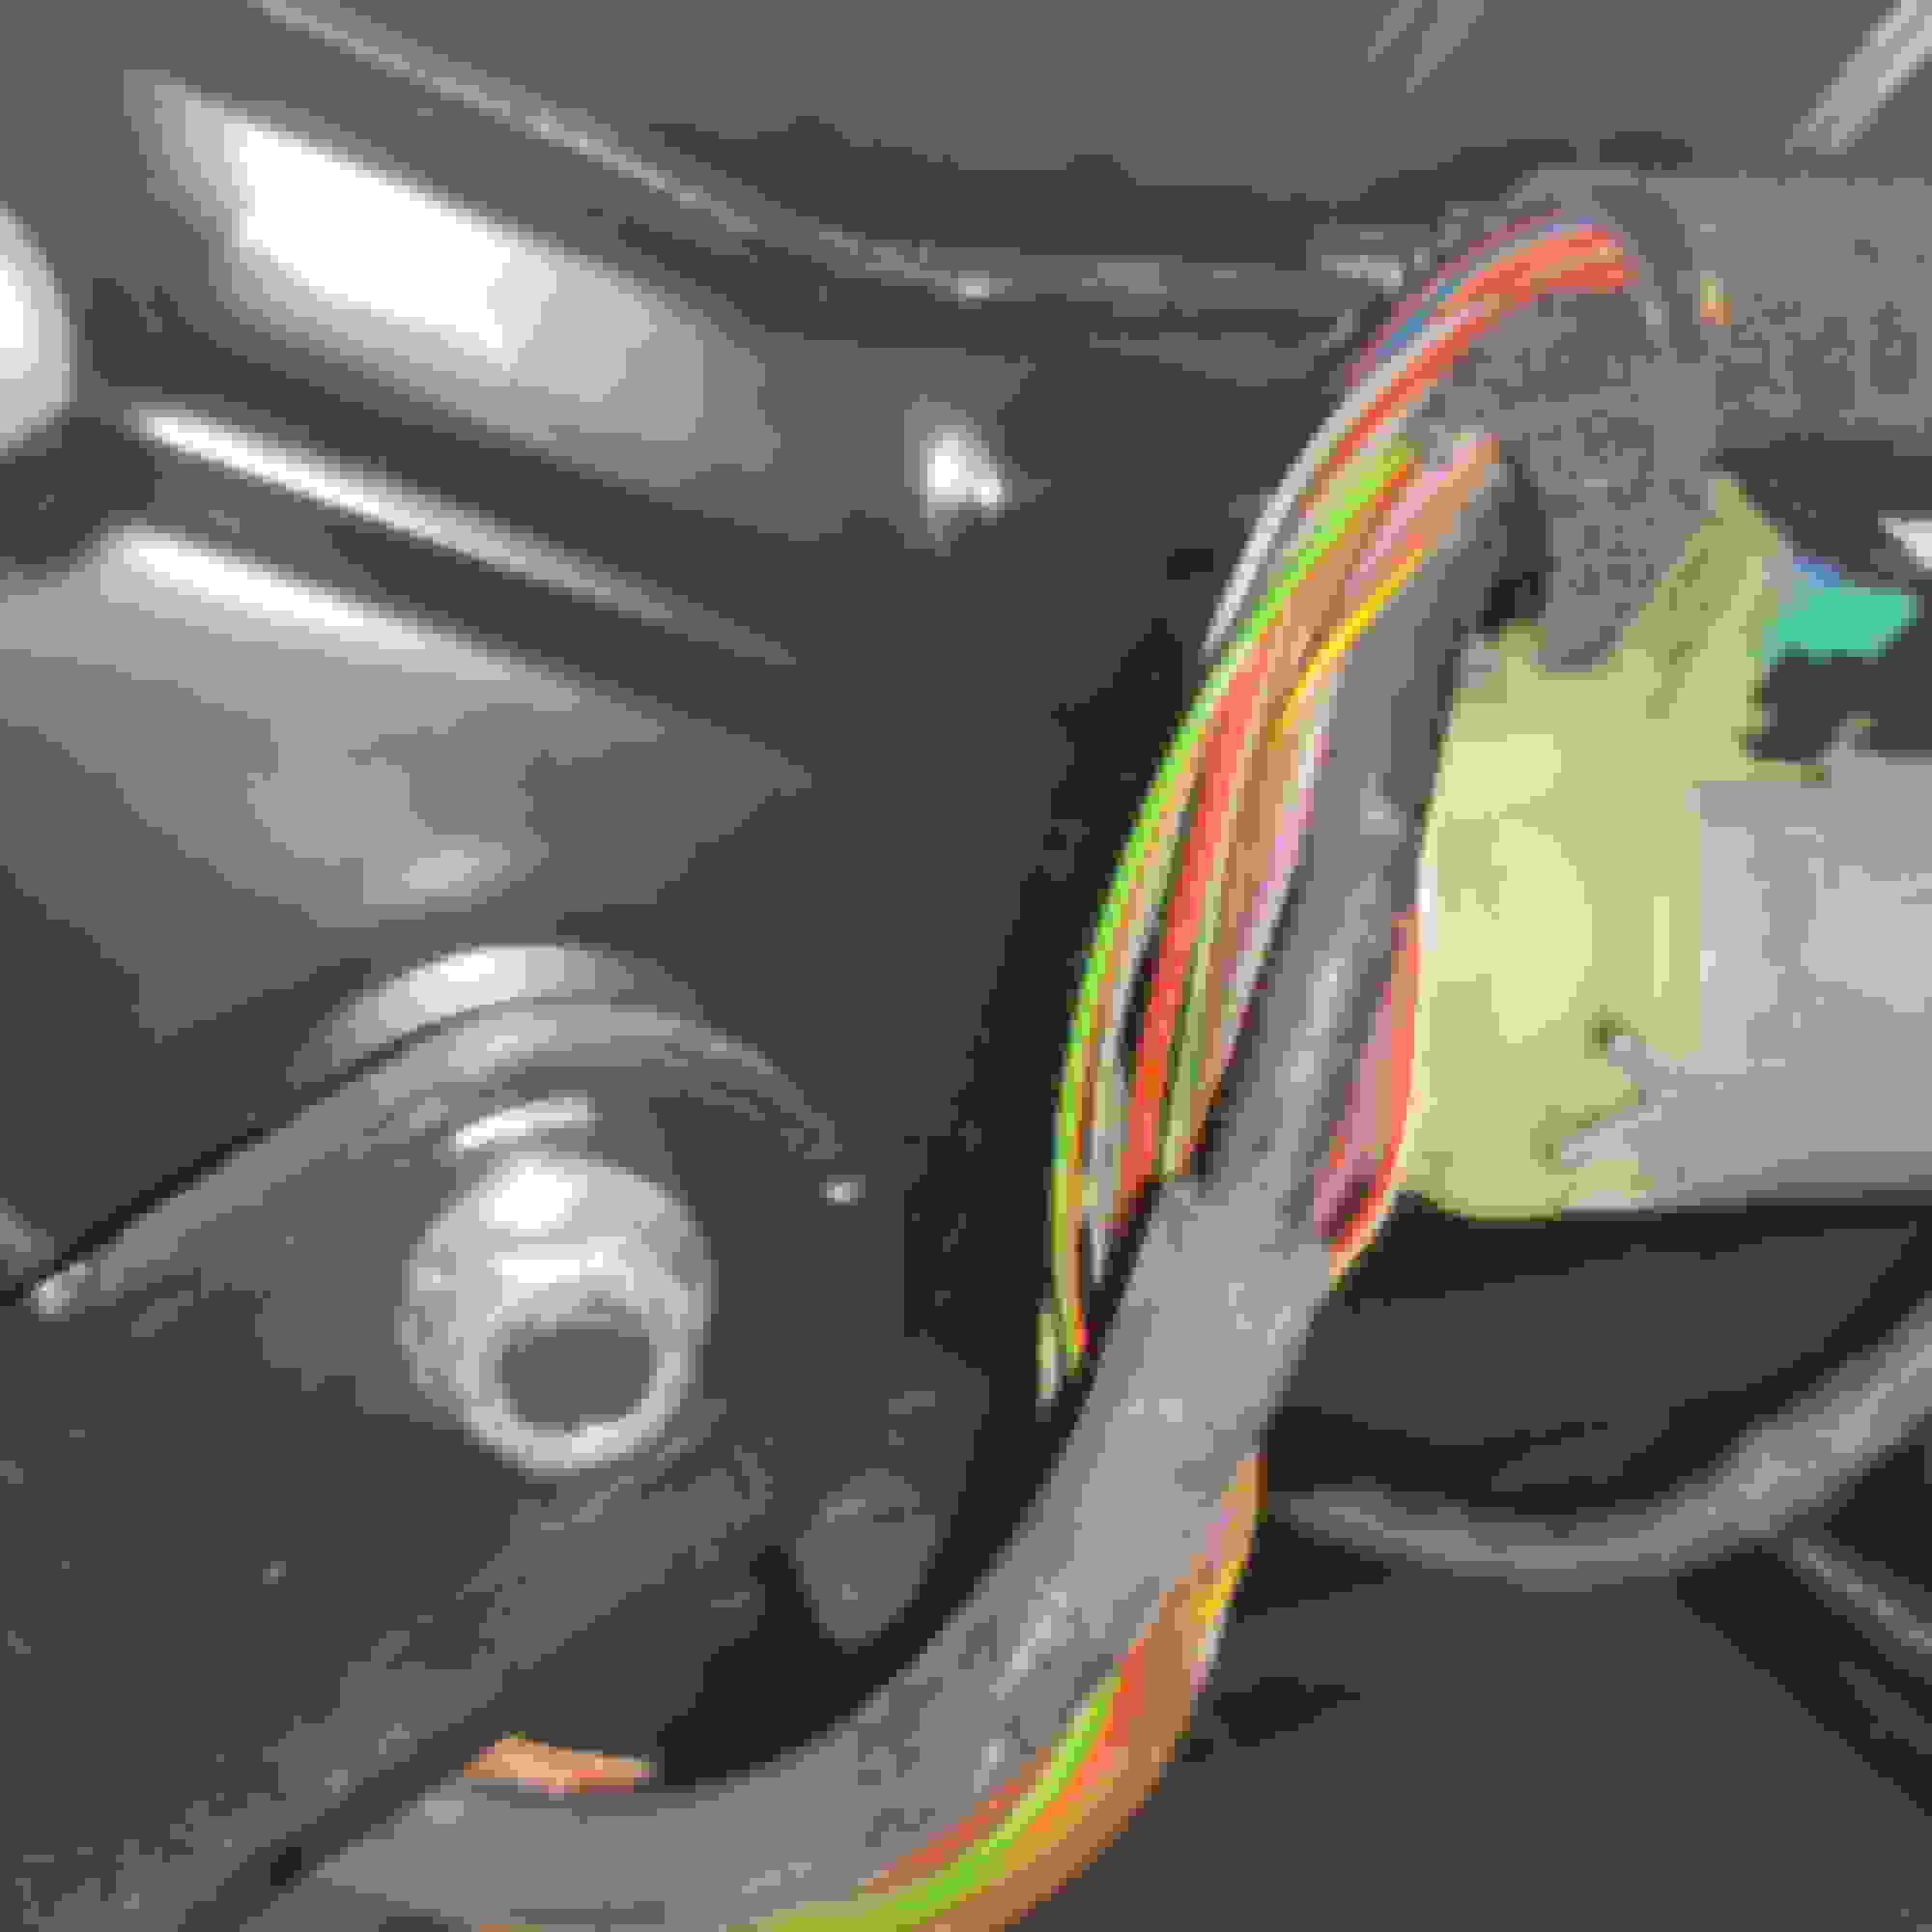
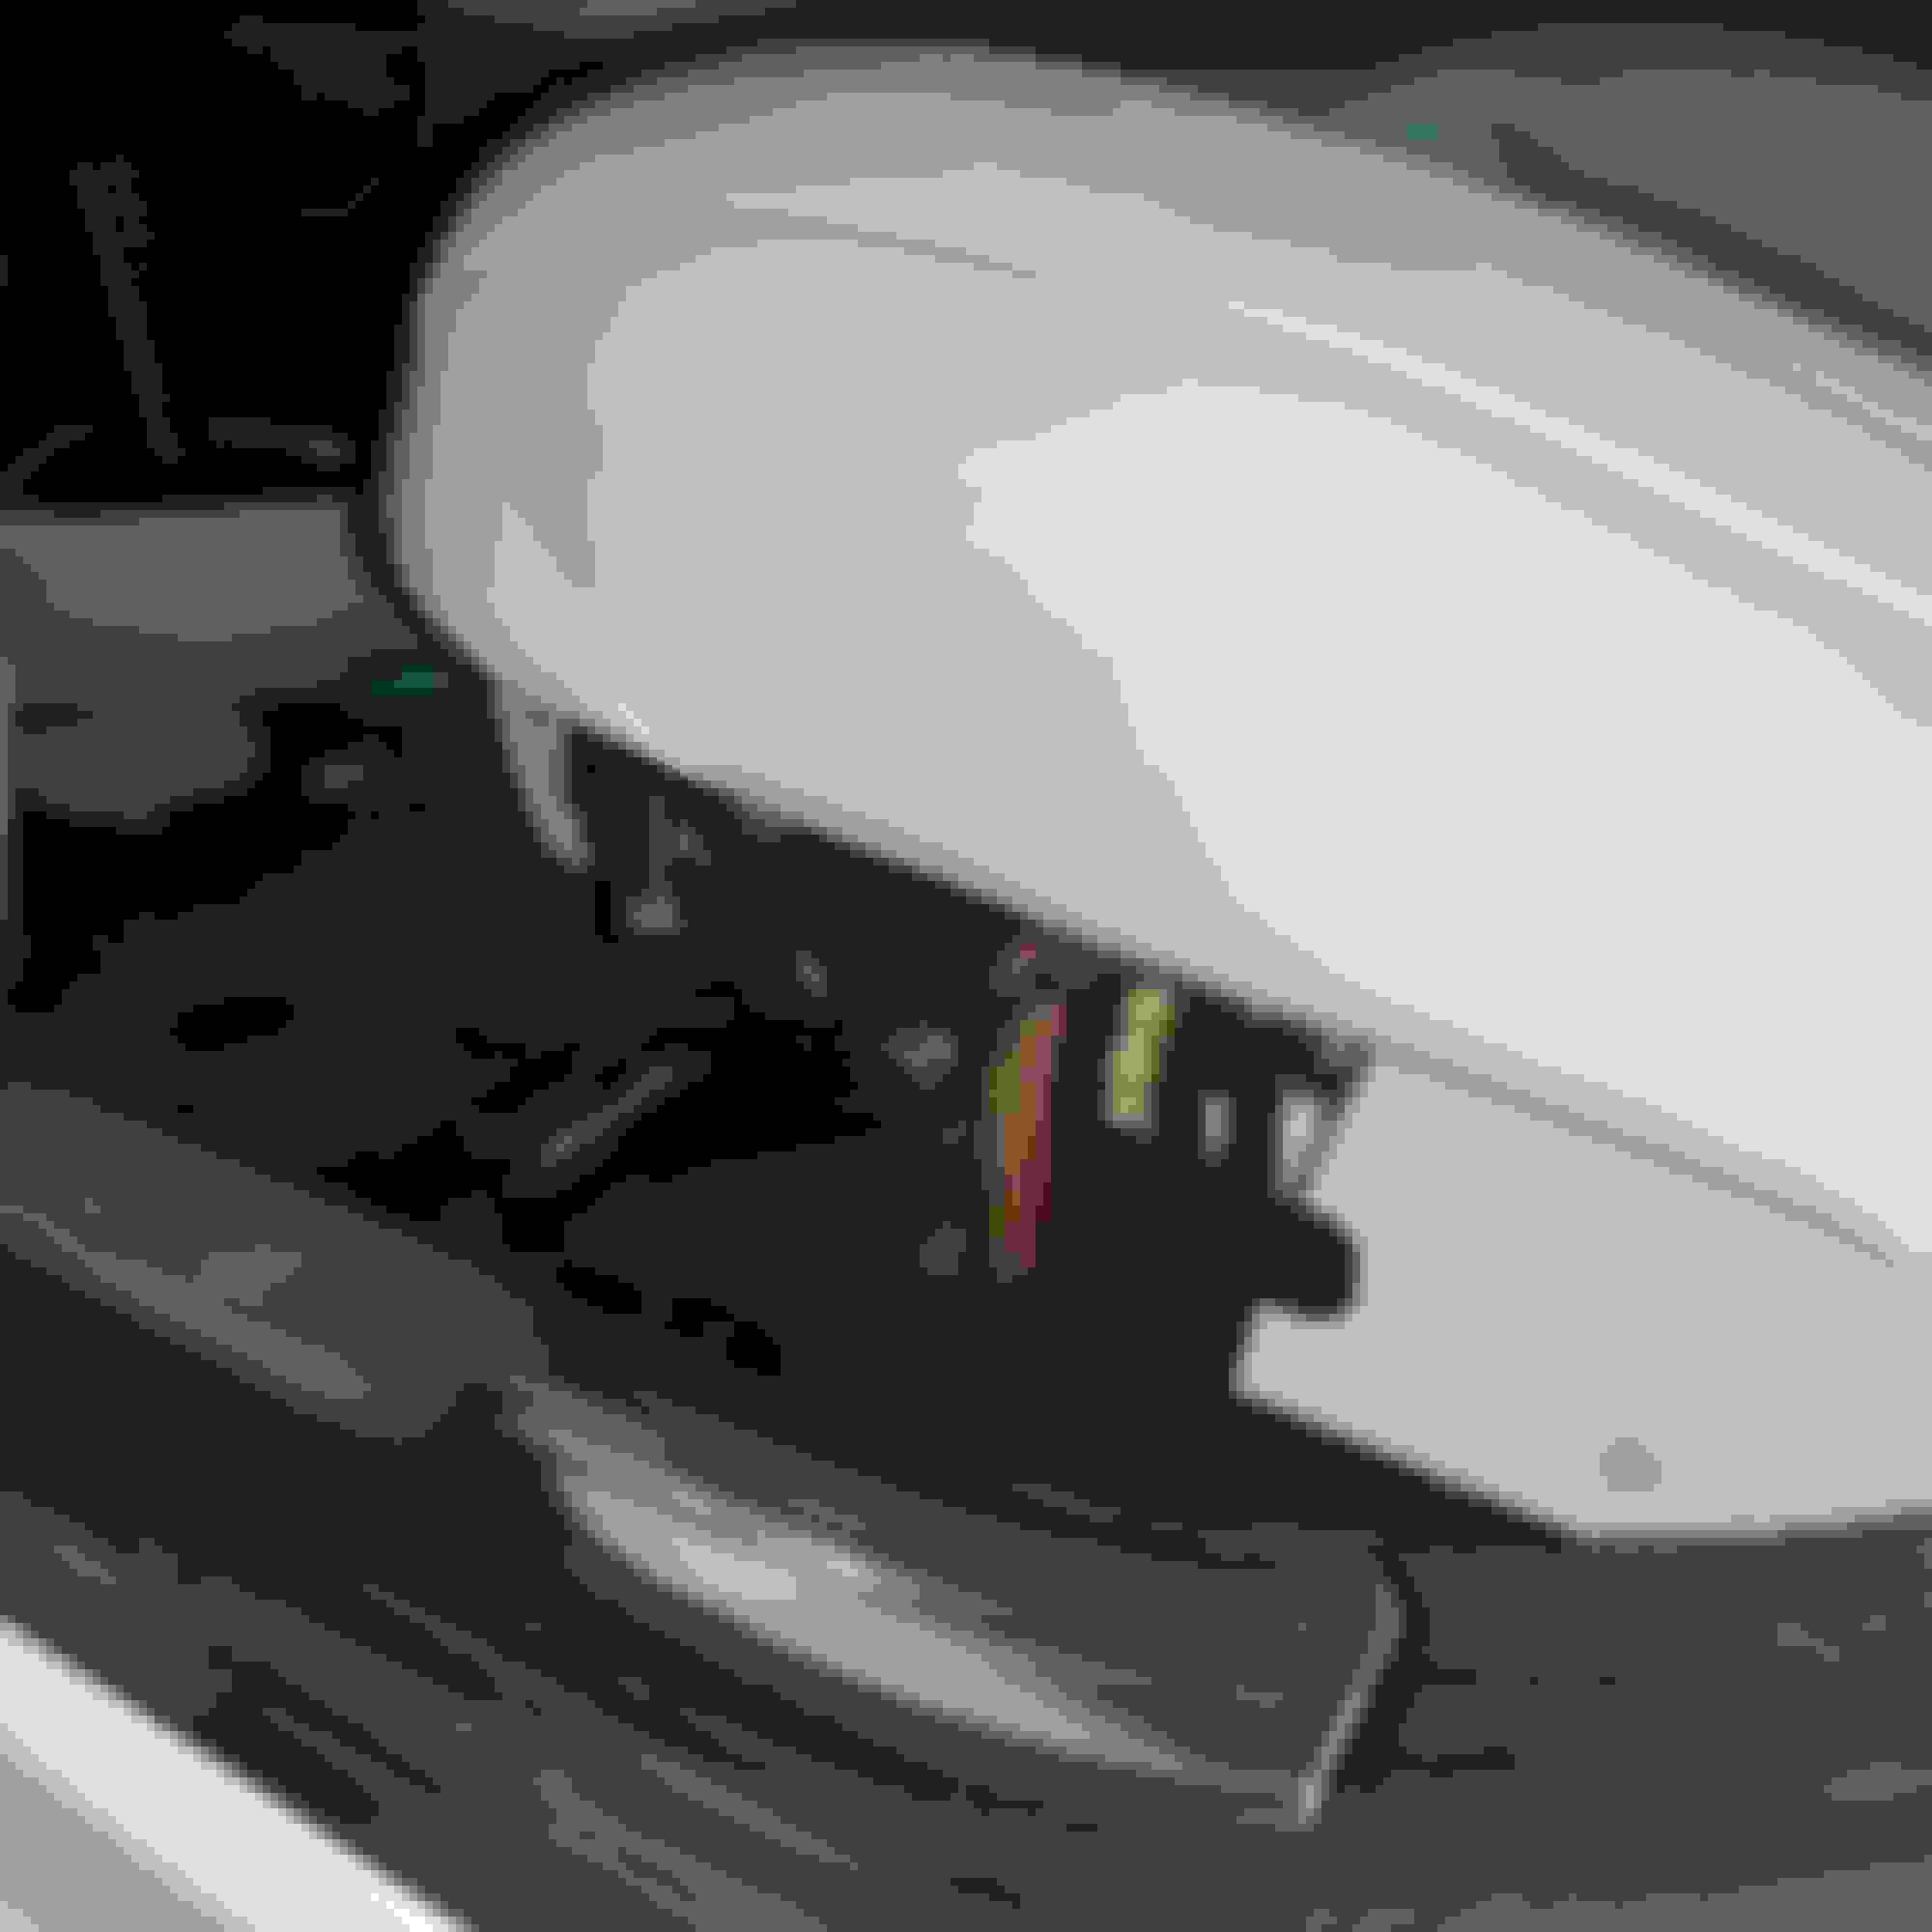
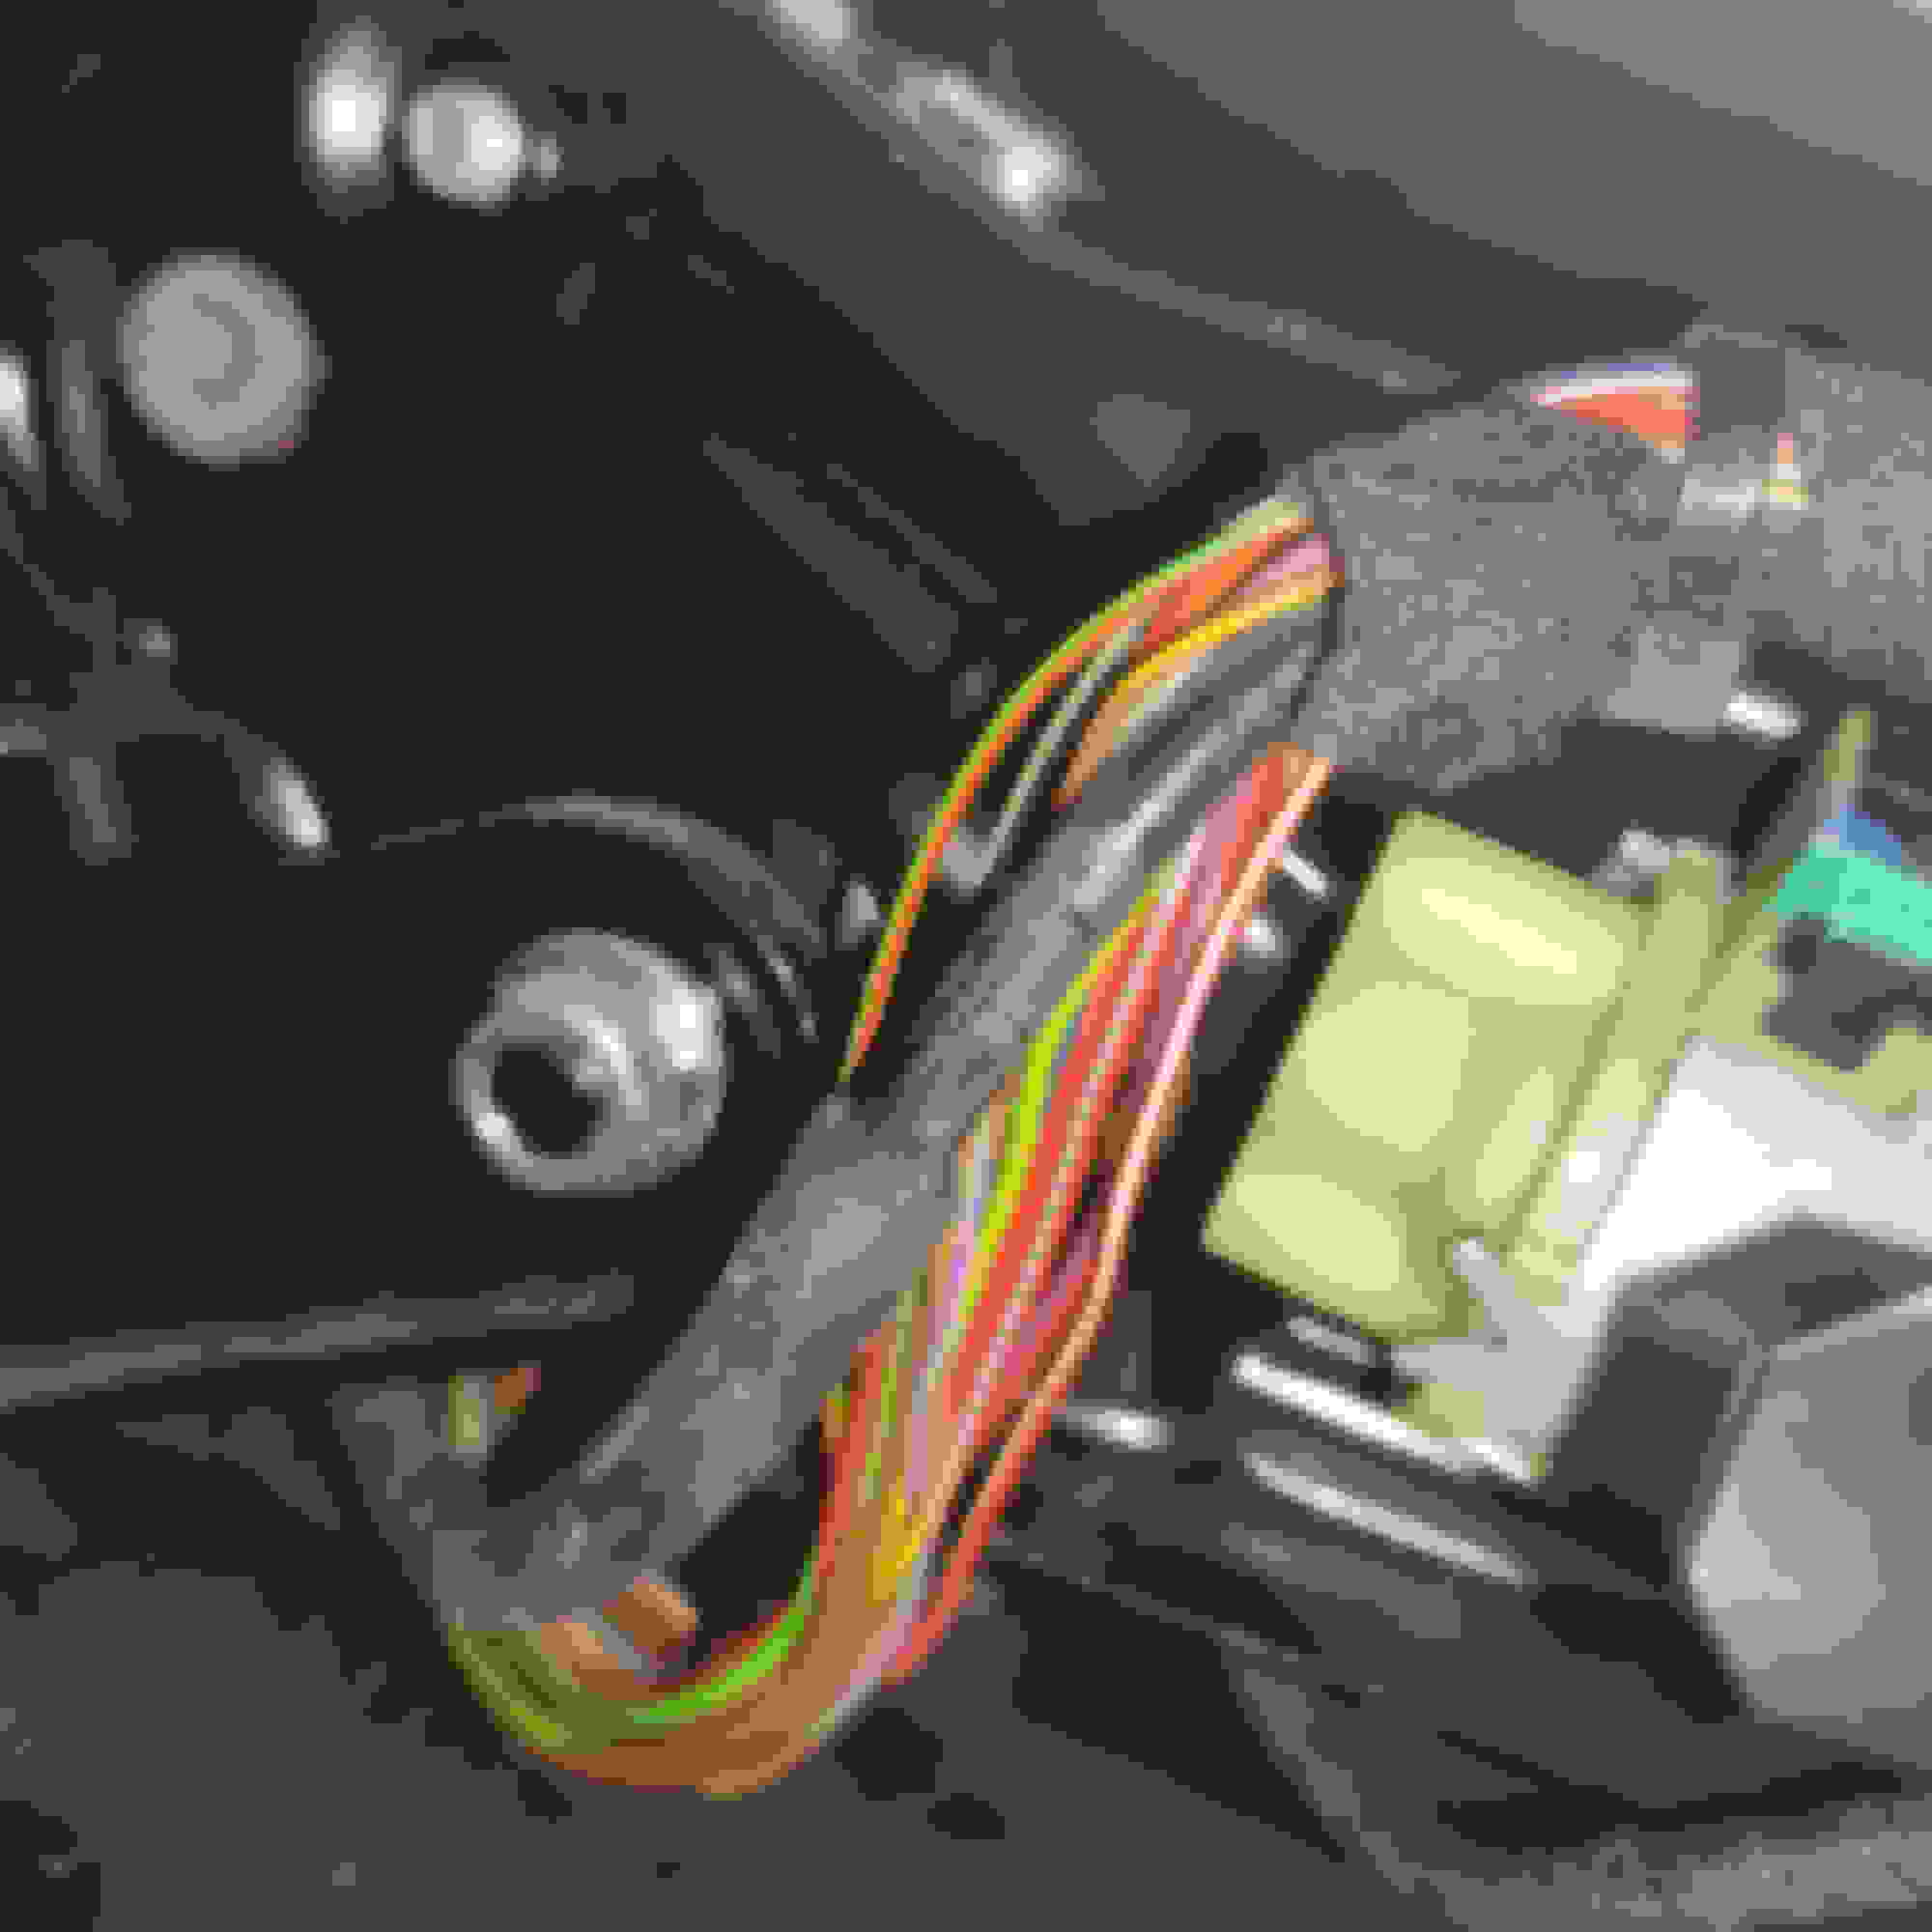
Anyway, the line that is leaking on the driver seat is indeed the line previously mentioned that routes along the outside of the seat. Old, brittle tubing that pretty much crumbled when I cut the end off and attempted to connect a new section of the rubber line. So now that I have ID'd the leak, and I'm pretty sure it'll be the same leak on the same line on the passenger seat (I haven't looked at the passenger side yet, no time) I'm going to completely bypass the factory line and not even mess with it. I'll hit up my local Ace Hardware for tubing tomorrow and wrap this up.
New lines run for both seats. All functionality returned. Only broke one tabby thingy removing the passenger front trim. Two hours spitting, cussing, fighting, busting my knees and back to remove two seat trim pieces on each side, two minutes to run new lines. Awesome.
Total cost for repair, $1.17.
Going to vacuum really good, button the trim and seat panels back on and call it a day!
So FYI, if any choose to do this in the future and break stuff like I did, lots of used seat trim covers on eBay for cheap, and depending on your interior color, around $50-$100 for a pair of brand new right and left corner covers, or "Ornamental Covers" through mboemparts.com or some other OEM supplier. So not a huge deal if you decide to replace broken covers with nice used or new covers.
Biggest tip I can give is take advantage of the seat controls. I'm an idiot and wrestled with the right seat side cover with the seat in the low position before I remembered the seat can be raised vertically almost 6" along with lengthy forward and rearward positioning. Duh me!
Good job on the fix. Your line break was in the exact same place as mine!
You are right that the trim removal is the hardest part...the rest is replacing lines.
Good job on the fix. Your line break was in the exact same place as mine!
You are right that the trim removal is the hardest part...the rest is replacing lines.
Thanks. Yup, lesson learned, next time I won't even bother removing the trim. Just bypass the old line completely and route a new line, the seats raise high enough to get to the connection point in the front of the seat.
Thanks. Yup, lesson learned, next time I won't even bother removing the trim. Just bypass the old line completely and route a new line, the seats raise high enough to get to the connection point in the front of the seat.
That's what I have done on my seat. The old line kept crumbling, so instead of unwrapping the whole harness I just ran a new piece of 1/4" plastic fridge water line.
Now I have air supply, but one of the three lumbar support bladders still leaks. I tried to get to it, but got stuck as I don't know what I'm doing and will probably rip the leather. Would capping, pinching or otherwise plugging the line leading to the leaking bladder convince the computer that it holds pressure and allow the rest of the seat work?
Nice fix with the fridge hose. I just found a box of sprinkler tubing at a friends house that would have been perfect too but I had just completed my repair. Funny how that works, now everywhere I go I see tubing that would have been perfect.
Not sure about capping. I presume you could disconnect a line from the module and blow into it to isolate leaking bladders, but as far as capping the module itself I'm not sure. I'm not sure how it measures/senses volume or pressure. Worth a shot though, the seatback covers are two screws. I still have a leak or something in the passenger side seat lower bolsters as they won't pump up but the driver side seat works fine so I don't care. I'll get to it someday.
I got exactly a blue colour air pipe loosen under my seat. If I assume , that's the pipe connecting the seating cushion that shows on the pic , what is the other end ?
I have a rough look of my under seat and cannot find a possible place that the pipe should connect to.
Thanks very much. The loosen blue air pipe under the seat.
Originally Posted by Senecat
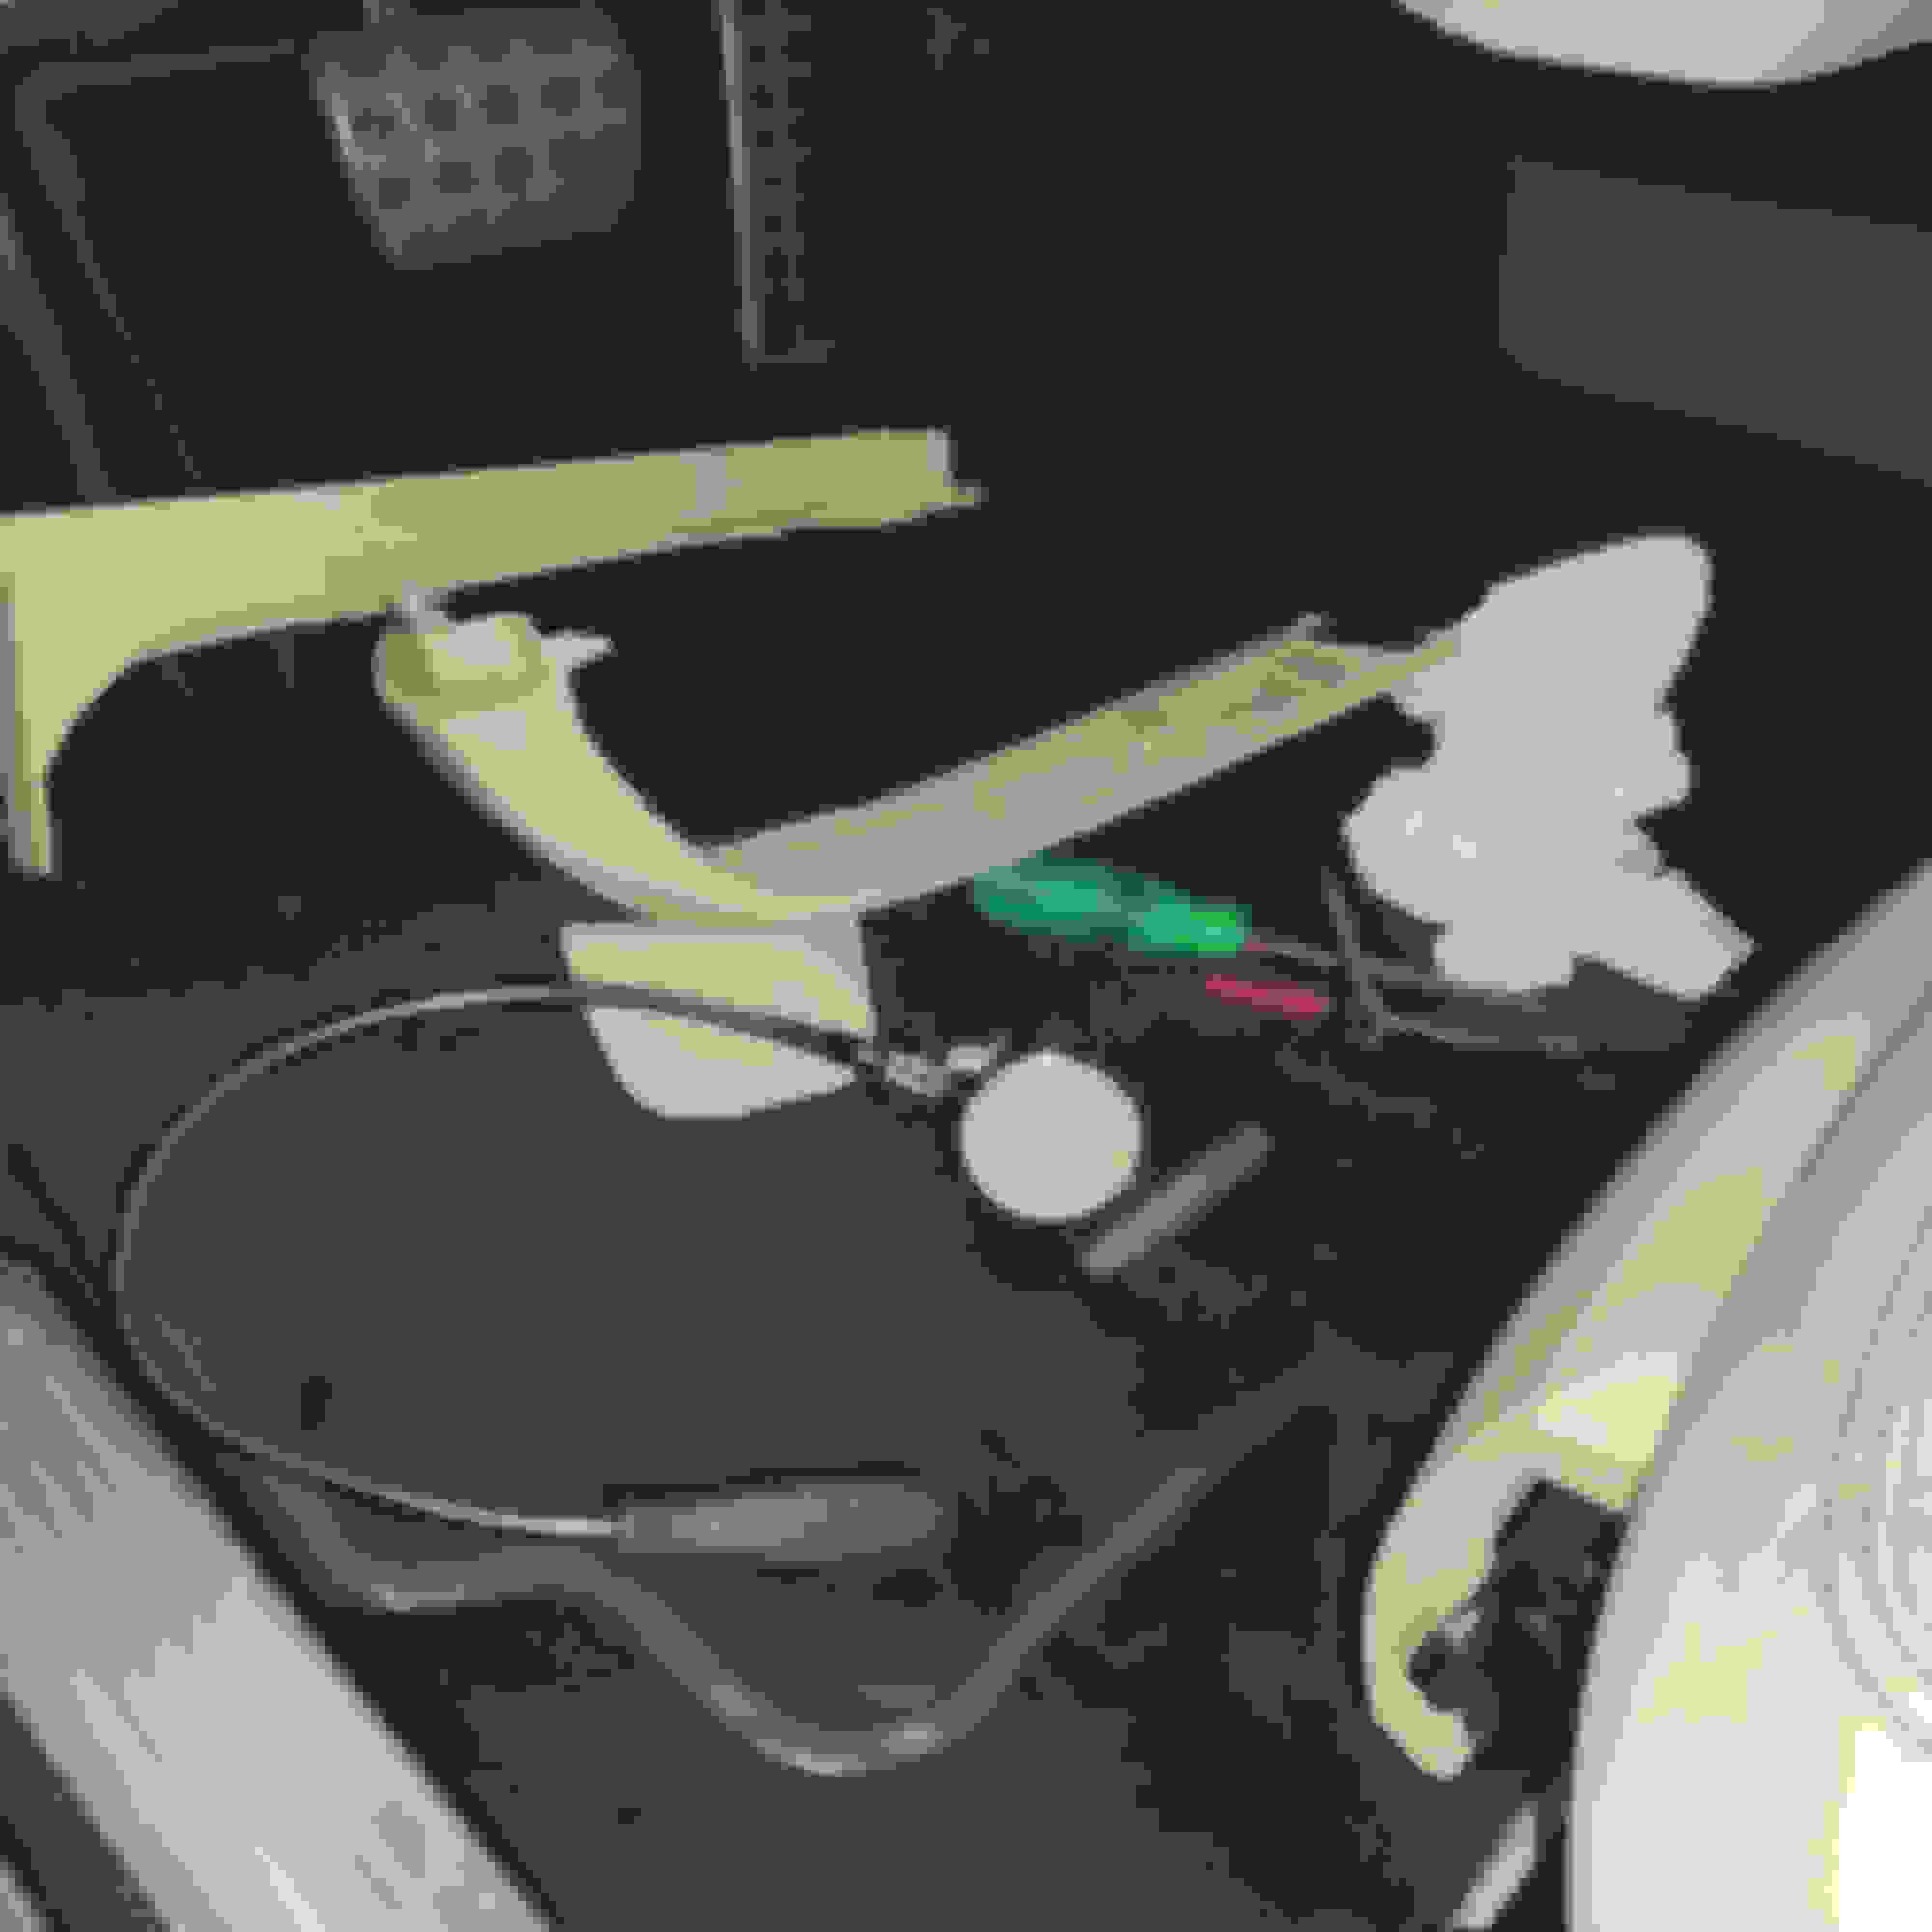
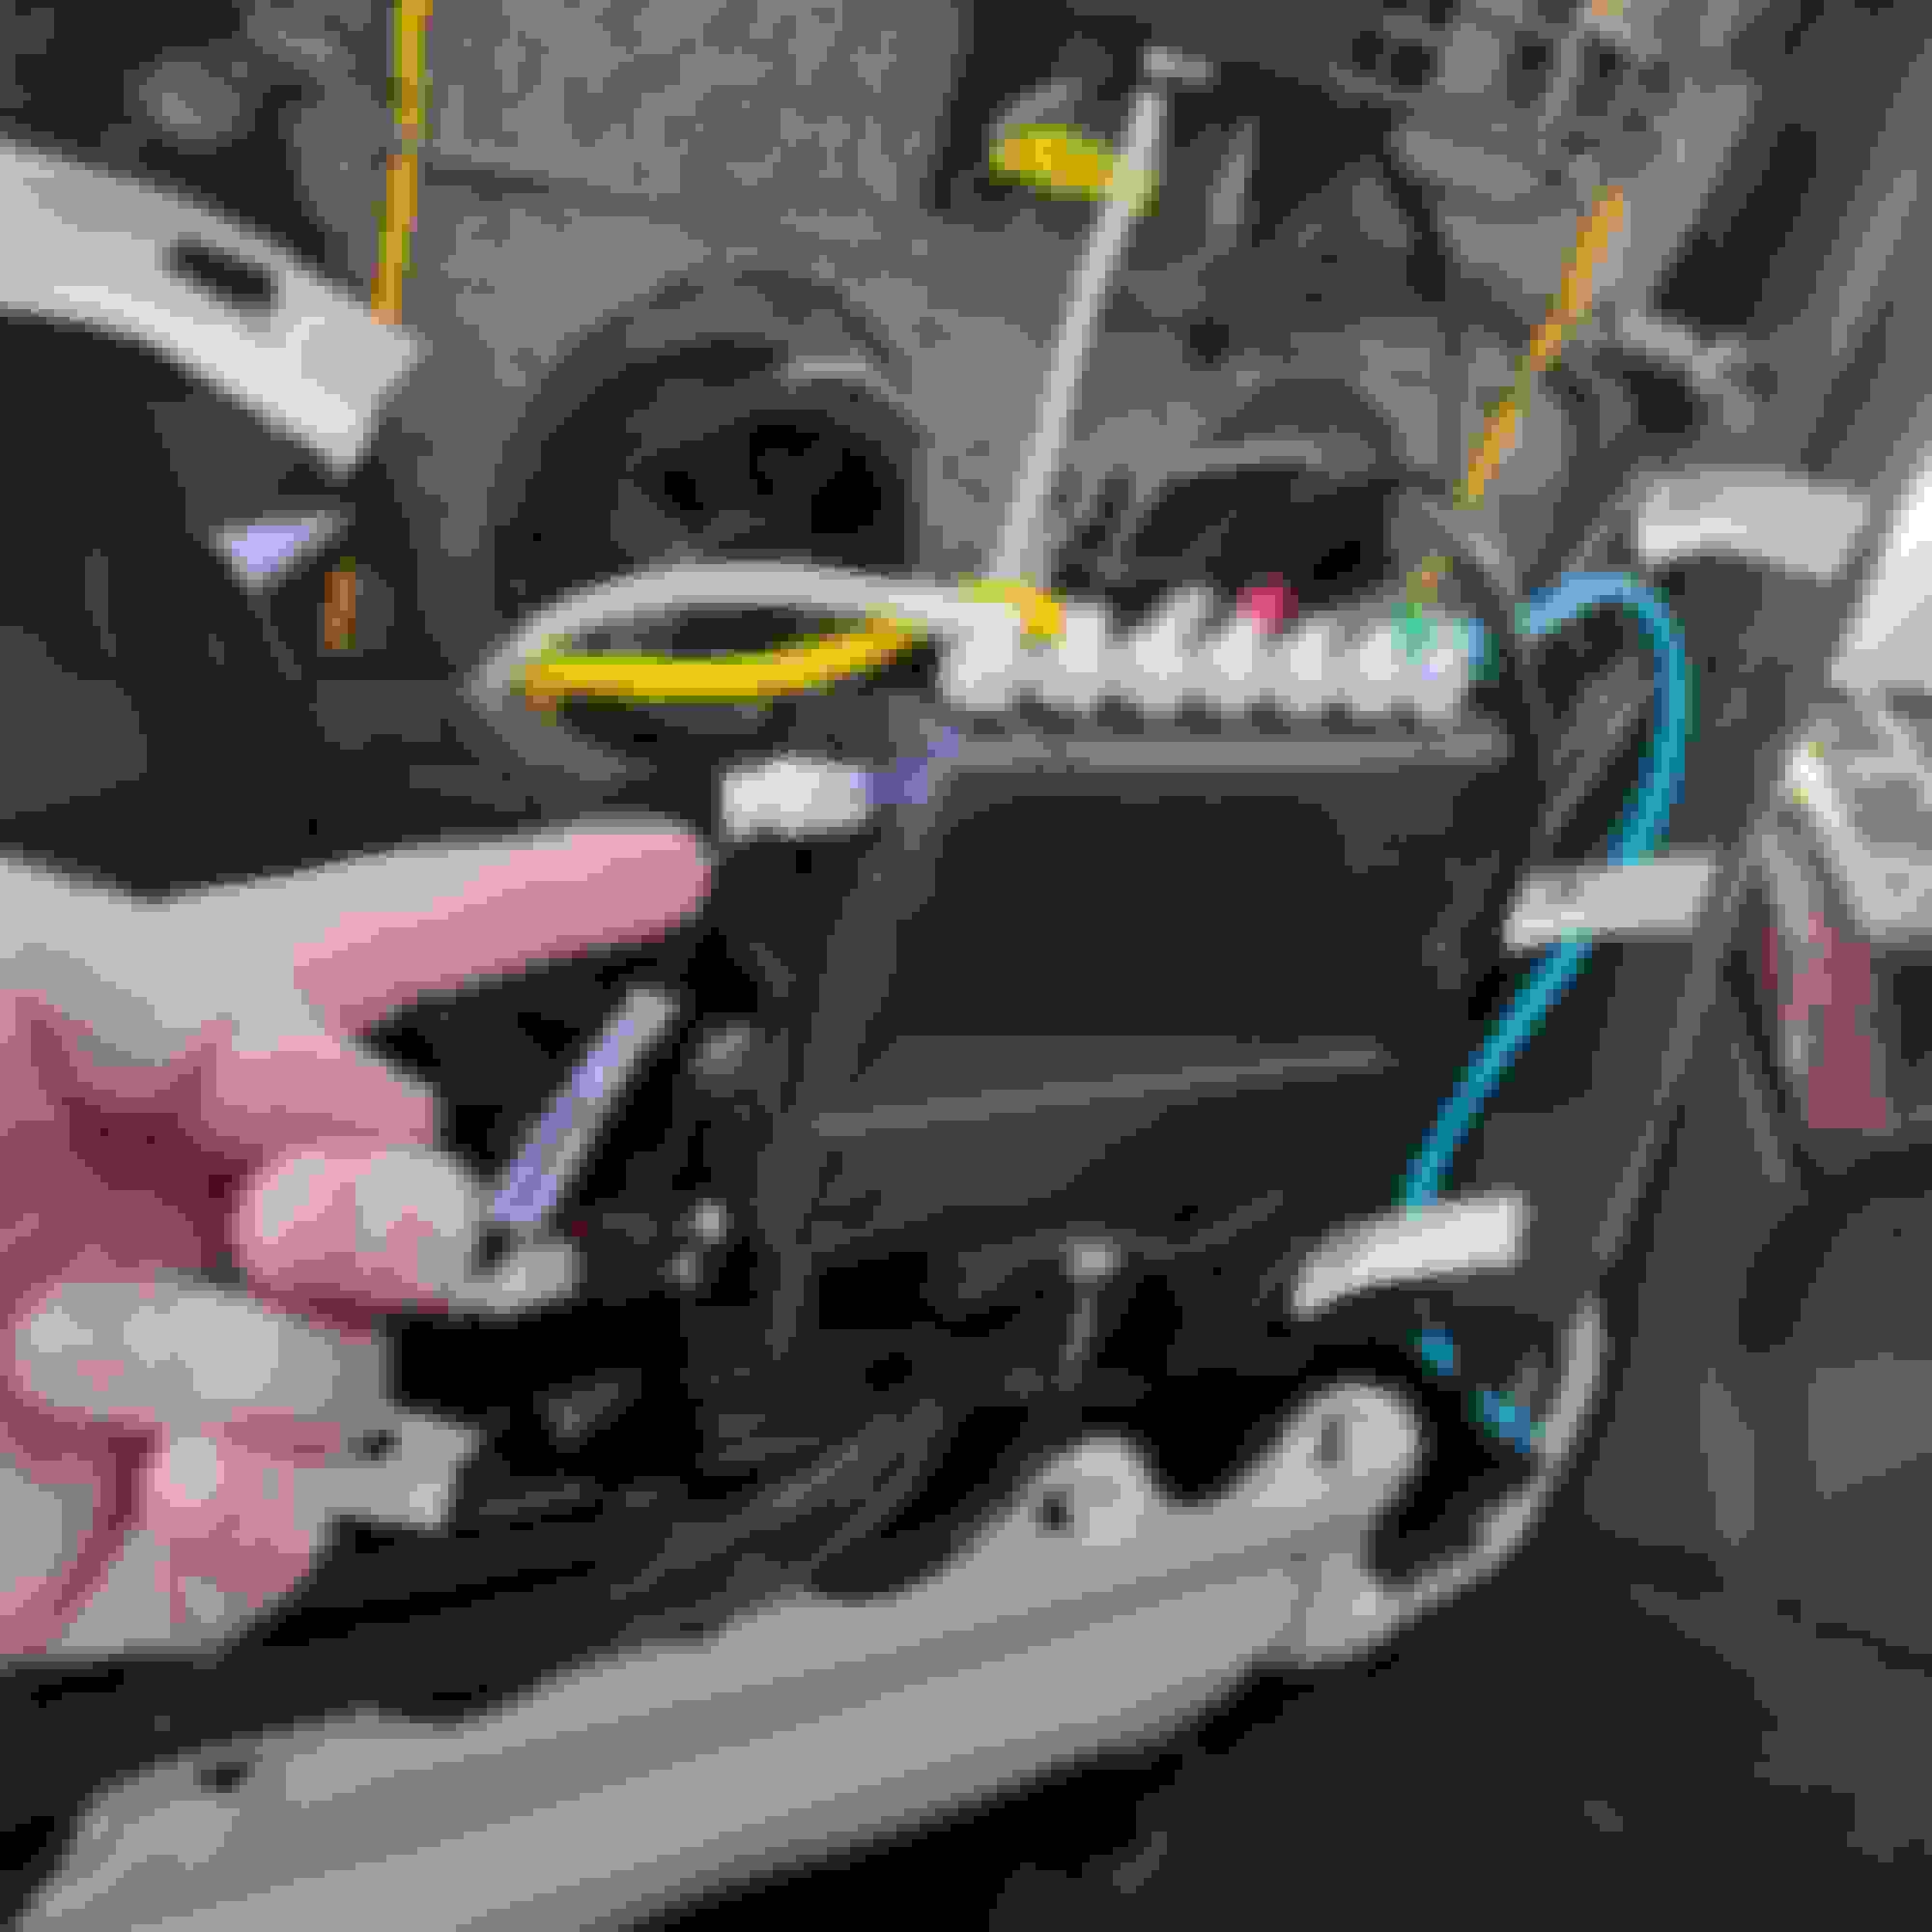
Ok so I found the leak. Should be a piece of cake. I just have to unbolt the seat, tilt it back and unwrap and replace a line. The line I'm pointing at is supply air from the compressor. I can hear the leak under the seat on the left side where the line routes, and when I disconnect the line from the module, the hissing under the seat stops and the air comes out of the connector. Everything else looks good. I'm off tomorrow so I'll get it apart, fix it then report back.
I just reread this entire post, as it came alive again, and I'm trying (again) to track down a new leak. FWIW...the difficulty of trim removal came up several times in this thread, and how easy they are to break. I only broke one tab getting mine off, but I went ahead and ordered most of the trim pieces new from MB. They are all fairly cheap, and hopefully are not as brittle as my existing pieces. The catch, though, is that there are only a handful of pieces left in the world. My parts person usually tells me how many are left at the warehouse in Germany...I again got the last piece of a couple parts, and others were down to low single digits. So, if you want/need new pieces, do it soon.
I got exactly a blue colour air pipe loosen under my seat. If I assume , that's the pipe connecting the seating cushion that shows on the pic , what is the other end ?
I have a rough look of my under seat and cannot find a possible place that the pipe should connect to.
Thanks very much. The loosen blue air pipe under the seat.
Mercedes SLR McLaren 722 S Is Extremely Rare Example Modified by McLaren
Slideshow: A one-of-one U.S.-spec Mercedes-Benz SLR McLaren Roadster became even rarer after a factory-backed transformation at McLaren's headquarters.