When you click on links to various merchants on this site and make a purchase, this can result in this site earning a commission. Affiliate programs and affiliations include, but are not limited to, the eBay Partner Network.
Guys, I just went through the install of the piggy back and I wanted to start a thread for those of you doing it or planning on doing it. Anyone doing this themselves is the bravest person on earth. This is not an installation for the novice.
So, I arranged a power install at a place called P1 Motors in Stamford Ct. This place has to be the most insane garage I have ever seen. Mostly Ferarri's but tons of other muscle cars. GTO's, Porsche GTS, Twin Turbo Ferraris, GTR's.. The list went on and on. The owner's name is Tommy and he put his best mechanic on the install.
According to him, the instructions are horrible and not very specific. For example, they do not recommend or even suggest where the module should go. There are half a dozen ways to run the wiring harness and the way we ran it we had to extend the ground wire. It could have been installed without doing so, but the idea was to get this completely hidden and by completely I mean no trace at all.
A few mods we had to make. Extending the ground. Trimming a small plastic piece to allow for the harness to clear the compartment on the passenger side, and velcro for the module to make sure it stays put.
The job took 3 hours, perhaps even more with all of the head scratching, hand contorting and attention to detail in hiding the wires. The ONLY visible wires are about 4 inches long and cross right in front, dead center above the radiator.
I will let the pictures speak for themselves. I will try to answer any questions you may have but, if you are interested in having P1 do it, I give them my highest recommendation. Not a scratch, not a single issue at all. 100% awesome.
P1 motorcars "Tommy" 203-276-0749 http://www.p1motorcars.com
You can tell them Eric or George from the MB World Forums sent ya!
+1 That sounds about right except I'd add "all of the head scratching, hand contorting, crying and attention to detail in hiding the wires." Only brave souls will try this at home.
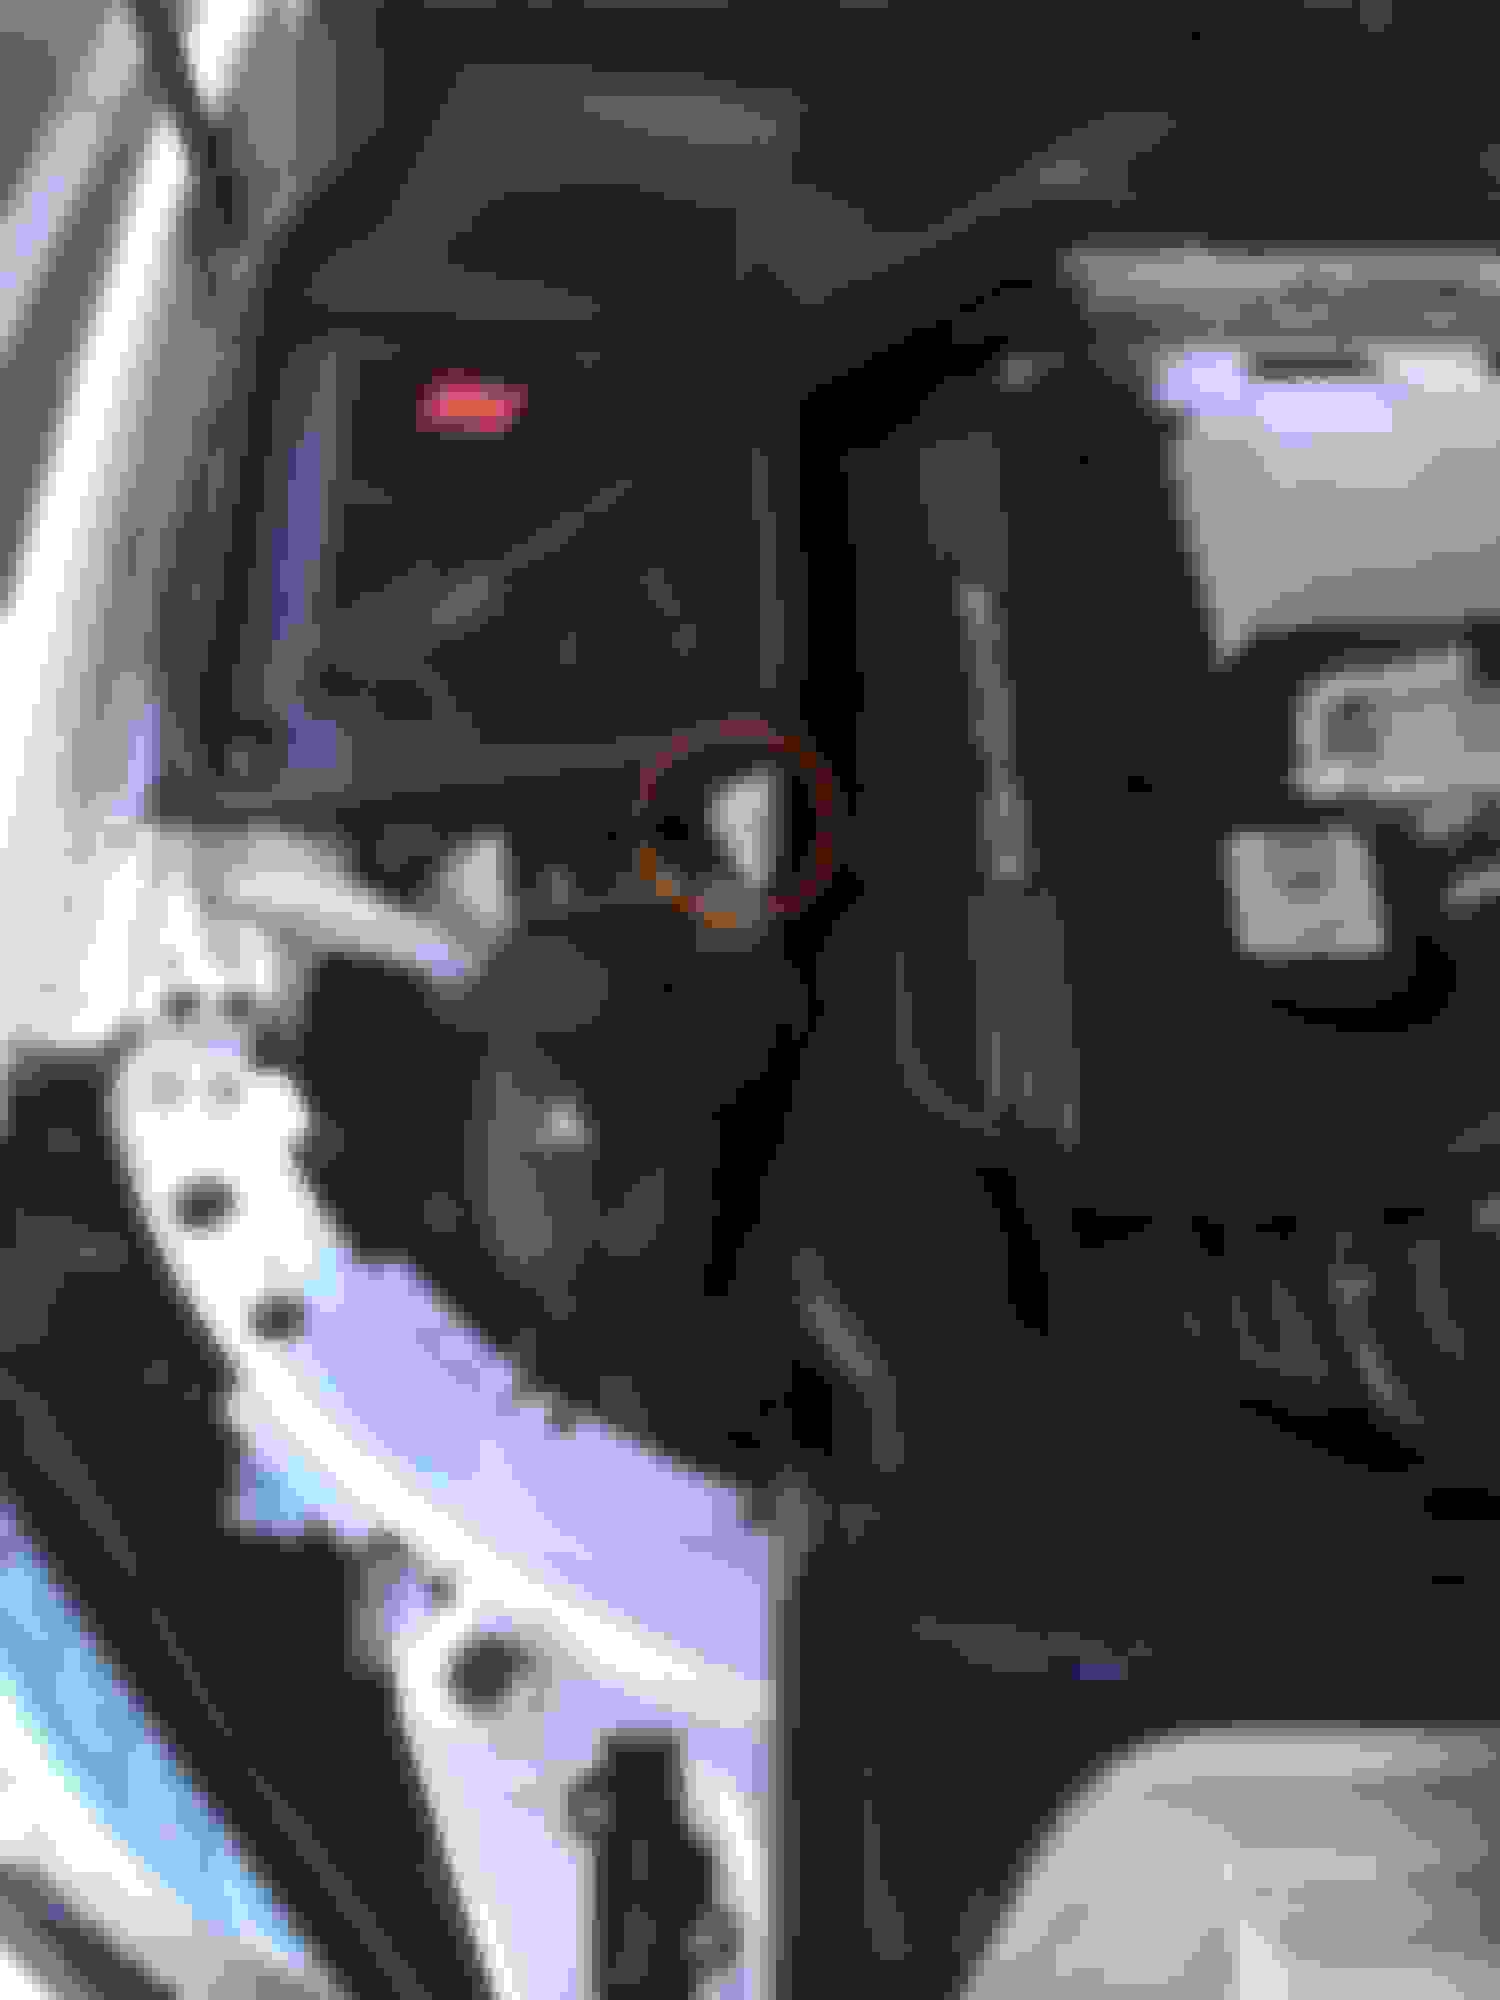
Just in case others are wondering, my guy wrapped the tuning box in plastic -- see picture for location. I believe the box is weatherproof but this is what he recommended. Anyone else here running 91 Octane?
Iceman: You grounded the box in the place I believe Rebellion suggests we ground it. However, by doing so you leave a "hint" that something is installed because that bolt has nothing connected to it from the factory. Will anyone notice? Probably not.
We thought about wrapping the module (box) in plastic or some sort of ziplock bag but, decided against it. Why? Because Rebellion didn't suggest it. Because it is supposed to be water tight. In addition to those reasons, we felt that the plastic wrap would retain moisture in the bag and retain heat. Where it is located there is little chance it can get wet but, the engine bay is so hot to begin with, that wrapping it with plastic might melt it or create more heat around it.
How long did your install take? Any dyno numbers?
Also, the part we shaved was exactly where your module is. Your installer didn't put it back and just removed it completely. We thought about that too but ultimately modded that part so we could slide it back and look stock
Glad the install went well. Hope you are enjoying the huge HP boost. I took a few hour trip with the wife and she IMMediatly noticed(and ahe never does). She asked why it seemed so much faster!
Yeah the directions are pretty terrible to be honest. Really need more then 4 photos and some better pictures of exactly what thing to unplug. The best part is where they say to "use the viewing hole" to attach boost sensor 1. Which is a 1 inch square haha.
That cover the Mb puts on all the wires is an absolute nightmare. My hands are all cut up and swollen haha.
I was actually thinking of mounting the box where you put it but I ran the wires before I thought of that and don't have enough slack.
Haven't had the time to test it yet, but at 45 I hit the gas and the back end slid out so I suppose its producing more HP, just can't stick it to the ground..
No dyno numbers. I travel too much and just can't get there while they are open. I am curious about the numbers for 91 and 93 octane. I'm in CA and use 91.
The install took over an hour and my install guy echoed what you posted. He's an authorized Dinan guy and also installs ESS and other harnesses. This was quite the challenge.
I had the same thoughts about the plastic but he said it shouldn't be a problem. I took the picture above today and checked it -- no problems with the plastic at all. I agree -- its probably not needed but thought I'd share the pic anyway.
As for the ground, I'm not worried since my CA deals with "tuned" cars and he has a pretty good relationship with my install guy. If I experience a CEL, my install guy is just minutes from me and agreed to troubleshoot any issues before I head in to the dealer. If I need to go to the dealer, he'll remove the harness for me first.
If your guy did it in "just over an hour" he is a master unlike any other. My guy, even after doing it for the first time, said there was no way it could be done in less than 2 hours. Too many ties to cut and reinstall, too many cables to hide properly and of course getting to those sensor clips is ridiculous.
Anyone who thinks this can just be removed and reinstalled for dealer visits is highly mistaken. The good news is that Rebellion does provide a jumper plug that allows you to remove the module and "plug" a jumper in its place for 100% stock factory readings but, the harness doesnt get removed.
Thats the main reason for my wanting no evidence of the harness, so that if I install the jumper the dealer cannot see any tell tale signs of anything.
Iceman care to share your installers info? I'm in the Central Valley so it's either LA or the Bay in order for me to find someone to put this thing on.
Iceman care to share your installers info? I'm in the Central Valley so it's either LA or the Bay in order for me to find someone to put this thing on.
I'm south of Riverside so this might be quite a drive for you. Here is a link to the shop website -- family owned. Ask for Erik.
Glad you are getting them installed, as per our recommendation professional install would be best as it is tricky to get into the sensors. That said it can be done at home just make sure you have plenty of time and a selection of tools at your disposal.
Due to the layout of the 63 engine access is difficult and there is no easy way to get to the boost sensors along the front, the best way I have found is using smaller flat head screw drivers to release the clips and another to gently leaver the clip off.
We have installed these at customers houses with limited tools so patience is your friend on this one.
Ill keep an eye on my mails if there are any specific questions please just fire them over to info@rebellionautomotive.co.uk
They are underneath the 2 large AMG black plastic pieces. I didn't personally change them but, they pop out fairly easily. Sorry, I don't have any pics or video for you but, the filters are fairly simple to swap out..
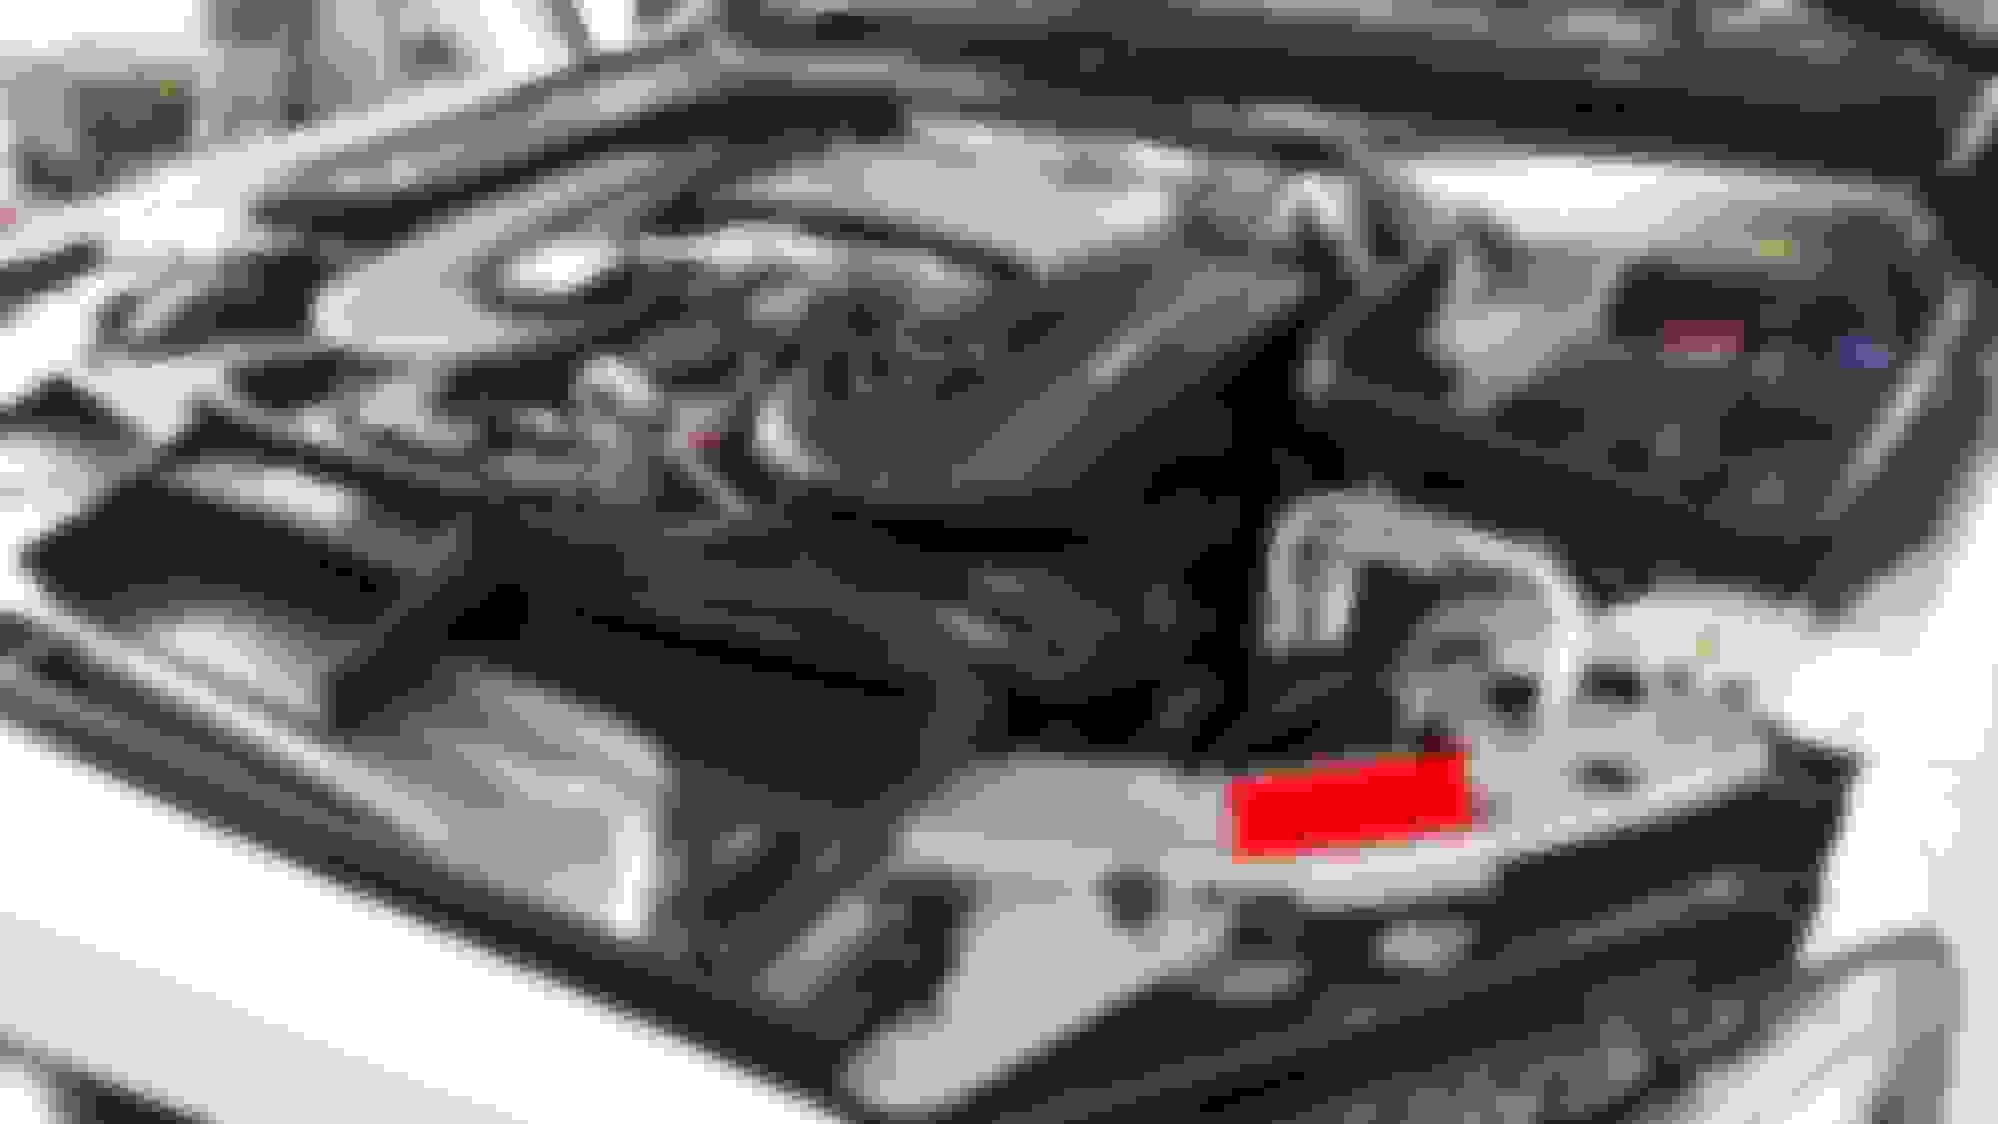
Ok i hope this picture works. did a quick edit on an engine pic I had.
first make sure the engine is cool. the clamp on the turbo get HOT
next you will have to remove the cap where the red arrows are. there is a clip on the back you push towards the front of the car to release it. inside you will find a sensor clips. first pull out on the white locking pin and then you should be able to un-clip the sensors.
next you want to use a torque bit and remove the remove the 4 screws per side (green arrows)
lastly you loosen the pipe clamps (yellow) and you should be able to lift the cover up and out.
make sure when putting back together you attached the pipe to the turbo fist you want to make sure that is in snug. then tighten the 4 screws. the 4 screws on each side make sure to tighten well. as that will pull the intake box together to create a seal.
you can see what it looks like with the covers removed
Does the mesh on the new filters go up or down? Rebellion print up or down?
Mercedes SLR McLaren 722 S Is Extremely Rare Example Modified by McLaren
Slideshow: A one-of-one U.S.-spec Mercedes-Benz SLR McLaren Roadster became even rarer after a factory-backed transformation at McLaren's headquarters.


 Only brave souls will try this at home.