When you click on links to various merchants on this site and make a purchase, this can result in this site earning a commission. Affiliate programs and affiliations include, but are not limited to, the eBay Partner Network.
Sounds weird, but the buttons for my hazards and door locks seem to accumulate a sticky coating (no off color comments needed)�anyone else have this problem and if so, how do you get that stuff off?
Seriously, it took me a long time to ask that question�but I am serious.
An adhesive/wax remover would probably work much faster but may damage or completely remove the lock/unlock and hazard screen printed decals under the coating that is being removed
Last edited by dRockSL55; Jul 21, 2014 at 09:28 PM.
I had the same issue on my 2009. I used denatured alcohol to clean them and they are white underneath and now have to replace them. My question is can anyone give me a clue on how to remove them? Thx
Not sure how to remove the buttons, I do know that you have to take the A/C vent cluster out to get to them.
As for the gooey buttons, I used wax cleaner and they cleaned up in about 10 minutes�like someone said, like new. The white triangle did come off the hazard button, but I would rather have that�than the gunked up buttons.
I use a clear transparent tape cut to fit stick on them......
Interesting fix. Maybe using Clear-Bra material, heated and stretched to fit might work, too. This soft-touch material is rich feeling until it starts to deteriorate. It happens on all of the cars - the ACC knobs on my C240, the dash vent knob panel on my CLK, and now the lock and hazard buttons on the SL.
I used goo gone and own fingernails to scrape off the goo. It took about 45 minutes to do all three buttons. The white painting on the emergency came off, unfortunately, but it still looks good. The door icons were perfect. No discoloration. After scraping off the goo with my fingers 3-4 times, I wiped off FIRMLY with a towel, and now it is good as new.
A word to the wise for those who decide to remove the center vent to gain access to the screws to remove the buttons themselves, do your best to not dismantle the vents & Silver trim Rings. Those Silver rings are a separate part and if they come loose, it's a real pain to reassemble. I ultimately had to use crazy glue to get the rings to set in place long enough to reassemble the entire vent assembly.
2nd word to the wise, Do NOT unplug the Hazzard/Door switch with 12v power in the on position. Failure to heed this warning will illuminate the SRS light.
3rd word to the wise, the ribbon cable that plugs the 3 vent control knobs to the rest of the center vent assembly plugs in at a 90 degree angle and the cable is quite short.
Memory of the headache of getting that all reassemble properly, and the fact that it's very difficult not to inadvertently see the center vent unit disassemble itself no matter how careful you are since you have to flex the unit for removal - leads me to strongly suggest that you avoid removing that vent assembly alltogether and try your best to find a remedy that leaves everything in place.
All that said, I found that hand sanitizer worked like a charm to clean to goo off my buttons...
05 SL55, 10 C63, 12 SLK3, 20 S560, 08Bentley GT Speed, 16 Aston Martin Vanquish
This is a picture of my problem
I tried alcohol and goo off and ruined my lock unlock and hazard buttons. Does anyone know the part numbers for replacement parts and how to remove and replace them? Thanks in advance for any help.
I have the same issue with the Hazard Switch. I was wondering how difficult of a task it is to replace it, and how much time would you estimate. From what I see in Rudeney's post:
Step 1: using a plastic wedge, pry off center speaker panel.
Step 2: remove 2 retaining screws holding vent panel.
Step 3: using plastic wedge, pry off vent panel.
Step 4: replace hazard switch.
I have successfully used "Purple Power" detergent on a cloth to clean the stickiness off several Porsche radio knobs, and several of the buttons on my '03 SL55 - including the radio, lock/unlock and hazard buttons. Doesn't come off instantly, but with some rubbing and refreshing of the detergent on a fresh section of the cloth, the stickiness is removed and there is no damage to any of the buttons.
Gary
Last edited by kittyandgary; Mar 27, 2019 at 10:03 AM.
Total time to replace, less than 1 hour
So this was much easier than I thought. The instructions provided earlier work great, but I am going to add more details to make this much more smooth.
1. First, this is one of the easiest DYIs there could be. The dealer quoted me about 250 to 300 for the labor to install. I did this job myself in less than 60 minutes.
2. Use a plastic wedge to carefully remove the upper speaker panel. Once you remove it disconnect the 2 wire connections, one on each side. Set the panel off to the side.
3. The reason you remove the upper speaker panel, is to access the 2 screws below the panel toward the front.
4. You will need to use a Torx T20 driver, and you will have to remove by feel as you will not be able to see them. It's not hard, the hard part is figuring out the correct Torx size. Do not fully remove the screws, just leave them "hanging".
5. After that, you are home free. Use the same plastic wedge to carefully pop out the vent. Disconnect the wires, the 2 outer plugs wiggle out, the one in the middle had a grey bracket that you slide forward to release.
6. Next, remove the vent and set in on the table. There are 2 tabs you press, one on each side of the hazard switch, and the switch pops right out. Look at the new part and how to release the tabs is very obvious.
7. Re-assemble, in reverse. Do not fully remove the Torx screws, with one hand hold both screws up to re-insert the vent panel. Then, just tighten the screws, they easily tighten from the position they are in.
This was well worth the money and time to replace because it makes your interior look brand new. The only mistake I made was buying the switch from the dealer. They charged 1.5 x list for a total cost of about $184. Using the link provided previously in the thread it should be about $125.
Good luck for anyone who tries this. It's not at all difficult, and well worth the time.
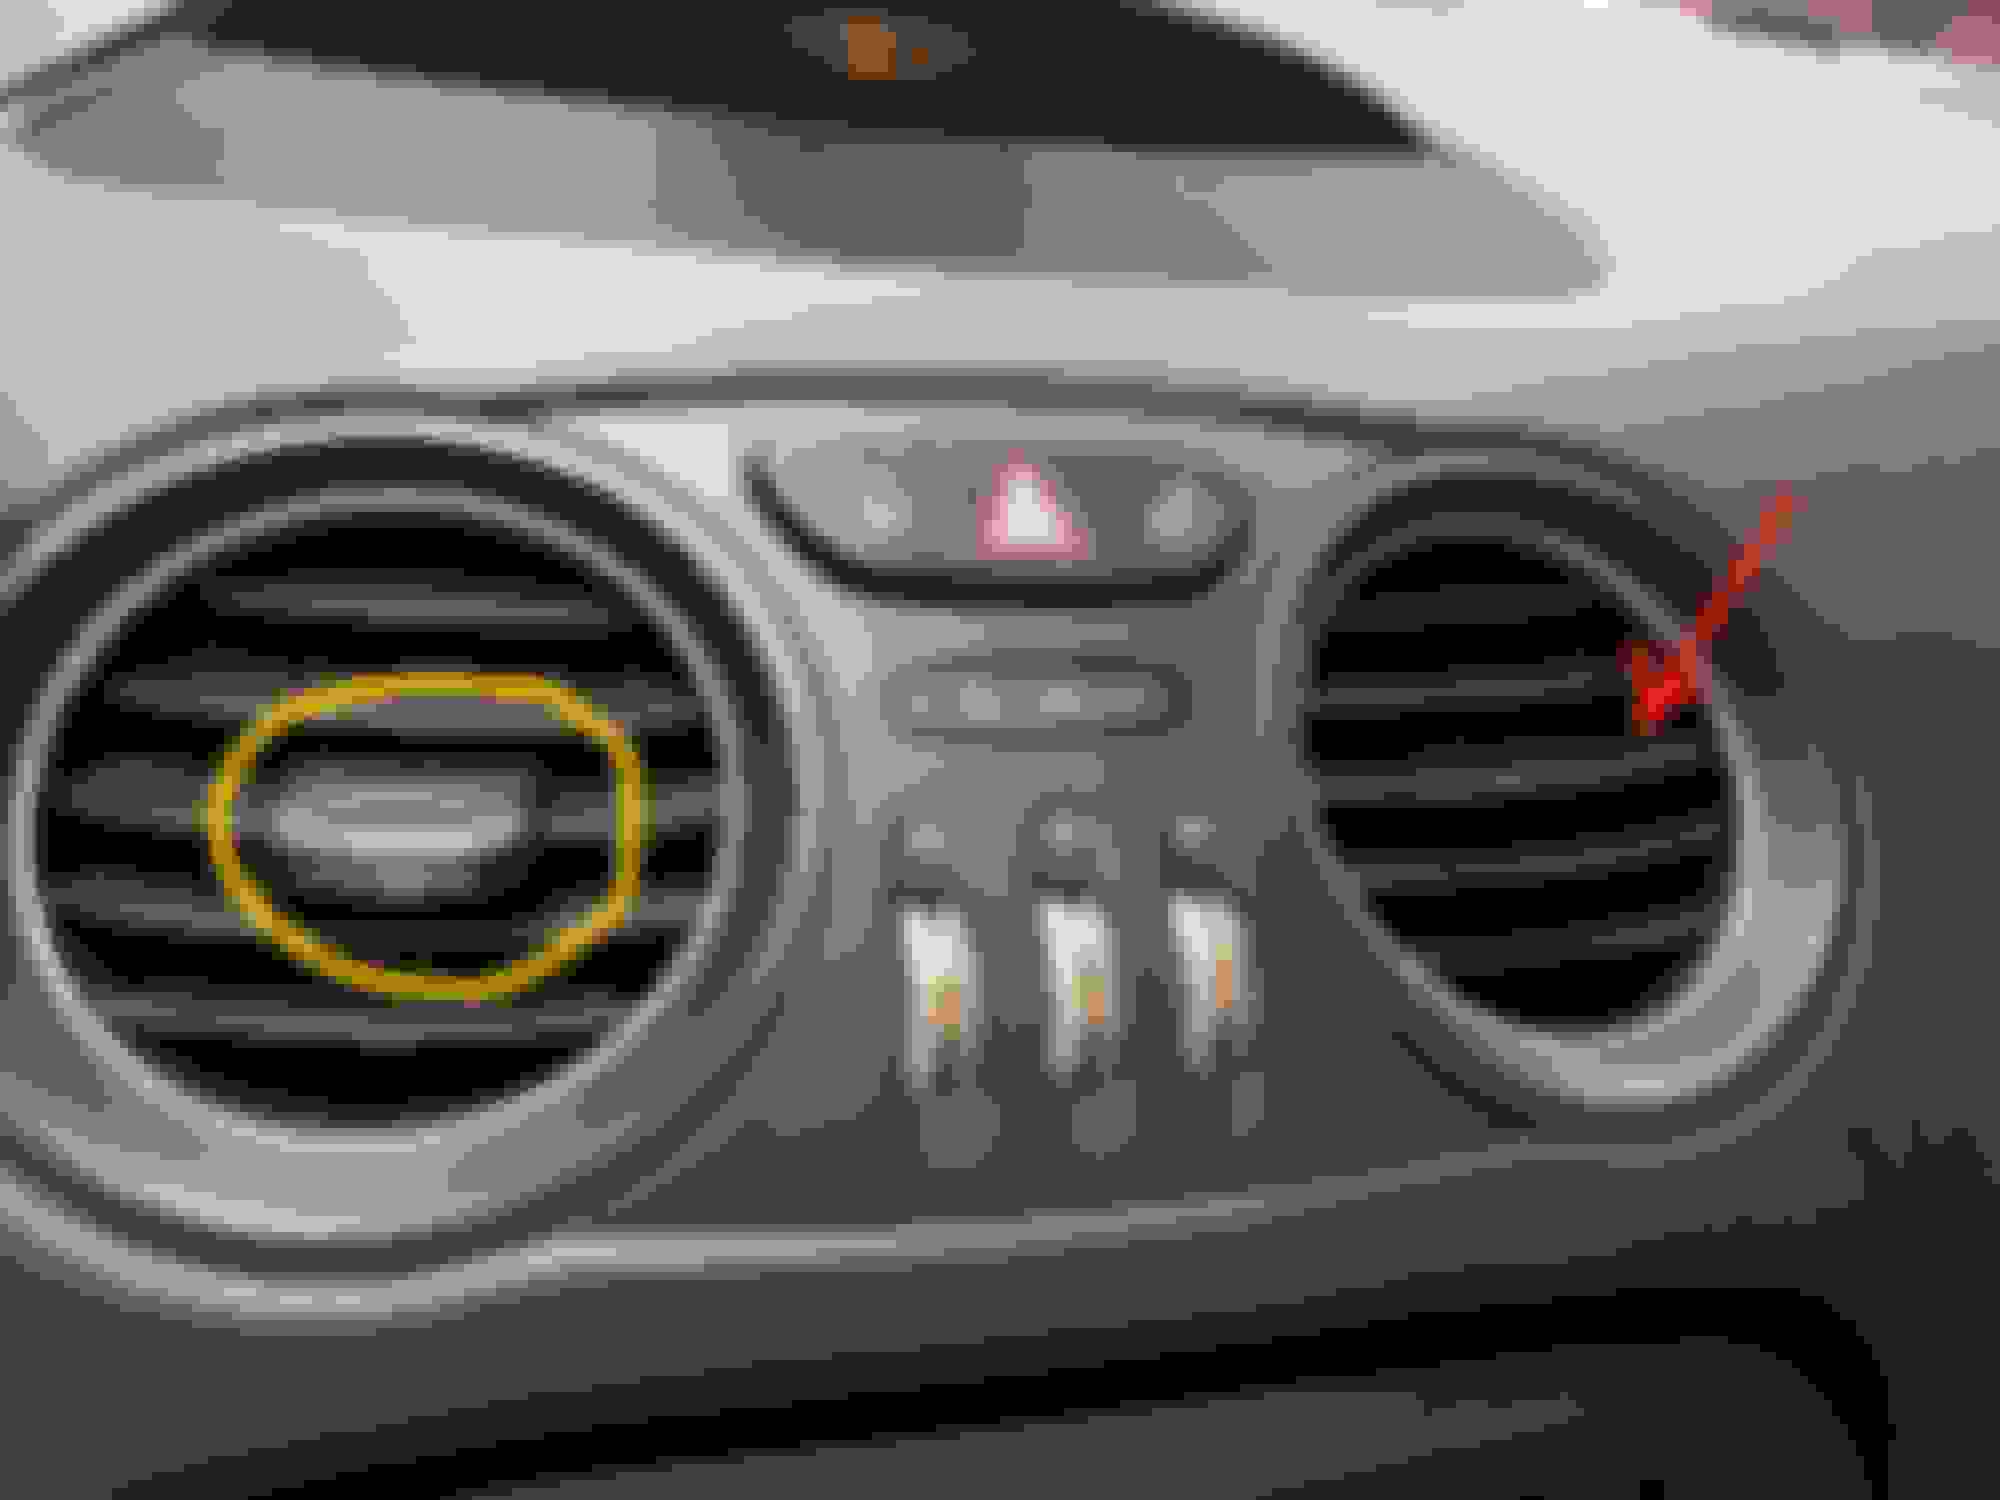
All this discussion about the buttons on the upper center reminds me (especially with the photos). Two of my vents are missing the airflow adjustment knob (circled). One in the upper center console (arrow) and the other on the drivers (left) side. Does anyone know if there is a way to replace just the knob or do I have to replace the entire vent assembly? Can someone provide the part numbers for either solution?
Those vent slides are not available individually. You may be able to find someone selling a used vent assembly. Our ML350 is also missing them and I found a Chinese supplier selling them, but they are a major PITA to replace as you have to disassemble the vents and get all the louvers lined up and hope that none of the little plastic pivot points on them break.
Thanks to everyone in this forum for making me aware of this sticky little issue! I had never even pressed one of those buttons before, but today in the car I remembered to touch them, and of course mine were sticky as well..
I can't help but wonder why those particular buttons are like that? What in the world did they do so different to manufacture those particular buttons?! I'm guessing it has something to do with sun exposure from the windshield?