


SL55/63/65/R230 AMG: 2005 Jet Black SL Paint Correction
Thread Starter
Junior Member
Joined: Apr 2013
Posts: 22
Likes: 0
From: San Diego
C63
2005 Jet Black SL Paint Correction
A recent job I completed, thought you'd enjoy seeing the process!
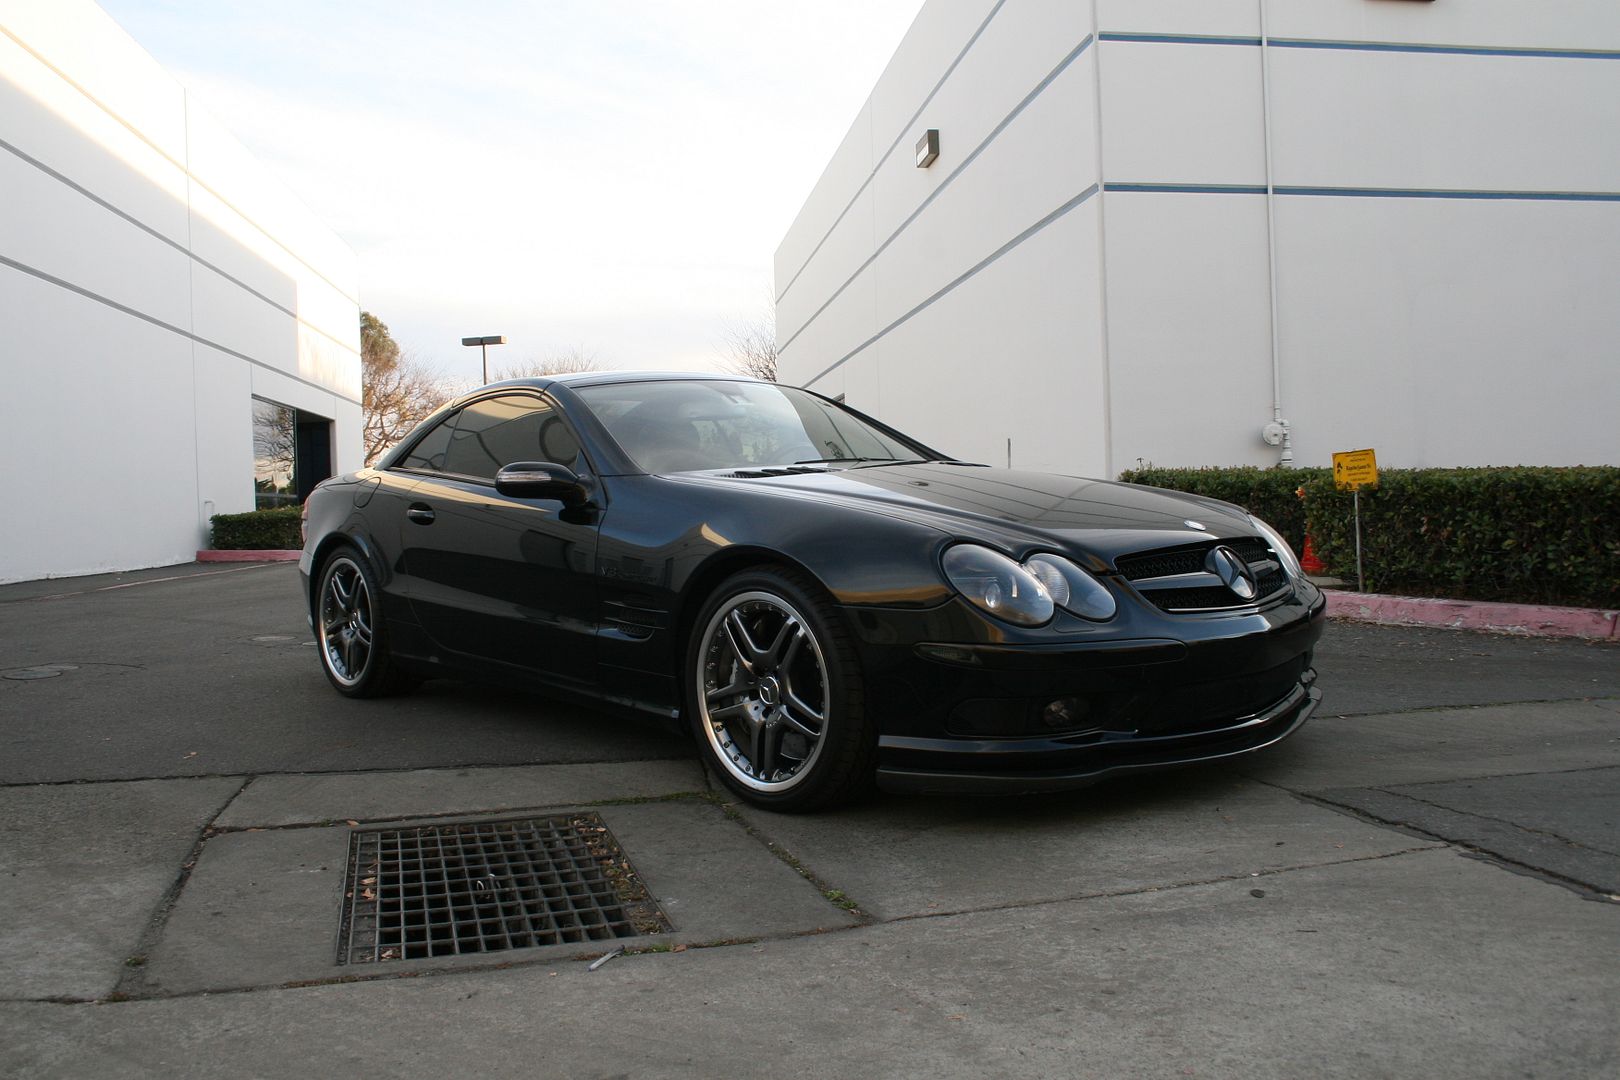
This week we work on a jet black 2005 Mercedes K55 that is in dire need of some work. Follow through to see the process involved to bring this car back to life.
Main Issues:
Severe damage to front clear bra that needs replacing
Heavy concentration of swirls and wash marring
Water spots and other etching on the paintwork
CQuartz Finest installation to protect paint surface
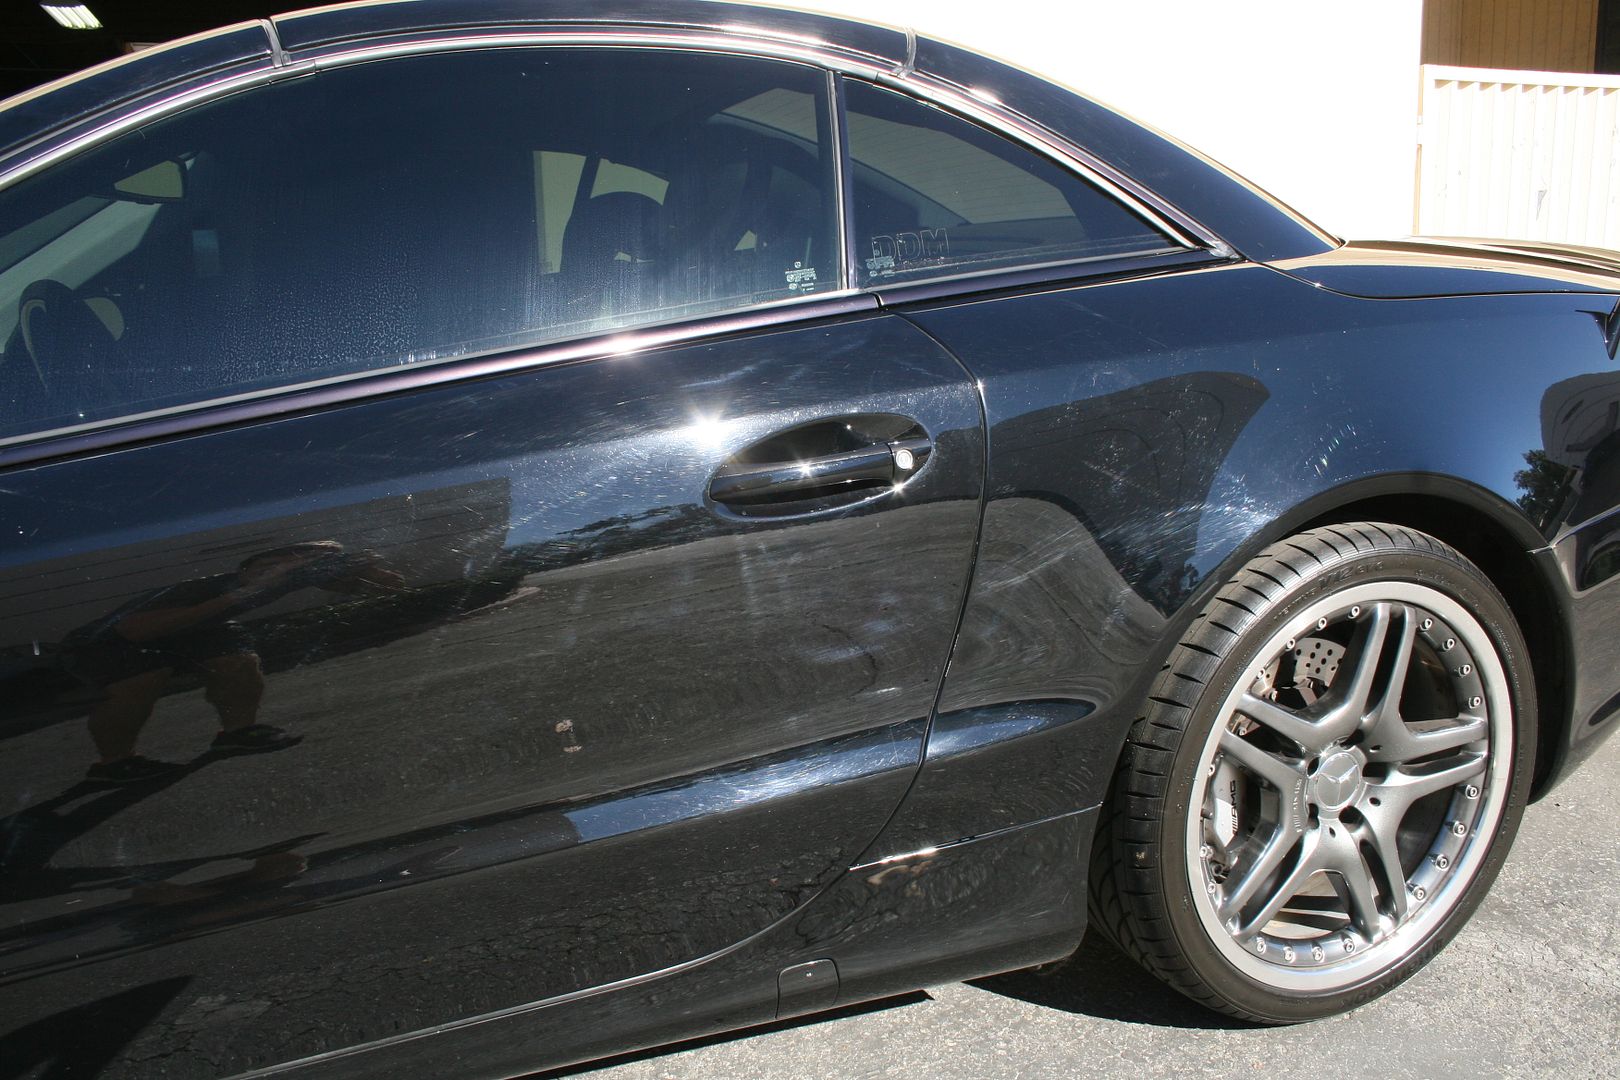
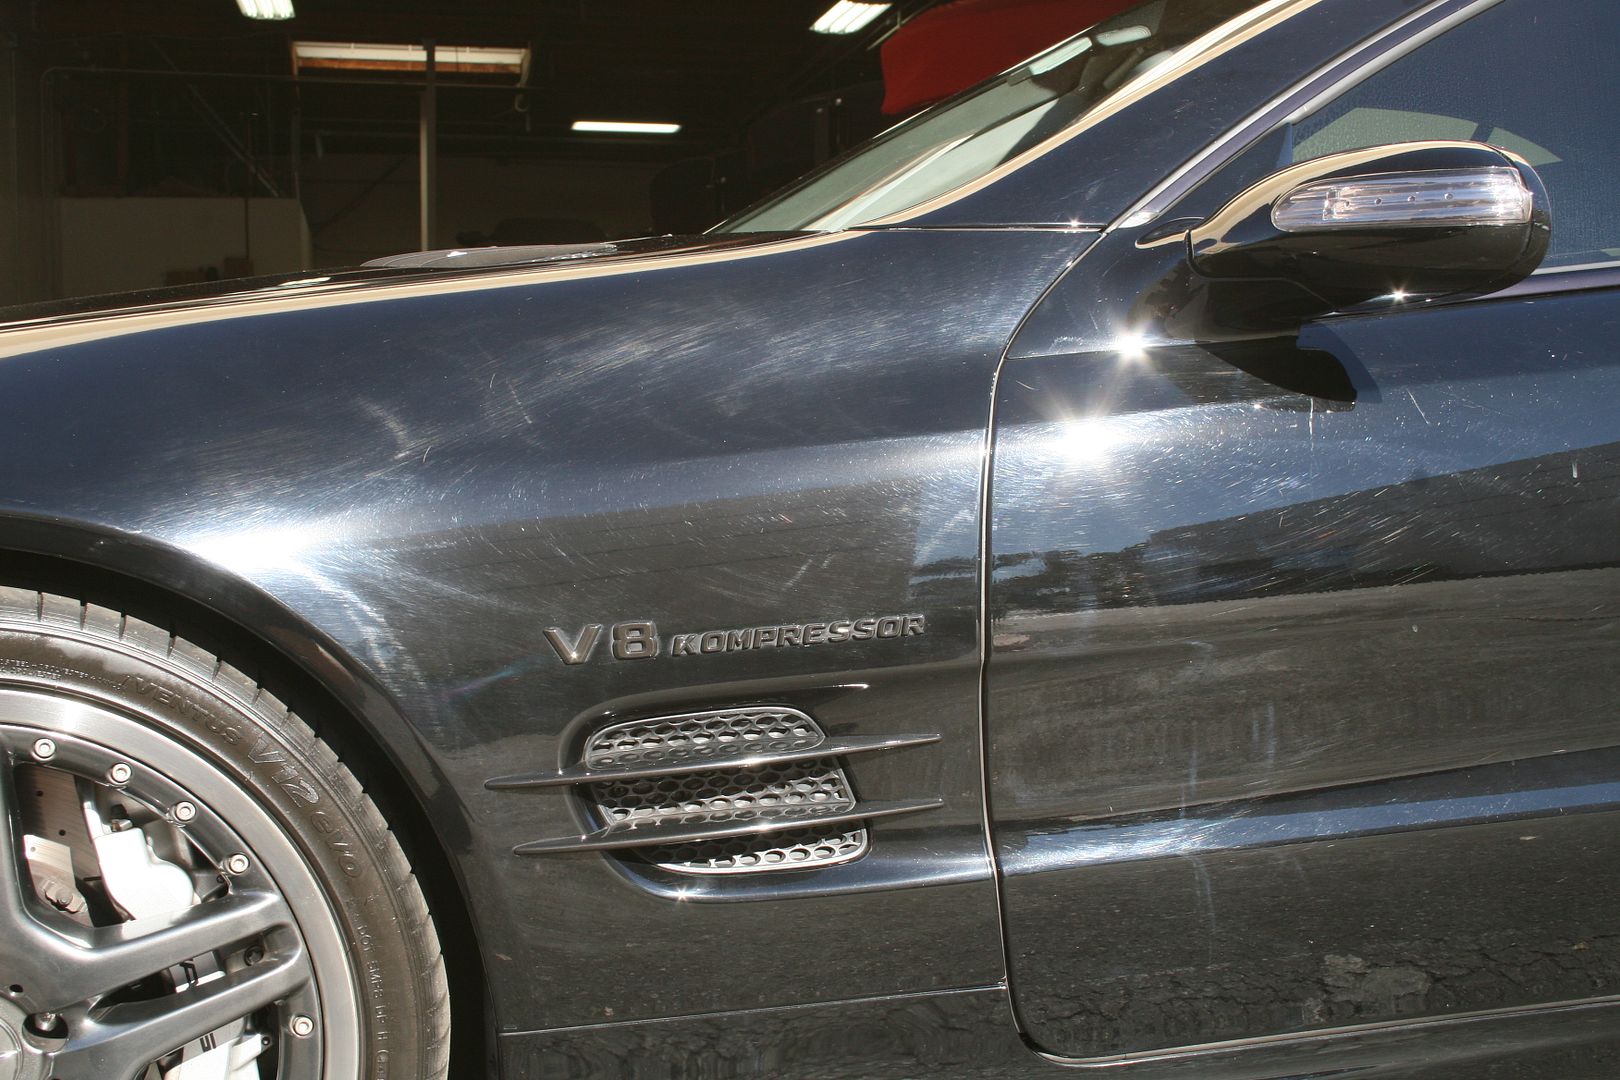
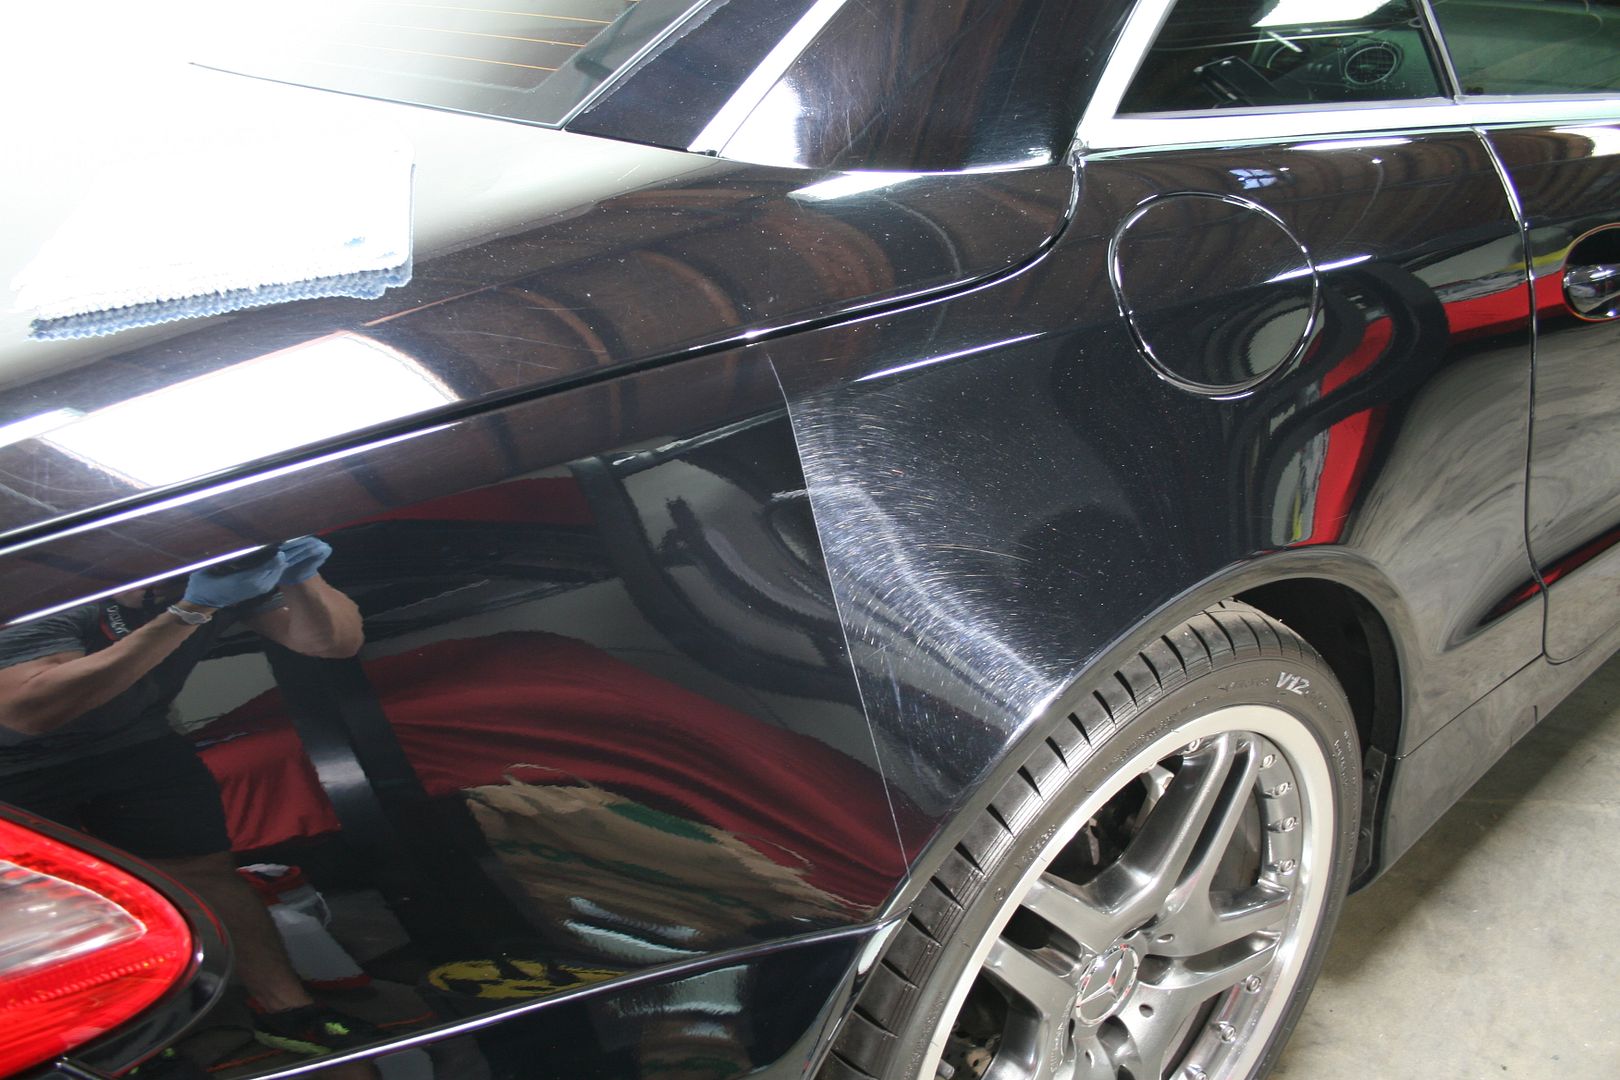
Here is the starting condition of the vehicle, note the dense concentration of wash marring, swirls and scratches.

After vehicle was decontaminated and prepped for polishing, a test section was performed.

The results were outstanding, the combination I decided on resulted in a flawless finish.
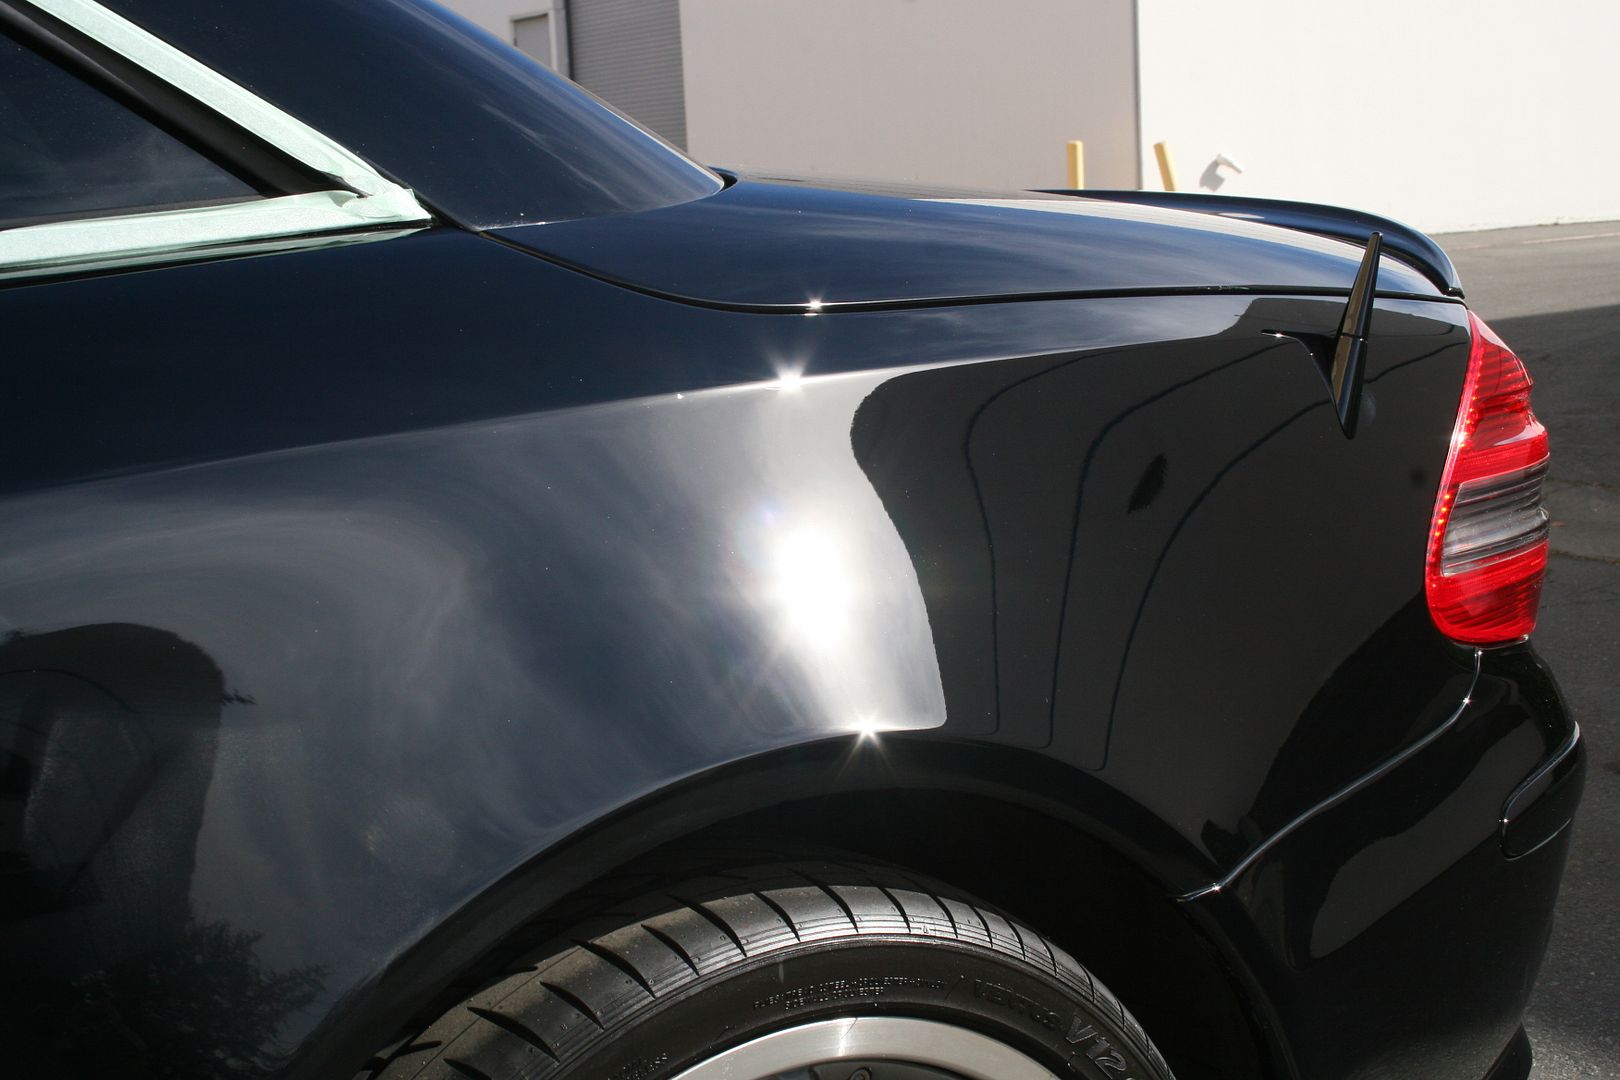
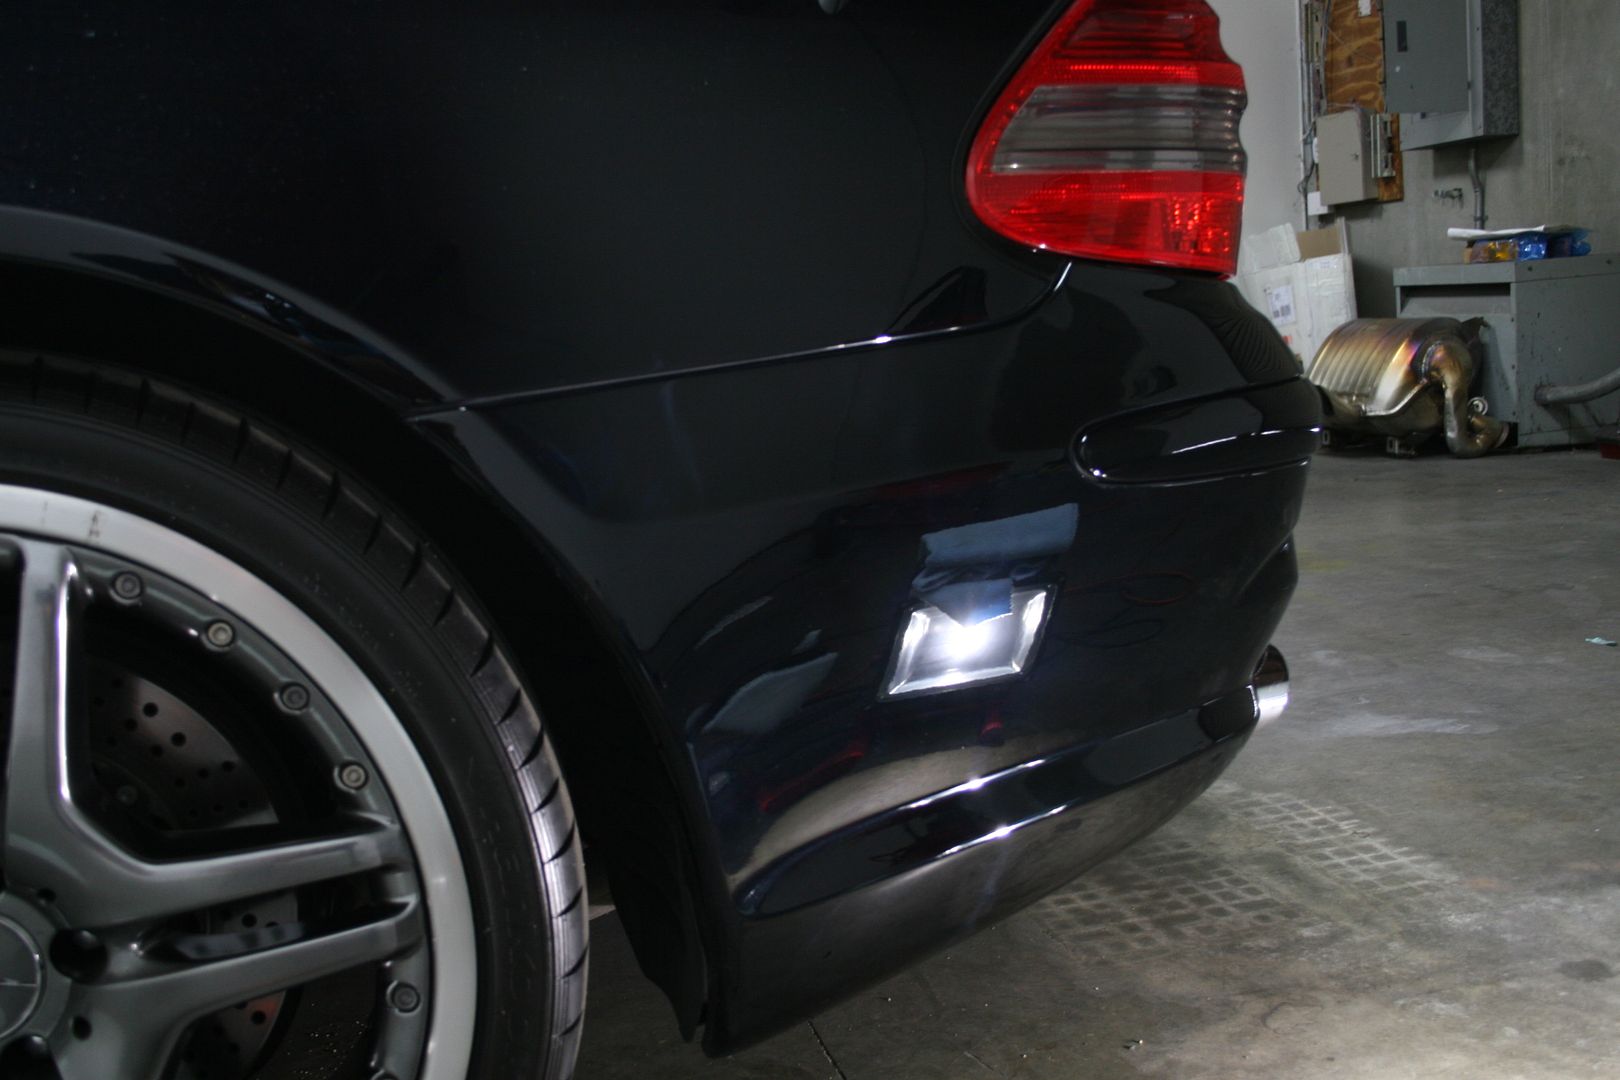
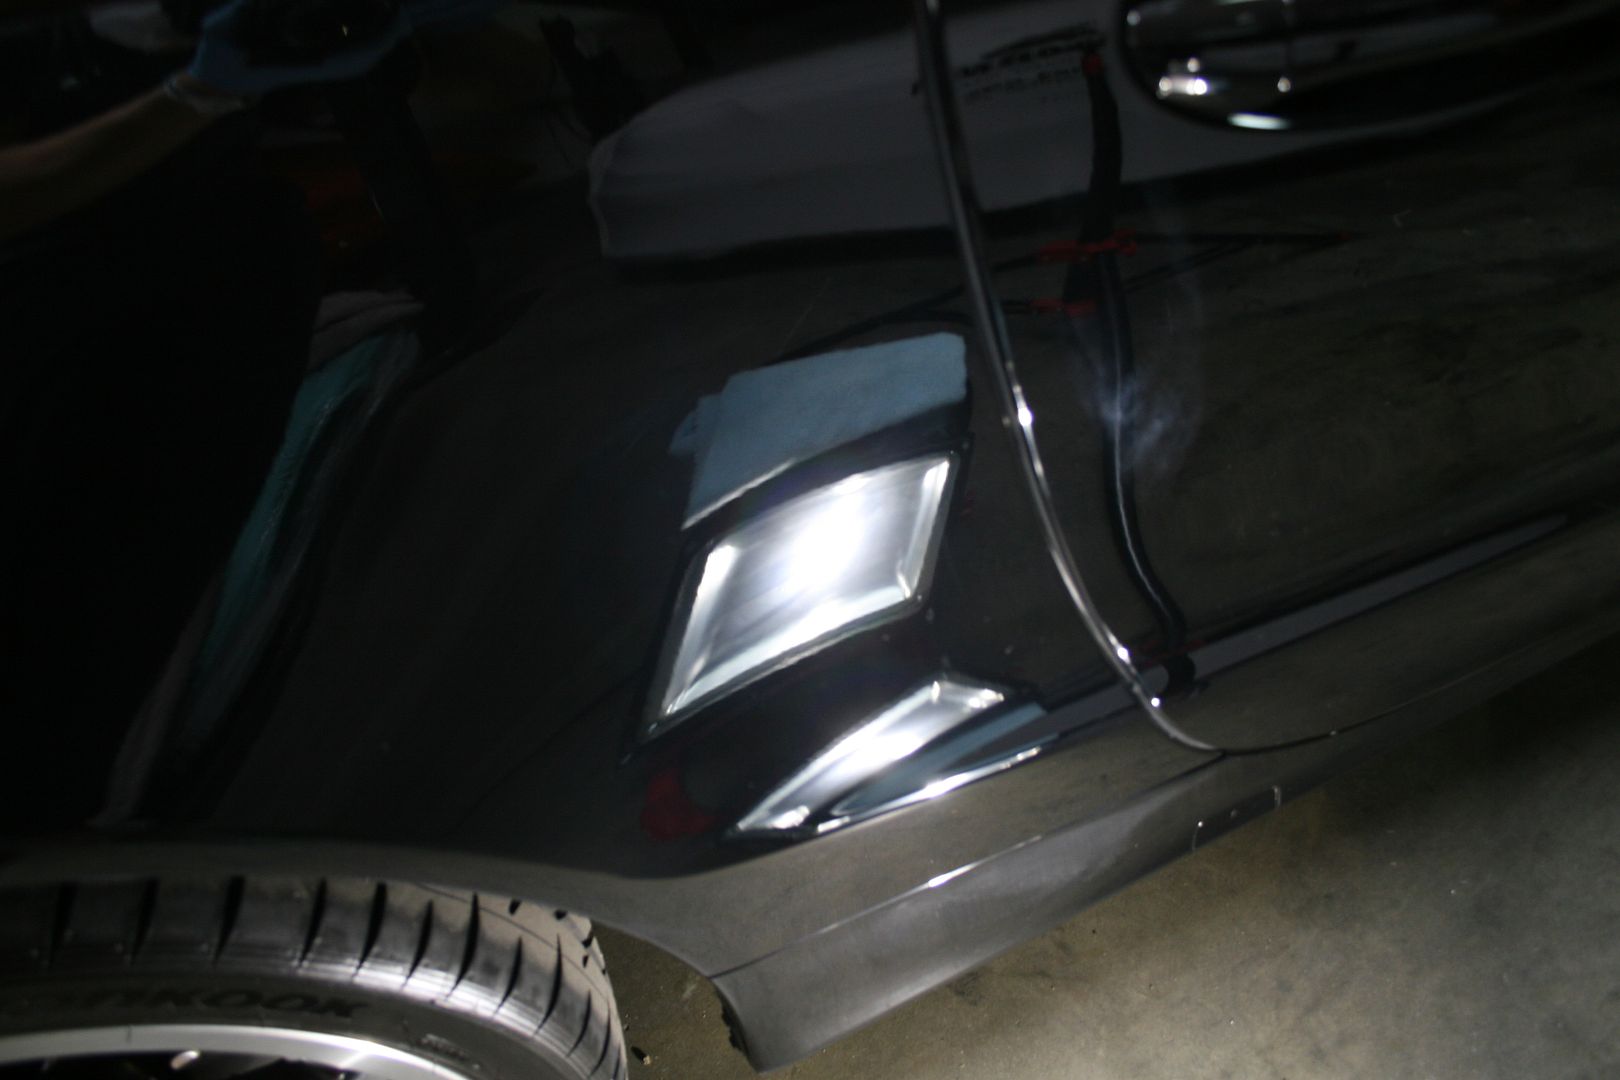
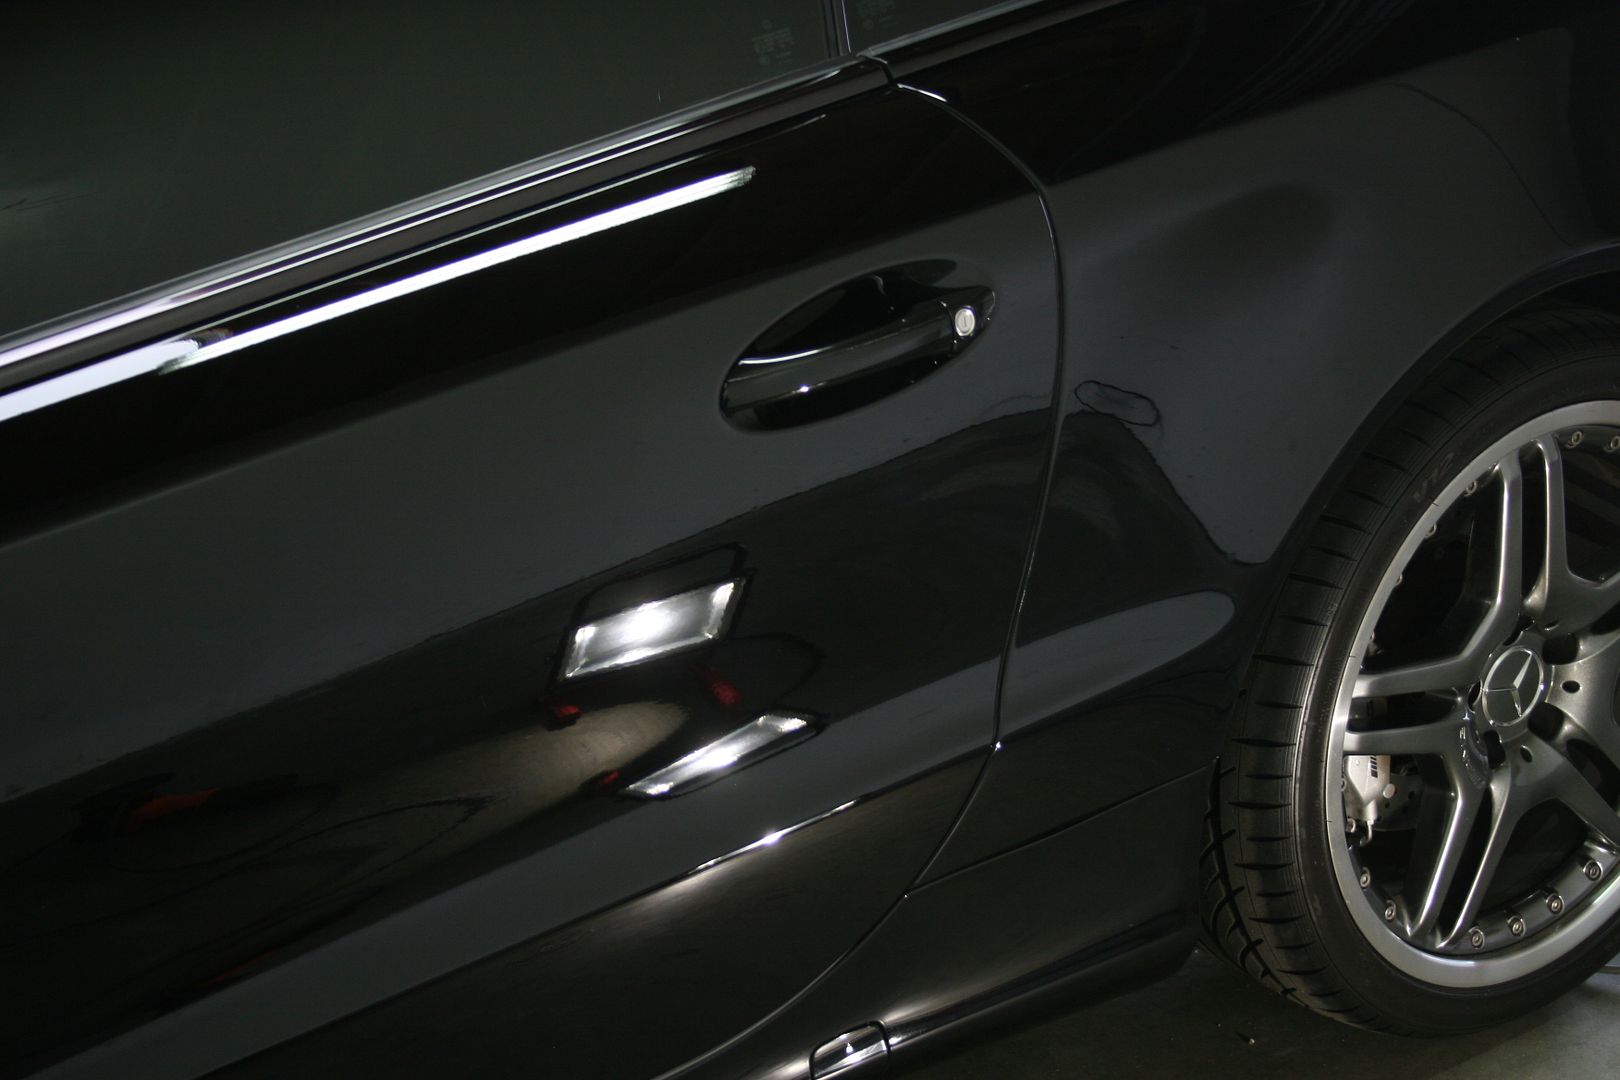
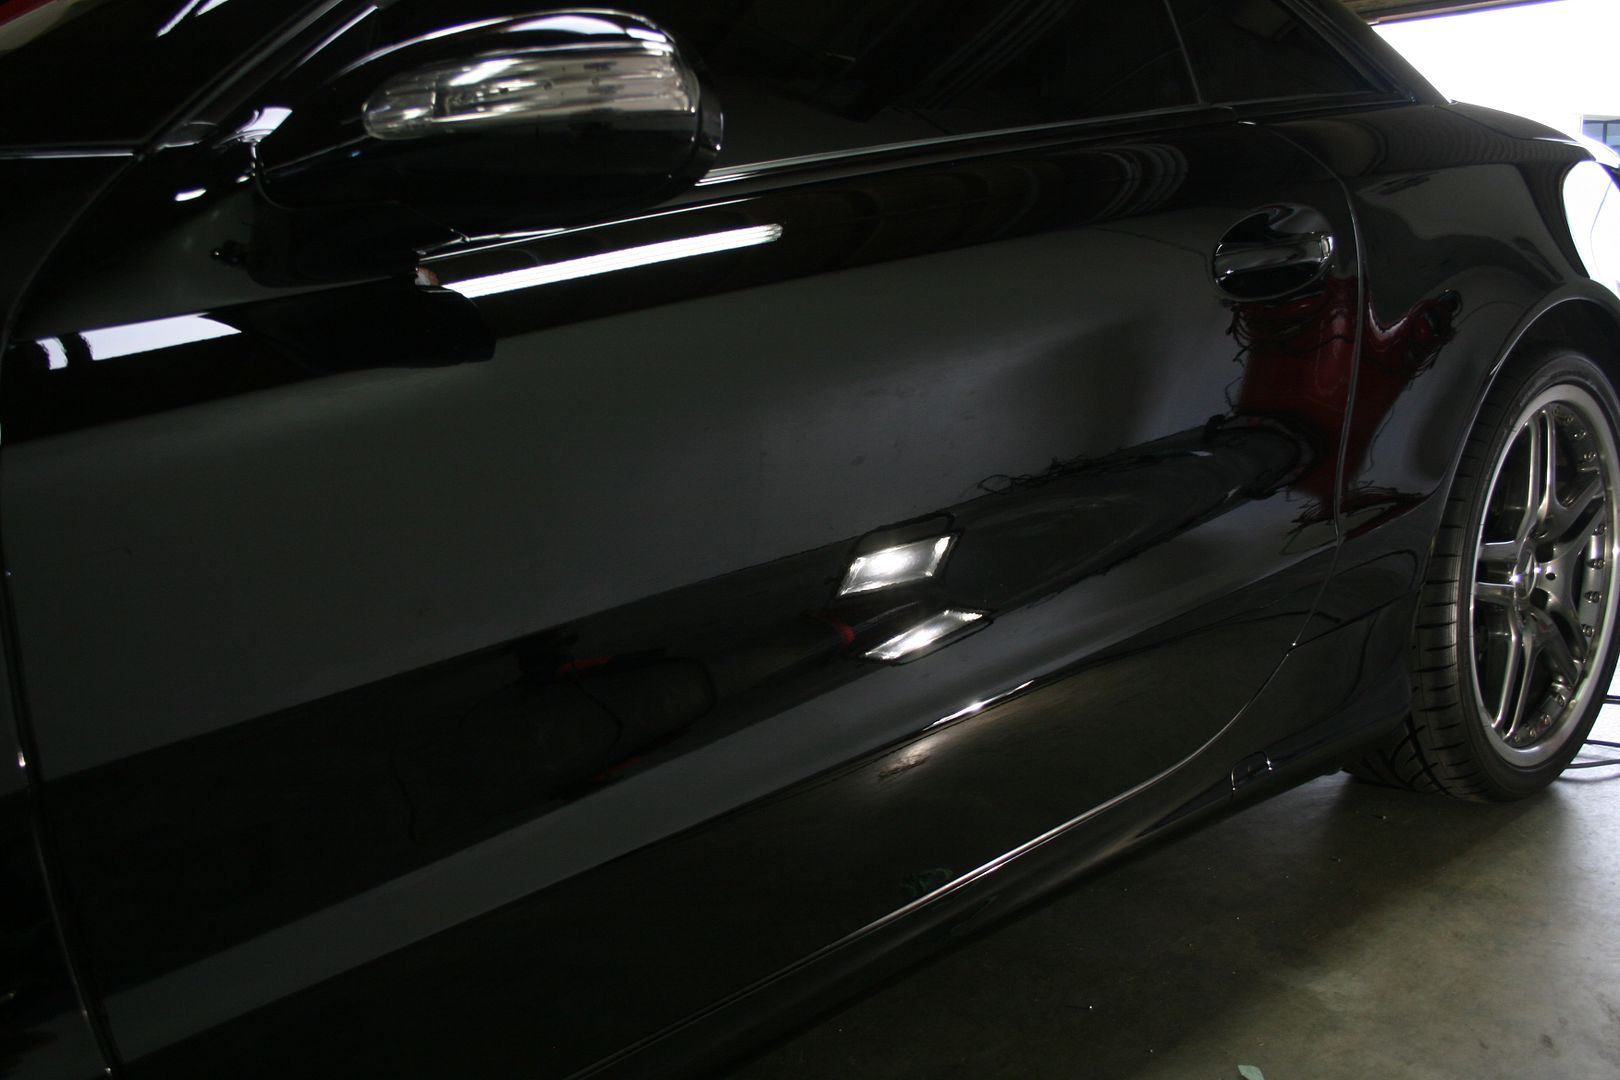
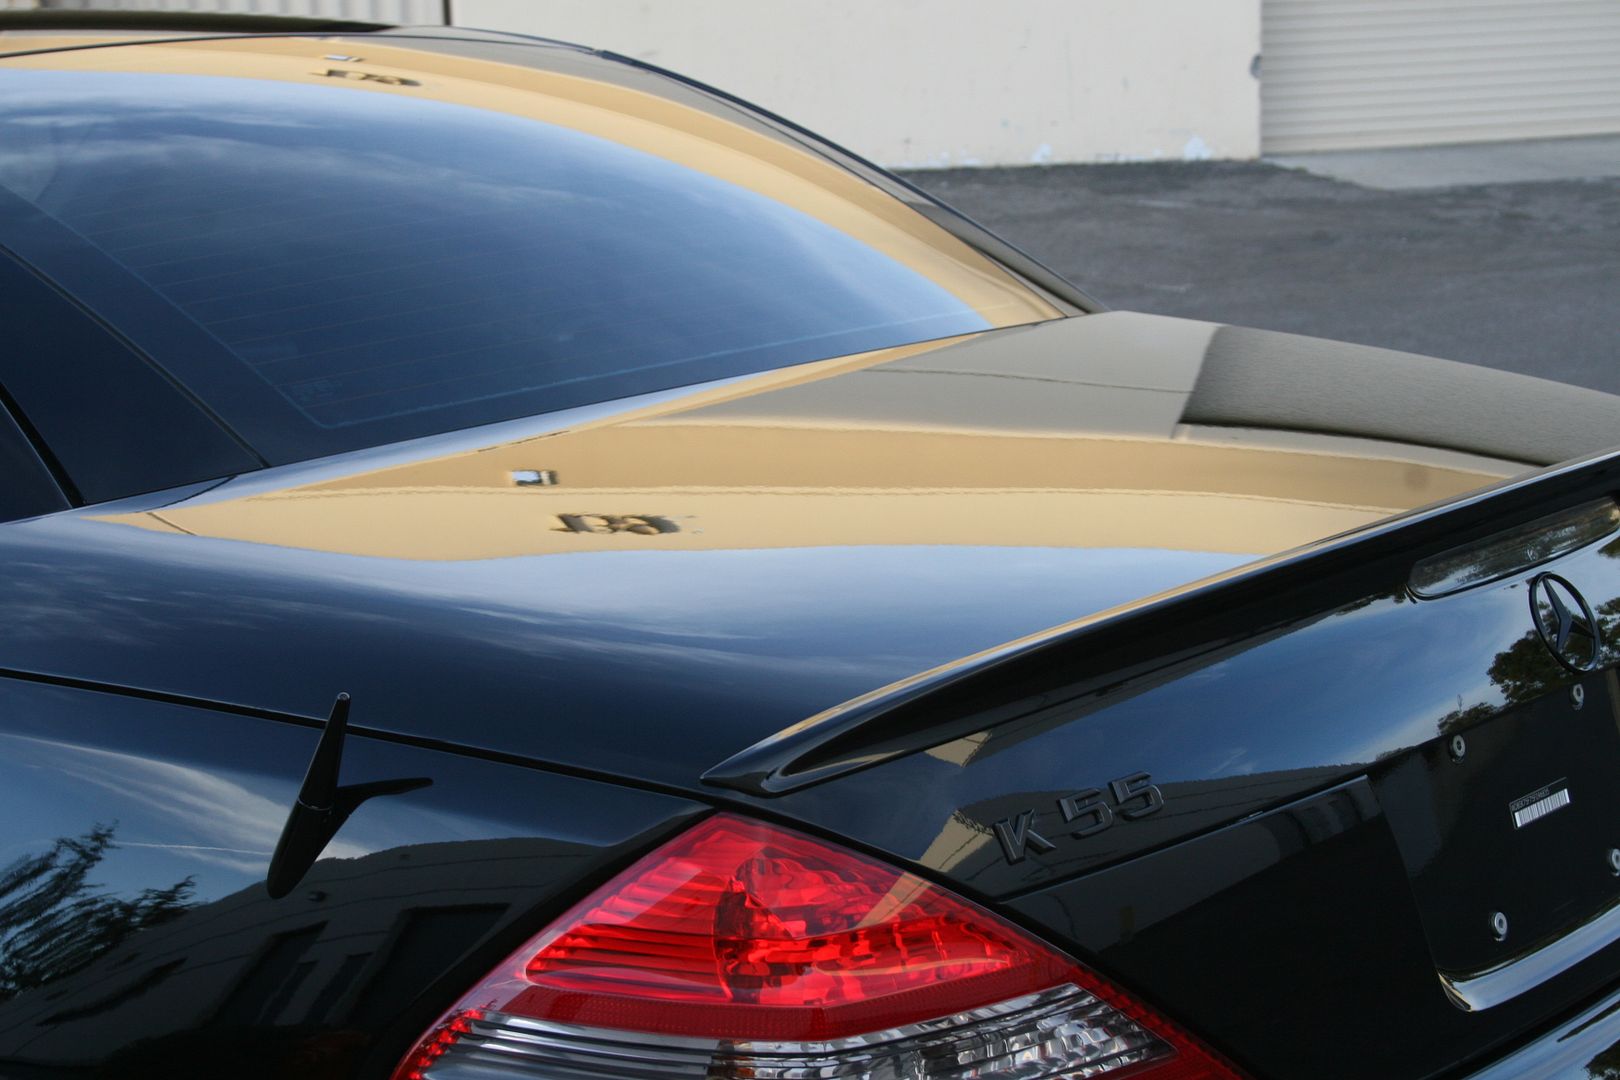
From grey to black. One of the reasons paint correction makes such a dramatic difference is the way light reflects off the surface. On the left side here you can see quite a bit of damage that results in the panel almost looking grey. This is because all of the defects cause the light to refract in a thousand different directions instead of reflect. The right side has been polished resulting in a flawless surface that reflects every ounce of light resulting in a deeper, richer and glossier appearance. This flawless finish is permanent with proper maintenance.
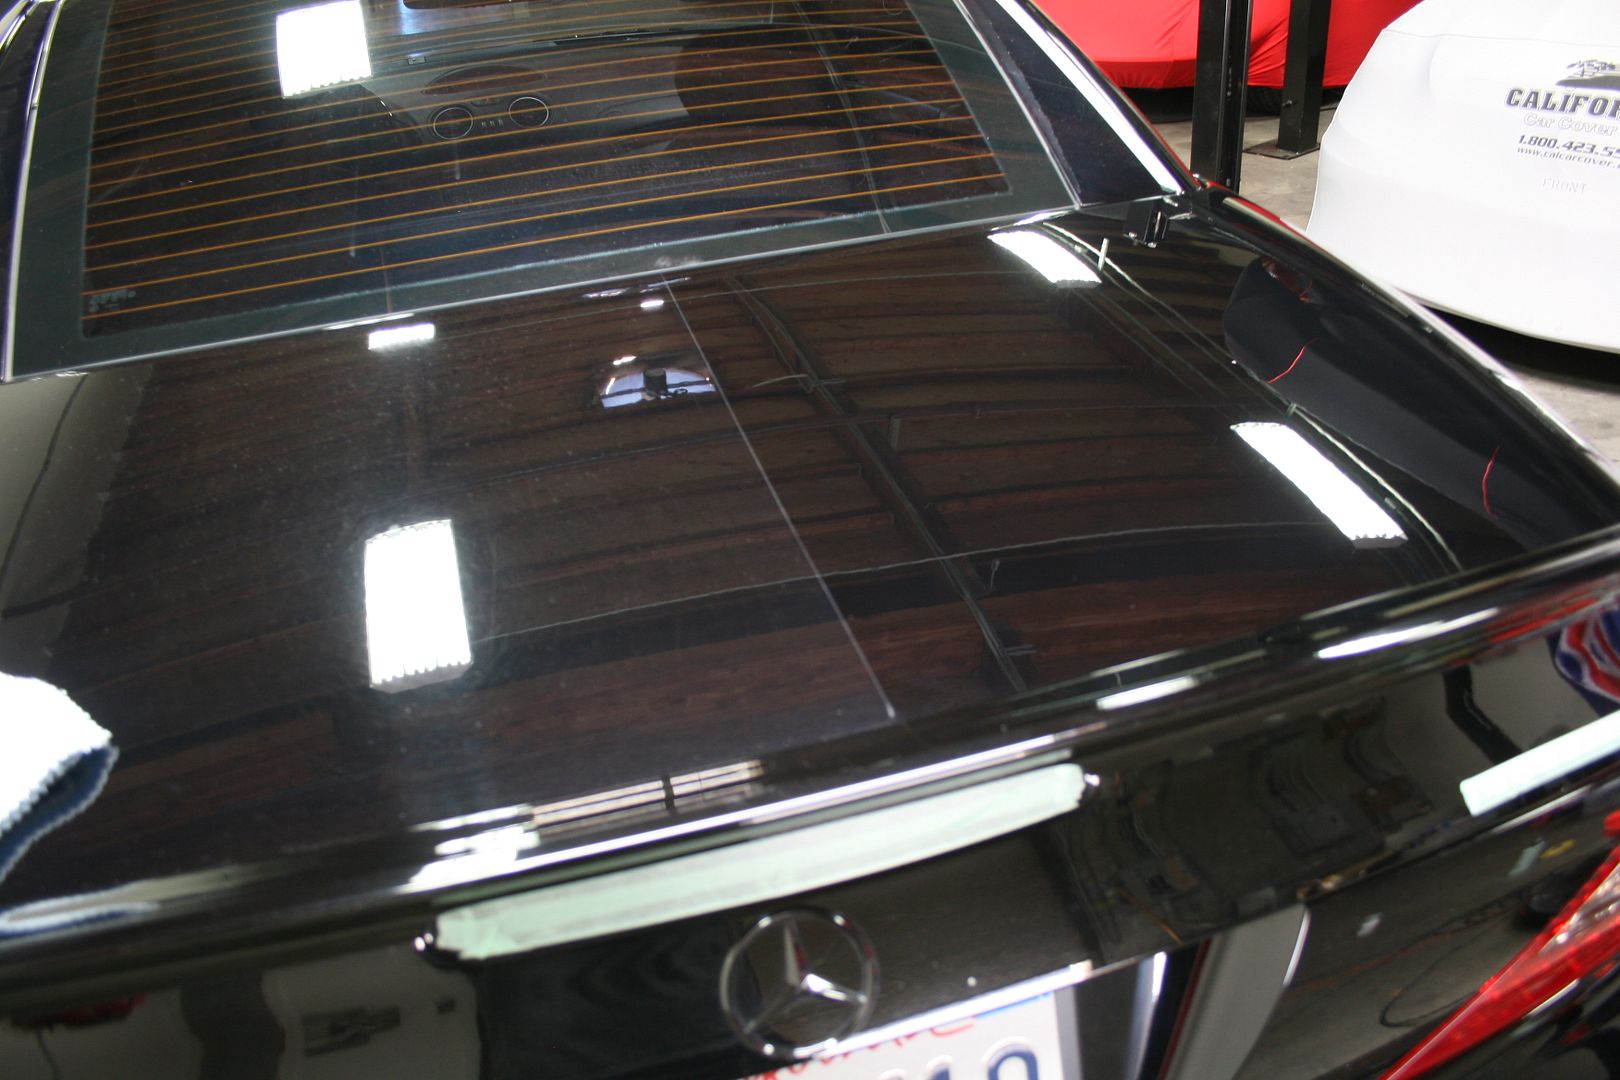
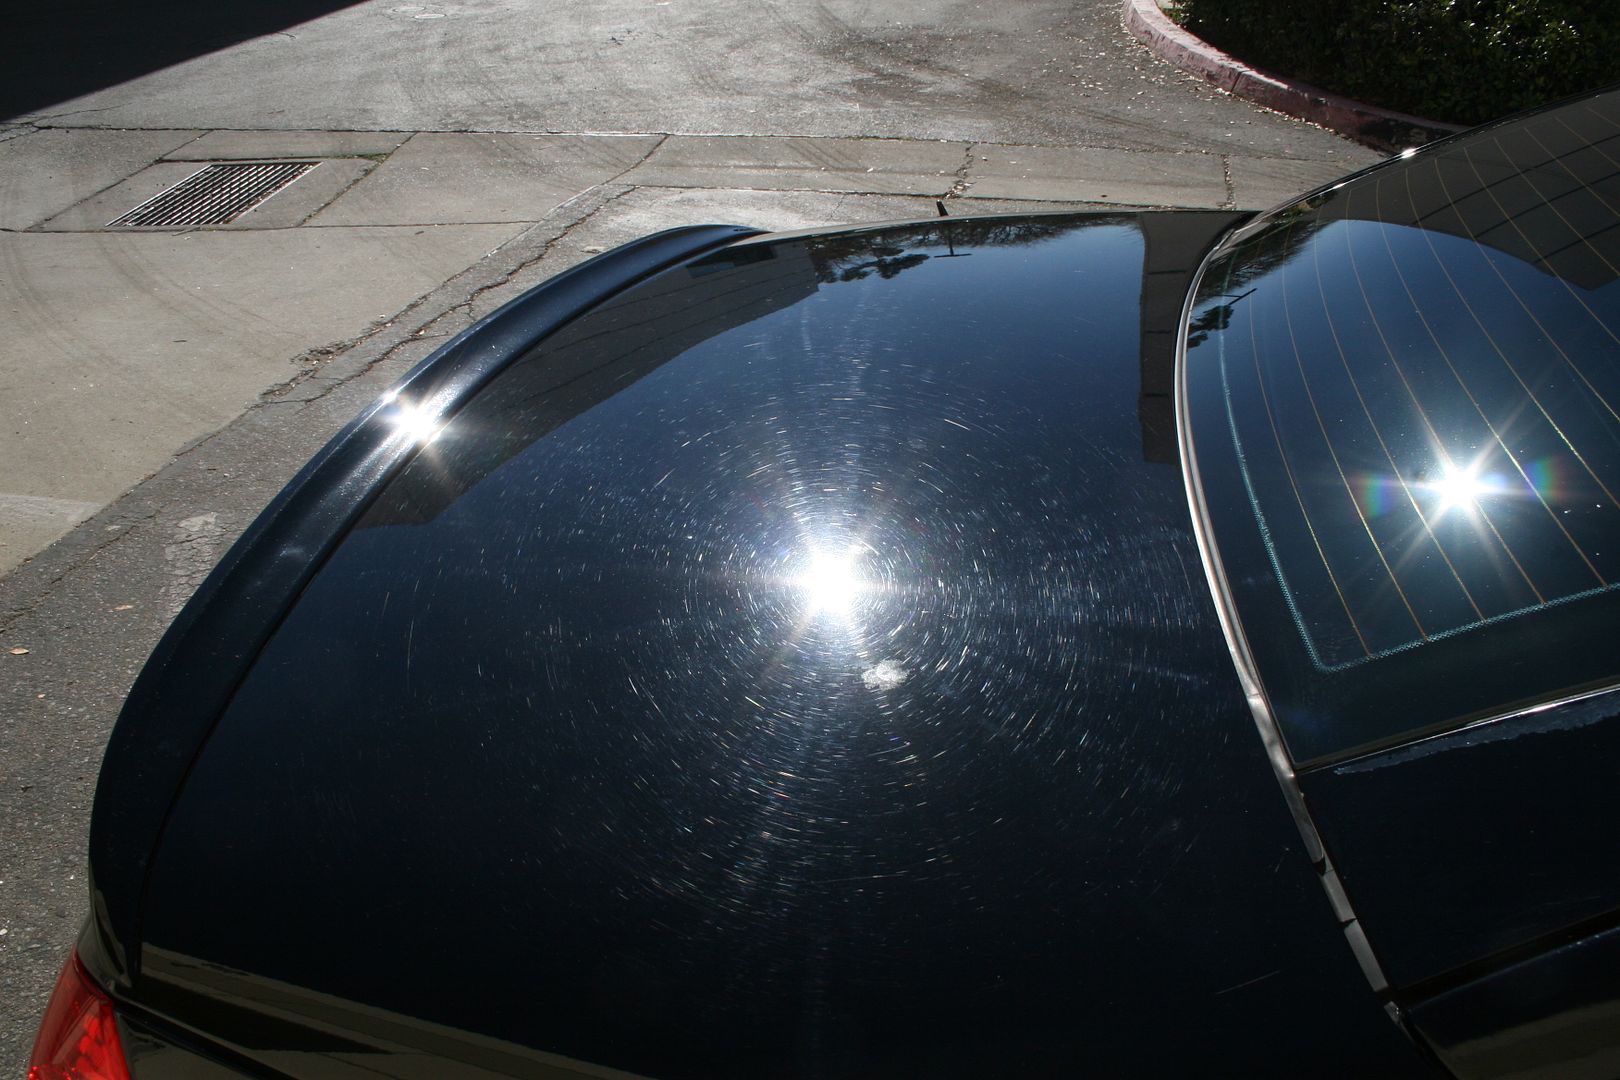
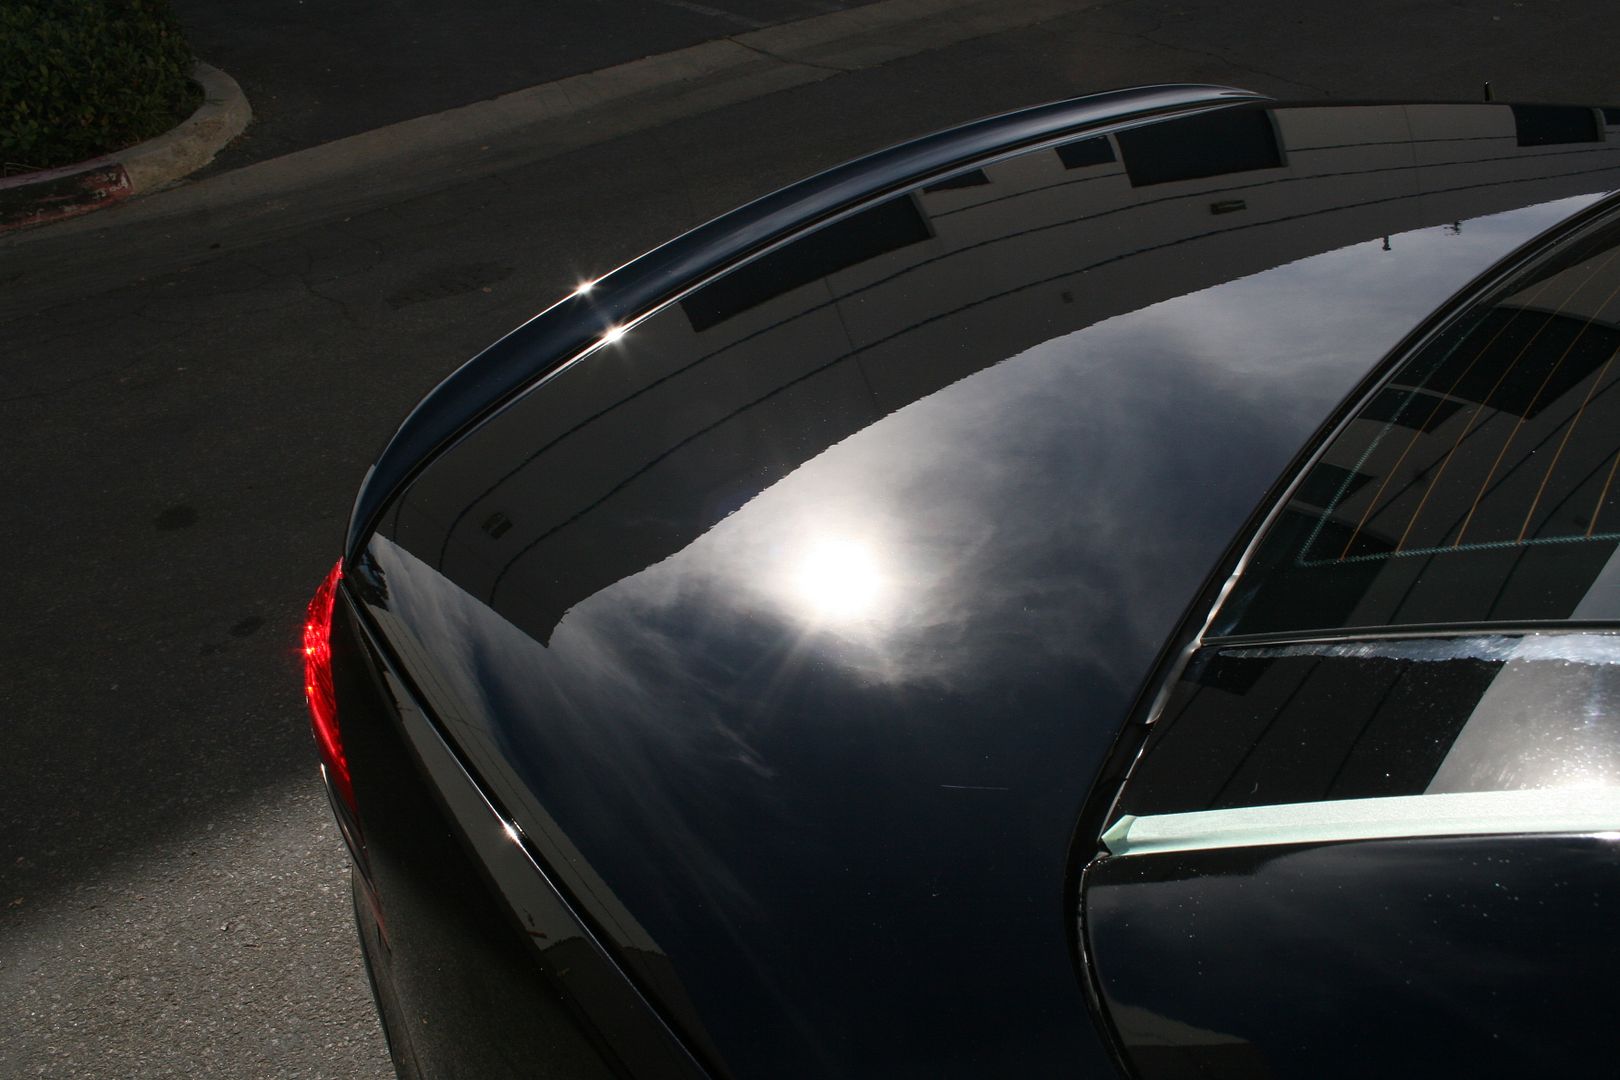
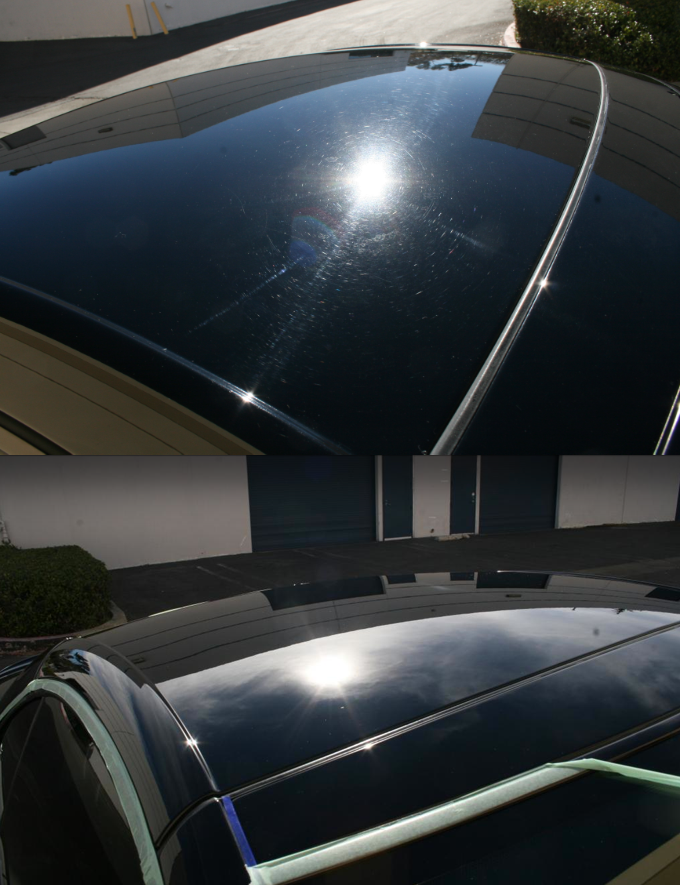
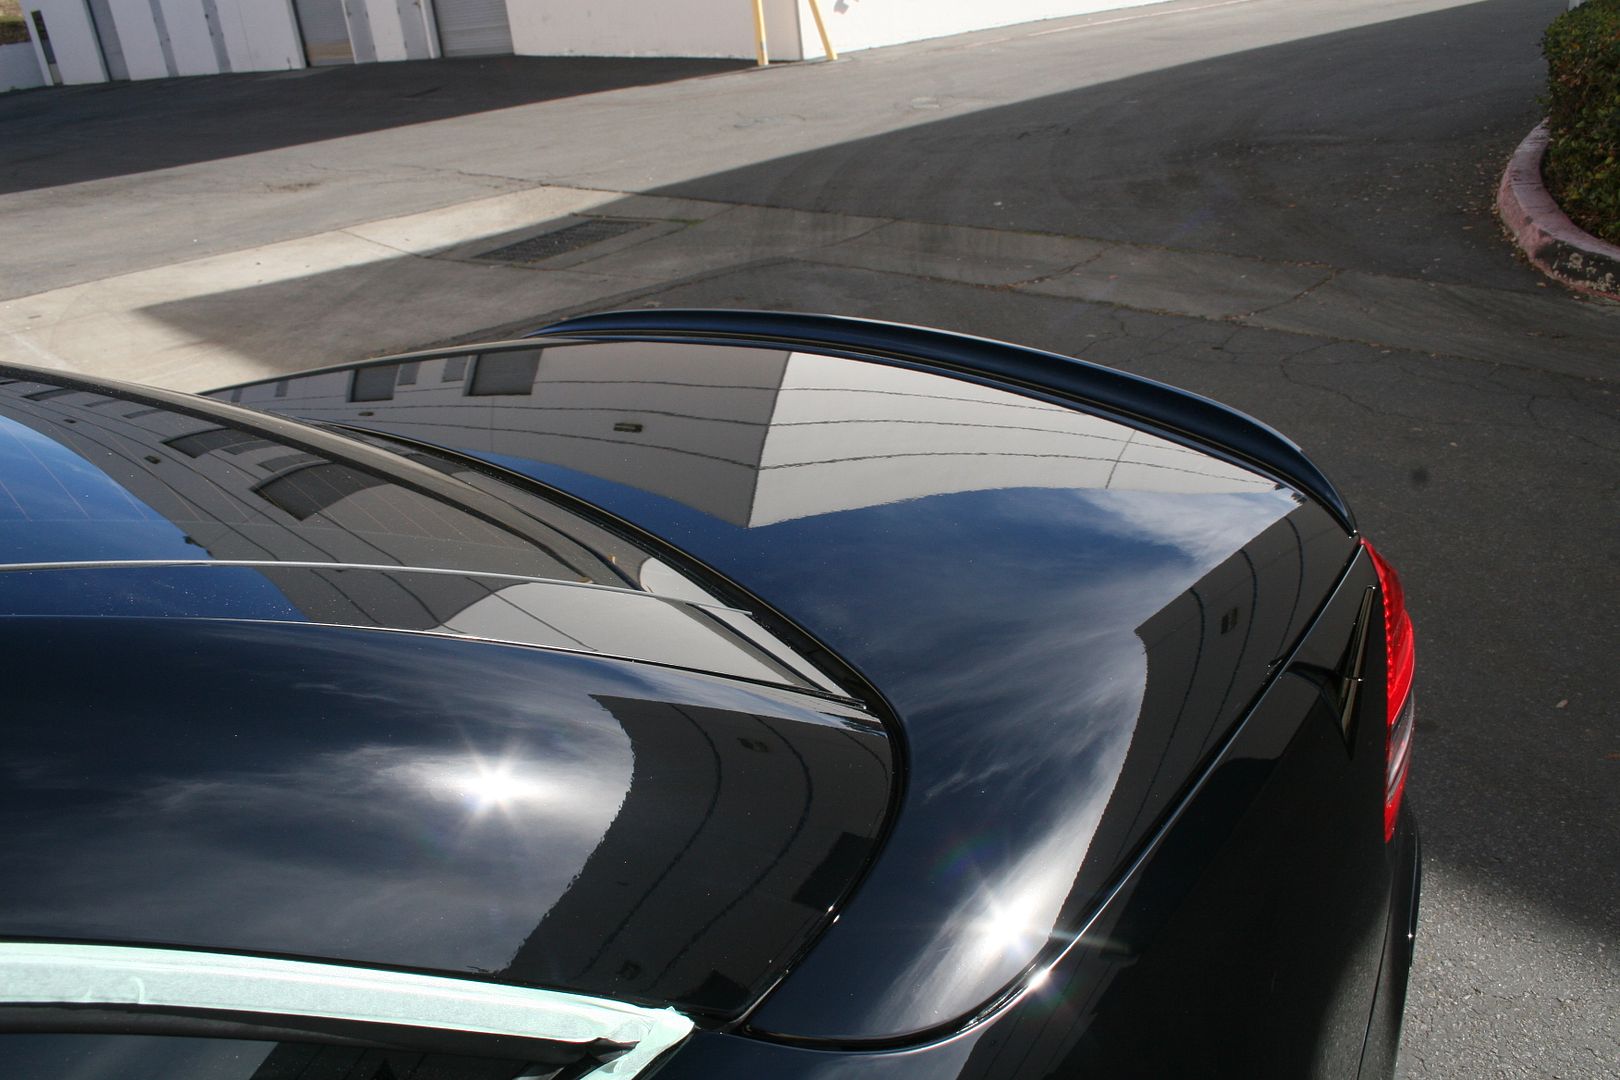
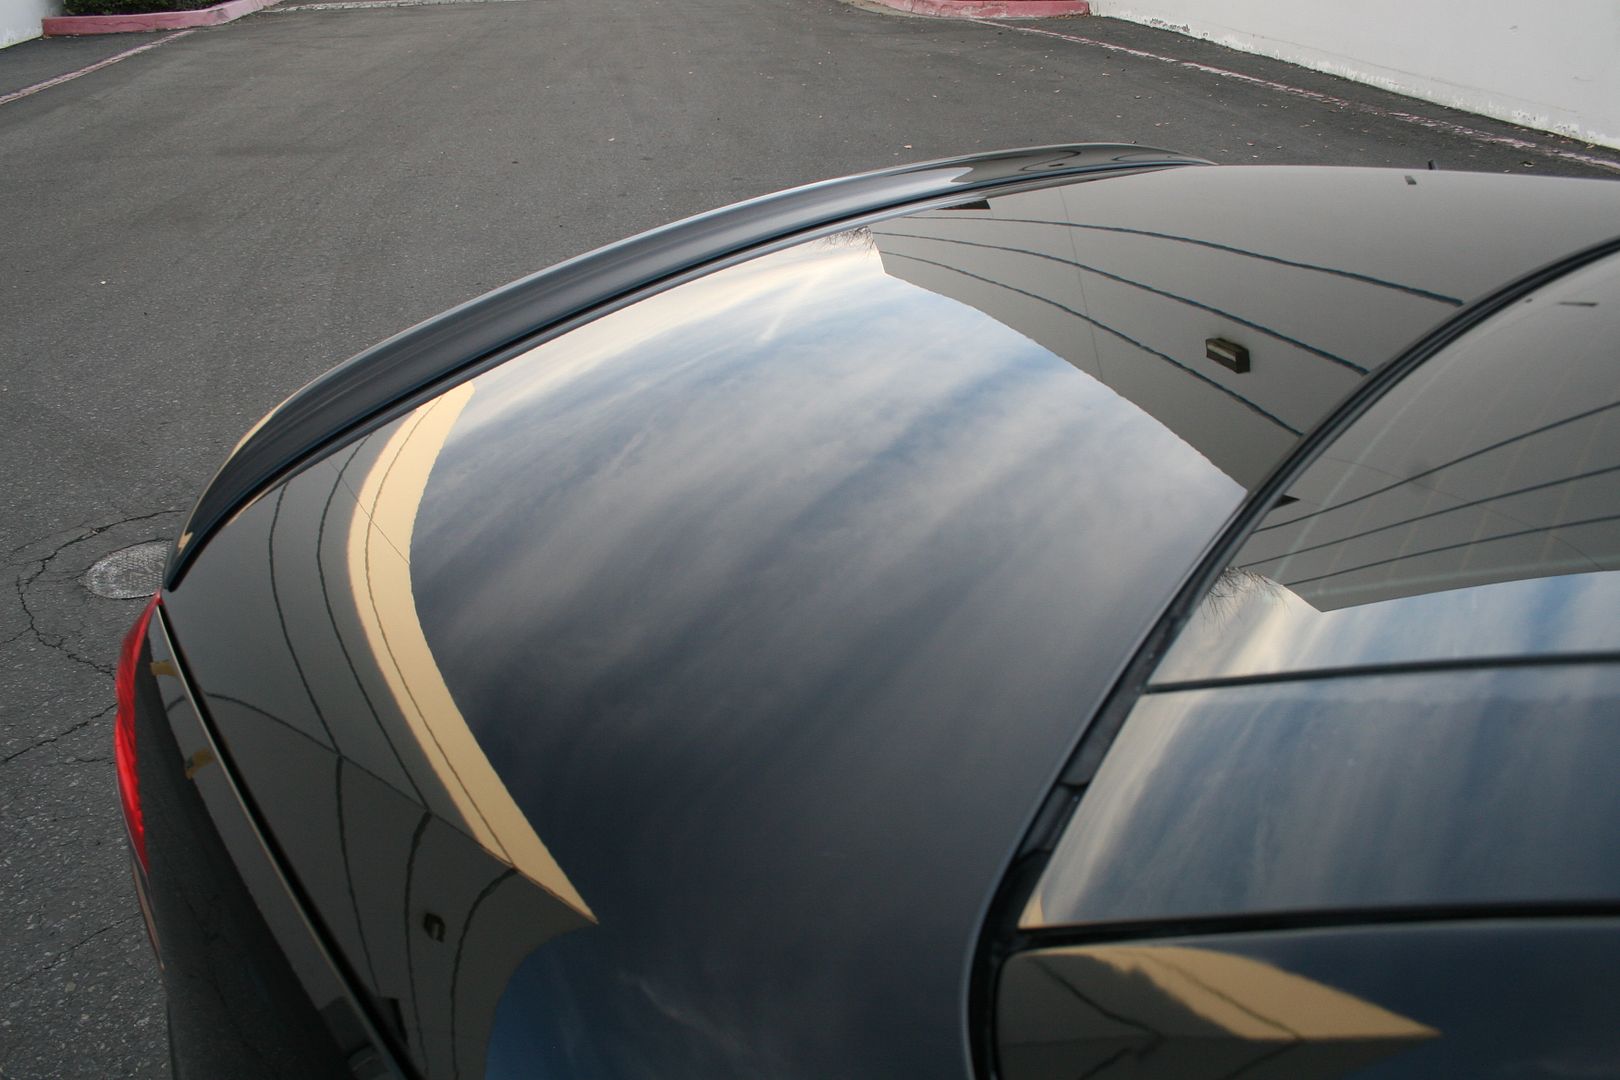
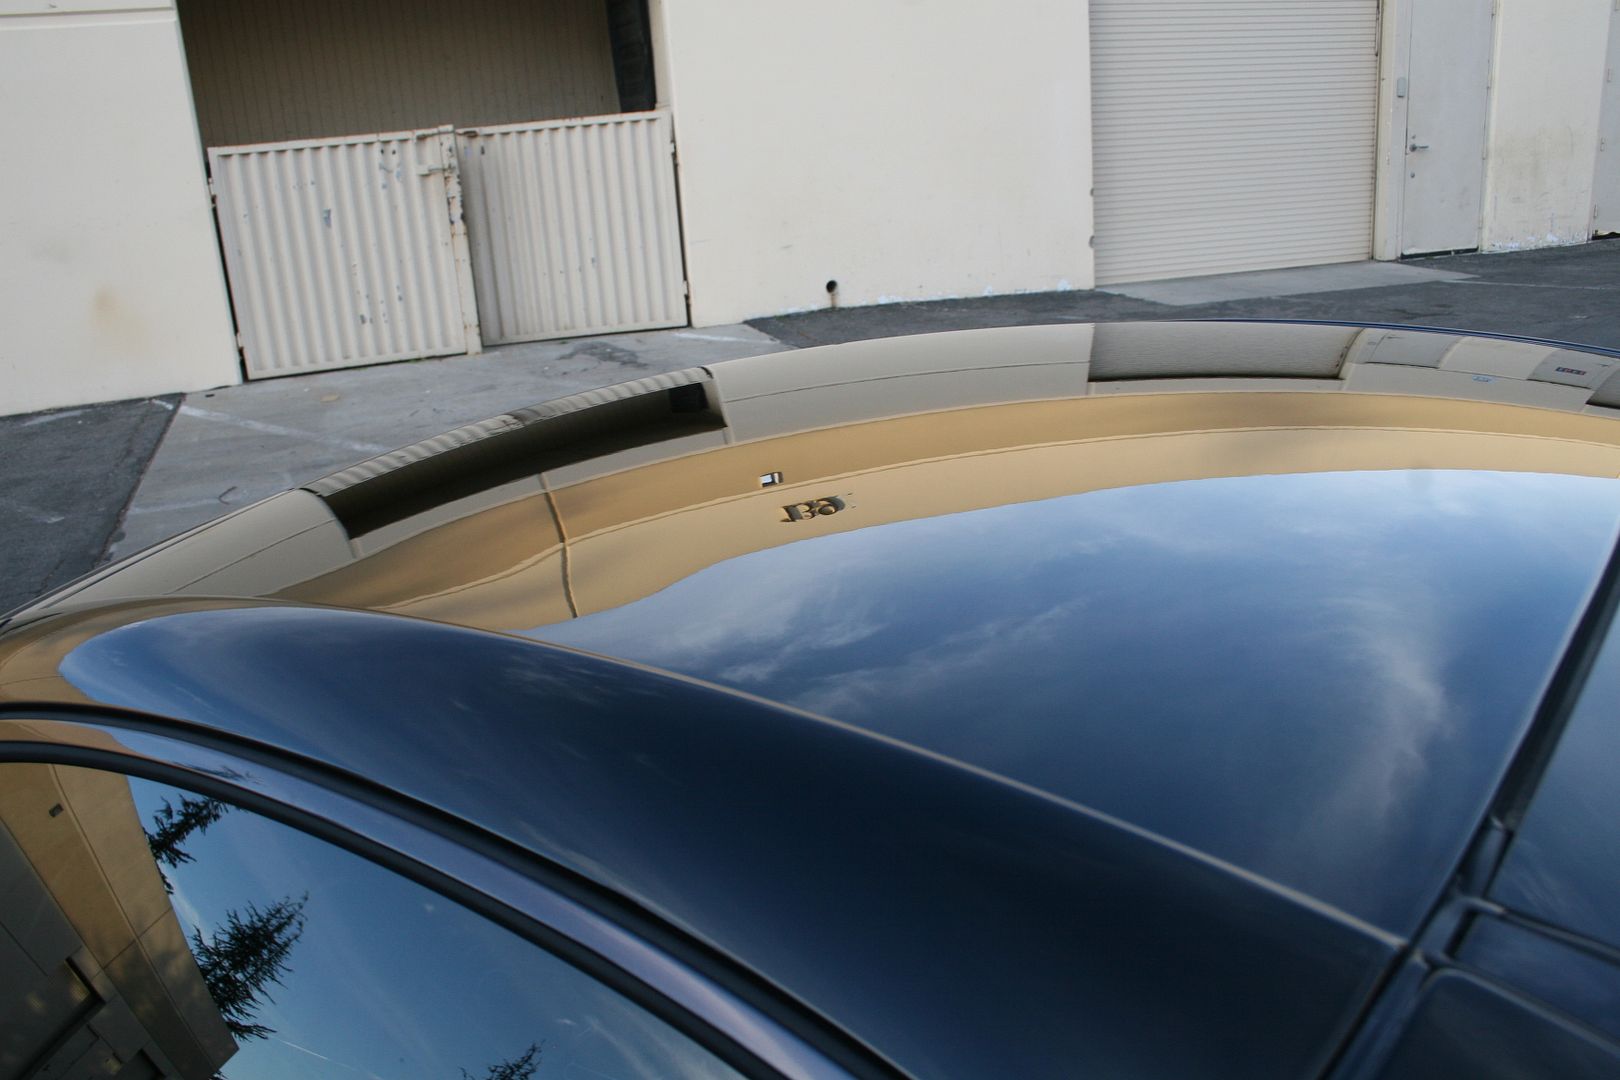
The deck lid and the roof had some of the worst concentration of defects I have faced yet. Here’s an example of the dramatic difference after working on this section.
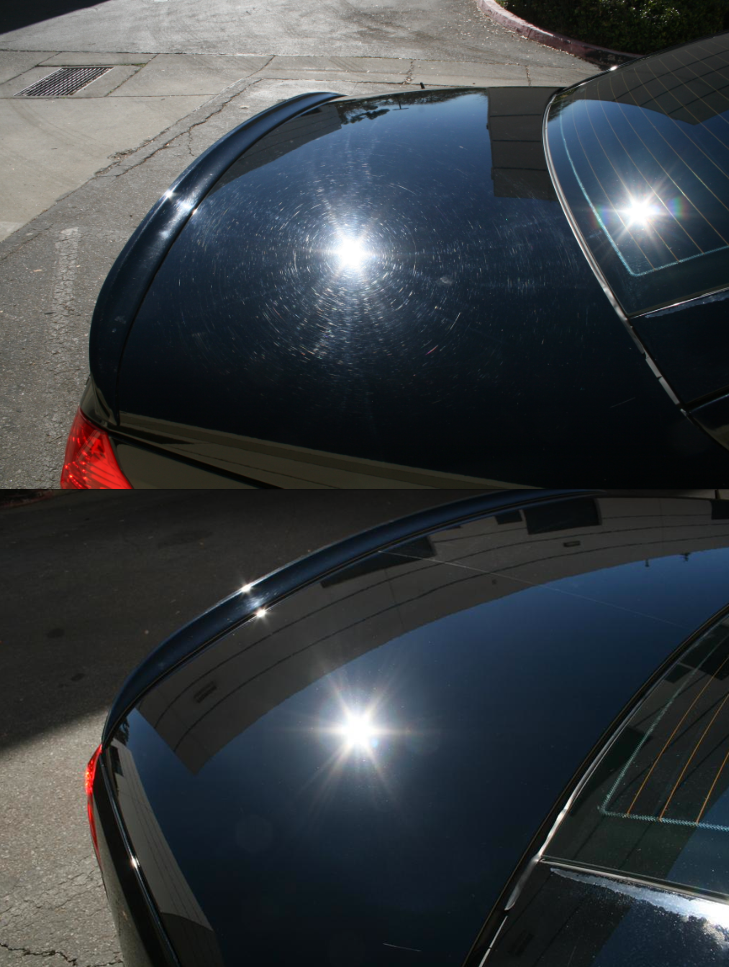
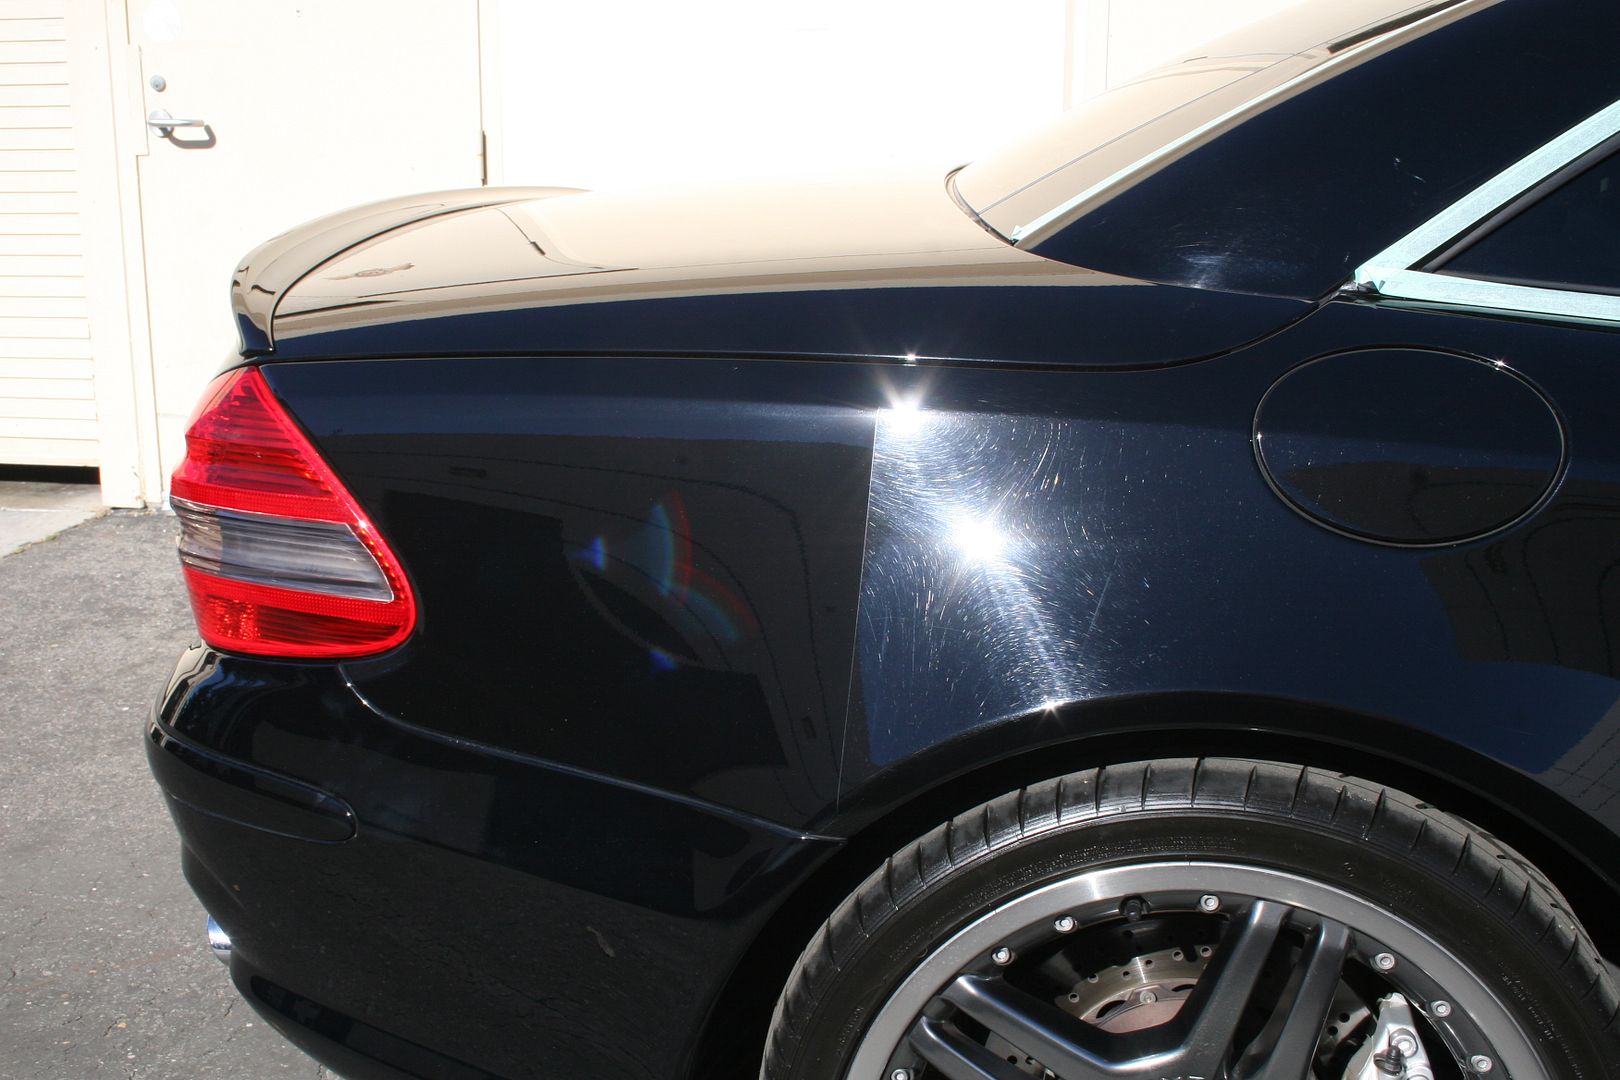
50/50 shot showing before on the high side, and after on the low side of the photograph.
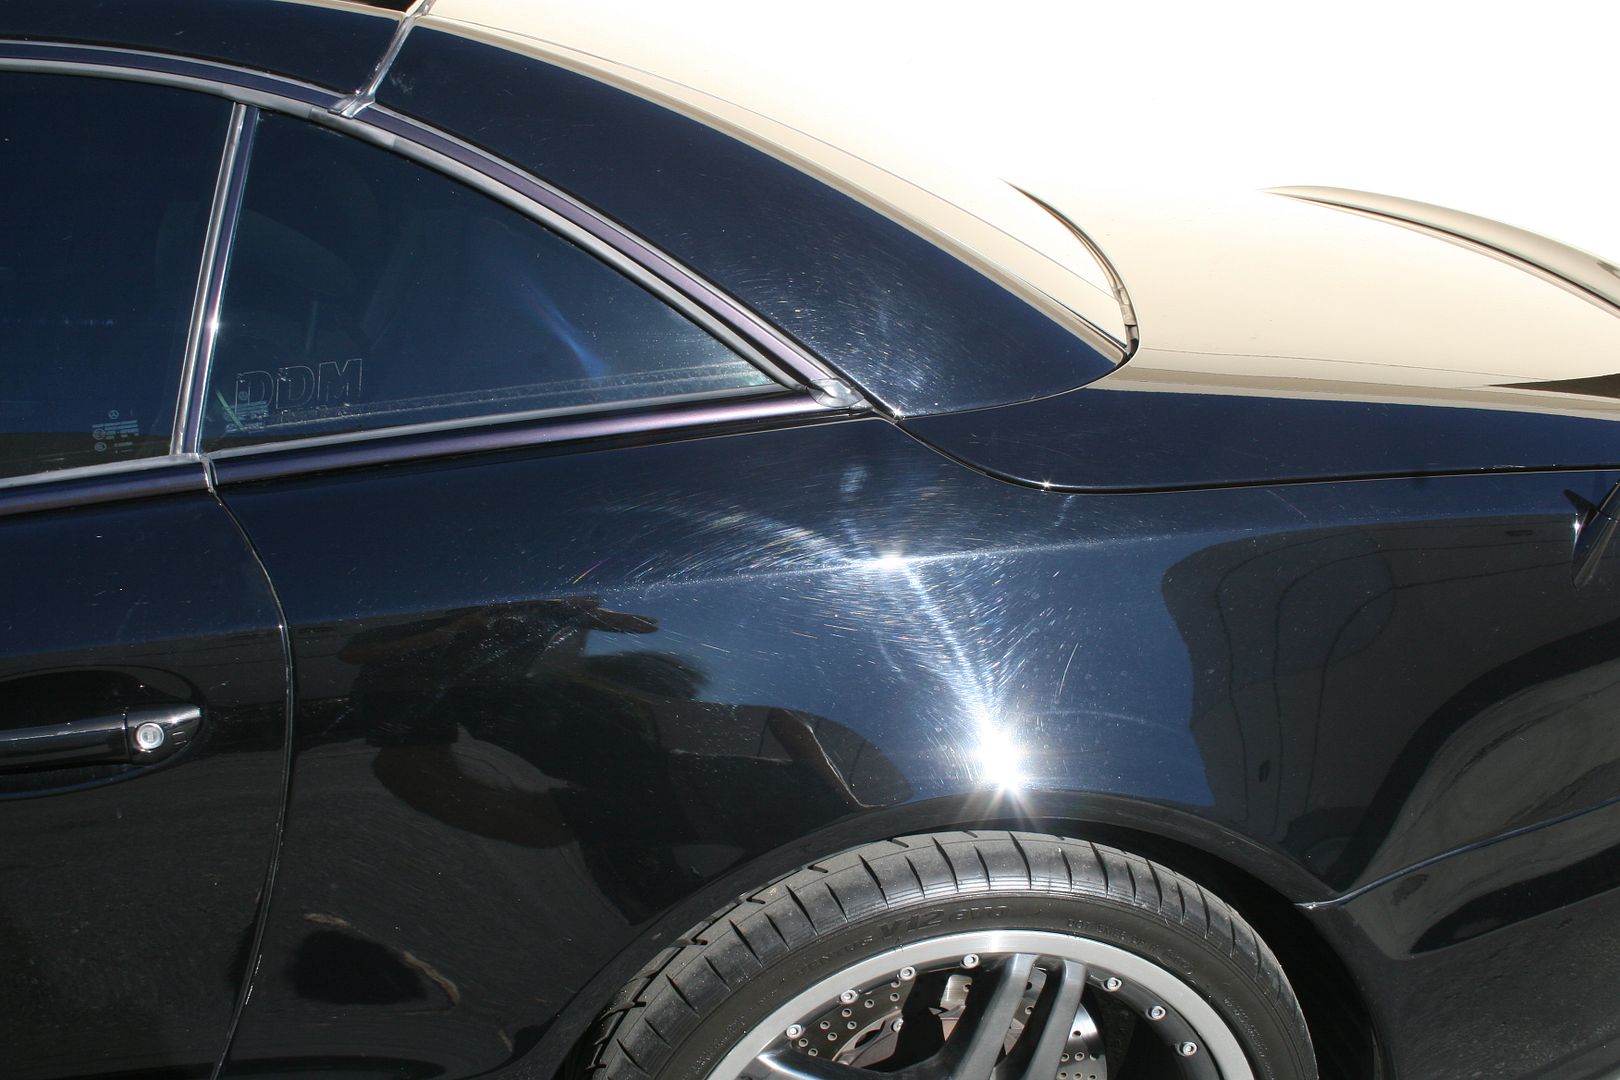
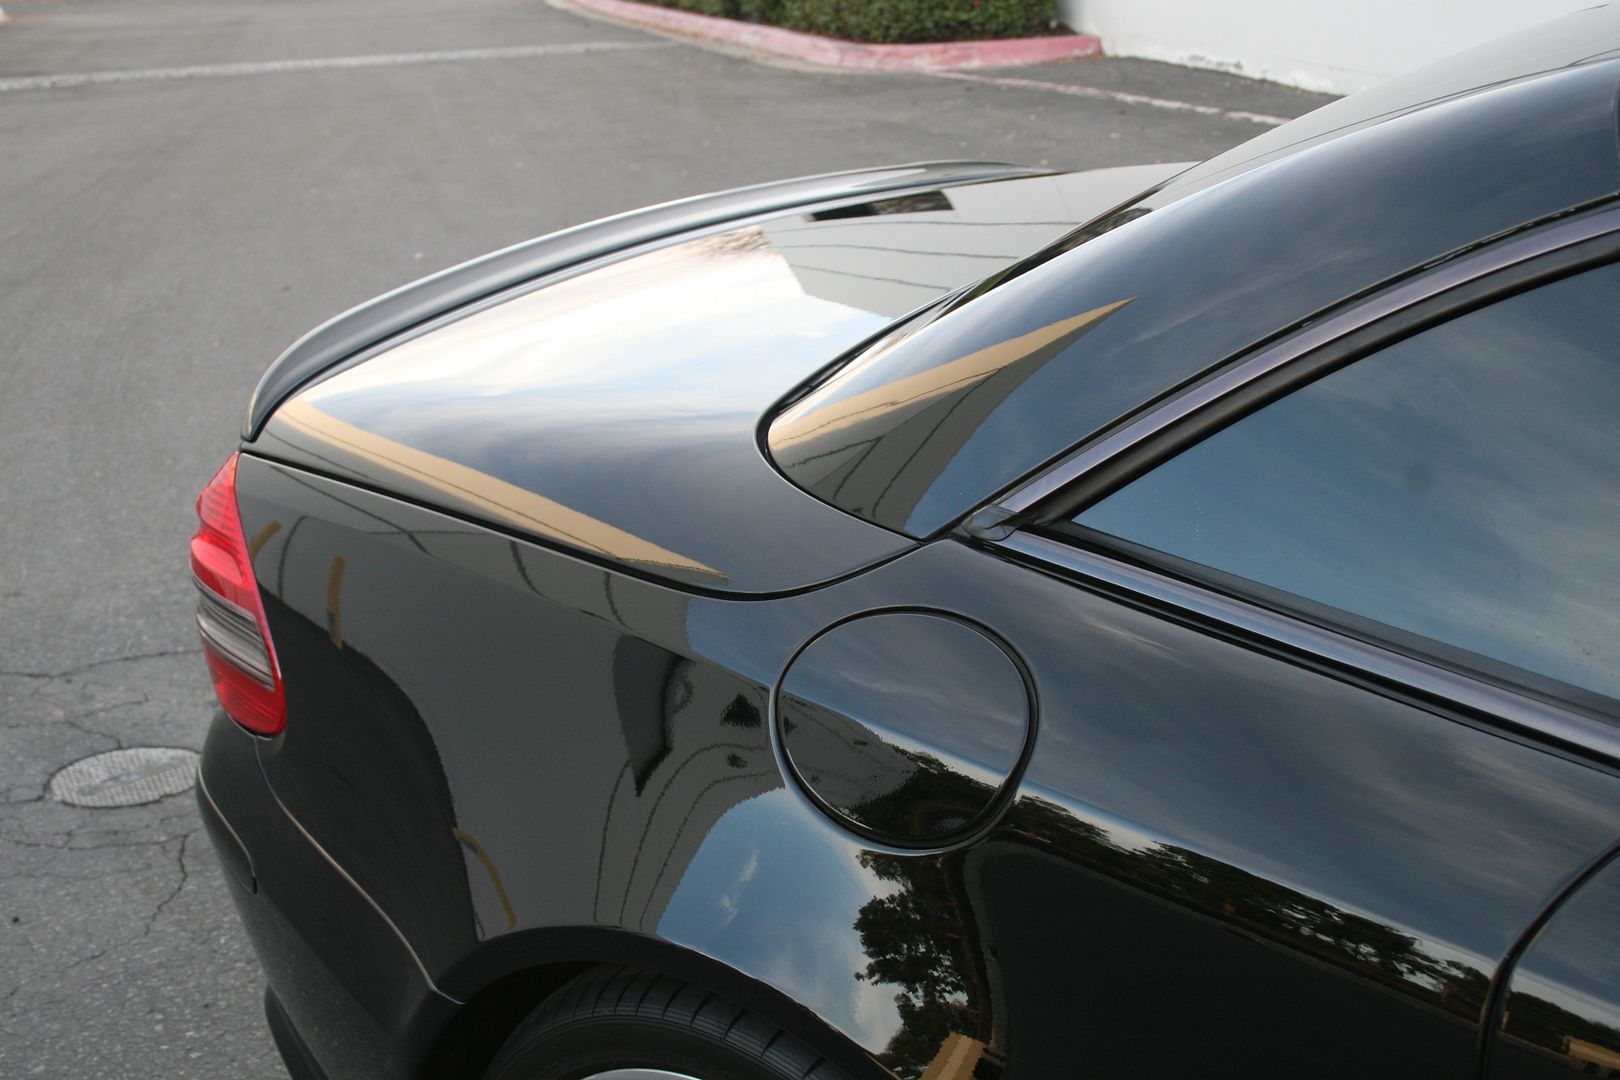
Rear passenger quarter panel 50/50 in the sun. No matter how well the panel looks indoors, its paramount to check the work in the brightest sunlight you can find.
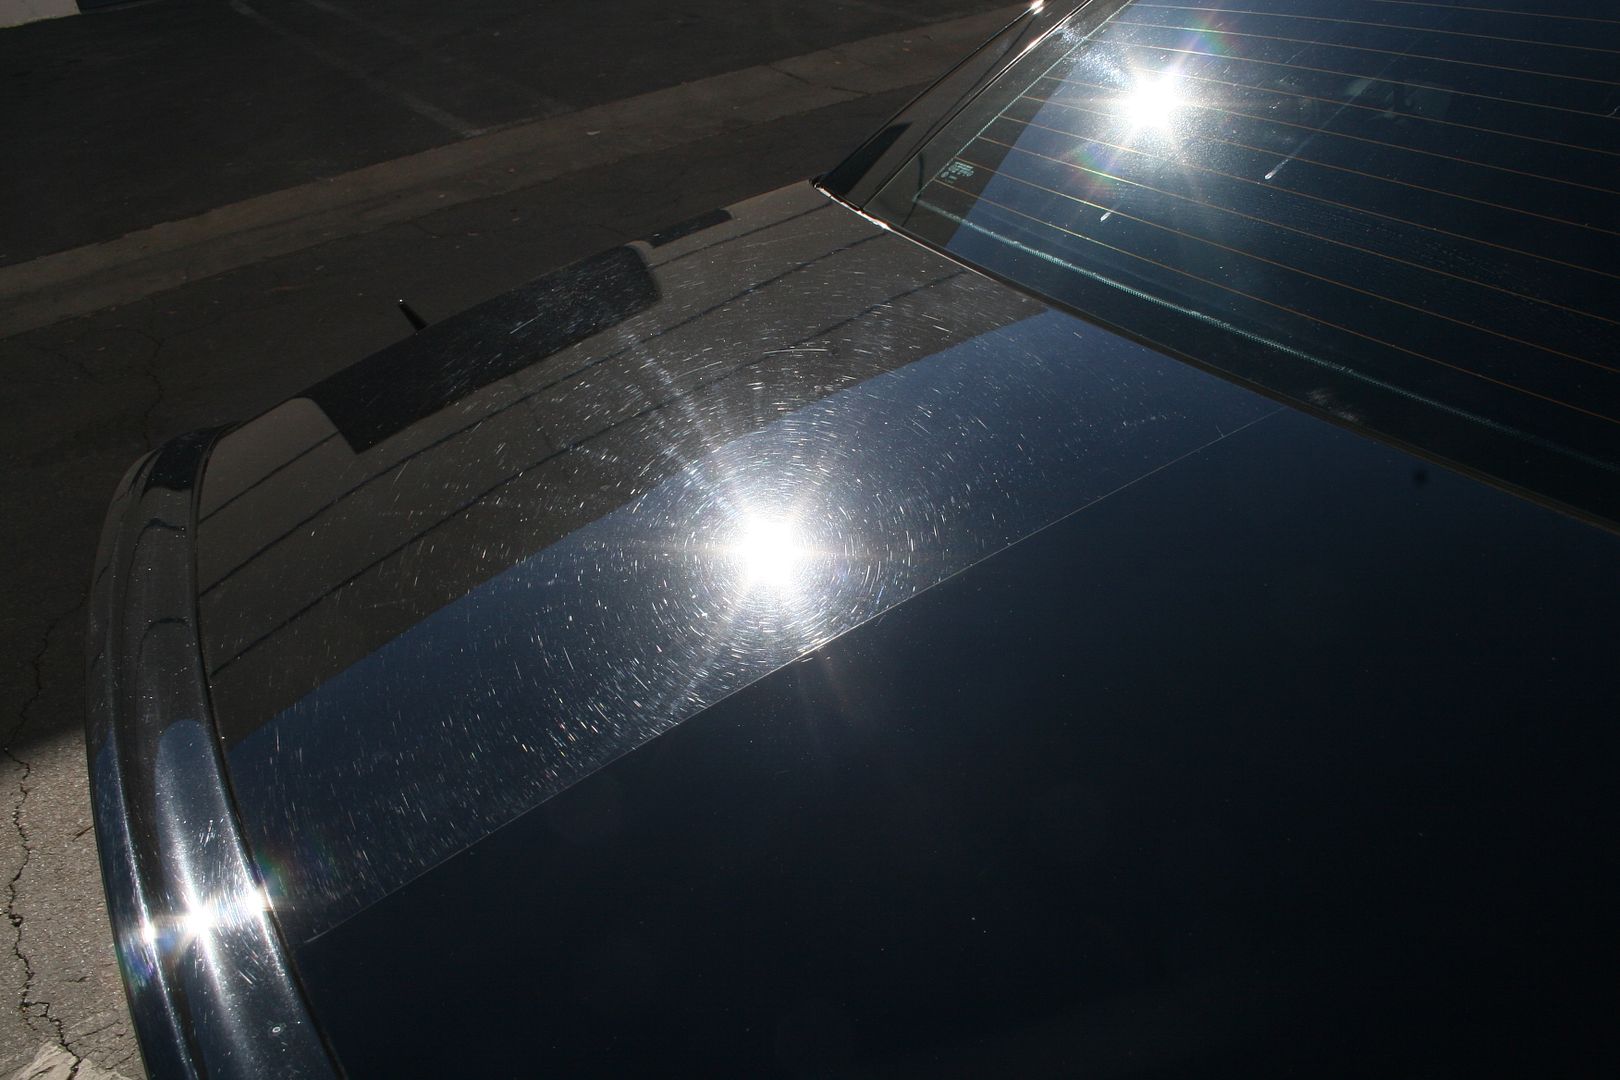
Here’s an example of the difference between “refracting” and “reflecting”. All these panels have been polished resulting in every micron of light reflecting back instead of all the defects refracting which would result in a dull, hazy appearance vs. This crystal clear reflection.

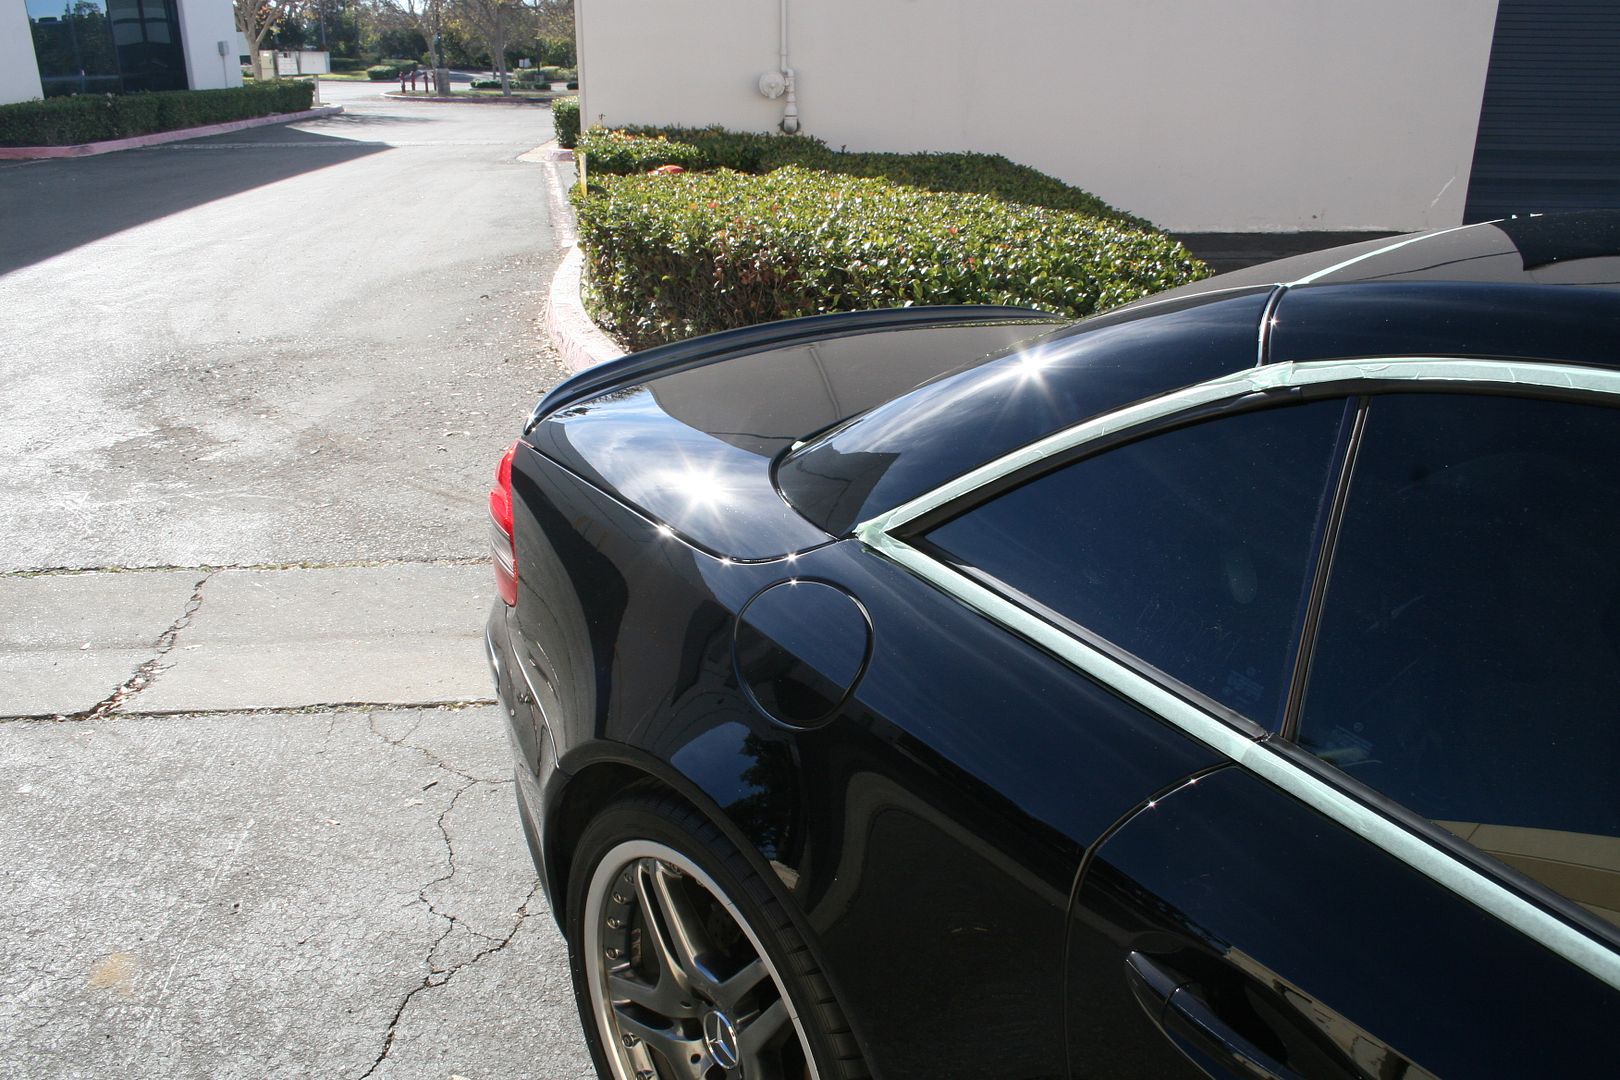
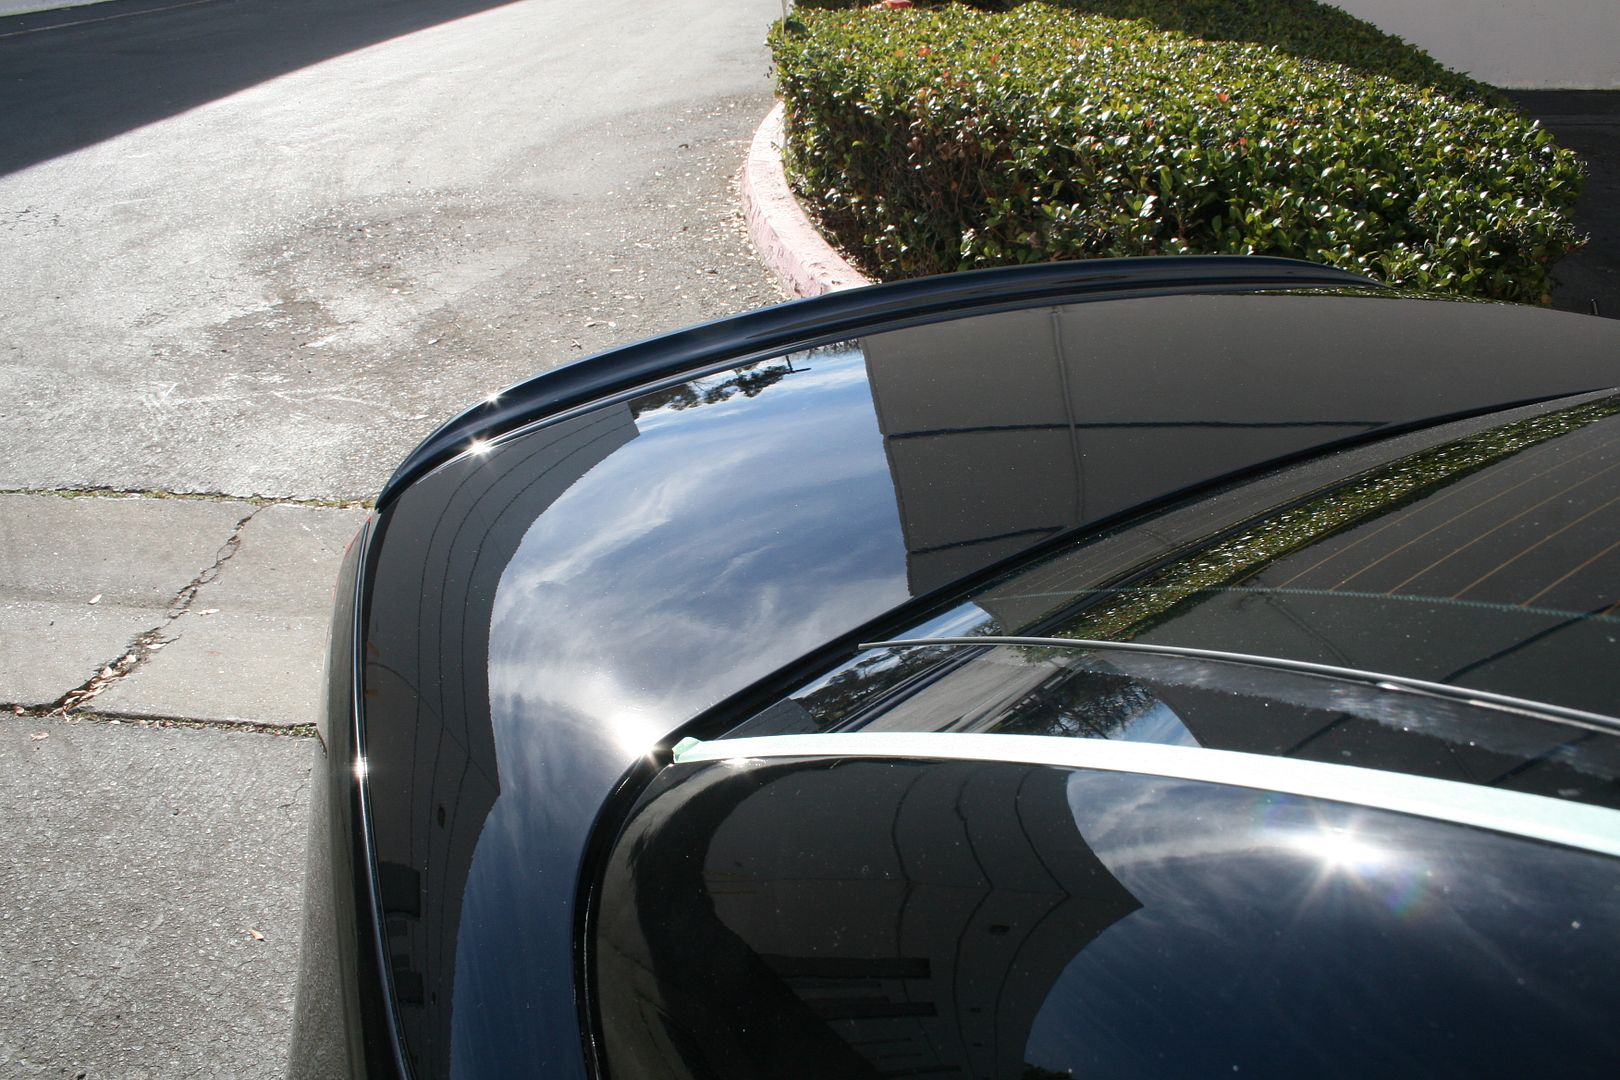
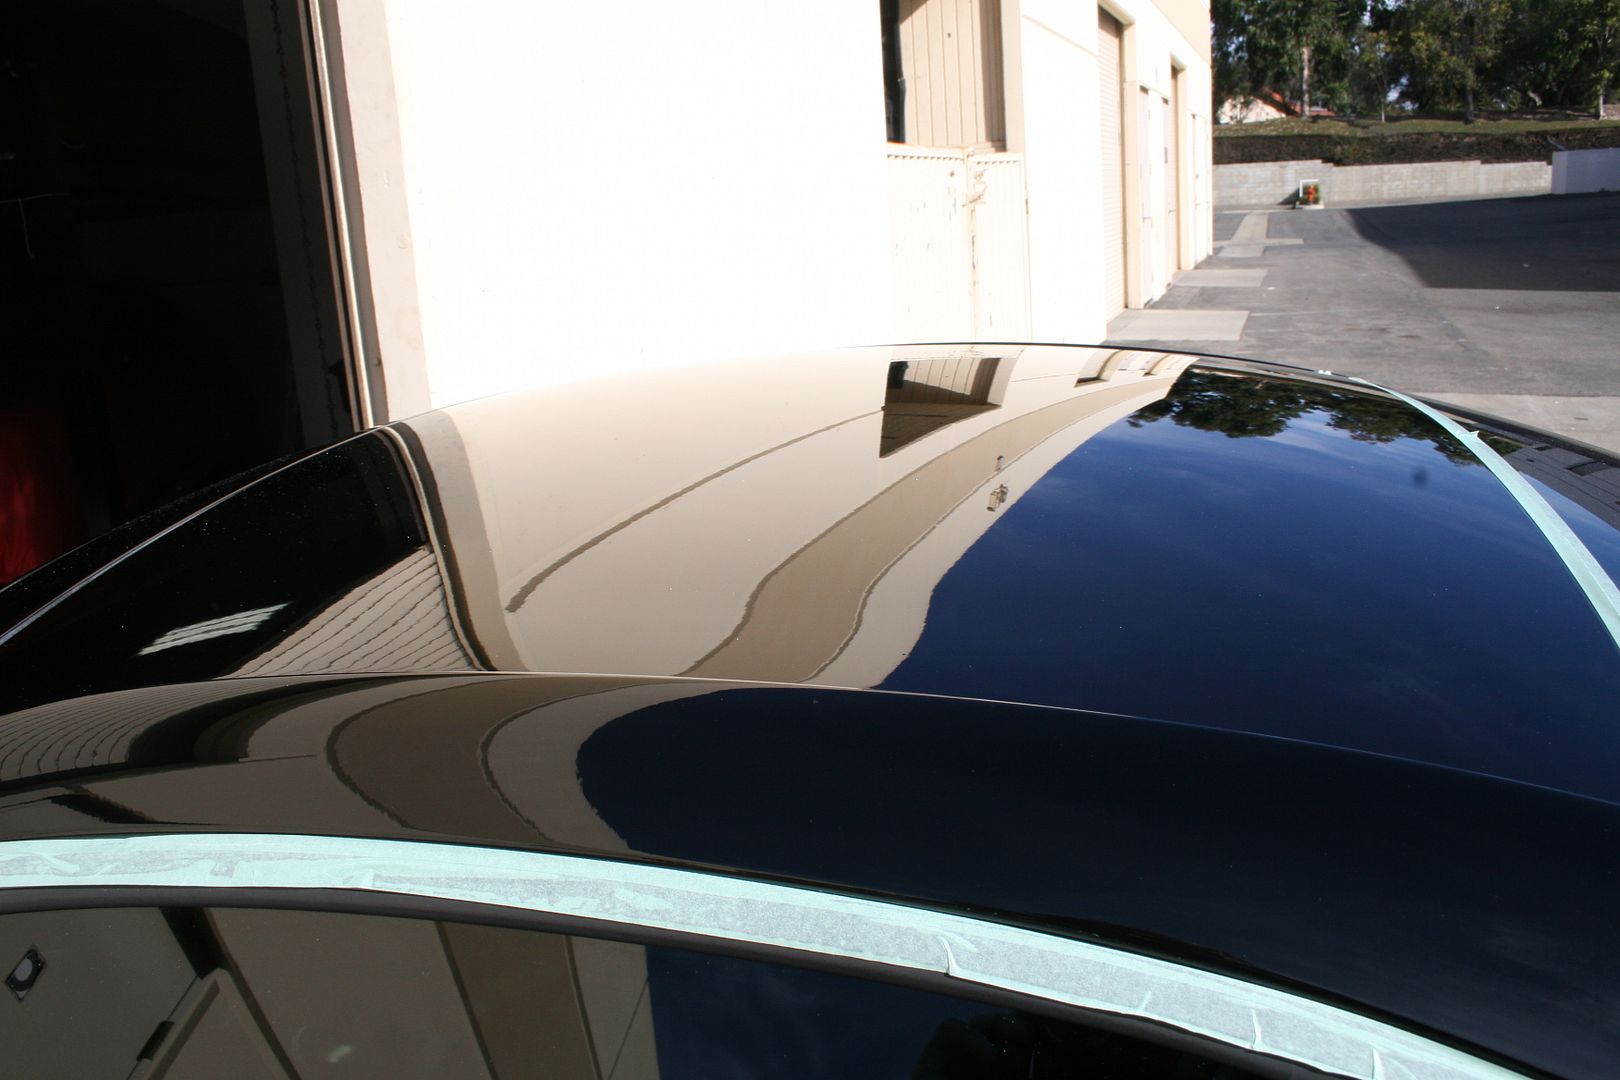
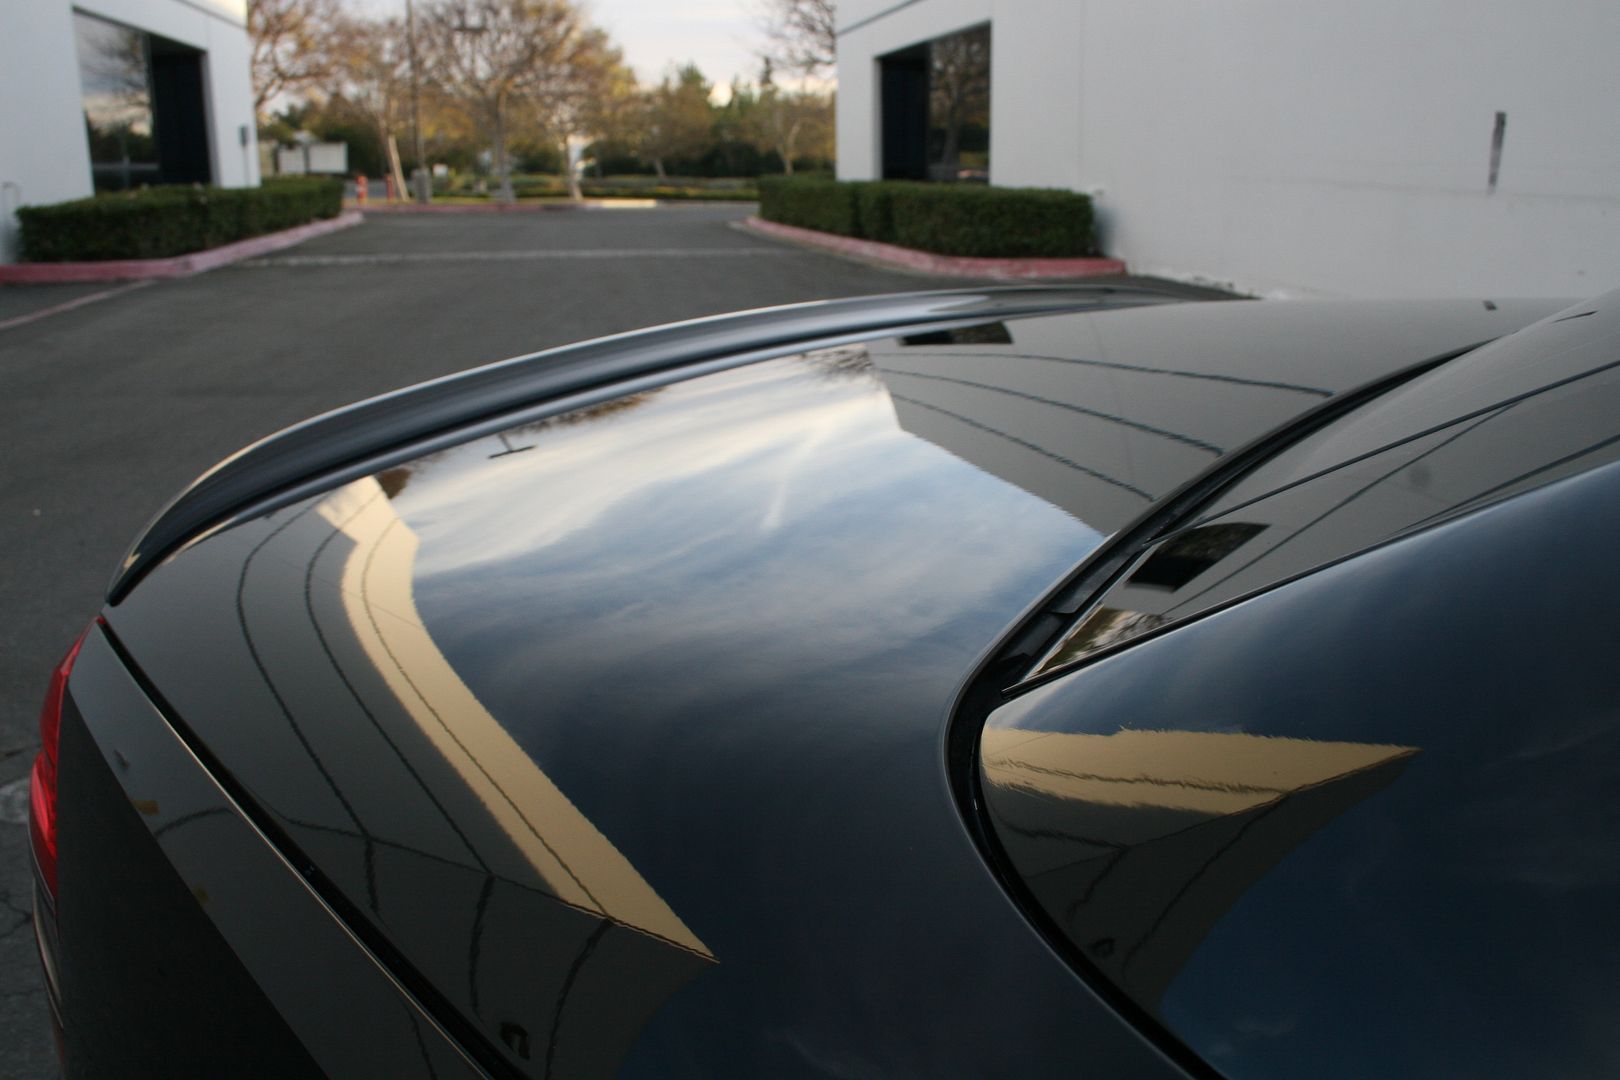
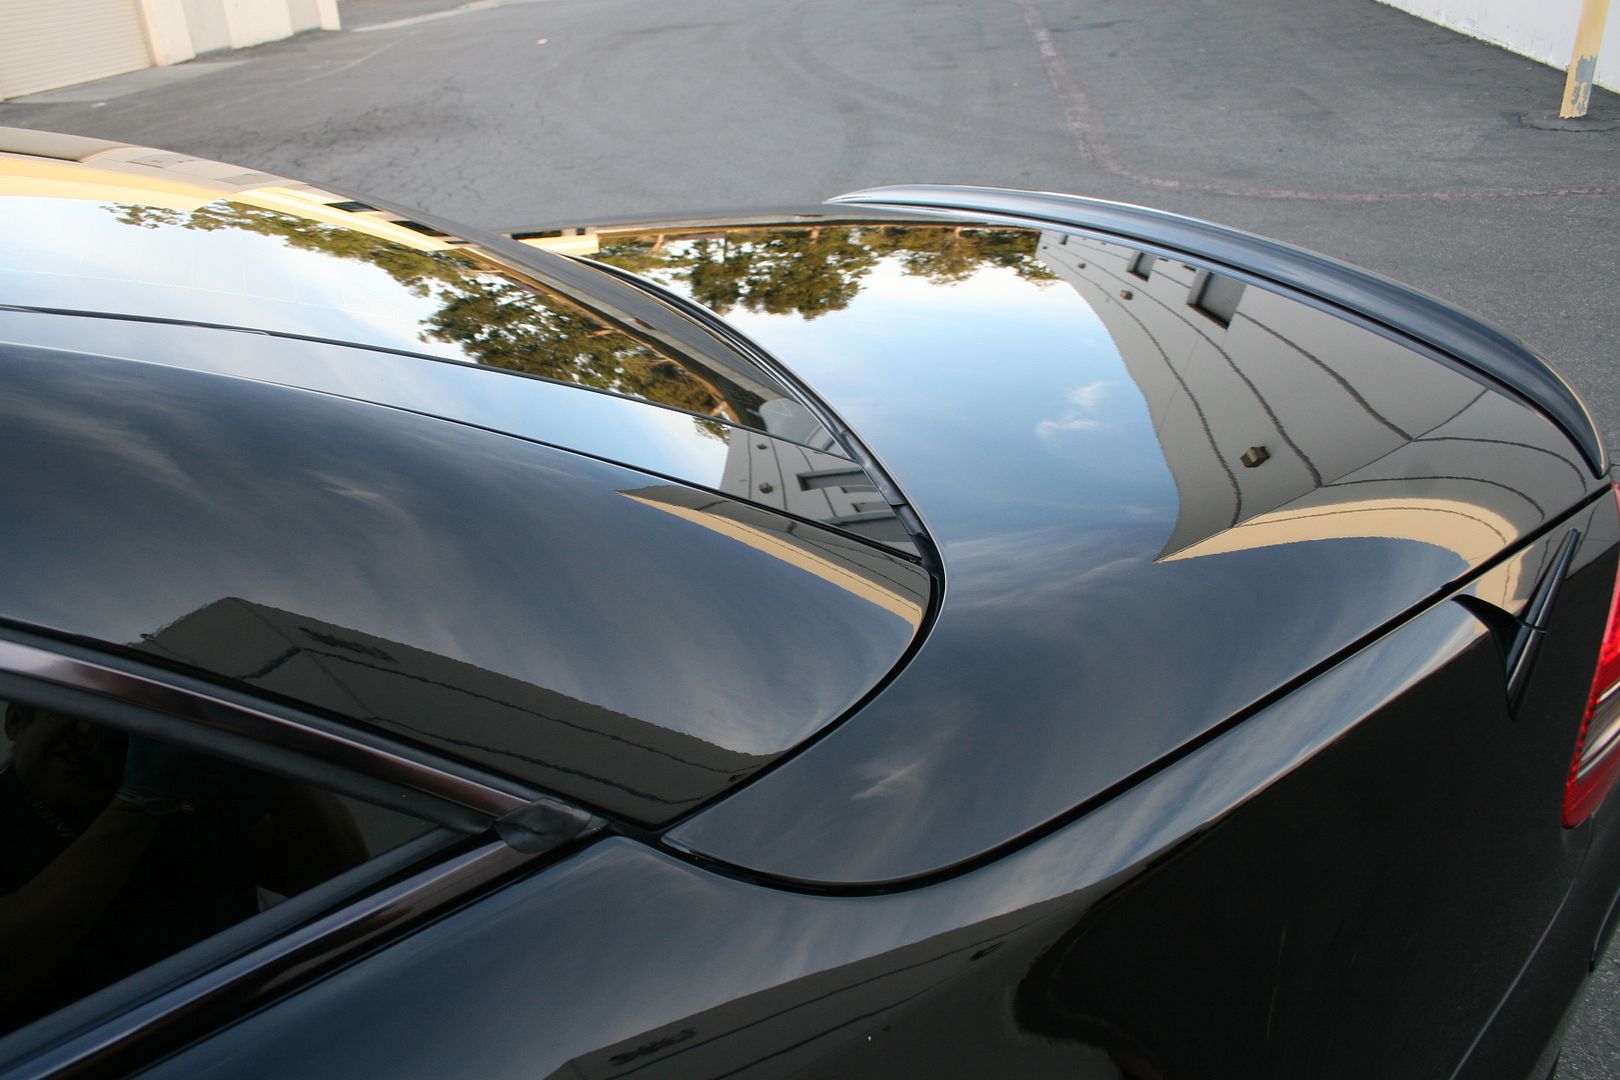
The roof was a key area on the vehicle, it needed a good amount of work to bring it back.
Driver quarter panel
Before
After
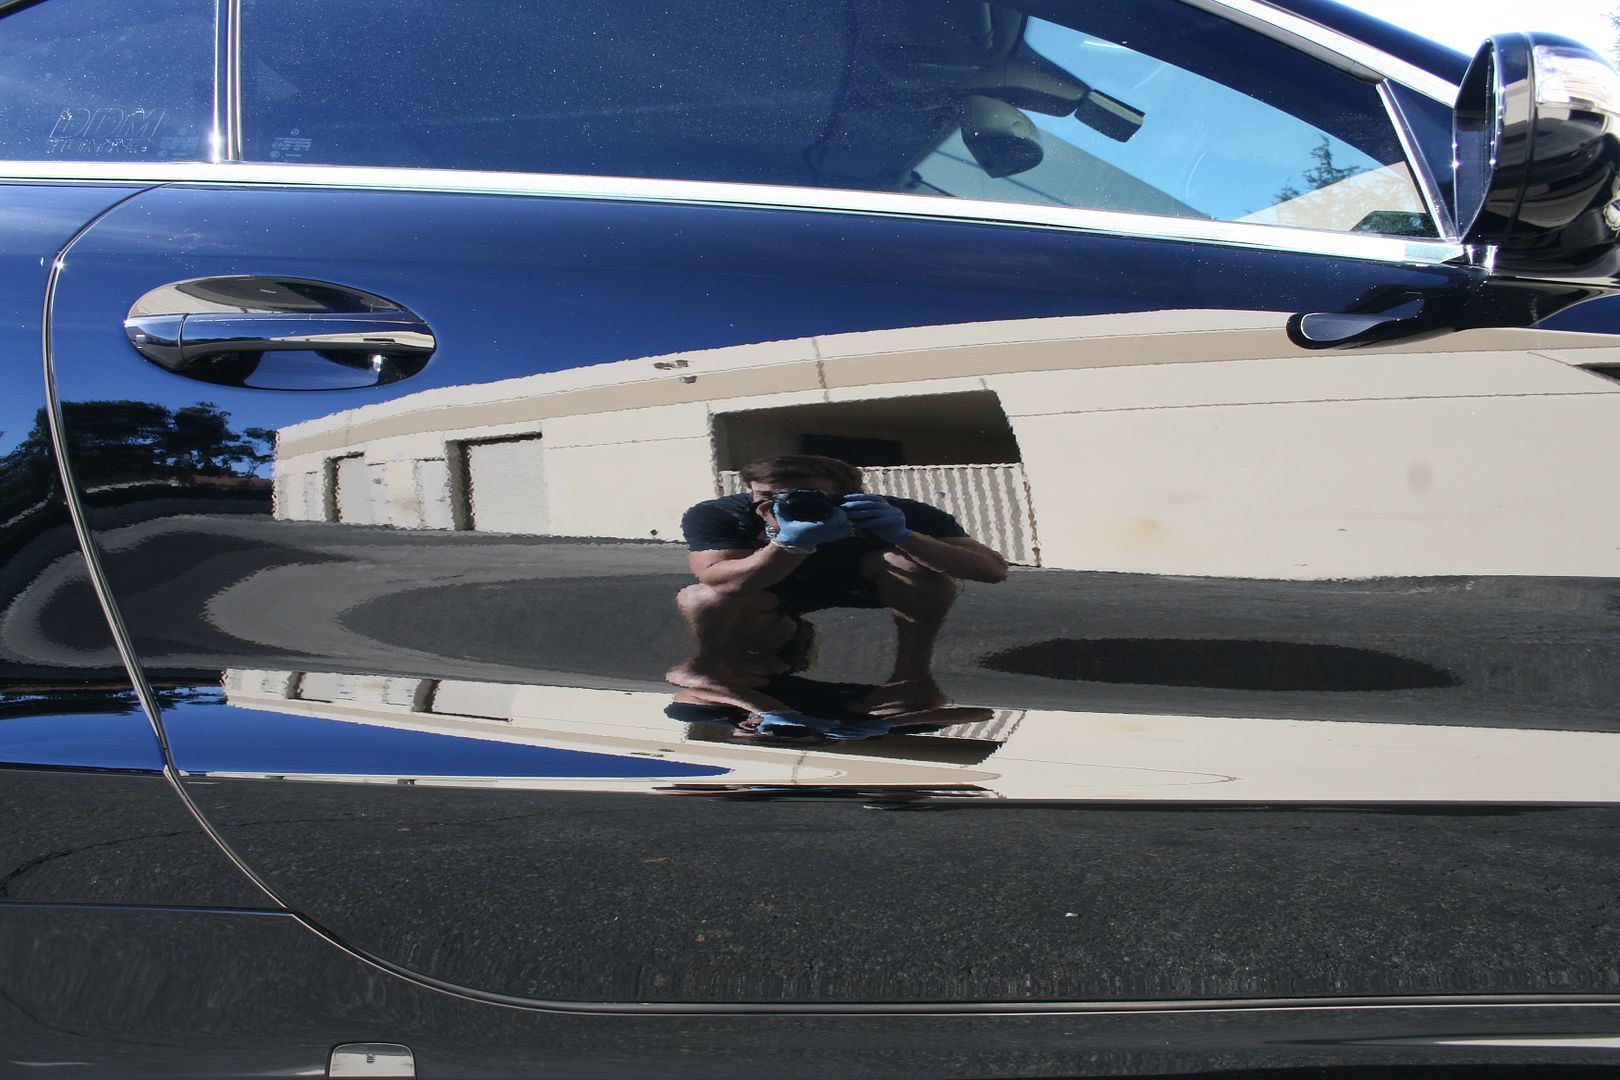
Look at that reflection!
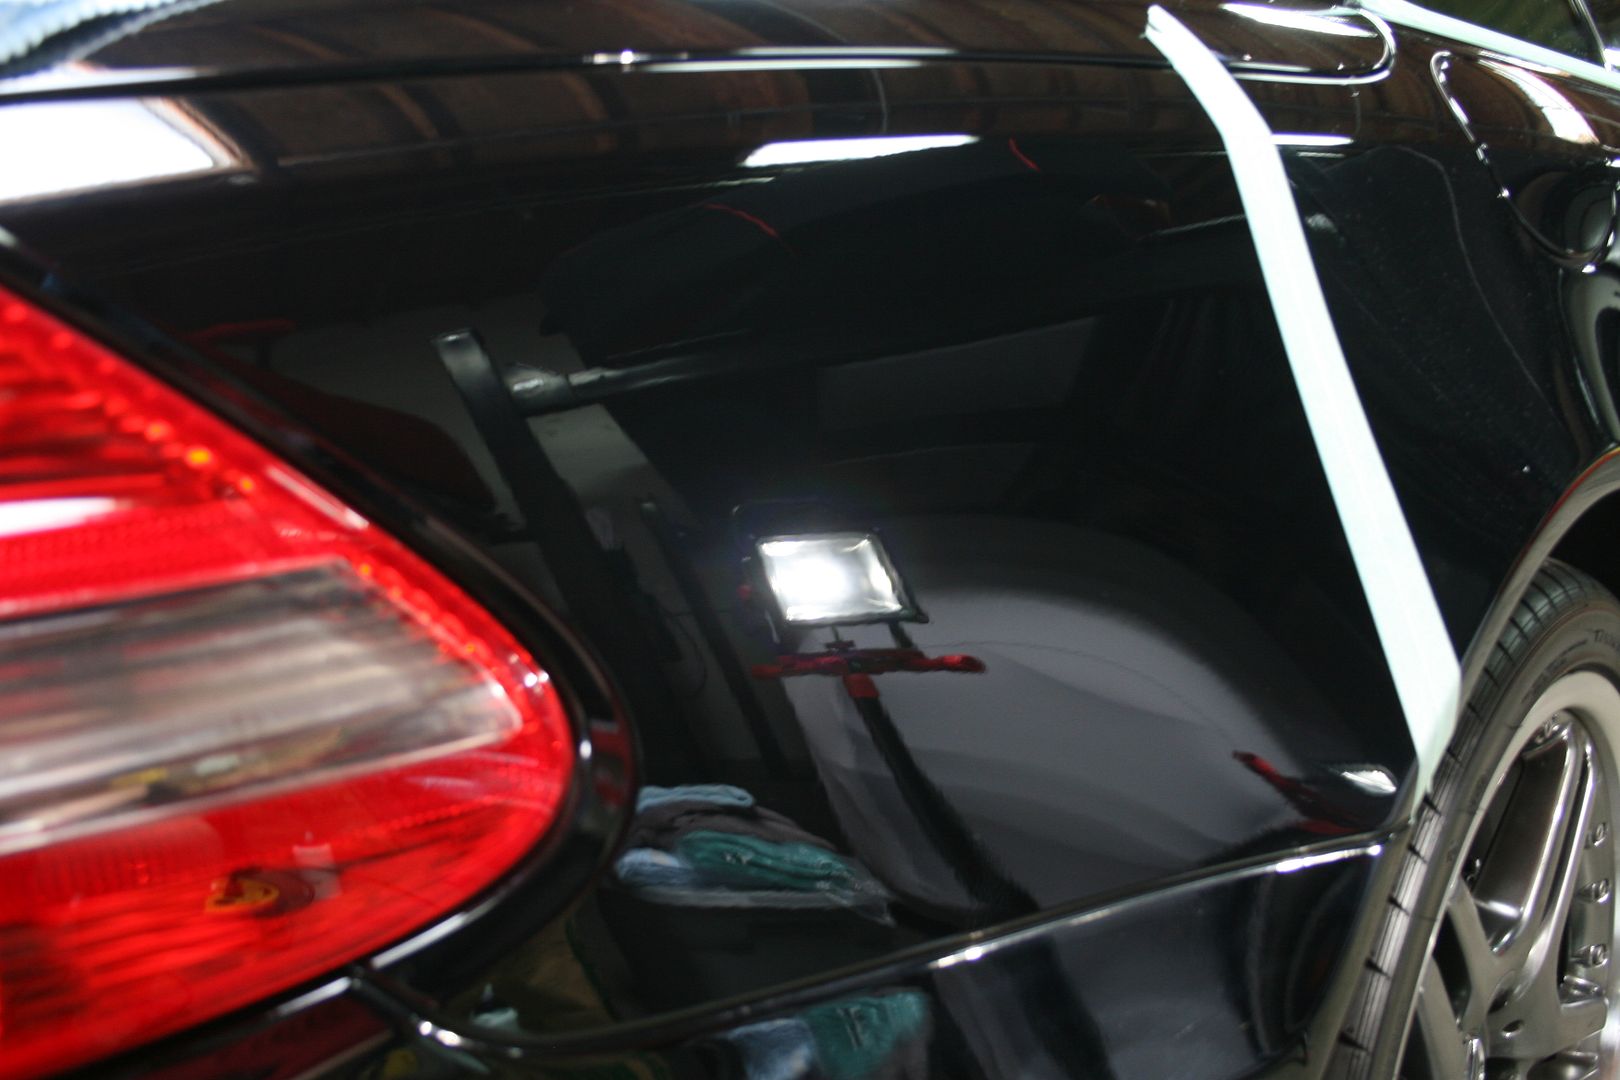
Checking my work after polishing, each section is viewed under different light sources before moving to the next.
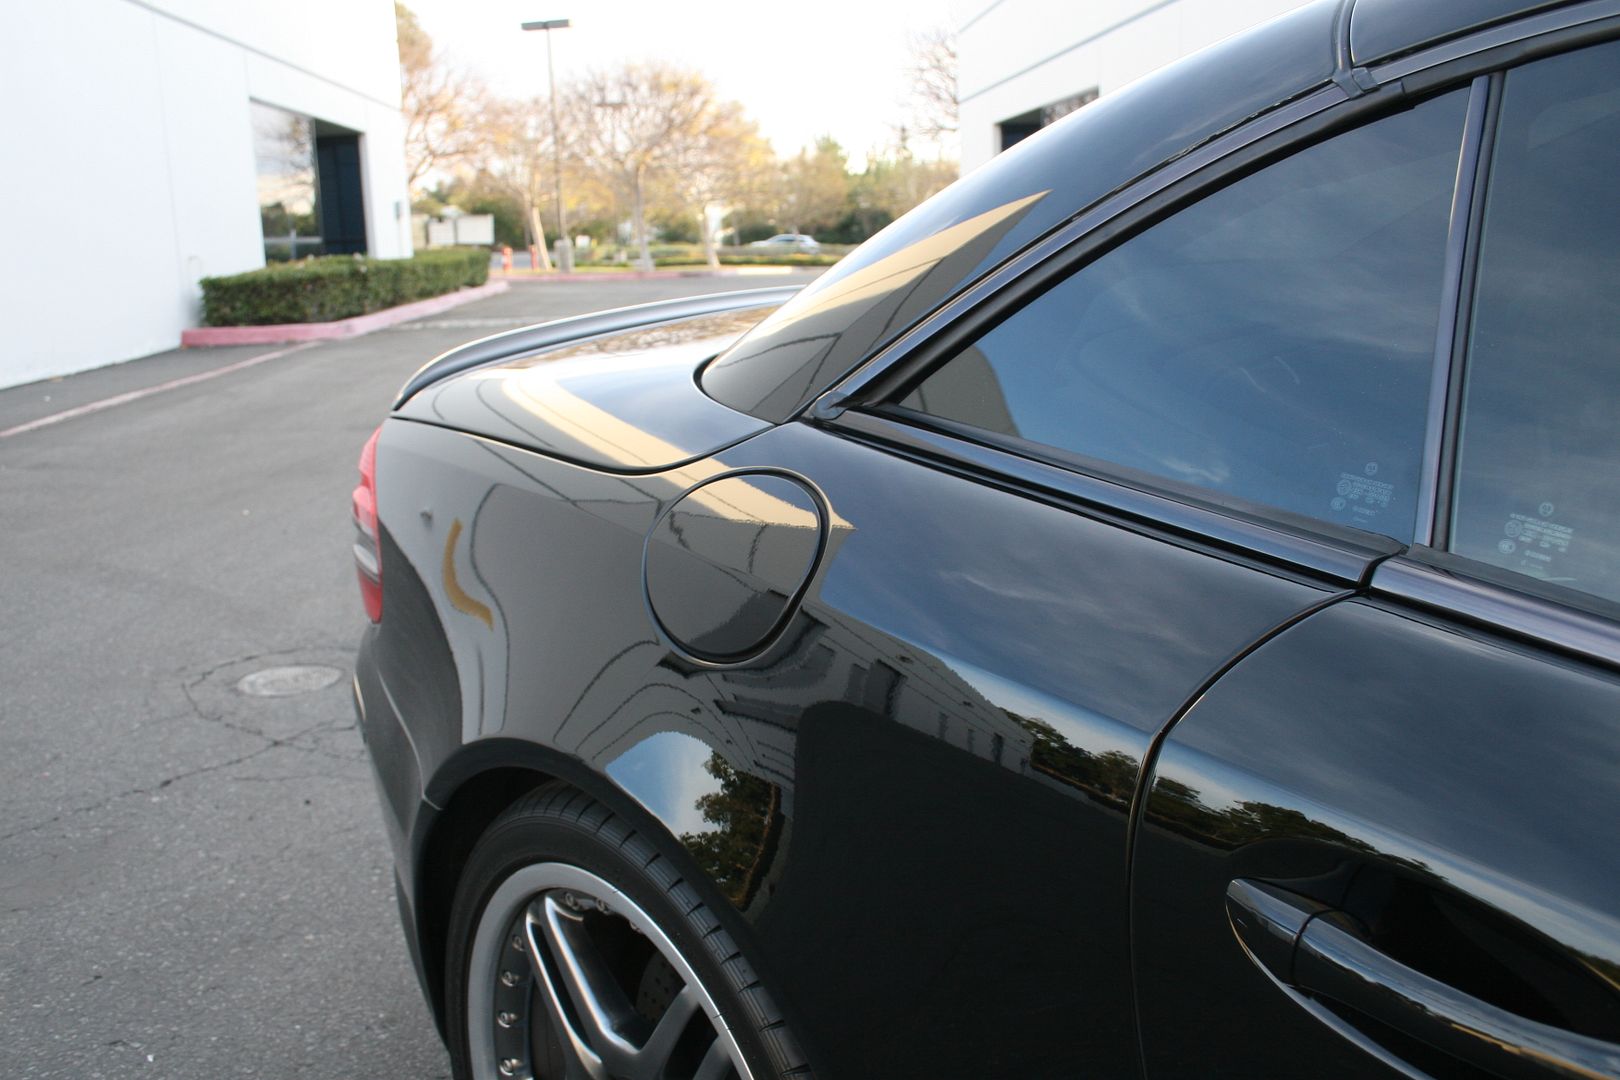
Flawless

After all polishing was performed the vehicle was then prepped for coating application. I’ve worked with alot of different coating products from Opti-Coat to 22PLE and from my experience nothing has come close to the durability and appearance of CQuartz Finest. To provide my client with the best, CQuartz Finest was chosen to protect this vehicle for years to come.
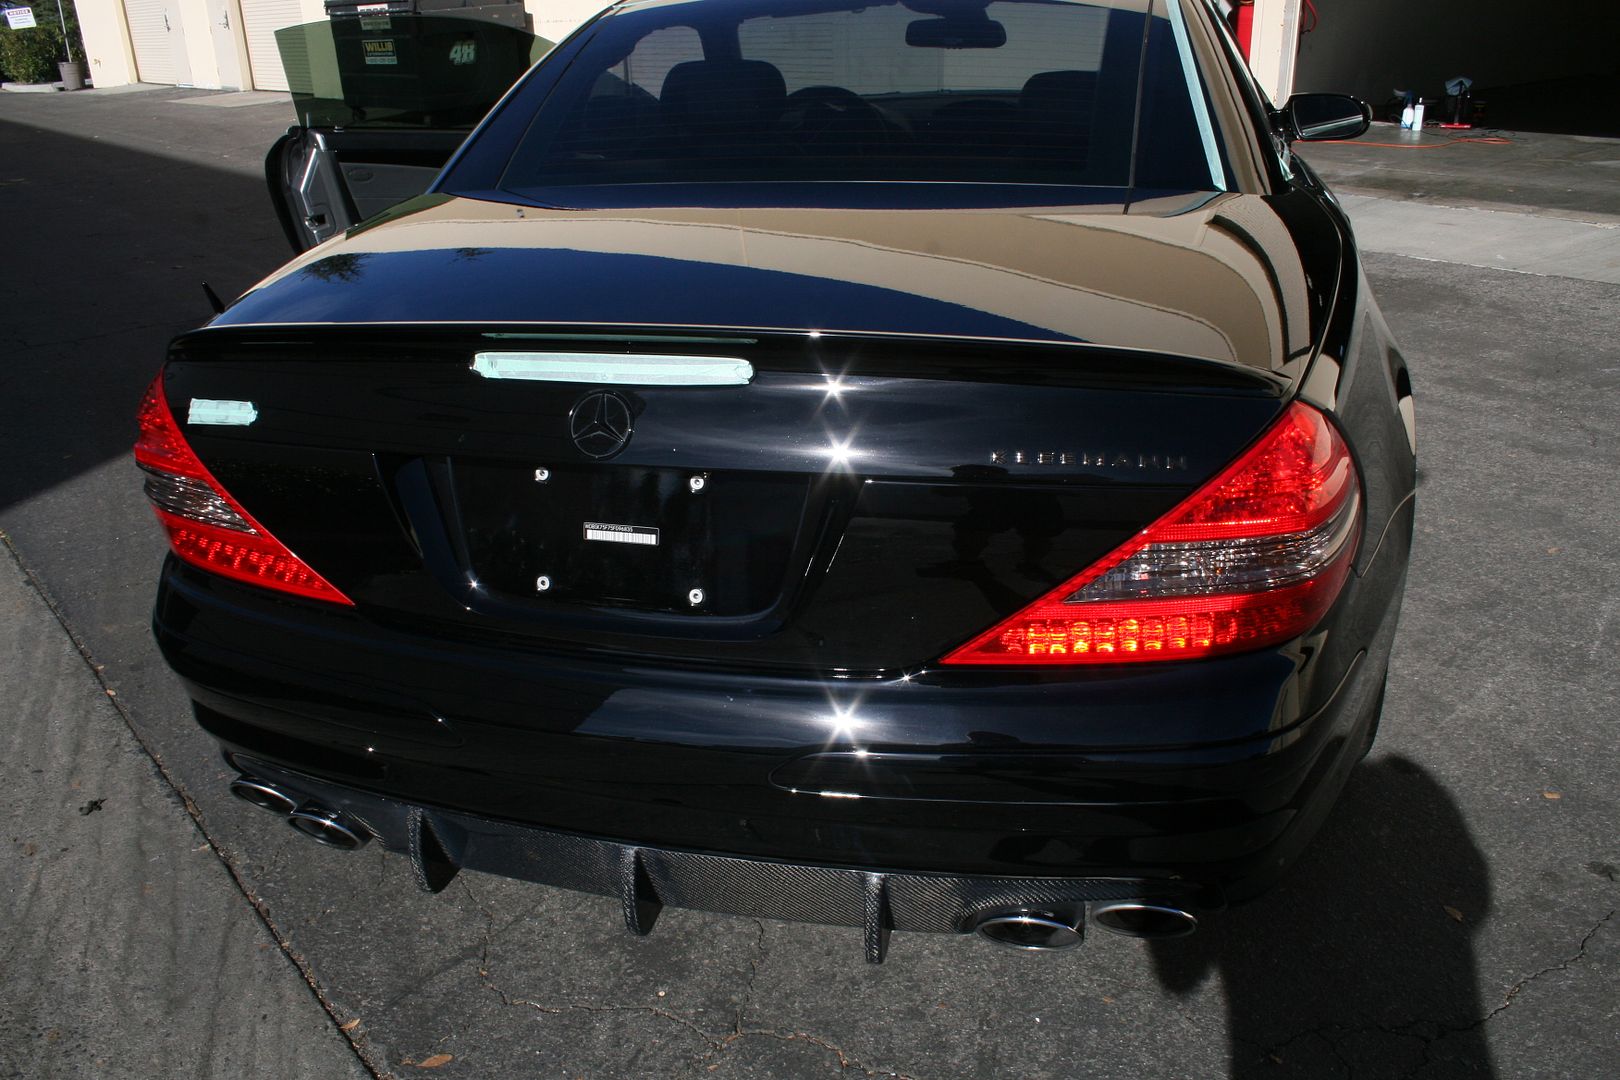
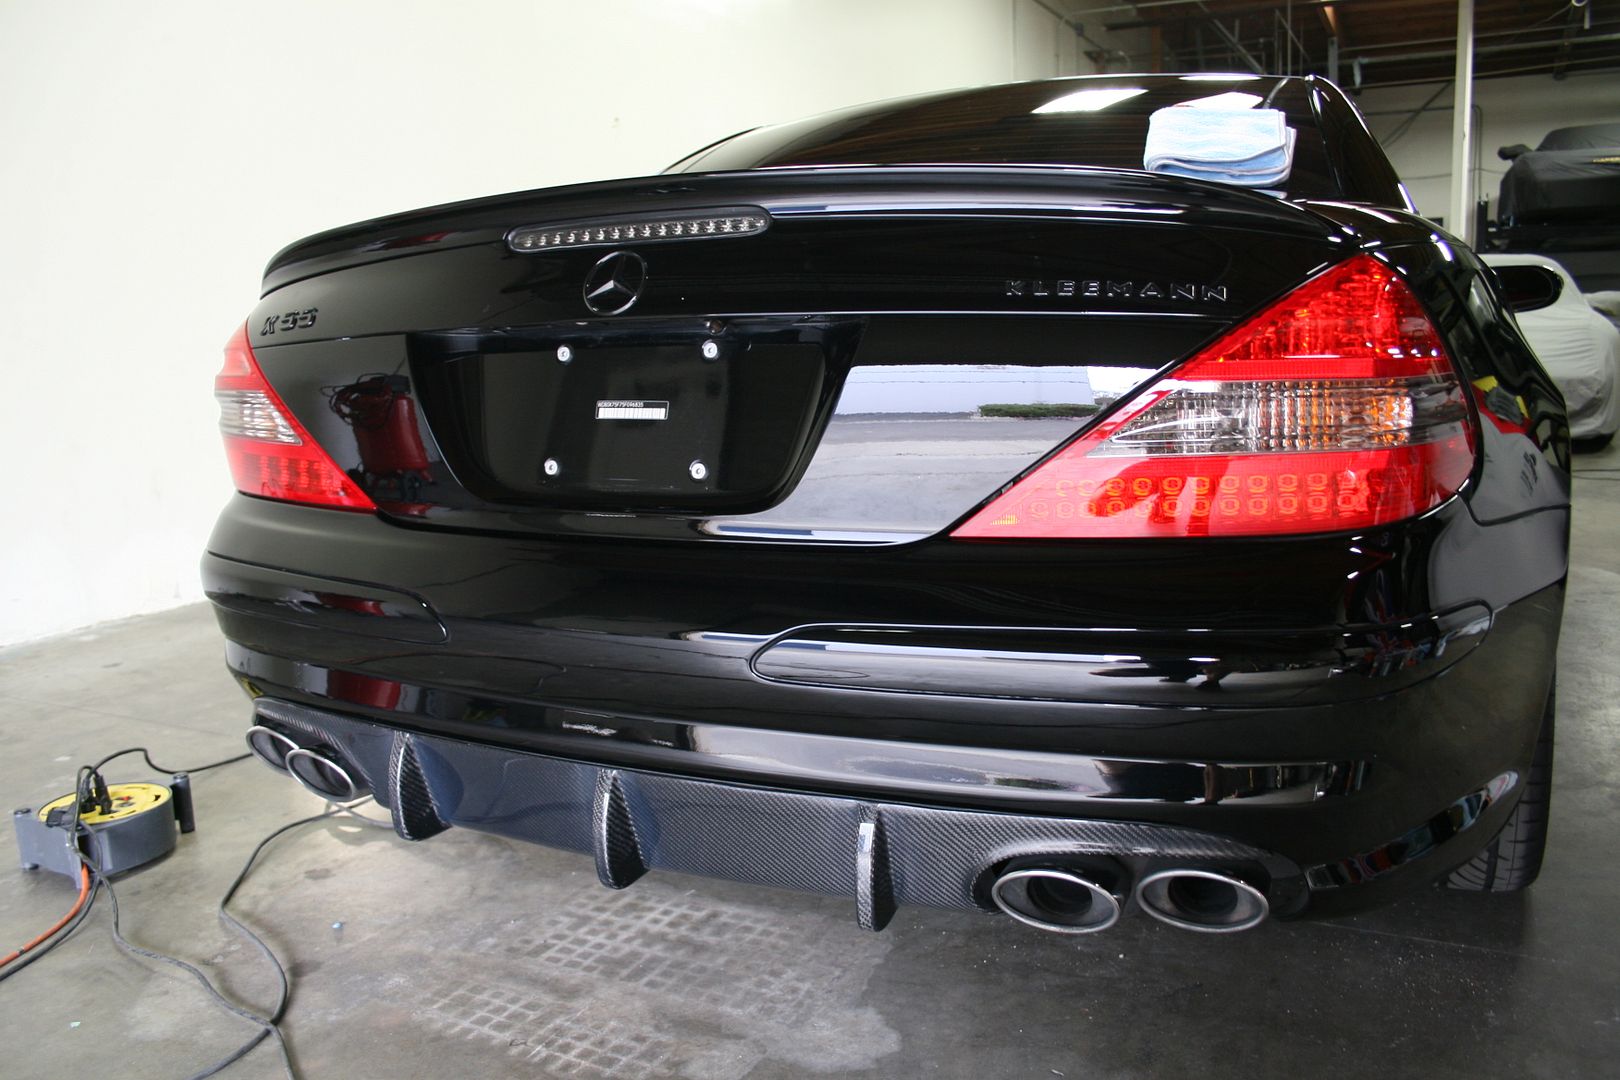
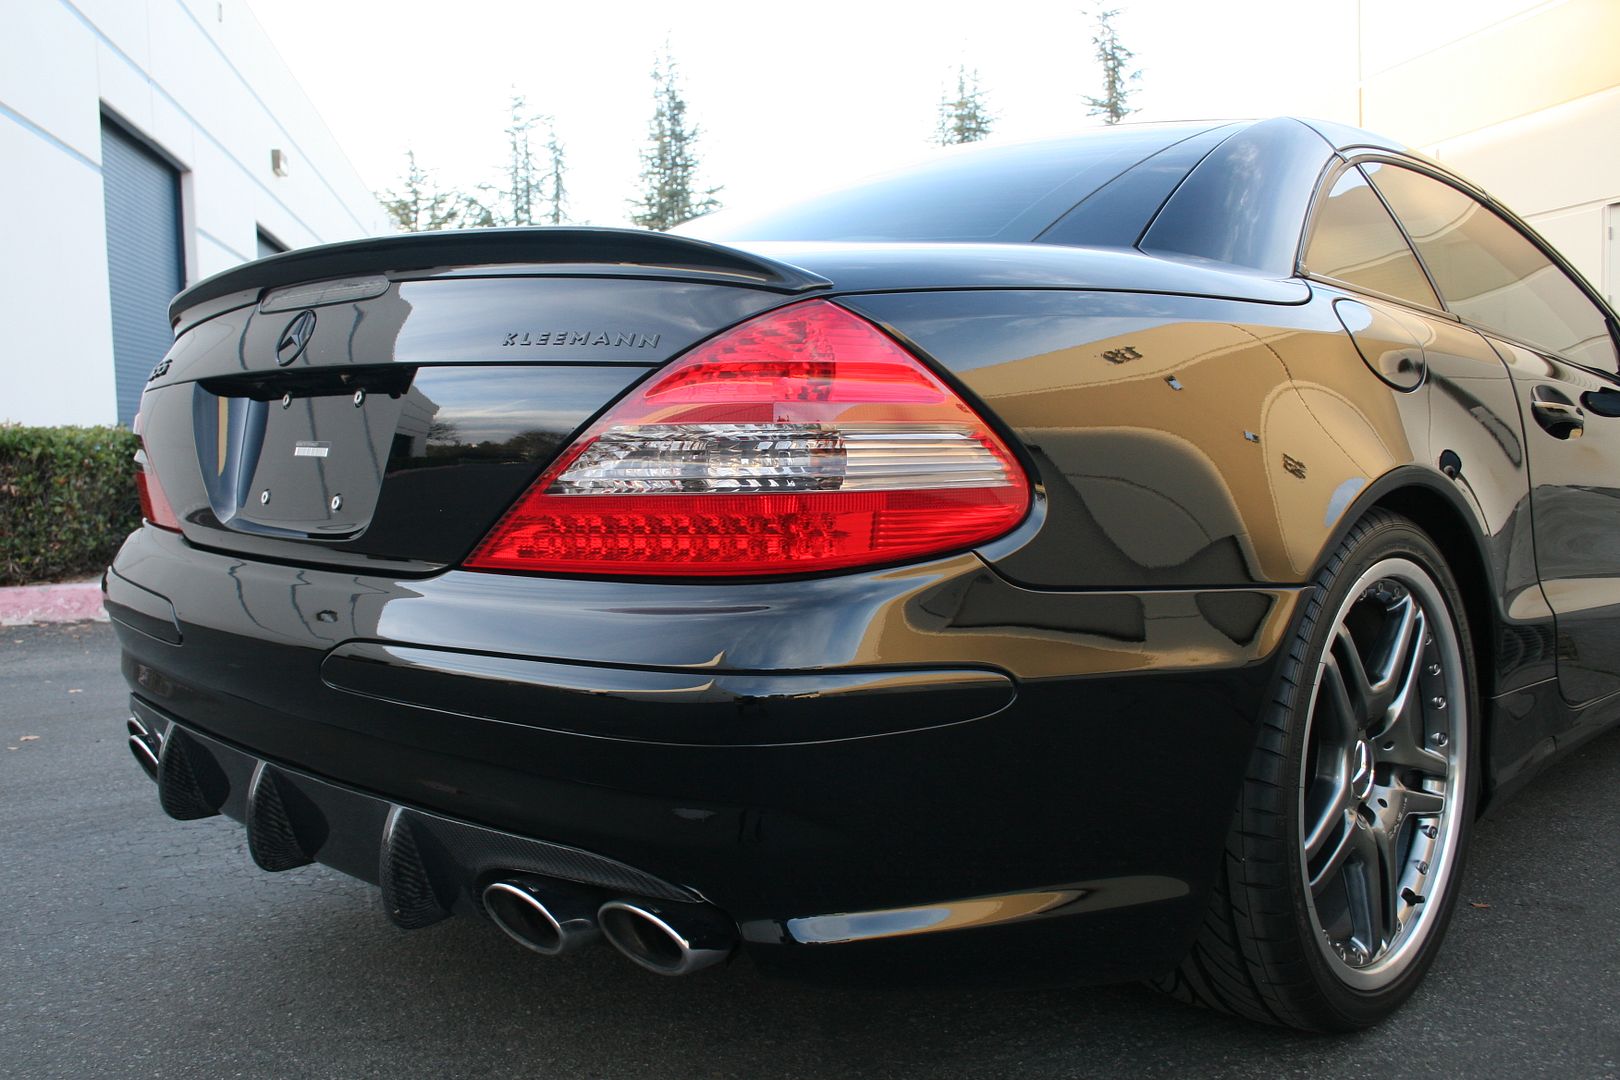
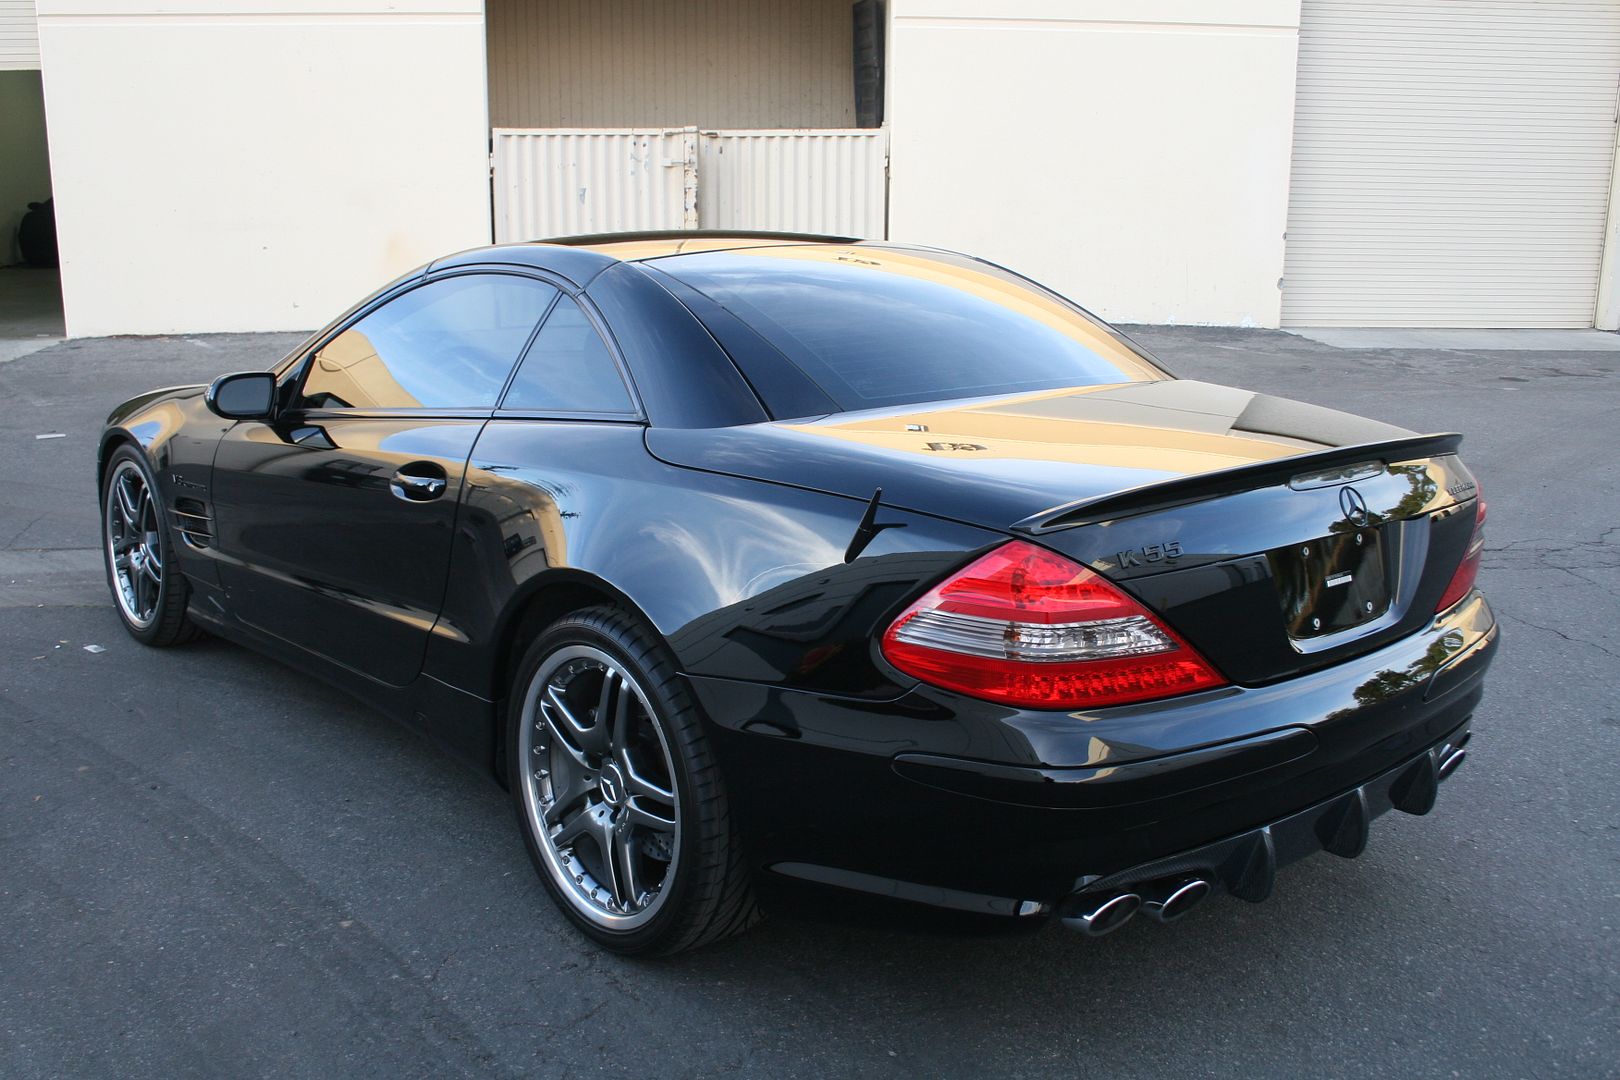
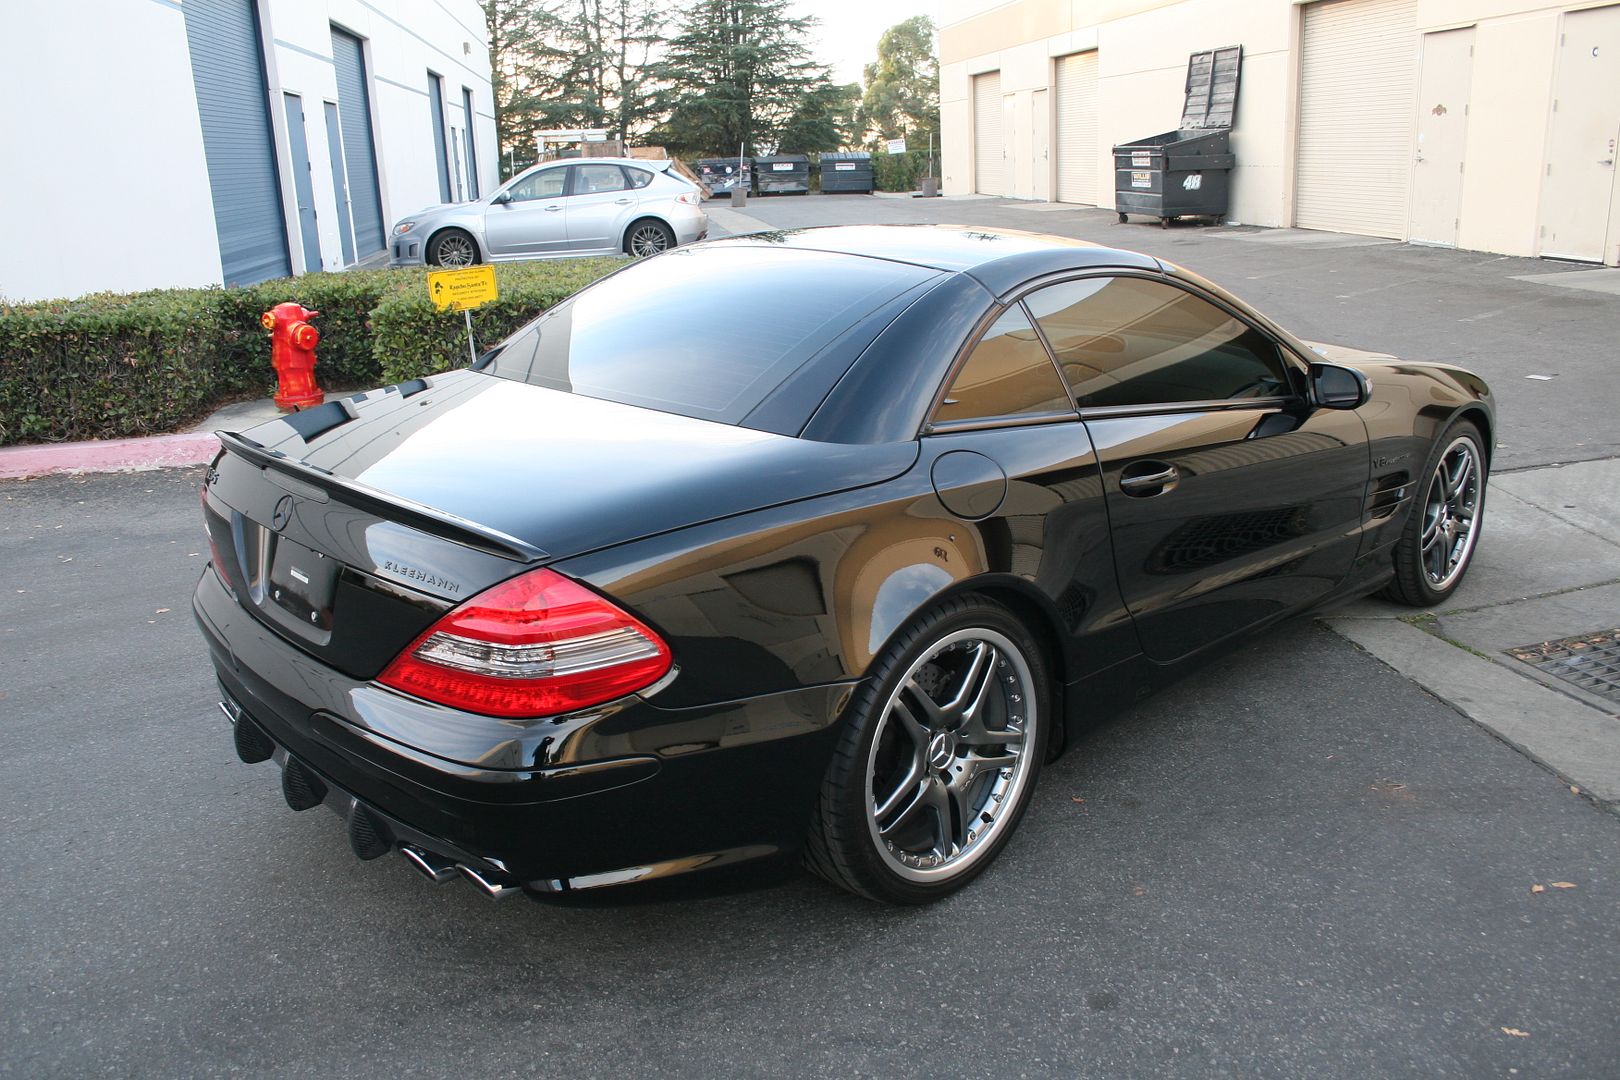
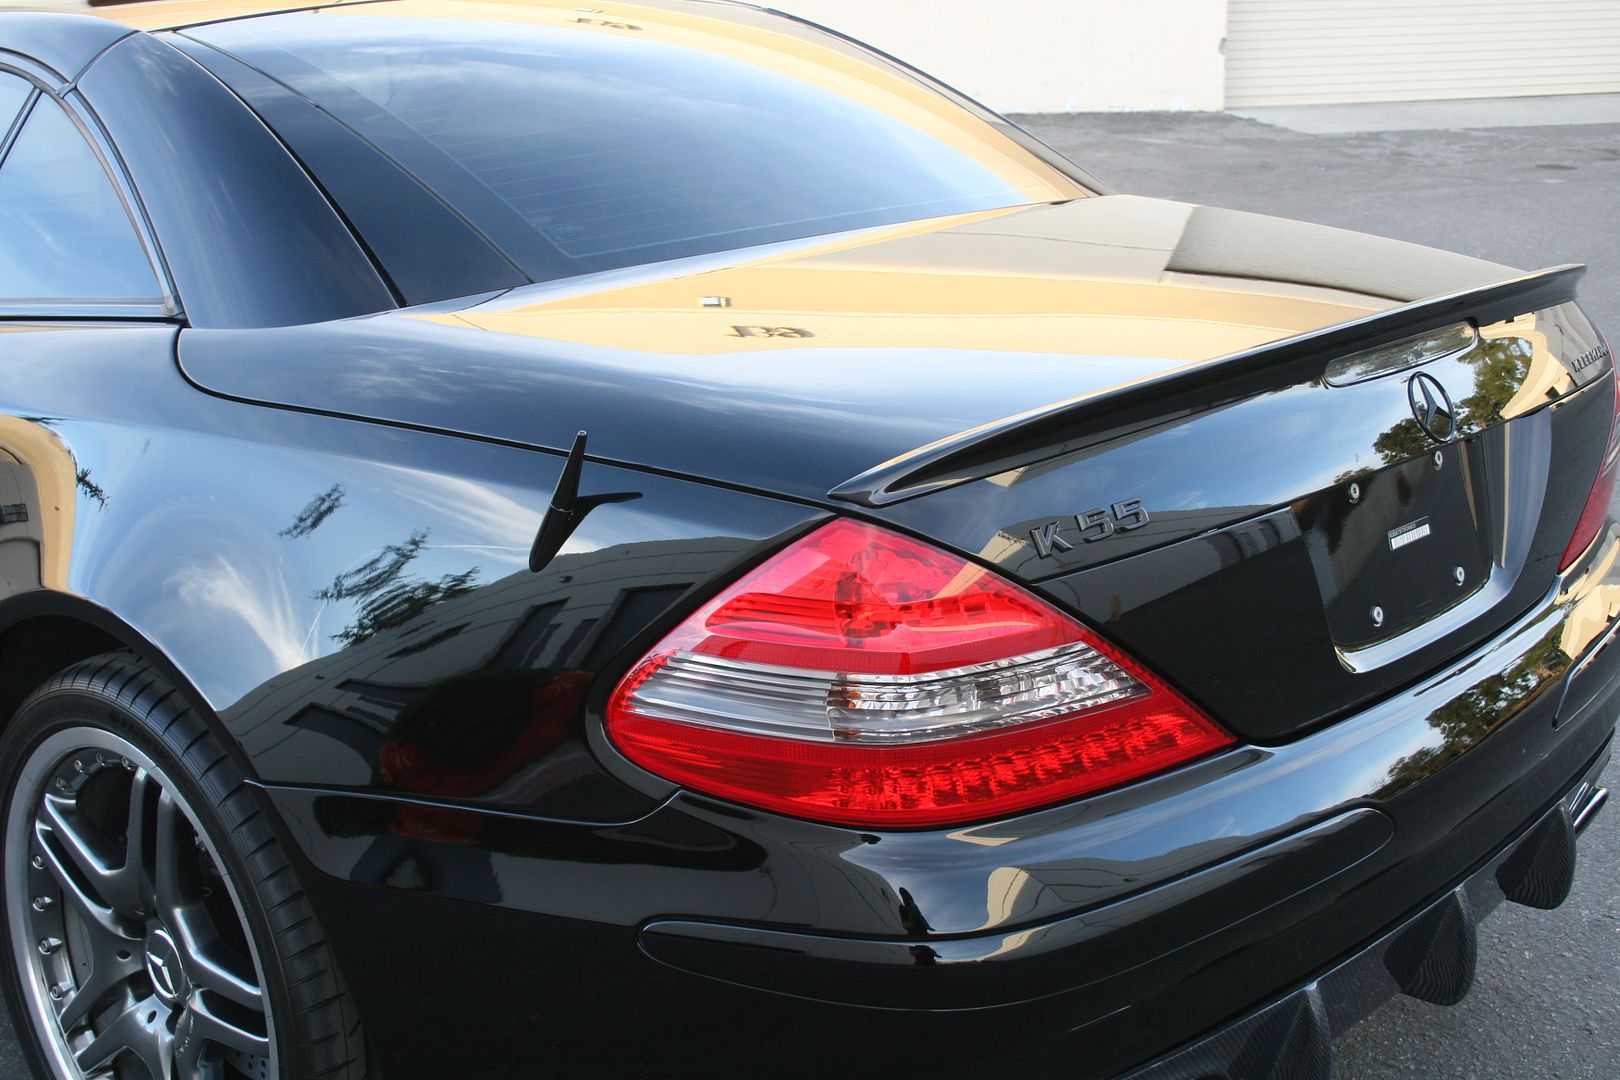
Finally what you have been waiting for, after 2 long days of work It was finally time to bring the car outside to snap some final shots. Enjoy!
Thanks for viewing.
-Tim
This week we work on a jet black 2005 Mercedes K55 that is in dire need of some work. Follow through to see the process involved to bring this car back to life.
Main Issues:
Severe damage to front clear bra that needs replacing
Heavy concentration of swirls and wash marring
Water spots and other etching on the paintwork
CQuartz Finest installation to protect paint surface
Here is the starting condition of the vehicle, note the dense concentration of wash marring, swirls and scratches.


After vehicle was decontaminated and prepped for polishing, a test section was performed.


The results were outstanding, the combination I decided on resulted in a flawless finish.

From grey to black. One of the reasons paint correction makes such a dramatic difference is the way light reflects off the surface. On the left side here you can see quite a bit of damage that results in the panel almost looking grey. This is because all of the defects cause the light to refract in a thousand different directions instead of reflect. The right side has been polished resulting in a flawless surface that reflects every ounce of light resulting in a deeper, richer and glossier appearance. This flawless finish is permanent with proper maintenance.

The deck lid and the roof had some of the worst concentration of defects I have faced yet. Here’s an example of the dramatic difference after working on this section.

50/50 shot showing before on the high side, and after on the low side of the photograph.


Rear passenger quarter panel 50/50 in the sun. No matter how well the panel looks indoors, its paramount to check the work in the brightest sunlight you can find.

Here’s an example of the difference between “refracting” and “reflecting”. All these panels have been polished resulting in every micron of light reflecting back instead of all the defects refracting which would result in a dull, hazy appearance vs. This crystal clear reflection.


The roof was a key area on the vehicle, it needed a good amount of work to bring it back.

Driver quarter panel
Before

After


Look at that reflection!


Checking my work after polishing, each section is viewed under different light sources before moving to the next.


Flawless


After all polishing was performed the vehicle was then prepped for coating application. I’ve worked with alot of different coating products from Opti-Coat to 22PLE and from my experience nothing has come close to the durability and appearance of CQuartz Finest. To provide my client with the best, CQuartz Finest was chosen to protect this vehicle for years to come.
Finally what you have been waiting for, after 2 long days of work It was finally time to bring the car outside to snap some final shots. Enjoy!


Thanks for viewing.
-Tim
Last edited by BenzoBoi; Feb 3, 2014 at 05:43 PM. Reason: Non sponsored advertisement
Thread Starter
Junior Member
Joined: Apr 2013
Posts: 22
Likes: 0
From: San Diego
C63
Thanks for the compliments guys!
The polishing process started with a 3000 grit wet sand of the rear trunk and roof. Followed by compounding with HD adapt on a MF cutting pad, then final polished with Menzerna Super Finish on a black foam pad.
The polishing process started with a 3000 grit wet sand of the rear trunk and roof. Followed by compounding with HD adapt on a MF cutting pad, then final polished with Menzerna Super Finish on a black foam pad.
Trending Topics
Thread Starter
Junior Member
Joined: Apr 2013
Posts: 22
Likes: 0
From: San Diego
C63
MB World Stories
The Best of Mercedes & AMG

Manual Mercedes? 6 Times Sindelfingen Let Drivers Have All The Fun
Verdad Gallardo
Mercedes SLR McLaren 722 S Is Extremely Rare Example Modified by McLaren
Verdad Gallardo
8 Classic Boxy Mercedes Designs That Have Aged Like Fine Wine
Verdad Gallardo
Flawlessly Restored Mercedes 190E Evo II Heads to Auction
Verdad Gallardo
Electric Mercedes C-Class Unveiled: 11 Things You Need to Know
Verdad Gallardo
Mercedes EQS Gets A Major Update: Everything You Need to Know
Verdad Gallardo
5 Underrated Mercedes-Benz Models That Don't Get the Love They Deserve
Verdad Gallardo
Mercedes 300D Has Pushed Well Past 1 Million Miles and It Ain't Stopping
Verdad Gallardo
10 Most Reliable Mercedes-Benz Models You Can Buy Used
Verdad Gallardo
Thread Starter
Junior Member
Joined: Apr 2013
Posts: 22
Likes: 0
From: San Diego
C63
Senior Member
Joined: Jan 2014
Posts: 311
Likes: 3
2004.7 C180 Kompressor, BMW X5, Chevrolet Camaro LT, Mercedes S, Cesna 152.
Thread Starter
Junior Member
Joined: Apr 2013
Posts: 22
Likes: 0
From: San Diego
C63
lol No, just went to the car wash often. It does not, on average I'm only removing 1-3 microns with all of the steps needed. Average clearcoat is about 50-100 microns thick. The CQuartz Finest coating then adds another 3-5 microns in protective thickness.

MBWorld Fanatic!


Joined: Aug 2003
Posts: 8,882
Likes: 1,212
From: In my garage
E55, GLS450, GL63, GLE350
Looks like swirl marks from hand washing. The sponge must have been covered in sand or grit multiple times. That's why I won't let the dealership wash my car.
$1,200 is really steep but if they are willing to pay the price....... It does look great though.
$1,200 is really steep but if they are willing to pay the price....... It does look great though.
MBWorld Fanatic!
Joined: Sep 2008
Posts: 3,152
Likes: 0
From: murfreesboro,tn
2003 porsche 996 turbo
3000 grit wetsand on an expensive car is not for the faint of heart! push to hard and you can cut thru the clear coat into the paint in an instant! it takes yrs of work skill and patience to this without killing a paint job
Last edited by 320 dreamer; Feb 2, 2014 at 04:04 PM.
Thread Starter
Junior Member
Joined: Apr 2013
Posts: 22
Likes: 0
From: San Diego
C63
Thanks for the compliments guys!
You are absolutely correct, and thank you for the compliments! Its very tough work and I definitely feel it for the next few days. lol All in all about 27 hours went into this car. At $1200 with CQuartz Finest this detail was actually pretty underpriced, but this is one of my biggest accounts so I do his cars at a discount. You must have some experience detailing yourself?
1200 /10 hrs per day(2) avg = 60$ per hr. add the cost of the materials as he is using some of the best in the business i.e.: Cquartz, mezerna etc plus tape, pads and microfibers and thats a great price in any part of the country. i know the work is hard as hell. the bending, the arms,(holding the polisher) the knees the feet all hurt like hell after just a few hrs on my car!
3000 grit wetsand on an expensive car is not for the faint of heart! push to hard and you can cut thru the clear coat into the paint in an instant! it takes yrs of work skill and patience to this without killing a paint job
3000 grit wetsand on an expensive car is not for the faint of heart! push to hard and you can cut thru the clear coat into the paint in an instant! it takes yrs of work skill and patience to this without killing a paint job


Junior Member
Joined: Jun 2007
Posts: 44
Likes: 2
From: Australia
SL55
this is not a $150 dollar filler polish out the door job...........with proper care should look good for a long time..........

MBWorld Fanatic!
Joined: Feb 2012
Posts: 1,355
Likes: 6
E55 amg
Couldn't u have just used a rupes Bigfoot so u don't have to worry about burning the paint ? Use a aggressive cutting compound them finish with a good polish and pad ? I hear this can bring about 80-85% correction. This project must have been going for 100%
Thread Starter
Junior Member
Joined: Apr 2013
Posts: 22
Likes: 0
From: San Diego
C63
A Rupes 21 was used for the polishing steps, I chose to go with 3,000 grit on the really bad areas just because this resulted in a much easier compounding process as 98% of the defects were removed wet sanding then polished to remove the haze. I could have gone straight to compounding but would not have yielded the same results, and would have removed just as much clear and generated alot more heat in the process.
MBWorld Fanatic!
Joined: Feb 2012
Posts: 1,355
Likes: 6
E55 amg
Great job I would love to do this myself minus the wet sanding. I'm a noob with a little knowledge on paint correction my car is no where near as bad of shape as the SL but it is black and could use a good cut and polish, just a little scared I might mess up being there are so many products of cut & polish and pads to choose from  plus once I'm done I have no clue how to apply opti coat to help with more cleat coat protection. Great job again !
plus once I'm done I have no clue how to apply opti coat to help with more cleat coat protection. Great job again !
MBWorld Fanatic!
Joined: Feb 2004
Posts: 3,703
Likes: 5
From: Arizona
SL55AMG, Ferrari 348, Ferrari Testarossa, Ferrari F40, Ferrari Mondial t, Ducati 916, Indycar
Great job I would love to do this myself minus the wet sanding. I'm a noob with a little knowledge on paint correction my car is no where near as bad of shape as the SL but it is black and could use a good cut and polish, just a little scared I might mess up being there are so many products of cut & polish and pads to choose from plus once I'm done I have no clue how to apply opti coat to help with more cleat coat protection. Great job again !
plus once I'm done I have no clue how to apply opti coat to help with more cleat coat protection. Great job again !
Great job btw...


