When you click on links to various merchants on this site and make a purchase, this can result in this site earning a commission. Affiliate programs and affiliations include, but are not limited to, the eBay Partner Network.
Wear some eye protection for rocks that will drop in your face. I would remove the clamps first then slide the hoses to the tip of the filter then remove the filter's holding bracket. The caps from the new filter will come in handy to prevent fuel from pouring out of the filter when you maneuver it out from the undercarriage.
My trunk stopped opening earlier this summer. Funny story is that I was just telling my friend how much I enjoy the car despite it being fairly expensive to upkeep and that I've just gotten it to a state where I feel comfortable taking it anywhere without worries. I dropped her off and we couldn't get the groceries out of the trunk until I operated the top to open the trunk the other way. Long story short, I replaced the trunk actuator bellow with a reproduction one from eBay and carried on with my life.
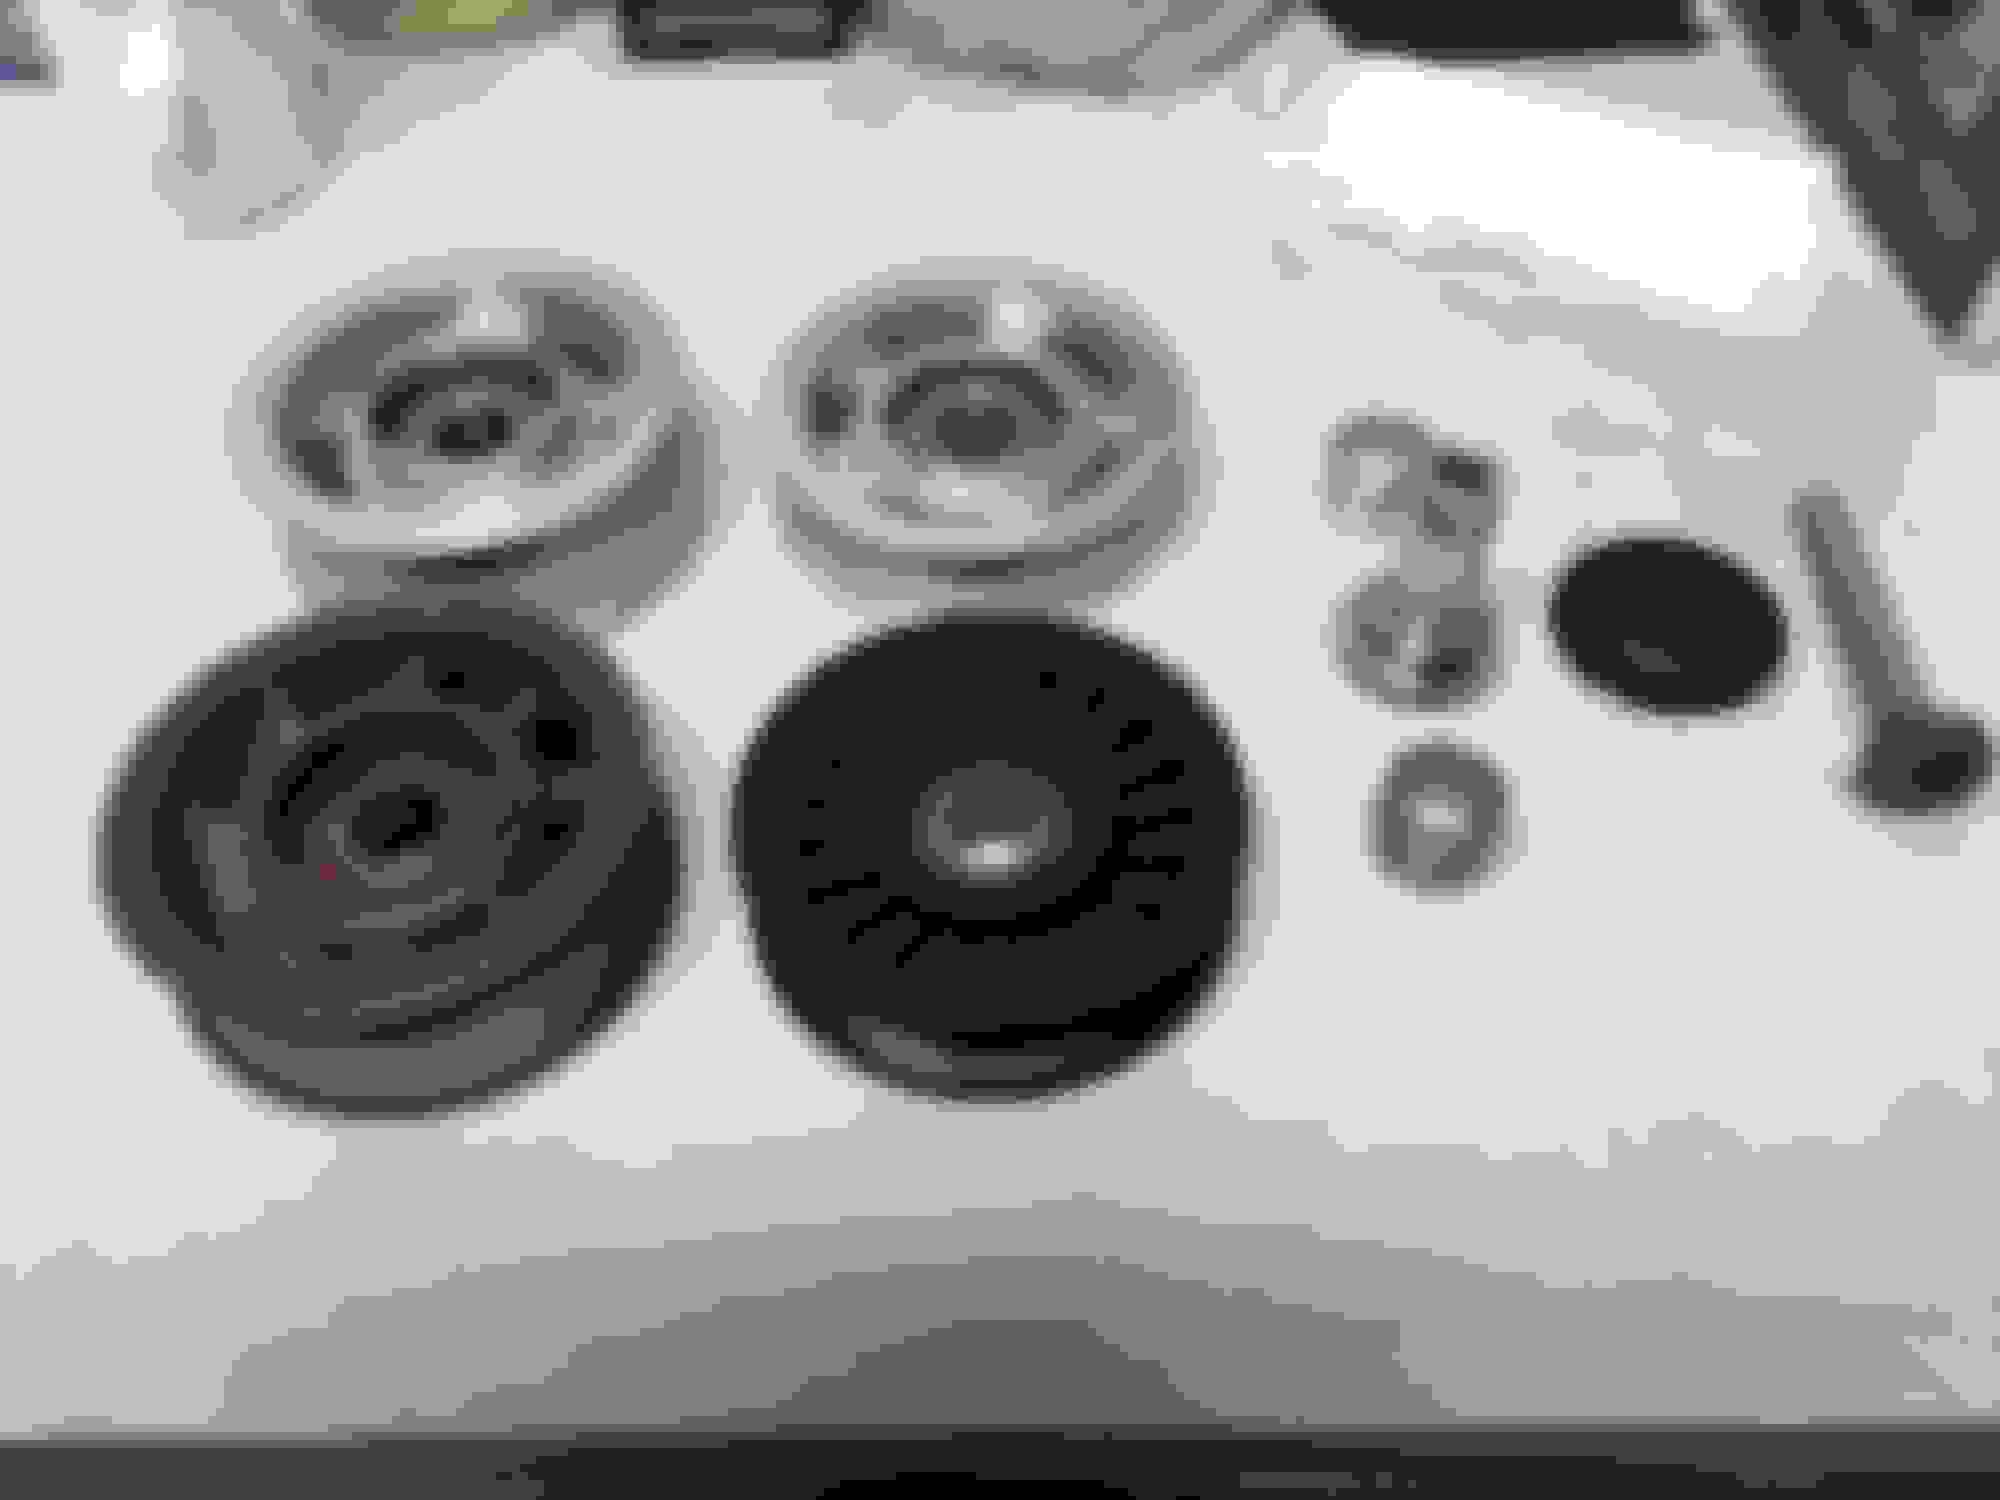
I also replaced the double idler pulleys because I noticed the front pulley bearing had a slight wobble. I purchased a set of ASP pulleys through Eurocharged. Fit and finish look great!
The old:
ASP pulleys:
Comparison shot:
New pulleys installed:
The car has been running flawlessly to date. For those of your wondering about ownership costs, here's a rough estimate. Please keep in mind that I do all of the work myself and this spreadsheet does not include labor. The car is just about to hit 136k miles.
Great thread..... love seeing what others do to freshen up their rides. I have a similar story and keep a log like you're doing.
I purchased a high mileage (158k) 2003 SL55 in mid August. Before I got to look at it the owner said it needed control arm bushings and the A/C charged. He wanted to get those addressed before selling it, and sent to to an independent MB specialist. Well, it turned out it needed a little more and the following was done 2 days before I purchased it: transmission service and conductor plate; A/C hose, compressor & drier; hose was damaged due to engine needing motor and transmission mounts, which was also done; and finally, both lower control arm bushings. Bill total $3,888.19. He also had records where in June he had the valve cover gaskets and the air filters replaced. Bill total $670.89. The final record from 2016 was the consumer battery was replaced in January. $419.90.
One final note, the roof was not operational when purchased, and I noted that at least the trunk locking hydraulic cylinder on the driver side leaked. The rubber seals at the top of the windows were wavy, and the prior owner (2nd owner) said he was told the front locking cylinder had been fixed before he purchased it.
With the knowledge of those recent repairs, I purchased it and have done the following:
Shop assistance items:
Both trunk locking cylinders and the trunk raising cylinder had to be rebuilt. I've rebuilt over a dozen cylinders for R170,s, but couldn't find seals for the R230 other than the front locking one. Removed the 3 cylinders and had them rebuilt. $281.90.
Windows tinted. $170.07.
I need to do the ABC flush as well. Will probably replace the accumulators and pulsation damper while doing that. I will order the dip stick/cap as you did because mine is cracked as well. Another future item I want to do is replace the idlier and tensioner pulleys. I've had those fail on 2 different R170's. May as well do the belts at the same time.
Love the way you've documented your work, even going as far as taking photos along the way. Good work.
98 Briliant Silver SLK230 and 85 Diamond Blue 500SEL
Originally Posted by desired_speeds
I'll start this update with a few pics I snapped after a quick wash. Swirl central!
Next thing I knocked out was the ABC flush. Not sure if it's been done before. It was dirty but wasn't terribly black. after about 6 liters, it was light green as it should be. I ran 2 more liters through, a total of 8.
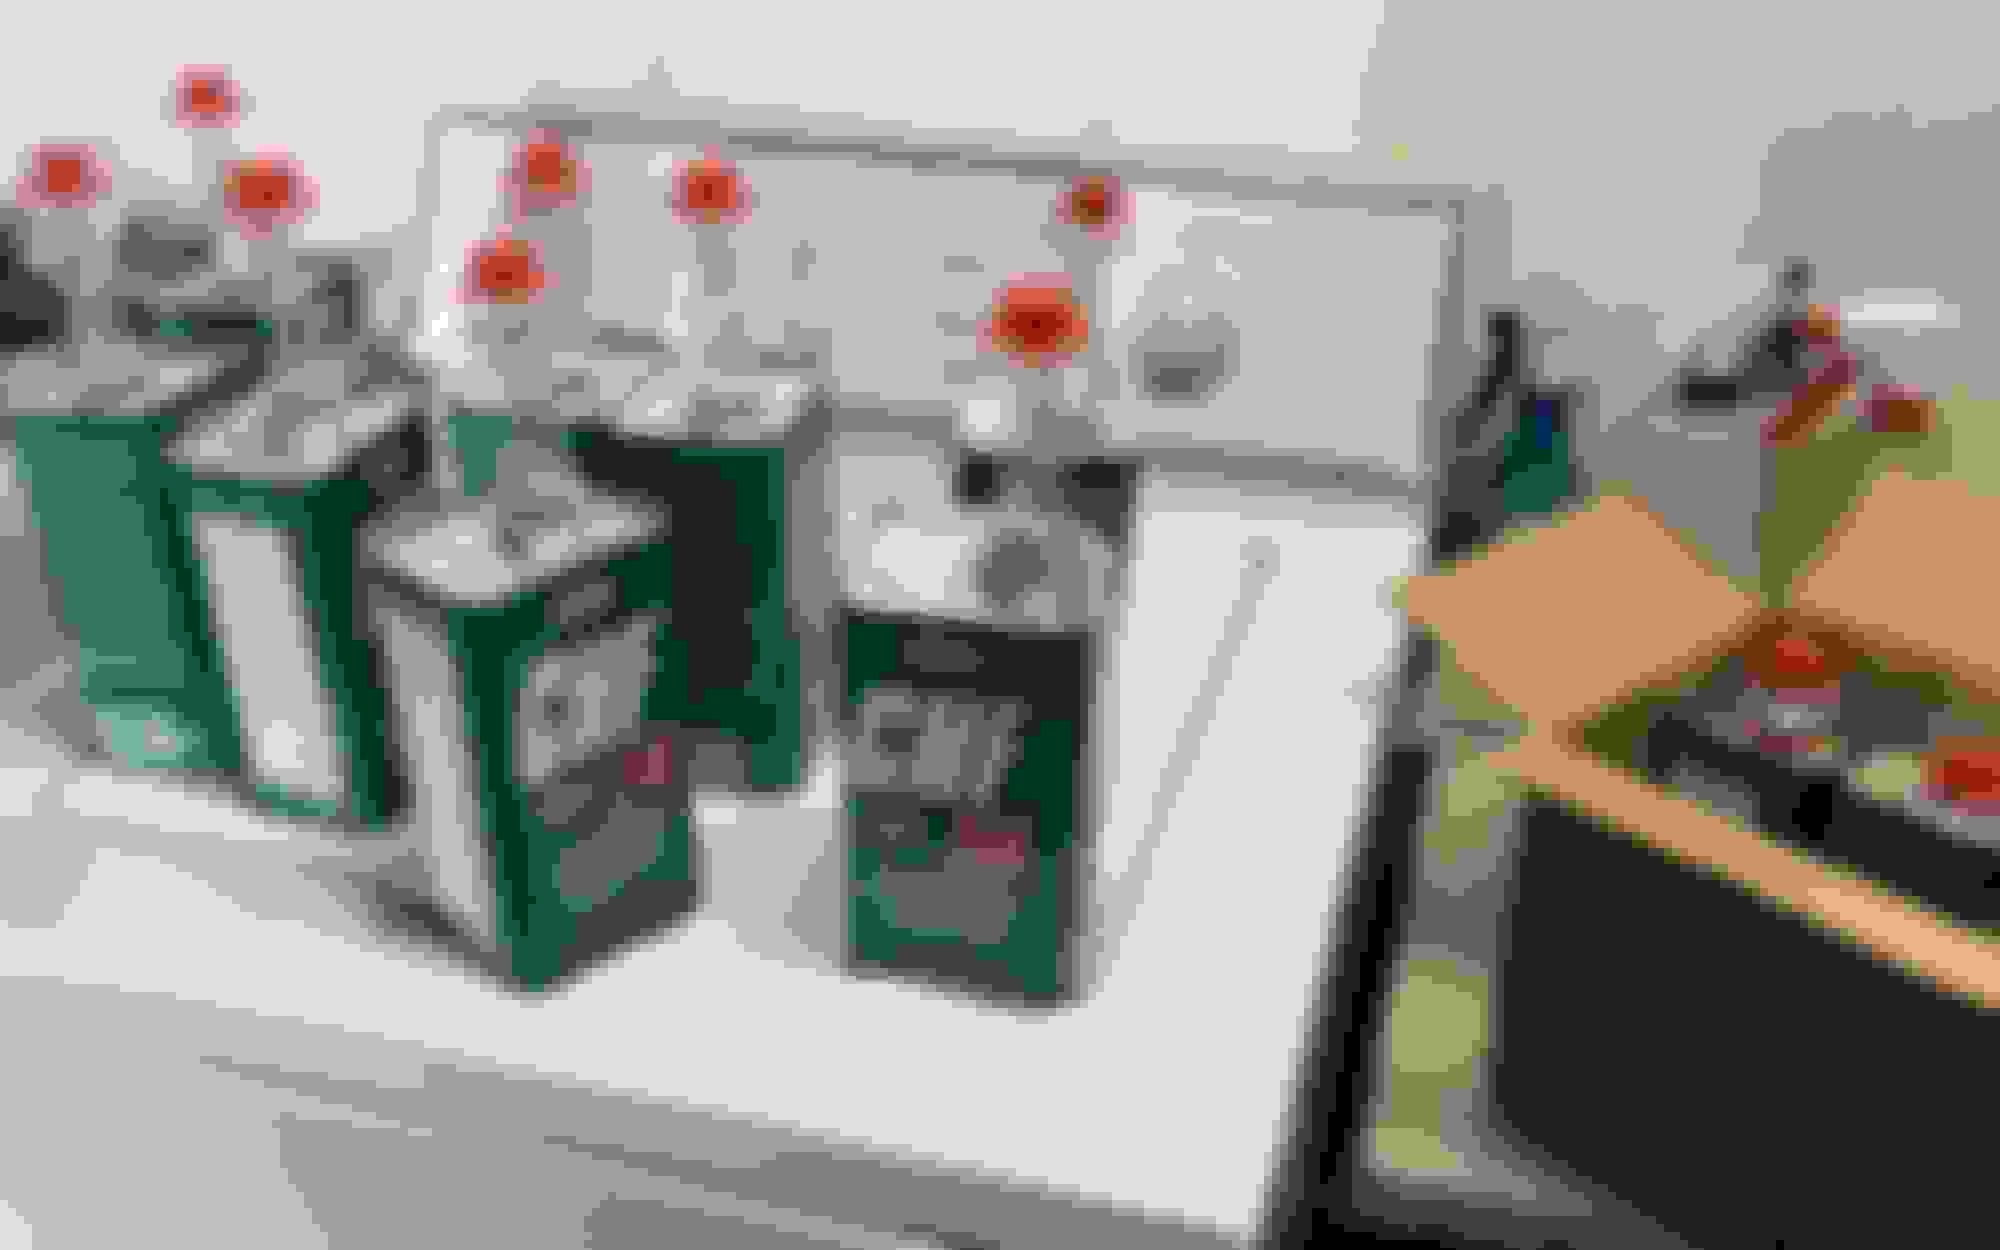
I slacked on taking pictures of my flush setup, but here are the supplies I used.
I replaced the dipstick as the rubber cap was brittle and was starting to split at the seams. I also added the a magnetic inline filter to the return line as most people recommended. Topped everything off with OEM clamps I purchased from Pelican Parts.
The filter I used was "MAGNEFINE INLINE 1/2" MAGNETIC TRANSMISSION FILTER" purchased from ebay. The inlets required a bit of sanding to slide the factory hoses over.
I thought my ABC would be trouble free for a while... and it was until I decided to take the car out Saturday evening a few weeks later. I gave the car some gas through a long stretch of road and came to a stop and got a noise with a vibration at my pedal and steering wheel. I gave it some gas at green light and it had the "whrrr" noise from the pulsation damper. I confirmed later on using a long screwdriver as a stethoscope.
Long story short I ordered the part and replaced it. It took 5 mins and I could've done it in 2. I've never paid so much for a part so easy to replace. Pic of the parts:
Step 1: Brake cleaned the whole area. You don't want any dirt near the inlet.
Step 2: Break it loose with a 17mm 6 point socket. This is accompanied with a 5" extension.
Step 3: Unscrew the pulsation damper and remove by pushing on the hose as seen in the following pic. I also carefully cleaned the area around the hole with a microfiber rag soaked in brake parts cleaner.
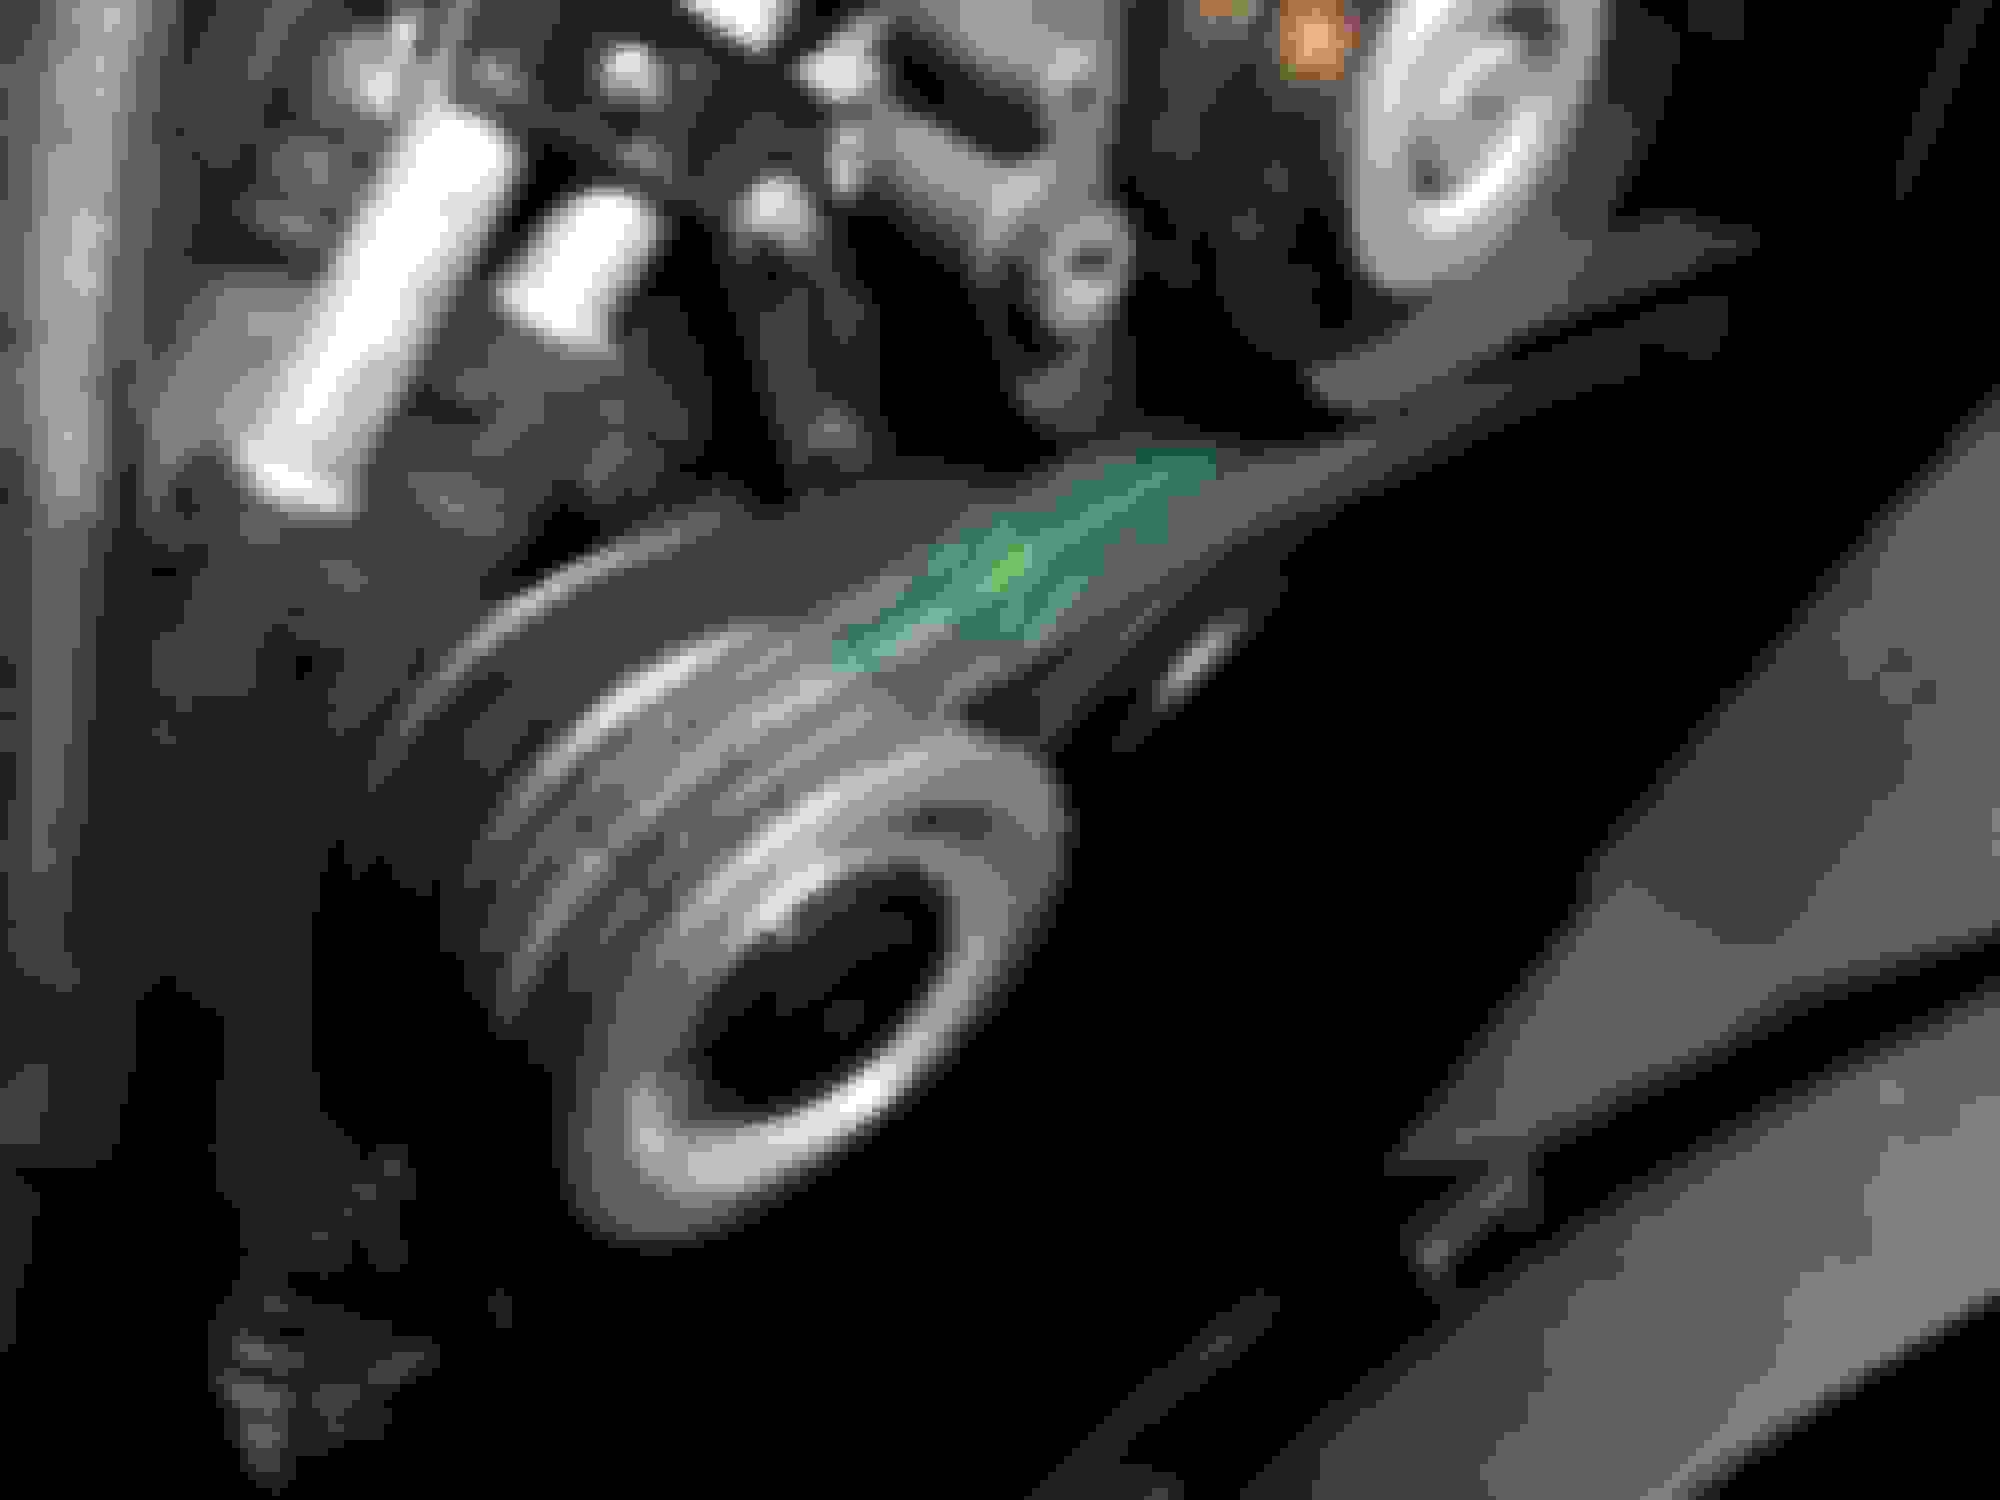
Here's the old one vs the new. The new one comes with a plastic cap you need to remove.
Step 4: Screw the new one on and torque down. Not too tight, but a a firm tightening will do.
Done! Here's how the engine bay looks to date. I replaced the belts somewhere along the way as well with a Conti acc. belt and a Gates HD for the S/C.
While the car was sitting around waiting for the damper to arrive, gave it a hand detail (Wash, clay, polish, wax) and threw some LEDs in for the city lights. They're bright as hell but too blue compared to the headlights. I'll end this update with this:
Hi,
just curious, did you have to drain the ABC fluid to replace the pulsation damper? also after replacing did you have to do the Rodeo? I do not have access to a STAR Diagnosis system yet but working on it. I will have to replace my one soon. great post BTW. Thanks!
2003 E55, 2003 SL55, 2014 CLS63, 2018 q50 Redsport, 1968 Camaro SS, 1999 Trans am Firehawk
i'd also replace the accumulators located on each valve block. there is also a 2nd pulsation dampener located on the rear valve block. the pulsation dampener on the newer models that regulate high pressure going out of the pump are located on the pump, on older models it is in the drivers wheel well. The pulsation dampener on the rear valve block dampens pressure as low pressure returns in the system.
just curious, did you have to drain the ABC fluid to replace the pulsation damper? also after replacing did you have to do the Rodeo? I do not have access to a STAR Diagnosis system yet but working on it. I will have to replace my one soon. great post BTW. Thanks!
I did not have to drain the fluid. It was a simple remove and replace. I do recommend starting the car and cycling the height a few times after.
Originally Posted by carguyshu
i'd also replace the accumulators located on each valve block. there is also a 2nd pulsation dampener located on the rear valve block. the pulsation dampener on the newer models that regulate high pressure going out of the pump are located on the pump, on older models it is in the drivers wheel well. The pulsation dampener on the rear valve block dampens pressure as low pressure returns in the system.
I do plan to replace the rest of the accumulators sometime in future, but as of right now the car drives perfectly fine and hasn't shown any symptoms of anything else going wrong. If something else ABC related fails, I will check the condition of the accumulators. Fingers crossed it won't be for a long time.
2003 E55, 2003 SL55, 2014 CLS63, 2018 q50 Redsport, 1968 Camaro SS, 1999 Trans am Firehawk
i would also suggest opening the pressure relief valve at each strut and letting all the fluid out of each strut. The fluid between the valve block and strut essentially never gets fully cycled through the system and needs drained from this bleeder screw in order to get that old fluid out and then new fluid put back in. When you open the bleeder screw at each strut you will find some pretty nasty black fluid will come out even if you just did flush the entire system (I know I did). This is really a no cost maintenance procedure that you just top off the fluid in the ABC reservoir afterwards.
i would also suggest opening the pressure relief valve at each strut and letting all the fluid out of each strut. The fluid between the valve block and strut essentially never gets fully cycled through the system and needs drained from this bleeder screw in order to get that old fluid out and then new fluid put back in. When you open the bleeder screw at each strut you will find some pretty nasty black fluid will come out even if you just did flush the entire system (I know I did). This is really a no cost maintenance procedure that you just top off the fluid in the ABC reservoir afterwards.
Thanks for the tip. Is there a specific procedure for this? (car on/ off the ground?) I don't want to get air into the system and have to rodeo the car at the shop.
Hey guys, I can't believe we're in the 4th month of the year already. I've had some ups and downs with this car so far. In January, I managed to get my hands on a set of facelift SL65/ SL63 PP/ CLS63 PP forged wheels. These have been my favorite OEM wheels on the SL to date and I just couldn't pass them up when I found them. I rented a Ford Focus hatchback (terrible car) and took off to Socal in the mid storm to get my hands on these! Here they are, what do you think of them? I also installed an SL63 trunk spoiler.
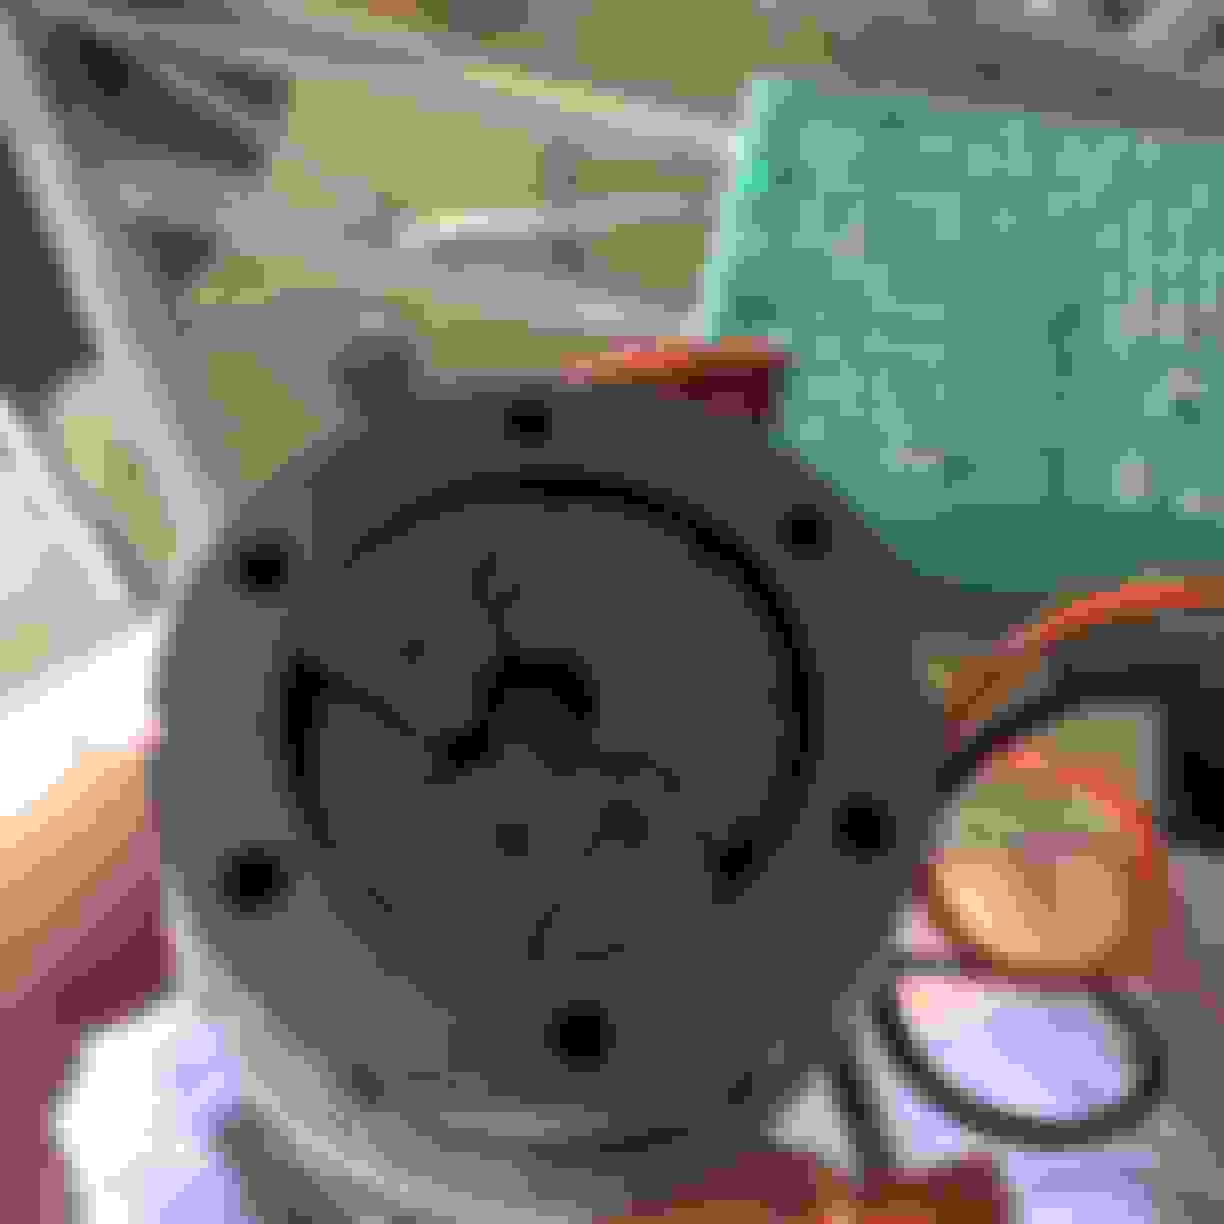
Now as far as the downs, it's the trunk again! I've already had to deal with the trunk not opening in the past because of the broken air actuator on the trunk latch. That was replaced and to my surprise in Feb, it was not opening again and my doors weren't locking either. I found the PSE pump fuse blown and it blew again immediately when I replaced it. The symptoms pointed to the PSE pump located in the trunk. I opened it up and found the impeller shattered.
Here you can see it the problem.
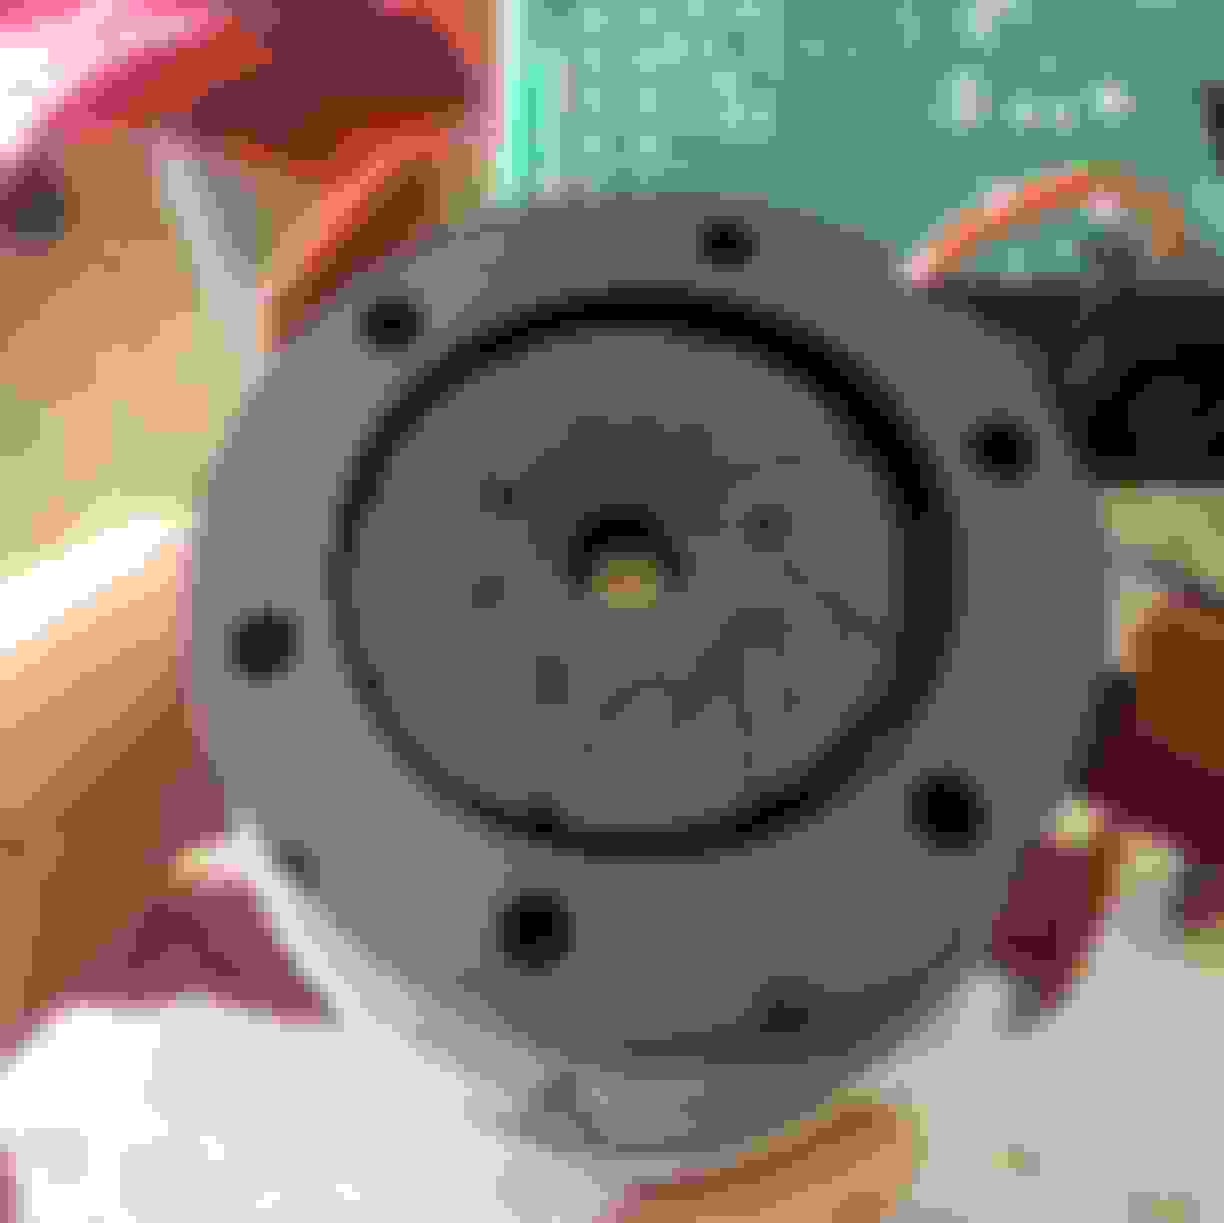
I got my hands on a damaged PSE pump and salvaged the unbroken impeller and put mine back together.
It went back together and with a new fuse, everything functioned again.
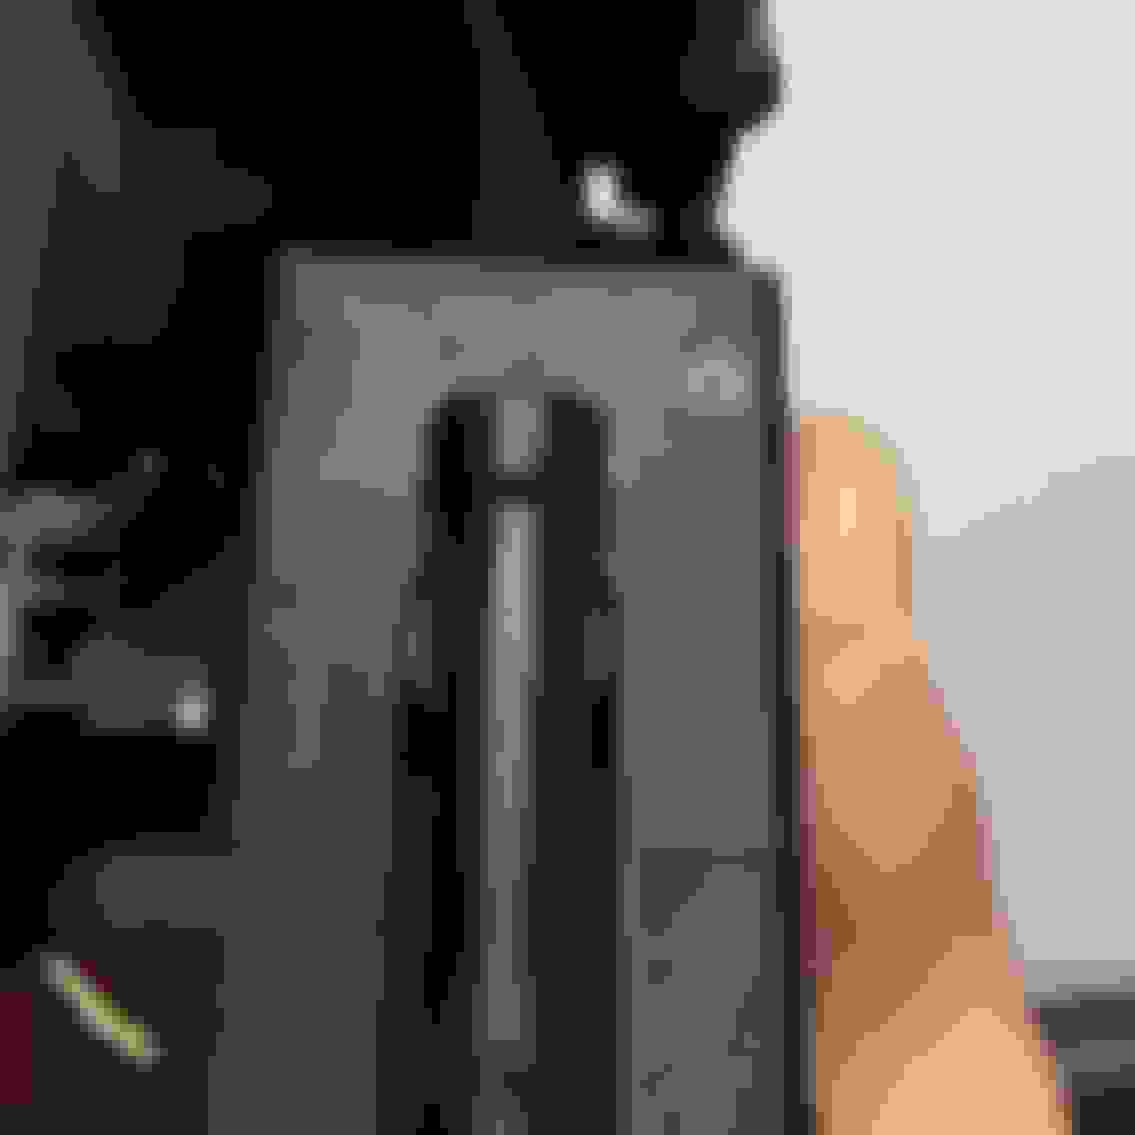
I really thought that was the last of the trunk issues but a month later, the soft close stopped working. I took the latch apart again to find a hairline crack on one of the tubes. Thanks to the DIY on here, I ran to Home Depot for some Gorilla Epoxy and was able to quickly resolve it.
Here you can see the hairline crack and the silver bearing that plugs the port.
I clamped it to the block of wood and coated all of the ports with two layers of epoxy. I highly recommend Gorilla Epoxy! For $5, it was easy to work with and dried quickly.
I let it dry for about 45 minutes and put everything back together. All groovy!
I'll snap some new pics after a spring detailing!
Last edited by desired_speeds; Apr 4, 2017 at 04:14 AM.
Great to see this thread again Desired Speed. Thank you
The attention to detail is awesome and I am fully subscribed. I second the Gorilla Glue for the trunk latch. My bother followed the DIY sticky and mine has worked flawlessly since this was done. I think these threads and Amok's create excellent tools for all us SL55 enthusiasts.
2003 E55, 2003 SL55, 2014 CLS63, 2018 q50 Redsport, 1968 Camaro SS, 1999 Trans am Firehawk
Originally Posted by desired_speeds
Thanks for the tip. Is there a specific procedure for this? (car on/ off the ground?) I don't want to get air into the system and have to rodeo the car at the shop.
Either way will work. If car is on the ground the car will get slammed all the way down as you are letting all the fluid out of the struts. Just open the bleeder, let all the fluid out, then close it. Pretty simple. You will then get a red abc warning message saying car is too low. Just hit the raise button and the car will pump the strut full of new fluid and you will be good to go.
Thanks desired_speeds for info...great post. I think the AMG rims are best and are the best looking SL/AMG rims, although these came on my 09 SL550 so I prob won't change them out.
I have a question or two on changing out the pulsation damper for you or anyone else who sees this: on my 09 SL550, it seems like the top of the damper is blocked by the edge of the valve head. I have read that simply removing the top pump bolt and loosening the bottom one will allow for a SLIGHT clockwise tilting of the pump to clear the top of the damper for removal.
1) This seems to NOT be an issue on your engine?
2) I have read that I should find a "skinny wrench" for loosening the damper by the underneath fitting (on the shank) but it seems on inspection that there is NO ROOM to get under the "bulb" of the damper. But it looks from your pics as though the damper can be safely loosened, and new one tightened, by the top hex fitting?
3) Did you in fact use a torque wrench to tighten the new one? If so, what torque pressure? or just a "snug fit"?
4) I gather from your experience (and others I've read) that the ABC system "never knows you've been there" when you replace the damper? Only follow-up is operating the raise/lower button several cycles? and...
5) Did you in fact follow the suggestion of carguyshu and do the strut bleed?
Significant savings, like $100 less on a remanufactured one. Several vendors even some Merc. dealer parts counters have them. FCP has new for $285 but "M Benz of Tampa" has reman. for $174.
Anyone ever have any experience with a reman. damper?
Thanks desired_speeds for info...great post. I think the AMG rims are best and are the best looking SL/AMG rims, although these came on my 09 SL550 so I prob won't change them out.
I have a question or two on changing out the pulsation damper for you or anyone else who sees this: on my 09 SL550, it seems like the top of the damper is blocked by the edge of the valve head. I have read that simply removing the top pump bolt and loosening the bottom one will allow for a SLIGHT clockwise tilting of the pump to clear the top of the damper for removal.
1) This seems to NOT be an issue on your engine?
2) I have read that I should find a "skinny wrench" for loosening the damper by the underneath fitting (on the shank) but it seems on inspection that there is NO ROOM to get under the "bulb" of the damper. But it looks from your pics as though the damper can be safely loosened, and new one tightened, by the top hex fitting?
3) Did you in fact use a torque wrench to tighten the new one? If so, what torque pressure? or just a "snug fit"?
4) I gather from your experience (and others I've read) that the ABC system "never knows you've been there" when you replace the damper? Only follow-up is operating the raise/lower button several cycles? and...
5) Did you in fact follow the suggestion of carguyshu and do the strut bleed?
Thx lots for any comments!
1) Was not an issue on my engine. The double overhead cams on the 550 engines allow more less clearance for removal. I would try the loosening and rotating method with some strategically placed extensions.
2)Yes, I loosened it from the top hex.
3) I did not use a torque wrench. I was unable to find the proper torque spec at the moment and just gave it a snug tightening. It's hard to find info on ABC 2 systems. :S
4) That's all I did. There wasn't any fluid overflowing at the mounting hole.
5) I did release the fluid from the bleed nipple. Fluid was very dark and I recommend doing it. It takes an 11mm wrench.
Significant savings, like $100 less on a remanufactured one. Several vendors even some Merc. dealer parts counters have them. FCP has new for $285 but "M Benz of Tampa" has reman. for $174.
Anyone ever have any experience with a reman. damper?
I think I am inclined to do that. Not a major expense, but I can still do a lot with $100 that stays in pocket! Bigger issue of course is the risk of doing this more than once. But the more I learn, the easier the job sounds. I'll find out soon.
Well, its funny what you can find with a simple phone call. I found several listings online for "remanufactured" pulsation damper, part no. 000-466-04-00-80, and it interchanges with part no. 000-466-03-10. A Mercedes dealer parts counter in another city has it for about $174.00 This is certainly worth taking a chance on the reman part. So...I call my LOCAL dealer. He looks up part no. 0004660310 and says he has one on the shelf. It is several hundred dollars. Then, I ask him about the reman part and mention a dealer in another city has it and I give him the other part no. (000-466-04-00-80). He says "Yeah, I have two on the shelf." He gives me the SAME price. So I can pick it up today and get started. (Core charge on this: about 40.00. So when I bring back the old, the "final" price is about 175.00).
I will be making a photo and/or video record of my R&R and final results.
Popping in to say that I still have the car. Although the updates have taken a pause, the projects have continued and my hands have stayed busy. I've done a few things like rebuild the torque converter, replace the conductor plate, both flex discs, ECE motor mounts, new injectors, plugs, wires..... to name a few.
It just ticked over 152k miles and the paintwork finally got a little attention. It took multiple sittings with a few hours spent each day and I'm really pleased with the results.
Mercedes SLR McLaren 722 S Is Extremely Rare Example Modified by McLaren
Slideshow: A one-of-one U.S.-spec Mercedes-Benz SLR McLaren Roadster became even rarer after a factory-backed transformation at McLaren's headquarters.


 EJbrock