
Seat clicking on acceleration repair write up
 08-24-2011 | 10:33 AM
#1

Thread Starter
Super Member
Joined: Sep 2010
Posts: 553
Likes: 3
From: Los Angeles
W210 E55
Seat clicking on acceleration repair write up
Update: While it has helped, it has not completely solved my problem. I will have to post a follow up the next time I go in. I will likely do the rear shoulder bolt and look more closely at what is going on overall.
Based on some recent interest, I went in and decided to tackle my seat clicking problem. I had already used the TSB shoulder bolts but that did not help with the clicking so I decided to go back in with some of my street knowledge to tackle the problem So far it is repaired (no clicking). It's not a hard job at all.
1. Make sure seat backrest is all the way forward and the headrest all the way down.
2. Remove the front seat. Move the seat to its highest position in front and then the back, in that order.
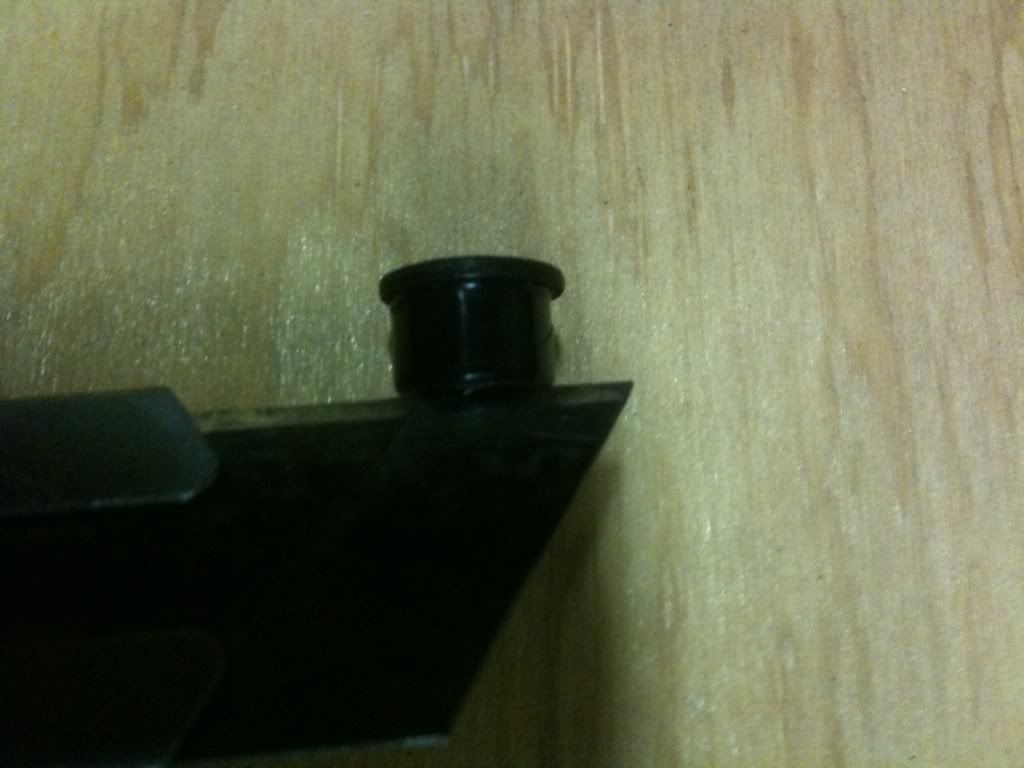
4. Move the seat all the way forward. remove the two rear plastic rail end caps and the two bolts.
5. Move the seat all the way back. Remove the two forward rail end caps and remove the bolts.
5A. Remove the front electrical and pneumatic connectors (red). Slip them back under and down through the seat frame and back out under the seat entirely and out of the way. The gray tube connector is hard. I used two small flat screwdrivers and inserted one and then pried with the other to lift the circular tabs - gently.
6. Remove the seat belt to seat plastic cover and bolt. Remember the order. From seat out: washer (lip in), belt, bolt.
7. Remove seat through driver door.
8. Remover seat belt side plastic cover by removing single screw in the back.
9. The two bolts that need to be "tightened" up are shown.
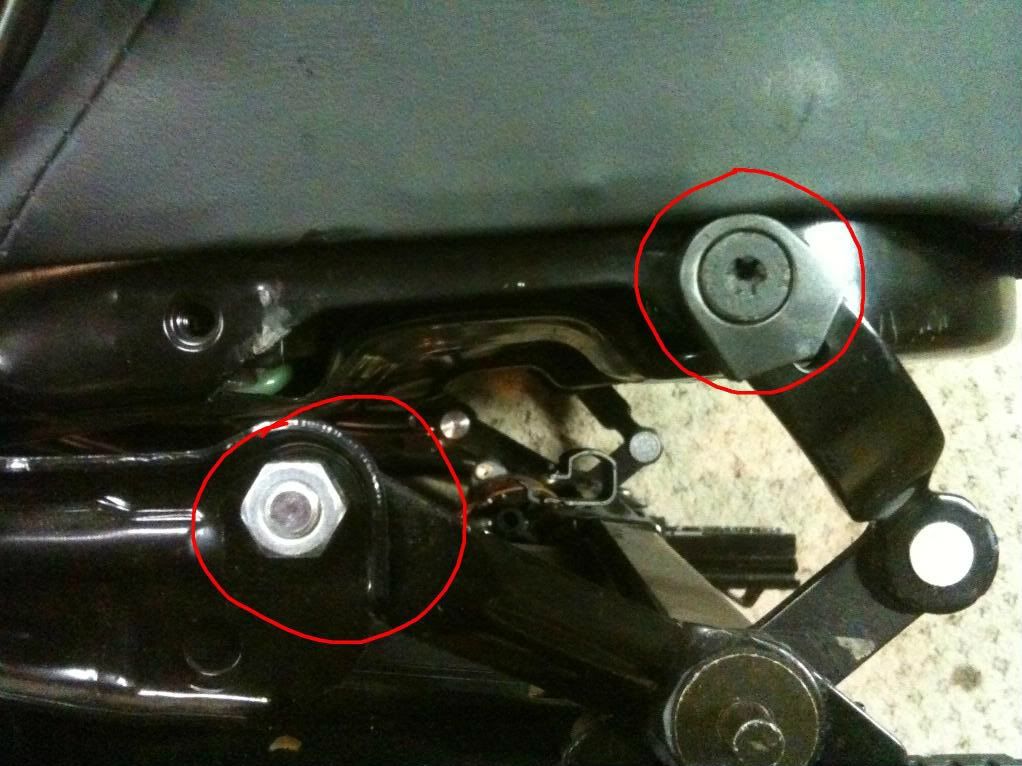
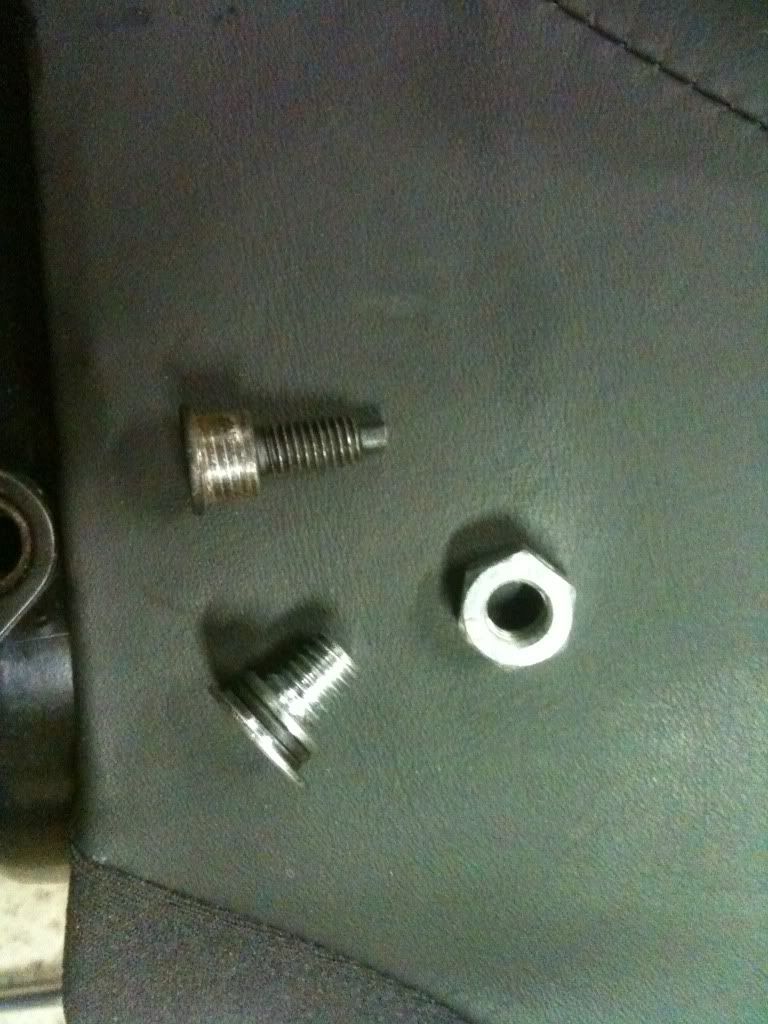
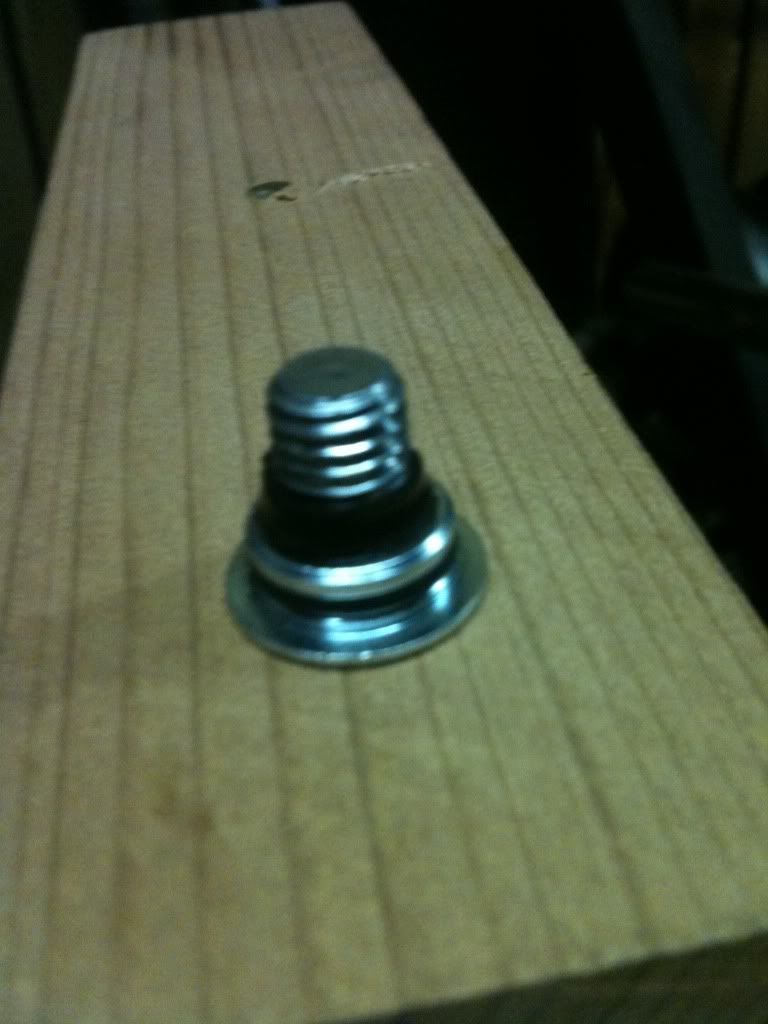
10. Since I had already used the repair bolt (with the rubber o-ring) and had not had repaired the problem, I decided to go a step further.
11. Remove both bolts one each side. Do one side at a time.
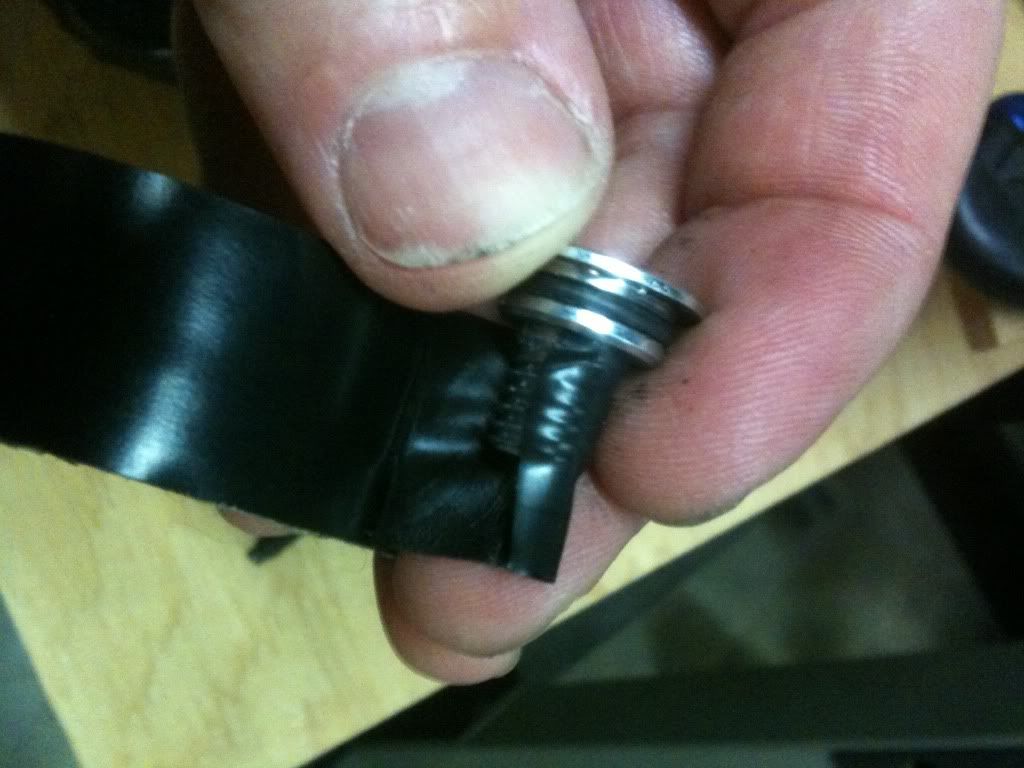
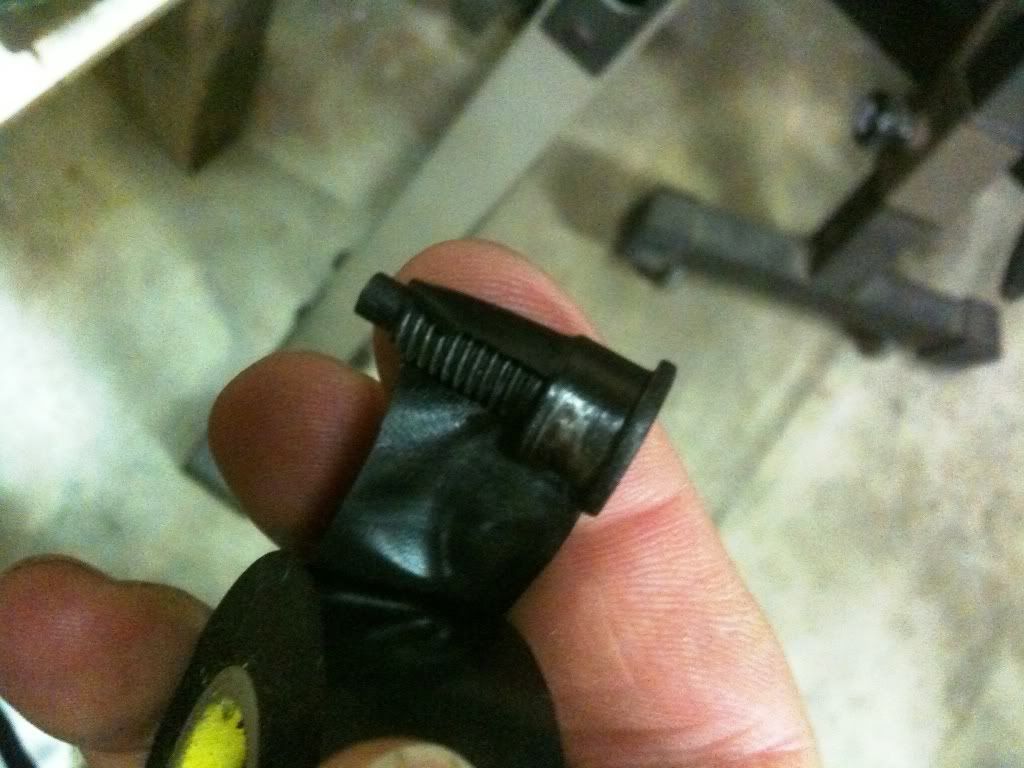
12. The problem is the smooth "shoulder" portion does not fit tightly in the hole in the seat frame. I wrapped each bolt on the shoulder and a little over the shoulder with about four wraps of regular electrical tape. I had to trim off the extra over the threads.
13. While I was in there, I needed to readjust the front seat extension bladder from when I replaced the cushion. The three elastic straps must be pretty snug. If you want to replace the cushion, you must remove the two bolts in green and a few more (I wont get into this now) to separate the rear cushion from the bottom frame. It's not hard but you will need to fuss with getting it free of the plastic air line and wires. This is not easy and will turn this one hour job into two or more hours. The seat cover is removed by pulling the cover down at the bottom of the seat frame.
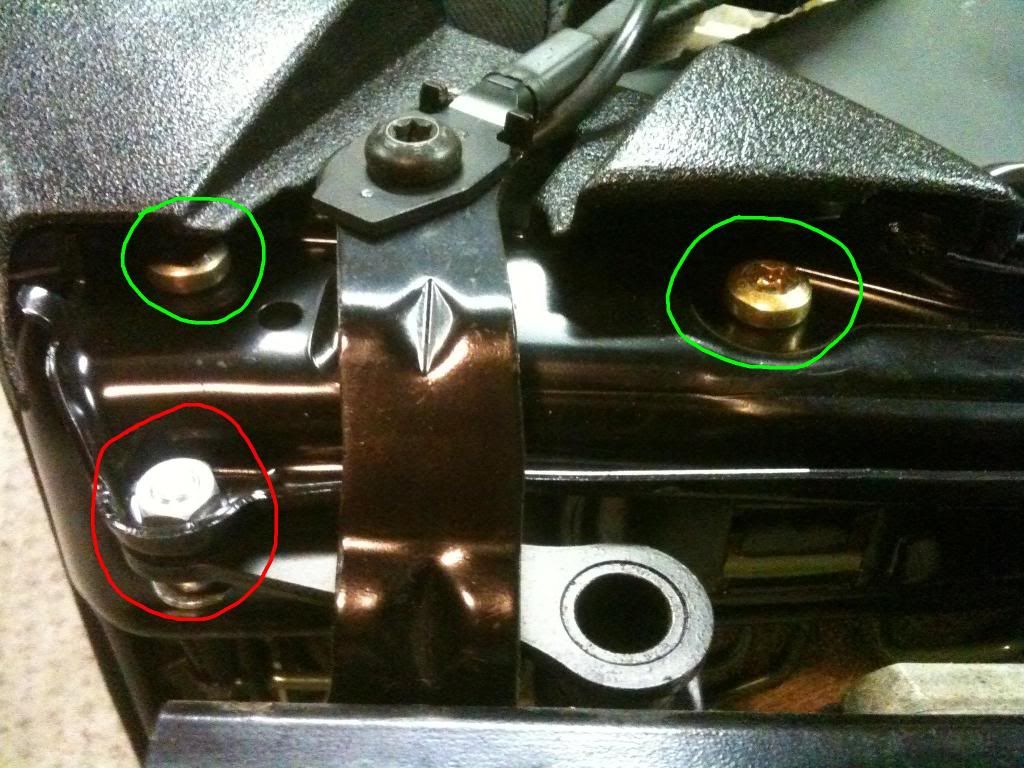
14. The other shoulder bolt that I did not do is in red above. It is at the rear of the seat and I do not think this one causes clicking but if the problem is not fixed I might go back in and tape this one up too. So far, the seat does not click though I imagine the tape will wear out sooner or later. Hopefully later!
15. Installation is the reverse of the removal.
Based on some recent interest, I went in and decided to tackle my seat clicking problem. I had already used the TSB shoulder bolts but that did not help with the clicking so I decided to go back in with some of my street knowledge to tackle the problem So far it is repaired (no clicking). It's not a hard job at all.
1. Make sure seat backrest is all the way forward and the headrest all the way down.
2. Remove the front seat. Move the seat to its highest position in front and then the back, in that order.
4. Move the seat all the way forward. remove the two rear plastic rail end caps and the two bolts.
5. Move the seat all the way back. Remove the two forward rail end caps and remove the bolts.
5A. Remove the front electrical and pneumatic connectors (red). Slip them back under and down through the seat frame and back out under the seat entirely and out of the way. The gray tube connector is hard. I used two small flat screwdrivers and inserted one and then pried with the other to lift the circular tabs - gently.
6. Remove the seat belt to seat plastic cover and bolt. Remember the order. From seat out: washer (lip in), belt, bolt.
7. Remove seat through driver door.
8. Remover seat belt side plastic cover by removing single screw in the back.
9. The two bolts that need to be "tightened" up are shown.
10. Since I had already used the repair bolt (with the rubber o-ring) and had not had repaired the problem, I decided to go a step further.
11. Remove both bolts one each side. Do one side at a time.
12. The problem is the smooth "shoulder" portion does not fit tightly in the hole in the seat frame. I wrapped each bolt on the shoulder and a little over the shoulder with about four wraps of regular electrical tape. I had to trim off the extra over the threads.
13. While I was in there, I needed to readjust the front seat extension bladder from when I replaced the cushion. The three elastic straps must be pretty snug. If you want to replace the cushion, you must remove the two bolts in green and a few more (I wont get into this now) to separate the rear cushion from the bottom frame. It's not hard but you will need to fuss with getting it free of the plastic air line and wires. This is not easy and will turn this one hour job into two or more hours. The seat cover is removed by pulling the cover down at the bottom of the seat frame.
14. The other shoulder bolt that I did not do is in red above. It is at the rear of the seat and I do not think this one causes clicking but if the problem is not fixed I might go back in and tape this one up too. So far, the seat does not click though I imagine the tape will wear out sooner or later. Hopefully later!
15. Installation is the reverse of the removal.
Last edited by Schweinhund; 08-24-2011 at 12:31 PM.
08-24-2011 | 12:21 PM
#2
MBWorld Fanatic!
Joined: Feb 2008
Posts: 1,280
Likes: 4
From: Bostonian Ma
2012 CLS63 AMG
Nice write-up and pics 
I don't have this issue, but what I do have is worse. I have the dreaded SRS light. Need to do the passenger-side but at least this will get me in the right direction.
thanks!
Armani
I don't have this issue, but what I do have is worse. I have the dreaded SRS light. Need to do the passenger-side but at least this will get me in the right direction.
thanks!
Armani
08-24-2011 | 03:58 PM
#5
Thread Starter
Super Member
Joined: Sep 2010
Posts: 553
Likes: 3
From: Los Angeles
W210 E55
08-25-2011 | 02:50 PM
#6

Member
Joined: Oct 2010
Posts: 209
Likes: 7
From: San Diego, Cali
AMG 2002 E55, 1997 E320
I have my new bolts at home. I haven't had the time to tackle this project, but will do before year end. Thank you for the write up and the pictures. Do you think heat shrink wrap could be better to use then the electrical tape?
08-25-2011 | 04:56 PM
#7

Senior Member
Joined: Jan 2011
Posts: 283
Likes: 0
From: Metro ATL
2001 E55 AMG (sold)
Off hand, I would say yes. Heat shrink is tougher in my experience. You'll just have to make sure there is enough clearance. The heat shrink in that size might be too thick.
Trending Topics
08-27-2011 | 11:26 AM
#9
Thread Starter
Super Member
Joined: Sep 2010
Posts: 553
Likes: 3
From: Los Angeles
W210 E55
Heat shrink might be too hard to allow for a tight but tolerant fit. I chose electrical tape becuase it is fairly tough but also gives when tightened. I think shrink would be too hard.
saintz, this writeup is for the front bolts. I am going in after the rears but after some listening and location, my problem seems to be from more in the middle of the seat. I'll follow up.
saintz, this writeup is for the front bolts. I am going in after the rears but after some listening and location, my problem seems to be from more in the middle of the seat. I'll follow up.
10-26-2011 | 04:51 PM
#10
Senior Member
Joined: Jan 2011
Posts: 283
Likes: 0
From: Metro ATL
2001 E55 AMG (sold)
I still haven't attempted to fix my seat. However, I've been thinking about it.
Schweinhund, how has that electrical tape held up?
I had the idea the other day about finding a way fill in the gap with metal somehow. Then I did a search for metal shim tape, and low and behold, there is such a product. It seems it is used in the printing and/or die cutting industry. They have stuff that is .002" thick and is made of stainless steel.
I will try and order some and report back when do the job.
http://www.barplate.com/tape-product...him-tapes.aspx
10-27-2011 | 01:57 PM
#11
Thread Starter
Super Member
Joined: Sep 2010
Posts: 553
Likes: 3
From: Los Angeles
W210 E55
The electrical tape has been fine but it only solved half of my problem. Apparently my seat is not fitting in the forward/back floor rails (the right rail particularly) and that is what is popping now. If I move the seat forward, I can stop the popping on acceleration for a short while and then the seat gets loose again.
10-27-2011 | 02:06 PM
#12
Senior Member
Joined: Jan 2011
Posts: 283
Likes: 0
From: Metro ATL
2001 E55 AMG (sold)
The electrical tape has been fine but it only solved half of my problem. Apparently my seat is not fitting in the forward/back floor rails (the right rail particularly) and that is what is popping now. If I move the seat forward, I can stop the popping on acceleration for a short while and then the seat gets loose again.
I'll still give it a try. Can't make it any worse.


