
Hidden USB Charger, iPhone Aux, and Bluetooth Speaker Install
 03-24-2012, 11:33 AM
#1
Super Member
Thread Starter

Hidden USB Charger, iPhone Aux, and Bluetooth Speaker Install
I always like to add modern functionality to my cars in a way that is as simple as possible but also works as simply as possible, and works very well. I really wanted a bluetooth handsfree system in my car, a good one. I looked into adding the V60 puck but it would require too much additional equipment, and expensive equipment, for really an older tech, "integrated" system. I also didn't like having to leave my console door open and have a cord come out to charge my iPhone and then another cord for "aux in" to my "Hidden Cassette Adapter" (see other thread).
Although I did find the best handsfree speaker setup I have ever used, the Jabra Freeway, which also looked great, like all of them, I didn't want to have to take it out and charge it every two weeks. I also didn't want to have it on the visor- for one, using the visor makes using the speakerhone impossible, and two, every time I push a button on it, the person behind me is thinking I am signaling them.
Yeah, I'm fussy I guess.
So could I have it all? Yes.
I test fit the Jabra around the car, but I found an awesome place just to the right of my knee mounted vertically. The buttons and mics were in an excellent place and I could get a usb cable to it easily and almost completely hidden. Now I wouldn't need to take it out ever to charge it, it would always be charged.
What about the iPhone? Well I found a gem of a cable for the iPhone which had the standard 30-pin connector but on the other end, had a usb AND a 3.5mm headphone jack for aux out. Simple! So what I started with was:
1 Speakerphone with USB charger (not shown) and cord
1 iPhone combo cord usb and aux audio out
1 audio cord magnet (donut) optional (its can be seen by the screwdriver) (I extracted mine from an old cord I had around)
1 female to female 3.5mm jack adapter
1 12V cig lighter splitter (two female 12V)
electrical tape
radio removal tools (see hidden cassette adapter post)
Already needed was a hidden cassette adapter
Links:
Jabra Freeway:
iPhone combo cord:
Radio Removal Tools:
iPhone Charger:
3.5mm female to female coupler:
12V socket splitter:
Koss 3.5mm in-line volume control:
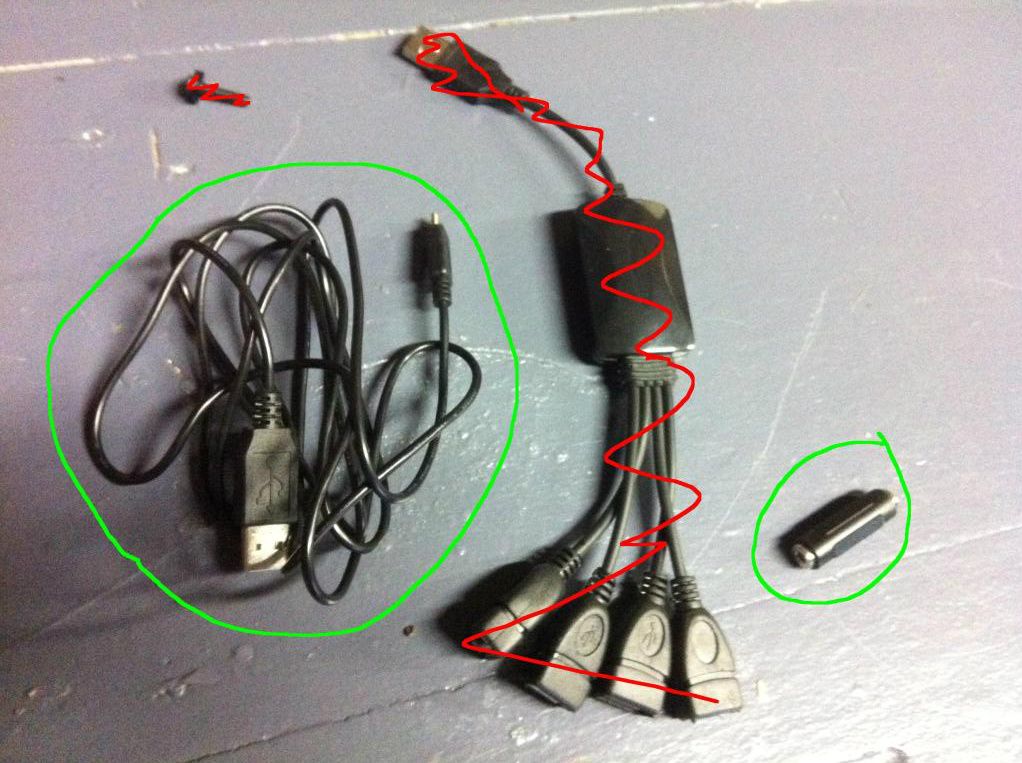
Here's the stuff (more or less). Don't mind the crossed out red stuff - that was experimental.
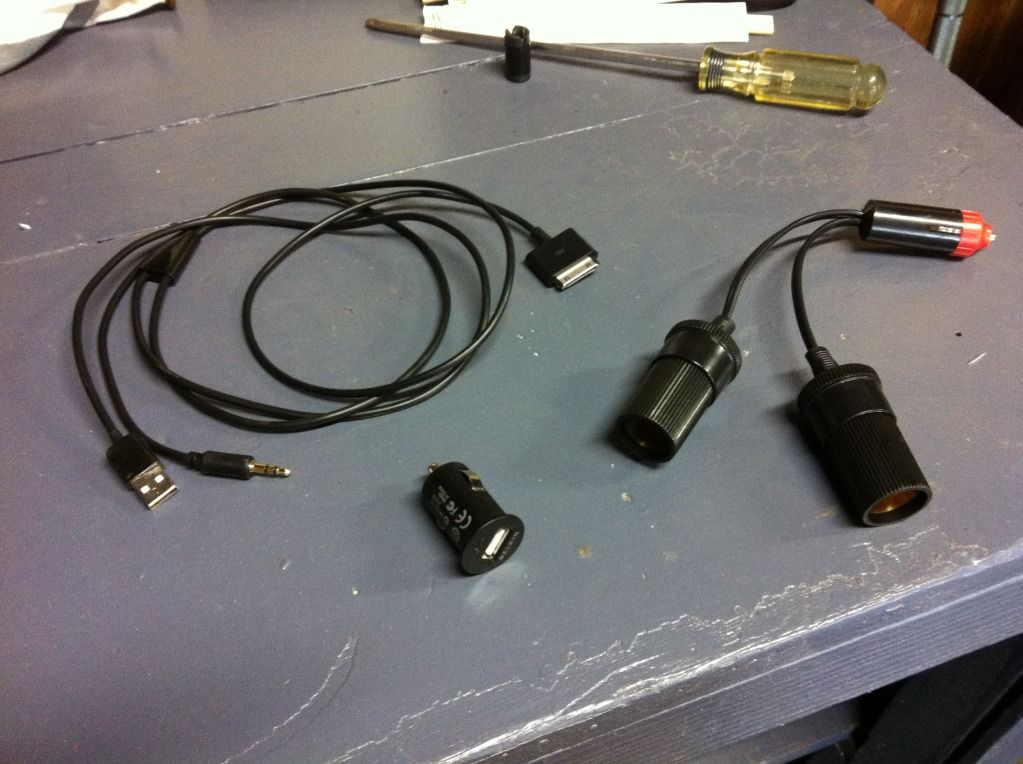
Need to cut both 12V sockets away from splitter. I do not use the male end so give yourself all the cord for the female sockets.
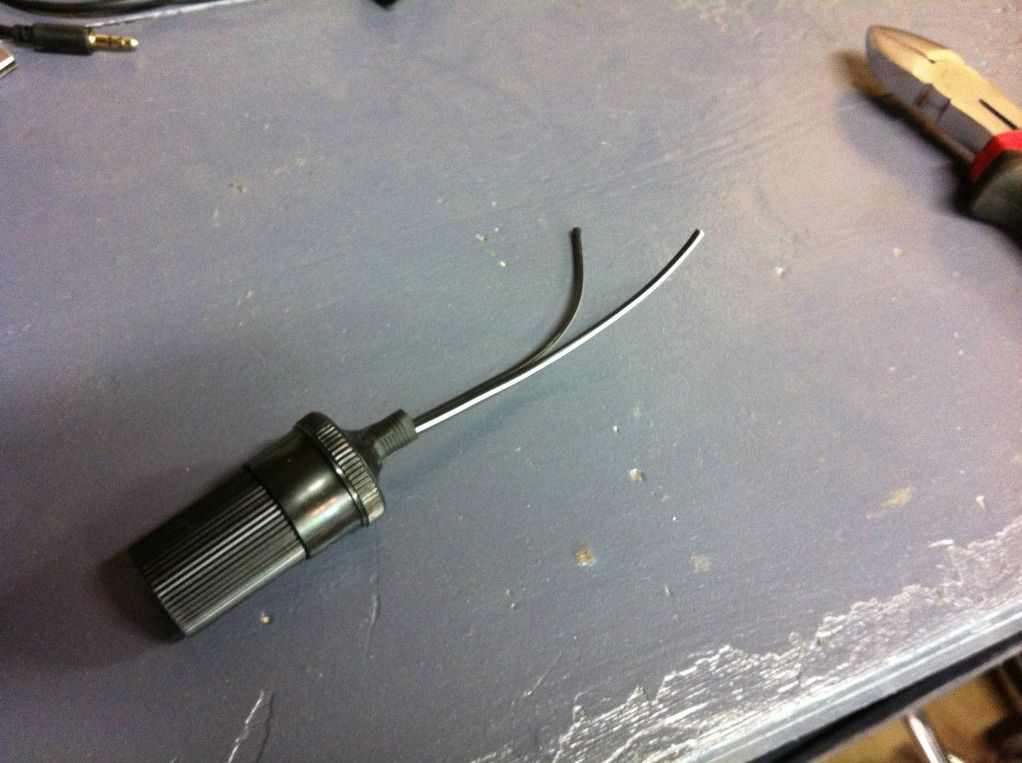
I started by pulling out the radio and finding the constant 12V positive and negative. Its the bigger red and brown wires.
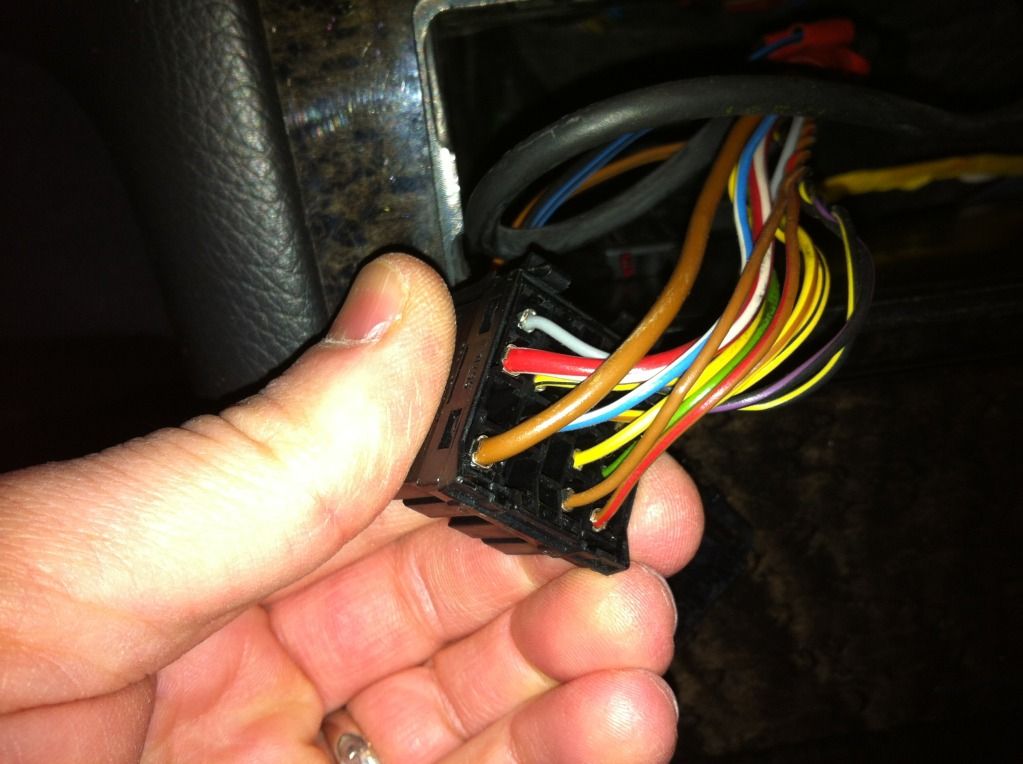
I needed to tap into them to add the two 12v female sockets. There are many ways to do this- I used butt splices. You can use clamp down connectors that require no cutting.
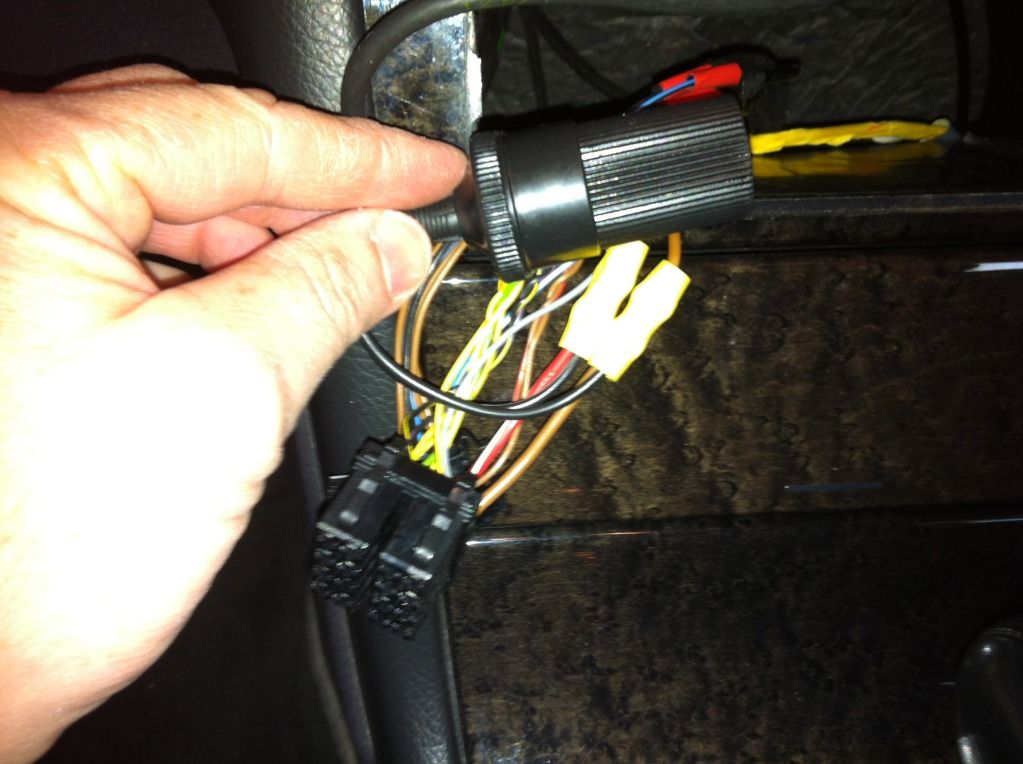
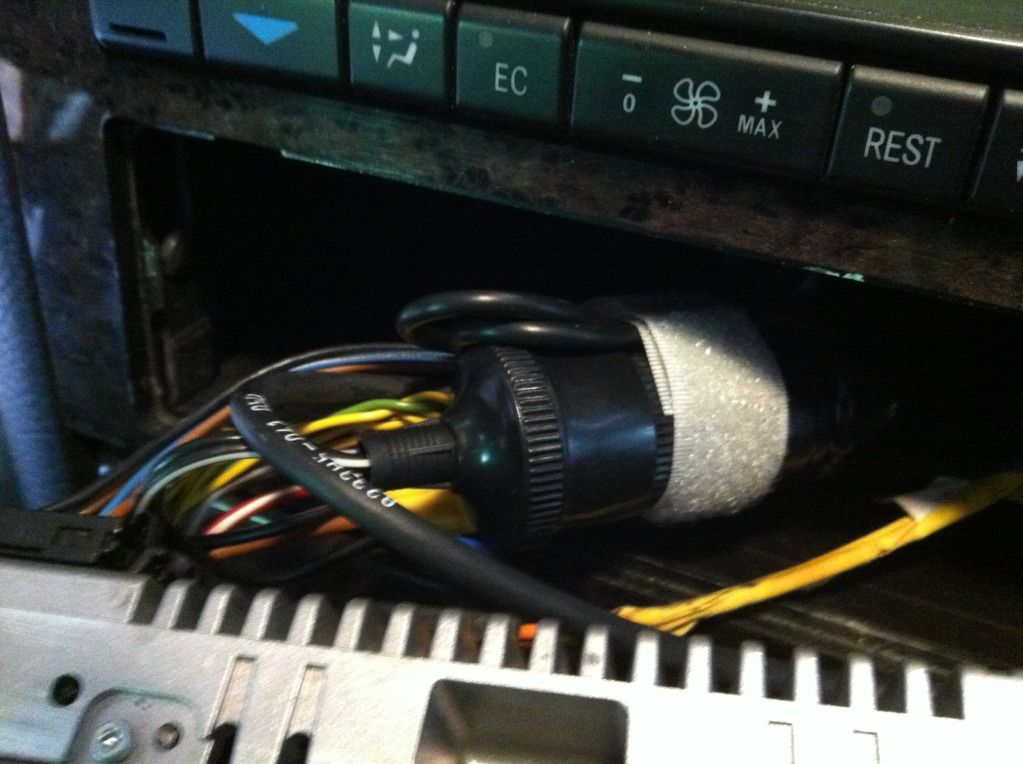
So, now splice in sockets, plug in USB adapters. Connect the aux in from the cassette adapter to the female coupler and the the other end to the iPhone cable. These cables will be kept completely in the center console. Only the iPhone 30pin end and the mini-USB connector (charger to the bluetooth) with come out of the center console. Tape all connections up to keep them together.
Tape up
Not very elegant, but it will all be neatly secured and tucked away when finished.
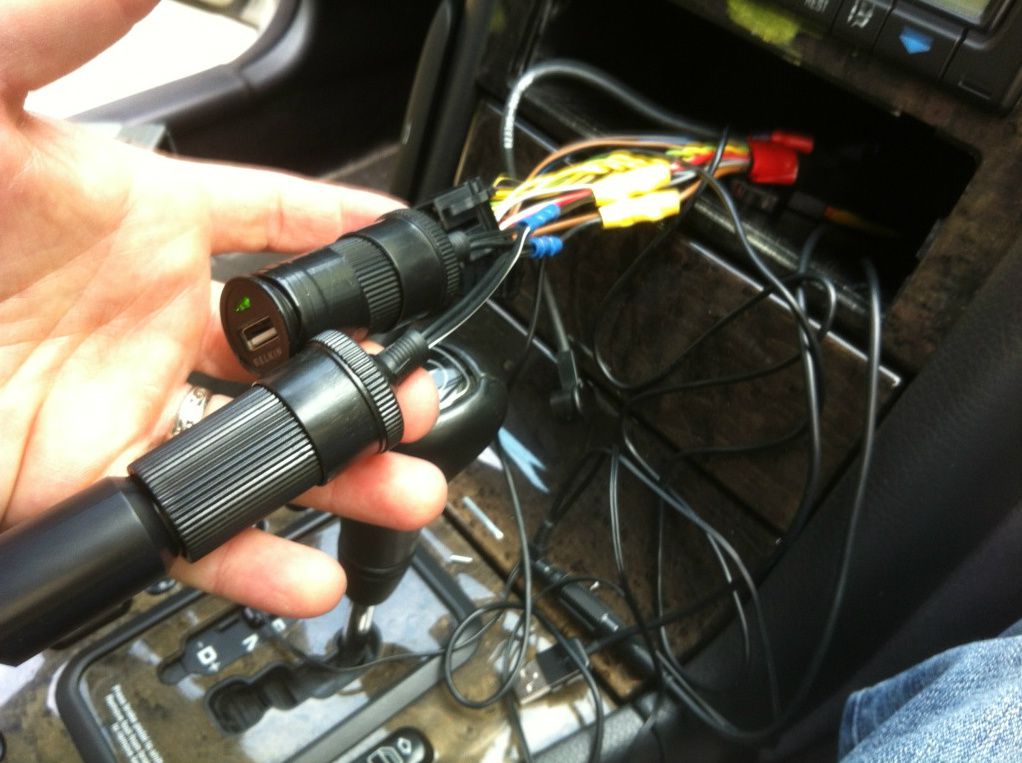
Make sure to tape up the cords into the usb chargers as well.
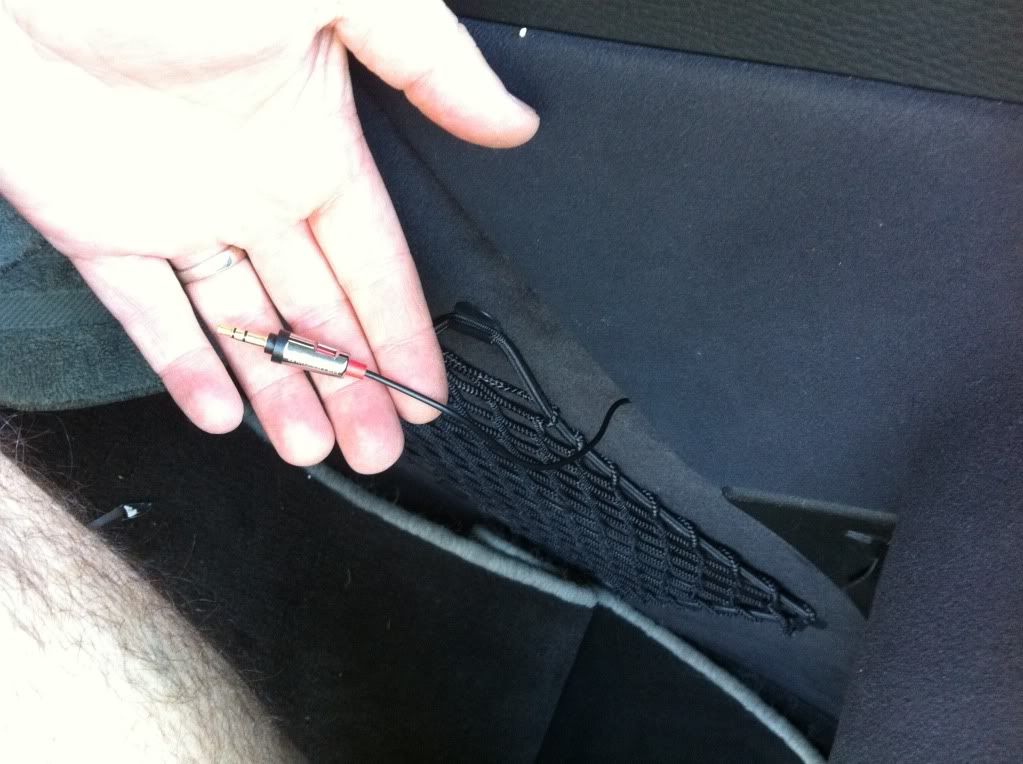
Fish cords through console side panels (in my case left for bluetooth, right for iPhone audio and charging). I stole this picture from my hidden cassette adapter install post. In this job, I removed the 3.5mm and fished the iPhone 30-pin connector through. I am just showing this to illustrate where about the pass through happens.
Lastly, I taped a donut magnet alongside the hidden cassette adapter exit point from my headunit. I got it out the right side. This greatly reduces the once in a while "chatter" interference from the iPhone when using the Aux in. The interference only happens when the iPhone goes off of 3G. In my area this is rare.
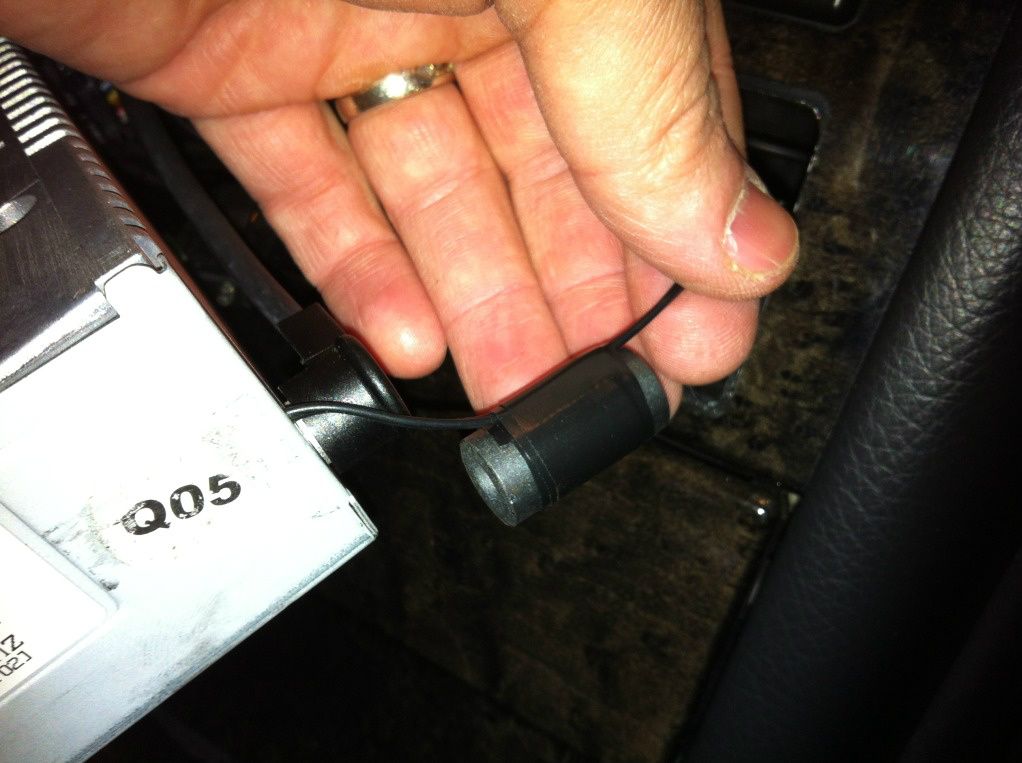
You can buy clamp around magnets. Once I find one, I will link it up.
Secure it all up either with tape or velcro straps, etc. Try to keep it slim.
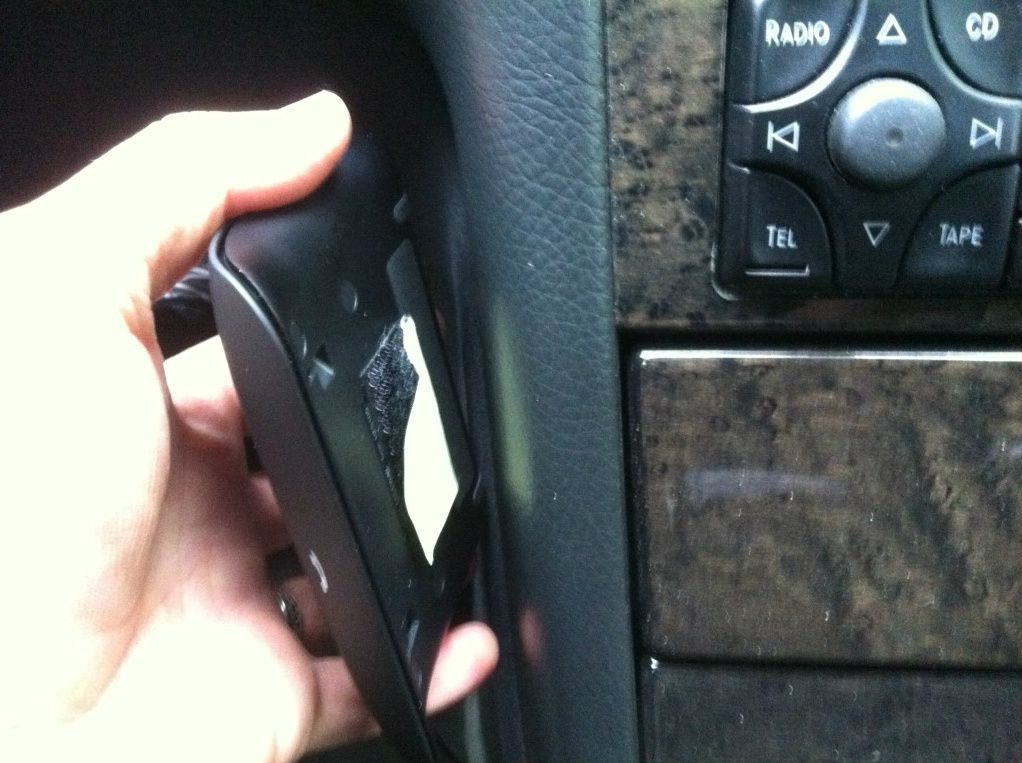
Reconnect head unit wires and carefully slide back in. Pull as much of the iPhone cable as you can through to the passenger footwell. For the usb cable to the bluetooth on the driver's side, just pull enough out to reach the bluetooth unit. Sliding the head unit in, I had to "tease" mine a bit, but eventually it just slid in. ALSO, when you go to remove the head unit again, it may take a little fussing to slide it all the way out as you have more stuff moving out with it. Just a note.
I mounted the Jabra Freeway with velcro. This allows me to zero-in on the best position.
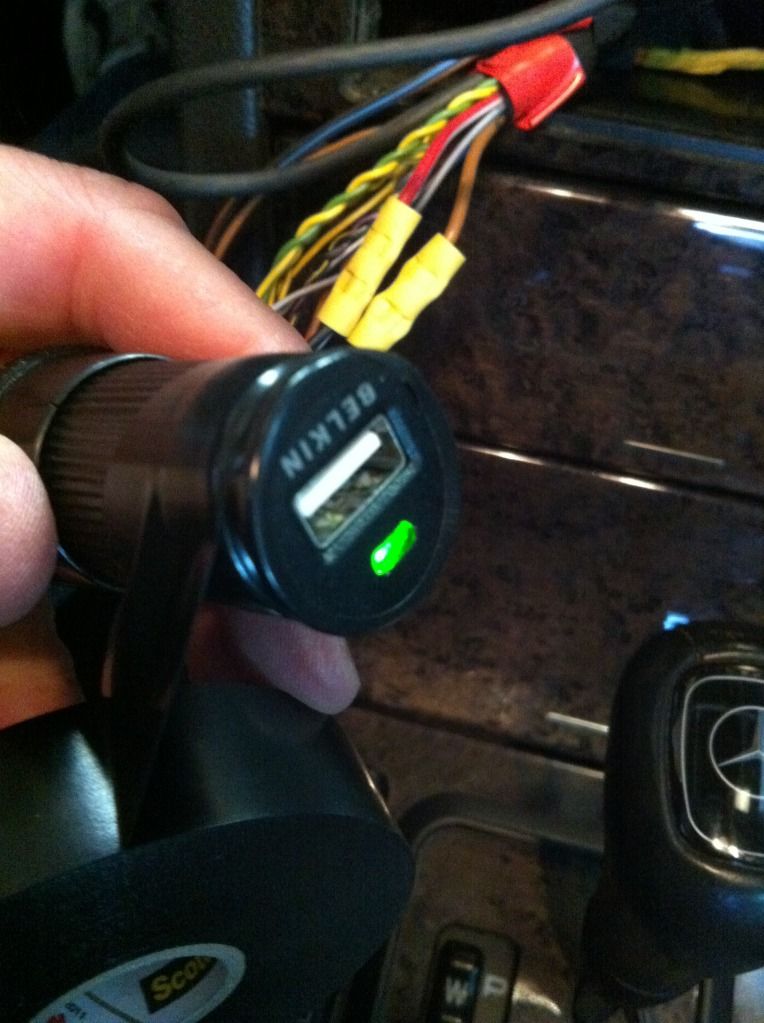
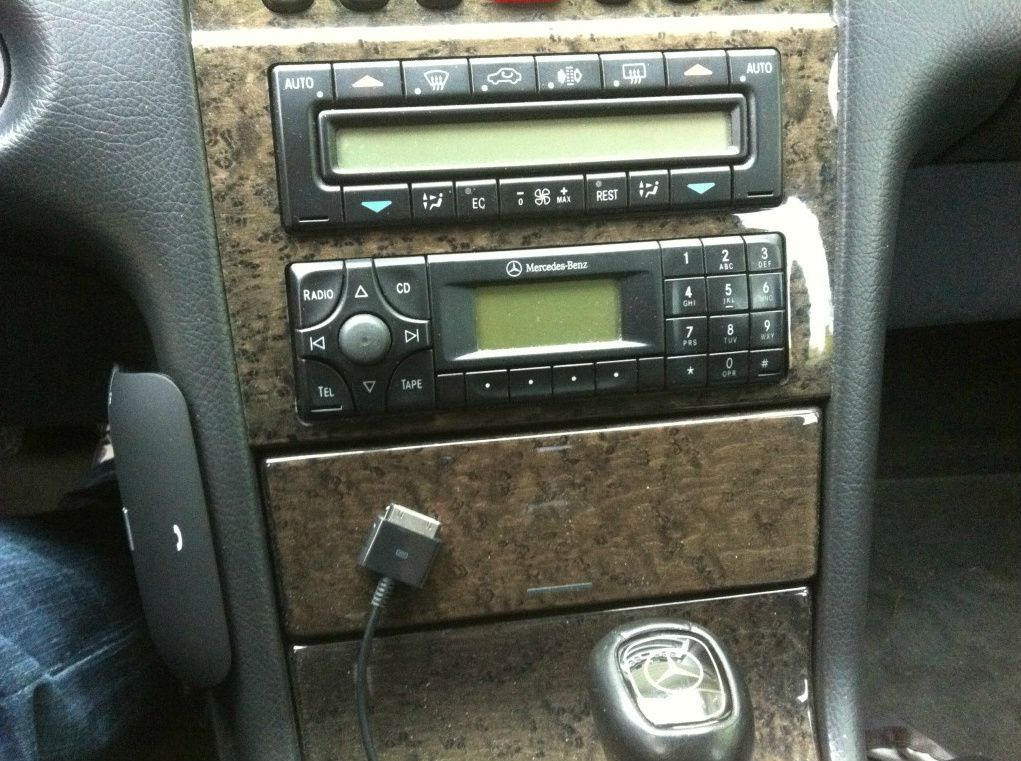
Enjoy your "integrated" stuff. The Jabra Freeway is on the left. Looks almost OEM. The power cable comes out underneath and just loops right into the side panel. Almost completely hidden. Remember your iPhone will now charge AND play through the aux in (tape) at the same time. Only one cable needed. Oh, and the bluetooth takes priority over other connections if you get a call so you will hear it on the hands-free every time. No worries. Also, your factory cig lighter is not used in front. Clean!
UPDATE 3/31/12
After using the system a while I have a few things to report:
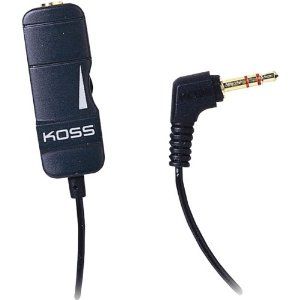
1. The cable to the iPhone is treated as a "Dock Connector" by the iPhone and does not allow for volume output control. While this works fine for docks, for cassette adapters, the audio output is too high and overloads the adapter causing distortion. The solution I am trying is this:
It is simply an in-line volume control with 3.5mm jacks (one female, one male). All I did was set it to bring the volume down a bit, taped it up, and shoved it in with the rest of the stuff. Problem solved.
2. The magnet alongside the aux in cable really helps cut down on the noise when playing audio and the phone goes off of 3G.
Although I did find the best handsfree speaker setup I have ever used, the Jabra Freeway, which also looked great, like all of them, I didn't want to have to take it out and charge it every two weeks. I also didn't want to have it on the visor- for one, using the visor makes using the speakerhone impossible, and two, every time I push a button on it, the person behind me is thinking I am signaling them.
Yeah, I'm fussy I guess.
So could I have it all? Yes.
I test fit the Jabra around the car, but I found an awesome place just to the right of my knee mounted vertically. The buttons and mics were in an excellent place and I could get a usb cable to it easily and almost completely hidden. Now I wouldn't need to take it out ever to charge it, it would always be charged.
What about the iPhone? Well I found a gem of a cable for the iPhone which had the standard 30-pin connector but on the other end, had a usb AND a 3.5mm headphone jack for aux out. Simple! So what I started with was:
1 Speakerphone with USB charger (not shown) and cord
1 iPhone combo cord usb and aux audio out
1 audio cord magnet (donut) optional (its can be seen by the screwdriver) (I extracted mine from an old cord I had around)
1 female to female 3.5mm jack adapter
1 12V cig lighter splitter (two female 12V)
electrical tape
radio removal tools (see hidden cassette adapter post)
Already needed was a hidden cassette adapter
Links:
Jabra Freeway:
iPhone combo cord:
Radio Removal Tools:
iPhone Charger:
3.5mm female to female coupler:
12V socket splitter:
Koss 3.5mm in-line volume control:
Here's the stuff (more or less). Don't mind the crossed out red stuff - that was experimental.
Need to cut both 12V sockets away from splitter. I do not use the male end so give yourself all the cord for the female sockets.
I started by pulling out the radio and finding the constant 12V positive and negative. Its the bigger red and brown wires.
I needed to tap into them to add the two 12v female sockets. There are many ways to do this- I used butt splices. You can use clamp down connectors that require no cutting.
So, now splice in sockets, plug in USB adapters. Connect the aux in from the cassette adapter to the female coupler and the the other end to the iPhone cable. These cables will be kept completely in the center console. Only the iPhone 30pin end and the mini-USB connector (charger to the bluetooth) with come out of the center console. Tape all connections up to keep them together.
Tape up
Not very elegant, but it will all be neatly secured and tucked away when finished.
Make sure to tape up the cords into the usb chargers as well.
Fish cords through console side panels (in my case left for bluetooth, right for iPhone audio and charging). I stole this picture from my hidden cassette adapter install post. In this job, I removed the 3.5mm and fished the iPhone 30-pin connector through. I am just showing this to illustrate where about the pass through happens.
Lastly, I taped a donut magnet alongside the hidden cassette adapter exit point from my headunit. I got it out the right side. This greatly reduces the once in a while "chatter" interference from the iPhone when using the Aux in. The interference only happens when the iPhone goes off of 3G. In my area this is rare.
You can buy clamp around magnets. Once I find one, I will link it up.
Secure it all up either with tape or velcro straps, etc. Try to keep it slim.
Reconnect head unit wires and carefully slide back in. Pull as much of the iPhone cable as you can through to the passenger footwell. For the usb cable to the bluetooth on the driver's side, just pull enough out to reach the bluetooth unit. Sliding the head unit in, I had to "tease" mine a bit, but eventually it just slid in. ALSO, when you go to remove the head unit again, it may take a little fussing to slide it all the way out as you have more stuff moving out with it. Just a note.
I mounted the Jabra Freeway with velcro. This allows me to zero-in on the best position.
Enjoy your "integrated" stuff. The Jabra Freeway is on the left. Looks almost OEM. The power cable comes out underneath and just loops right into the side panel. Almost completely hidden. Remember your iPhone will now charge AND play through the aux in (tape) at the same time. Only one cable needed. Oh, and the bluetooth takes priority over other connections if you get a call so you will hear it on the hands-free every time. No worries. Also, your factory cig lighter is not used in front. Clean!
UPDATE 3/31/12
After using the system a while I have a few things to report:
1. The cable to the iPhone is treated as a "Dock Connector" by the iPhone and does not allow for volume output control. While this works fine for docks, for cassette adapters, the audio output is too high and overloads the adapter causing distortion. The solution I am trying is this:
It is simply an in-line volume control with 3.5mm jacks (one female, one male). All I did was set it to bring the volume down a bit, taped it up, and shoved it in with the rest of the stuff. Problem solved.
2. The magnet alongside the aux in cable really helps cut down on the noise when playing audio and the phone goes off of 3G.
Last edited by Schweinhund; 04-03-2012 at 01:45 PM.

 03-29-2012, 08:56 PM
#3
MBWorld Fanatic!
Join Date: Jan 2010
Location: MICHIGAN
Posts: 1,073
Likes: 0
Received 0 Likes
on
0 Posts
2001 E55 - 2008 CLS63 -2016 F-150
this is very kool setup .. def.. wish i had it in my ride .. seems like every usb cig plug is to small or doesnt catch right connection somhow . the ipod plug , does it charge only or charge and play ?
03-30-2012, 09:36 AM
#4
Super Member
Thread Starter
05-13-2012, 01:47 PM
#5
Newbie

Join Date: Jun 2011
Posts: 11
Likes: 0
Received 0 Likes
on
0 Posts
2006 E55 Wagon
Thanks for the instructions Scweinhund. I did this set up in 2006 E55 Wagon (W211) and made a couple of changes along the way:
1. There isn't enough space under the CD changer and behind the ashtray to put both cigarette lighter females. In order to get around this problem, I spliced the two connections into the OEM cigarette wire and then ran them by the shifter to the armrest glove box. There is ample space below the glove box to put all the connections and wires.
2. When routing the wires by the shifter, keep them to the LEFT of the shifter. There is ample space to route the wires through the holes provided for the shifter wiring harness so it is a nice clean install.
3. The armrest glove box already has an opening under the cup holders to drain spills to the underside of the car. Use this opening to route all your wires in to the armrest.
4. The iphone charger connector used here will not work on the iphone 4S. I ended up adding a third female cigarette lighter socket and used the car charger that came with my iphone. I now have a car charger for the iphone 4S and another charger for the ipd which hooks up with the aux line in.
My W211 E55 did not have the factory bluetooth puck and MB wanted an arm and a leg to do the retrofit. For ~$120 and 2 hours of my time I got the same thing.
05-28-2013, 10:51 PM
#6
Newbie
Join Date: May 2013
Posts: 5
Likes: 0
Received 0 Likes
on
0 Posts
2001 E430, 2006 R350, 2011 C300W4
Schweinhund (love your user name!) I have a question about a comment you make near the end:
Oh, and the bluetooth takes priority over other connections if you get a call so you will hear it on the hands-free every time.
How does this work? Are you saying that if you are listening to music on the radio/iPod that somehow the Jabra takes priority? Any clarification would be welcome.
Another question: The Jabra supports Bluetooth streaming of audio and also has the ability to transmit via FM to your head unit. Any comments on how this works?
Last edited by chriswhitworth; 05-28-2013 at 10:53 PM.
05-30-2013, 01:09 AM
#7
Super Member
Thread Starter
Schweinhund (love your user name!) I have a question about a comment you make near the end:
Oh, and the bluetooth takes priority over other connections if you get a call so you will hear it on the hands-free every time.
How does this work? Are you saying that if you are listening to music on the radio/iPod that somehow the Jabra takes priority? Any clarification would be welcome.
Another question: The Jabra supports Bluetooth streaming of audio and also has the ability to transmit via FM to your head unit. Any comments on how this works?
Oh, and the bluetooth takes priority over other connections if you get a call so you will hear it on the hands-free every time.
How does this work? Are you saying that if you are listening to music on the radio/iPod that somehow the Jabra takes priority? Any clarification would be welcome.
Another question: The Jabra supports Bluetooth streaming of audio and also has the ability to transmit via FM to your head unit. Any comments on how this works?
The bluetooth (once paired the first time to a phone), will automatically connect and "stand by" until a call comes in, or is initiated. At that time the phone pauses any playback thought the cable audio connection (primary) and routes audio through the bluetooth unit until the call is concluded and then resumes playback (most of the time.)
The Jabra fell out of favor with me not long after the write up and I've been using a Blueant Supertooth 3 with good results.
The FM playback was gimmicky and did not work well at all.
The cable connection via the cassette adapter (only buy the Philips from Amazon) work phenomenally well.
Hidden Cassette Adapter Install (again, the Monster is crap. Get the Philips).
-Pig Dog
Last edited by Schweinhund; 05-30-2013 at 01:15 AM.


