
Hidden Cassesette Adapter Install
 02-22-2012, 09:52 AM
#1
Super Member
Thread Starter

Hidden Cassesette Adapter Install
** Can a merciful moderator please correct my misspelling in the thread title to "Cassette" please? ****
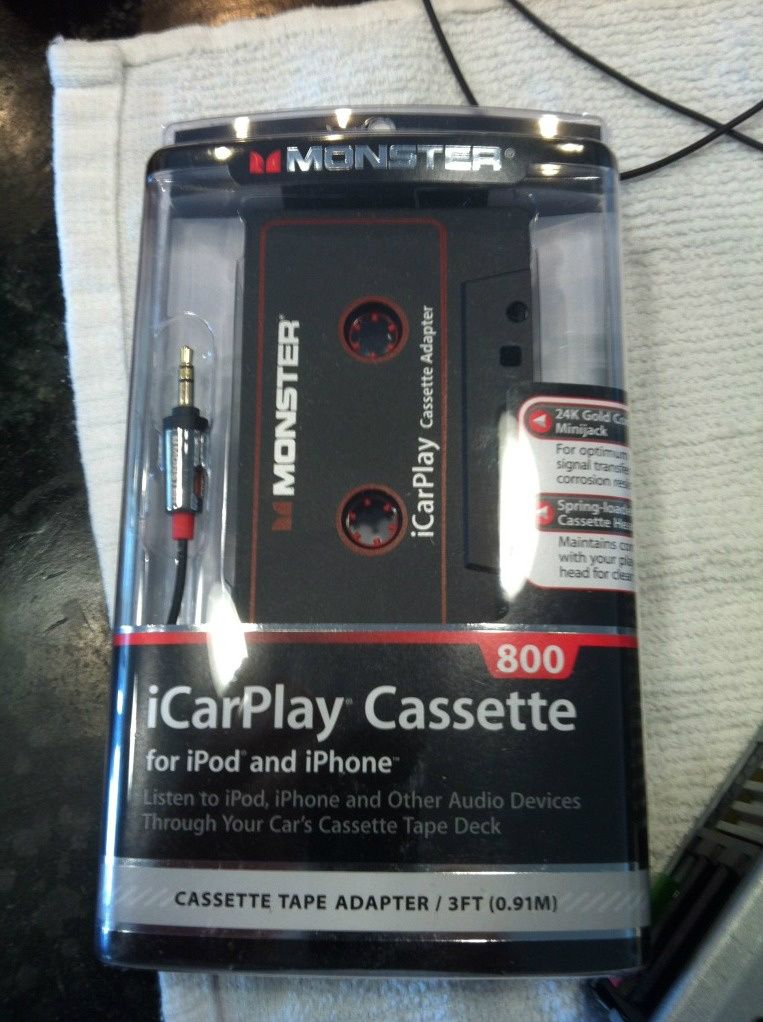
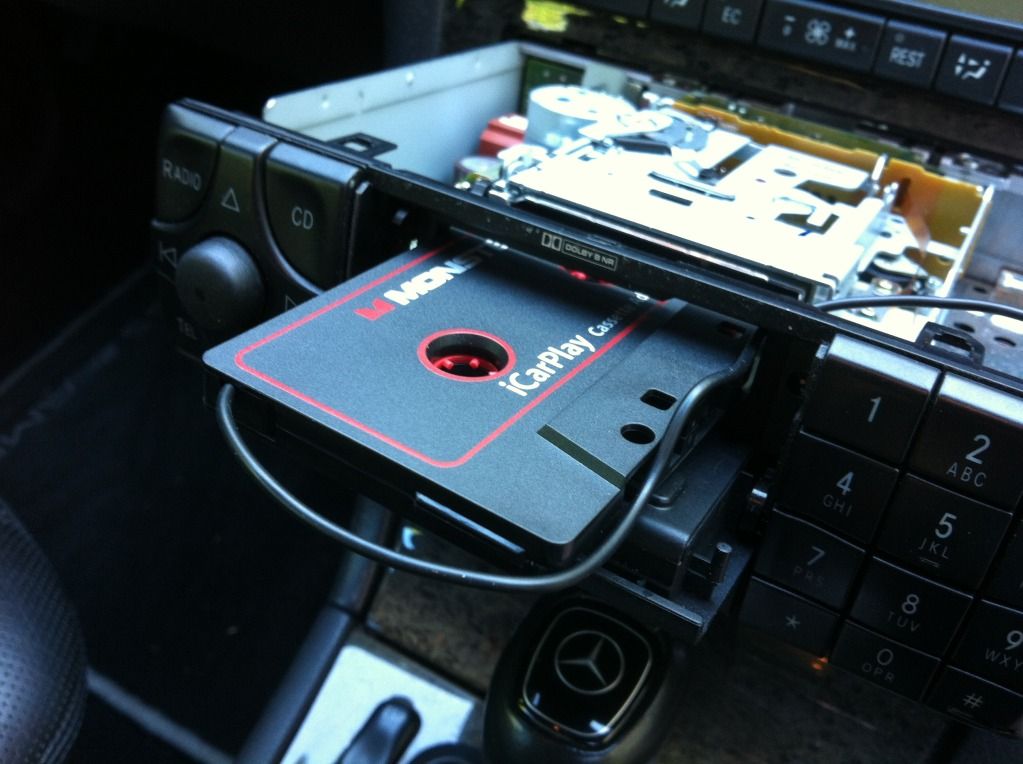
Sorry its taken a long while. I have mixed feelings about it. I have tried two adapters. The Sony had very good sound quality but started making a rotating noise after a while. The current one, by Monster, doesn't make noise, but it sounds just OK. Regardless, this is a great way to get your audio source into your head unit without losing your CD and costing only about $20.
**** MAKE SURE YOU HAVE YOUR RADIO CODE ****
1. Start with getting an adapter. It should have a cord on it at least 4 feet long. 6-feet is best. Mine was too short and I needed to install an extender. You can find a 3 foot extender for a few bucks.
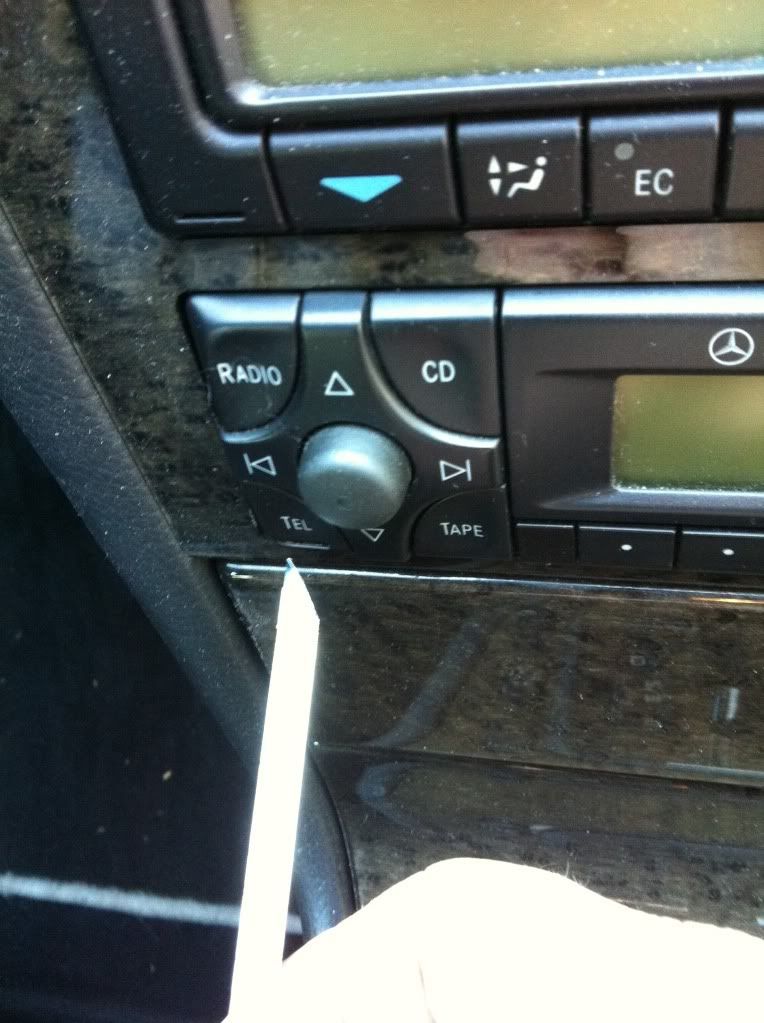
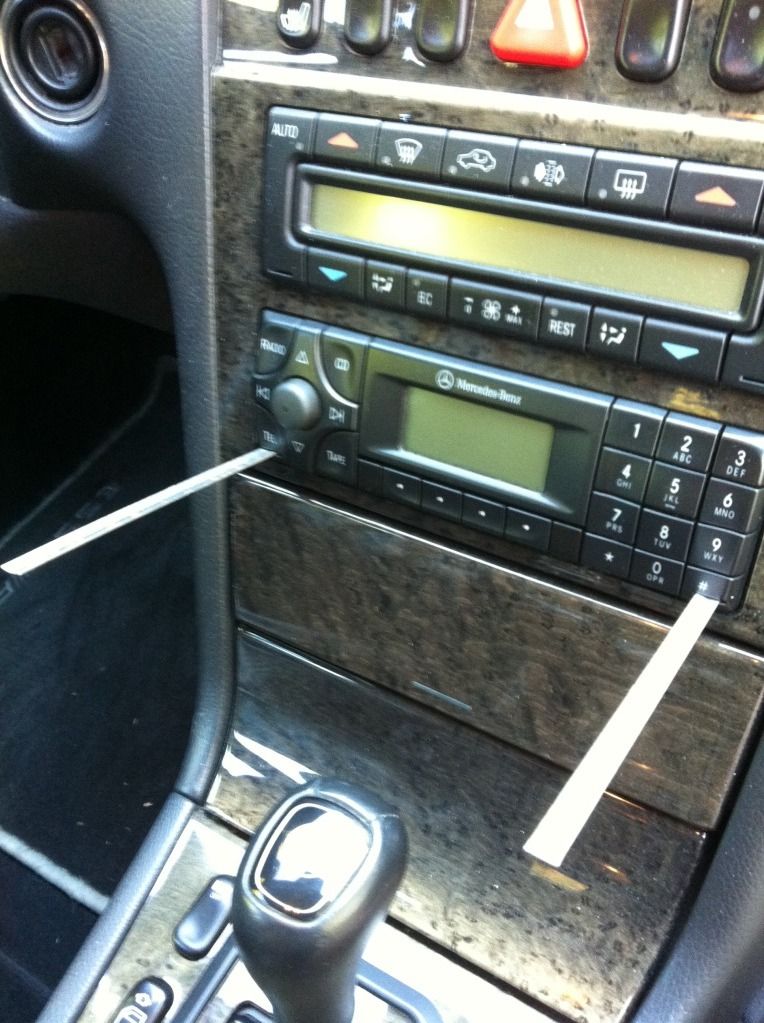
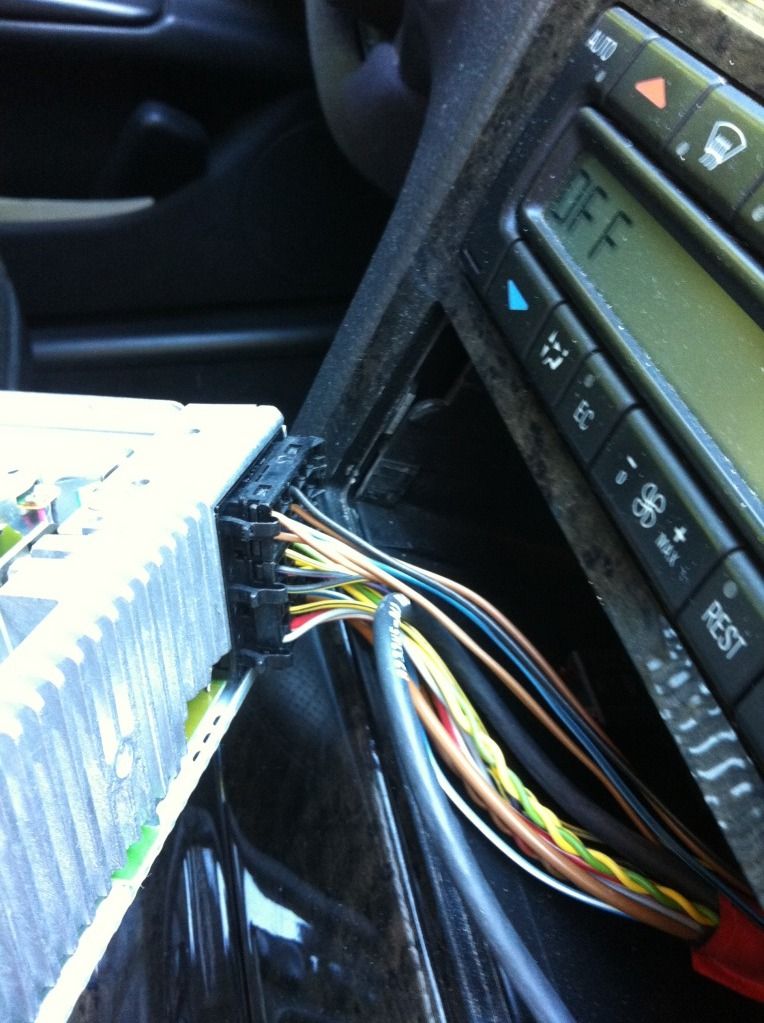
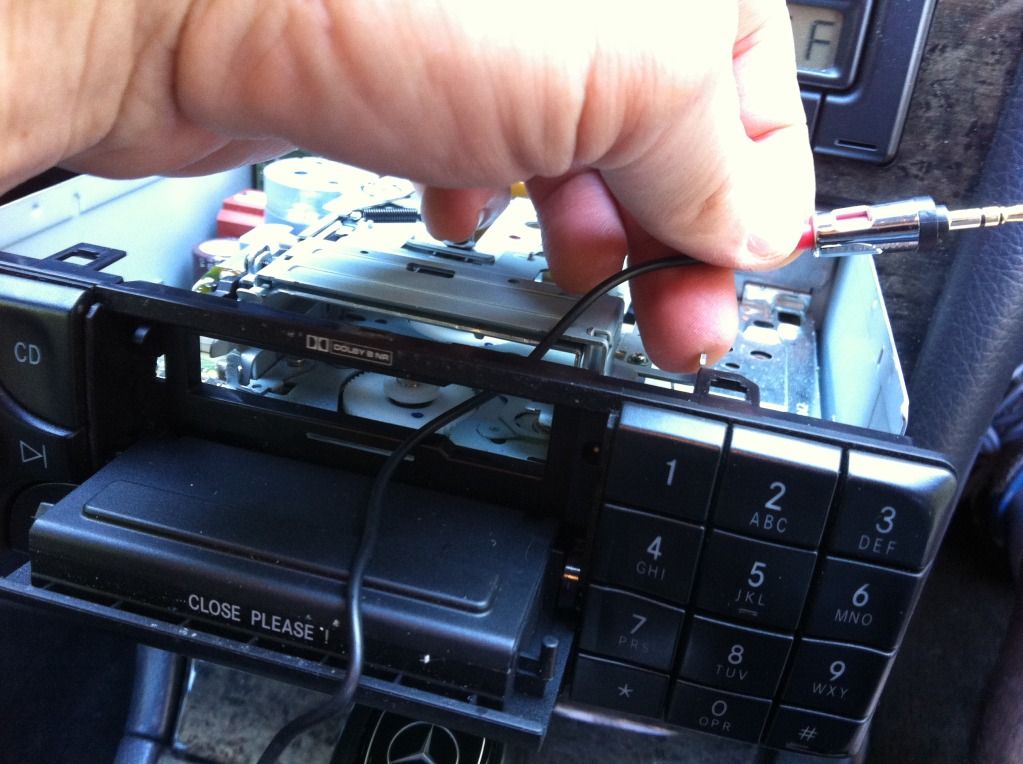
2. FIRST: Turn on the radio and eject the cassette to OPEN the cassette door. Power down the radio. (My pics have the door closed, I had to go back and do it). Remove head unit with two tools by inserting them into the slots as shown. I made them by taking the hanging rails out of a hanging file folder and cutting with snips at an angle. That's it. As you slide them in, the angled end engages a clip and pulls the clips inward to allow you to take slide the radio out towards you. So, leave the tools inserted and pull the head unit towards you. Once you get it past the clips, you can remove the removal tools. Then pull it out further and unplug the wire connectors on the back.
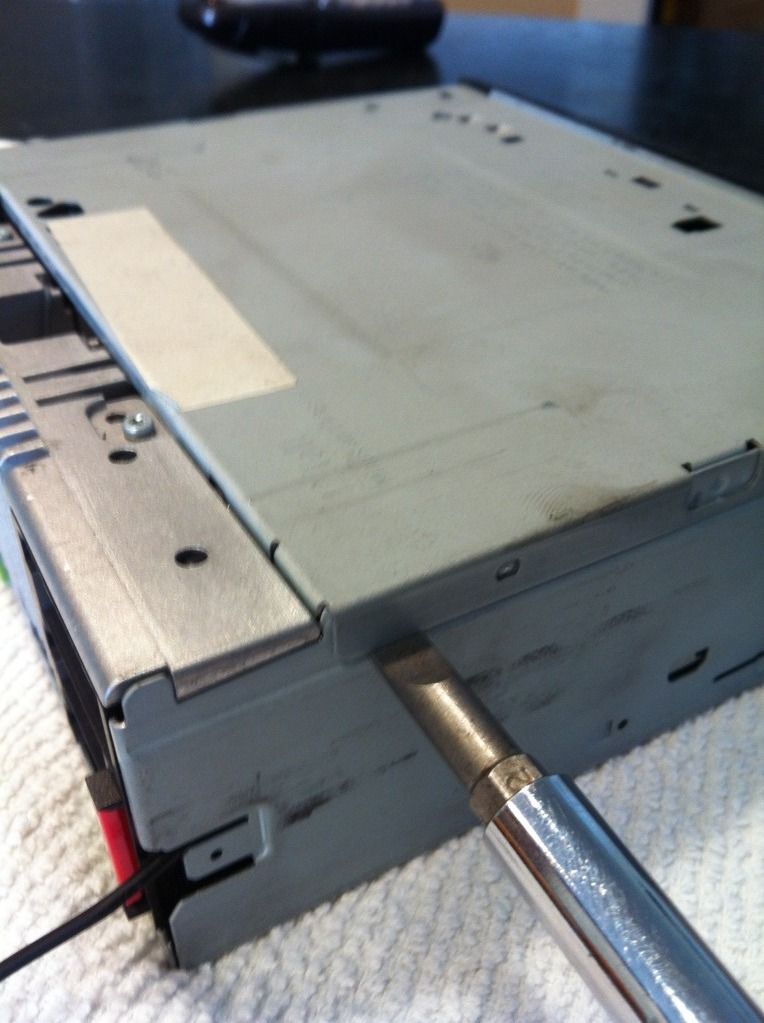
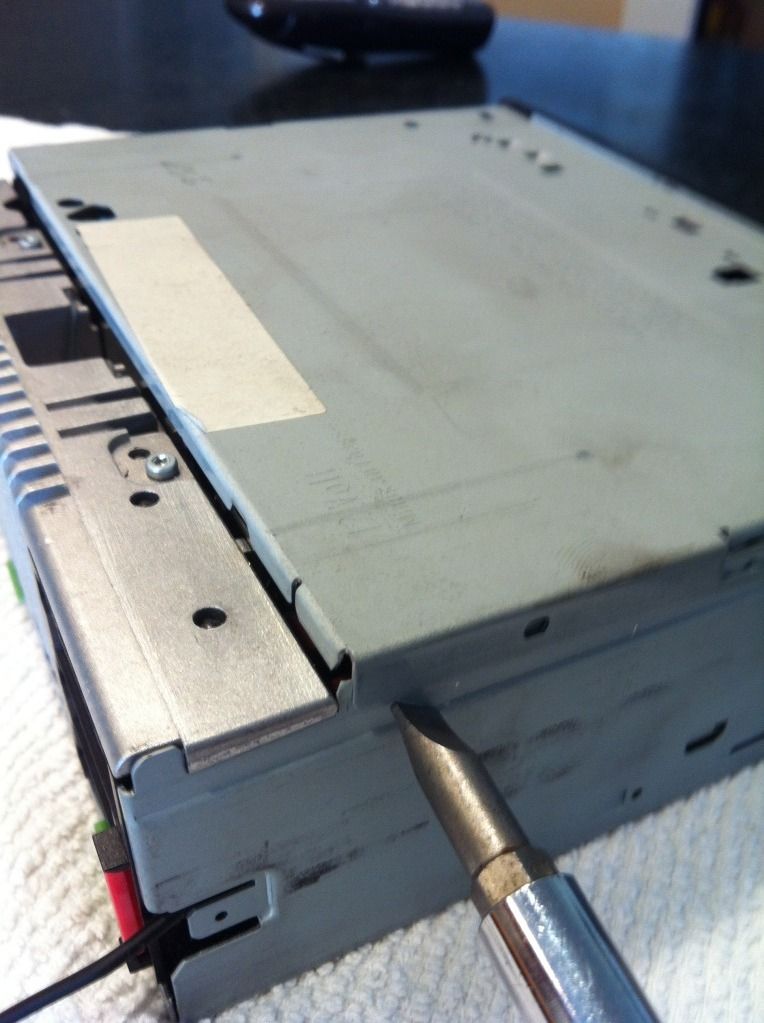
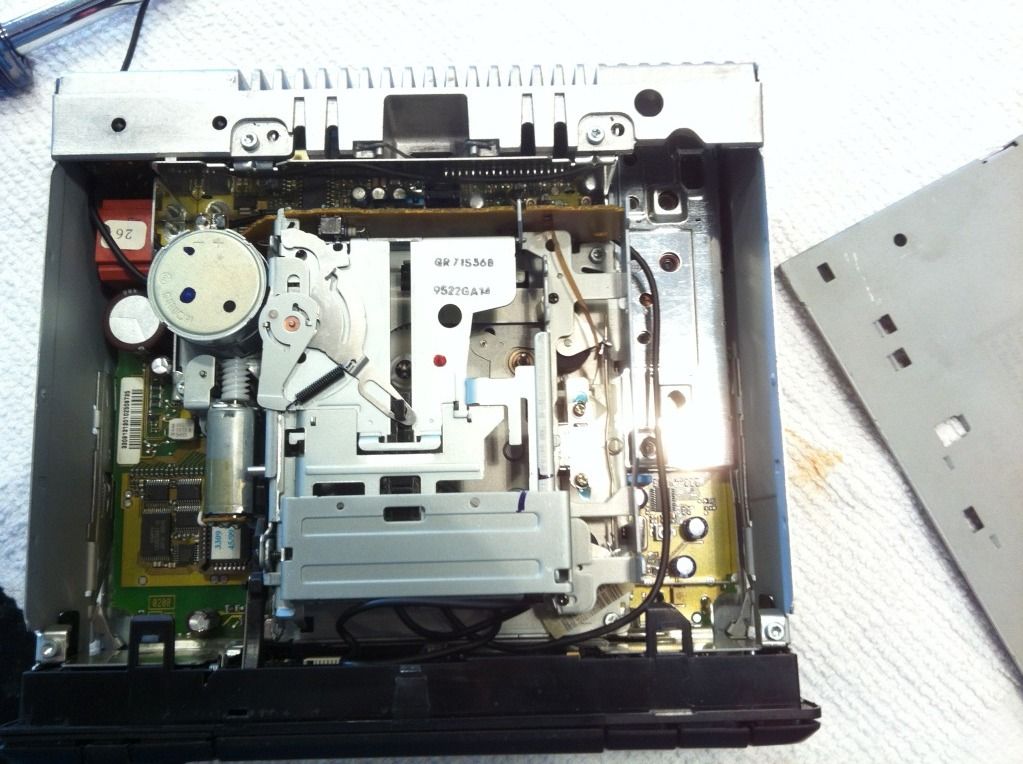
3. Take the head unit to a table or bench and pop the top off by twisting a flat head screwdriver.
4. Route the adapter wire through the front of the mechanism to the RIGHT SIDE of the of the cassette loading cage, NOT through the cage.
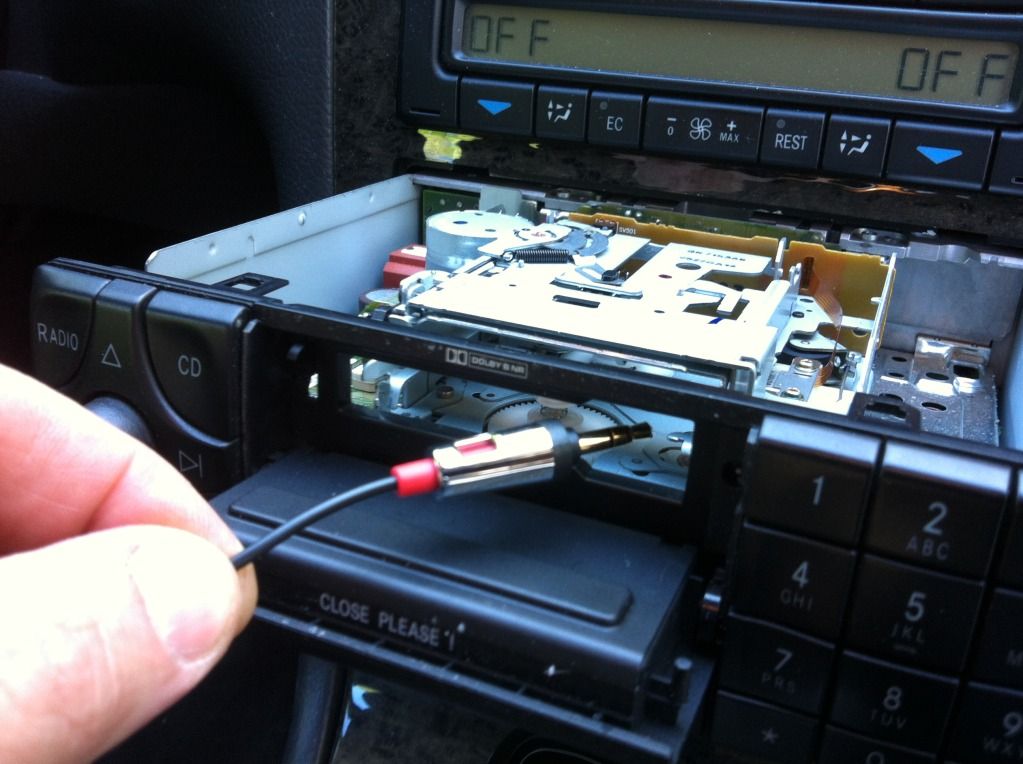
5. Get most of the cord through and leave just enough to slide the cassette adapter into the cage. This is in the case you need to remove the adapter, you will have enough cord to do it.
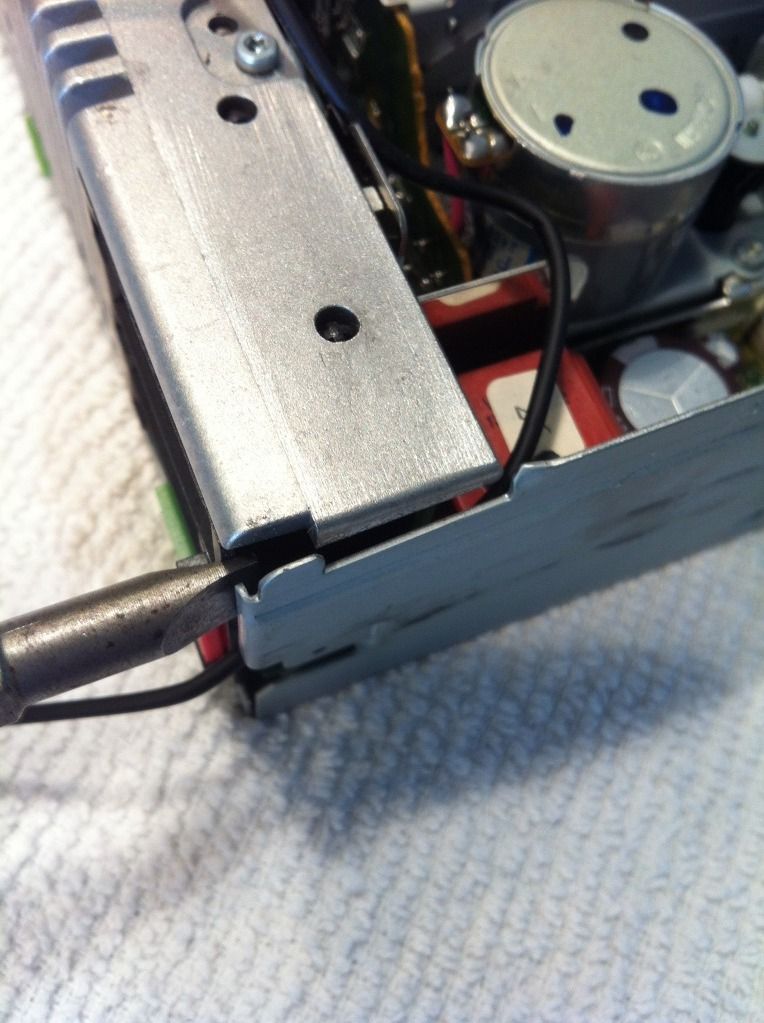
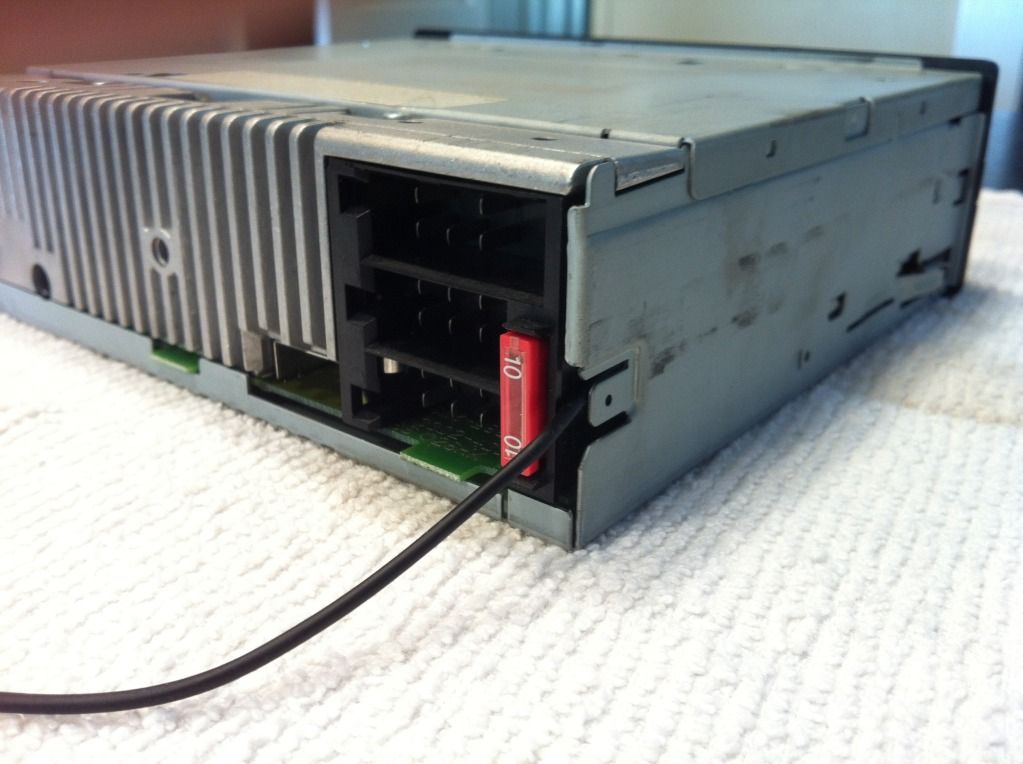
6. Route the cord through the unit, to the right of the cage, behind the cage, and out the small slot in the back of the unit on the left. Use the screwdriver to separate the side case from the back a little to drop the cord through.
7. Put the cover back on by pressing and take it over to the car.
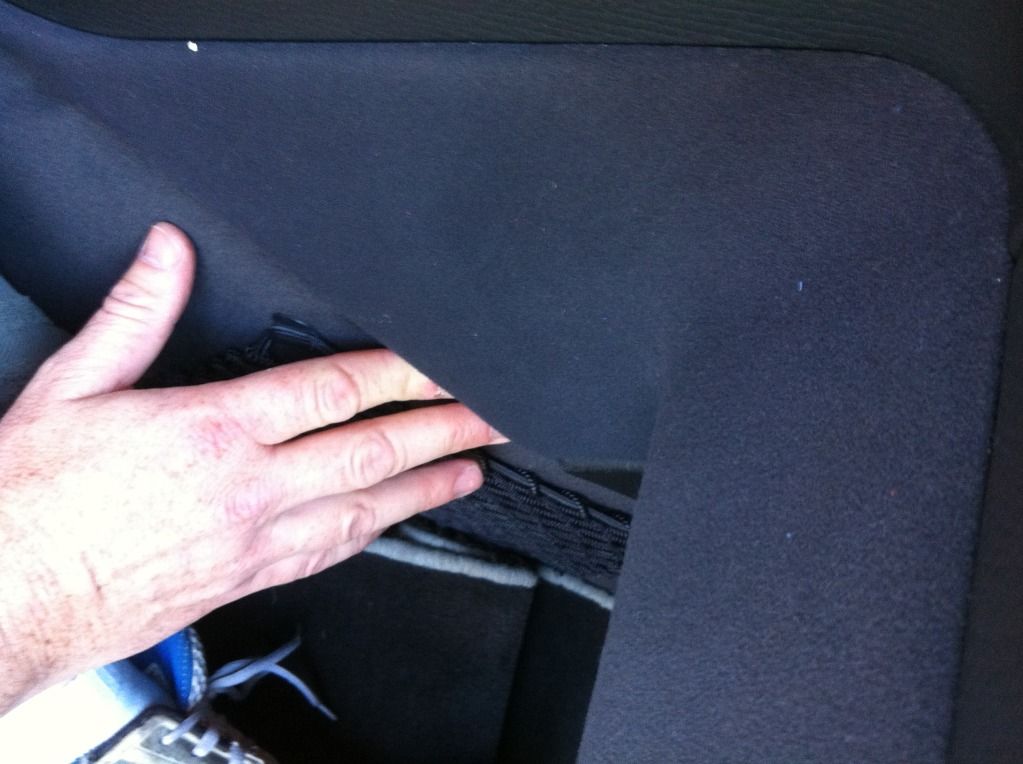
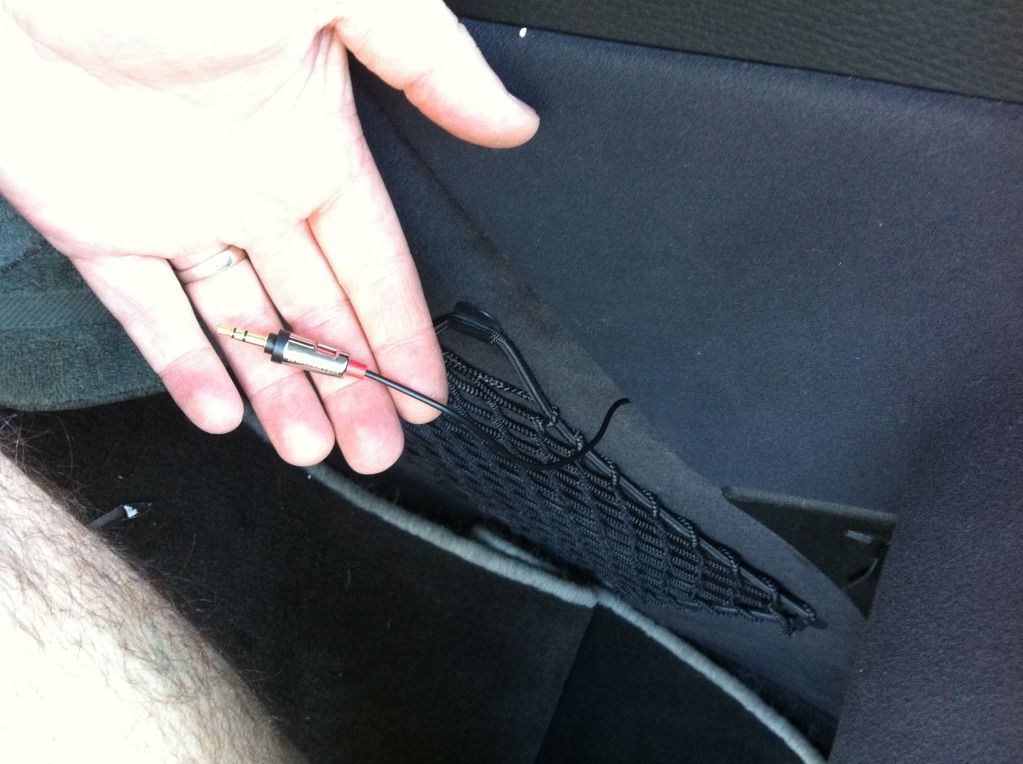
8. Route the 3.5mm cord and plug out the passenger side foot well between the two interior panels. They just pull apart enough.
9. Start to slide the unit in, plug in all cables/connectors.
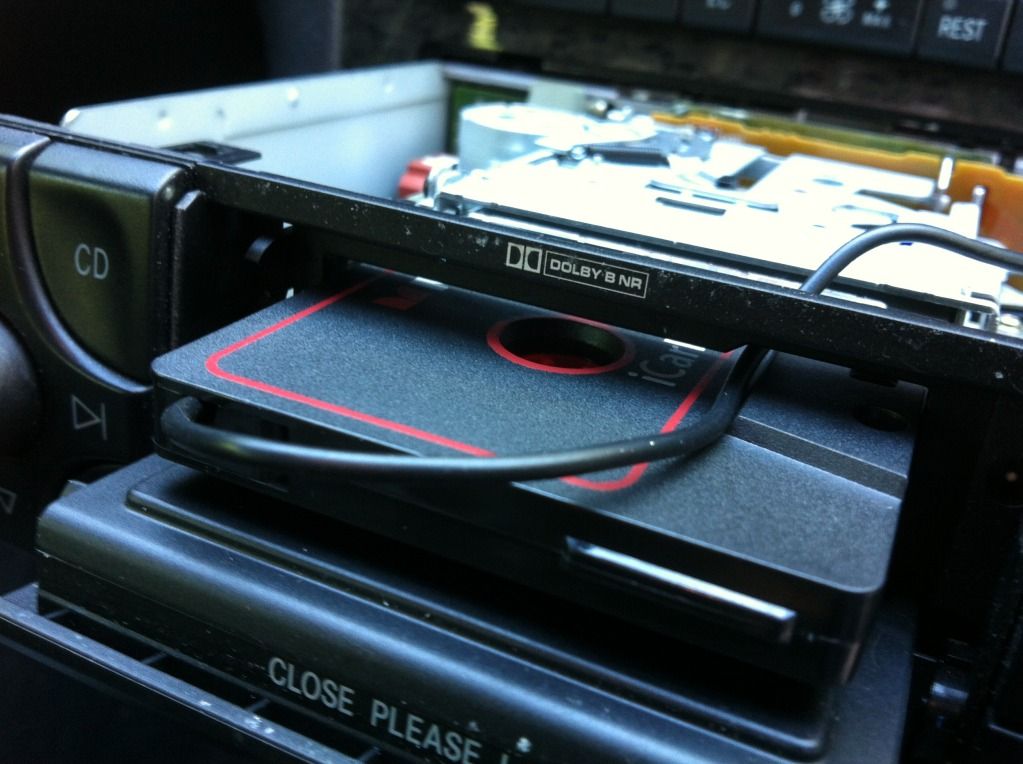
10. In one move, carefully align the adapter cord so that it will go in with the adapter when the head unit loads the cassette. It's tricky and takes a little fussing. Try not to get it jammed up.
11. Finish pushing the unit in, enter your code and enjoy. Remember the TAPE function has it own audio settings so you can custom adjust the settings for that mode.
Sorry its taken a long while. I have mixed feelings about it. I have tried two adapters. The Sony had very good sound quality but started making a rotating noise after a while. The current one, by Monster, doesn't make noise, but it sounds just OK. Regardless, this is a great way to get your audio source into your head unit without losing your CD and costing only about $20.
**** MAKE SURE YOU HAVE YOUR RADIO CODE ****
1. Start with getting an adapter. It should have a cord on it at least 4 feet long. 6-feet is best. Mine was too short and I needed to install an extender. You can find a 3 foot extender for a few bucks.
2. FIRST: Turn on the radio and eject the cassette to OPEN the cassette door. Power down the radio. (My pics have the door closed, I had to go back and do it). Remove head unit with two tools by inserting them into the slots as shown. I made them by taking the hanging rails out of a hanging file folder and cutting with snips at an angle. That's it. As you slide them in, the angled end engages a clip and pulls the clips inward to allow you to take slide the radio out towards you. So, leave the tools inserted and pull the head unit towards you. Once you get it past the clips, you can remove the removal tools. Then pull it out further and unplug the wire connectors on the back.
3. Take the head unit to a table or bench and pop the top off by twisting a flat head screwdriver.
4. Route the adapter wire through the front of the mechanism to the RIGHT SIDE of the of the cassette loading cage, NOT through the cage.
5. Get most of the cord through and leave just enough to slide the cassette adapter into the cage. This is in the case you need to remove the adapter, you will have enough cord to do it.
6. Route the cord through the unit, to the right of the cage, behind the cage, and out the small slot in the back of the unit on the left. Use the screwdriver to separate the side case from the back a little to drop the cord through.
7. Put the cover back on by pressing and take it over to the car.
8. Route the 3.5mm cord and plug out the passenger side foot well between the two interior panels. They just pull apart enough.
9. Start to slide the unit in, plug in all cables/connectors.
10. In one move, carefully align the adapter cord so that it will go in with the adapter when the head unit loads the cassette. It's tricky and takes a little fussing. Try not to get it jammed up.
11. Finish pushing the unit in, enter your code and enjoy. Remember the TAPE function has it own audio settings so you can custom adjust the settings for that mode.
Last edited by Schweinhund; 02-23-2012 at 09:26 AM.

 02-24-2012, 04:51 PM
#4
MBWorld Fanatic!
03-14-2012, 12:42 AM
#5
Super Member
Thread Starter
Glad to contribute to the excellent board here!
Update: I GOT RID of that CRAPPY Monster adapter and put in this one:
This thing is as good as its ratings! Quiet and the sound quality is superb! I will be giving it a solid five stars over on Amazon soon. I am ecstatic. Plus, the cord is very thin and long enough. I found I could route this one out the RIGHT side of the head unit, just above the antenna connector. Very happy right now. GREAT AUDIO QUALITY.
 10-14-2014, 12:02 AM
#7
Super Member
Thread Starter


