
••• Project Stock to Awe •••

 10-09-2008, 01:25 PM
#276
Super Member
Thread Starter
Just some work done so far for your amusement...
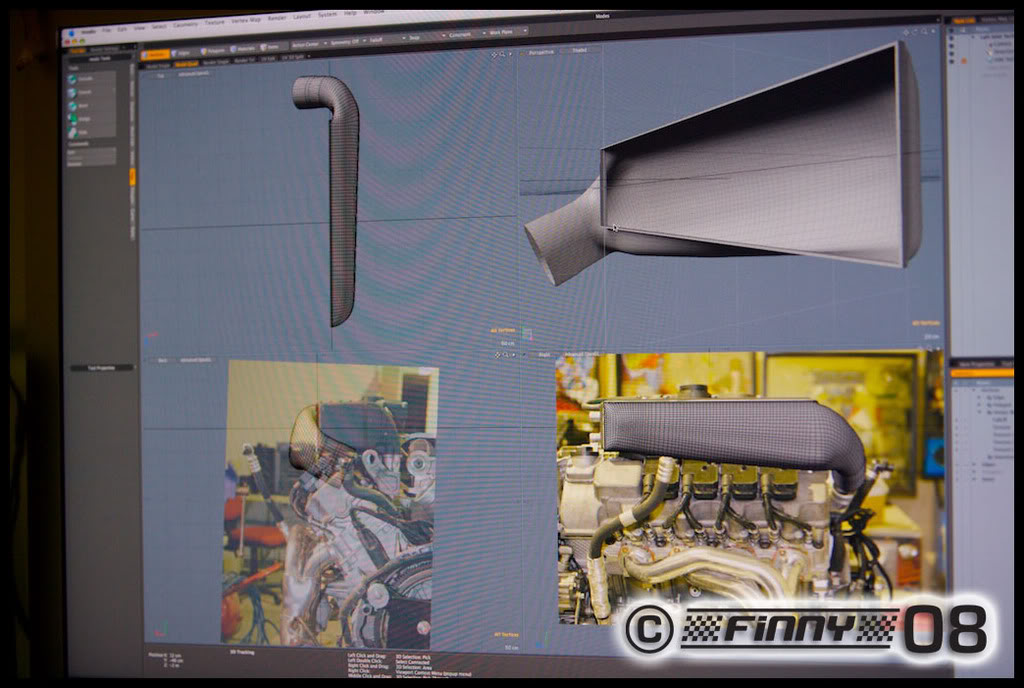
The original SLR cooler inlet plumbing was to wide to fit in our 55's bay so via a Mac 3D cad application I designed an alliterative inlet that wouldn't be restrictive due to loss of space.
The solution was to swing the main cavity section down and ramp it towards the front of the engine preserving the same flow characteristics. After taking some reference shots and then placing them into the CAD app with some measurements I then constructed a new inlet manifold to fit like a glove.
I personally don't like Frankinstine alloy tig weld box styles so thats why I went with this method instead.
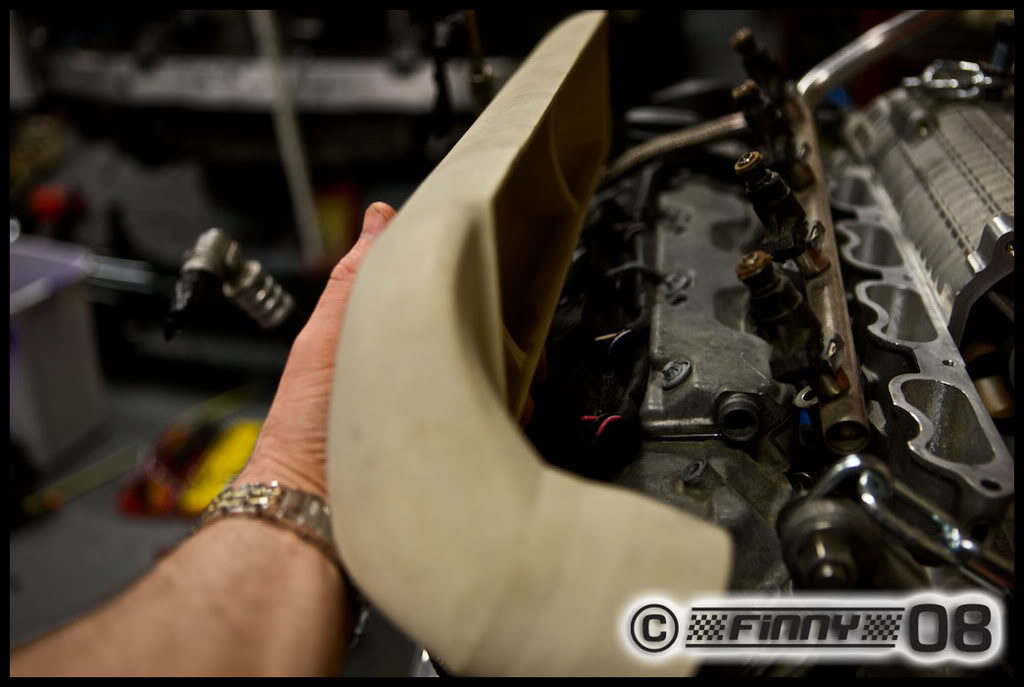
After being happy with the computer model it was then saved out and sent to a company who specializes in 3D printing. The printed models were returned for mock fitting and trimming.
From these models I'll have casts made to be welded on the original coolers and then finished off with the factory style powder coating.
Check out the following shots...
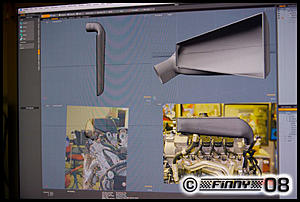
Reference images in MODO 3D.
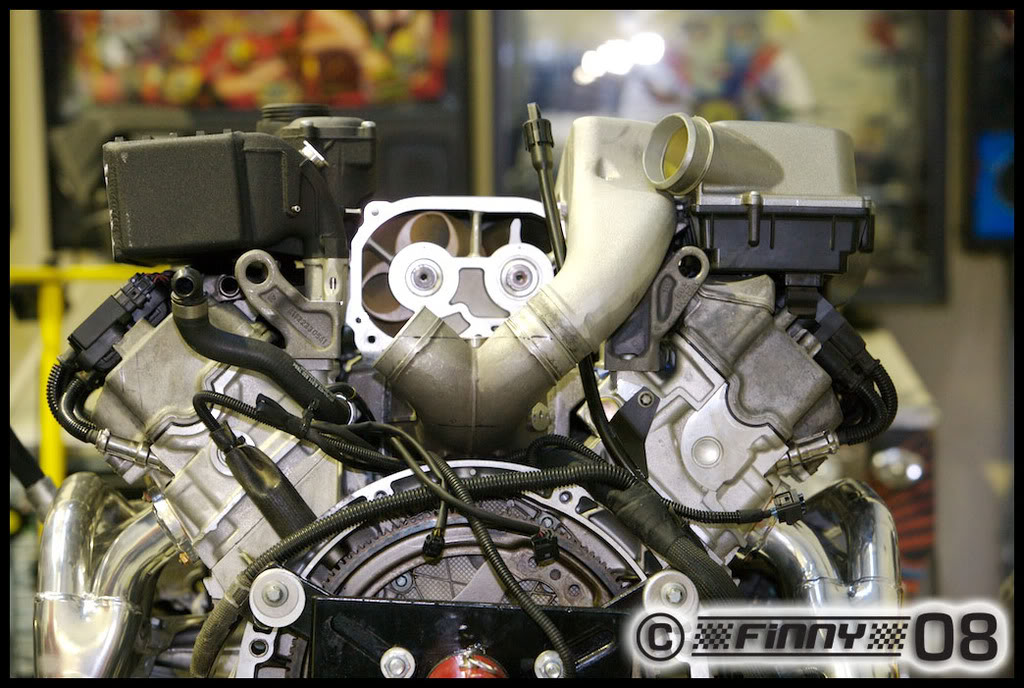
Must take advantage of this space here without restricting flow. Vertical line represents bay wall.
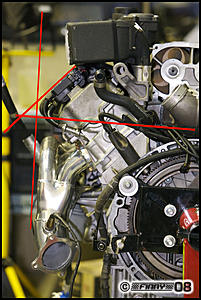
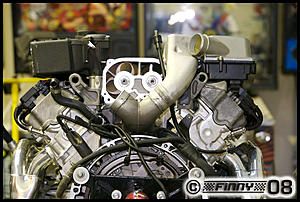
Looking forward, note the stock filter inlet location in relation to bay wall.

Approximate location.
The two join sections will be removed from final casting.

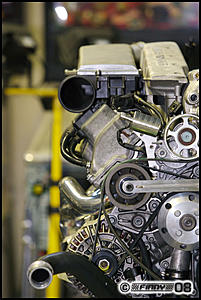
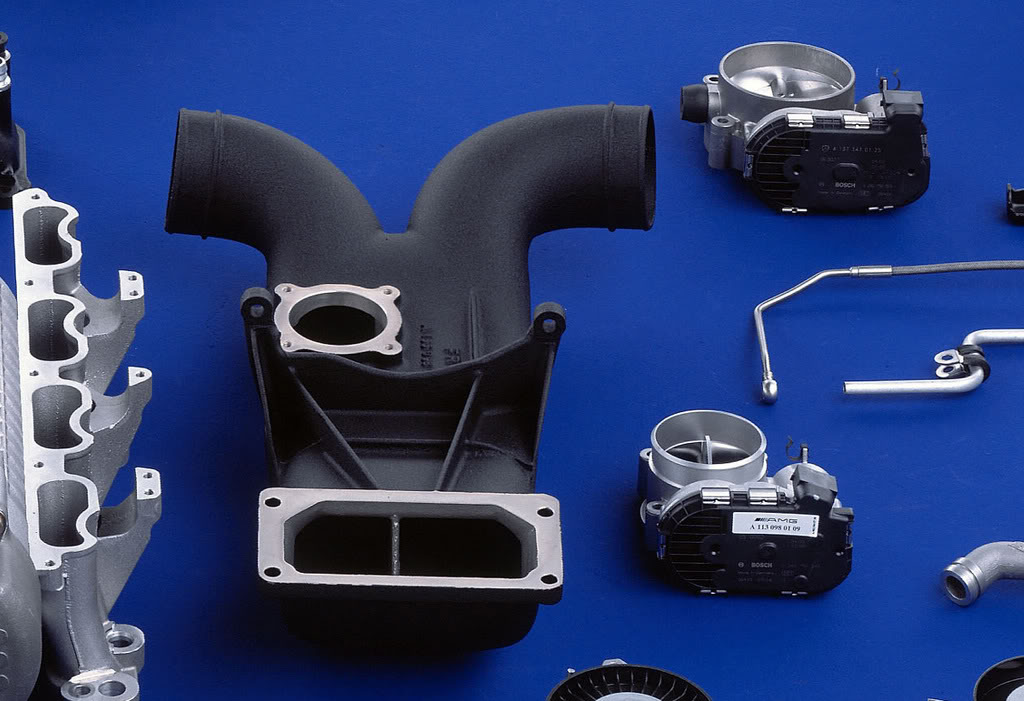
The restrictive stock core will be replaced with a hollow box section along with the removal of the temperature sensor mounting boss. (just to the right)
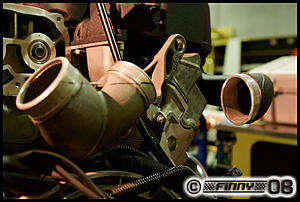
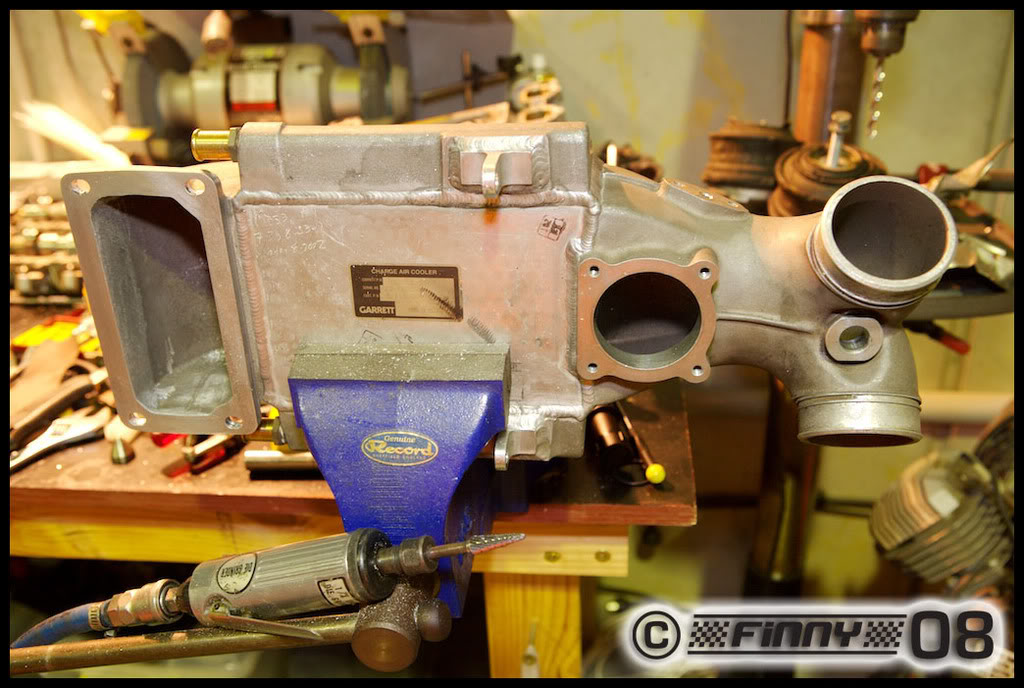
Original SLR inlet entering horizontal.
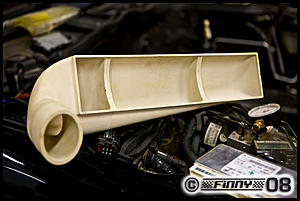
Comparison, Stock Right and chopped SLR Left.
No cooling restriction here...
More latter...
The original SLR cooler inlet plumbing was to wide to fit in our 55's bay so via a Mac 3D cad application I designed an alliterative inlet that wouldn't be restrictive due to loss of space.
The solution was to swing the main cavity section down and ramp it towards the front of the engine preserving the same flow characteristics. After taking some reference shots and then placing them into the CAD app with some measurements I then constructed a new inlet manifold to fit like a glove.
I personally don't like Frankinstine alloy tig weld box styles so thats why I went with this method instead.
After being happy with the computer model it was then saved out and sent to a company who specializes in 3D printing. The printed models were returned for mock fitting and trimming.
From these models I'll have casts made to be welded on the original coolers and then finished off with the factory style powder coating.
Check out the following shots...
Reference images in MODO 3D.

Must take advantage of this space here without restricting flow. Vertical line represents bay wall.

Looking forward, note the stock filter inlet location in relation to bay wall.
Approximate location.

The two join sections will be removed from final casting.
The restrictive stock core will be replaced with a hollow box section along with the removal of the temperature sensor mounting boss. (just to the right)

Original SLR inlet entering horizontal.
Comparison, Stock Right and chopped SLR Left.
No cooling restriction here...
More latter...
 10-09-2008, 02:12 PM
#277
MBWorld Fanatic!
Join Date: Dec 2007
Location: Sin City
Posts: 1,862
Likes: 0
Received 4 Likes
on
3 Posts
2005 E55 AMG - - 2005 SL55 AMG - - - - - - 2006 SLK55 AMG - - - - - - 2013 Ducati Diavel AMG -
Excellent work Finny!
Does the SLR have a "hollow box section" underneath its supercharger?
Does the SLR have a "hollow box section" underneath its supercharger?
 10-09-2008, 02:38 PM
#280
Super Member
Thread Starter
10-09-2008, 02:43 PM
#281
MBWorld Fanatic!
Finny...thank you for the info and the pics. That is fantastic work!
 10-09-2008, 03:27 PM
#284
Super Member
Thread Starter
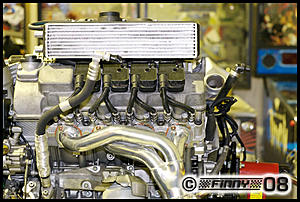
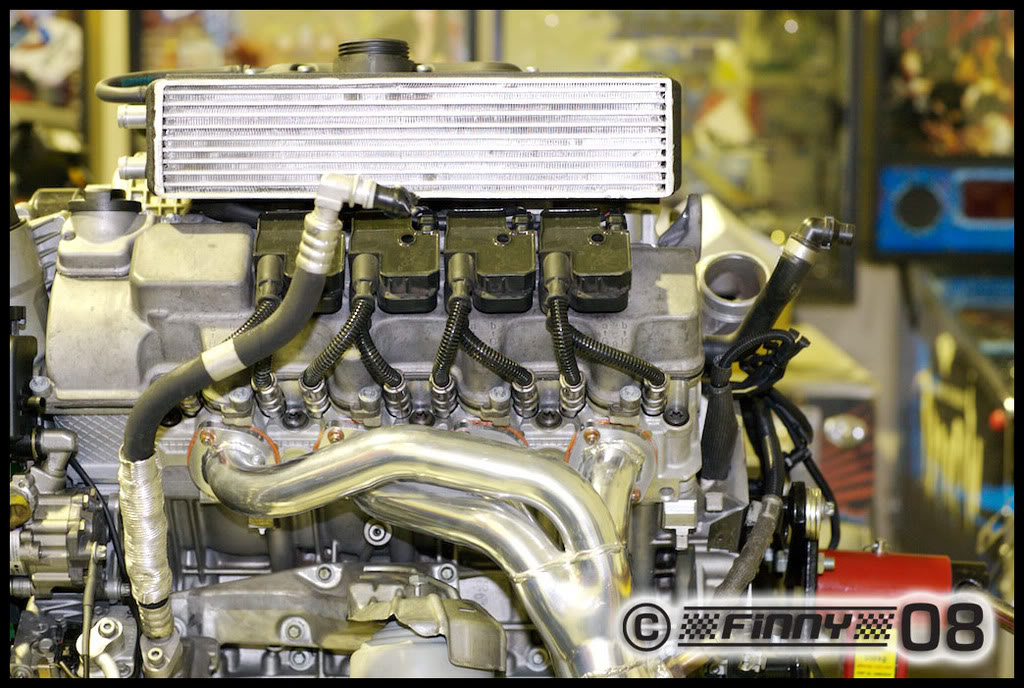
The existing front cooler core under the front bumper is quite small IMO thats why I made my one the same size as the radiator and very thin to get the heat out as fast as possible... More area and water pressure = more efficient induction cooling.
You could get away with the stock system re plumbed and an extra pump but if you're going to invest in these babies it would be counter productive. My setup will have the big area radiator installed.
 10-09-2008, 03:36 PM
#286
MBWorld Fanatic!
Join Date: Dec 2007
Location: Sin City
Posts: 1,862
Likes: 0
Received 4 Likes
on
3 Posts
2005 E55 AMG - - 2005 SL55 AMG - - - - - - 2006 SLK55 AMG - - - - - - 2013 Ducati Diavel AMG -
The existing front cooler core under the front bumper is quite small IMO thats why I made my one the same size as the radiator and very thin to get the heat out as fast as possible... More area and water pressure = more efficient induction cooling.
You could get away with the stock system re plumbed and an extra pump but if you're going to invest in these babies it would be counter productive. My setup will have the big area radiator installed.
You could get away with the stock system re plumbed and an extra pump but if you're going to invest in these babies it would be counter productive. My setup will have the big area radiator installed.
Awesome pic!


 10-09-2008, 07:19 PM
#291
MBWorld Fanatic!
Join Date: Oct 2006
Location: Caribbean/Florida/Colorado
Posts: 3,642
Likes: 0
Received 11 Likes
on
11 Posts
E-ZGO 53hp., 1999 E 430 sport, 2004 E 55, 2008 Tahoe LTZ on 24"s
Found some cheep late model head lights on eBay the other day with the intent of updating the look of my 03 but unfortunately the connectors and electronics were incompatible with my 03 setup.
All is not lost though as the plastic lamp covers and LEDs were brand new so I swapped them out and transplanted the factory LEDs to the old units.
My existing clear covers had seen better days and now look brand new for a portion of the cost of new units. The parking or pilot lamps now match the same color temperature of the main projection lamps via the factory LEDs and optics.
Those with the earlier model style lamps could possibly order the LED modules as spare parts and fit these yourself. I'm not sure though if these items are available as a separate part from the light assembly. May need to investigate.

The money shot! Switched on with new lenses... "Lovely"
All is not lost though as the plastic lamp covers and LEDs were brand new so I swapped them out and transplanted the factory LEDs to the old units.
My existing clear covers had seen better days and now look brand new for a portion of the cost of new units. The parking or pilot lamps now match the same color temperature of the main projection lamps via the factory LEDs and optics.
Those with the earlier model style lamps could possibly order the LED modules as spare parts and fit these yourself. I'm not sure though if these items are available as a separate part from the light assembly. May need to investigate.
The money shot! Switched on with new lenses... "Lovely"
https://mbworld.org/forums/w211-amg/248575-anybody-know-what.html
10-10-2008, 01:50 AM
#293
Super Member
Thread Starter
I like it Finny! here is a little mod for the high beam you might want to consider, as long as you may have the spare parts for it.
https://mbworld.org/forums/showthread.php?t=248575
https://mbworld.org/forums/showthread.php?t=248575
Thanks!
10-27-2008, 06:38 PM
#295
Member

Join Date: May 2008
Location: Commack, Long Island New York
Posts: 110
Likes: 0
Received 0 Likes
on
0 Posts
2005 E55 AMG
Dear Finny: Who made you those awesome headers! I need a set true 4 into 1 as best as I can see from the pics very sweet. I cannot wait to see how much power your BEAST produces! Very best regards, Joseph
10-28-2008, 06:11 AM
#296
Super Member
Thread Starter
Trying to fix some software bugs at the moment but the road test... Off it's face! spin in 1st 2nd and 3rd... base dyno soon without SLR coolers once software is ironed out.
10-28-2008, 09:45 AM
#297
Member
Join Date: May 2008
Location: Commack, Long Island New York
Posts: 110
Likes: 0
Received 0 Likes
on
0 Posts
2005 E55 AMG
Finny that is amazing spinning in 1st 2nd and 3rd gear!!! Did you also plan to put in a LSD like Quaife or such. You are going to need it to stay somewhat straight while you blast down the road like a rocket! Great job, I wish your exhaust fabricator was here in the states I would definitely buy a set or a bunch and sell them over here!!! Do you have a goal in mind for RWHP And TQ numbers?
Very best regards, Joseph
Very best regards, Joseph
10-28-2008, 02:44 PM
#298
Senior Member
Join Date: Jul 2007
Location: Lower NY Area
Posts: 404
Likes: 0
Received 0 Likes
on
0 Posts
2003 E55 Blk/Blk
Put together by a local exhaust guy. Custom fitted, where the top of the cat was cutoff and rejoined with an 75-80mm 4 bolt joining plate. I believe the stock hole is around 50mm causing a bottle neck. The secondary cats and resonator were deleted too. Sound is still reasonably quite but the SC is friggin loud! Love it!
Trying to fix some software bugs at the moment but the road test... Off it's face! spin in 1st 2nd and 3rd... base dyno soon without SLR coolers once software is ironed out.
Trying to fix some software bugs at the moment but the road test... Off it's face! spin in 1st 2nd and 3rd... base dyno soon without SLR coolers once software is ironed out.
11-01-2008, 10:34 AM
#299
MBWorld Fanatic!
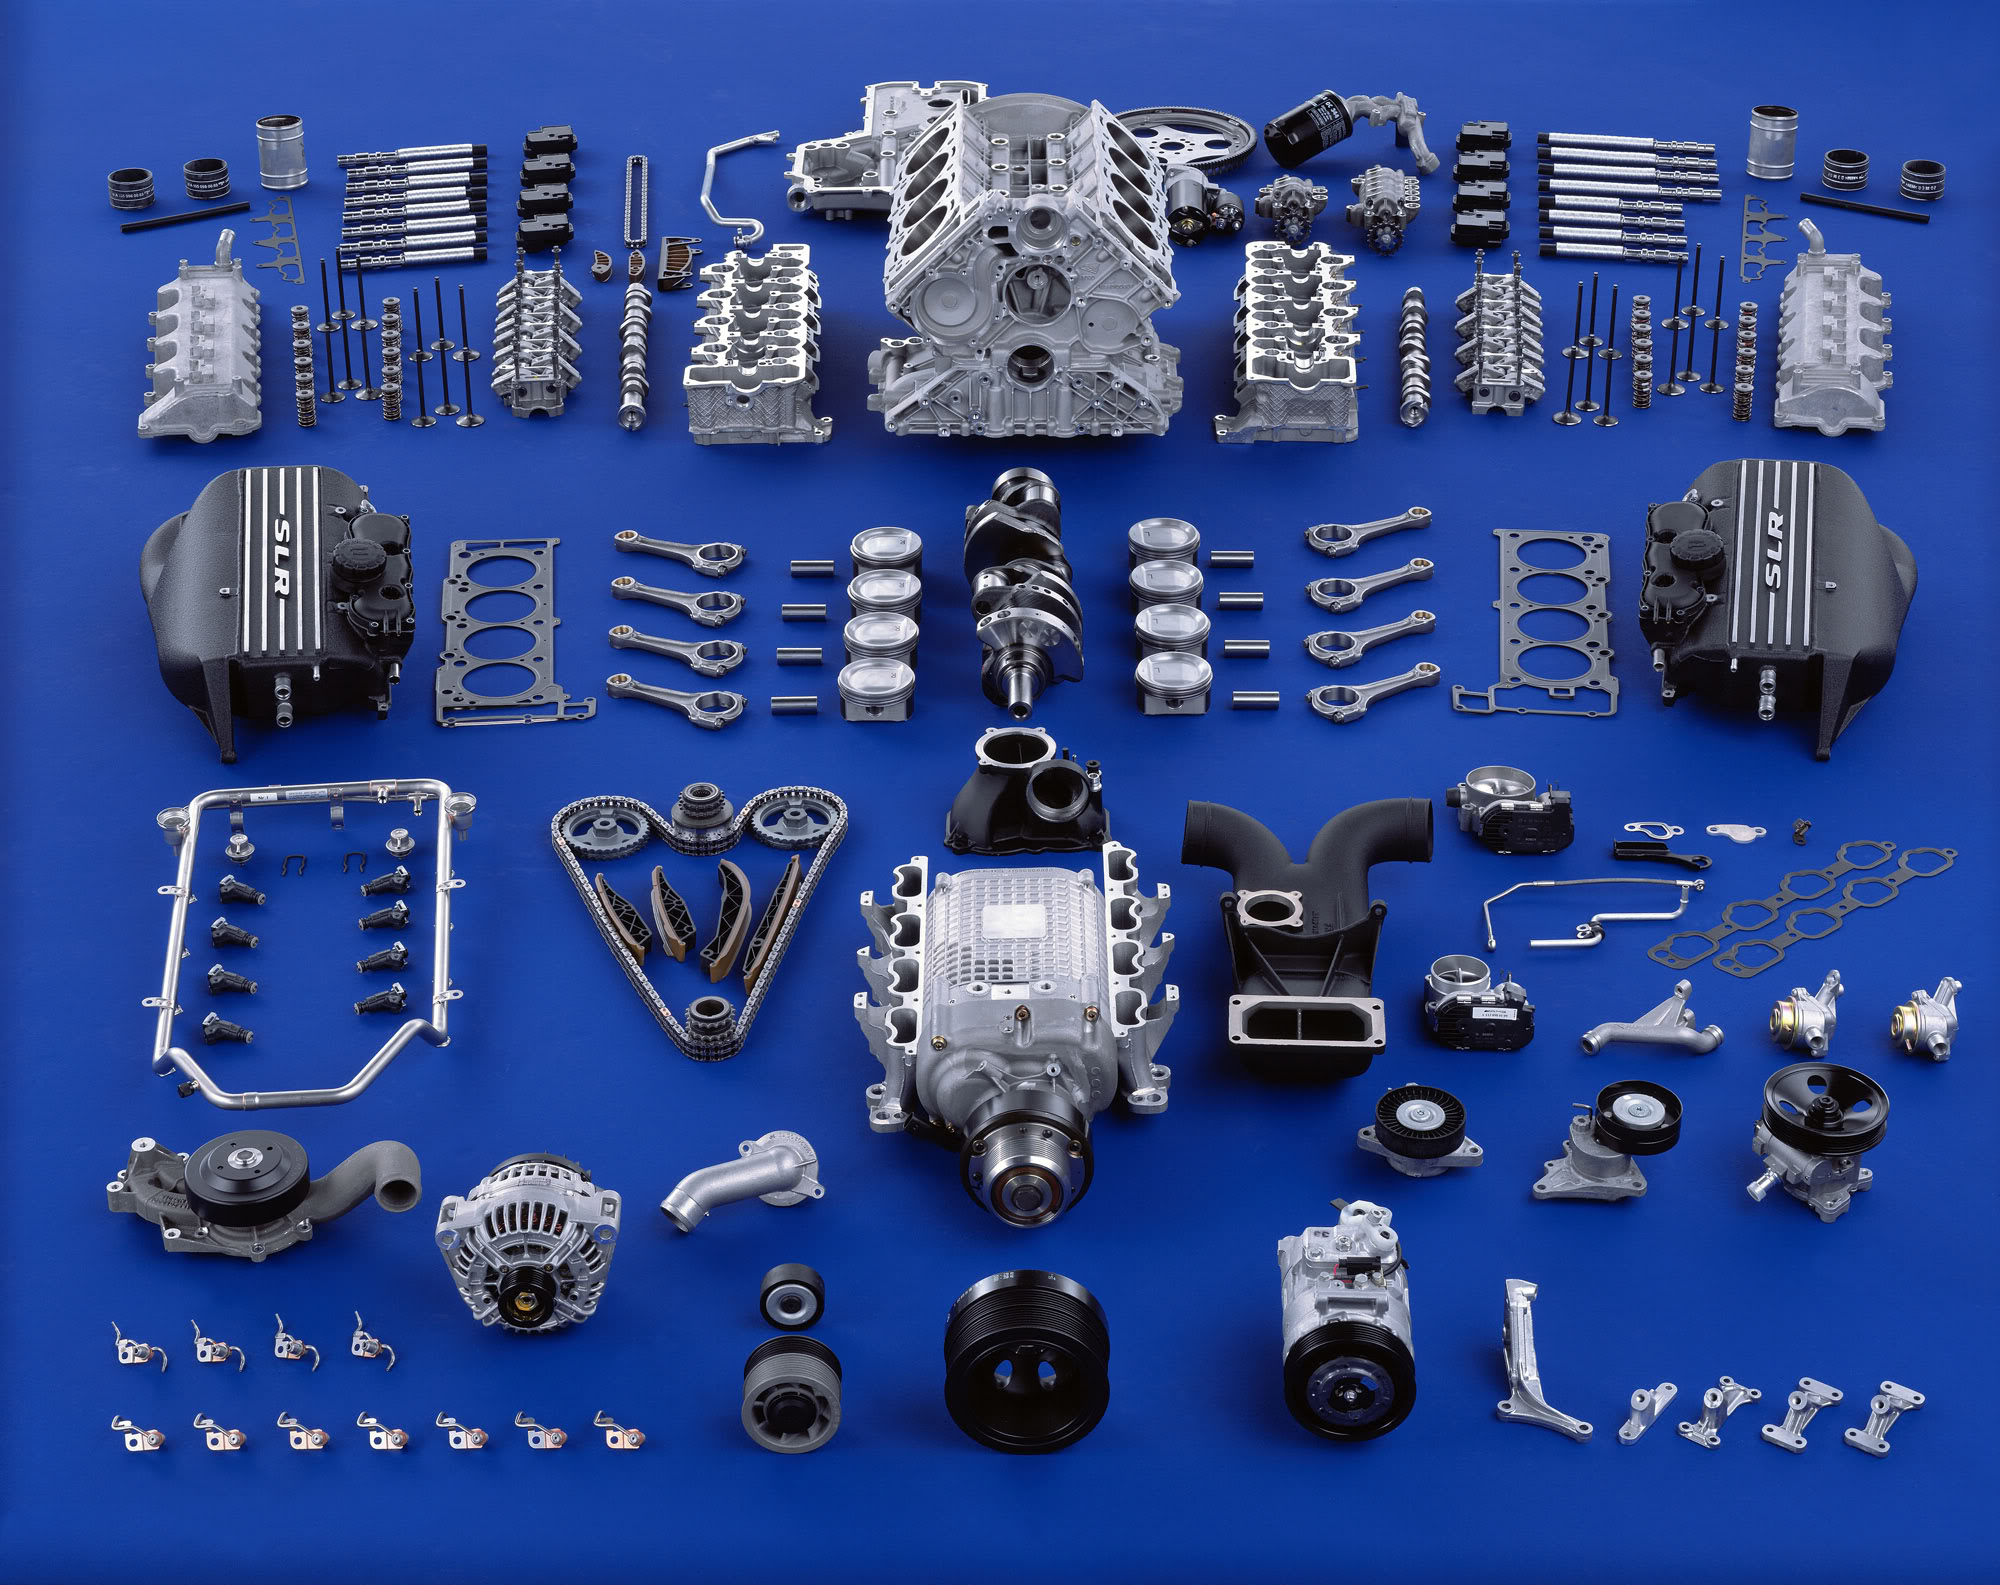
THANK YOU SO MUCH FOR THE EXPLODED VIEW
Finny, I'll never keep saying thank you for long enough
but, if I remember well from the beginning of the story, your plan was to cut the SLR inlet .. enough to fit the 55 bay: something similar in the image below, I think.
sure, would have remained the problem of mismatching between the stock core and Original SLR inlet entering horizontal ...
as you plan to replace the stock core with a modded hollow box, why not sImply modding the box's outlets to match original SLR inlets, ( or using original SLR box, duly modded for by-pass valve difference) too ?
- ... and our HOOD should be cut the same way as in that arabic car?
can't wait to know your solution for intake Ypipe and filters location
[IMG] [/IMG]
but, if I remember well from the beginning of the story, your plan was to cut the SLR inlet .. enough to fit the 55 bay: something similar in the image below, I think.
sure, would have remained the problem of mismatching between the stock core and Original SLR inlet entering horizontal ...
as you plan to replace the stock core with a modded hollow box, why not sImply modding the box's outlets to match original SLR inlets, ( or using original SLR box, duly modded for by-pass valve difference) too ?
- ... and our HOOD should be cut the same way as in that arabic car?
can't wait to know your solution for intake Ypipe and filters location
Just some work done so far for your amusement...
The original SLR cooler inlet plumbing was to wide to fit in our 55's bay so via a Mac 3D cad application I designed an alliterative inlet that wouldn't be restrictive due to loss of space.
The solution was to swing the main cavity section down and ramp it towards the front of the engine preserving the same flow characteristics. After taking some reference shots and then placing them into the CAD app with some measurements I then constructed a new inlet manifold to fit like a glove.
I personally don't like Frankinstine alloy tig weld box styles so thats why I went with this method instead.
After being happy with the computer model it was then saved out and sent to a company who specializes in 3D printing. The printed models were returned for mock fitting and trimming.
From these models I'll have casts made to be welded on the original coolers and then finished off with the factory style powder coating.
Check out the following shots...
.................
The restrictive stock core will be replaced with a hollow box section along with the removal of the temperature sensor mounting boss. (just to the right)
...............
Original SLR inlet entering horizontal.
...
[/IMG]


