
DIY: SC Idler Pulley Bearing repair

 01-15-2010, 02:43 AM
#1
MBWorld Fanatic!
Thread Starter
Join Date: Oct 2009
Location: Southern California
Posts: 2,825
Likes: 0
Received 16 Likes
on
11 Posts
E55 w/ goods, Z32 Project underway
As we all know, the OEM supercharger idler pulley bearing is prone to premature wear. The factory pulley is expensive as usual and the only item that goes south on these is the bearing which is readily available from many sources including Ebay for under $5.00.
First off, keep in mind that this can be done in the garage , a press is recommended though with perseverance it can be done without one. You will just need to get creative with large sockets and/or a vice.
Also, ASP is apparently working on a nice forged unit with a quality bearing for a great price and I would recommend the layman to go that route if you are not comfortable with the following.
The bearing number is a 6203 and I highly recommend purchasing a 6203ZZ which is rated to 17k rpm. I picked mine up for $4.99 to my door.
First thing is to remove the belts and there are xlnt write ups on those below.
Supercharger belt
Serpentine belt
Now on to removing the pulleys as both must be removed at the same time. They are held on with a long bolt and a T50 hex is required at this point. As space is limited I used the T50 with a 10mm box wrench to loosen the bolt and then removed it with my hand.
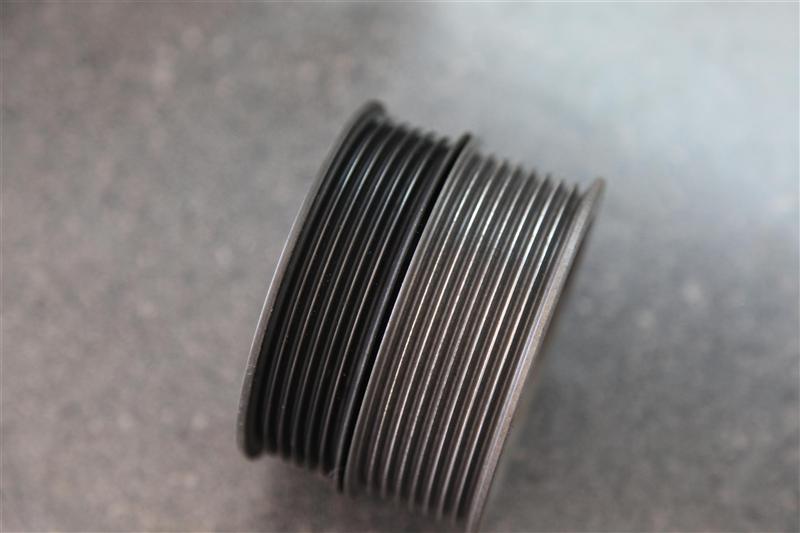
The entire assembly will come out and you will noticed the front SC idler will just slide off the sleeve.
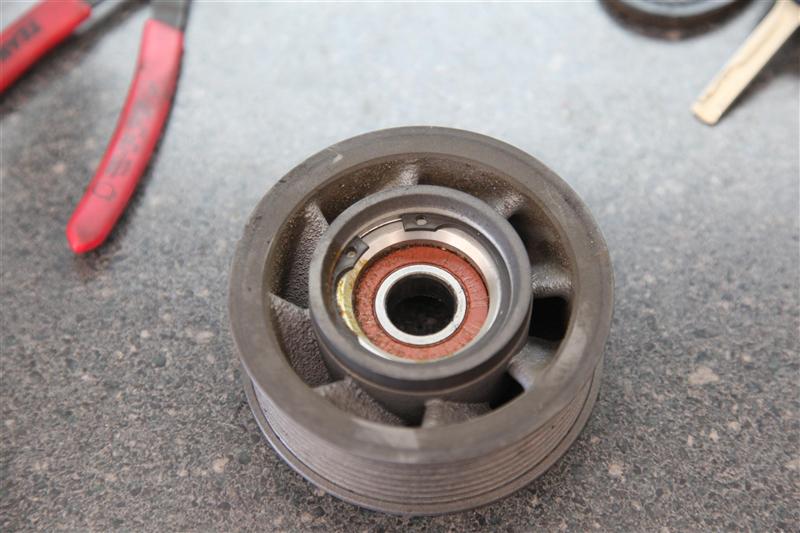
Once you flip it over you will see a large c-clip. Large c-clip pliers are recommended as smaller or angled units are more prone to slip or bend. It should just take a few seconds. As always I wrap the middle with masking tape to keep the clip from flying away once removed.
Once the c-clip is removed, it is now time to remove the bearing assembly from the pulley. I used a press though a large socket on one end and another socket on the other should allow you to to knock it out.
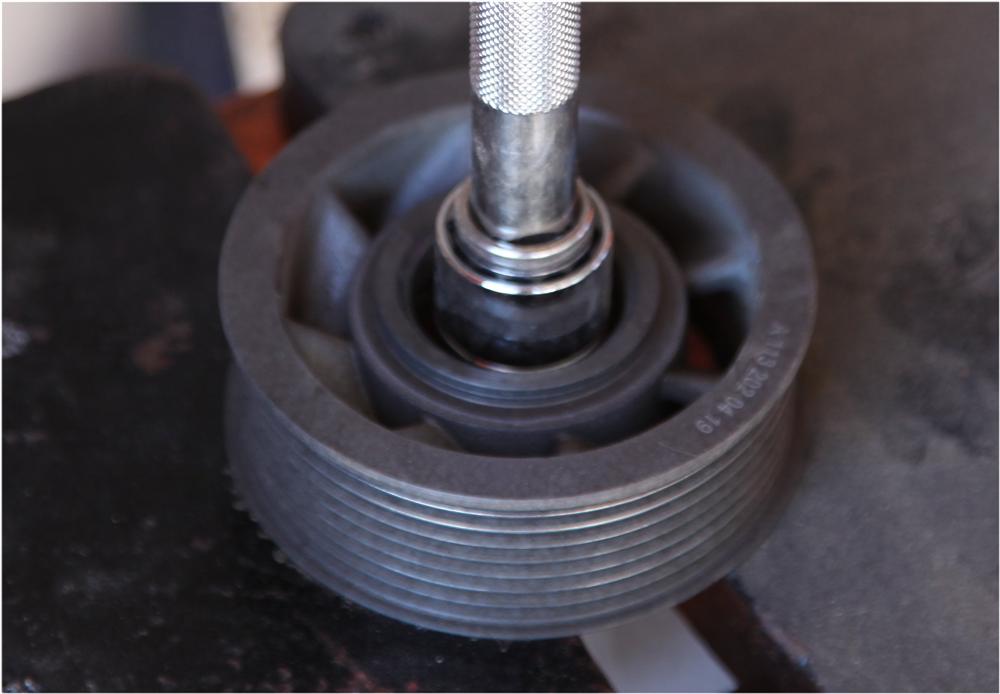
Once removed you will see the bearing assembly which is encased in a steel sleeve. This will be the most difficult part of the procedure. It is very easy with a press, though again, I suppose placing a large socket under the lip of the sleeve which will allow the bearing to come through would work. Either way, the bearing needs to be removed (you sure you would rather not just buy that ASP unit right now?).
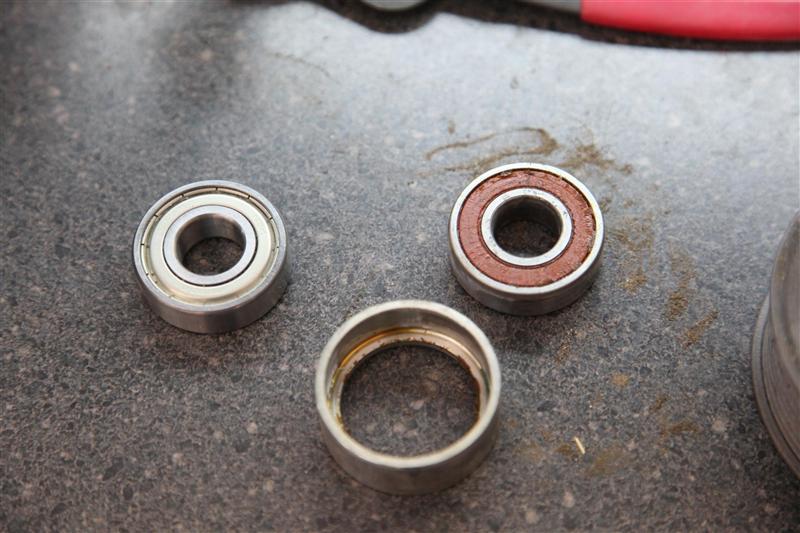
The old bearing in the steel sleeve.
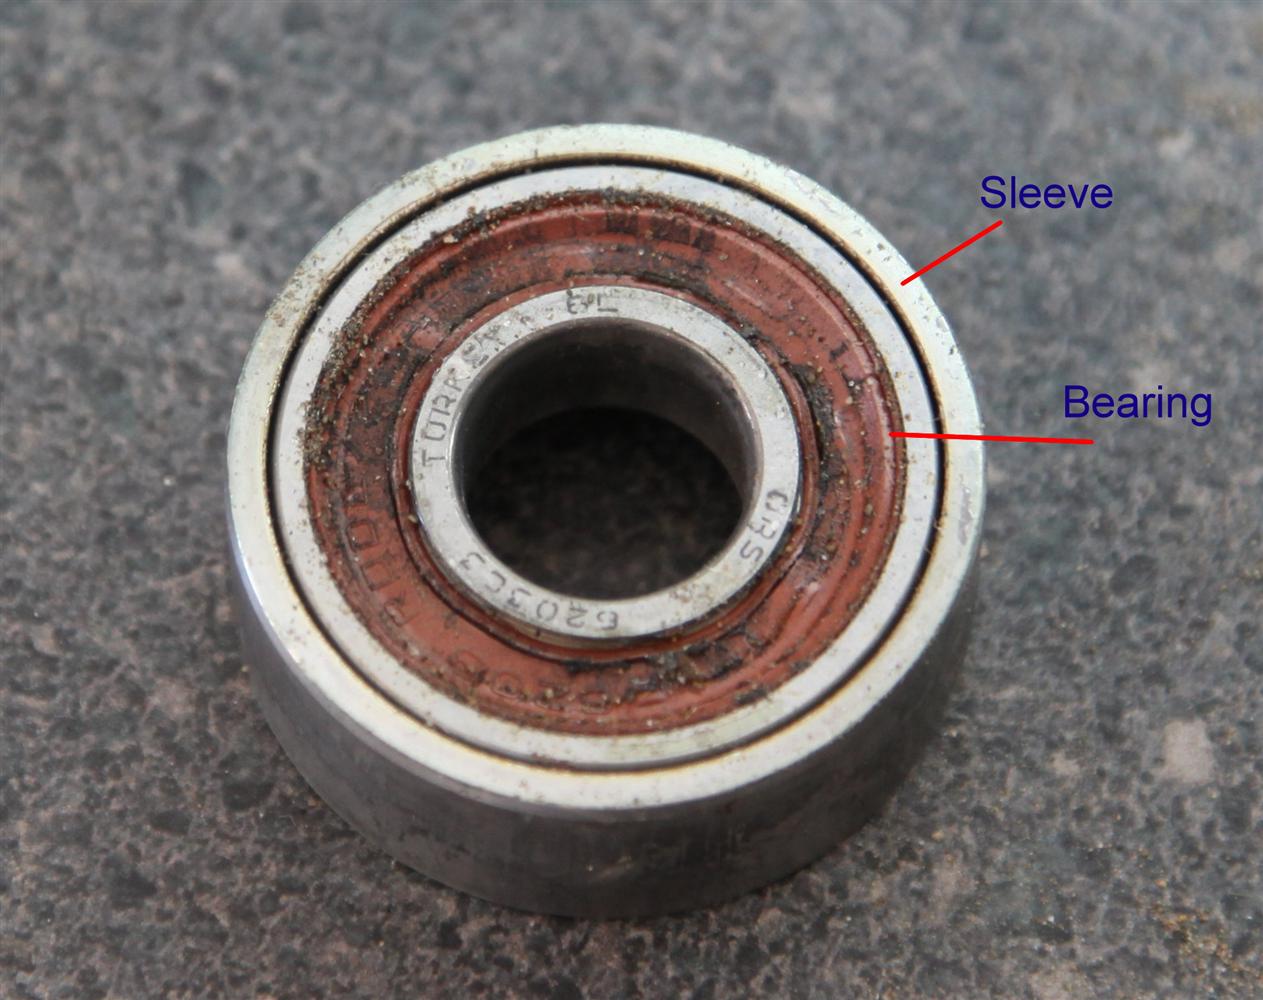
This is what the old bearing (upper right) appears when removed from the sleeve (bottom) and my new bearing (upper left).
The rest is easy.
Just tap the new bearing into the sleeve until it stops.
Install this assembly into the pulley until it stops. There is no exact measurement. Once you have enough room for the c-clip to fit, install it and your done.


First off, keep in mind that this can be done in the garage , a press is recommended though with perseverance it can be done without one. You will just need to get creative with large sockets and/or a vice.
Also, ASP is apparently working on a nice forged unit with a quality bearing for a great price and I would recommend the layman to go that route if you are not comfortable with the following.
The bearing number is a 6203 and I highly recommend purchasing a 6203ZZ which is rated to 17k rpm. I picked mine up for $4.99 to my door.
First thing is to remove the belts and there are xlnt write ups on those below.
Supercharger belt
Serpentine belt
Now on to removing the pulleys as both must be removed at the same time. They are held on with a long bolt and a T50 hex is required at this point. As space is limited I used the T50 with a 10mm box wrench to loosen the bolt and then removed it with my hand.
The entire assembly will come out and you will noticed the front SC idler will just slide off the sleeve.
Once you flip it over you will see a large c-clip. Large c-clip pliers are recommended as smaller or angled units are more prone to slip or bend. It should just take a few seconds. As always I wrap the middle with masking tape to keep the clip from flying away once removed.
Once the c-clip is removed, it is now time to remove the bearing assembly from the pulley. I used a press though a large socket on one end and another socket on the other should allow you to to knock it out.
Once removed you will see the bearing assembly which is encased in a steel sleeve. This will be the most difficult part of the procedure. It is very easy with a press, though again, I suppose placing a large socket under the lip of the sleeve which will allow the bearing to come through would work. Either way, the bearing needs to be removed (you sure you would rather not just buy that ASP unit right now?).
The old bearing in the steel sleeve.
This is what the old bearing (upper right) appears when removed from the sleeve (bottom) and my new bearing (upper left).
The rest is easy.
Just tap the new bearing into the sleeve until it stops.
Install this assembly into the pulley until it stops. There is no exact measurement. Once you have enough room for the c-clip to fit, install it and your done.
Last edited by pearlpower; 01-15-2010 at 03:14 AM.

 01-15-2010, 05:36 PM
#7
Nice writeup. Clear, concise, and respectful.
Just a heads up to anyone who follows these instructions: This pulley has been updated at least twice by MB, so yours might not break down the exact same way as the OP. The original version did not use a steel sleeve around the bearing. On the original one, the bearing sits directly in the aluminum pulley.
Just a heads up to anyone who follows these instructions: This pulley has been updated at least twice by MB, so yours might not break down the exact same way as the OP. The original version did not use a steel sleeve around the bearing. On the original one, the bearing sits directly in the aluminum pulley.
The following users liked this post:
paste (04-08-2021)
Trending Topics
01-16-2010, 04:11 PM
#9
Member

Join Date: May 2007
Posts: 110
Likes: 0
Received 0 Likes
on
0 Posts
There is only one way it goes on and i believe it is the "C" facing forward. This fixed my noise and cost me $5 shipped!! Now that I know how everything works, I could do this in an hour including removing the Supercharger belt, serpentine belt, replace bearing, and put back together.
NOTE: I did get a loud belt squealing noise initially for about 2 miles and then it went away. The belt was slightly used as I have a 180mm pulley and i think I flipped it around so it had to wear itself in place during the first 2 miles and now its super quiet!
Thanks for the write up!
NOTE: I did get a loud belt squealing noise initially for about 2 miles and then it went away. The belt was slightly used as I have a 180mm pulley and i think I flipped it around so it had to wear itself in place during the first 2 miles and now its super quiet!
Thanks for the write up!
01-16-2010, 06:21 PM
#10
MBWorld Fanatic!
Thread Starter
Join Date: Oct 2009
Location: Southern California
Posts: 2,825
Likes: 0
Received 16 Likes
on
11 Posts
E55 w/ goods, Z32 Project underway
There is only one way it goes on and i believe it is the "C" facing forward. This fixed my noise and cost me $5 shipped!! Now that I know how everything works, I could do this in an hour including removing the Supercharger belt, serpentine belt, replace bearing, and put back together.
NOTE: I did get a loud belt squealing noise initially for about 2 miles and then it went away. The belt was slightly used as I have a 180mm pulley and i think I flipped it around so it had to wear itself in place during the first 2 miles and now its super quiet!
Thanks for the write up!
NOTE: I did get a loud belt squealing noise initially for about 2 miles and then it went away. The belt was slightly used as I have a 180mm pulley and i think I flipped it around so it had to wear itself in place during the first 2 miles and now its super quiet!
Thanks for the write up!
01-16-2010, 07:44 PM
#11
Member
Join Date: May 2007
Posts: 110
Likes: 0
Received 0 Likes
on
0 Posts
Well after spending an hour with it and breaking the snap ring pliers, I took it to my mechanic buddy and he did it within a couple minutes after getting some good snap ring pliers. I'm not sure how he pressed the bearing in.
01-17-2010, 07:37 PM
#12
Super Member

Excellent and many thanks for the write up, very useful 
PLEASE MAKE THIS A DIY STICKY
the bearings can be found on ebay very cheap, so why would anyone want to pay so much for a complete pulley replacement, plus you have actually increased the rating of the pulley by using the ZZ bearings (no brainier I feel)?
the original bearing has a rubber outer protection seal which is not as good as the metal one on the ZZ bearing, water is not a problem in this area but heat is.
do the tensioners use the same bearing size.............my supercharger belt tensioner has some play also (I suppose I will remove and check the size soon)?
Last edited by � C43 � AMG �; 01-17-2010 at 07:54 PM.
01-17-2010, 10:40 PM
#13
MBWorld Fanatic!

Join Date: Jun 2007
Location: Bloomingdale,IL
Posts: 1,378
Likes: 0
Received 4 Likes
on
3 Posts
2004 W211 E55K, GL550
i ordered a new bearing my self just waiting to get my car back from the dealer so i can do the install thanks for the write up i had my belt snap the first 2 weeks after my 180 pulley not sure if it was the bearing but i have checked it and it does have slight play and some noise as well thanks again!!!!!
01-17-2010, 10:53 PM
#14
Super Member

Join Date: Apr 2009
Location: Chicago suburbs
Posts: 552
Likes: 0
Received 11 Likes
on
9 Posts
2004 E55 AMG
i ordered a new bearing my self just waiting to get my car back from the dealer so i can do the install thanks for the write up i had my belt snap the first 2 weeks after my 180 pulley not sure if it was the bearing but i have checked it and it does have slight play and some noise as well thanks again!!!!!
I carry two extra belts in the trunk of my car(S/C and serpentine) because I saw what happened when yours broke at the track. I hope you made it home safe.
BTW, two months later my buddy destroyed the belt on his Mustang at GLD(one drives everything, including the S/C) and had to drive home with only 2 or 3 ribs left.
Last time I checked my idler pulleys(over 10K ago) they both had a bit of play but have been dead silent and show no signs of wear since then.
02-01-2010, 01:23 PM
#15
MBWorld Fanatic!
Join Date: Jun 2007
Location: Bloomingdale,IL
Posts: 1,378
Likes: 0
Received 4 Likes
on
3 Posts
2004 W211 E55K, GL550
I carry two extra belts in the trunk of my car(S/C and serpentine) because I saw what happened when yours broke at the track. I hope you made it home safe.
BTW, two months later my buddy destroyed the belt on his Mustang at GLD(one drives everything, including the S/C) and had to drive home with only 2 or 3 ribs left.
Last time I checked my idler pulleys(over 10K ago) they both had a bit of play but have been dead silent and show no signs of wear since then.
Hey Izzy just saw this post lol sorry for the late reply but yeah i made it home safe that day change it out with a gates belt and have'nt had a problem since. Hope to see u out on the track again can't wait till the weather breaks just put in my pump & H.E so im hoping to run some better times.
02-12-2010, 03:38 AM
#16
Junior Member
Join Date: Nov 2009
Location: Kuwait
Posts: 69
Likes: 0
Received 0 Likes
on
0 Posts
05 E55, 96 Caprice SS with T-56, 97 Wrangler with an LS2 & TH350
02-12-2010, 09:09 AM
#17
Could you use it, you sure can.
FWIW Why would you want to use a $2 bearing from China?
Germany, Japan, and even Korea would be my choice of origin. I would have included good 'ol USA but who are we kidding, hardly anything is made here anymore.
FWIW Why would you want to use a $2 bearing from China?
Germany, Japan, and even Korea would be my choice of origin. I would have included good 'ol USA but who are we kidding, hardly anything is made here anymore.
02-12-2010, 02:21 PM
#18
Junior Member
Join Date: Nov 2009
Location: Kuwait
Posts: 69
Likes: 0
Received 0 Likes
on
0 Posts
05 E55, 96 Caprice SS with T-56, 97 Wrangler with an LS2 & TH350
I'm all for better, but it has to be from Amazon. Care to help with a link?
02-12-2010, 06:09 PM
#21
05-29-2010, 11:54 PM
#22
MBWorld Fanatic!
Join Date: Oct 2009
Location: San Diego, CA
Posts: 2,771
Likes: 0
Received 0 Likes
on
0 Posts
'13 GT-R AMS Alpha 9+, CLA45, E55
Just had to bump this thread and give a very big thank you to those who contributed to it. It should definitely be added to the DYI sticky.
I hade a majorly annoying bearing/belt squeak on cold start ups that would eventually go away after a couple of miles/minutes of driving. I had every suspicion it was something in the S/C belt line and thought I'd give this a try. Hell for $10 it couldn't hurt. I took the tensioner off and cleaned out the dirt as much as possible. Lifted the car a bit to get easier access to the Serpentine tensioner and followed the directions. It's pretty straight forward and will certainly require a press to install the new bearing.
Thanks to all that contributed. I have no more squeak and couldn't be happier.
I hade a majorly annoying bearing/belt squeak on cold start ups that would eventually go away after a couple of miles/minutes of driving. I had every suspicion it was something in the S/C belt line and thought I'd give this a try. Hell for $10 it couldn't hurt. I took the tensioner off and cleaned out the dirt as much as possible. Lifted the car a bit to get easier access to the Serpentine tensioner and followed the directions. It's pretty straight forward and will certainly require a press to install the new bearing.
Thanks to all that contributed.
I have no more squeak and couldn't be happier.
07-05-2010, 06:36 PM
#23
Super Member
Join Date: Sep 2009
Location: Orlando FL
Posts: 935
Received 74 Likes
on
58 Posts
a unicorn tuned p30 e63
I had to do the same thing as tgoss and bump this back up. I rec for everyone who has more than 60k on thier car to spend ten bucks on the bearing and 12.99 on the tool from sears to remove the c-clip. My bearing either had to be in the worst condidtion ever or i dont know what, but after i changed this, the car is MUCH MUCH MUCH more smoother, runs great, and is more responsive. It kinda feels like a oil change x10. This is easily the best thing i've ever done to my 55. once again thanks to all who contributed.
09-24-2010, 11:41 AM
#24
Super Member
Join Date: Sep 2009
Location: Orlando FL
Posts: 935
Received 74 Likes
on
58 Posts
a unicorn tuned p30 e63
one more bump and update for all, i used a F*A*G bearing and noting more than a couple of months later it started to make noises. took off the SC belt and it had play again. i now bought a MTM bearing and i will be trying that out. it has the rubber protectant like the OEM bearing. supposebly its better.
10-05-2010, 11:22 AM
#25
MBWorld Fanatic!
Before I start taking things apart, when this bearing goes bad, does it whir like a power steering pump that is low on fluid? I'm getting that whirring noise and I believe I pinpointed it to the idler with a stethoscope.


