
**DIY** Floored Fabrication L/T Header And Full System Install 20 Steps With Pictures

 03-27-2011, 04:31 PM
#1
MBWorld Fanatic!
Thread Starter
Join Date: Nov 2009
Location: Columbus, OH
Posts: 1,559
Likes: 0
Received 6 Likes
on
6 Posts
Evo VIII/E55 AMG
As promised Here is the DIY for the Headers. This should make the install alot easier, there are some tips and tricks included within the article.
Materials needed:
-10 mm box wrench non ratcheting, as well as a ratcheting one to speed up the process
-Inverted torx sockets
-12mm 13mm 14mm 15mm sockets shallow and deep
-3/8 inch extensions (variaty)
-10 mm deep 1/4 drive socket and ratchet
-High Temp gasket maker
-P/B Blaster
-Rubber mallet
-Needle nose vice grips
-Razor blade
-Electrical Tape
-Lots of wire (02 sensor extensions)
-Heatshrink
-Soldering gun and solder
-Jack and 4 Jack stands
Step 1:
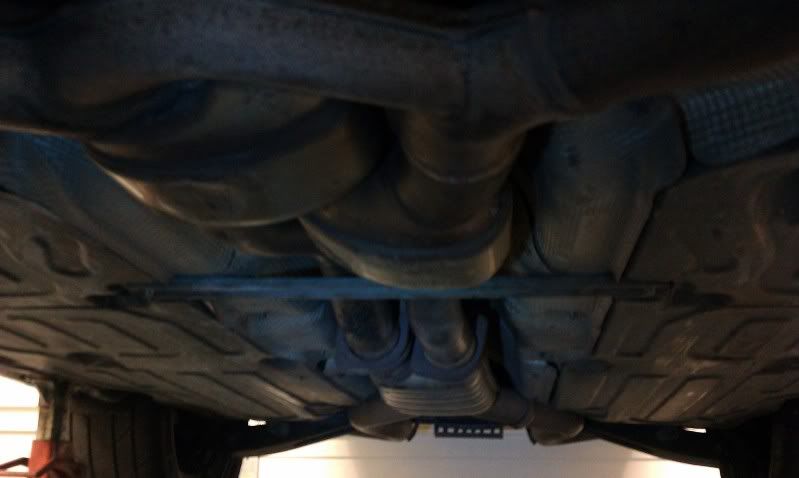
Jack up the car starting from the rear diff (I used some bricks to get the car higher on top of the jack) Then from the front I jacked up on the rubber pice in the front of the car. Set the jackstands and remove all undertrays

Jack up the car starting from the rear diff (I used some bricks to get the car higher on top of the jack) Then from the front I jacked up on the rubber pice in the front of the car. Set the jackstands and remove all undertrays
Step 2:
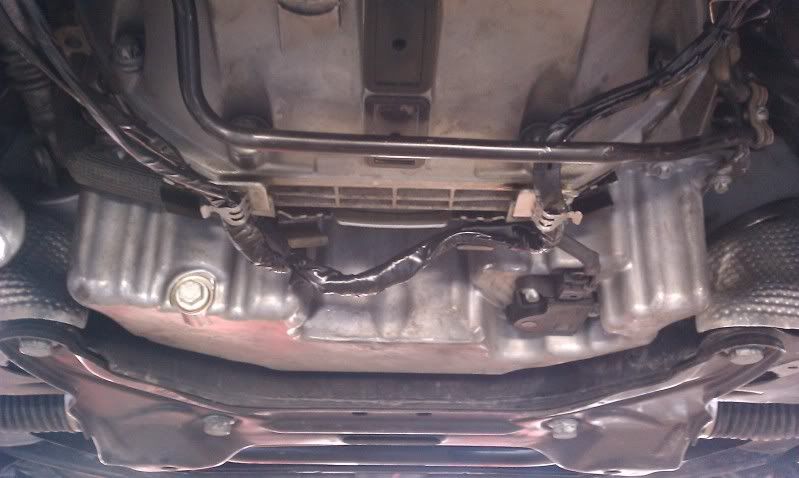
Remove the bolts from the resinator flangs, the crossbar and the 4 torx bolts on the headers that is the last piece holding the stock exhaust up. Its heavy so be carfull with lowering it down.
Remove the bolts from the resinator flangs, the crossbar and the 4 torx bolts on the headers that is the last piece holding the stock exhaust up. Its heavy so be carfull with lowering it down.
Step 3:
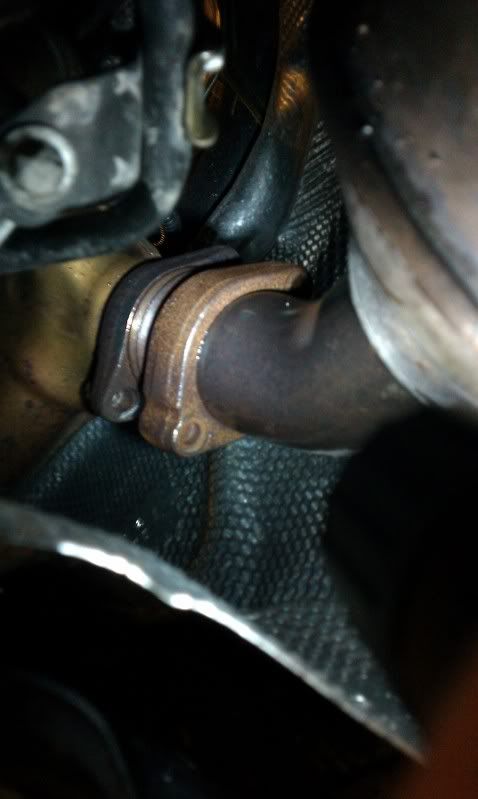
Remove the 10 mm nuts from studs holding the stock manifolds on. This will take some patience some of the studs will come out with the nuts, NOT to worry there. Once all the 10mm nuts/studs are removed pull the stock manifolds out. Be sure not to loose the metal OEM header gaskets as you will reuse them (2 per runner) with your L/T's.
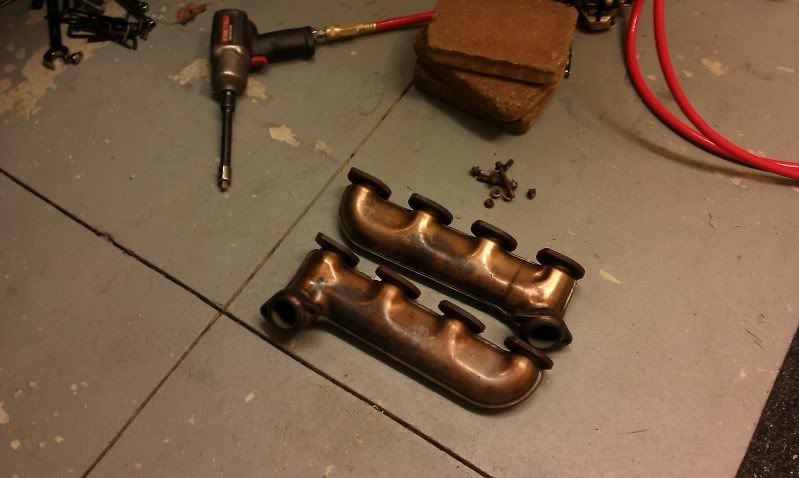
Remove the 10 mm nuts from studs holding the stock manifolds on. This will take some patience some of the studs will come out with the nuts, NOT to worry there. Once all the 10mm nuts/studs are removed pull the stock manifolds out. Be sure not to loose the metal OEM header gaskets as you will reuse them (2 per runner) with your L/T's.
Step 4:
Using a pair of needle nose vice grips clamp the middle of the stud and grab your 10mm wrench and remove all 10mm nuts. Then apply a thin coat of Anit Seize to the thread on the studs (this will aide removal down the road and make them alot less proned to stick together.
Using a pair of needle nose vice grips clamp the middle of the stud and grab your 10mm wrench and remove all 10mm nuts. Then apply a thin coat of Anit Seize to the thread on the studs (this will aide removal down the road and make them alot less proned to stick together.
Step 5:
Re-Install all studs back into the head ports, BE CAREFULL not to drop one into the exhaust port. Also pull the black brackets off the bottom side of the car that are used to hold the rear part of the undersheild, Also remove the two 14mm bolts holding on the other black brackets on by the transmission pan, and reinstall the bolts once the black brackets are removed.
Re-Install all studs back into the head ports, BE CAREFULL not to drop one into the exhaust port. Also pull the black brackets off the bottom side of the car that are used to hold the rear part of the undersheild, Also remove the two 14mm bolts holding on the other black brackets on by the transmission pan, and reinstall the bolts once the black brackets are removed.
Step 6:
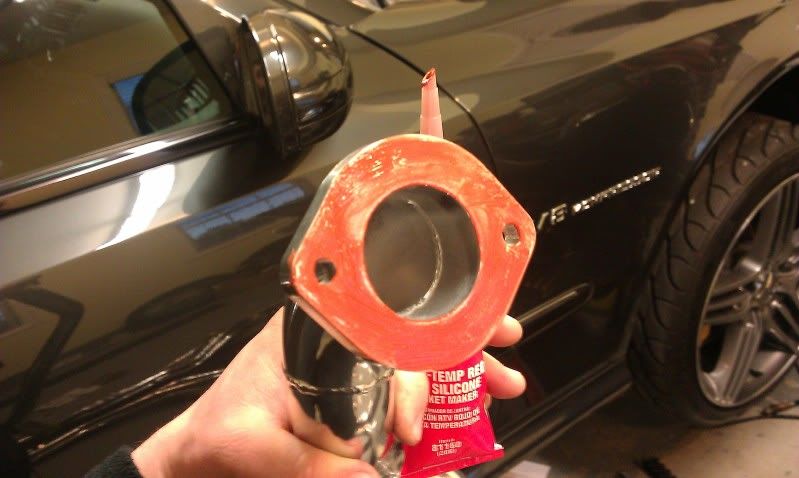
Start with the passanger side L/T. (This is the more difficult install of the 2 sides.) you wil have to take each runner off at a time for install, Make sure you dont mix them up. Start from the front cylinders and work your way back. Apply a light coat of high Temp gasket maker to the header flange. I noticed installing the gaskets on the studs with some high Temp gasket maker worked the best then installing the runner. Install the nuts hand tight. Once all 4 runners are installed hand tight apply a generous coat of anti seize to the inside of the collectors. then slip it into place and use your rubber mallet to seat them together. Repeat on the drivers side. (Its MUCH EASIER) Leave the allan bolts and 10mm nuts hand tight on the collectors.
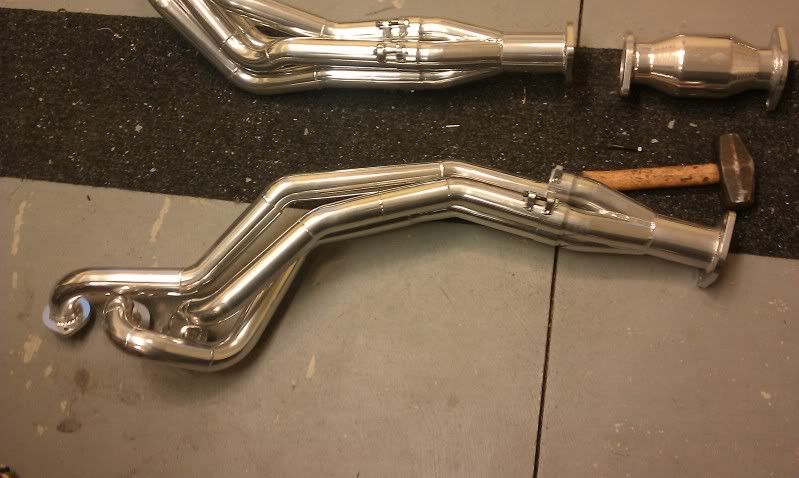
Start with the passanger side L/T. (This is the more difficult install of the 2 sides.) you wil have to take each runner off at a time for install, Make sure you dont mix them up. Start from the front cylinders and work your way back. Apply a light coat of high Temp gasket maker to the header flange. I noticed installing the gaskets on the studs with some high Temp gasket maker worked the best then installing the runner. Install the nuts hand tight. Once all 4 runners are installed hand tight apply a generous coat of anti seize to the inside of the collectors. then slip it into place and use your rubber mallet to seat them together. Repeat on the drivers side. (Its MUCH EASIER) Leave the allan bolts and 10mm nuts hand tight on the collectors.
Step 7:
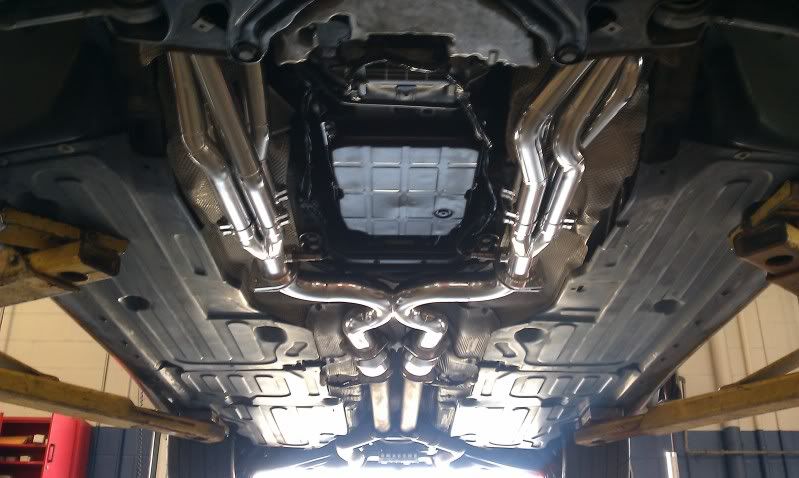
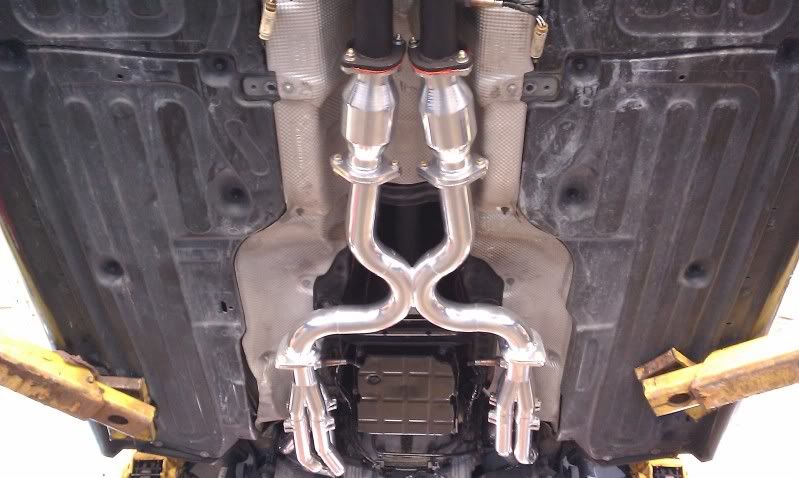
Install the provided gasket and X-Pipe, Again use some High temp gasket maker inbetween the flanges then tighten down your bolt,washer, and nuts.
Install the provided gasket and X-Pipe, Again use some High temp gasket maker inbetween the flanges then tighten down your bolt,washer, and nuts.
Step 8:
Install the Cat's using the same technique as used for the X-Pipe.
( The X-Pipe, and Cats are labeled at the top of the flange so you dont mix them up)
Install the Cat's using the same technique as used for the X-Pipe.
( The X-Pipe, and Cats are labeled at the top of the flange so you dont mix them up)
Step 9:
Cut the Resniator out about a 1/4 inch after the welds on the back side.
Cut the Resniator out about a 1/4 inch after the welds on the back side.
Step 10:
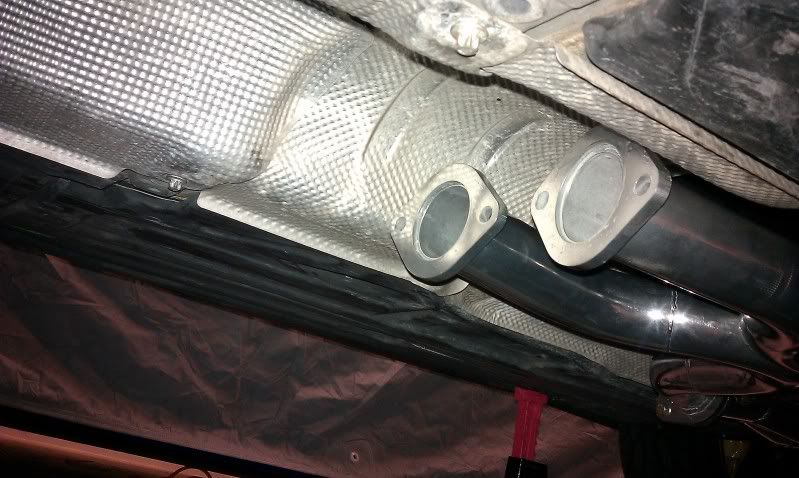
bolt the provided flange up to the cat with the gasket (Dry no gasket maker, Insert the provided pip inside the flange and mark in the back how much you have to cut off the pipe to mate it up to the axle back part of the system. Make your cut and repeat on the other side.
bolt the provided flange up to the cat with the gasket (Dry no gasket maker, Insert the provided pip inside the flange and mark in the back how much you have to cut off the pipe to mate it up to the axle back part of the system. Make your cut and repeat on the other side.
Step 11:
once both cuts are made hold the pipe up to the flange and tac weld it in 3 places (or mark it if you dont have acess to a welder.) MAKE sure you mark it in atleast 3 seprate places. Repeat the same process on the back with the provided flanges both on the stock exhaust, and the pipes provided.
(Personally I think you can get away with a "slip fit" style exhaust clamp that can be purchased at jegs eliminating some welding.)
Step 12:
Make your marks where the o2 Bungs will go making sure the sensor will clear the floor board. Take the system down and complete your welds, Drill your holes for the o2 sensors and weld them as well.
Make your marks where the o2 Bungs will go making sure the sensor will clear the floor board. Take the system down and complete your welds, Drill your holes for the o2 sensors and weld them as well.
Step 13:
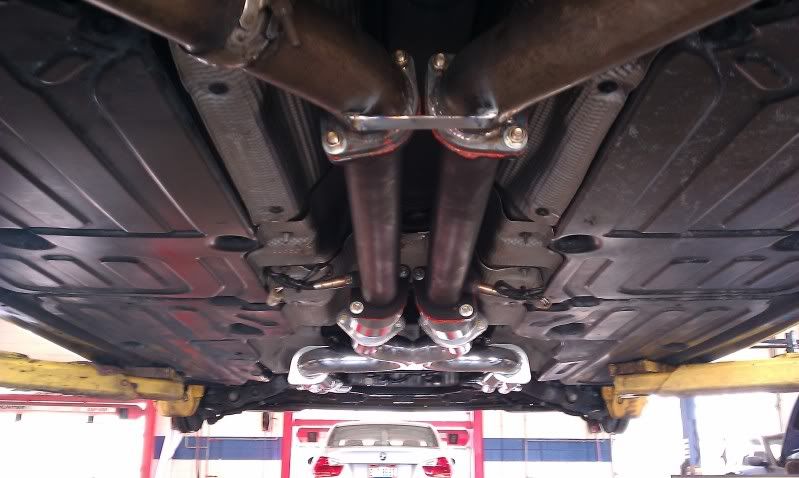
Using a scuff pad Scuff the whole pipe and coat it with 4 generous coats of VHT High Temp Ceramic (Can be purchased at Advanced Auto/Auto Zone.) It dries to the touch very quickly and does its final curing on the car once its heat cycled. I also added a metal brace on the underside of the rear stock exhaust because the Cats and flanges sat very close to eachother, I put a small 2x4 inbetween the 2 resinator delete pipes seperating them a bit and welded the metal piece and removed the 2x4.
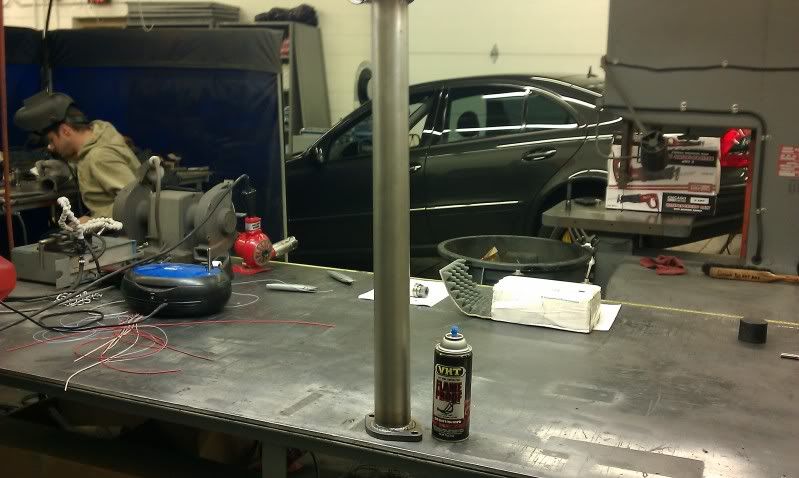
Using a scuff pad Scuff the whole pipe and coat it with 4 generous coats of VHT High Temp Ceramic (Can be purchased at Advanced Auto/Auto Zone.) It dries to the touch very quickly and does its final curing on the car once its heat cycled. I also added a metal brace on the underside of the rear stock exhaust because the Cats and flanges sat very close to eachother, I put a small 2x4 inbetween the 2 resinator delete pipes seperating them a bit and welded the metal piece and removed the 2x4.
Step 14:
Now for the o2 sensor wiring. Cut the primary o2 sensor connectors (black) off about 2 inches off the connector leaving room to extend. Peel the black sheathing off with a razor blade leaving yourself some room to work. Solder all your connections and seal up with heat shrink and then electrical tape. repeat with the secondar o2 sensor connectors (white) Make sure you do this on the connector side, If you do it on the sensors and you ever have a sensor go bad you will have to redo all your wiring.
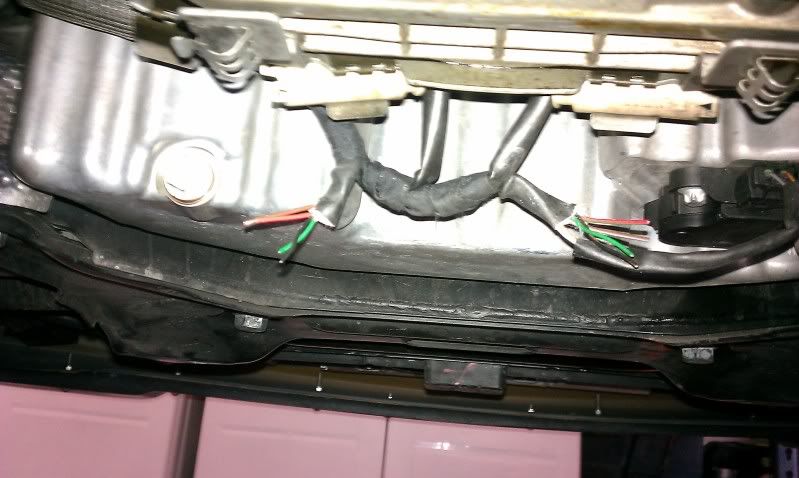
Now for the o2 sensor wiring. Cut the primary o2 sensor connectors (black) off about 2 inches off the connector leaving room to extend. Peel the black sheathing off with a razor blade leaving yourself some room to work. Solder all your connections and seal up with heat shrink and then electrical tape. repeat with the secondar o2 sensor connectors (white) Make sure you do this on the connector side, If you do it on the sensors and you ever have a sensor go bad you will have to redo all your wiring.
Step 15:
Make sure you tripple check all your work before startup.
Make sure you tripple check all your work before startup.
Step 16:
Start the Car, If you hear anything out of the ordinary shut it down immediatly. Let the car idle until it gets to operating temp, Then shut it down.
Start the Car, If you hear anything out of the ordinary shut it down immediatly. Let the car idle until it gets to operating temp, Then shut it down.
Step 17:
Re torque all the 10mm nuts on the L/T headers to insure they are snug after the first heatcycle. then Snug all the collector allan bolts and 10mm nuts (Do not over torque them as I learned if you tighten them to much the exhaust will hit the lower transmission mount.
Re torque all the 10mm nuts on the L/T headers to insure they are snug after the first heatcycle. then Snug all the collector allan bolts and 10mm nuts (Do not over torque them as I learned if you tighten them to much the exhaust will hit the lower transmission mount.
Step 18: Once again check all your work, Nuts bolts etc.
Step 19: Remove all your tools from under the car, and lower it from the stands.
Step 20: Your DONE!!!!

Last edited by Evolved8; 03-27-2011 at 04:34 PM.


 03-27-2011, 07:02 PM
#6
MBWorld Fanatic!
Great work man! Will be installing my LT's soon 
Honestly speaking, how hard was it to get the stud bolts off? Mine look all rusted and If I try to spin it they might strip. I'm afraid of that.
Honestly speaking, how hard was it to get the stud bolts off? Mine look all rusted and If I try to spin it they might strip. I'm afraid of that.
03-27-2011, 07:12 PM
#7
MBWorld Fanatic!

Join Date: Jun 2010
Location: Puerto Rico
Posts: 4,173
Likes: 0
Received 5 Likes
on
4 Posts
2005 E55 AMG
Nice...long tubes sure are sexy. The install of my kleeman headers wasn't too bad...actually it was a LOT easier on the E55 than it was to install headers on my Infiniti G35 ( Which was a PITA ).
Dyno soon?
Dyno soon?
Trending Topics
 03-27-2011, 10:12 PM
#11
MBWorld Fanatic!
Thread Starter
Join Date: Nov 2009
Location: Columbus, OH
Posts: 1,559
Likes: 0
Received 6 Likes
on
6 Posts
Evo VIII/E55 AMG
Thank you sir.
To be honest A LOT quieter than expected. Very tatefull. I will have a vid soon...
No doubt!!
 03-28-2011, 06:39 AM
#15

Materials needed:
-10 mm box wrench non ratcheting, as well as a ratcheting one to speed up the process
-Inverted torx sockets
-12mm 13mm 14mm 15mm sockets shallow and deep
-3/8 inch extensions (variaty)
-10 mm deep 1/4 drive socket and ratchet
-High Temp gasket maker
-P/B Blaster
-Rubber mallet
-Needle nose vice grips
-Razor blade
-Electrical Tape
-Lots of wire (02 sensor extensions)
-Heatshrink
-Soldering gun and solder
-Jack and 4 Jack stands
-10 mm box wrench non ratcheting, as well as a ratcheting one to speed up the process
-Inverted torx sockets
-12mm 13mm 14mm 15mm sockets shallow and deep
-3/8 inch extensions (variaty)
-10 mm deep 1/4 drive socket and ratchet
-High Temp gasket maker
-P/B Blaster
-Rubber mallet
-Needle nose vice grips
-Razor blade
-Electrical Tape
-Lots of wire (02 sensor extensions)
-Heatshrink
-Soldering gun and solder
-Jack and 4 Jack stands
Any CELs after extending the O2 sensors?
We need sound clips and before and after dyno graphs.
 03-28-2011, 08:11 AM
#17
MBWorld Fanatic!
Thread Starter
Join Date: Nov 2009
Location: Columbus, OH
Posts: 1,559
Likes: 0
Received 6 Likes
on
6 Posts
Evo VIII/E55 AMG
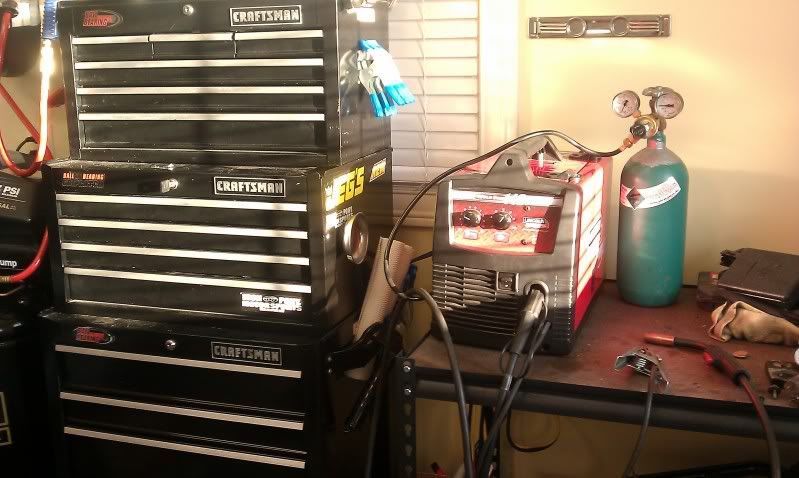
Nice write-up, but it seems like your list of materials needed omits some rather crucial major stuff, like the welding equipment and the lift the car is pictured on. I doubt most guys are going to be doing welding while lying on their back under a car supported by four jackstands, let alone have access to welding equipment in their home garage. Also, per the workshop manual, there's no call to use any gasket maker at the exhaust ports; the thin metal gaskets "crush" slightly upon being torqued down and seal perfectly. They aren't intended to be re-used.
Any CELs after extending the O2 sensors?
We need sound clips and before and after dyno graphs.
Any CELs after extending the O2 sensors?
We need sound clips and before and after dyno graphs.
As far as the gaskets, I have 0 leeks, Chris from floored fab mentioned they have reused them many times in the past. The gasket maker although over kill is just added assurance.
And the o2 sensors as stated from Floored Fab, With proper install 0 issues. I have no CELS and no problems. Everything was soldired and heatshrinked, Then wrapped with electrical tape.
If your looking for loud I would keep the cats, and gut the rear mufflers. If you delete the cats you will have cel issues with the 02's. However you can cheat that with a sparkplug defowler if you know the trick.
03-28-2011, 08:57 AM
#18
Super Member
Join Date: Feb 2008
Location: Texas
Posts: 756
Likes: 0
Received 3 Likes
on
3 Posts
e55 w/LET TUNE Drinks: vodka STRAIGHT Wheels: 19" HRE 547r Mods:FF headers ASP Pulley
So i have to put the bungs in myself they didnt comr pre linstalled? Also why is a part of the exhaust uncoated ?
03-28-2011, 09:14 AM
#19
MBWorld Fanatic!
Thread Starter
Join Date: Nov 2009
Location: Columbus, OH
Posts: 1,559
Likes: 0
Received 6 Likes
on
6 Posts
Evo VIII/E55 AMG
The only part of the exhaust that is not coated is the stock pipes right before the mufflers because you retain those pipes.


