When you click on links to various merchants on this site and make a purchase, this can result in this site earning a commission. Affiliate programs and affiliations include, but are not limited to, the eBay Partner Network.
So having completed the intercooler circuit splitting while doing my turbo upgrades, I thought I'd provide some of the finer points and parts to complete the job. I did not do a comprehensive DIY with pics when I did it,
so I'll try to describe as best as I can where I don't have pictures.
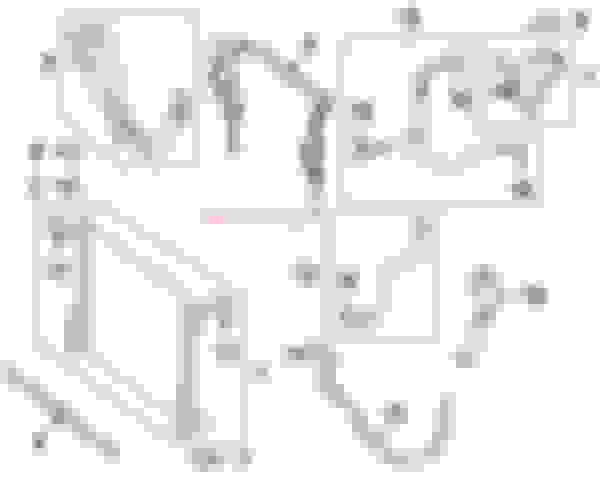
The first point I'll make, is that the purpose of this mod is to seperate the intercooler circuit from the main cooling loop. In the older cars the main radiator overflow tank feeds both the radiator AND directly into the
intercooler pump inlet via a split molded hose to goes into the rad and connects to both the intercooler heat exchanger and the pump. See part 14 in diagram below.
NEW PARTS YOU NEED:
RADIATOR COOLANT OVERFLOW HOSE (218-501-21-82)
COOLANT EXPANSION TANK - (278-200-03-85)
COOLANT HOSE -(278-203-01-03)
VENT HOSE - MERCEDES-BENZ (278-203-14-17)
MB COOLANT CONCENTRATE ( 4L )
OTHER PARTS :
4 ft of 1/2 heater hose
4 ft 5/8 heater hose
3/4-5/8 heater hose adpater
5/8 to 1/2 heater hose adapter
3/4 ID SS hose clamp
5/8 ID SS hose clamps x 2
1/2 ID SS hose clamp
You will also need access to a Star SDS C4 or above to be able to activate the IC pump to properly bleed.
1. PREP WORK:
The first thing you want to do is remove the upper and lower engine covers and drain the rad via the petcock valve. You also need to remove the fan assembly to have the most amount of room to work. Remove all the covers over the Rad.
There are 2 bolts underneath connecting fan the assembly to the rad. Remove those, then go back up top and pull on the assembly release tabs. Finally disconnect the harness and remove the assembly.
2. REMOVING OLD FEED HOSE SECURING NEW FEED LINE
Once everything is removed and rad drained you want to remove the hose from the bottom of the overflow tank and the part going into the rad. Pull back the rubber cover and use a pick to pull up the spring clip retainer,
then remove it from the rad.
The last thing you want to do is cut the hose just under the rad feed, IE the vertical part feeding into the pump. This is where you will feed into the intercooler circuit from the new expansion tank. Insert the 3/4 to 5/8 hose
adapter into the pump feed hose and secure with clamp. Connect 5/8 heater hose to the other end of the adapter and secure with correct hose clamp. Lay hose over the front of the car for now
At this point you can connect the rad overflow back to the rad with the new coolant overflow hose listed below. Instead of being a tee like the old hose,
this one is direct from tank to rad. Make sure it snaps back in tight with the spring retaining clip, and replace the rubber cover over the joint.
COOLANT OVERFLOW HOSE [ 13 ] (218-501-21-82)
3. INSTALLING THE NEW TANK AND LINES
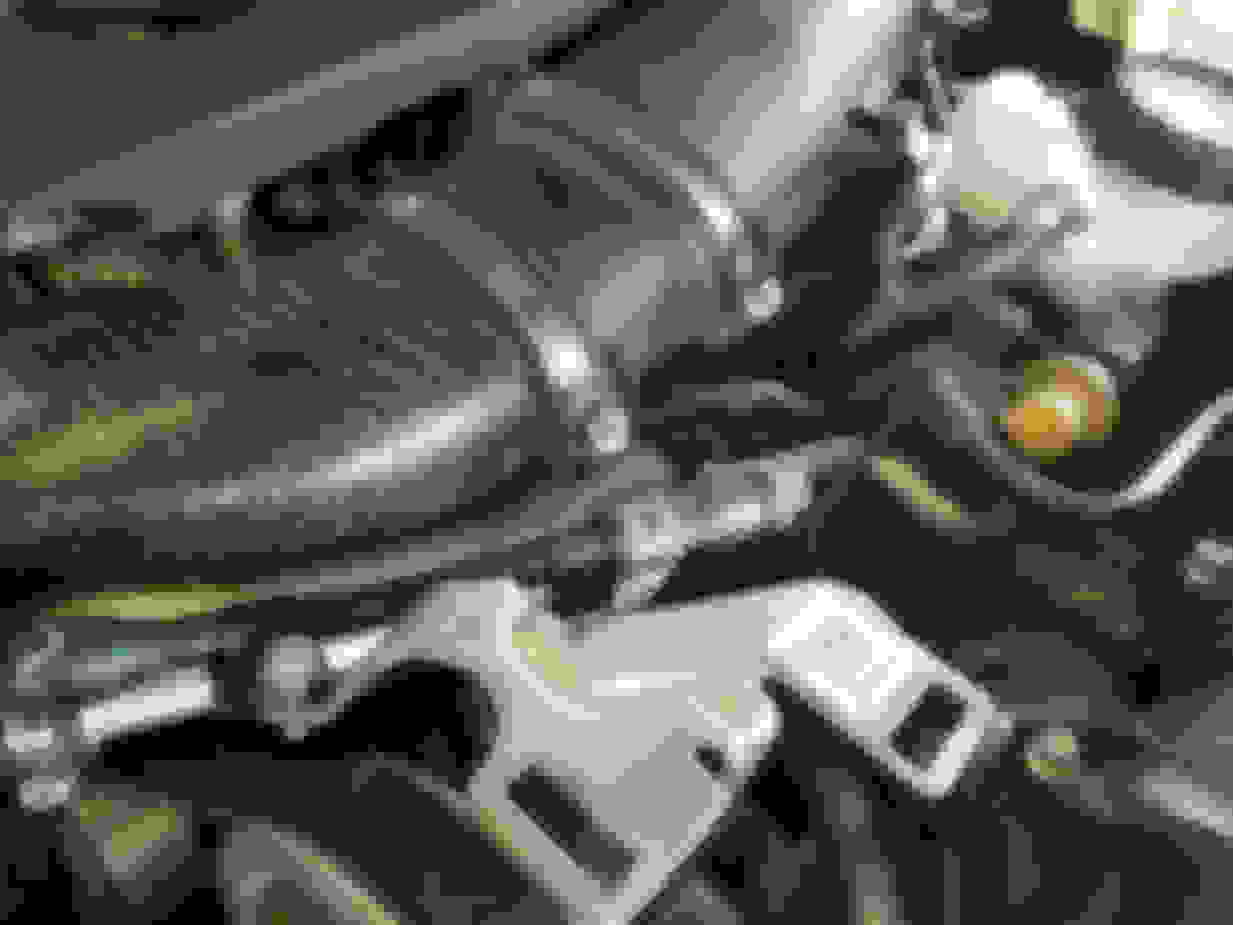
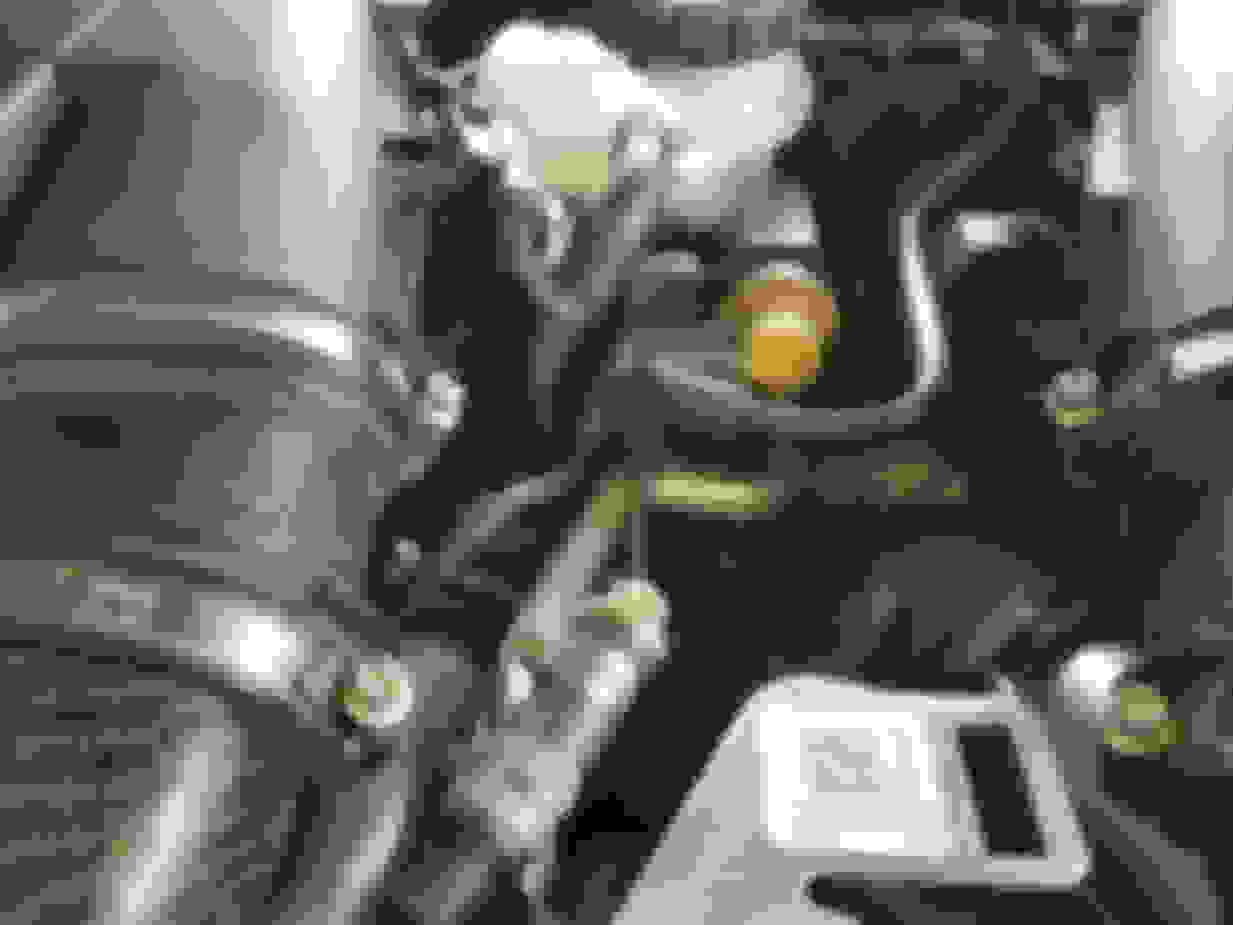
Now we can work on the intercooler side. The first thing to do is remove the current overflow feed line from the top of the intercooler.
This line also tee's into the steam pipe from the valley plate. You want to cut the line just before the Tee and plug the line with a bolt and hose clamp like the pic below.
Next you can install the parts below. First remove the boost control solenoid from the mounting plate connecting to the manifold, then remove the metal mounting plate.
The boost solenoid now bolts to the coolant tank, and the tank bolts to the IM. To mount the tank to the IM, you need some shorter screws. You can get them from the dealer, or use some you may on hand.
Part Number 6:
COOLANT EXPANSION TANK - (278-200-03-85)
Part Number 8:
COOLANT HOSE -(278-203-01-03)
Part Number 9:
VENT HOSE - MERCEDES-BENZ (278-203-14-17)
Connect the vent hose from the intercooler to the tank. Lastly connect the metal drain hose to the bottom of the tank, and bolt to the engine cover stand off.
Now connect the 1/2" heater hose to the metal drain tube and secure with clamp.
You can now connect the 5/8" hose and the 1/2" hose together with the adpater. Route each hose as it fits best them trim the lines to appropriate length. Use the hose adapter and clamp off tight again.
Now you can refill radiator and the IC Tank with MB coolant made from 50/50 mix of concentrate and water. Replace the fan assembly at this point as well. Start with Rad first. Fill from the rad overflow tanks, and start car.
Bring to temp and keep filling with fill cap off. It may take a few start cycles to fully fill it up. Keep some collant on hand.
Next Fill the IC tank. You will need access to a Star SDS to activate the IC pump to properly fill and bleed the new IC circuit. Run the pump while filling the tank, it will suck the fluid down into the pump and cycle it
through the circuit. Eventually the tank will begin to fill up and the strem into it steady with no air bubbles or popping. Once you reach this point, you are done and can reassemble all covers.
Make sure the tanks have caps appropriately secured. Enjoy your new cooler IC Temps!
Unbelievable Peter, thank YOU so much for this. Wonder if putting a screen over the drain in the IC tank for putting a few ice cubes in the tank at the track would be worth it?
Last edited by 6speeddave; 09-04-2017 at 10:52 PM.
THANKS!! I've looked and looked for this type of info. I even pulled my bumper and visually followed every line. Couldn't find a comfortable way to deal with the hose at the radiator. AMS sell's a kit for $500 to do this but I don't know what all it contains.
Hey has anyone else done this mod? Going to try it but not sure exactly where are we cutting the original hose to the rad feed(is the red line accurate), and is hose #13 for the new reservoir the correct part number listed above as 218-501-2182? Thanks for any help before I try it.

 09-04-2017 | 09:27 PM