When you click on links to various merchants on this site and make a purchase, this can result in this site earning a commission. Affiliate programs and affiliations include, but are not limited to, the eBay Partner Network.
Tell them you want a 12mm center hole or anything slightly bigger
Turn the stock down to 30mm OD; You could use it as 32mm, but it is very close to the rotor. It won't touch ever, but for those who are neurotic turn it down to 30mm.
Cut four 15mm sections
All in for $50 or less, depending on what the machine shop charges you for their 30mins to lathe.
Put the front of the car on jack stands (jack and jackstands)
Remove front wheel lugs and place wheels aside (17mm socket)
Remove 5mm rotor retention bolt (5mm Hex)
Remove the retainer pad pins. You can use the 5mm hex to hammer out the pins to get them started. Pro tip: Push on the brake retainer plate towards the center of the hub to help ease tension off the pins.
Remove the center retainer pin. If this is stuck, back the bolt off a few threads and tap from the backside slightly to push the pin out (13mm Socket).
For passenger side, disconnect the brake pad wear sensor.
Spread the brake pads, compressing the pistons back into the caliper (Brake pad spreader). Alternatively, if you don't have a spreader, you can use a flathead screwdriver against the rotor and pads. Alternatively #2, pull a pad halfway out of the caliper, then pull and push on the exposed pad. This will help compress the pistons
Remove the caliper bolts and ziptie to the strut to get it out of the way. (10mm hex)
The fun bit, if your rotors might be seized on the hub.... hammer them off. If you plan on saving them, use the wood block to avoid damage (hammer). Be careful that the rotor might FLY off. If concerned, thread a lug bolt back into the hub.
Clean up the hub surfaces with the nylon brush drill attachment. Clean up the brake retaining pins as well.
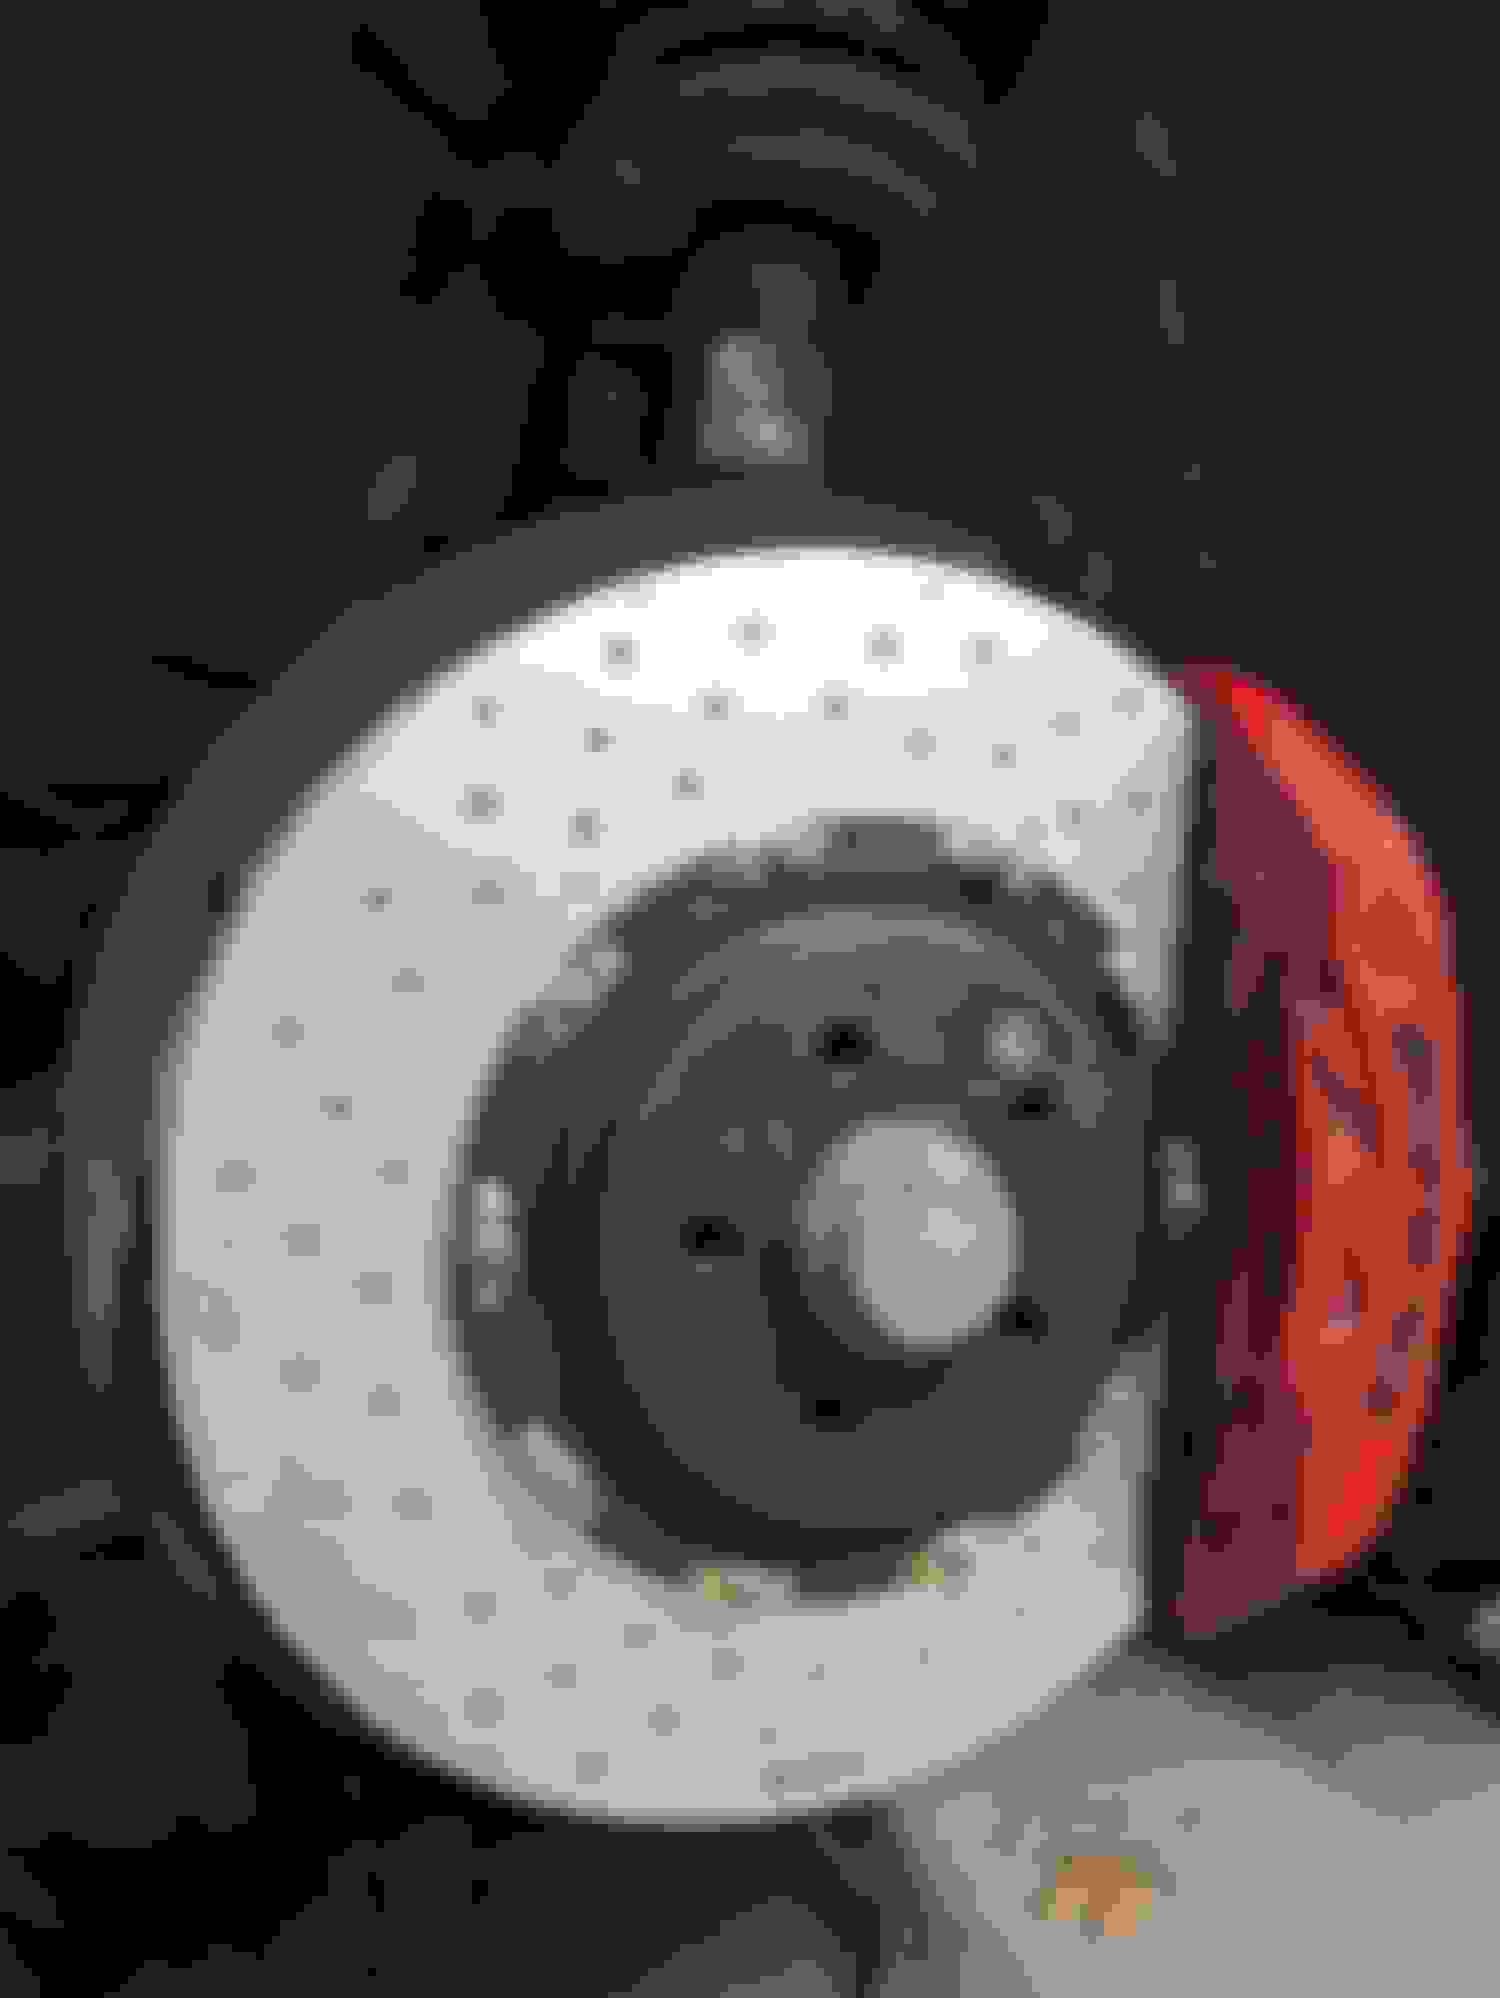
Put new rotors on (390mm Rotors)
Reinstall rotor retaining bolt (5mm hex)
Slide new caliper bolt into top position, then align caliper into position, sliding the spacer between bracket and caliper (Porsche caliper bolt, spacer).
Do the bottom caliper bolt. Tighten (T55 Torx)
Check fitment and verify nothing is interfering. If good, proceed.
Use brake cleaner on both sides of the rotors. They are often shipped with a special coating to prevent rusting.
Slide brake pads into place. Passenger pad, add new brake pad wear sensor (new pads, brake wear sensor)
Add center retaining pin (13mm Socket)
Reinstall lower pad retaining pin, sliding thru bottom of the pad retaining plate. Push on plate to help.
Install upper pin. Make sure the pins are fully seated.
Reinstall wheels.
Lower car.
Torque your wheels
Pump your brakes to seat the pads.
Go for a test drive.
Notes:
Sadly, rotors only come in crack-proned drilled/slotted. I wish someone would make a blank, which are better for brake fade resistance, but alas. Brake pads don't need holes for "degassing". That's 1970s technology. More material = better thermal cooling
The RockAuto rotors don't have directional vanes, so it does not matter Right / Left. If the vanes are directional, then the rotor should be on their respective side
If you have all the parts and your brakes are fairly clean and don't need any clean-up, this should take 30mins, start to finish.
3d Print to verify dimensions before having a machinist lathe up some out of aluminum Spacer cut and installed New stuff.
Hi prsmithjr, I'm interested, are these stainless or aluminum? Not sure how to respond to you directly or even if I can. you can call me a 303 570 0421
Mercedes SLR McLaren 722 S Is Extremely Rare Example Modified by McLaren
Slideshow: A one-of-one U.S.-spec Mercedes-Benz SLR McLaren Roadster became even rarer after a factory-backed transformation at McLaren's headquarters.