Mercedes-Benz C-Class AMG: How to Replace PCV Valve
The PCV valve is an important emissions control device. Over time, it becomes less efficient as the residue from the oil vapors passing through the valve begin to restrict airflow. To keep your C-Class AMG engine running optimally, it's important to identify when a replacement is in order.
This article applies to the Mercedes-Benz C-Class AMG (2007-2014).
The PCV valve routes unwanted pressure in your Mercedes-Benz C-Class AMG's crankcase back into the intake to be re-burned during combustion. This helps in two ways:
- Oil vapors found in the crankcase are burned during combustion, reducing emissions.
- Moisture that develops in the engine oil (which causes sludge build up) is removed.
The PCV valve contains a pintle which moves depending on engine load. A spring also acts on the pintle to calibrate the valve to the engine size. Conditions that can indicate a problem with the PCV valve are a rich or lean air fuel mixture, poor fuel economy, and misfires. If the problem is severe enough, the computer may set a DTC (diagnostic trouble code).

Materials Needed
- 1/4" or 3/8" ratchet
- T30 Torx socket
- Razor blade/ knife
- Diagonal cutters
- 8mm socket
- Flat head screwdriver
- Towel
- Breather pipe/pcv valve P/N A 156 010 03 70
- Hex bolt P/N A 000 990 70 11
Mercedes has made a DTB (diagnostic trouble bulletin) to notify owners of a problem with their PCV valve.
DTB S-B-01.20/24 FEB09 ML63, C63, CLK63, E63, CL63, CLS63, S63, SL63, and R63 up to engine # 156698x 60 022000 - Whistling sound from the engine compartment (in the area of the firewall). The cause may be a malfunctioning diaphragm in the pressure-regulating valve. The sound can also be heard for up to several seconds after the engine is switched off. The sound goes away when the engine dipstick is removed. To resolve, the valve is replaced.
What this means is that Mercedes-Benz has acknowledged this to be an issue, and has purposed a testing procedure and repair order if the vehicle comes into the dealership. With that said, if your warranty has long since expired, and you're sick of oil burning and smoky exhausts, it's time to replace your own PCV valve.
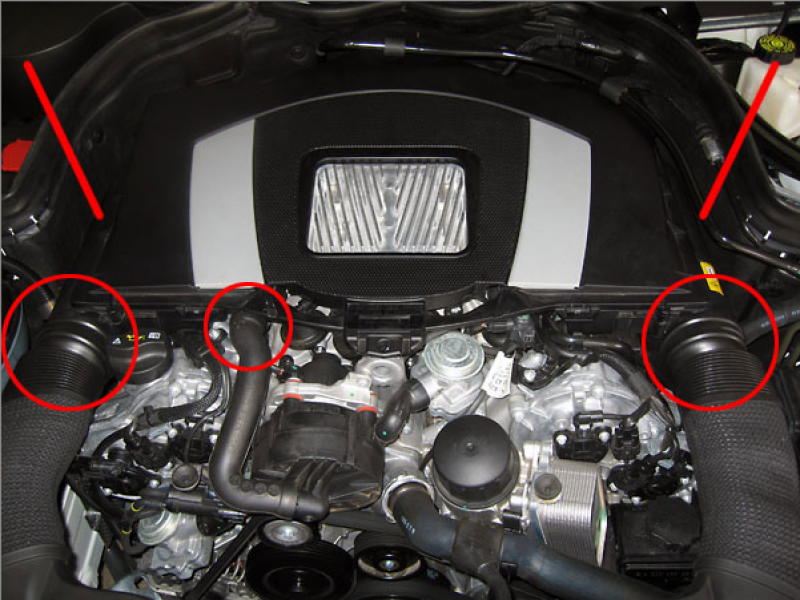
Step 1 – Remove engine covers
- The engine cover is two pieces. The smaller one (with the Mercedes symbol at the front) is removed by pulling upwards on both sides.
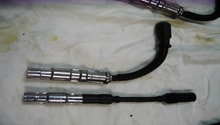
- Remove the two flexible intake tubes as well as a rubber hose that is pictured in Figure 1. Pull them towards the front of the vehicle to remove them.
- Remove the rear engine cover by grasping the sides and pulling upwards.
Step 2 – Remove the air boxes
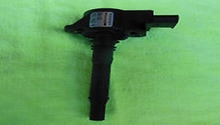
First, make sure your new PCV valve resembles the one in Figure 2.
- Once you've confirmed the correct valve, begin removing the air boxes by disconnecting the MAF sensor wiring harness connectors.
- The base of the rubber y-pipe is secured onto the intake by two clips. Remove the y-pipe from the intake by creating space between the intake and clips then pulling the y-pipe off of the intake. Both air boxes will come off with the y-pipe.
- Place a towel over the open intake so nothing is dropped inside.
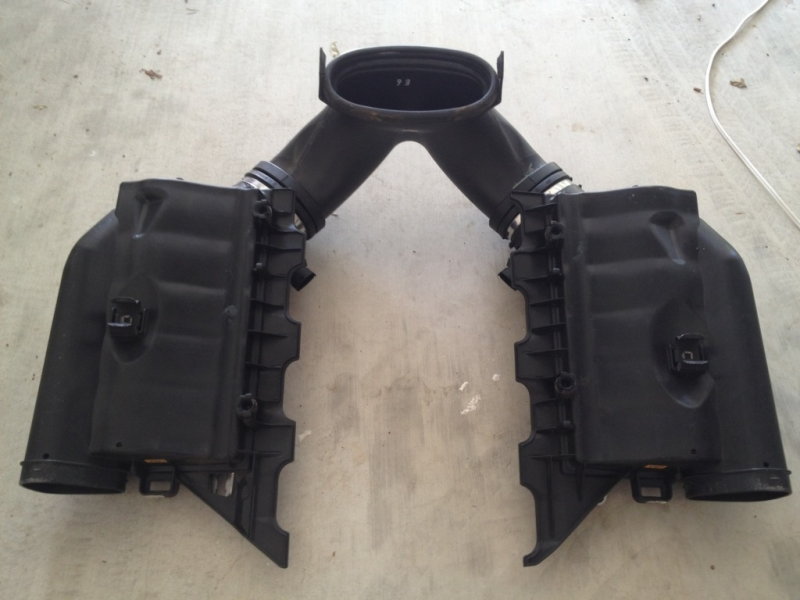
Figure 3. The bottom side of the y-pipe/air boxes. 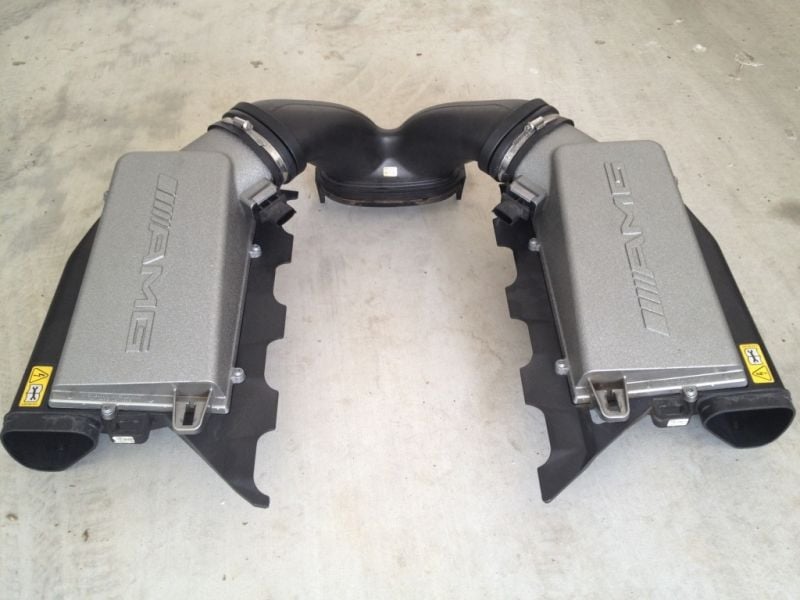
Figure 4. The top of the y-pipe/air box.
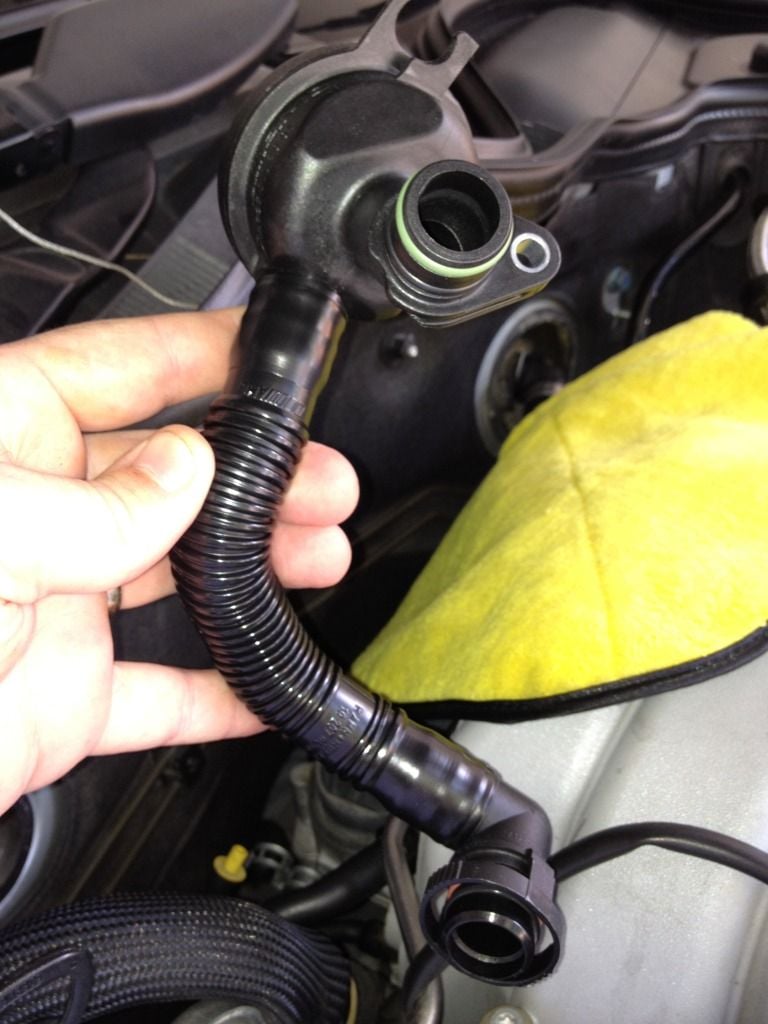
Step 3 – Remove the PCV valve
- First, remove the small hose that locks into the top of the pcv valve. It simply pops out.
- Now begin working on the passenger side and locate the T30 torx bolt holding the PCV valve to the engine. Remove it, then look down the PCV hose and find the metal clasp that holds the PCV hose and another hose together. Push on the metal clasp and rotate it off the PCV hose.
- Moving to the driver's side, locate the point at which the PCV hose connects to the engine. There is a squeeze clip that holds it in place. The hose will come off by squeezing the circle of the clip at the textured areas. Then, pull the hose away from the engine while squeezing. Due to space constraints, a section of the clip may need to be cut off first using a pair of diagonal cutters or a razor blade. Once it is cut, pull the hose off the engine, and maneuver the PCV valve from the engine bay.
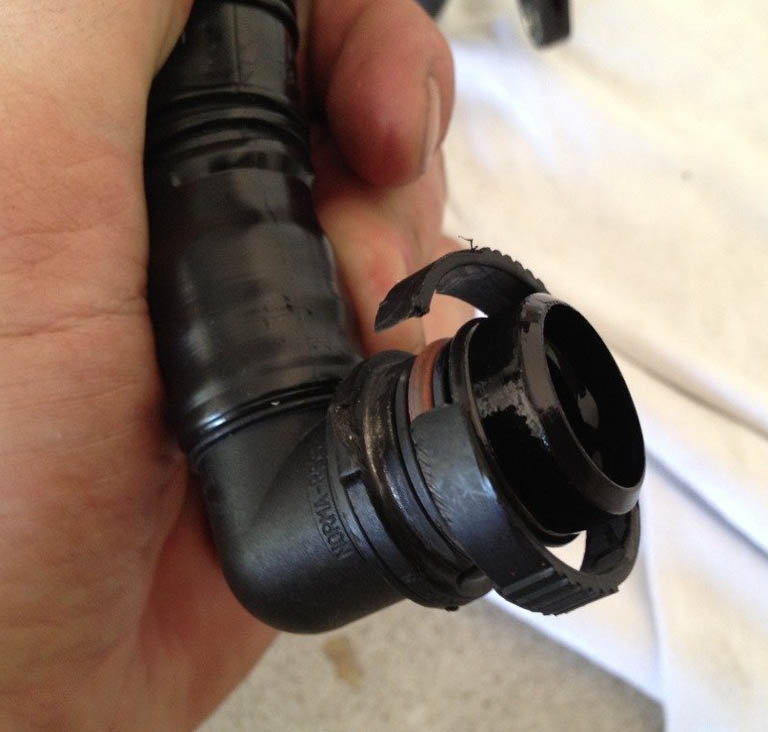
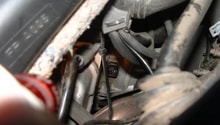
Figure 5. One side of the plastic circle clip has been cut from the hose. 
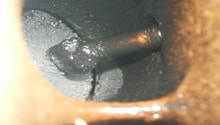
Figure 6. The PCV hose connects to this opening.
Step 4 – Install the PCV valve
- Route the PCV valve into position at the back of the engine.
- Snap the hose end of the PCV valve into place. Lock the PCV valve to the engine with the T30 torx bolt. Re-connect the small hose that runs across the PCV valve.
- Route the MAF sensor wiring connectors by running them underneath and in front of the air boxes.
- Finish by tightening any clamps and snapping the engine covers back into place.

Related Discussions
- PCV Breather DIY - MBWorld.org
- PCV Valve Questions - MBWorld.org
- Purge Control Valve - MBWorld.org