Mercedes-Benz E-Class: How to Replace Air Filter
A dirty air filter will limit the amount of air that the engine can breathe in. Mercedes-Benz recommends air filter replacement between every 40,000 and 60,000 miles, or every 4 to 6 years depending on the engine configuration of your E-Class. Many times, individuals choose to replace their air filters sooner as they are inexpensive and easy to replace.
This article applies to the Mercedes-Benz E-Class w212 (2009-Present).
Engine air filters are the first line of defense when it comes to keeping harmful dirt and debris out of the engine. Air being sucked into the engine first passes through the air filters, which strain any harmful contaminants out of the air before entering the combustion chamber. Over time, leaves, bugs, dirt, and dust becomes embedded in the filters, which limits the amount of air that can pass through them. In turn, owners may see a reduction in fuel mileage as well as a decrease in engine performance because the dirty air filter is causing the engine to work under congested airflow. Replacement of your E-Class' air filter element(s) is inexpensive and can be done in minutes. Continue reading to restore your vehicle's performance and allow your engine the breathe again.

Materials Needed
- T25 Torx bit socket and driver
- Screwdriver or nut driver
- New air filter element(s)
Mercedes offers many different engine configurations in the w212 model lineup, which consists of both gas and diesel engines ranging in size from the small 1.8L turbocharged 4-cylinder up to the naturally aspirated 6.2L V8 in AMG trim. Some models utilize a single air box and air filter element as opposed to dual air boxes and filters. While this article focuses on air filter maintenance for the 3.5L V6 and 5.5L V8 engines, the air filter replacement procedure can be used as a guide for all E-Class models because the steps involved are very similar.
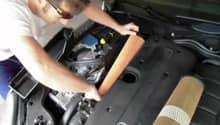
Step 1 – Remove the engine covers
- Remove the engine cover by grasping it at the front and lifting upwards.
- With the front engine cover free, remove it from the engine bay. Some engines may have a multi-piece cover as opposed to a single piece. Regardless, the covers are held in by small spring clips that will release when lifting on the cover.
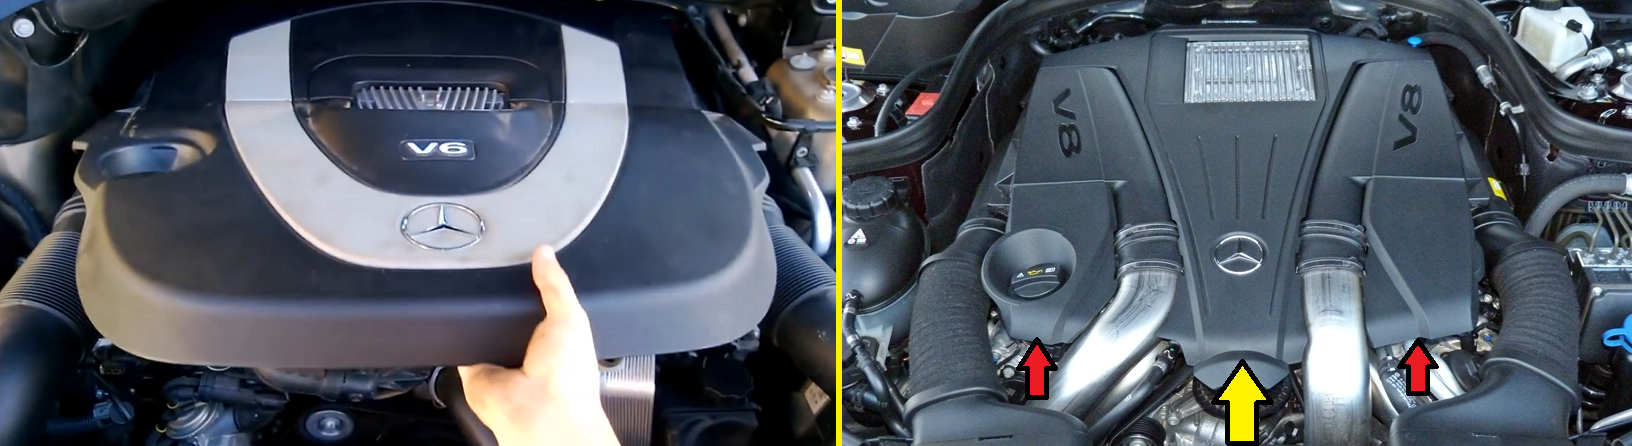
Figure 1. V6 and V8 engine cover removal.
Step 2 – Disconnect the intake tubes
- Simply slide the tubes off of the air box housing by gently pulling them towards you.
- Once the intake tubes are detached from the air box assembly, set them aside. Depending on your engine configuration, you may only have one tube running to the air box.
-
Additionally, certain models have a rubber hose running to the air boxes that will need to be disconnected as well.
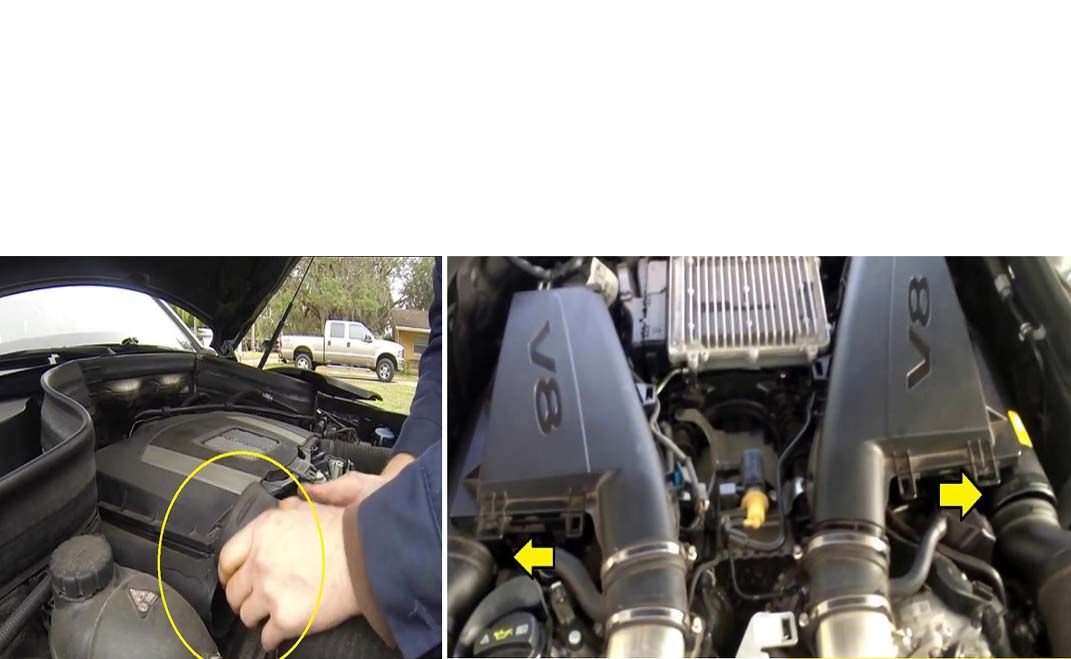
Figure 2. Intake tube removal. 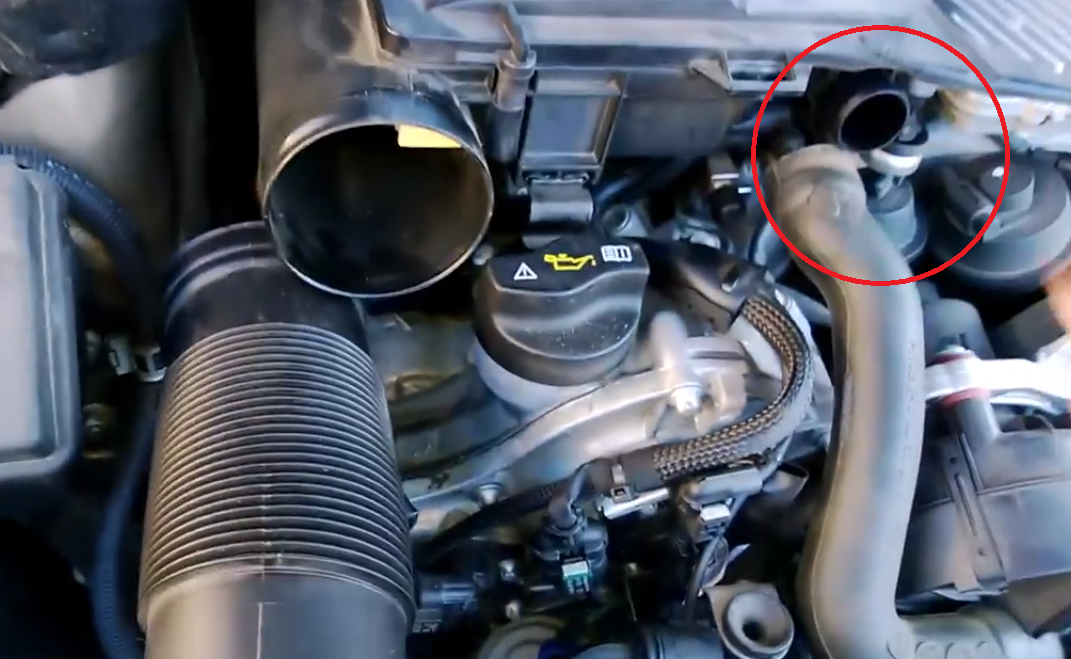
Figure 3. Additional rubber hose removal.
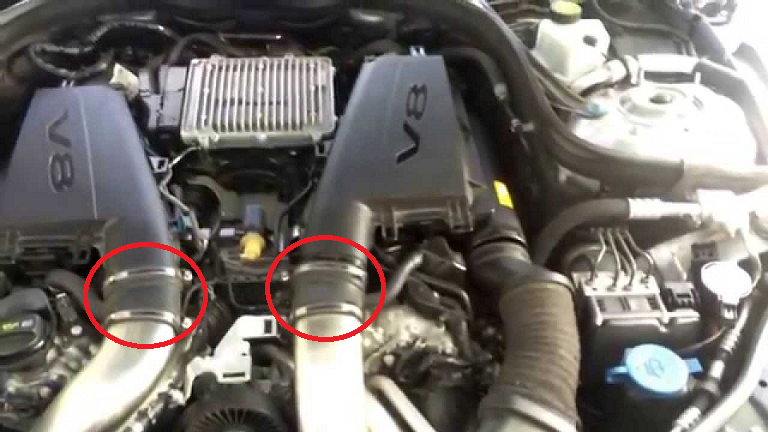
Step 3 – Loosen the rubber couplers (if applicable)
-
For models with split air box/filter housing designs, loosen the clamps on the rubber couplers from the air box lid using a screwdriver or appropriate sized socket/nut driver.
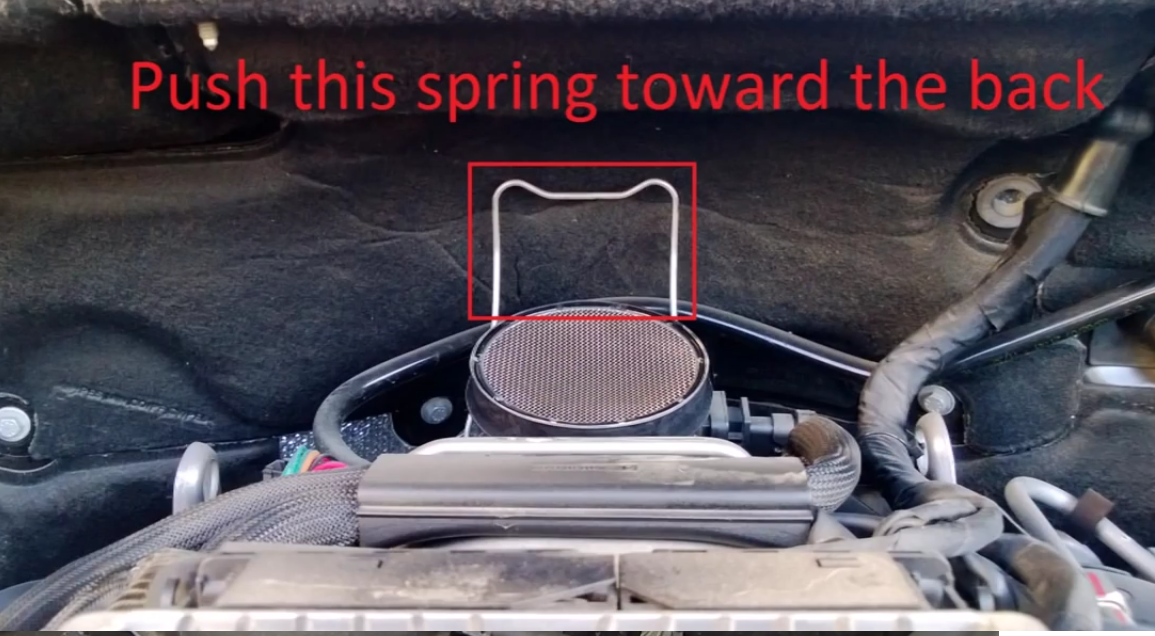
Step 4 – Remove the air box assembly
- Un-clip the air box assembly retaining clip (if applicable). This clip is located on the back of the air box assembly.
- Push the clip back until it is free of the air box housing.
-
Lifting the front of the air box assembly should also disconnect the clip.
- Lift the air box housing upwards and out of the engine bay. Some models may have wiring or a mass airflow sensor plugged into the air box.
-
Make sure the senor is disconnected before removing the air box.
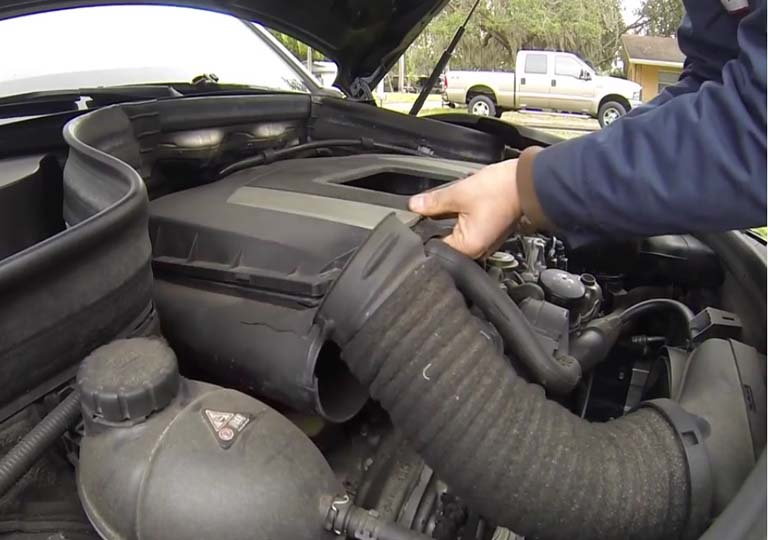
Figure 6. Lift air box assembly from the engine bay. 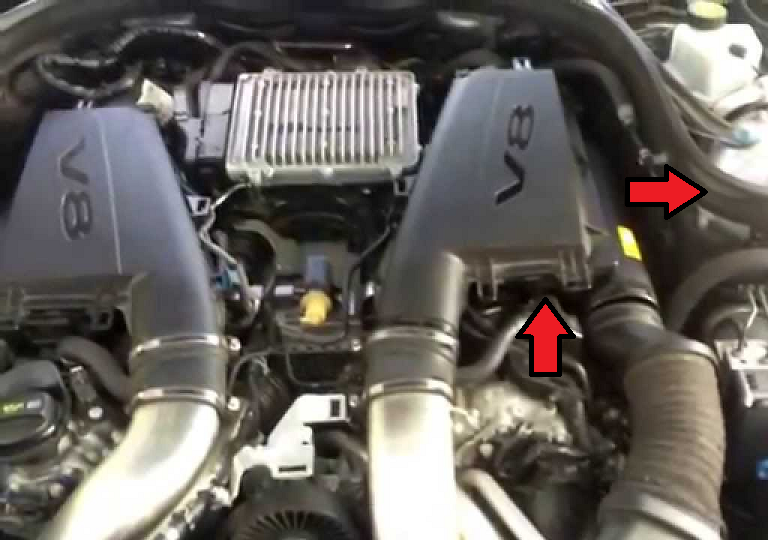
Figure 7. Lift the individual air box backward, up and then out.
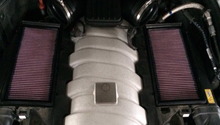
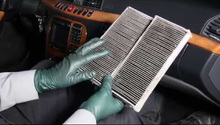
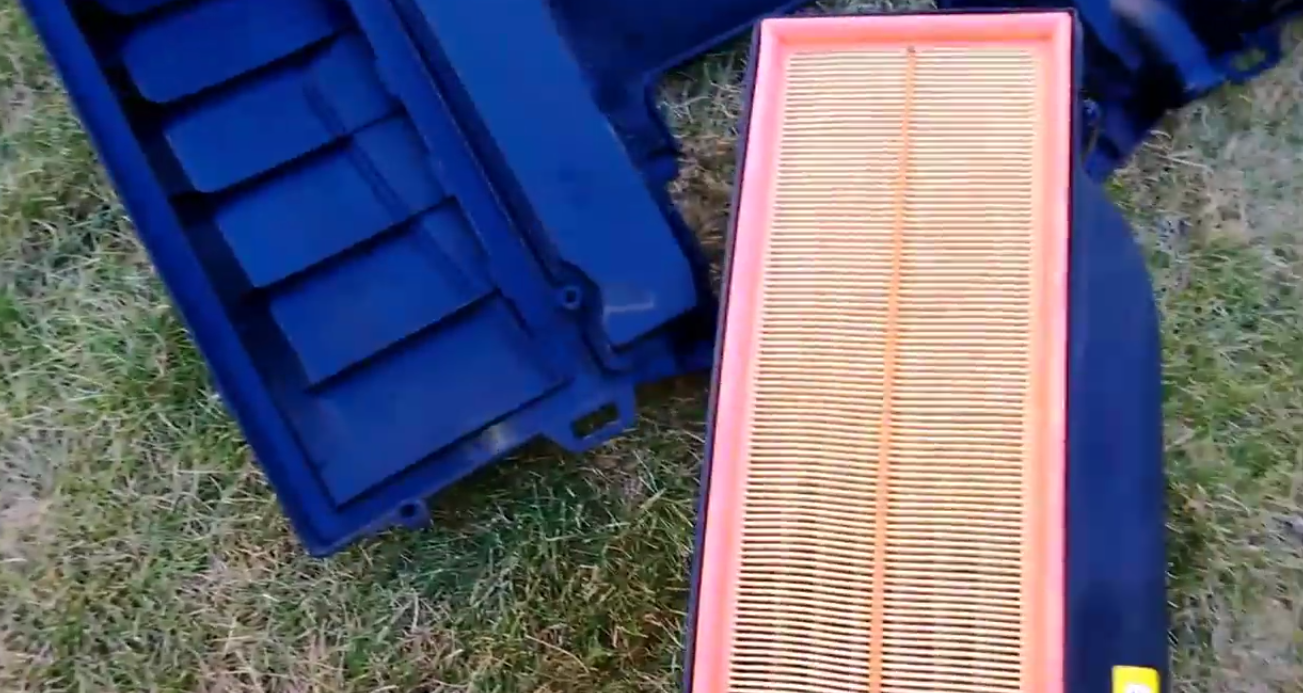
Step 5 – Replace the filter elements
With the air box assembly removed from the car, the filter elements can be removed.
- Loosen the Torx fastening screws to separate the two halves of the air box. Most air boxes have four retaining screws per filter housing.
- With the screws loosened, separate the air box halves to expose the filter. This process is the same whether you have individual air boxes or an air box assembly, as shown below.
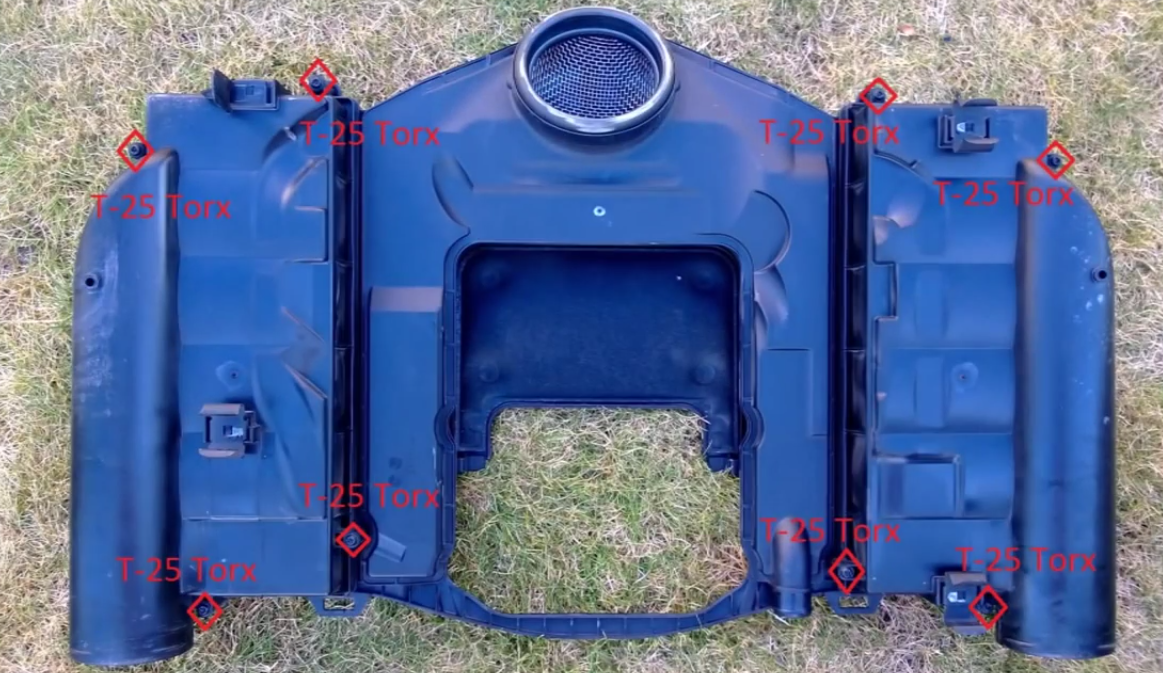
- Remove the air filter elements from their housings.
- Clean the air box of all dirt and debris before installing the new filter element.
- With the new filters in place, reconnect the air box halves and tighten the Torx screws.
Pro Tip
Be sure the filter elements are properly seated in their housing. Improper installation would cause the engine to ingest dirt and debris. Also, do not over-tighten the air box fasteners as they can become stripped out.
Step 6 – Reassemble the air filter components
- With both air filter elements replaced, re-install the air box assembly onto the engine. Make sure that it is correctly aligned on the engine as it was before.
- If applicable, clip the locking tab at the rear of the air box housing in place.
- If applicable, tighten the hose clamps on rubber air box couplers.
- Re-install the intake tubes and any wiring or sensors that may have been disconnected from the air boxes during removal.
- Re-install the engine covers. Be sure they are properly aligned and clipped into place.
Featured Video: Engine Air Filter Change
Related Discussions
- Need a DIY to Change Air Filters - MBWorld.org
- K&N Air Filter - 2012 W212- MBWorld.org
- Engine Air Filter Change 2013 E350 - MBWorld.org