

MBWorld Fanatic!
i've had my Piaa fog bulbs since the summer i should prolly put them in today or tomorrow since its gonna be nice and sunny out.... i hate the color of the stock fogs plus i've got hyper whites all around

Senior Member
Out Of Control!!
you can actually reach the passenger side bulb from the top of the car, reaching down behind the passenger headlamp. The driver's side is truly a pain.
MBWorld Fanatic!
Quote:
Easy job.
yeap I agree, install university is the best! Originally Posted by wizkid
I have step by step instructions on my website at www.installuniversity.comEasy job.

Super Moderator Alumni
drexappeal
Super Moderator Alumni
close
Aug 28, 2023
Quote:
It's good to know that the procedure isn't different for the '05's and up that have the AMG front end. It's always been a big debate whether or not the steps would be the same. Thanks for indicating your experience. Since you have a 350, that basically ends any debate that existed before!Originally Posted by e1000
you can actually reach the passenger side bulb from the top of the car, reaching down behind the passenger headlamp. The driver's side is truly a pain.
Out Of Control!!
Quote:
sweet - yeah - and I actually did change mine so I'm not just going off of some website. The driver's side was sutch a pain....Originally Posted by drexappeal
It's good to know that the procedure isn't different for the '05's and up that have the AMG front end. It's always been a big debate whether or not the steps would be the same. Thanks for indicating your experience. Since you have a 350, that basically ends any debate that existed before!
Super Moderator Alumni
drexappeal
Super Moderator Alumni
close
Aug 28, 2023
Quote:
That's another thing that proves it's the same for all w203's...LOL. I couldn't get the tabs off in the wheel well, like ct did, so I had to lift the car up w/ a race jack and undo the under-panel. It was way too much hassle for a fog light bulb.Originally Posted by e1000
sweet - yeah - and I actually did change mine so I'm not just going off of some website. The driver's side was sutch a pain....
MBWorld Fanatic!
Quote:
http://www.xtremewhite.com/ORD-Light...20-1-1-1-1.cfm
i'm pretty sure i used silverstar bulbs but i dont remember nowOriginally Posted by chkdg8
ctc230k, are these the ones you used?http://www.xtremewhite.com/ORD-Light...20-1-1-1-1.cfm
MB World Stories
The Best of Mercedes & AMG
Explore

Manual Mercedes? 6 Times Sindelfingen Let Drivers Have All The Fun
Verdad Gallardo
Mercedes SLR McLaren 722 S Is Extremely Rare Example Modified by McLaren
Verdad Gallardo
8 Classic Boxy Mercedes Designs That Have Aged Like Fine Wine
Verdad Gallardo
Flawlessly Restored Mercedes 190E Evo II Heads to Auction
Verdad Gallardo
Electric Mercedes C-Class Unveiled: 11 Things You Need to Know
Verdad Gallardo
Mercedes EQS Gets A Major Update: Everything You Need to Know
Verdad Gallardo
5 Underrated Mercedes-Benz Models That Don't Get the Love They Deserve
Verdad Gallardo
Mercedes 300D Has Pushed Well Past 1 Million Miles and It Ain't Stopping
Verdad Gallardo
10 Most Reliable Mercedes-Benz Models You Can Buy Used
Verdad GallardoSuper Member
Okay I have read the DIY 100 times and i can not seem to locate all the clips that keep the panel on, from under the car,
I have my hids and im dying to put them in, but i cant for the life of me, get the cover off from the bottom,
What else am i missing ?
I have my hids and im dying to put them in, but i cant for the life of me, get the cover off from the bottom,
What else am i missing ?
MBWorld Fanatic!
lol you have to like open your whole under car cover off... is really a pain so i just change the passenger side and give up...
and since you have wheels that big might be really really optional to take it off if you have skinny arm....
and since you have wheels that big might be really really optional to take it off if you have skinny arm....


MBWorld Fanatic!
i need help putting my lenses in too. i bought the part but never put them on, dealer wants to charge $230 just to install which is like quadruple wat i paid for the parts lol.

MBWorld Fanatic!
wow this is an old thread. Take of the bottom guards not the whole thing but just the side bolts, enough to stick your hand in.
Super Member
Quote:
Fow what its worth, here is another thread talking about installing new fog bulbs. It may not be much help as all the pics have been removed.Originally Posted by fstblckpresiden
i need help putting my lenses in too. i bought the part but never put them on, dealer wants to charge $230 just to install which is like quadruple wat i paid for the parts lol.


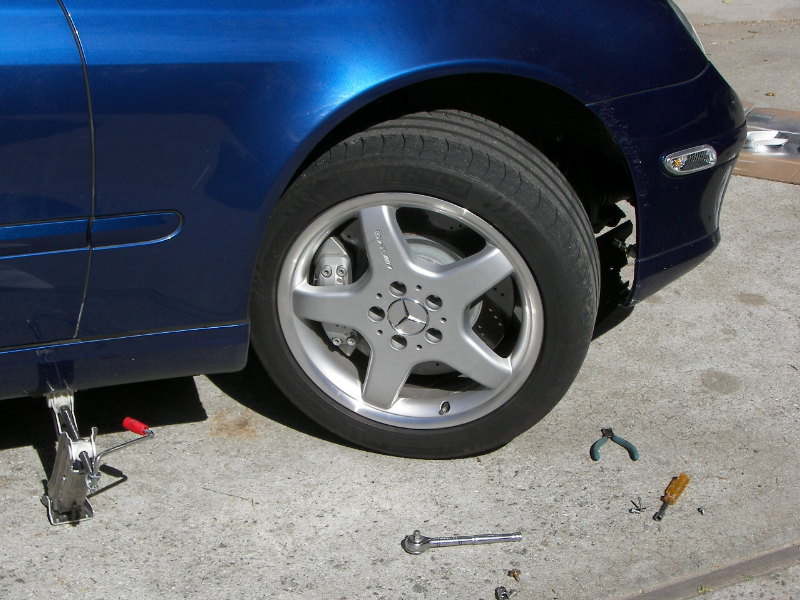
Turn the wheel to access the panel is the wheel well.
Jack the car up a little bit, don't need the wheels off the ground, but it might help.
Remove the bolts from the cover in the wheel well.
Then under the car are these black plastic things, use a pair of side cutters to grab the nipple of the thing, (best way to describe it) and pull it down, being careful not to cut it off. There's 3 or 4 of them.
Take the one screw out of the bottom pan closest the wheel.
Pull the whole panel off.
Get yer head under the car, and you'll see 2 8mm screws holding the fogs in place. Undo the screws, fish out the assembly, disconnect bulb.
Below in the attachment, you'll see the view from the bottom of the assembly
and you see where the bolts go. You'll also see where I cut myself on the old lense that was broken.
Also, a pic of the little plastic pins. You want to pull the center part down.
Like I said, there a little hard to grasp. Side cutters work well.
You'll also see the assembly ready to go back in.
I painted the grey plastic with hi temp silver paint, and put in
Philips 4K halogen bulbs.
To bad they sent the wrong one for the passenger side, but now I know how, it's a 10 minute job.
Found the bulbs from a store on yahoo. Guess I can't post the link.
29 bucks including shipping.
Nice white light.
One last pic, here's the passenger side, with the panel and light removed.
Note the tools, all you need. 10mm, 8mm, side cutters...screwdriver to pop the clips on the lenses...


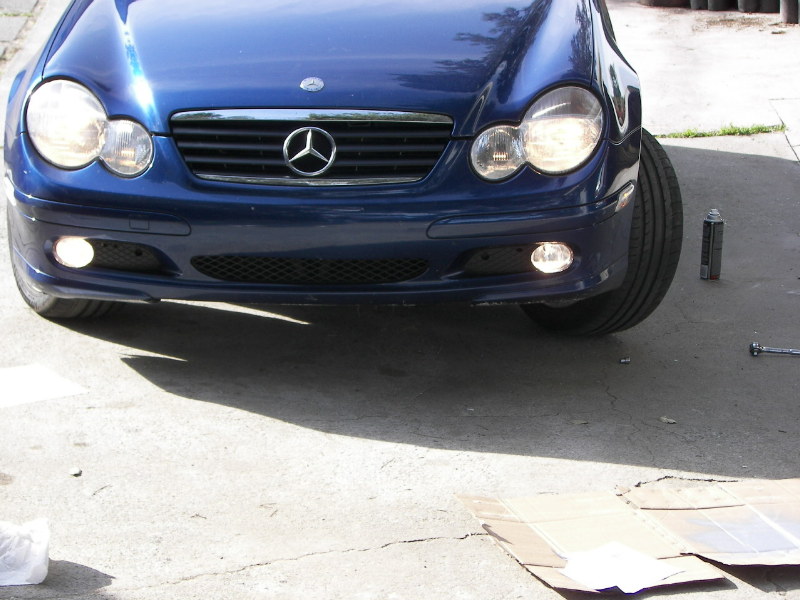
Here's one more pic.
Drivers side is clear...
passenger side is old lense.
Waiting for the right one nexxt week.
Drivers side is clear...
passenger side is old lense.
Waiting for the right one nexxt week.
Junior Member
Quote:
Them fog light lense(s) change-out only takes a few snaps (literally; three on each light), just use a flat head screw driver and pop them clips out. Hardest part is getting them out from where they're mounted... driver side being somewhat more difficult due to the windshield washer reservoir.Originally Posted by fstblckpresiden
i need help putting my lenses in too. i bought the part but never put them on, dealer wants to charge $230 just to install which is like quadruple wat i paid for the parts lol.
I'd follow C230 Sport Coup instructions on how to get them out... also, using a swivel would ease the removal of the 8mm fog light mounting bolt, and use some eye protection if you plan to stick your head under there, lots of dirt debris will be falling onto your face.

MBWorld Fanatic!
Quote:
Wow, you trusted that cheapo jack and got under the car? Originally Posted by C230 Sport Coup
...

Quote:
lol...the cheapo jack is fine if he's on the even ground, but you gotta make sure you use the triangle stopper and use the hand brake too.Originally Posted by Blake P
Wow, you trusted that cheapo jack and got under the car?
Super Member
Quote:
Originally Posted by FrankW
lol...the cheapo jack is fine if he's on the even ground, but you gotta make sure you use the triangle stopper and use the hand brake too.
Always use jack stands.

Super Member
Hey I just changed my fog lights for the first time today...I followed the instructions from install university, and I have to say it was very easy...I took my time since it was the first time, but still it was easy...I'm thankful for that after hearing that it might be difficult...I put in sylvania silverstars. I had the driver fog go out, so I took the opportunity to change both. 
Super Member
Quote:
Just did my hid fogs. it is exactly as you said. Jack up the car, and remove the few bolts. the light is right there. pull the clip off and twist the light up counter clockwise. pops right out, install new light and twist back down clockwise, replace the clip and stand back and enjoy, too 30 minutes to install the HIDS. Originally Posted by DACHIGGA
ACtually now, to remove the fog light I pretty sure you can remove the black panel infront of the wheel well three bols infront of the wheel section and the clips under the bumper. Take out the panel and with a few bolts the fog light comes right out.

Super Moderator Alumni
drexappeal
Super Moderator Alumni
close
Aug 28, 2023
Quote:
Nice, nice! What output bulb# did you get? Take some pics when you get a chance.Originally Posted by outaurleague
Just did my hid fogs. it is exactly as you said. Jack up the car, and remove the few bolts. the light is right there. pull the clip off and twist the light up counter clockwise. pops right out, install new light and twist back down clockwise, replace the clip and stand back and enjoy, too 30 minutes to install the HIDS.
MBWorld Fanatic!
Damn, I finally got my fog lights done today. It was much harder than I anticipated, I brought it into my dad's dealer, threw it up on a lift and started working away at it around 3. I worked dilligently and slowly, making sure that I didn't break anything. I didn't fully finish until about 5:30. I had the advice and a little help from the mechanics, but they had work to do...so I was pretty much on my own.
IT IS POSSIBLE to change the driver's side fog lens without loosening the bumper, but if you're taking the whole fog light out, you will need to loosen the bumper.
I wasn't planning on replacing the bulbs, but I already had it up on a lift and the mechanics said it would be a good idea since I already have it taken apart. So, I drove down to the nearby AutoZone, grabbed a pack of the best Sylvania bulbs I could find and went back and put them in.
My advice to anyone who is going to tackle this is to make sure you have a spotlight and to fasten the covers ABSOLUTELY tight when you put it back together. After finishing the driver's side, I forgot I left the passenger side slightly loose. When I went to park my car, tire rub scared the crap out of me, it was soooo loud.
Also did the clear side mirror blinkers as well.
Super Member
Kev, I know this is posted sumwhere, but I see that your online at the moment, what bulb do I get to make the mirrors clear...non-led that is, urs are non-led right?


