


Quote:
Originally Posted by FrankW
take a saw and cut away the inside part of the impact strip.
Quote:
Dremel Acquired. That damn impact strip is going down!Originally Posted by phister
Pm replied. I angle grinded it down.
Quote:
Lemme know if ya wanna update yours Originally Posted by glocati
John....damn that new front is looking good ! Love it. Makes me hate mine now. lol
 I spotted some good deals lately on fleabay. Sounds like you've got good access to a painter/powdercoater, which was the majority of my costs.
I spent a couple days heating up my fender and pushing out that tab smore, then took the dremel to the tab. I made only a few mm of space, but I am no longer rubbing. Actually, scratch that i rub a teeny tiny bit when I have a full load.
Thanks for the help everyone :P
Lowered the front a quarter inch too. No pix, just happy to be mostly rub free! 235/265 + more camber has proven to be completely awesome while pushing the car hard around turns. Cant wait for the PNW to dry up s'more so I can drive hard more.
Thanks for the help everyone :P
Lowered the front a quarter inch too. No pix, just happy to be mostly rub free! 235/265 + more camber has proven to be completely awesome while pushing the car hard around turns. Cant wait for the PNW to dry up s'more so I can drive hard more.

MBWorld Fanatic!
I took a dremel and shaved down my tabs too... i'll try to take a pic to show you how much. its pretty close like yours, but it helped a lot in the end.
Quote:
I hate chu. Someday when my w203 grows up, it'll be like yours.Originally Posted by WaveyKat
BOOO...
Quote:
Im sure anyone who's grinded down there knows what im talking about. I feel like a damn dremel pro now after grinding away in there. hahah!Originally Posted by Midnight Koop
I took a dremel and shaved down my tabs too... i'll try to take a pic to show you how much. its pretty close like yours, but it helped a lot in the end.
****ty pic in chinatown:
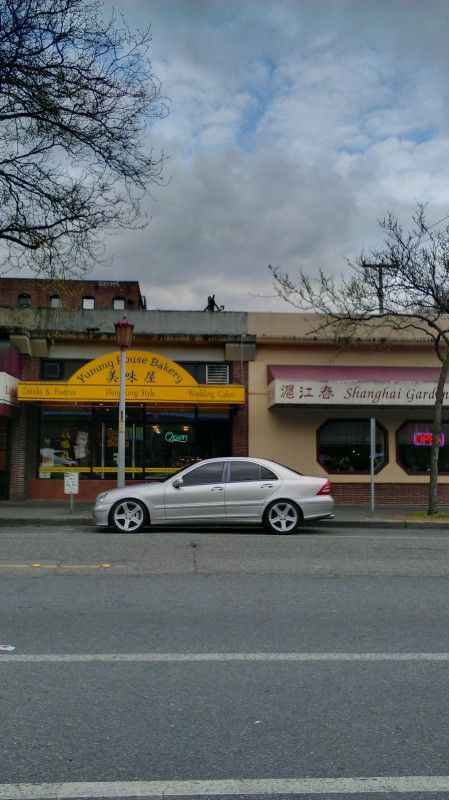
Good rake and even space between fender/tires all around, but after creating an account on stanceworks, all i wanna do is go lower + space out and run skinny tires. hahah!
MBWorld Fanatic!
I need to do my rear tabs still ") Do you have any good pics of your work so I can get an idea what needs to be shaved down?
Do you have any good pics of your work so I can get an idea what needs to be shaved down?
Do you have any good pics of your work so I can get an idea what needs to be shaved down?MB World Stories
The Best of Mercedes & AMG
Explore

Manual Mercedes? 6 Times Sindelfingen Let Drivers Have All The Fun
Verdad Gallardo
Mercedes SLR McLaren 722 S Is Extremely Rare Example Modified by McLaren
Verdad Gallardo
8 Classic Boxy Mercedes Designs That Have Aged Like Fine Wine
Verdad Gallardo
Flawlessly Restored Mercedes 190E Evo II Heads to Auction
Verdad Gallardo
Electric Mercedes C-Class Unveiled: 11 Things You Need to Know
Verdad Gallardo
Mercedes EQS Gets A Major Update: Everything You Need to Know
Verdad Gallardo
5 Underrated Mercedes-Benz Models That Don't Get the Love They Deserve
Verdad Gallardo
Mercedes 300D Has Pushed Well Past 1 Million Miles and It Ain't Stopping
Verdad Gallardo
10 Most Reliable Mercedes-Benz Models You Can Buy Used
Verdad GallardoMBWorld Fanatic!
drop and stretch John... PLAY THE GAME HAHA
That last pic makes my rear look ridiculously high..
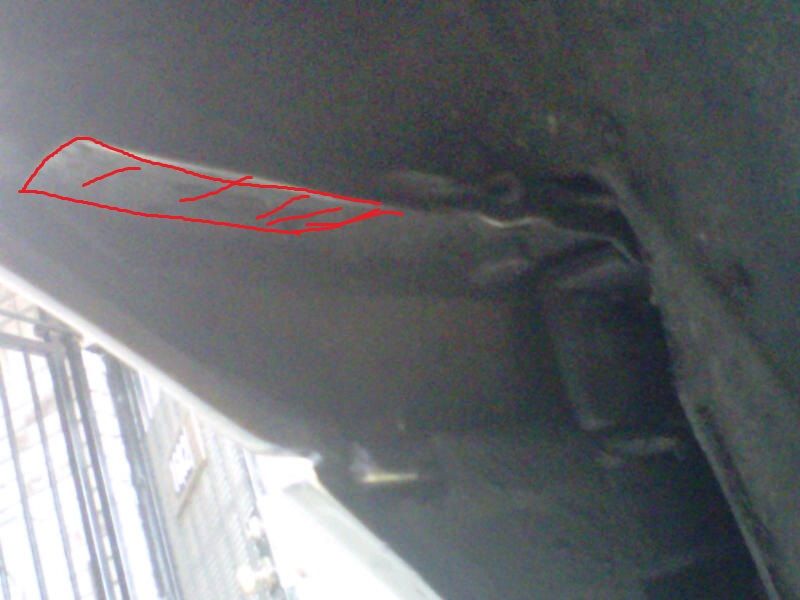
 I swear, i fyou poke your head down there, you'll KNOW the first time you look at it. The huge tab/bracket that you have to take down is readily apparent. The one thing I was concerned about was cutting off too much of the bracket and the bumper/fender not staying together, but after talking w/ Phister, I knew i had plenty of space to cut away. Phister cut all the way to the screw... I have about half an inch till I get to it, but i didnt need THAT much space.
Quote:
Do you have any good pics of your work so I can get an idea what needs to be shaved down?
Ya know, while I was down there, i told myself to take pictures, but i didnt cuz i just wanted to get that **** done and be done w/ rubbing Originally Posted by CoupeCrazy03
I need to do my rear tabs still Do you have any good pics of your work so I can get an idea what needs to be shaved down?
I swear, i fyou poke your head down there, you'll KNOW the first time you look at it. The huge tab/bracket that you have to take down is readily apparent. The one thing I was concerned about was cutting off too much of the bracket and the bumper/fender not staying together, but after talking w/ Phister, I knew i had plenty of space to cut away. Phister cut all the way to the screw... I have about half an inch till I get to it, but i didnt need THAT much space.Quote:
Dangit - you and your nice wheels and the awesome drop. Trust me, ive thought about it and ran the math for what spacers id need. I already have rear spacers + lugs. So, 100 bux + put my front tires on the rear and find new skinny fronts.... and I could be there... I just dont think I can give up the functional aspect of my ride height right now. Nor do i wanna eat up tires like crazy cuz i DO put on lots of miles + the stiff sway bars would have to go too. I three wheel and have a hard enough of a time going up/down weird drive ways now as is.Originally Posted by phister
drop and stretch John... PLAY THE GAME HAHA


John, how are you?. i want to say sorry for all the Booos lol hee hee.. but your car do look great loving the black roof and the Bix set the car off right nice and clean. time to change your Sig Picture. and get some 05+ Tail lights.. Your wheels in the last Picture looks like
19" looks great. Whats next for the car?
19" looks great. Whats next for the car?

Junior Member
car looks awesome man... I just went thru the exact same scenario last week.. I was rubbing in the exact same place and also wanted to use the drummel... Instead I raised the car up 1/2 inch in the back and adjusted the camber so the wheels were more tucked.. At the end of the process the car actually sit 3/4 inch lower ( middle of fender to ground) then when i started, just the wheels are more tucked.. I too will be grinding down that bracket now that I see it has been done successfully.. Pictures of the build will be coming shortly.. Keep up the good work and thanks for all the help.
MBWorld Fanatic!
lol you dont have to do crazy negative camber just a nice one to tuck it in a bit. I'm going to call BC and get stiffer springs so I have more static in my suspension so I dont have to worry about big dips and bumps.
Quote:
Fellow forum member/'boo-er' of my threads/posts, waveykat, sent me a cell phone pic after he was rubbing on fatter tires. The pic shows exactly what to cut out w/ the rear tabs. You could even push it further towards the screw like mr phister has doneOriginally Posted by CoupeCrazy03
Do you have any good pics of your work so I can get an idea what needs to be shaved down?
Update on my car:
Current Mileage: 146k+ miles
I replaced the key amplifier to get my key remote to lock/unlock/open the trunk this weekend. Damn that tint shop! I got lucky and scored the part for $75 shipped off ebay and I imagine ALOT of wrecked cars have these parts available - just be sure to make sure the part number will work with your car as there have been NUMEROUS changes/updated to this part through the w203's production. IIRC, the part is roughly $550+ new!
Keyfob (RF?) Amplifier DIY steps:
Remove the SRS logos on the C pillars and unscrew the screws behind them
Remove the rear side weatherstripping around the rear doors to expose the C pillars
Remove the grab handles
Remove visible clips (by weather strips) holding the C pillar.
Remove the C pillars
Pull down the rear headliner enough to work between the headliner and the rear windshield - the amplifier should be visible at this point.
Unplug the three amplifier plugs on the driver side C pillar
Unclip the OLD amplifier - The casing splits into two. DO NOT pry them from car /tear the adhesive holding them onto the ceiling.
Install the new amplifier.
Re-install everything.
Keys work again from long distance! woot!
Its ridiculous how convenient it is to have these keys work properly. Its something I took for granted until I had to spend time w/o properly functioning keys.
Need oil changeeeeee
I've never wanted a spoiler on my car, but recently I've been thinkin about the carlsson spoiler! What do yall think? :P
MBWorld Fanatic!
Carlsson or OEM C32 spoiler I say.
Glyn M Ruck
Super Moderator
close

Sep 20, 2024
Quote:
I replaced the key amplifier to get my key remote to lock/unlock/open the trunk this weekend. Damn that tint shop! I got lucky and scored the part for $75 shipped off ebay and I imagine ALOT of wrecked cars have these parts available - just be sure to make sure the part number will work with your car as there have been NUMEROUS changes/updated to this part through the w203's production. IIRC, the part is roughly $550+ new!
Keyfob (RF?) Amplifier DIY steps:
Remove the SRS logos on the C pillars and unscrew the screws behind them
Remove the rear side weatherstripping around the rear doors to expose the C pillars
Remove the grab handles
Remove visible clips (by weather strips) holding the C pillar.
Remove the C pillars
Pull down the rear headliner enough to work between the headliner and the rear windshield - the amplifier should be visible at this point.
Unplug the three amplifier plugs on the driver side C pillar
Unclip the OLD amplifier - The casing splits into two. DO NOT pry them from car /tear the adhesive holding them onto the ceiling.
Install the new amplifier.
Re-install everything.
Keys work again from long distance! woot!
Its ridiculous how convenient it is to have these keys work properly. Its something I took for granted until I had to spend time w/o properly functioning keys.
Good news! Originally Posted by TruTaing
I replaced the key amplifier to get my key remote to lock/unlock/open the trunk this weekend. Damn that tint shop! I got lucky and scored the part for $75 shipped off ebay and I imagine ALOT of wrecked cars have these parts available - just be sure to make sure the part number will work with your car as there have been NUMEROUS changes/updated to this part through the w203's production. IIRC, the part is roughly $550+ new!
Keyfob (RF?) Amplifier DIY steps:
Remove the SRS logos on the C pillars and unscrew the screws behind them
Remove the rear side weatherstripping around the rear doors to expose the C pillars
Remove the grab handles
Remove visible clips (by weather strips) holding the C pillar.
Remove the C pillars
Pull down the rear headliner enough to work between the headliner and the rear windshield - the amplifier should be visible at this point.
Unplug the three amplifier plugs on the driver side C pillar
Unclip the OLD amplifier - The casing splits into two. DO NOT pry them from car /tear the adhesive holding them onto the ceiling.
Install the new amplifier.
Re-install everything.
Keys work again from long distance! woot!
Its ridiculous how convenient it is to have these keys work properly. Its something I took for granted until I had to spend time w/o properly functioning keys.

146k+ Miles
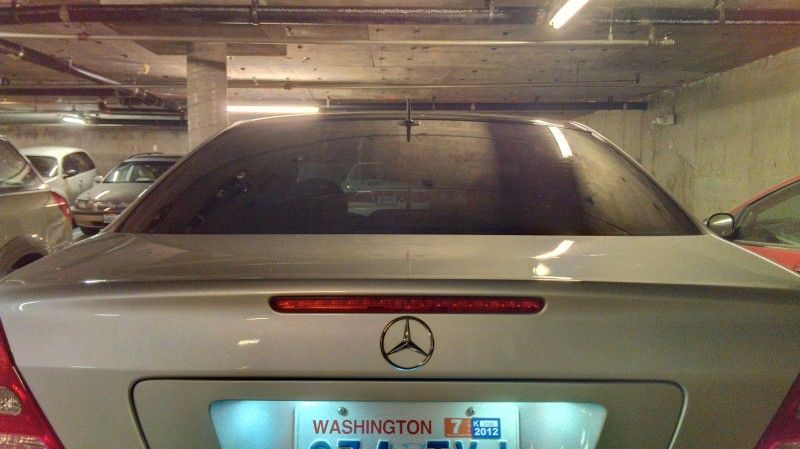
I finally installed the 05+ brake light as mine was cracked but didn't want to die. I also Installed LED Plate Lights from AZNOptics!
Whats the diff between the pre/post facelift tail lights aside from the entire bottom being lit? Are the new ones actually lighter in color or brighter?
I finally installed the 05+ brake light as mine was cracked but didn't want to die. I also Installed LED Plate Lights from AZNOptics!
Whats the diff between the pre/post facelift tail lights aside from the entire bottom being lit? Are the new ones actually lighter in color or brighter?
Damnit - I just bought the 12mm front spacers to add to my 12mm rear spacers from a3i.
Phister - Be prepared for me the harass you more about how you got the FRONT wheels/tires to fit!
Coming after this set of tires dies:
Front 8.5 ET16 215/40/18 (12mm spacer)
Rear 9.5 ET21 235/40/18 (12mm spacer)
Merlot/moarlow
Phister - Be prepared for me the harass you more about how you got the FRONT wheels/tires to fit!
Coming after this set of tires dies:
Front 8.5 ET16 215/40/18 (12mm spacer)
Rear 9.5 ET21 235/40/18 (12mm spacer)
Merlot/moarlow

MBWorld Fanatic!
There is a big difference in how the facelift taillights look at night. The entire bottom is lit up as you already know, but it's the reflectors inside on the facelift vs the diffuser on the lens of the pre-facelift. Like frosty headlights the diffuser-type taillights just look 80s.
Here are pics:

vs

Here are pics:
vs
MBWorld Fanatic!
To get even sidewall heights I'd go 215/40 & 245/35
Glyn M Ruck
Super Moderator
close
Sep 20, 2024
Quote:
Here are pics:
vs
You can fit the 2 extra lamps to the pre facelift housings if it bugs you.Originally Posted by LILBENZ230
There is a big difference in how the facelift taillights look at night. The entire bottom is lit up as you already know, but it's the reflectors inside on the facelift vs the diffuser on the lens of the pre-facelift. Like frosty headlights the diffuser-type taillights just look 80s.Here are pics:
vs
Phister - I considered 245/35/18, but it would leave me w/ less clearance than what I have now after adding the spacers. I suppose I could camber in some to make up for that though... Im interested in the BC coil over's rear set up - esp if you could get higher spring rates.
Glyn - do you have pictures of someone who has made their prefacelift tails light up like the facelifted ones?
Random updates (148+k miles):
Oil changed a while ago. Everything looked fine.
Considering a brake fluid flush before winter.
Replaced my K1Motorsport rear camber arms with Ghostrider camber arms. The old camber arms joints were exposed and worn out. They made ALOT of noise if the grease ran dry, so I'm glad the new adjustable arms appear to be much better protected from the elements.
Replaced the front adjustable Code3Performance front sway bar end links with OEM AMG end links. The ball joints had worn out after ~90k of usage. Will look into replacing the ball joints and/or replicating the entire setup. Other car forums seem to do this frequently.
I noticed my car makes a bit of a ticking noise now inside the cabin - started happening after I got my fenders rolled. Im guessing the guy might have messed up my parking brake or something. Any ideas here? The noise seems to adjust according to the speed of my car....
I still rub on medium/large dips w/ people in the back seat. Damn meaty stance is great for driving aggressively, but has sucked in terms of carrying people.
Boring pic w/ the GF's car - I cant get enough of black roofs...
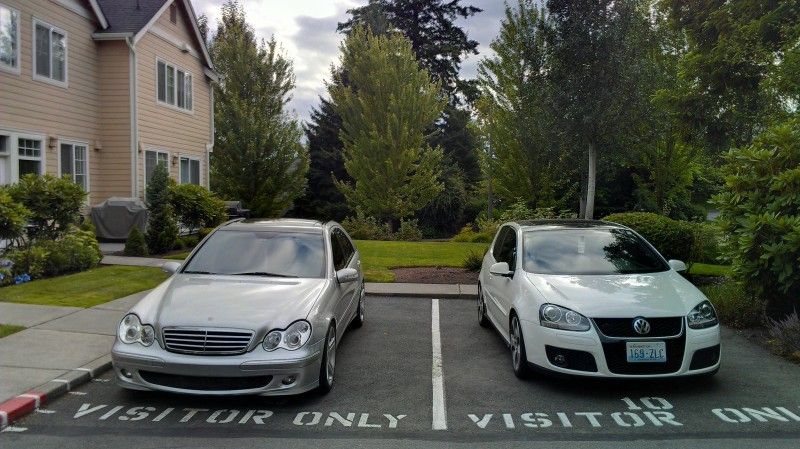
Time the update the sig pic! Lol
Car looks great. Blk out the grille in the middle would look great
Car looks great. Blk out the grille in the middle would look great


