My DIY Carbon Fibre Trim

Thread Starter
Newbie
Joined: Oct 2010
Posts: 14
Likes: 1
MB C230 W203
My DIY Carbon Fibre Trim
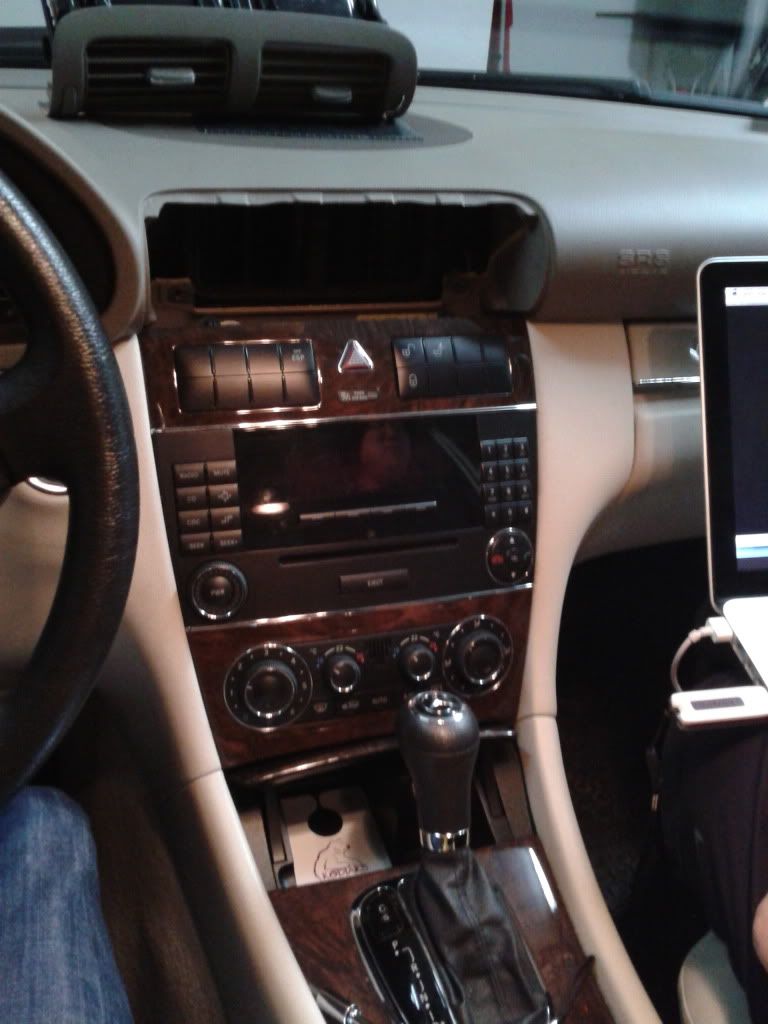
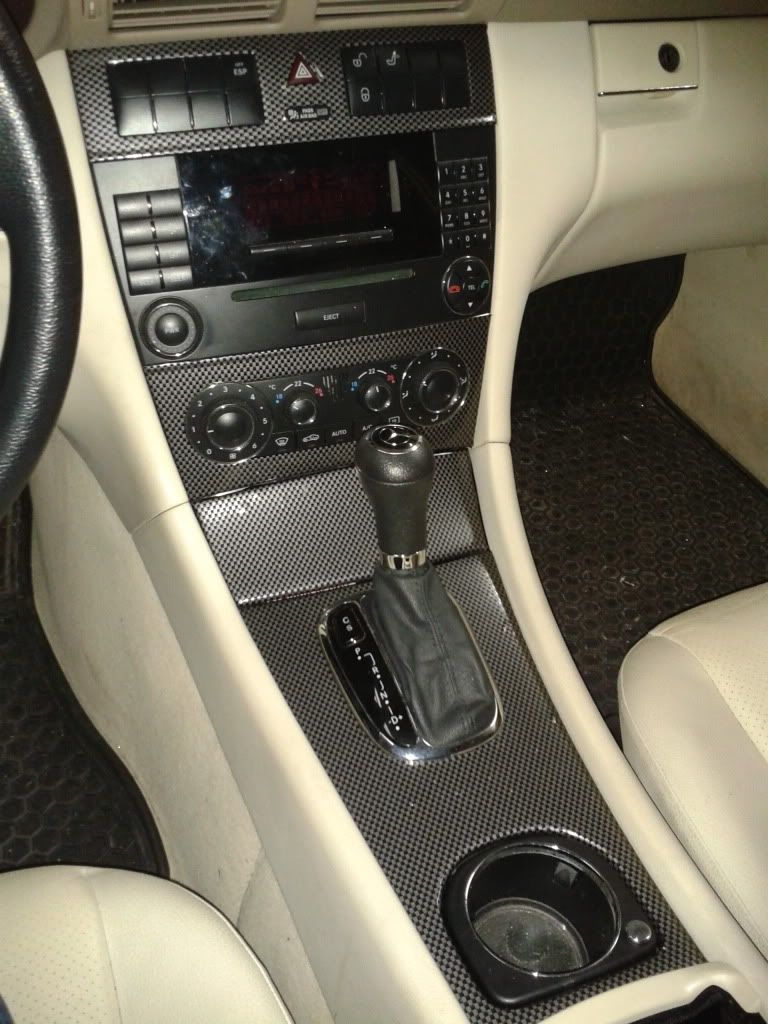
Hey guys, I just wanted to share what I did today. One of my friends had some leftover fake carbon fibre sticker sheet so we decided to put it on my 2006 w203. My (Dad's) C has the wood trim. All I did was took the head unit apart and put the fake CF sticker on. It took me around three hours and I took only 2 pictures during the whole process. I'm not good with these kind of stuff so when it was done, there were many air bubbles, but as an 19y.o., I'm pretty satisfied with my work.
Does anyone know how to remove these bubbles, even after I mounted all pieces back onto the car? Or does anyone have any tips how I can do it better next time? Thanks!!
Here are some pictures:
Does anyone know how to remove these bubbles, even after I mounted all pieces back onto the car? Or does anyone have any tips how I can do it better next time? Thanks!!
Here are some pictures:

MBWorld Fanatic!
Joined: Sep 2010
Posts: 1,089
Likes: 6
From: Salt Lake City, UT
2010 Mercedes-Benz E350
You can use a razor blade and carefully make puncture the bubble, then use a credit card or drivers license to smooth it out. This works best for very small bubbles. Good job taking a chance  You never know what you can do till you try.
You never know what you can do till you try.
MBWorld Fanatic!


Joined: Jun 2002
Posts: 7,263
Likes: 169
From: So. Oregon Coast
C230 Sport Coup + 2006 W164 ML350 + 99 Ford Escort RIP
Mmmmm. I think i woulda sold the wood trim and replaced it with CF.
Bubbles = cheese.
A small needle oughta do it, but never would done it in the 1st place.
That wood trim is expensive!
A c coupe trim kit woulda accomplished the same thing.
Bubbles = cheese.
A small needle oughta do it, but never would done it in the 1st place.
That wood trim is expensive!
A c coupe trim kit woulda accomplished the same thing.

Super Member
Joined: Jul 2009
Posts: 734
Likes: 27
2021 Yukon XL Denali, 2017 GLS450 4MATIC, 1993 Chevy Corvette

MBWorld Fanatic!
Joined: Sep 2007
Posts: 7,136
Likes: 5
Corrolla

Junior Member
Joined: Oct 2010
Posts: 23
Likes: 0
From: NJ
05 C230 SPORT | ZX-636
Trending Topics
MB World Stories
The Best of Mercedes & AMG

Manual Mercedes? 6 Times Sindelfingen Let Drivers Have All The Fun
Verdad Gallardo
Mercedes SLR McLaren 722 S Is Extremely Rare Example Modified by McLaren
Verdad Gallardo
8 Classic Boxy Mercedes Designs That Have Aged Like Fine Wine
Verdad Gallardo
Flawlessly Restored Mercedes 190E Evo II Heads to Auction
Verdad Gallardo
Electric Mercedes C-Class Unveiled: 11 Things You Need to Know
Verdad Gallardo
Mercedes EQS Gets A Major Update: Everything You Need to Know
Verdad Gallardo
5 Underrated Mercedes-Benz Models That Don't Get the Love They Deserve
Verdad Gallardo
Mercedes 300D Has Pushed Well Past 1 Million Miles and It Ain't Stopping
Verdad Gallardo
10 Most Reliable Mercedes-Benz Models You Can Buy Used
Verdad Gallardo
MBWorld Fanatic!
Joined: Jun 2002
Posts: 7,263
Likes: 169
From: So. Oregon Coast
C230 Sport Coup + 2006 W164 ML350 + 99 Ford Escort RIP