


Paintscratch help... doesn't look right.

Thread Starter
Member
Joined: Dec 2012
Posts: 220
Likes: 0
From: Houston, Tx, USA
2002 c240
Paintscratch help... doesn't look right.
Hi, I searched and didn't see a specific thread for the paint not looking right... so here is this.
I got a touch up pen(brillant Silver Metallic) from Paintscratch today. I washed my car, dried the certain areas up really good and applied the paint(yes, i did put it on the card 1st). This is the results.
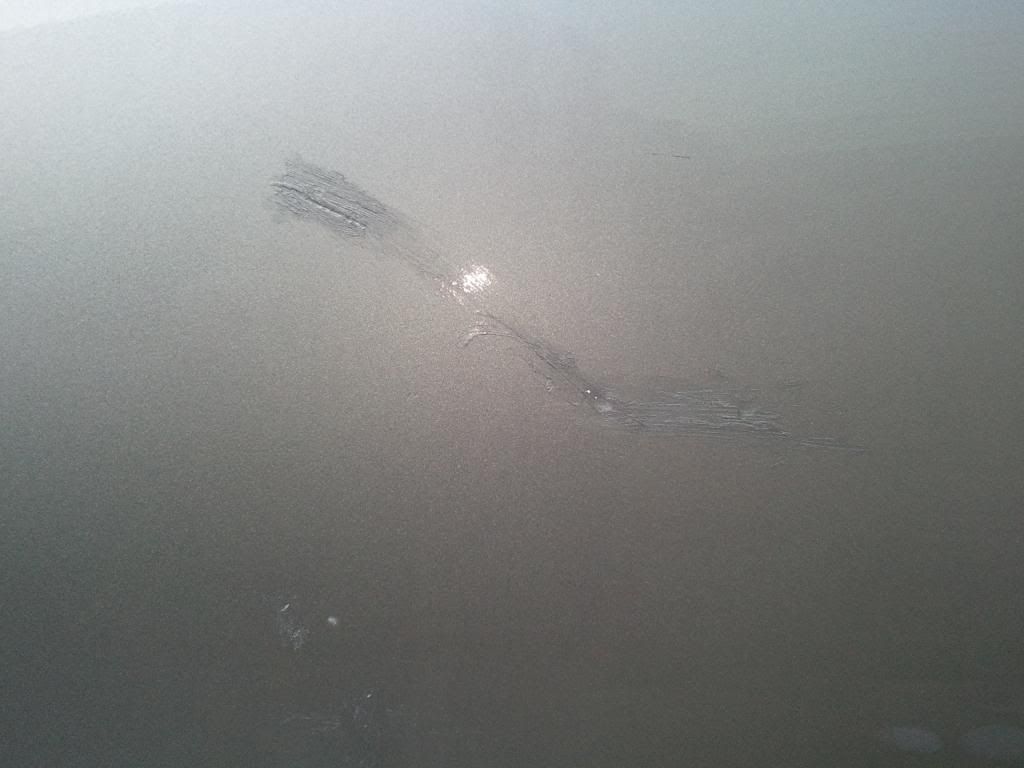
As you can see, the paint is darker than the original and is very rough and bumpy. What should I do? Add more coats? get FINE sand paper...? Need advice here. I need the bumps gone because I applied it to 2 door handles and edges, along with other places.
Thanks in advance.
I got a touch up pen(brillant Silver Metallic) from Paintscratch today. I washed my car, dried the certain areas up really good and applied the paint(yes, i did put it on the card 1st). This is the results.
As you can see, the paint is darker than the original and is very rough and bumpy. What should I do? Add more coats? get FINE sand paper...? Need advice here. I need the bumps gone because I applied it to 2 door handles and edges, along with other places.
Thanks in advance.

Junior Member
Joined: Jul 2012
Posts: 68
Likes: 1
c240
never had good experience with "touch up" paint. Also what you have looks more like gouges rather than scratches, which makes it more difficult. You may want to use filler material first, sand and re-touch.
MBWorld Fanatic!
Joined: Feb 2009
Posts: 5,054
Likes: 11
From: fort worth, tx
06 C230 SS 6spd
You're gonna have to wet sand it down and paint it. Touch up isn't gonna help. You can order aerosol paint to match. Just wet sand the area with 1500 paper then paint it. Usually you want to paint a little larger area to blend it. Then clear it then buff and polish it.
Super Moderator

Joined: Jun 2008
Posts: 19,942
Likes: 192
From: Llandudno, Cape Town, South Africa
late 2009 CLK 350 Coupe Elegance, '65 Jaguar S Type wires
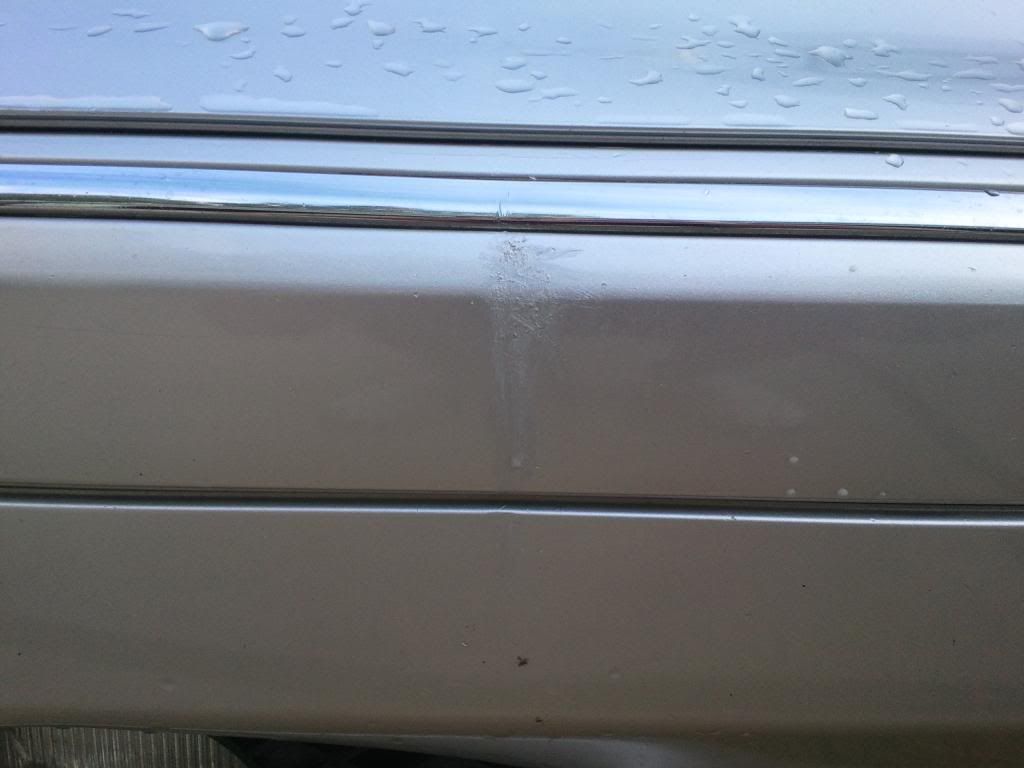
Even spray cans are hard to control. You have to get the flake to lay down properly. Fill deep scratches with a spot filler, wet sand flat in a small controlled area. Touch up & blend with an air brush, re clear coat & buff. The Glasurit waterbased base coat & nano clear system works really well for this. You can patch repair & see absolutely no sign of it. No need to spray the whole panel.
eg. this bumper on my old C240. Hit on the corner to the right of the joint.

eg. this bumper on my old C240. Hit on the corner to the right of the joint.

Out Of Control!!


Joined: Aug 2010
Posts: 12,516
Likes: 628
From: Charlotte NC area
2019 WS222 S450 4-Matic / 2007 W211 E350 4Matic (Sold) / 2008 X164 GL320 CDI
Very lightly (VERY LIGHTLY) sand off the touchup paint outside the scratch.
Use a toothpick to put a little more touchup paint into the scatch.
Let it dry a few days.
If the scratch is below the surface repeat.
When the touchup paint is even with or just slightly above the surrounding paint, let dry a few days and VERY VERY lightly sand it to even then polish.
Use a toothpick to put a little more touchup paint into the scatch.
Let it dry a few days.
If the scratch is below the surface repeat.
When the touchup paint is even with or just slightly above the surrounding paint, let dry a few days and VERY VERY lightly sand it to even then polish.

Junior Member
Joined: Dec 2012
Posts: 24
Likes: 0
2006 C280 4matic
I got a touch up set from the dealer. It was only $20 or so. It's color matched and comes with a tube of clear coat. I haven't used it yet since it's been in the negatives recently and my garage isn't insulated but we'll see when the weather warms up.
Trending Topics
MBWorld Fanatic!
Joined: Sep 2011
Posts: 1,657
Likes: 35
From: Austin, TX
2005 C230K(sold), Mk7 Jetta
MB World Stories
The Best of Mercedes & AMG

Manual Mercedes? 6 Times Sindelfingen Let Drivers Have All The Fun
Verdad Gallardo
Mercedes SLR McLaren 722 S Is Extremely Rare Example Modified by McLaren
Verdad Gallardo
8 Classic Boxy Mercedes Designs That Have Aged Like Fine Wine
Verdad Gallardo
Flawlessly Restored Mercedes 190E Evo II Heads to Auction
Verdad Gallardo
Electric Mercedes C-Class Unveiled: 11 Things You Need to Know
Verdad Gallardo
Mercedes EQS Gets A Major Update: Everything You Need to Know
Verdad Gallardo
5 Underrated Mercedes-Benz Models That Don't Get the Love They Deserve
Verdad Gallardo
Mercedes 300D Has Pushed Well Past 1 Million Miles and It Ain't Stopping
Verdad Gallardo
10 Most Reliable Mercedes-Benz Models You Can Buy Used
Verdad GallardoSuper Moderator
Joined: Jun 2008
Posts: 19,942
Likes: 192
From: Llandudno, Cape Town, South Africa
late 2009 CLK 350 Coupe Elegance, '65 Jaguar S Type wires
I suppose about 4 square inches. I was distracted & reversed into my builder's truck.
I had another spot repair done on that car's RHS front fender by the pros. Another vehicle threw up a stone & put a neat dent in the fender right through the paint down to metal. That was popped, light filled & spot painted. You could see no sign it was ever there. Job done in one hour.
I had another spot repair done on that car's RHS front fender by the pros. Another vehicle threw up a stone & put a neat dent in the fender right through the paint down to metal. That was popped, light filled & spot painted. You could see no sign it was ever there. Job done in one hour.
Last edited by Glyn M Ruck; Jan 28, 2013 at 07:18 AM.


