When you click on links to various merchants on this site and make a purchase, this can result in this site earning a commission. Affiliate programs and affiliations include, but are not limited to, the eBay Partner Network.
With the supercharger out, there is no need for that offset wrench. Both can be accessed easily. A wobble head might be nice to have for the R (exhaust manifold) side but isn't required.
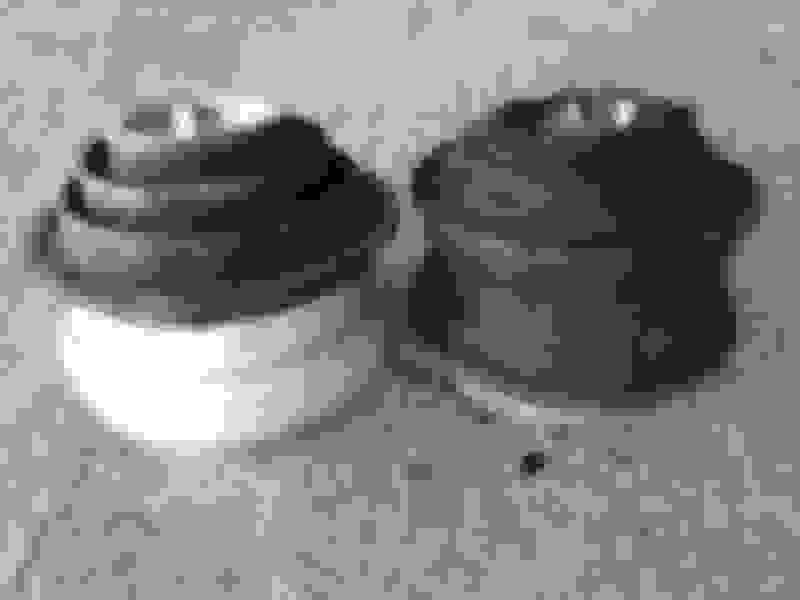
Turns out both of mine were completely shot and collapsed (mileage 235k km). I didn't see any obvious signs of failure (ie engine rocking excessively), and there was no leakage I could see, but as soon as I tipped them, a pile of oil spilled out of both.
If doing the L side, be sure to disconnect the battery ground cable first. I caused a bunch of sparks when the mount touched the starter motor terminals. Fortunately I didn't cook anything.
The hardest part was actually getting the mounts in and out. Not only are the new ones slightly larger in diameter (especially with the rubber shields that now come with both mounts), they are also taller. The old mounts must've collapsed by a good 15-20mm. In both cases, I was able to get them out using the gap towards the rear of the car, and by forcing them up past the engine support leg. Both were removed upwards. For the L side, I also forced one of the AC hoses (there are 2 in the vicinity) out of the way. Turns out that both are actually part of the same circuit. The refrigerant flows from the compressor through 1 hose, through a U-shaped metal pipe that's attached to the engine, then back through the 2nd hose. If I were to do this job again, I would unbolt the U-shaped metal pipe (attached to the engine with 2 screws), then drop the 2 hoses out of the way.
Engine mount L collapsed
Engine mount R collapsed
I lifted the engine using a padded floor jack against the oil pan. A bottle jack could've worked here as well.
To remove the mounts requires 2 steps - rolling them out of their original spots into a gap, then rolling them around the engine support to get them out of the car. I found the 2nd step was easier when the engine was lowered slightly, but YMMV.
To seat the engine mount, I found it was easiest to simply thread the bottom fastener very loosely (just thread a couple of turns in), then jiggle the mount until the top tab lines fits into the notch in the mount. At that point the top fastener can be hand tightened, and then the mount lowered the engine into position. At this point both the top and bottom fasteners can be tightened.
This was surprisingly less difficult than I had anticipated. It's literally 4 bolts.
If using a bottle jack, stick a piece of wood between the jack and the transmission pan. Lift the transmission at the rear edge of the pan, not in the middle.
The other trick was to make sure there was enough room to fit the torque wrench in there. I had to do my final tightening at small angles. As long as the bolt is moving when the wrench clicks, the torque will be correct.
Remember that the "middle bar" of the new mount will sit higher than the old one. Therefore the transmission will have to be raised to a slightly higher position after the old one is removed.
To line up the new mount, loosely thread the 2 transmission bolts first. With the new mount still slightly suspended, thread the bottom (crossmember) bolts in partially as well, then lower the mount until it just touches the crossmember. Everything then can be tightened. Remember that the transmission bracket bolts require a different torque than the crossmember bolts.
My old mount was 6mm lower than the new one. In addition, the rubber had cracked and was starting to peel away from the middle bar.
Old transmission mount cracked rubber
Old and new transmission mounts (note the difference in top/bottom gap)
Last edited by slammer111; 10-01-2020 at 12:06 PM.
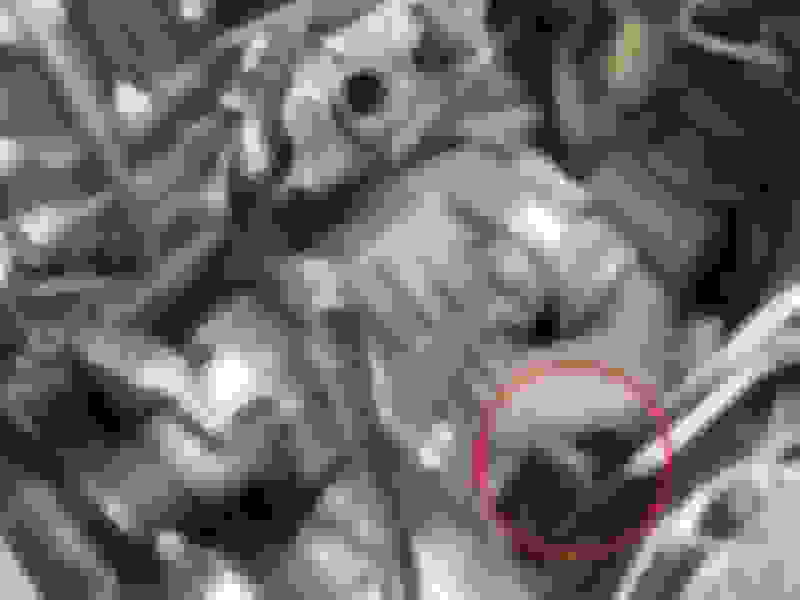
I had great difficulty with this one because there is very little space. The hose is held in place with a Clic-R clamp on one side (connects to plastic pipe), and a spring loaded hose clamp (not shown in photo) on the other (throttle body) side. The hose clamp is a bit too tight for the application.
Hose elbow
PN for the elbow is 203-476-72-26.
There are actually 2 of these hose elbows (the other one is on the other end of the same plastic pipe). I would recommend checking both. I found a crack on the inside of the elbow, right at the bend.
My hose clamp pliers didn't fit here. I got around it by using a pair of bent needlenose pliers. I squeezed the hose clamp as hard as possible while forcing the hose all the way into the throttle body connection. Then I slowly wobbled the hose clamp into place.
Last edited by slammer111; 04-11-2022 at 09:56 PM.
This one actually wasn't necessary as I found there was less than a drop of actual oil. The back of the plate had a thin uniform brown film, but didn't resemble a blockage at all. It was on there good. I couldn't even scratch it off with a fingernail. My spray can of throttle body cleaner had no effect on said film. Oh well, might as well change the gasket between the throttle body and the intake manifold.
Last edited by slammer111; 08-16-2020 at 06:53 AM.
The intake muffler was a pita to put back. Once again, the finger ratchet saved the day.
The WIS documents actually list torques for both fasteners. Who in their right mind is going to try using one here.
Be sure to reconnect every electrical connector. You do not want to have to reverse steps just because a connector got missed.
The only major hiccup I had was reinstalling the fuel injector rail. Just as they were a huge pita to remove (high pull strength required), I couldn't get them to go back in, despite pushing as hard as I could on the rail. The problem was solved with a long piece of wood and a hammer, smacking the wood lengthwise. Be sure not to smack the thin feed tube.
Turns out the o-rings are supposed to be lubricated with special sliding compound 000-989-01-60-09 aka Chemours Krytox GPL 105. I didn't do this at the time (didn't know about it) but it would've made this part of the job easier.
Last edited by slammer111; 08-21-2023 at 10:09 PM.
As mentioned earlier, these repairs took me 20h(!) in total, even with the WIS instructions. I can only imagine how much labour the dealership would require. Be sure to have plenty of cold beers ready.
Some may suggest also changing out the serpentine belt tensioner since replacing the spring assembly also requires the removal of the supercharger. However, I found that mine had no problem. In addition, my understanding is that the pulley can be replaced separately. I can't imagine how a steel spring would go bad, as it doesn't seem like a particularly high stress application.
When inspecting the rear engine (transmission) mount, take a look at the flex discs as well. I didn't see any problems with mine.
When lifting the engine for the engine mounts, I accidentally raised the engine too high and cracked off the high temperature epoxy from the previous repair on the exhaust manifold. Something to watch out for. Fortunately I still had my old container stored in the freezer. Stuff was still viable after all this time, though the top layer had to be cracked off just like creme brulee.
Special thanks to RedGray for telling me to check my engine mounts. The engine now sits noticeably higher than before. With the new mounts in, engine vibrations are pretty much all gone. Didn't realize the impact would be so great. Wow. Don't remember the car ever being this smooth since I test drove the car at the dealership.
Last edited by slammer111; 08-18-2020 at 07:34 AM.
1) replace crankcase breather hoses and check valve
The next major pita is removal of the intake muffler from underneath the car. The instructions say to remove 2 bolts. What they don't mention is that this thing is tucked up maybe 40cm from the bottom of the car.
One bolt is easy enough with an extension, but the other (upper) one is barely reachable. In addition, it is oriented at an angle where the axis passes right through the steering column, with maybe only 10cm clearance. After another hour of trying a random combo of extensions, universal joints, and wobble extensions, I finally found a combo that worked: a 9 inch extension followed by a universal joint into a 2" wobble head. Once I broke the bolt loose, I used a ratchet wheel to finish the task. Thank goodness I had one.
Intake muffler ratchet extension combo
I may be doing some of this work next summer and this is a great resource. For anyone else contemplating these jobs, I suggest a slightly different approach to this step. When I had to replace my alternator-battery-starter cable I also faced the task of removing the supercharger muffler. I found instructions for removing the starter which included guidance on moving the steering column out of the way.
Hello everyone
i have a problem with my merc
its a w203 2.3k m271 engine
The car hasnt catalytic converter and my engine has check engine light on , missfire , smell of gasoline inside the car while driving and when i press hard the gas comes black smoke from exhaust.
please help me to find what it is thank you
hello. im having this problem with my clk200. in the morning when cold start iddle too high like 3000 and when its hot sometimes its perfect and sometimes when i stop the car and start again it hadly starts, its like its dying but doesnt die.(detonations) sometimes it dies and i have to start again and its perfect again. i changed all the hoses, also changed and relearned throttle, maf sensor is good. no faults on star computer, except o2 sensor problems. what else can cause this? everyone telling me that its air problems but everything perfect even checked with smoke like 3-4 times and good after hoses replacement. sorry for my english i hope u can help me with this
Thanks to Slammer for the great forum post!.
I recently bought a low km c230K, and decided to have a look at this PCV valve.. I am glad i did!
As you can see, the valve was split and dribbling oil out onto the engine block, and as soon as i touched it, it fell apart!.. MB plastics do not inspire much confidence! lol..
Have given the fuel injectors a good clean out, and about to change over the engine and transmission mounts.
Will also do a supercharger oil change while everything is apart..
Be sure to update all 4 hoses (3 in the photo, and 1 going into the valve cover). I can see in the photo that they're an older style, and also that someone has worked on them before. FYI there are some 4-5 versions of the hoses in the wild. Took MB a few times to get the material right.
The top hose (ie the famous $12 hose) specifically requires a Clic-R type clamp as opposed to the conventional screw type in your photo.
Thanks Slammer, i do have the new hoses ready to go in.
In saying that, the existing hoses were in pretty good nick, considering age of car.. It was just the PCV valve that was crappy!..
I am pretty sure that top hose with the screw clamp was replaced at some point, possibly by MB??.. why would you need a Clic-R clamp there?; maybe to make future replacement easier without removing the supercharger?..
The check valve is technically a crankcase breather and not a PCV. Mine was a brittle as a potato chip.
The older version hoses aren't as durable as the newest ones. The ones I removed (originally installed by the dealership under recall but were the newest version) when doing the job were still basically in perfect condition. Meanwhile the original hoses (installed at the factory ie before the recall) had tears in them.
Clic-r clamps have several advantages. They will never loosen over time, and there are no holes in the straps so nothing will bite into or otherwise damage the underlying hose. This is especially true for cheap hose clamps. Also if sized properly, there is no chance of overtightening. The downside is that a special tool is required to do the work properly. The tool is useful to have though, as these clamps are found throughout the car. Another location for example is the lines going into the fuel filter.
Last edited by slammer111; 05-06-2022 at 04:28 PM.
Pre service O2 voltage levels above.
============================ Post service O2 voltage levels above.
--------------------------------------------------
Amazing! So different driving the c230 after replacing the crankcase breather hoses and broken valve.. The idle is a lot more stable and smooth, as is the driving experience, without any lags or hesitation..
Interesting to see the difference in the O2 sensor responses, pre and post service, are totally different. The response now is a lot more smooth, as you can see above.
Major operation over, very happy with the results!. One of the engine mounts was leaking, so good to have those replaced. Fuel injectors cleaned out. Supercharger oil replaced.
A few other little jobs along the way.
All in all fantastic result, happy to have it back on the road again!
The check valve is technically a crankcase breather and not a PCV. Mine was a brittle as a potato chip.
The older version hoses aren't as durable as the newest ones. The ones I removed (originally installed by the dealership under recall but were the newest version) when doing the job were still basically in perfect condition. Meanwhile the original hoses (installed at the factory ie before the recall) had tears in them.
Clic-r clamps have several advantages. They will never loosen over time, and there are no holes in the straps so nothing will bite into or otherwise damage the underlying hose. This is especially true for cheap hose clamps. Also if sized properly, there is no chance of overtightening. The downside is that a special tool is required to do the work properly. The tool is useful to have though, as these clamps are found throughout the car. Another location for example is the lines going into the fuel filter.
Hi was the fume smell ever found? What was the exact issue. I seem to have it & there are too many options. I filled the tank earlier & its bad from the enhine into the car.
 08-15-2020, 09:31 AM


 The engine now sits noticeably higher than before. With the new mounts in, engine vibrations are pretty much all gone. Didn't realize the impact would be so great. Wow. Don't remember the car ever being this smooth since I test drove the car at the dealership.

 After another hour of trying a random combo of extensions, universal joints, and wobble extensions, I finally found a combo that worked: a 9 inch extension followed by a universal joint into a 2" wobble head. Once I broke the bolt loose, I used a ratchet wheel to finish the task. Thank goodness I had one.


