When you click on links to various merchants on this site and make a purchase, this can result in this site earning a commission. Affiliate programs and affiliations include, but are not limited to, the eBay Partner Network.
The other day one of my passengers mentioned that my car had some fume smell inside. The smell is coming from the engine bay, then wafting over to the plenum where the air intake is then going through the HVAC system into the cabin. So this leads to 2 issues.
1. One of the foam pieces separating the main engine bay and the intake plenum (the space with the car battery) has shriveled up and turned brittle. Anyone know the PN for this part? There isn't one stamped on the piece. Looks like someone else here was looking for the same part at one point. Part is located at the red oval (part is missing in the photo).
**update** The PN for the foam piece is A203-628-46-98 which supsersedes 2 previous versions. The gap in the seal created when the old piece shrivelled is also most likely how the exhaust gases are making it into the cabin. I also had a problem with "vent" (ie econ) air blowing warm/hot all the time during regular driving, which is another reason to suspect that without this piece sealing the gap properly, the car ends up drawing fresh air that has been heated up by the exhaust pipe.
I highly recommend replacing this piece to seal the intake plenum properly.
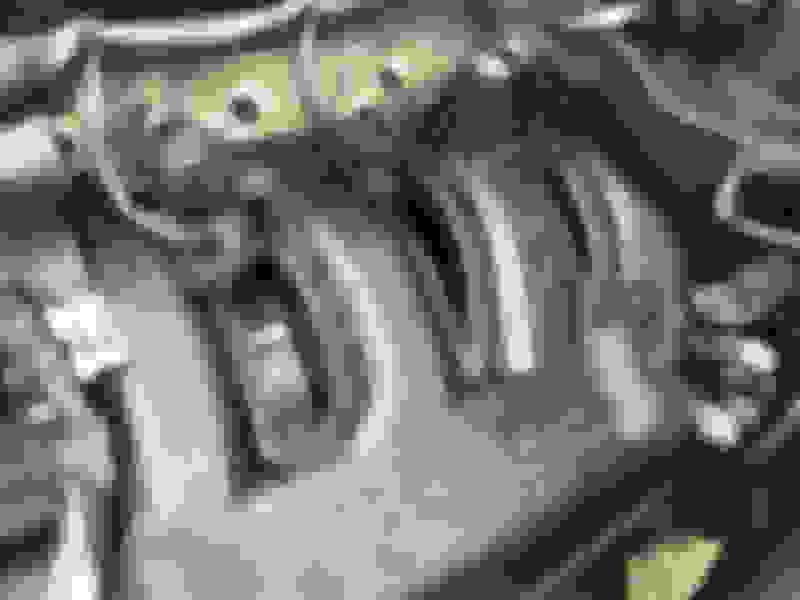
M271 engine bay (photo credit mtnman82)
2. The fume smell seems to be coming out in the vicinity of the fuel rail schrader valve (green rectangle), or somewhere farther back. However, I cannot visually detect any leak. The smell only appears when the engine is running. When I shut the engine off, the smell is gone in seconds. On a hunch, I flipped the gasket inside the oil filler cap, in case the smell was leaking out from the oil fill hole. This did not fix the problem.
There is no unusual smell in the exhaust. Not that I can tell at least.
I also ran the engine hard to see if there were any performance issues. Didn't notice anything in terms of smoothness when idling or under WOT. With that said, I always had an inkling that fuel efficiency has decreased in recent months. However, my driving pattern has also changed during this time (% of city driving has increased). So this may not mean anything.
There are no stored codes or CEL.
Opening up the engine, I found a breather hose between the valve cover and the air box (attaches to the pipe after the engine air filter, PN 271-016-04-81) wet with engine oil on the air box end. Wiped it down and added a hose clamp before reinstalling the air box and putting everything back. This did not solve the problem.
The fume smell is strong enough to make people dizzy, so this is becoming a real problem. Any help would be greatly appreciated. Thanks in advance.
Last edited by slammer111; 07-08-2020 at 05:16 AM.
If its a fuel leak it wont go away when you switch off. A split breather hose will fume crankcase fumes. Maybe pressure test complete intake tract for leaks. If the breather hose have gone soft...replace them all
Ran a pressure test on the fuel rail and sure enough the fuel system was fine. Held pressure for several minutes (just lost ~5 psi after 10 minutes) after the engine was switched off.
The dumb thing is I already had all the crankcase breather hoses and the check valve replaced under recall in 2008. Anyone else have the "new" 2008 pipes also go bad?
Last edited by slammer111; 05-06-2022 at 05:15 PM.
Checked and there are no leaks there. With that said, if the pipes inside the tank split, would that lead to an external fuel leak?
The mystery smell only appears when the engine is running. When I shut the engine off, the smell disappears after a few seconds.
Had a buddy look and he is convinced it's crankcase or exhaust fumes. I took a whiff of some spilled gasoline from the fuel rail test and would agree that the smell is not gasoline. It is coming from the engine bay, and because it is coming from the intake side of the engine (ie L side of the motor as opposed to the R side), between the air box and motor, I don't think it is exhaust. In other words, it is from somewhere in the vicinity of the fuel rail, either above or below. The smell is also different from the exhaust coming out of the tailpipe.
Last edited by slammer111; 07-04-2020 at 04:37 AM.
The pipe splits at the outlet of the tank where the rubber hose fits to the tank. The fuel rail only has one braided hose which is easy to see if it leaks. Also in the centre of the fuel rail is a damper that's held in with a circlip it points downward. Maybe remove Airbox to inspect a bit deeper
Found a leak in the exhaust manifold (thanks to jkowtko's post). Pipe had cracked underneath at the seam where the 4 pipes converge into 1. The circular thing in the photo is a mirror, not a magnifying glass.
No idea why the smell was stronger on the intake side of the engine. My guess is that because of the orientation of the crack, the exhaust flow was being directed below or around the engine.
Thanks to everyone else who also provided assistance. Will provide an update after repairs are complete. **update** this was not the cause of the fumes.
Last edited by slammer111; 05-06-2022 at 05:16 PM.
Glad you found it and will be able to pull it to repair it. That seems to have been more common on earlier m271 engines.
A few years ago I thought I had an exhaust leak there too, but mine was a split bolt where the down pipe connects to the mid pipe. Broke the transmission mount in the process, or, the reverse happened. Anyway, a few bolts and a half hour on the Bridgeport I was good to go.
If you�re not, find a competent welder to repair it. You�ll be good to go too!
Here are a couple more photos of the crack. No idea what the white stuff is.
The crack itself is about 40mm long. Looks like the actual weldment failed. Looks more like a stress than a corrosion crack.
In terms of orientation, the crack faces the rear R side of the car (5 o'clock position).
For those members with M271 engines, I highly recommend taking a look here. There is an updated manifold/cat assembly 271-140-22-09 which replaces the older 271-140-16-09, so I'm guessing MB found a problem with the older version. No idea when they started installing the updated version. I also couldn't find the PN stamped on the part itself, so I am assuming I have the older version. The new part cost some $800 USD though, so I'll simply have a shop weld the crack shut.
Last edited by slammer111; 07-06-2020 at 05:10 AM.
So the local (reputable) muffler guy says it can't be welded. Not that it physically can't, but he said I'd be back in a year when new cracks form around the new weld. He recommended a new manifold, and actually recommended I get it installed at the dealer as opposed to his shop. I'm trusting his judgement, since he basically just turned down my business for what I thought would be a quick and easy job. The shop also has a very good reputation around town for honesty.
Just looked online and the exhaust manifolds are quite expensive (and twice as expensive in Canadaland ) Still deciding my options here:
1. Patch the hole with some JB Weld or other high temperature product(s) and hope it holds
2. Go to a sketchy shop and weld it anyways (the few sketchy shops I checked around town also wouldn't do it, so this may not be feasible)
3. Buy a used manifold from a local wrecker if available. Big problem with this choice is the part will probably eventually crack in the same spot, especially if I get the older version again
4. Order a new overpriced one and cry myself to sleep for a few days
In USA a new manifold is about 25% of the market value of my car. In Canada it's more like 50%. I'd also have to wait for the border to reopen (currently closed because of Covid) if picking one up from USA.
What would you guys do in my situation? Could use some input. And yes I do realize the choices above are not mutually exclusive.
Last edited by slammer111; 10-01-2020 at 11:36 AM.
First, check your engine mounts.
Second, check your engine mounts.
Third... check your engine mounts.
As I recall, on the MB exhaust, there's no flexible joint (like GM), or 'kinda flexible ball joint' (like Ford).
Wow, that is a reputable muffler mechanic!
Yes, I can do brain surgery. I even offer an interweb discount!
But, who do you trust more?
Me (Yes! ), or some random-person that does brain surgeries for a living? :-)
Welding that stainless steel connection can be done.
Even *I* can weld that.
However, like the reputable muffler said, "it likely won't last that long".
WHAT EVER!
Did I say that it would last - No! So, stfu reputable muffler dude! :-D :-D
Like a professional brain surgeon, a professional welder that welds stainless steel regularly, is in a different league.
Imho, if you were going to get it welded, I say: Take it to a professional welder.
SS is a PITA to weld, even when it's brand new.
Plus, iirc, TIG is better. Other than a professional welder, who the heck has a TIG welder? Very few.
Yes, I can weld a SS box.
Iirc, I welded a SS bird, or something, that I bought in a "learn to weld SS kit". It is still fine. Well, as far as I'm concerned. It's likely buried under a ton of car parts in my basement.
There's a difference between welding something that has no/little stress, and something that has a good amount of stress, and bad(i.e. fast, and a lot of) thermal cycling.
As for JB Weld: (JB Weld Rules!)
You wouldn't want to use regular JB Weld on exhaust.
In this case, since you do not have to fill a "hole", or a rusted area, I suggest using:
JB Weld High Heat Epoxy Putty.
Build up the repair in layers.
If you use the high heat epoxy putty (or JB Weld HighHeat), remember that surface prep is everything.
It's best if you use a rotating wire brush, to get down to bare metal.
Then, Acetone clean the area a few times.
Then, ~120 grit sandpaper.
Then, Acetone clean many times.
Don't let the JB Weld cure in direct sunlight, or direct heat.
Avoid having the area get condensation over night.
I'd suggest doing JB Weld repair over at least two days. That way, the bottom layer is fully cured.
For the first layer, you want to let that fully cure. The actual time to fully cure varies by temperature and humidity.
============ HIGHHEAT™ EPOXY PUTTY - 2 OZ
SKU: 8297
$ 7.99 https://jbweld.com/product/highheat-epoxy-putty
HighHeat™ is a hand mixable epoxy putty stick specifically formulated to bond and repair materials that will be exposed to high temperatures in automotive and industrial maintenance applications. It cures to a tough, hard bond with little to no shrinkage. This industrial-strength product outperforms conventional epoxy putties at high temperatures and sets in 1 hour at room temperature. After 8 hours, it can be drilled, tapped, machined, ground, filed and painted. HighHeat™ is rated at a tensile strength of 800 PSI and cures to a machine grey in color. It is able to withstand continuous heat exposure of 400�F and intermittent heat exposure to 550�F
============
Also, while you're there, you should replace the studs and nuts that hold on the manifold. They are cheap.
It'll make it easier for the next time, and they won't break/snap, making it a PITA job to fix.
Before you remove them, you should heat them first, nice and red, with a propane torch. The reduces the chance of them breaking.
Snow and salt do very nasty things to exhaust components. And, everything else also.
I checked my engine mounts (superficial test, running the engine at 2k RPM in D/R) a few weeks ago. While the engine does move a bit, it doesn't seem to show any obvious signs of failure (fluid leaking out of bushings, engine hopping up and down excessively etc.). It is interesting that MB never bothered adding any kind of flex pipe like most other cars.
Picked up some JB Weld ExtremeHeat for a few bucks at the local hardware store. It's rated up to 1300C (2400F) and specifically mentions it can be used to fill cracks. Even lists exhaust manifolds as a suitable place to use. This stuff is also rated to 800 psi (5.5 MPa) tensile strength according to the manufacturer.
Took a drill and wire wheel as best as I could to the area. The limiting factor was accessibility, as my drill isn't the thin pointy type. In hindsight, I should've taken some steel wool to the hard to reach areas. Didn't cross my mind at the time. Oh well, too late. Actually it's pretty cool to see just how shiny the manifold once was. The manifold material is as shiny as a mixing bowl underneath all that rust and crap.
Washed my hands with lots of dishwasher soap to get rid of the grease. Used my finger and a small wooden stick to smear everything around nice and thick. The stuff only smeared well for the first few minutes, then began to lump up.
The instructions did mention to widen any cracks to 1/8" (3mm), but I didn't bother, mainly because of the difficulty of getting in there. Some videos online also mentioned it was a good idea to drill the ends of the crack to prevent propagation, but I also didn't do this because of lack of space.
According to the instructions, the stuff only takes 1h to set, 2-4h to become hard, and 24h to fully cure. I waited some 5h (the stuff was hard as concrete by then), then smeared a second layer of product all around. Will leave the car overnight then go for a test drive. Hopefully I covered the entire length of the crack.
JB Weld ExtremeHeat
Exhaust manifold crack after wire wheel
Exhaust manifold crack after JB Weld
Fingers crossed that this holds. If not I still have about 2/3 of the container of product left, which is now sitting in a freezer.
Last edited by slammer111; 07-15-2020 at 06:31 AM.
I've used that paste before. Iirc, it has some "give". (All materials "give" to some extent. )
The paste doesn't provide much (if any) structural support. So, if that section is still flexing, eventually the paste will fracture.
If an exhaust leak does happen in the paste in the future, clean off the area with Acetone, then sandpaper, then Acetone, then put more paste on.
If it lasts ~1+ years at a time, that could be good enough.
Otherwise, you'd need to take the manifold off the car, then grind off all of the paste.
You should be able to clean it off well enough for the epoxy putty.
I don't know if you can get it clean enough to weld. A professional welder likely could.
Iirc, the M271 has a front hydraulic engine mount.
Iirc, that engine mount goes a lot. And, it's not easy to tell, since the rubber/poly/what-ever still does some dampening, and it often "looks fine".
Good luck with the repair.
Yes, JB Weld does rule!
Took the car for a test drive. Bounced around the roads a bit for a few km.
Good:
The JB Weld seems to be holding. Looks like I don't have to replace the manifold, for now at least. Crack seems completely sealed though I will do a more thorough inspection tomorrow. I no longer feel anything puffing out where the crack is located.
Bad:
The original problem (fume smell) is still there. I still think it's coming out of the area with the green rectangle. Any idea what could be there that would cause this?
- I've replaced the $12 hose before. (in fact I started the thread )
- The other 3 hoses and crankcase breather valve were replaced under recall in 2008.
- I had the valve cover gaskets replaced in 2016 as part of a timing chain inspection. Also I don't see any oil leaks in that vicinity. There is a bit of pooled oil there by the green rectangle but I believe that's from me spilling when topping up the oil, which I do regularly as my engine consumes oil. I wiped it down and will keep an eye on it.
Thinking of trying to run the car without the air box. The problem right now is I can't pinpoint where the leak is coming from. No obvious hissing noises or anything while the engine is running, though it might just be quieter than the engine.
There is no CEL. There are also no engine performance issues.
I tried opening the oil cap with the engine running. The cap bounces around a bit but doesn't fly off. So it doesn't seem like excess crankcase pressure either.
Anyone else have any suggestions?
Last edited by slammer111; 05-06-2022 at 05:24 PM.
Opened up the car and took a closer look. This time I removed the airbox and reattached everything else. Car runs but will occasionally backfire, so don't just leave the car idling.
Poking around some more, I think the smell is coming from this vicinity (red circle), from underneath the intake manifold. Anyone know if there are there any other hoses down there other than the crankcase breather and valve (ie the same hoses that were fixed under recall around 2008 including the $12 hose)?
Found a cracked hose going from some kind of purge valve(?) to the intake plenum, just after the throttle body. The crack is on the inside of the bend. Another part one may want to look into. PN is A203-476-72-26. See below. Part is accessible without removing anything, though it's a tight squeeze to loosen the hose clamp.
Last edited by slammer111; 07-09-2020 at 08:20 PM.
It's good that it's unlikely that you'll have to replace the cat and manifold soon!
Gas and exhaust-fumes have very different smells.
If raw gas was coming out of the exhaust, then there would be a number of OBD-II error codes.
If it is gas, then you need to take off the air cleaner assembly.
Yea, it semi-sucks. But, imho, removing the exhaust sucks more. :-)
There is also a difference between
o a raw gasoline smell
o a leaky intake smell
o a leaky exhaust smell
o a leaky EGR smell
o a leaky gas evap recovery smell.
Raw gasoline in the engine compartment can come from very few places.
A very likely place is from an injector-to fuel-rail 0-ring seal. Feel, look, and smell the tops of each injector.
In your case, the smell is not coming from bottom of the injector.
That would set off all types of OBD-II messages, especially in an M271 engine.
The only other place raw gasoline could come from is from the fuel rail, or gas line.
Feel all along the rail and gas-line.
First, use paper towels to clean the fuel rail and the top of the injectors.
Then, any fuel leakage at all would make a paper towel, or Kleenex wet.
If there are no leaks, then a paper towel or Kleenex can't get wet from anything.
You could also use a soapy water spray (dish detergent mixed with water in a spray bottle) to look for leaks.
You could also use a professional leak testing liquid like the following:
That's part of the fuel evaporation recover system.
That could also cause a gas smell.
For that, you might need soapy water to see/detect the leak.
If that is leaking, I'm surprised that it didn't set an EVAP OBD-II code.
It would have to be a very small leaking.
Evap leaks are all too common on older cars. They can be a massive PITA to find. Even a very small leak can result in an evap OBD-II error.
For areas that require emission testing on vehicles, an evap OBD-II error will fail the vehicle.
Ordered a crankcase breather hose parts kit (PN 271-010-00-82-05, includes the $12 hose) as well as a set of engine mounts and some supercharger oil. Might as well do all 3 jobs while half the engine is out of the car.
The kit includes 4 o-rings for the injector. Does anybody know if they're upper (connects the injector to the fuel rail) or lower (seals the injector against the engine block)? The dealership didn't know either. **update** Just checked the invoice. The kit includes 4x PN 013-997-91-45-64 which is the LOWER ring aka the rings that pop into the tips of the injectors, not the base of the injectors.
**update**
Looks like nobody sells the kit anymore on its own, including the dealer. So here is a breakdown of all the parts required. Hoses are listed starting from the lowest point (where the fumes leave the crankcase) and travelling upwards.
271-018-14-82-64 lower hose, crankcase to valve 271-018-03-29 check valve 271-018-15-82-64 upper hose, check valve to nipple bottom 271-018-12-82-64 hose, nipple top to throttle body (aka $12 hose) 001-997-69-90 hose clamp (0-2x required) - depends if one wants to reuse the Clic-R and spring hose clamp on $12 hose. Official dealer procecure recommends using Clic-R on the engine end 271-016-04-81-64 hose, valve cover to intake - mine was in excellent condition and PN is not superseded, so I reused this one. 013-997-91-45-64 O-ring, fuel injector, lower (4x required)
**update** looks like the injector o-rings are supposed to be lubed with a special grease aka unicorn juice before installation. PN is 000-989-01-60-09. This is the same PN as the special sliding compound for the panoramic sunroof, and is just repackaged Chemours Krytox GPL 105.
In addition, I ordered the parts below. Might as well change out some gaskets if I have everything apart. 271-141-08-80-64 gasket, intake manifold (4x required) 271-141-10-80-64 gasket, intake pipe (after baffle) to throttle body housing 203-476-72-26 90 degree rubber elbow that feeds a vacuum line into the throttle body assembly (found a hole in mine)
The Clic-R tool is a CTA 4029. Variants from other brands exist as well, such as Astro 9406F.
Last edited by slammer111; 08-21-2023 at 10:03 PM.
Finally got the job done. Would've posted earlier except the parts took over a month to arrive. This job was a real doozy.
Not sure what's going on with shipping, but ECS took over a month for the parts to ship. Long story. Certain parts were delayed for weeks (the ECS website inventory is not trustworthy) even though they were listed in stock. Meanwhile, the same parts I ordered from FCP (after I cancelled the same items out of my ECS order) showed up within days. For this reason I cannot recommend ECS. Thank goodness my car wasn't already on a lift or I would've been stranded for a full month.
First, a look at all the parts. Turns out I didn't need any extra hose clamps. Can't go wrong having some spares lying around though. The local auto parts stores don't seem to carry this type for some reason.
Repair parts
Since I had half the engine taken out, it only made sense to do several repairs simultaneously. These were the ones I performed:
1) replace crankcase breather hoses and check valve
2) top up supercharger oil
3) replace front engine mounts
4) replace rear engine (transmission) mount
5) replace leaking hose elbow (feeds gasoline fumes into throttle body)
6) clean throttle body
7) put everything back together
Also replaced that foam piece between engine bay and intake plenum, as well as a pen clip in the glove box.
All of the tasks there took a combined 20h(!) to perform because I got stuck multiple times. There are plenty of gotchas that will be discussed below. Not every mini procedure will be mentioned as there are also threads on these.
Last edited by slammer111; 03-14-2021 at 08:50 AM.
The first part where I got stuck was at the removal of the fuel injectors. The official instructions say to pull on the rail after undoing the 2 bolts. I couldn't get them out for the life of me, as each injector is held in the hole by an O-ring and they are freaking tight because of built up carbon. Almost had to use a mini crowbar. Be sure to pull on the main rail and not the attached thin feeder tube.
The injector O-rings were all in excellent condition. Looked brand new. To be honest I don't think it is necessary to replace them, considering how tight they all fit.
As others have mentioned, it is possible to weave the injector rail around the cables and out of the way towards the top of the engine. Just be sure not to catch the injectors on anything.
Another major problem was disconnecting the electrical connectors for the intake. The harness connector (black) has the wire clip with 2 tabs that are squeezed together, which disengages the connector from the injector (green). However, I could not squeeze hard enough for the life of me. This was a problem especially for cylinder #3, which is tucked behind the raised cone-looking screw hole. After cursing at the car for probably over an hour, eventually I was get them out by using a crescent wrench. Set the size to the "squeezed" distance, then force the wrench over each injector clip.
Injector electrical connectors
Next problem was removing the lower bolt between cylinders 3 and 4 (underneath red circle). There is barely enough room to squeeze the socket between the air ducts. An extension is needed as well. The ideal length is somewhere around 7", as the long metal air tube gets in the way.
Intake manifold difficult bolt
Intake manifold difficult bolt ratchet extension
With the intake off, the lower crankcase breather hoses and check valve can be seen and even touched. However, the gap between the supercharger and the engine block is way too narrow to do anything useful at this point. In addition, the hoses are attached very tightly to their respective nipples. Even if one uses a pick to poke a hole in the old hoses and pull them out, there is no way I can think of to pop the new hoses back in with sufficient strength. Therefore, the supercharger does indeed have to be removed.
The next major pita is removal of the intake muffler from underneath the car. The instructions say to remove 2 bolts. What they don't mention is that this thing is tucked up maybe 40cm from the bottom of the car.
One bolt is easy enough with an extension, but the other (upper) one is barely reachable. In addition, it is oriented at an angle where the axis passes right through the steering column, with maybe only 10cm clearance. After another hour of trying a random combo of extensions, universal joints, and wobble extensions, I finally found a combo that worked: a 9 inch extension followed by a universal joint into a 2" wobble head. Once I broke the bolt loose, I used a finger ratchet to finish the task. Thank goodness I had one.
To remove the supercharger, 3 bolts have to be removed. 2 of the bolts are doable, but the 3rd one (lower bolt towards the front of the car) barely has enough room to put a ratchet with a bit attached. I mean this literally. The clearance must've been only 4cm or so. I had to hammer my ratchet into place. I highly recommend getting the lowest profile ratchet money can buy here.
Supercharger lower bolt
The WIS instructions then say to remove the supercharger clutch (guess that's a poor German translation of electrical connector) by rotating the supercharger 180 degrees. Except they didn't specify which axis. I rotated the supercharger 180 degrees along the longitudinal axis of the car, in a counterclockwise direction (if facing towards the front of the car).
Finally, the supercharger was out. Only took 5 hours.
The crankcase breather valve was literally split in half. Found the smoking gun for the fume smells. Notice all the spilled oil as well. The 2 lower hoses are on really tight, so there are actually no hose clamps between the crankcase and nipple. The OEM hoses actually have internal indents for both the engine nipples and the check valve.
The ($12) upper hose has a Clic-R style clamp on the engine end and a fuel injection style clamp (solid band without any holes) on the throttle body end.
The check valve bulb section literally crumbled into pieces (much like a potato chip) as soon as I touched it. German plastic fail.
There was some debate elsewhere on the forum regarding the correct direction of the check valve. The correct orientation is with the conical side pointing away from the crankcase. This orientation allows gases out of the crankcase, in one direction only. This was also the orientation that the dealership used when changing out the hoses for the 2008 recall.
Because of all the broken valve plastic bits stuck inside both lower hoses, I recommend changing out (as opposed to reusing) both of them. The hoses themselves did not have any sign of wear or damage.
Cracked crankcase breather check valve
The nipple between the lower and upper ($12) hose contains a pinhole restriction, about the thickness of a paper clip wire. Mine was caked in carbon. I poked out the obstruction with a paper clip.
The PNs for all of the (2020) hoses are identical to the ones the dealership installed during the 2008 recall. In fact, all of the hoses were in great condition. Too bad the valve is made of garbage plastic.
The valve I installed is PN 271-018-03-29 which supersedes the older 271-018-00-29. I cannot confirm which version was the failed one I removed, as there was no PN stamped on both valves. The sad part is that both valves look identical. I am hoping that the new one doesn't splinter and die the same way. Really do not want to do this job again.
Crankcase breather valve pieces
Last edited by slammer111; 06-20-2023 at 09:45 AM.
Be sure to give the area near the fill hole a good cleaning before attempting to open it up.
The trick to this one is getting all the supercharger oil out. The "tank" is irregularly shaped. Specifically, there is a large indent where the pulley goes. I thought mine was perfectly dry until I took that into consideration. Got maybe 20mL out. The stuff was dark brown like used engine oil. Can confirm it smells like goat cheese, though the smell wasn't as strong as I thought it would be.
The service plug requires a T30 head. Wasn't seized at all.
New oil is clear, almost like water.
According to this site, the M45 supercharger variant for the M271 engine requires 4.6oz or 136mL of supercharger oil. I poured in about 130mL. Good enough.
Last edited by slammer111; 09-21-2020 at 06:30 AM.
 06-29-2020, 07:34 AM


 **update** this was not the cause of the fumes.


 ) Still deciding my options here:


 I still think it's coming out of the area with the green rectangle. Any idea what could be there that would cause this?


 So here is a breakdown of all the parts required. Hoses are listed starting from the lowest point (where the fumes leave the crankcase) and travelling upwards.


 Notice all the spilled oil as well. The 2 lower hoses are on really tight, so there are actually no hose clamps between the crankcase and nipple. The OEM hoses actually have internal indents for both the engine nipples and the check valve.