


DIY_Led_Eyelids[TB5]
Super Member
Joined: Apr 2010
Posts: 633
Likes: 1
From: Saskatoon, SK CANADA
W205 c400 sport
Lol I couldn't get the orange piece out for the life of me. How does one fit their fingers in such a tiny place and still maneuver to get a good grip...
Will try again in daylight tomm with some needle nosed pliers.
They don't have to be rotated or anything? Just pulled, correct?
Will try again in daylight tomm with some needle nosed pliers.
They don't have to be rotated or anything? Just pulled, correct?
Super Member
Joined: Sep 2010
Posts: 649
Likes: 0
From: Bakersfield, CA
Mercedes Benz C300 Sport
Lol I couldn't get the orange piece out for the life of me. How does one fit their fingers in such a tiny place and still maneuver to get a good grip...
Will try again in daylight tomm with some needle nosed pliers.
They don't have to be rotated or anything? Just pulled, correct?
Will try again in daylight tomm with some needle nosed pliers.
They don't have to be rotated or anything? Just pulled, correct?
It's best done during the day to minimize the risk of pulling or damaging the wrong part of the bulb. It doesn't have to be rotated in any direction before pulling. Make sure you grab the base of the bulb assembly with a needle nose pliers (Be careful not to pull by the wires) and try to wiggle it out as you pull it. A little extra force may be needed.

Junior Member
Joined: Jan 2011
Posts: 19
Likes: 0
From: Toronto, ON
2008 C300 4matic
Hi,
I bought my LED's from AZN Optics and they don't seem to fit into the socket. Am I supposed to do something special to the resistor or something? Sorry I'm a bit of a noob at this, but hey I tried Doing It Myself~
Thx
I bought my LED's from AZN Optics and they don't seem to fit into the socket. Am I supposed to do something special to the resistor or something? Sorry I'm a bit of a noob at this, but hey I tried Doing It Myself~
Thx
Junior Member
Joined: Jan 2011
Posts: 19
Likes: 0
From: Toronto, ON
2008 C300 4matic
Anyone from around Toronto willing to help out? Willing to give compensation and a sense of satisfaction in helping me out a lot =)
MBWorld Fanatic!
Joined: Mar 2009
Posts: 1,177
Likes: 2
From: UCF area Orlando/West Palm Beach FL.
c350coupe, Gencoupe R-spec
AZN optic Leds are a direct plug and play, just give it a little force and itll go in. they might seem like there not snug but there in. you did purchase the wedge lights correct?
MB World Stories
The Best of Mercedes & AMG

Manual Mercedes? 6 Times Sindelfingen Let Drivers Have All The Fun
Verdad Gallardo
Mercedes SLR McLaren 722 S Is Extremely Rare Example Modified by McLaren
Verdad Gallardo
8 Classic Boxy Mercedes Designs That Have Aged Like Fine Wine
Verdad Gallardo
Flawlessly Restored Mercedes 190E Evo II Heads to Auction
Verdad Gallardo
Electric Mercedes C-Class Unveiled: 11 Things You Need to Know
Verdad Gallardo
Mercedes EQS Gets A Major Update: Everything You Need to Know
Verdad Gallardo
5 Underrated Mercedes-Benz Models That Don't Get the Love They Deserve
Verdad Gallardo
Mercedes 300D Has Pushed Well Past 1 Million Miles and It Ain't Stopping
Verdad Gallardo
10 Most Reliable Mercedes-Benz Models You Can Buy Used
Verdad Gallardo
Junior Member
Joined: Jan 2011
Posts: 19
Likes: 0
From: Toronto, ON
2008 C300 4matic
It looks exactly like this
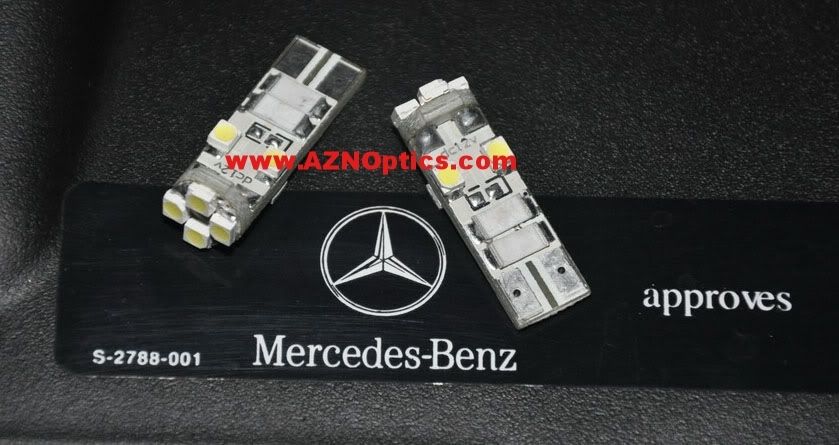
as AZN Optics advertised but it just doesn't fit deeply into the bronze housing, like it goes half a centimeter in and hangs loosely... Did you guys have to cut anything? I even tried stretching the housing a bit and it still doesn't work =S
even had my girlfriend give it a go just to make sure i wasn't doing anything completely wrong. It's nice to see your girl handle your car, but sucks when it still doesn't work =(
Last edited by Antimage; Jul 13, 2011 at 11:37 PM.
Junior Member
Joined: Jan 2011
Posts: 19
Likes: 0
From: Toronto, ON
2008 C300 4matic
Just an update - looks like this
http://imageshack.us/photo/my-images...cc2f0ddff.jpg/
Was busy the last week or so. I took out the housing (somewhat accidentally lol) but I'm not sure if you can see from here - the bulb does not fit in.
http://imageshack.us/photo/my-images...cc2f0ddff.jpg/
Was busy the last week or so. I took out the housing (somewhat accidentally lol) but I'm not sure if you can see from here - the bulb does not fit in.


Junior Member
Joined: Jul 2011
Posts: 36
Likes: 0
2010 C350 Sport
Great write up!
Question: I just changed my eyelids w/ LED's today and noticed that my wiring is all jacked up. I think whoever installed the bulbs before twisted the crap out of them so it was all stripped. Is it easy to rewire everything? Just need to take the bumper off ya?
Question: I just changed my eyelids w/ LED's today and noticed that my wiring is all jacked up. I think whoever installed the bulbs before twisted the crap out of them so it was all stripped. Is it easy to rewire everything? Just need to take the bumper off ya?

Junior Member
Joined: Jun 2011
Posts: 72
Likes: 0
c300
Jus took some quick pictures while doing my eyelids...
you really need to do it yourself to come to understand certain things like spacing and what not. the pictures i took are pretty straight forward and im sure will help people understand what they are grabbing at and can't really see.
Tools Used: Fingers
1. remove protective shield + 2 clips (each side) pull the center straight up to loosen the clips
2. reach under and remove cover to the eyelid bulb housing by rotating it

3. pull the wiring straight outwards [using your left hand works a lot easier on the inside most bulb on the right side]

4. because the wiring is so short.. find some space where you can have the bulbs fit through
5. remove the originals and pop in the leds [ i noticed that moving the box shown at the bottom right help a lot with the right light... there is very little space to work with otherwise... once again use your right and left hand]


6. position the bulbs by rotating it when you re-insert them into the housing... try to keep it looking symmetrical on both sides.
7. put everything back.
you really need to do it yourself to come to understand certain things like spacing and what not. the pictures i took are pretty straight forward and im sure will help people understand what they are grabbing at and can't really see.
Tools Used: Fingers
1. remove protective shield + 2 clips (each side) pull the center straight up to loosen the clips
2. reach under and remove cover to the eyelid bulb housing by rotating it
3. pull the wiring straight outwards [using your left hand works a lot easier on the inside most bulb on the right side]
4. because the wiring is so short.. find some space where you can have the bulbs fit through
5. remove the originals and pop in the leds [ i noticed that moving the box shown at the bottom right help a lot with the right light... there is very little space to work with otherwise... once again use your right and left hand]
6. position the bulbs by rotating it when you re-insert them into the housing... try to keep it looking symmetrical on both sides.
7. put everything back.
i am lost i am able to go towards the wiring then do i have to turn it right or left or just pull out ?!?!? sorry i am lost here

Member
Joined: May 2011
Posts: 80
Likes: 0
10 C63 AMG
I appreciate the DIY. I know like some people when I looked at them at first it didn't seem too straight forward so I quit, I have had the lights in my garage for a couple weeks. All it took was you to tell me there is nothing special to doing it. It was very simple. Although I did not see the part to take off at all in step one. Maybe it's possible the C63 doesn't have it

Junior Member
Joined: Jun 2011
Posts: 72
Likes: 0
c300

Newbie
Joined: Jun 2010
Posts: 6
Likes: 0
03 Camry, 06 ML350
I have change eyelid to Blue LEDs. hope I don't get pulled over. I was choosing between White and Blue and went with blue
The inner two bulb were difficult to remove. I found it easier using a small Pliers to pull it out because finger couldn't get enough grip.
The inner two bulb were difficult to remove. I found it easier using a small Pliers to pull it out because finger couldn't get enough grip.
Member
Joined: Apr 2011
Posts: 133
Likes: 0
From: Houston, TX
CL63 AMG (W216); E350 4Matic (W212); Cadillac SRX V8 N*
I got the cap off step and i'm stuck trying to pull the orange piece out.
Is there a trick to them or should i just go back a needle nose pliers?
Is there a trick to them or should i just go back a needle nose pliers?
Newbie
Joined: Jun 2010
Posts: 6
Likes: 0
03 Camry, 06 ML350
I had to use small pilers for 2/4 bulb cause i couldn't get to it with fingers. you don't have to turn them just wiggle/pull at same time with pilers.

Super Member
Joined: Sep 2008
Posts: 833
Likes: 0
From: St. Paul, MN
2011 E550 4Matic
Member
Joined: Apr 2011
Posts: 133
Likes: 0
From: Houston, TX
CL63 AMG (W216); E350 4Matic (W212); Cadillac SRX V8 N*
I really don't see how people do this w/o a long nose pliers, I couldn't even get one out, but I changed all of them out in a few mins w/ a pliers.


Last edited by midnightfang; Sep 14, 2011 at 06:13 PM.


