
DIY_Led_Eyelids[TB5]


Junior Member
Joined: Aug 2010
Posts: 21
Likes: 0
From: SE Wisconsin
2016 C450 AMG, 2011 BMW Z4 35i, 2009 Cadillac STS, 2011 Infiniti QX56
OK so my left inboard eyebrow light was out. Went to MB stealer and got a new bulb for less than $3. (probably cheapest item in their entire catalog).
Anyway after 16 hours and 12 scraped knuckles got the old one out and see it is a blue tinted bulb. No markings to indicate what number or anything. Same size, shape as the new OEM clear bulb. So put it in anyway and of course it lights up yellow compared to the others.
Part number was 000000-000853 12V 5W.
Did MB give me the wrong bulb? Could this be aftermarket? (Doubt the first owner did anything with the car) 2008 W204
Junior Member
Joined: Aug 2010
Posts: 21
Likes: 0
From: SE Wisconsin
2016 C450 AMG, 2011 BMW Z4 35i, 2009 Cadillac STS, 2011 Infiniti QX56
Checked the owners manual and saw that the eyebrow bulb is w5w bl. When I picked up the bulb from the dealer I was over there with another car and didn't have my manual with me. Ya think the parts guy would have given me the right bulb? Anyway got the correct blue bulb and put it in in less than 10 minutes. Amazing how quickly you can do something once you have already accomplished it once.
The suggestion to take off the plastic cover is spot on. You can actually see the cap and wires through one of the holes and can pull the bulb up through too. Makes the job a lot easier.
The suggestion to take off the plastic cover is spot on. You can actually see the cap and wires through one of the holes and can pull the bulb up through too. Makes the job a lot easier.

Member
Joined: Jan 2013
Posts: 87
Likes: 0
From: Kirkland WA
E350
size
what size bulb is it?
Jus took some quick pictures while doing my eyelids...
you really need to do it yourself to come to understand certain things like spacing and what not. the pictures i took are pretty straight forward and im sure will help people understand what they are grabbing at and can't really see.
Tools Used: Fingers
1. remove protective shield + 2 clips (each side) pull the center straight up to loosen the clips
2. reach under and remove cover to the eyelid bulb housing by rotating it

3. pull the wiring straight outwards [using your left hand works a lot easier on the inside most bulb on the right side]

4. because the wiring is so short.. find some space where you can have the bulbs fit through
5. remove the originals and pop in the leds [ i noticed that moving the box shown at the bottom right help a lot with the right light... there is very little space to work with otherwise... once again use your right and left hand]


6. position the bulbs by rotating it when you re-insert them into the housing... try to keep it looking symmetrical on both sides.
7. put everything back.
you really need to do it yourself to come to understand certain things like spacing and what not. the pictures i took are pretty straight forward and im sure will help people understand what they are grabbing at and can't really see.
Tools Used: Fingers
1. remove protective shield + 2 clips (each side) pull the center straight up to loosen the clips
2. reach under and remove cover to the eyelid bulb housing by rotating it
3. pull the wiring straight outwards [using your left hand works a lot easier on the inside most bulb on the right side]
4. because the wiring is so short.. find some space where you can have the bulbs fit through
5. remove the originals and pop in the leds [ i noticed that moving the box shown at the bottom right help a lot with the right light... there is very little space to work with otherwise... once again use your right and left hand]
6. position the bulbs by rotating it when you re-insert them into the housing... try to keep it looking symmetrical on both sides.
7. put everything back.

Senior Member
Joined: May 2011
Posts: 306
Likes: 1
From: Socal, USA
2008 C350 Benz, GLA250 4matic
@hotcorner216 this IS happening to me right now. Still waiting for a solution. The LEDs are brand new & I've tested them to make sure they're working and they are. I've also tested the original (non led) bulbs and they work when I put them in so I don't think it's a wiring issue. I honestly don't know what else to do. I have four brand new LEDs and can't get them to work. I posted this a few posts up but no answer as of yet.
Ever find a fix?
Senior Member
Joined: Dec 2012
Posts: 448
Likes: 1
From: M'sia
MB C250
i am a stubborn guy in terms of lighting
AznOptic offers best led bulbs around. i had them all around my ride except the door light (stock red).
None of the LED in my country beats the quality and price.
Installed them and be a happy driver
AznOptic offers best led bulbs around. i had them all around my ride except the door light (stock red).
None of the LED in my country beats the quality and price.
Installed them and be a happy driver

Junior Member
Joined: Dec 2012
Posts: 46
Likes: 1
C300
I used anz's for the eyebrows too, they work great
I did have a few issues that the instructions warned me of. the 50/50 they work one way in or not and as always every one of mine i had to turn around, I'm lucky that way
and the other issue is at first I pushed them in too far so they didn't work...pulled them out slightly and viola they worked but...when i then gave them a little push into the lens that must have pushed them into far again so they didn't work
so pulled them out a little bit further then when I pushed them into the holder and into the lens it all worked and continues to work great

Newbie
Joined: Mar 2010
Posts: 9
Likes: 1
From: Fort Lee, NJ
1998 CL600, 1998 C230 2010 C350
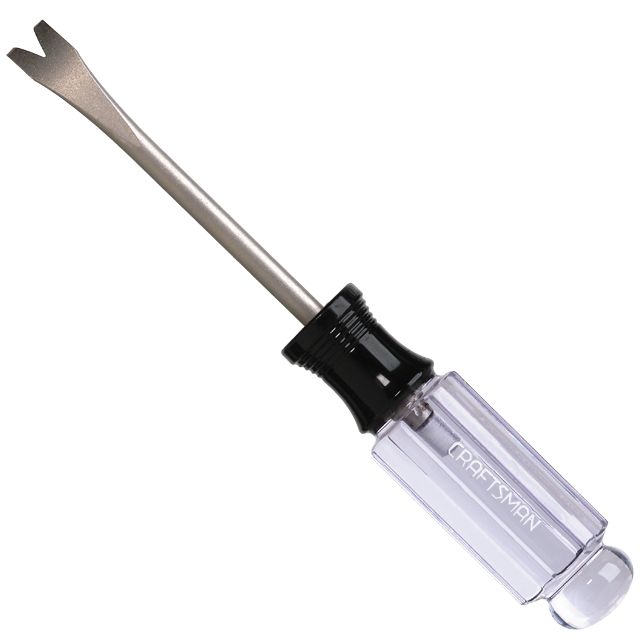
Thanks to TB5 for this DIY posting. I have a passenger side outer eyelid bulb that is out. I tried pulling on the protective cover to get the clips out as indicated in step 1 but they are not budging and I'm apprehensive about pulling any harder for fear of breaking the cover. Do you think I can use a flat head screwdriver or other tool to help work the clips up without breaking anything?


SPONSOR/MBworld Guru
Joined: Jul 2010
Posts: 6,936
Likes: 215
From: California
MB W204/W212, BMW E66, Porsche 958, VW MK6 TDI, Maserati Ghibli SQ4
This flat head (or fork) works. Best is to just pick up an automotive clip puller. Comes in handy to have around.


Member
Joined: Jun 2004
Posts: 230
Likes: 1
From: New Jersey
2009 C300 Sport 4Matic
I managed to replace both light right next to the turn signal, but the other 2 is giving me hard time, I tried the pull/tug method just like i did on the other 2 but the remaining 2 is not budging, should I give it a little more force or use a long nose pliers to take them off ? thanks
SPONSOR/MBworld Guru
Joined: Jul 2010
Posts: 6,936
Likes: 215
From: California
MB W204/W212, BMW E66, Porsche 958, VW MK6 TDI, Maserati Ghibli SQ4
try twisting them to loosen any dirt/debris that might be jamming it, then try pulling. If that doesn't work, then use needle nose pliers to get a firm grim on the plastic to pull. Do not pull by wire, especially if it's so tight.
Member
Joined: Jun 2004
Posts: 230
Likes: 1
From: New Jersey
2009 C300 Sport 4Matic
Thanks AZN I will try the need nose pliers.
MBWorld Fanatic!


Joined: Aug 2007
Posts: 1,543
Likes: 86
From: San Jose, CA
2010 c300
I was able to do mine also without the 1st step either. All I did was pull on the wire but made sure I was pulling on the wire by the bulb side. One was a bit tighter but enough pull and it came off. I tried a long nose but it was hard to grip. Probably one of these would worl best.
Last edited by aznmode; May 23, 2013 at 05:15 PM.
Member

Joined: Jul 2013
Posts: 110
Likes: 0
2016 C300 4Matic Sport
Things that helped me with Eyebrows Lights
Did my ASNOptics install. Overall it took about 15 minutes. A few things that I found useful and recommend.
1. Do the passengers side first where you have better visibility and learn.
2. Needle nose are a must. With them you can rotate the connector to loosen and then pull the bulb straight out.
3. Work with the eyelids lit. The lights themselves create illumination to work by as well as a trouble light. Once all of the bulbs are out of the housing, then turn the lights off and give them a chance to cool. They'll be hot.
When reinstalling, turn the lights back on, check all of the LED's in the bulb, and use the illumination of the bulb to guide you towards the housing socket. As you get close and then in the right location, the light will increase inside of the housing and act as a guide for the replacement of the bulb.
4. Remove the fairings on top of the light housing as previously suggested. It takes maybe 30 seconds per side and well worth the effort as it increases visibility.
5. Remove the windshield solvent bracket. This will help you for the drivers side bulb which sits just adjacent to this bracket. It slides up and down along the axis of the fill tube. By sliding it down, it gives you more room to maneuver. I couldn't remove it, but it helped to be able to shift it down and provide a little more room. I've included a pic below of which bolt to remove. It's a 15 second addition to remove this bolt.
Solvent Support Bolt.jpg
My 2�!
Thanks to all of the previous posts which helped this job go quickly.
BTW, the AZNOptics LEDs look great although there is one with a dead LED. It's on the side and not worth the trouble of sending it back. The 5000K look great with my Morimoto 5000K kit and the smoke side marker lights with 5000K LEDs. Pics to come.
K
Last edited by KCaudell; Jul 30, 2013 at 02:26 PM.
SPONSOR/MBworld Guru
Joined: Jul 2010
Posts: 6,936
Likes: 215
From: California
MB W204/W212, BMW E66, Porsche 958, VW MK6 TDI, Maserati Ghibli SQ4
email me a pic of the dead LED diode at aznoptics@gmail.com with your order number and we'll get a warranty unit out to you.

Member
Joined: Jul 2013
Posts: 110
Likes: 0
2016 C300 4Matic Sport


Member
Joined: Feb 2013
Posts: 230
Likes: 2
From: southern NJ
C63
i have a couple quick questions. i had to remove the black caps with the white rubber seals a few times. i got six 194s, did the license plates first and when i got to the front, i found out i had one DOA and one with a single LED not working. sucked, so i had to undo what i had done.
anyway, the outer caps for the eyelid bulbs...the ones closest to the turn signals on both sides...
1. is it correct that the white rubber seal doesn't seem to compress much at all when the cap is reinstalled?
2. also, the inner caps are flat when tightened. the wings/tabs for your fingers are parallel to the ground. the "stop" is pretty pronounced for them when they are tight. the outer ones (toward the turn signal side of each lamp) are not like that. they go like 45 degrees past parallel and are kinda loose up to that point.
is that all normal??? i couldn't remember if they were tight when parallel before i removed them. they certainly loosened easily though the first time. just a little pressure turned them.
thanks.
Last edited by builthatch; Aug 3, 2013 at 11:45 PM.


