Lic plate bumper plug DIY
 08-04-2009, 11:51 PM
#1
MBWorld Fanatic!
Thread Starter
Lic plate bumper plug DIY
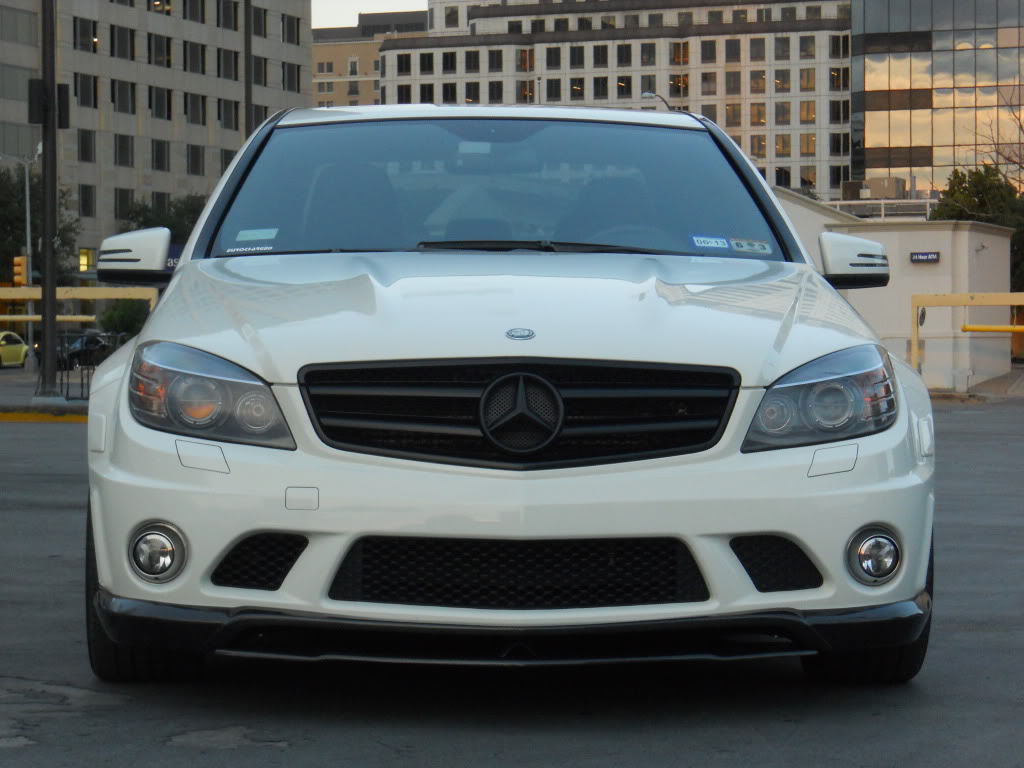
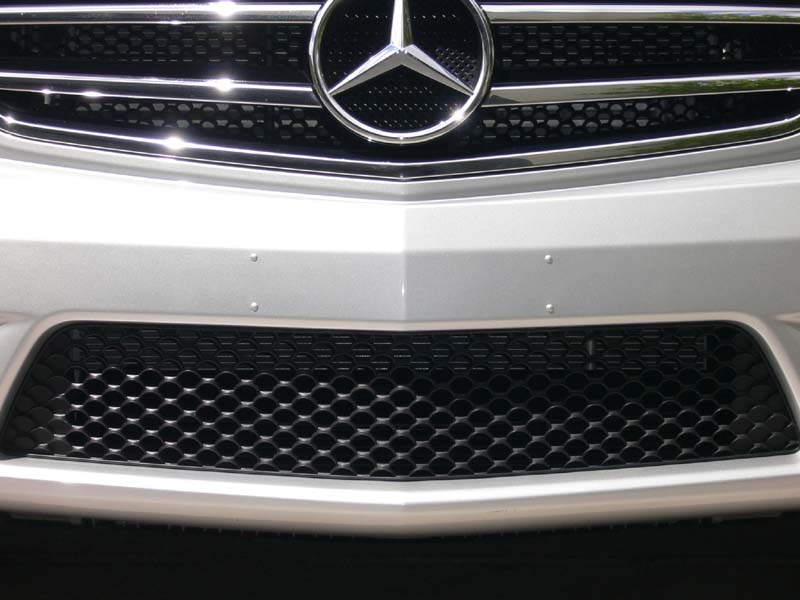
I just picked up this car in CA where the dealer already mounted the front lic plate holder. Before I picked the car up, I told them not to mount the holder but they stated in CA, it must be done. In NV, a front plate is not required. I find the plugs in Lowes are smaller than the ones at bumperplug.com.
Here is the step-by-step:
1) Get plugs from Lowes. They are $1.04 per pair.
2) Scuff the plugs with either red scour pad or 1000 grit sandpaper.
3) Buy plastic primer @ Lowes and spray 1-2 coats. This stuff comes clear.
4) Buy grey or white primer and spray 2 coats to cover the black plastic. Black colored cars do not need grey/white primer (skip 4 and go to 5).
5) Brush on 2-3 coats of color (let dry between coats). On the 3rd coat, use "dry brush" technique which is a modeling painting technique if you are using a metallic color. The purpose is to even out the metallic flakes and give it a matte finish prior to clear coating. To do that, wet brush with a little paint and brush on a piece of paper till there is hardly any paint left. Then paint the platsic part. This will give a dull even color for the metallic base color coat.
6) Buy DupliColor clear (avail at auto supply stores) and spray on 4-5 coats. Let dry between coats.
7) Drill hole to size. Slowly step up one size larger till you get a hole that is a little tighter than the plug.
8) Press newly painted plugs in. No need to glue.
You could probably get away using the clear that comes with the touchup paint set from the dealer since the part is so small and you probably would not be able to see the brush strokes. I elected to spray so I can get a smooth even surface. I was going to airbrush the color, but I got lazy and wanted to see the results on brushing before deciding on airbrushing.
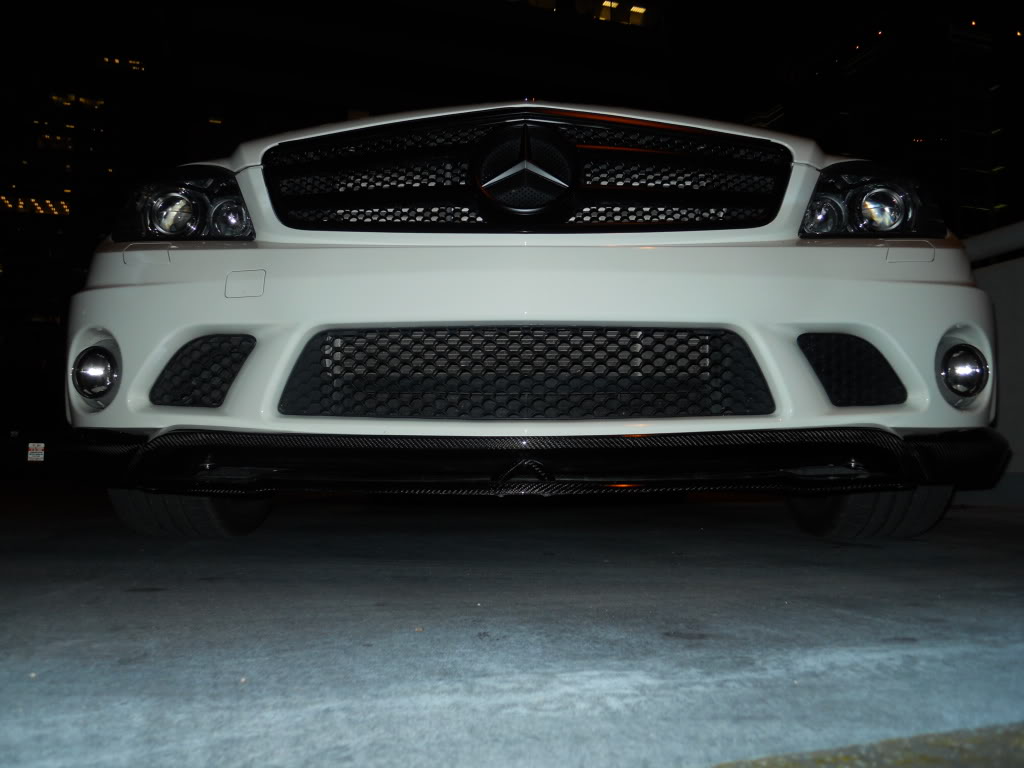
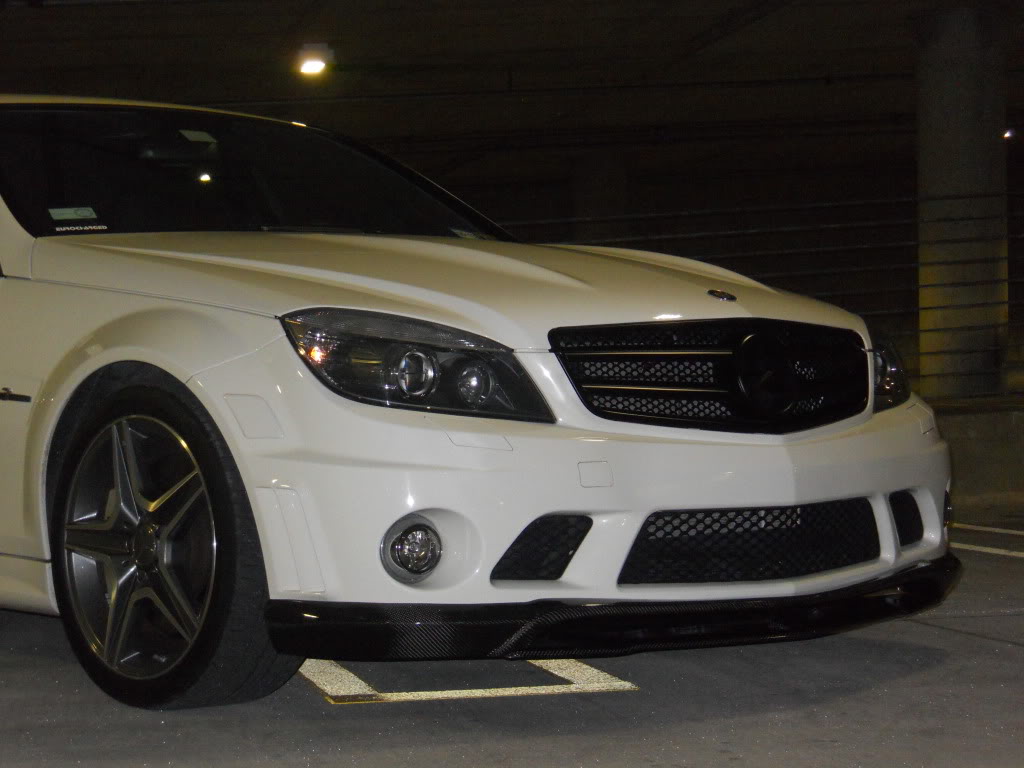
Here it is with Lowes 3/16" plugs:

Here is the step-by-step:
1) Get plugs from Lowes. They are $1.04 per pair.
2) Scuff the plugs with either red scour pad or 1000 grit sandpaper.
3) Buy plastic primer @ Lowes and spray 1-2 coats. This stuff comes clear.
4) Buy grey or white primer and spray 2 coats to cover the black plastic. Black colored cars do not need grey/white primer (skip 4 and go to 5).
5) Brush on 2-3 coats of color (let dry between coats). On the 3rd coat, use "dry brush" technique which is a modeling painting technique if you are using a metallic color. The purpose is to even out the metallic flakes and give it a matte finish prior to clear coating. To do that, wet brush with a little paint and brush on a piece of paper till there is hardly any paint left. Then paint the platsic part. This will give a dull even color for the metallic base color coat.
6) Buy DupliColor clear (avail at auto supply stores) and spray on 4-5 coats. Let dry between coats.
7) Drill hole to size. Slowly step up one size larger till you get a hole that is a little tighter than the plug.
8) Press newly painted plugs in. No need to glue.
You could probably get away using the clear that comes with the touchup paint set from the dealer since the part is so small and you probably would not be able to see the brush strokes. I elected to spray so I can get a smooth even surface. I was going to airbrush the color, but I got lazy and wanted to see the results on brushing before deciding on airbrushing.
Here it is with Lowes 3/16" plugs:
 08-04-2009, 11:57 PM
#2
MBWorld Fanatic!
Join Date: Apr 2008
Location: Chino Hills, CA
Posts: 3,809
Likes: 0
Received 4 Likes
on
3 Posts
Mercedes C300 Sport, BMW 745Li, VW Mk6 Golf TDI
Good job. I read your thread on the dealer applied plates without your permission and I was like wtf. Ruins the look of the ride. Plugs although not as good as just not having holes in the first place, are better than front plates or the europlate idea you had. 
08-05-2009, 12:01 AM
#3
MBWorld Fanatic!
Thread Starter
Yeah, that sucked. The poster of that thread was actually Desmo996 and I just posted the DIY in his thread. We both purchased our cars the same week and at the same dealer in Torrance. He had his delivered and I flew down to pick mine up. We actually live pretty close to eachother.
Last edited by Sincity; 08-05-2009 at 12:03 AM.
08-05-2009, 08:03 PM
#4
Senior Member

Join Date: Jun 2009
Location: Inland Empire, CA
Posts: 396
Likes: 0
Received 0 Likes
on
0 Posts
C300, 330i, MDX
Nice job. My dealer f*****d up the hole. It's not even and not centered. I had to get a plate holder that I had to modify to make it look halfway decent. Now, I have another option... Thanks.
08-06-2009, 07:17 PM
#6
MBWorld Fanatic!
Thread Starter
08-06-2009, 07:18 PM
#7
MBWorld Fanatic!
Thread Starter
Trending Topics
03-16-2010, 01:07 PM
#9
Newbie

Join Date: Mar 2010
Location: Dallas/Chicago
Posts: 11
Likes: 0
Received 0 Likes
on
0 Posts
2005 C230 Kompressor
Doing mine now, I was one of the lucky ones who had 6 holes drilled in, thank you Texas. Hopefully it looks good and last. If not be an easy job for a body shop. Ill post pictures later.
03-16-2010, 07:01 PM
#10
MBWorld Fanatic!
That is a lie....they forgot and didn't want to fix it. You need a front plate in illinois and wisconsin and they just make me sign a waiver.
03-16-2010, 09:12 PM
#11
Senior Member
Join Date: Oct 2005
Location: East Bay, CA
Posts: 387
Likes: 0
Received 0 Likes
on
0 Posts
MB w204 C300 Sport, Audi B7 A4 2.0TQ, Porsche Cayman 981
^^^ what he said. You just need to sign a waiver and they wont install the plate. Your dealer probably just forgot your request. When my car was delivered, I had to remind my sales agent 5x not to drill into it when the boys in the back prep it for the final sale (just enough times so he would remember)
 Tks!
04-25-2010, 05:16 PM
Tks!
04-25-2010, 05:16 PM
#14
Super Member
10-01-2012, 01:58 AM
#15
MBWorld Fanatic!

Join Date: Apr 2012
Location: Austin, TX
Posts: 1,097
Likes: 0
Received 6 Likes
on
3 Posts
507 SEDAN
I have a wonderful solution. It doesn't take much time at all.
1.Take off plates, backing, and any hardware to expose the holes. (Mine were pretty easy. MB only driller 2 holes, but this procedure applies to any number of holes.)
2. Go to any hardware store of your choice. But some industrial silicone of your choice, but should pertain specifics about cars, trucks, motos, buses, watercraft, etc.. (I'll share my tubes and cost when I go back out tomorrow)
3. Then get some painter tape and a small can of the color of your choice. (I got a nice, small tin of 650(Arctic White)).
4. You do not have to take the bumper off, but I did. My friend did not. Both methods worked for us both (I think mine is a little better).
5. Fill the holes from both, or either direction. Then wait a while while it hardens. Crack some beers, talk about cars, hop on MBWorld to see what's going on, and general tom foolery.
6. Once hardened, it's time to snip and trim. Start by cutting the silicone out of the way, really close to the bumper. Use your cutting device to clean up area, get shrapnel and all existing silicone cut down to right at the bumper.
7. Use the highest scale number to indicate coarse/delicate texture to get a pad or steel wool. You want the highest number and softest/finest textured pad. Use the pad (or steel wool) to lightly and GENTLY remove the leftover and excess silicone. DO NOT SCRUB TOO HARD. Stay away from the paint.
8. Make sure area is clear, only the holes should be filled with silicone. After the area was clean, I hit the holes very lightly with super glue(probably not necessary, but it was my first time).
9. Tape off portion of bumper and grille, so that only the license plate area is clear. Because of some of the lines, I'd leave about 2" above and below the plate and about 4" to either side.
10. Get your desired color, load your paint tool and begin shooting. All that is needed is for your hand to stay fluid, your wrists loose, and just kind of relax and shoot the color back and forth in a blending fashion. Let cure.
There, you are done. 10 incredibly easy steps to restore the front bumper. Maybe half an hour(30min). And you cannot tell that I EVER drilled holes. I knew I didn't want the buttons. I don't like them either. They always stand out too much. And in my case, the empty holes looked better than the buttons. Here are some pics: