
DIY painted sidemarkers
 04-26-2012, 05:37 PM
#1
Member
Thread Starter

Join Date: Feb 2012
Posts: 85
Likes: 0
Received 0 Likes
on
0 Posts
2010 c300
DIY painted sidemarkers
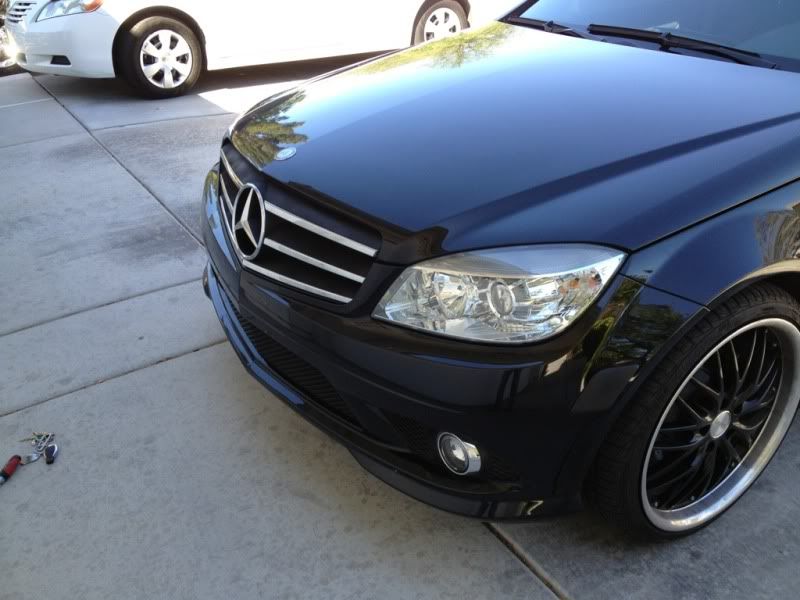
Took me about an hour to do! One of the easiest DIY and a great overrall change to the car !
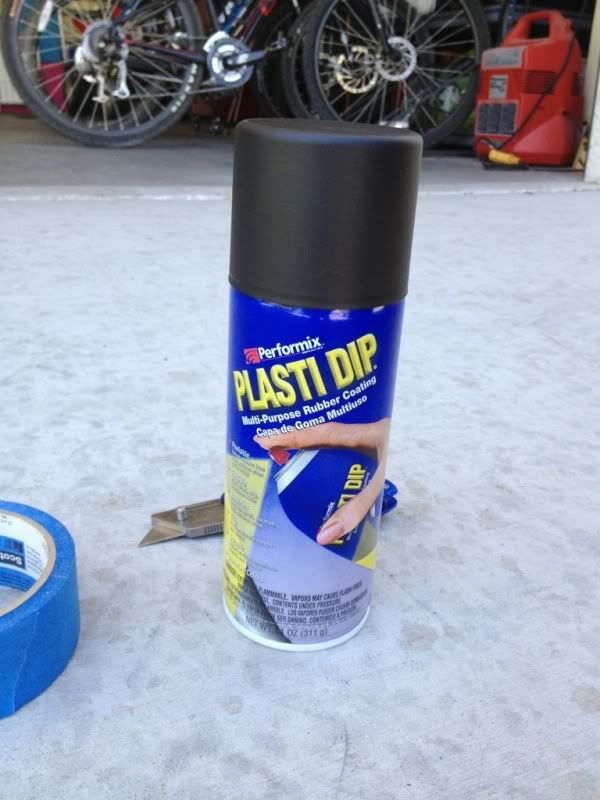
First start out with a can of black plasti-dip(can be bought at home depot for 5.86$), an exacto knife, some painters tape, and newspaper.

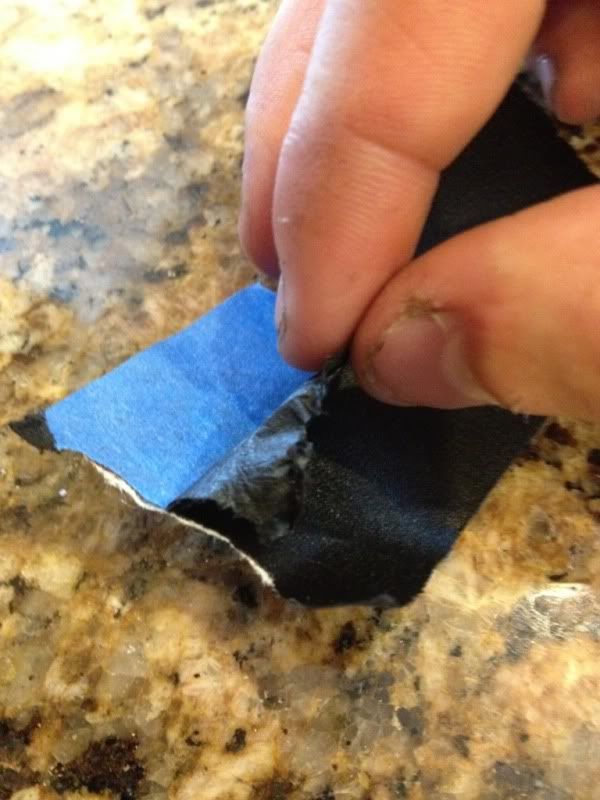
I used peeling off this tape as an example for if you ever want to take it off ! Easy easy removal, peels off just like an elasticy tape !
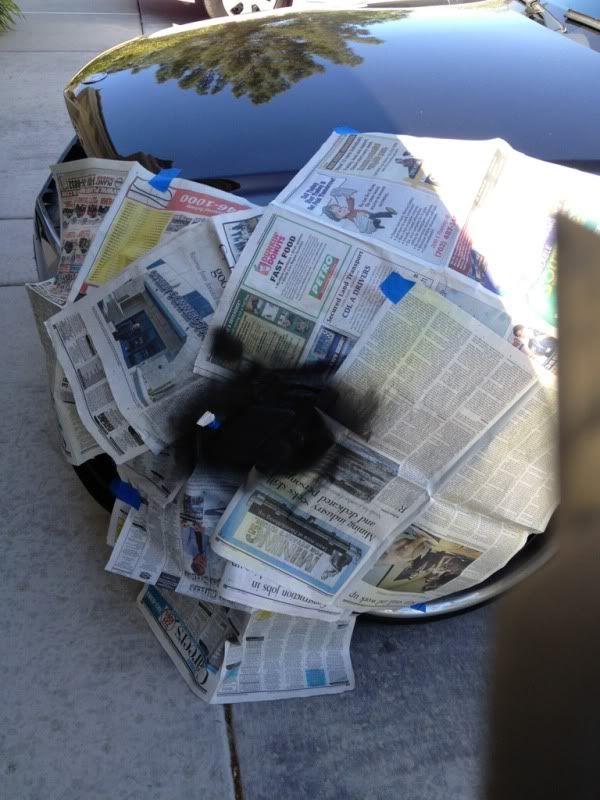
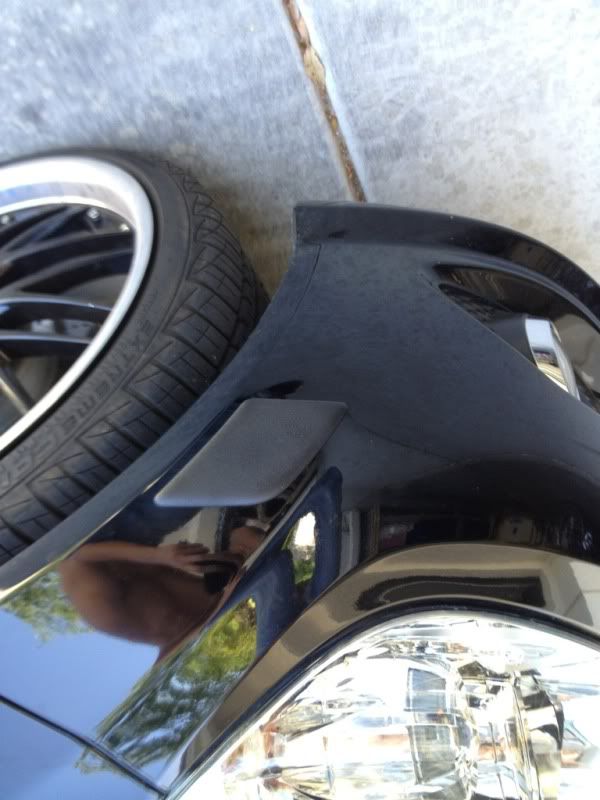
Make sure you clean the light with some febreeze or rubbing alcohol! Now your going to tape up/newspaper your light! (forgot to take picture before,but you get the idea) just make sure when taping you edge the tape underneath the light, it seems to be a cap so getting tape under it is easy as pie.
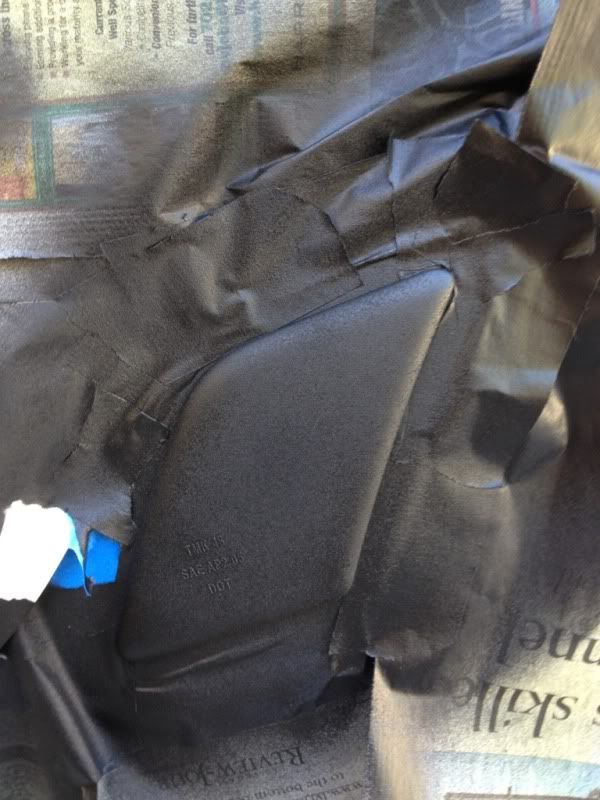
(the not painted part is where I Took a piece of tape off to take a pic of the peeling you can do)
Now your going to want to paint in coats. The first coat won't cover all the orange just be patient and hit it with about 4-5 coats ! Wait 10-15 minutes between coats.
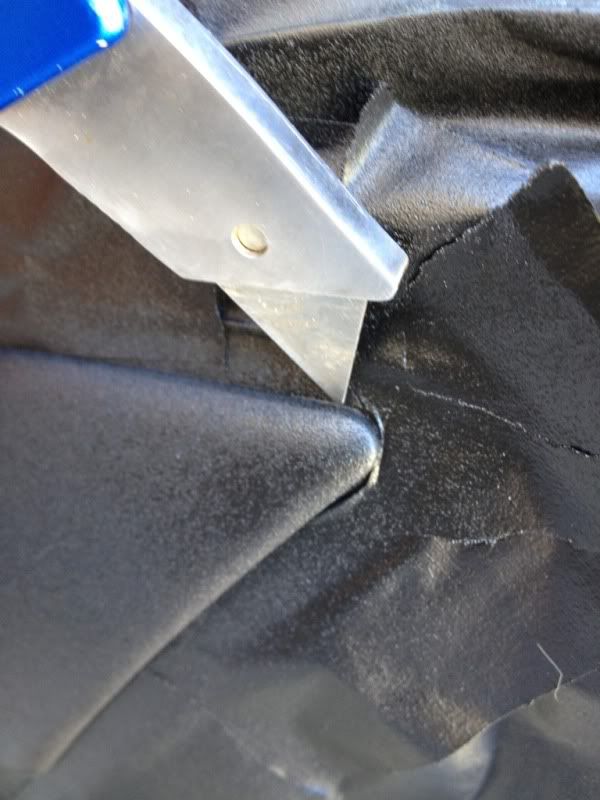
Now the next step is very important ! Once you've finished, take an exacto knife and cut the edges under the cap, so the paint will separate from the tape and it won't peel off ! A quick run through with the knife is all it takes.
Now peel away at the tape/newspaper and your done !
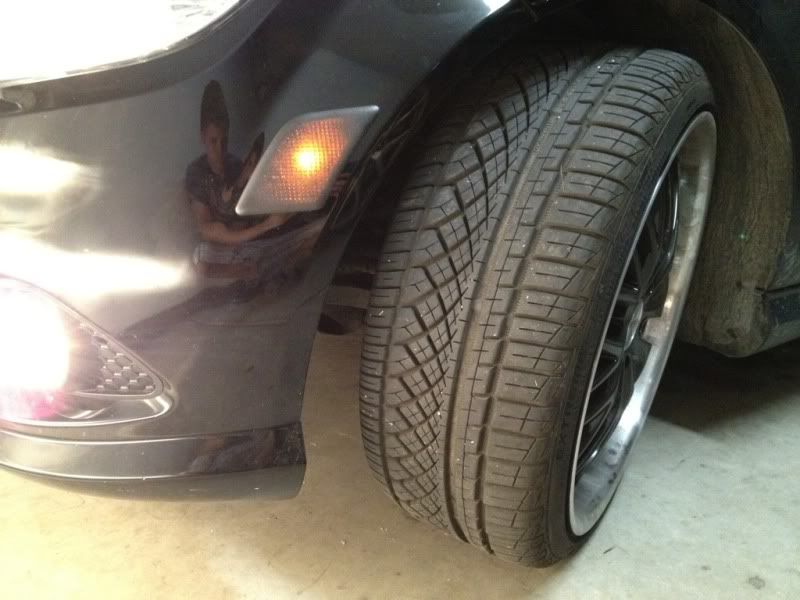
There's a nighttime shot with the light on!
First start out with a can of black plasti-dip(can be bought at home depot for 5.86$), an exacto knife, some painters tape, and newspaper.
I used peeling off this tape as an example for if you ever want to take it off ! Easy easy removal, peels off just like an elasticy tape !
Make sure you clean the light with some febreeze or rubbing alcohol! Now your going to tape up/newspaper your light! (forgot to take picture before,but you get the idea) just make sure when taping you edge the tape underneath the light, it seems to be a cap so getting tape under it is easy as pie.
(the not painted part is where I Took a piece of tape off to take a pic of the peeling you can do)
Now your going to want to paint in coats. The first coat won't cover all the orange just be patient and hit it with about 4-5 coats ! Wait 10-15 minutes between coats.
Now the next step is very important ! Once you've finished, take an exacto knife and cut the edges under the cap, so the paint will separate from the tape and it won't peel off ! A quick run through with the knife is all it takes.
Now peel away at the tape/newspaper and your done !
There's a nighttime shot with the light on!
 04-26-2012, 08:06 PM
#6
Senior Member
Join Date: Dec 2011
Posts: 387
Likes: 0
Received 0 Likes
on
0 Posts
2008 Mercedes C300
I personally would have done it a gloss black. It kind looks out of place with the gloss black. But, its your car, you do what you like!
Why not just remove the light from the car then paint it? painting on the car seems to much of a risk with overspray and tape and the knife?
Why not just remove the light from the car then paint it? painting on the car seems to much of a risk with overspray and tape and the knife?
04-26-2012, 08:11 PM
#7
Senior Member
Join Date: Dec 2011
Posts: 387
Likes: 0
Received 0 Likes
on
0 Posts
2008 Mercedes C300
Trending Topics
04-26-2012, 08:12 PM
#8
Member
Thread Starter
Join Date: Feb 2012
Posts: 85
Likes: 0
Received 0 Likes
on
0 Posts
2010 c300
With this stuff there's very little overspray, it's great. Looking at it in person it goes flush with the grille and has a Matte black look to it. Doesn't look out of place, at least not to me !
04-26-2012, 08:18 PM
#10
Senior Member
Join Date: Dec 2011
Posts: 387
Likes: 0
Received 0 Likes
on
0 Posts
2008 Mercedes C300
have you thought of doing the chrome rings around your fog lights? I think that would be a nice look to go with it all
04-26-2012, 08:20 PM
#11
Member
Thread Starter
Join Date: Feb 2012
Posts: 85
Likes: 0
Received 0 Likes
on
0 Posts
2010 c300
It's on my list of my possible to do's, but Im trying to keep the black/chrome ratio solid... So it's a tough choice !
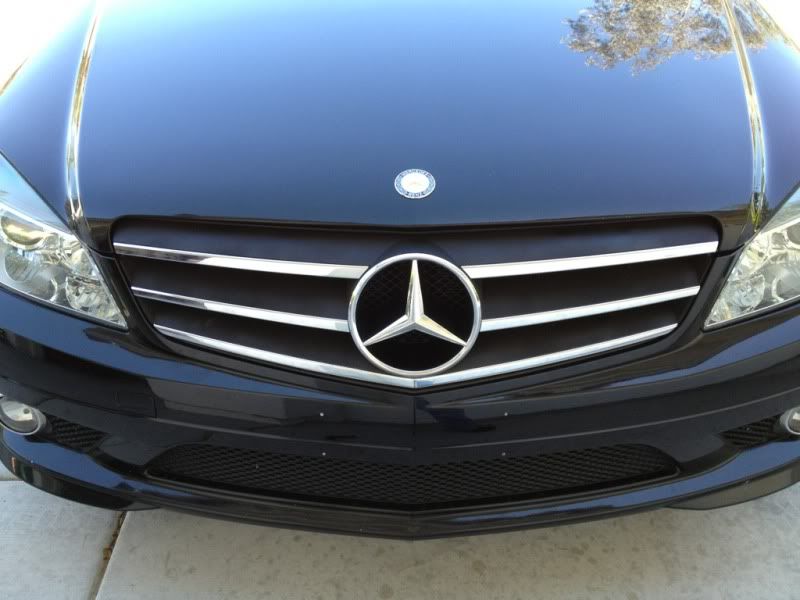
You can barely see the fogs... But I kind of like how it flows with the grille still...
Guess I could try and if I don't like it, peal it off! Lol
You can barely see the fogs... But I kind of like how it flows with the grille still...
Guess I could try and if I don't like it, peal it off! Lol
04-26-2012, 08:22 PM
#12
Senior Member
Join Date: Dec 2011
Posts: 387
Likes: 0
Received 0 Likes
on
0 Posts
2008 Mercedes C300
Yes, thats true. Please if you do post a pic. Ive seen a lot of people using the plasti dip, is it that easy to remove?
04-26-2012, 08:33 PM
#13
Member
Thread Starter
Join Date: Feb 2012
Posts: 85
Likes: 0
Received 0 Likes
on
0 Posts
2010 c300
Put it this way, it's like a condom on your paint... It peels off as easy as a piece of scotch tape peels off something. Nice and easy. Look up "plasti dip removal" on YouTube
04-27-2012, 01:23 PM
#14
Senior Member
Join Date: Dec 2011
Posts: 387
Likes: 0
Received 0 Likes
on
0 Posts
2008 Mercedes C300
05-16-2012, 04:52 PM
#15
Newbie

Glossy Finish
Is there any way to do this with a glossy finish to match the rest of the car?
Or has anyone seen smoke/blacked out ones yet to purchase? - I'm a chick so I don't usually spend my time searching MB parts sites
Or has anyone seen smoke/blacked out ones yet to purchase? - I'm a chick so I don't usually spend my time searching MB parts sites
05-16-2012, 05:01 PM
#16
Member

you could just use a glossy finish clear coat over it, thats what we did to my buddies rims
05-16-2012, 07:30 PM
#18
Super Member
Join Date: Mar 2012
Location: San Francisco
Posts: 591
Likes: 0
Received 0 Likes
on
0 Posts
'08 Mercedes C300
05-17-2012, 12:41 PM
#20
Member
Thread Starter
Join Date: Feb 2012
Posts: 85
Likes: 0
Received 0 Likes
on
0 Posts
2010 c300
take your time on your grille... best advice I can possibly give! When I did it i took off the top 2 rows of chrome, and left on the bottom row. I taped off the bottom row so it wouldn't get painted. (making sure in between each layer I ran an exacto-knife between the cracks so the tape wouldn't become part of the vinyl) I did 5-7 coats I believe... Make sure you spray from all angles you can think of! Nothing worse then having a random gray spot! Best of luck to you, post some pics!


