When you click on links to various merchants on this site and make a purchase, this can result in this site earning a commission. Affiliate programs and affiliations include, but are not limited to, the eBay Partner Network.
I'd like to report that the front bumper conversion is finally complete! Also, had to get the entire car wrapped in Satin Black. Love the way she looks.
You got the mesh too! Good for you, better safe than sorry I guess : )
1986 Light Ivory R107 560SL & 2024 W206 Starling Blue C300 4MATIC AMG-Line, Exclusive Trim
Originally Posted by Kush Desai
I'd like to report that the front bumper conversion is finally complete! Also, had to get the entire car wrapped in Satin Black. Love the way she looks.
I'd like to report that the front bumper conversion is finally complete! Also, had to get the entire car wrapped in Satin Black. Love the way she looks.
Congratulations dude! It came out really awesome! It sure is a great feeling to see your vision come to life, huh? Totally worth it IMO!
Now that this is complete, you'll need to find something else to think about 24/7, lol.
nevermind I got it wrong, thanks for clarifying I remember about that thread, I think it is a cool mod actually looking forward to hear your impressions on it but I am pretty sure you will love it.
how you get the bumper with no sensor holes? on the picture it shows the sensor holes do i have to tell them that i dont have sensors? or did you do have work done to it to cover them?
how you get the bumper with no sensor holes? on the picture it shows the sensor holes do i have to tell them that i dont have sensors? or did you do have work done to it to cover them?
I know this is a very long thread, so you probably missed it, see the end part of this post:
So that it�s clear; I am installing an aftermarket C63-style front bumper which is made to fit any W205 model except an actual C63. The C63 is the only W205 model that has unique front body panel dimensions that were expanded to facilitate a V8 engine (hood, fenders & bumper). So don�t expect C63 hoods, front fenders, front bumpers or most related components to fit anything but a C63.
One of the most visible differentiators between a C63 front bumper and all other W205�s can be seen where the hood meets the bumper. A C63 hood has a flat-faced front edge, whereas all other W205 hood front edges protrude forward on the outer front edges in a �V� shape, kind of like vampire fangs. This is a quick and easy way to tell a real C63 from imposters.
Also notice the difference in length of the bumper-to-fender seam and the distance from the headlights to the outer edge of the fender in the pic above. This clearly shows how much wider the fenders and bumper cover is on a C63 compared to all other W205�s.
I chose to go with the facelift (2019+) version of the C63-style front bumper that looks like this:
I could not find a C63-style front bumper without the sensor holes (my model options don�t have sensors), so in lieu of just putting some butt-ugly plastic plugs in the holes, I brought it to a local body shop to have the sensor holes filled. They used a combination of a fiberglass mesh backing and plastic epoxy to fill the holes.
Hello, I�m curious to know the dimension of the l bracket used or if you happen to have the link tot he purchase the you made. Thank you !
Originally Posted by Keith66
REAR BUMPER
I'm starting at the back and working my way forward. I snagged a great deal on Ebay for a new aftermarket, (painted Black #040) AMG-line Sport Rear Bumper Cover for $350 shipped. Woot:
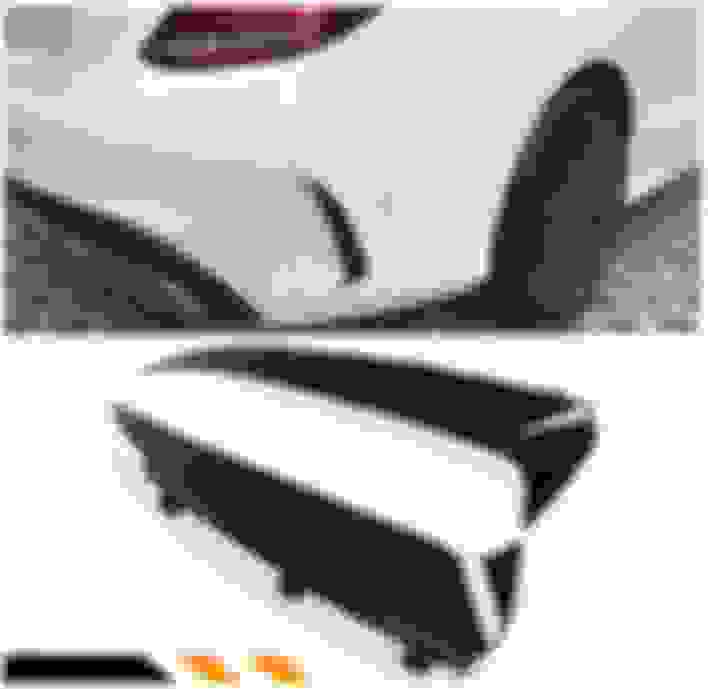
Ordered an aftermarket facelift (2019+) C63 Gloss Black Rear Diffuser w/chrome tips $485 shipped:
Ordered a pair of Gloss Black Rear Bumper Vent "Canards"/Winglets (snap-in) $45 shipped:
A reminder of what I�m starting with:
Bumper is off! That was quick: :p
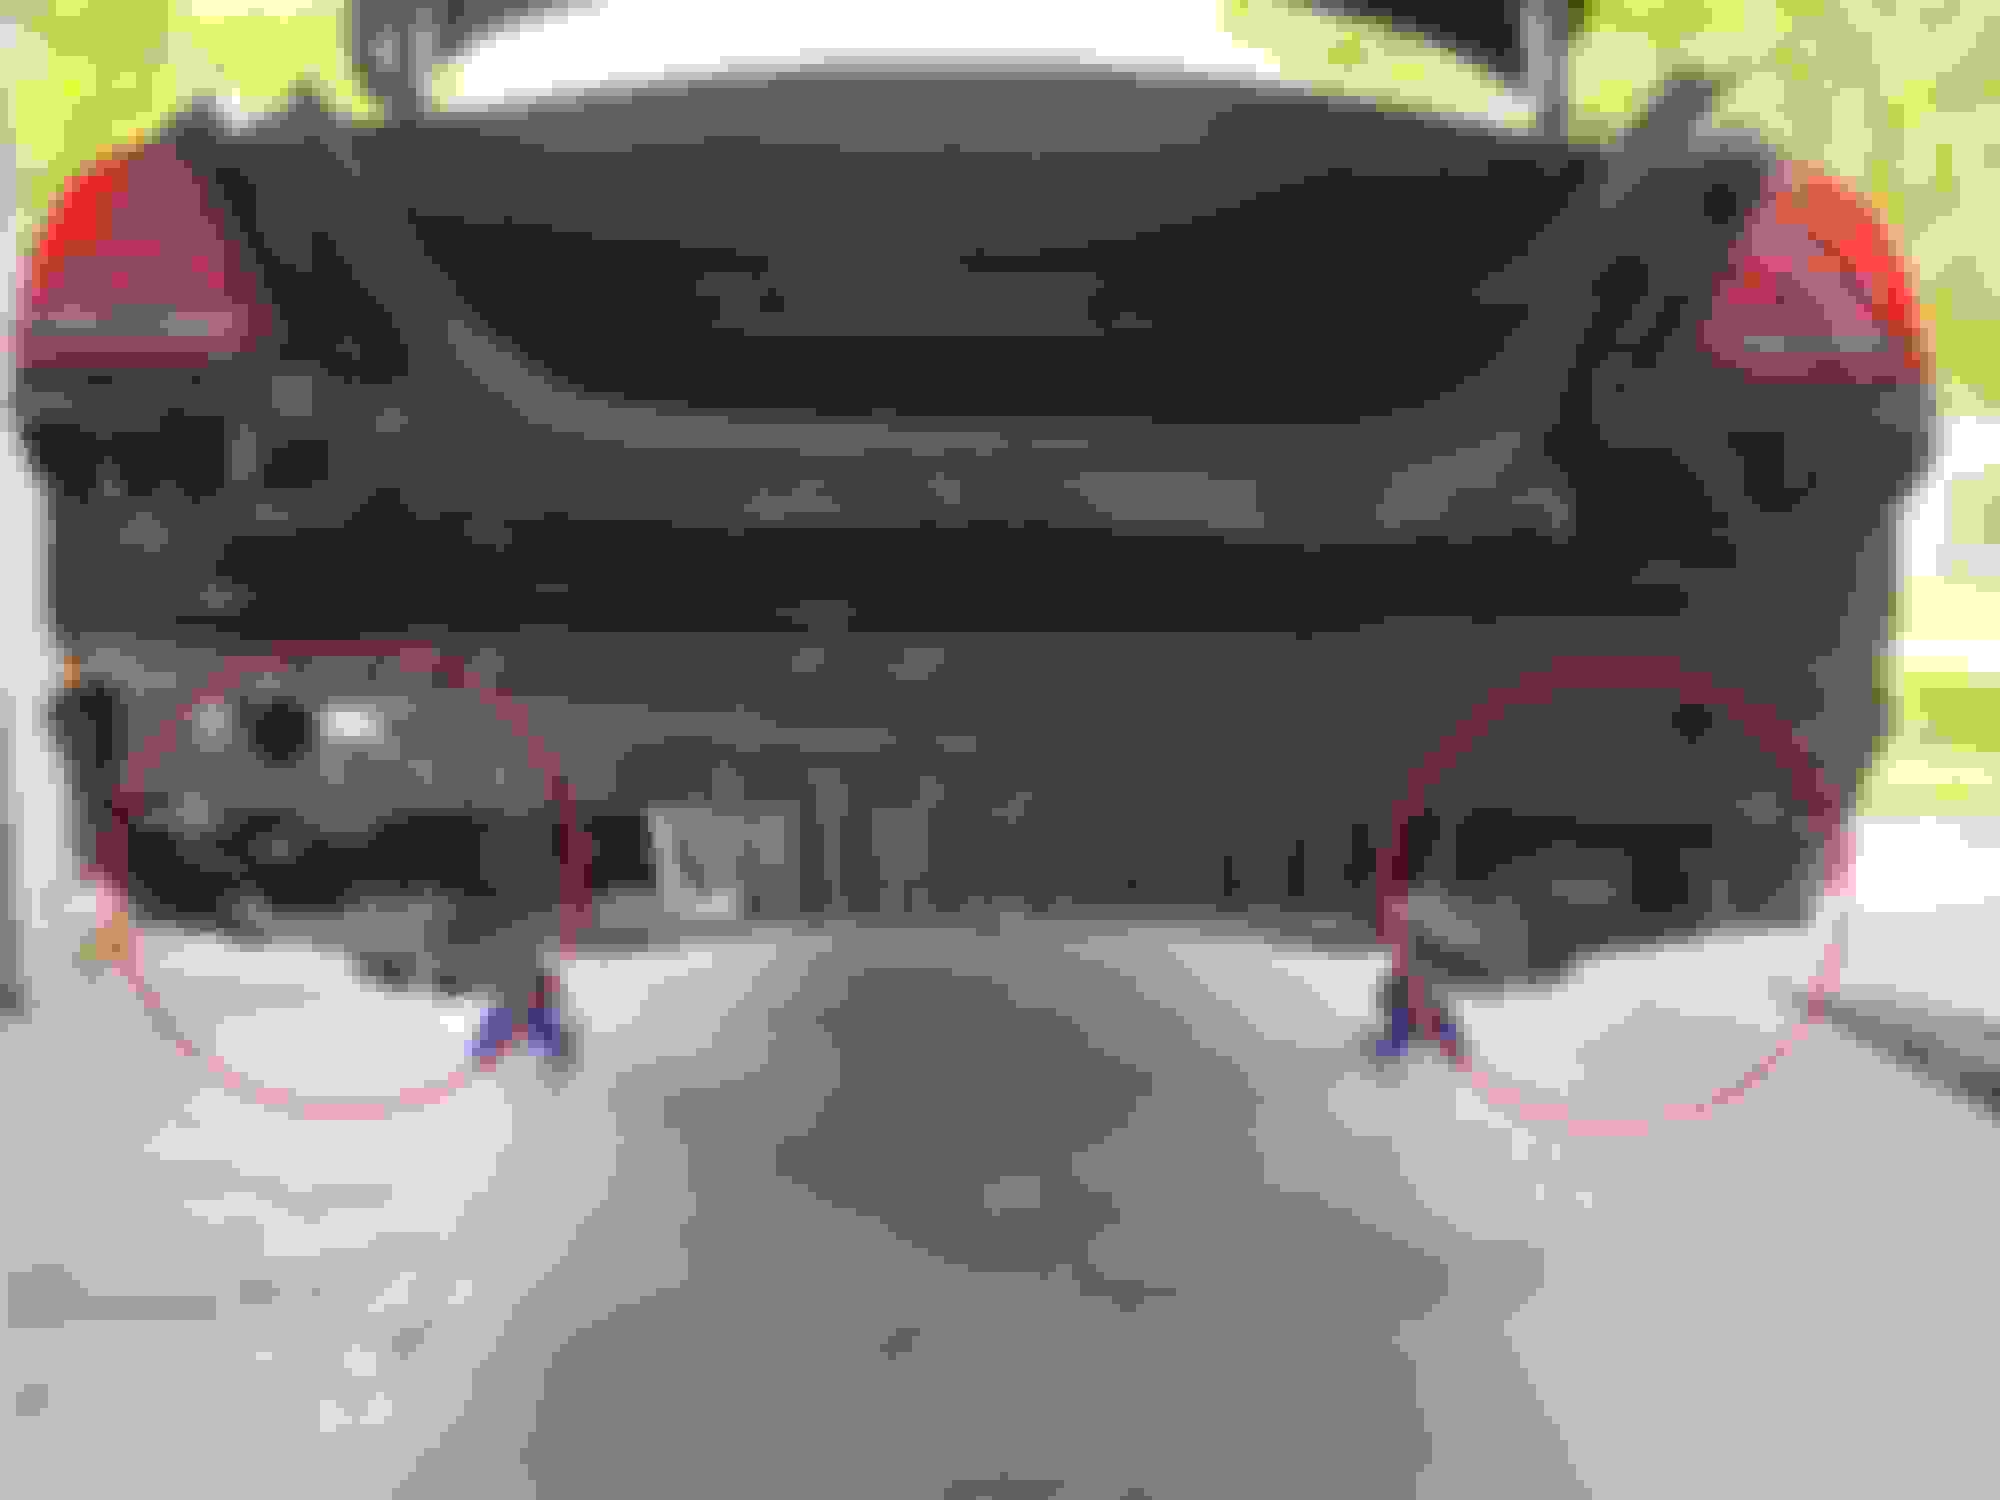
The original bumper and diffuser comes off as one piece. The plastic inserts with the studs (circled in red) will need to be transferred to the new bumper (snaps/clips-in):
One of the small things that has bugged me about this car is how you can clearly see the mufflers behind the fake exhaust tips. To try to blend the mufflers more into the shadows, I painted the muffler ends with high-temperature black stove paint:
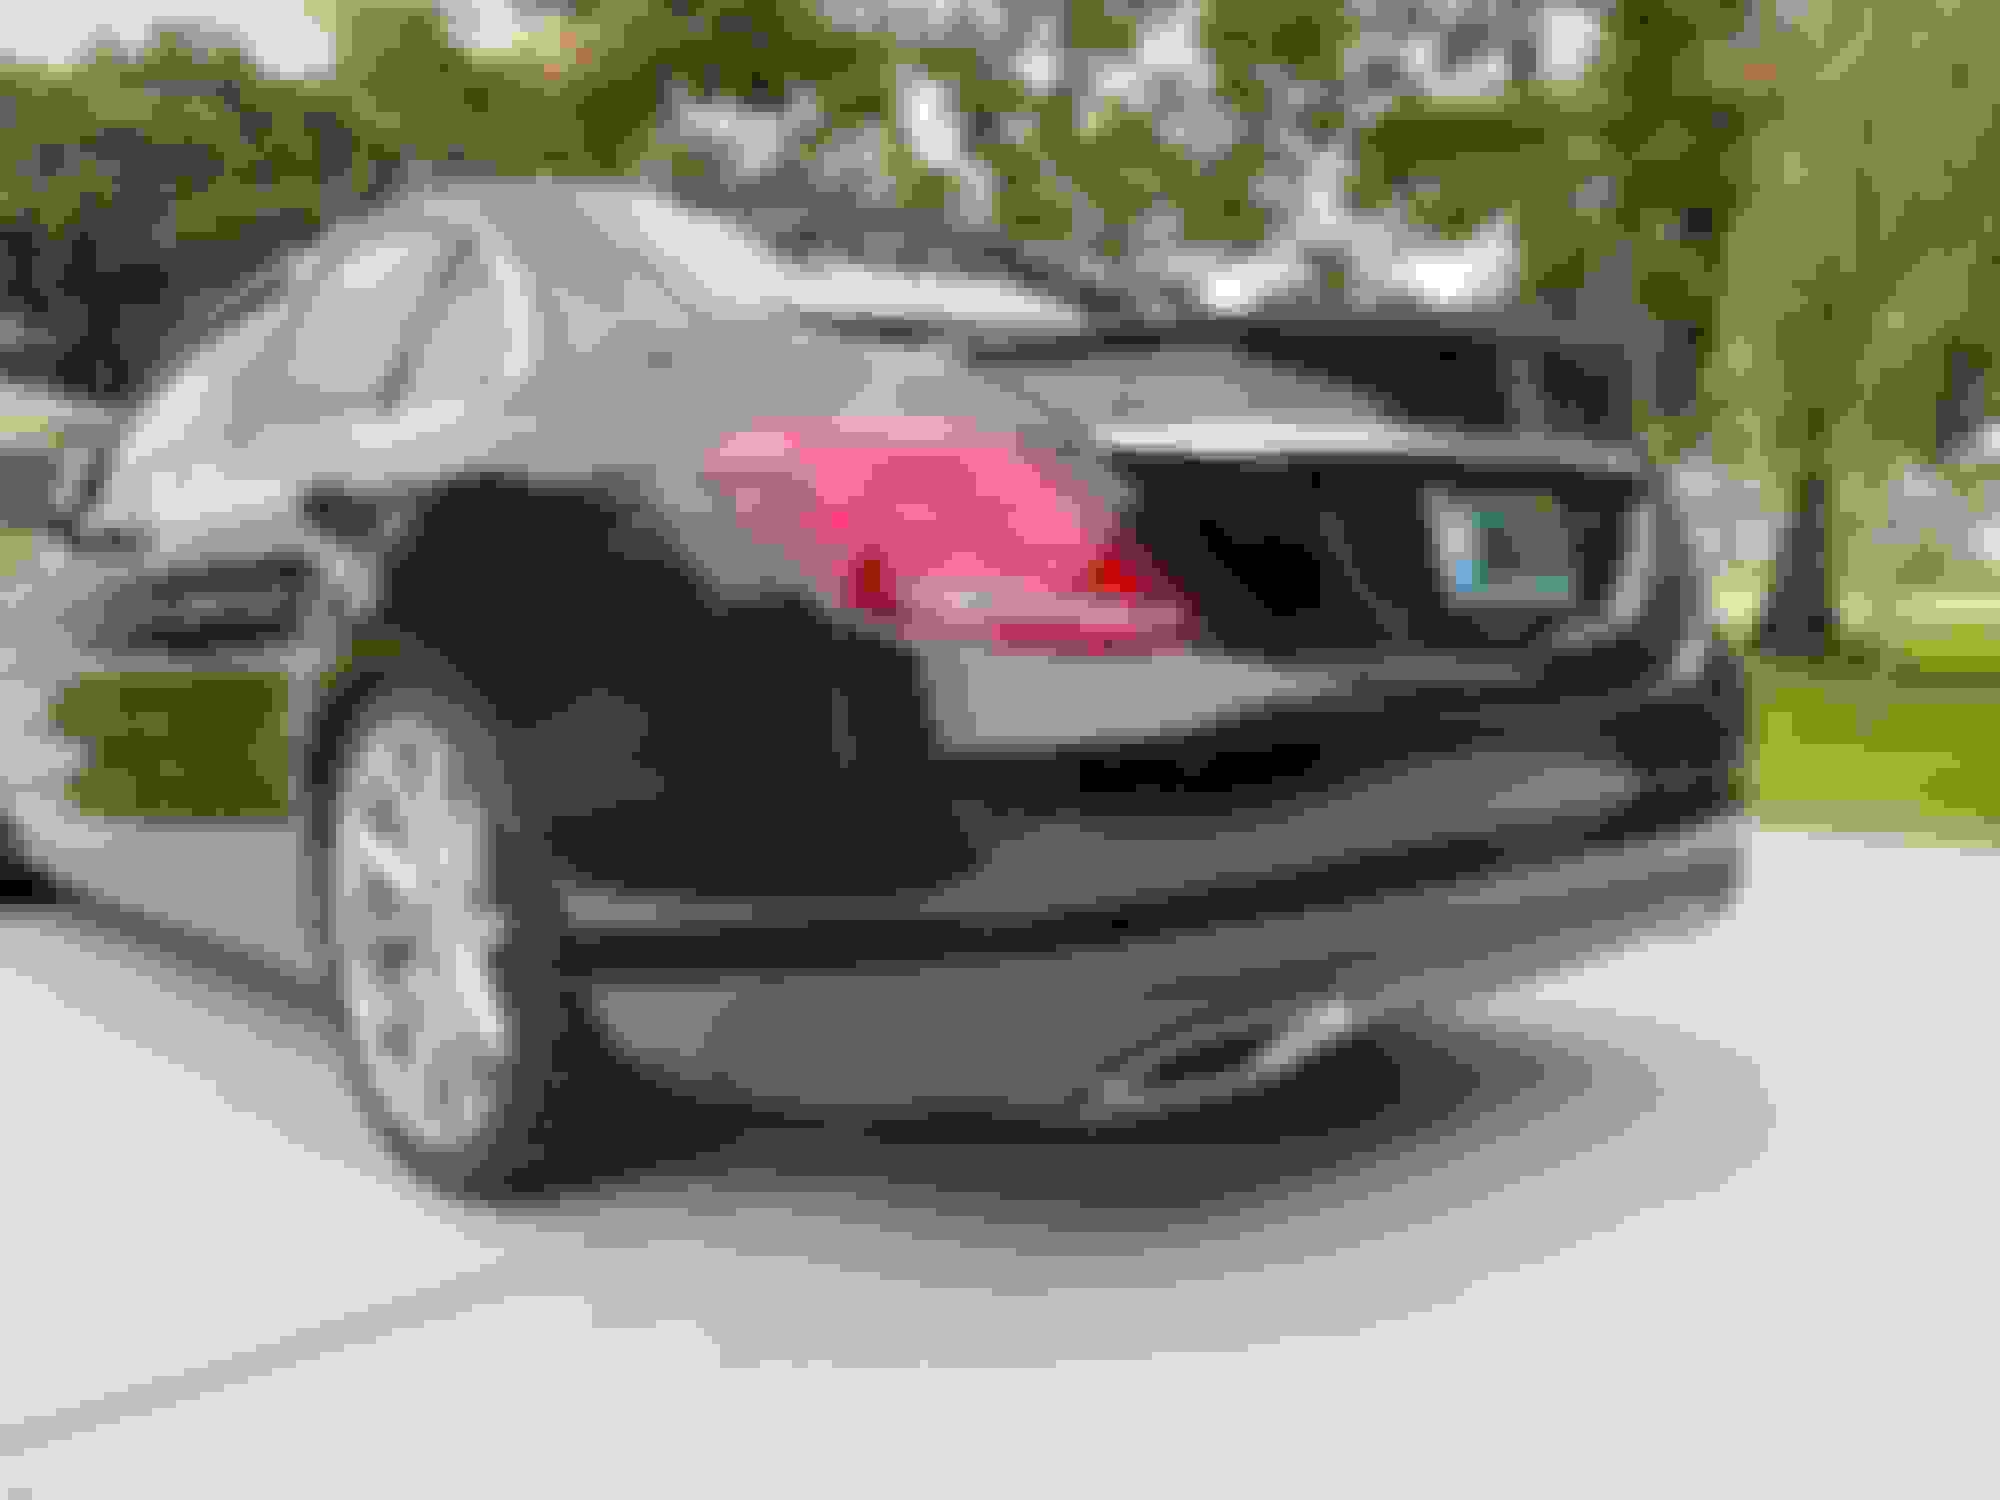
New bumper is on!:
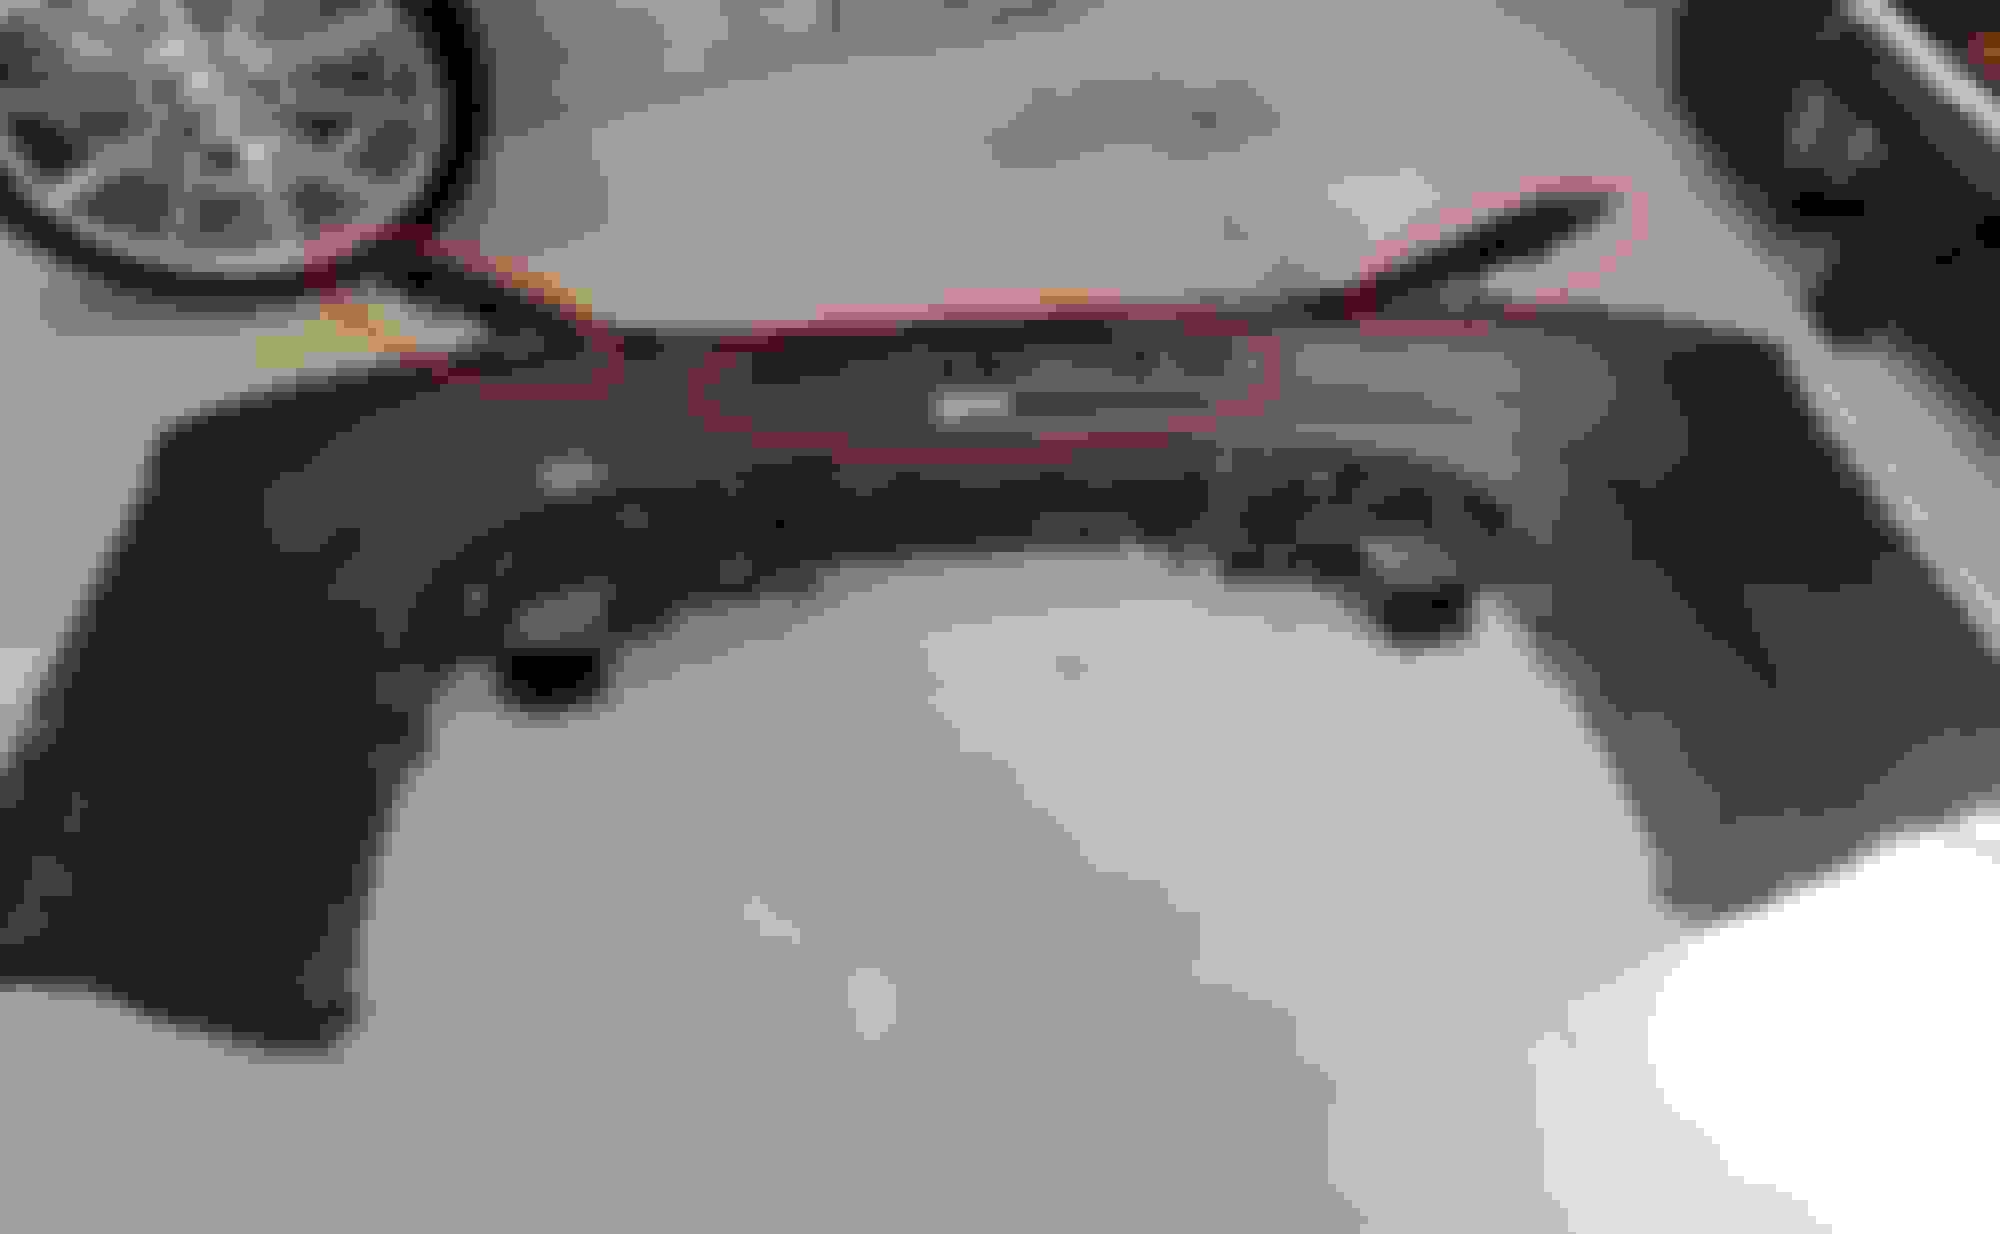
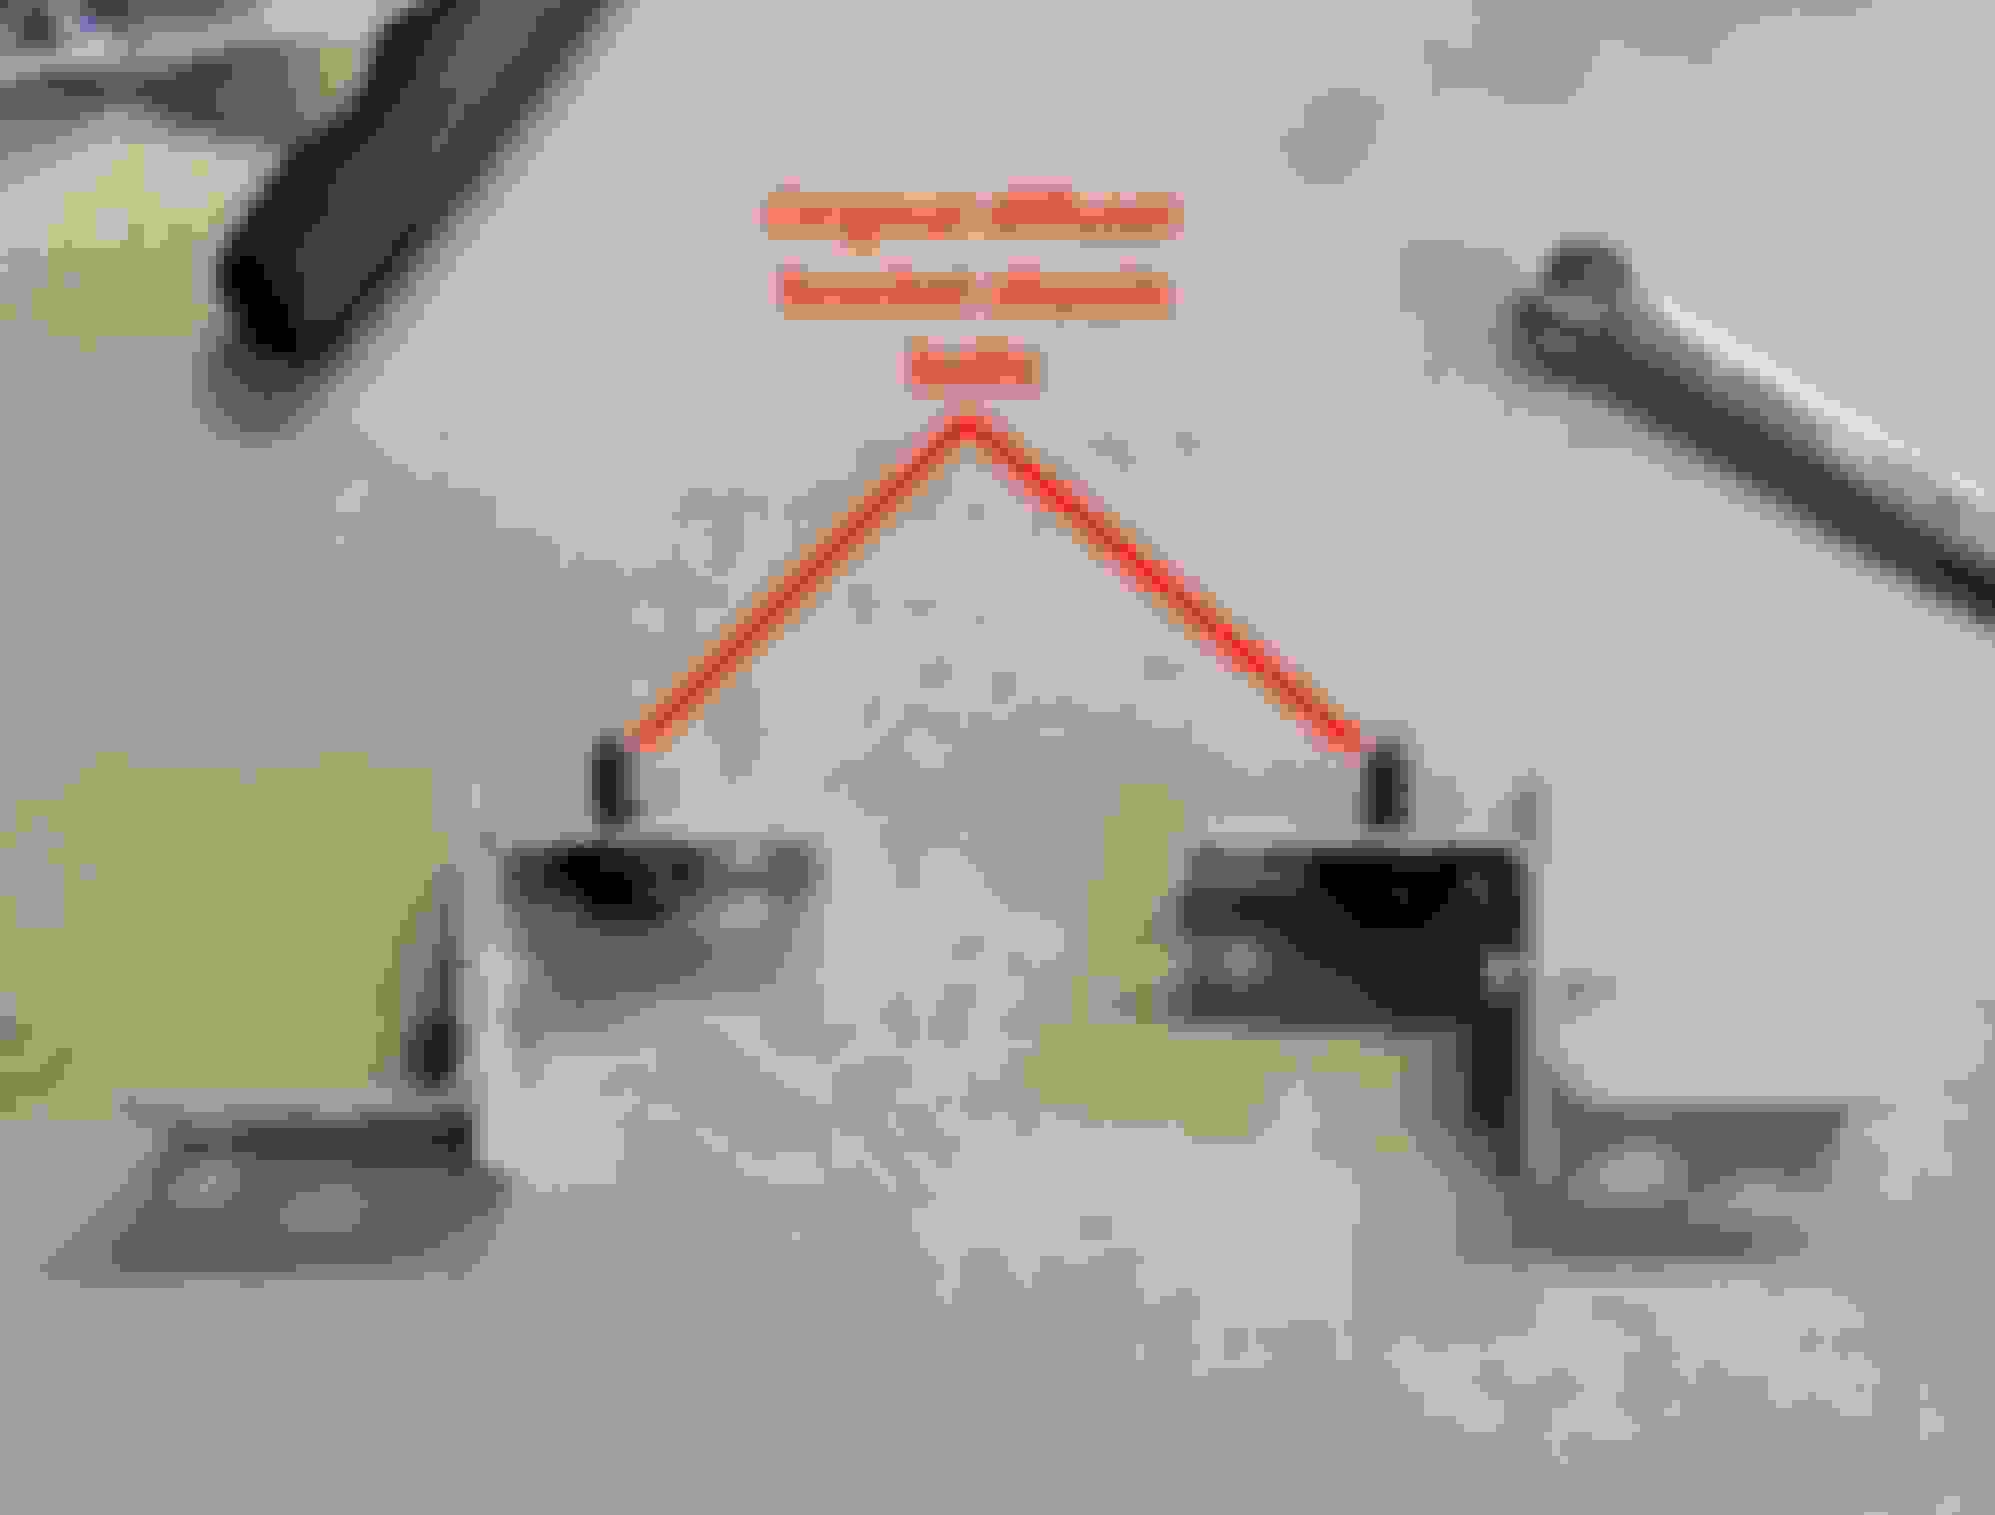
The new-diffuser to original-diffuser chassis mounting points did not line up, neither "left-right" or "up-down". Here's the issue (a minor issue):
There are many ways this can be corrected properly. I'll share my "special engineering" solution (not saying I'm right, just what I came up with): Using 4 small metal L-brackets (can be found at any hardware store) and 5mm machine screws, flat washers and nylon-insert locking nuts, I made 2 brackets to fill the gap and correct the offset of the mounting bolts:
Here's what it looks like installed on one side:
And here it is completed:
My description and the pictures may not make any sense without being familiar with the parts. When you go to do this work, it will definitely make sense then. I've found one of the advantages of having this type of bracketing is it allows you loosen the chassis mounting bolts and rotate the brackets to adjust the exhaust tips in and out to achieve flush-ness and make them even. Tightening the chassis bolt while holding the tip where you want it locks the adjustment and it's solid.
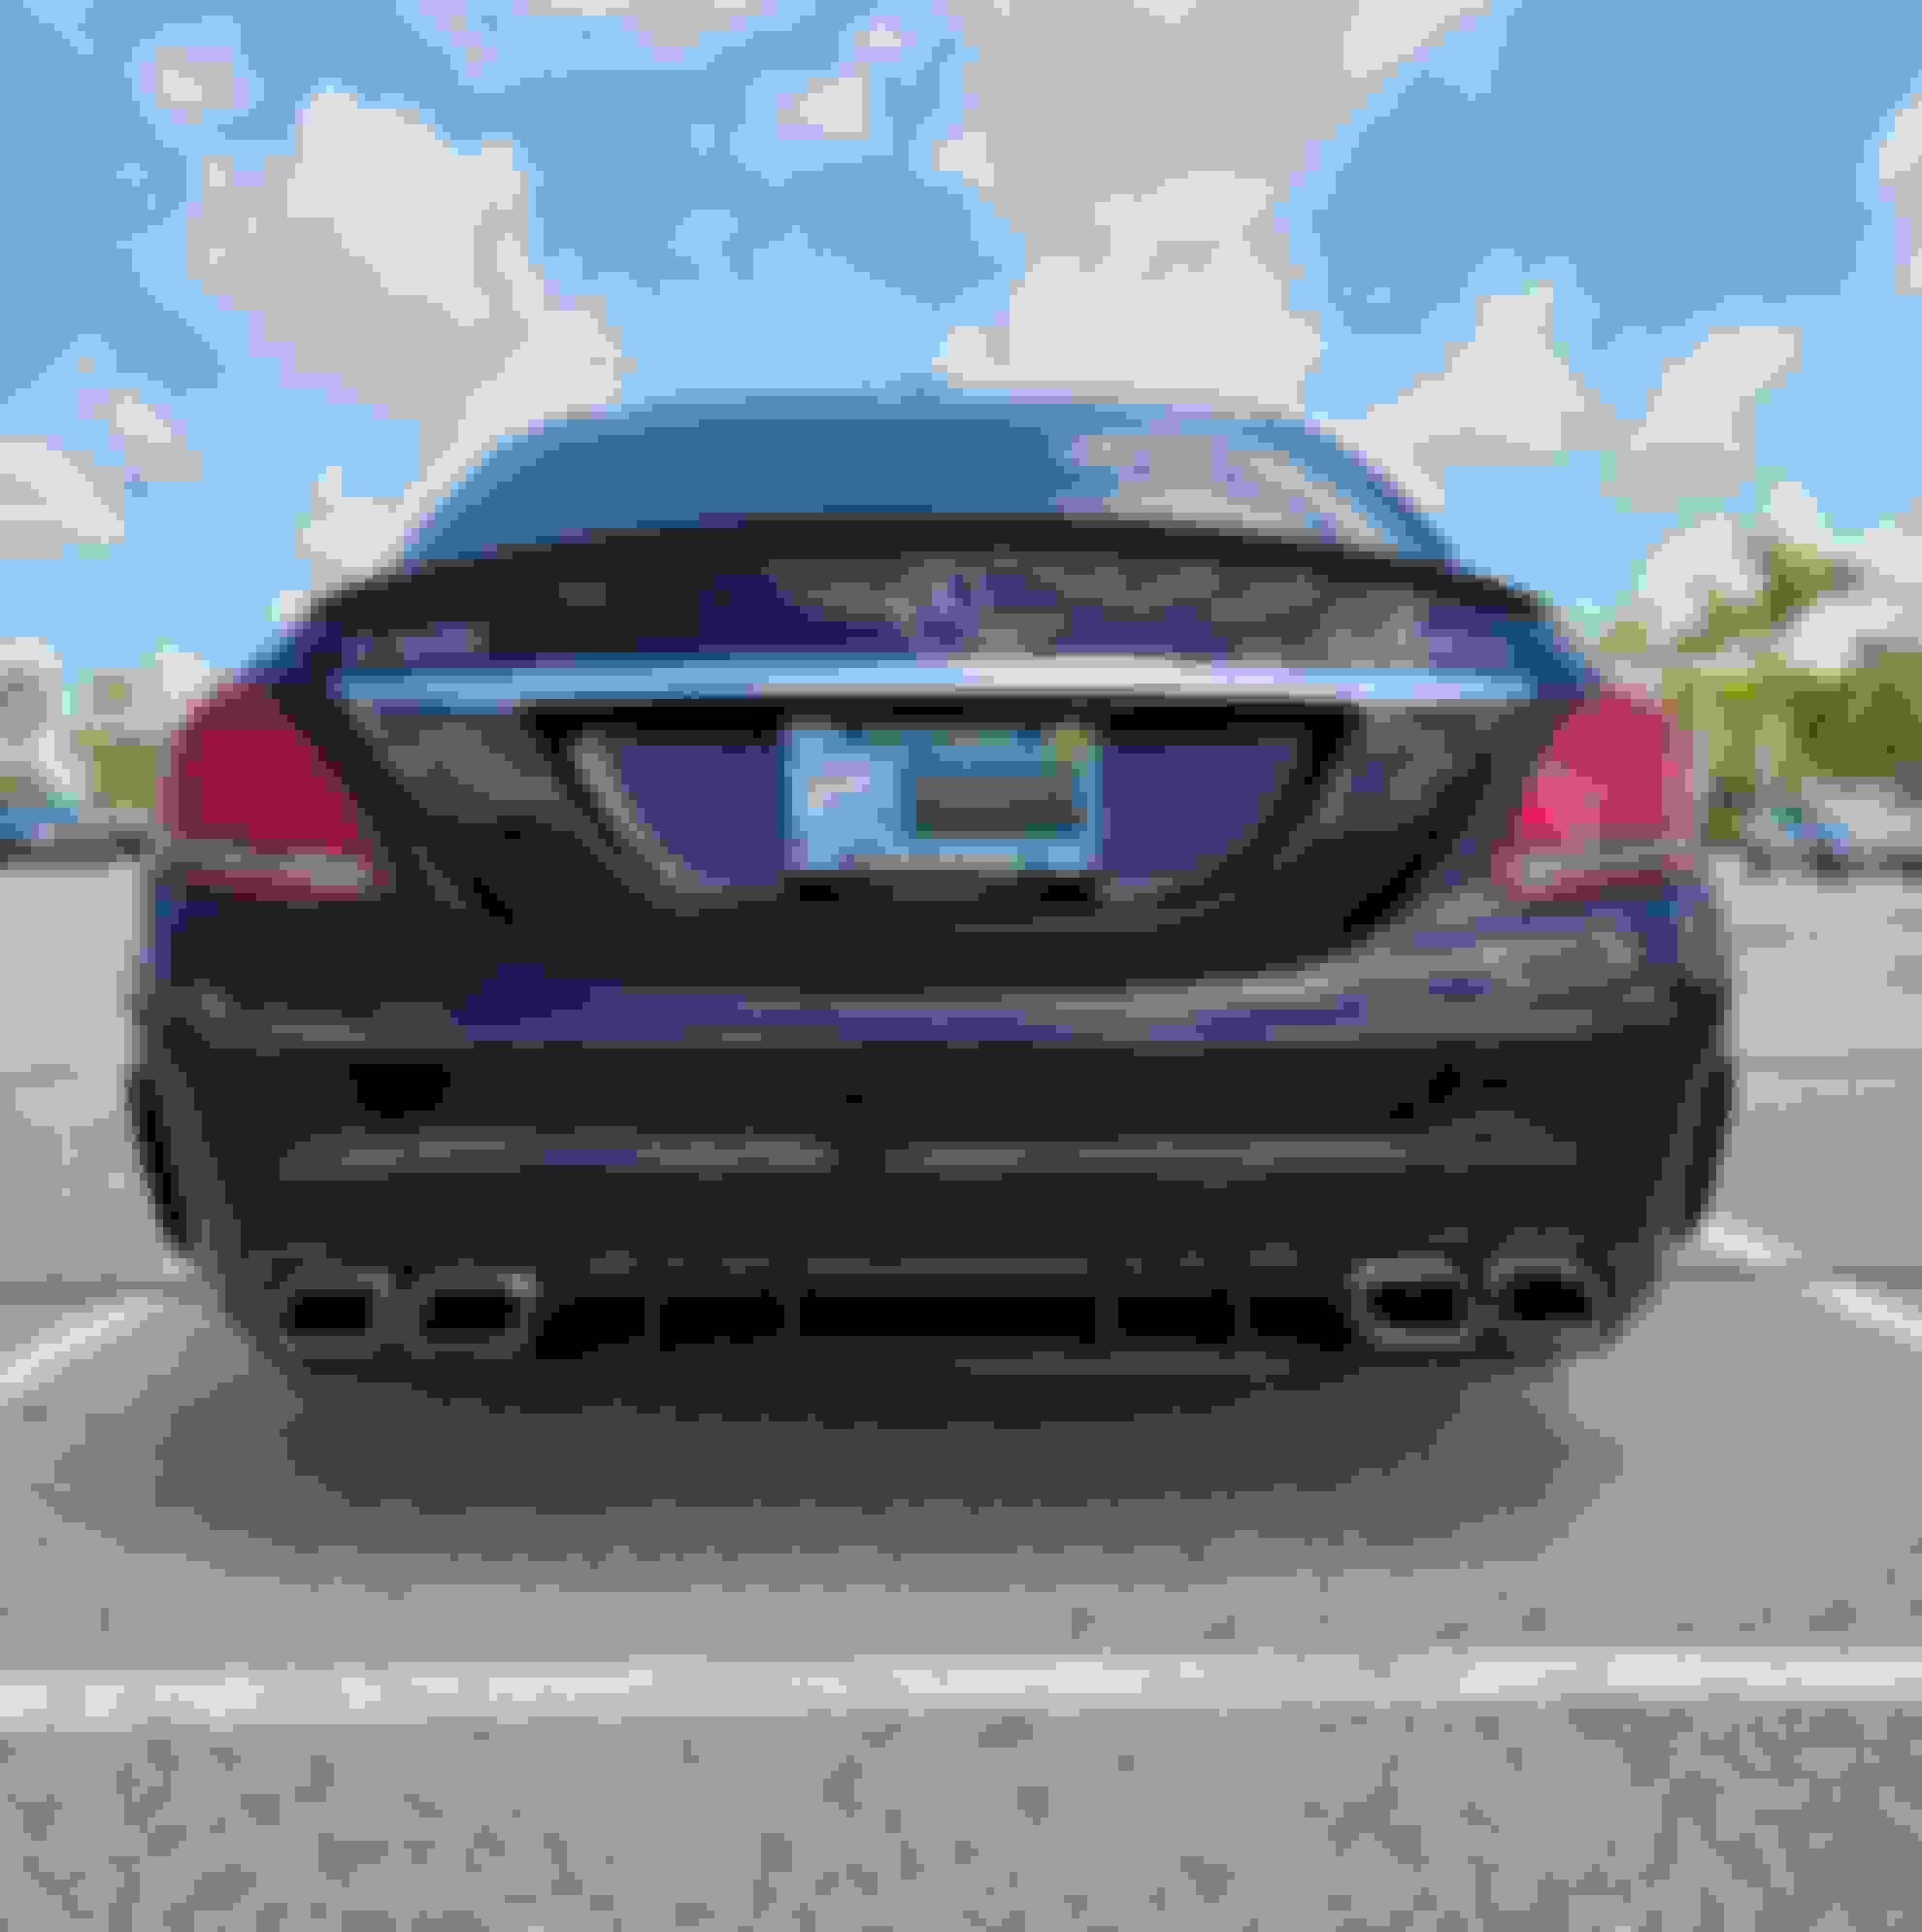
New diffuser is on!:
And the results!:
In the pics above, I have a temporary cheapo one-piece tow hook cover to fill the hole. The bumper cover did not come with a tow hook cover and the correct tow hook cover configuration should be 3 pieces; a backing plate, an upper cover and a lower cover. The lower cover portion will consist of the lower tow hook cover that came with the aftermarket diffuser to match the diffuser. I�ve painted the upper tow hook cover, but I still need to wet sand and polish it before installing. I will post updated pics when this is done and on the car.
The Parts:
New aftermarket (Good Go brand) W205 Sport/AMG Rear Bumper Cover (already painted code #040 Black, no sensor holes) from Ebay auction: $350
Four (4) Metal L-Brackets and Assorted 5mm Screws, Washers and Nylon-Insert Lock Nuts for the diffuser: $15.00
Total Cost: $975.23
Basic Summary of Work:
This turned out to be much easier than I had initially thought. It's approximately a dozen small bolts/screws/nuts and a handful of reusable plastic expansion rivets. The rest is all tracks of snap-in/snap-out tabs and ears. The bumper cover is just a big plastic cover and can be easily done by one person. The whole bumper cover hangs on two pins on the car located between the taillights and the trunk at the top of the twin thin upright portions of the bumper cover. After hanging the new bumper cover on the pins, it's just a matter of snapping it back in the tracks and putting the small bolts/screws/nuts and reusable plastic expansion rivets back in. All the original fasteners were reused and no additional parts, screws or brackets were needed for the bumper cover.
Even taking my time (which I always do) and plotting my own path for installing the diffuser, brackets and adjusting the tips, I spent about 5 hours getting this done.
Notes:
All W205 rear bumpers have the same mounting for the W205 chassis. It does not matter if the bumper cover is from a pre-facelift, post-facelift, C180 or C63.
The W205 rear diffusers are bumper-specific and the only specificity is that they are made for either the base/avantgarde bumper cover or the Sport/AMG bumper cover.
The diffuser outer ends attach to the bumper cover using a rivet on each end. I'm not a fan of rivets (unless you are an experienced riveter), so I used some short stainless-steel 5mm machine screws, 5mm flat washers and nylon-insert lock nuts instead, which to me is a much more reliable fastener than my lame riveting skills.
Hello, I�m curious to know the dimension of the l bracket used or if you happen to have the link tot he purchase the you made. Thank you !
Hi there. If you mean the brackets I added to correct the mounting offset on the diffuser, those are just small galvanized metal L-brackets I picked up at a local hardware store that are very common in the US.
Mercedes SLR McLaren 722 S Is Extremely Rare Example Modified by McLaren
Slideshow: A one-of-one U.S.-spec Mercedes-Benz SLR McLaren Roadster became even rarer after a factory-backed transformation at McLaren's headquarters.