
Weistec Stage 3 build w/ replacing head bolts thread.
 03-27-2013, 09:18 AM
#26
MBWorld Fanatic!
Thread Starter

Rags, I'm just going off what Weistec told me. I'll know more once I remove the stock bolts.
weistec has built plenty of these engines now so aim sure they know what they are doing.
Coolant may get past the bottom threads, but the top is where the seal is, so I don't see it necessary to silicone the bottom.
weistec has built plenty of these engines now so aim sure they know what they are doing.
Coolant may get past the bottom threads, but the top is where the seal is, so I don't see it necessary to silicone the bottom.

 03-27-2013, 10:31 PM
#28
MBWorld Fanatic!
Thread Starter
Anyone ever remove the rad on one of these??
I cant get it past some lines to the other coolers... Not removing those lines and spilling oils and **** everywhere..
Rad slipped out of my latex gloves and landed on the tip of my finger.. Almost turned into the hulk it hurt so bad.
Might just leave it in the car after all... should have enough room to get my 90degree air drill on the crank end to drill for the new pulley.
Going back in to clean out the holes where the head bolts are with brake clean and my sucker.
I took a piece of metal as long as a head stud and just looked around at the back of the heads where the heat shield is.. Appears to be enough room to get the bolts out and studs in without disturbing the heat shield.
03-27-2013, 11:49 PM
#29
MBWorld Fanatic!
Thread Starter
Well I thought the head bolts were situated in a galley or cylinder in the head... I was wrong.
The head of the bolt is open around the valve springs. Its still do able but going to be tedious. If we drop a washer or nut trying to put it onto the studs, it going to turn into a big headache.
The head of the bolt is open around the valve springs. Its still do able but going to be tedious. If we drop a washer or nut trying to put it onto the studs, it going to turn into a big headache.
 03-30-2013, 06:07 PM
#34
MBWorld Fanatic!
Thread Starter
The ARP studs, we are bottoming them out and backing it off a turn. Then torquing the nut to 110 ft lbs per Weistecs instructions.
The MAIN issue with these studs is they run right into the water jacket in the crank case. So you must clean the surface where the washer seals perfectly and seal it with silicone so coolant doesn't seep by and get into the head.
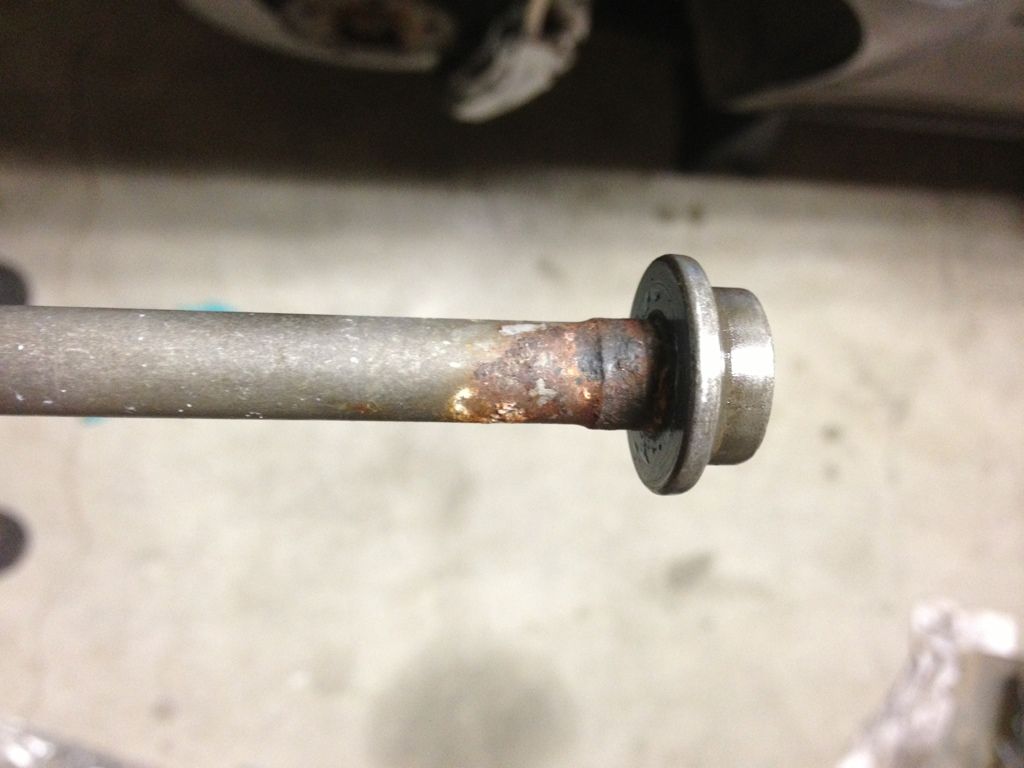
I am sure glad we switched to studs after pulling these stock bolts. All of them are rusted except one so far.
The MAIN issue with these studs is they run right into the water jacket in the crank case. So you must clean the surface where the washer seals perfectly and seal it with silicone so coolant doesn't seep by and get into the head.
I am sure glad we switched to studs after pulling these stock bolts. All of them are rusted except one so far.
03-30-2013, 08:04 PM
#37
MBWorld Fanatic!
Thread Starter
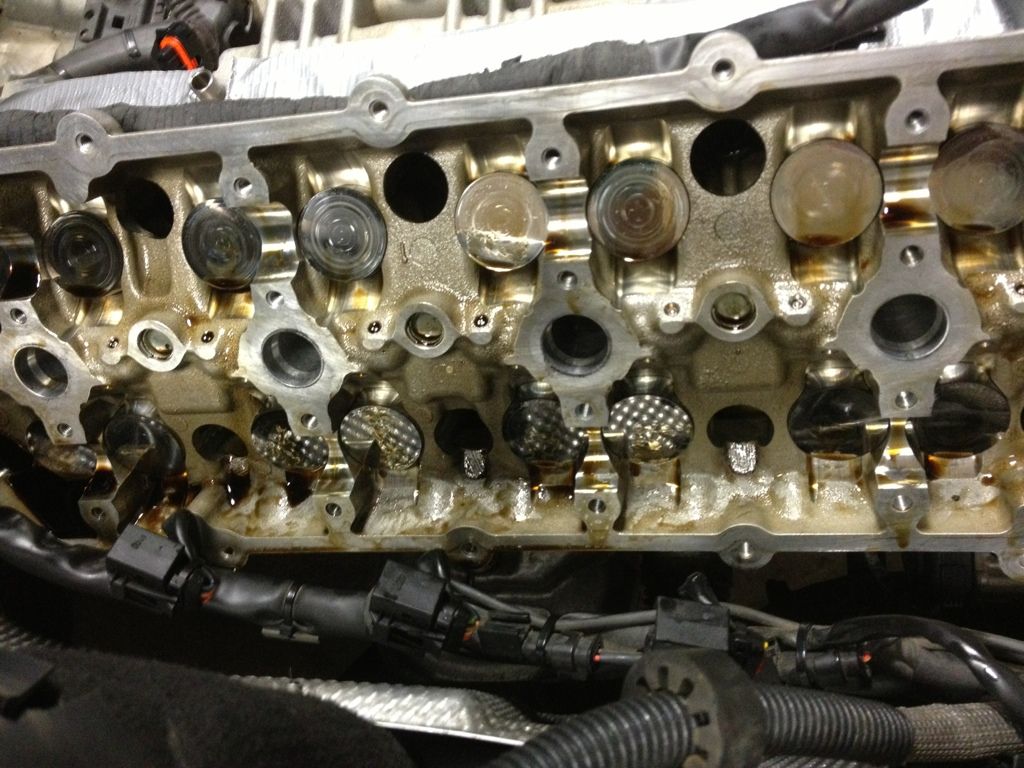
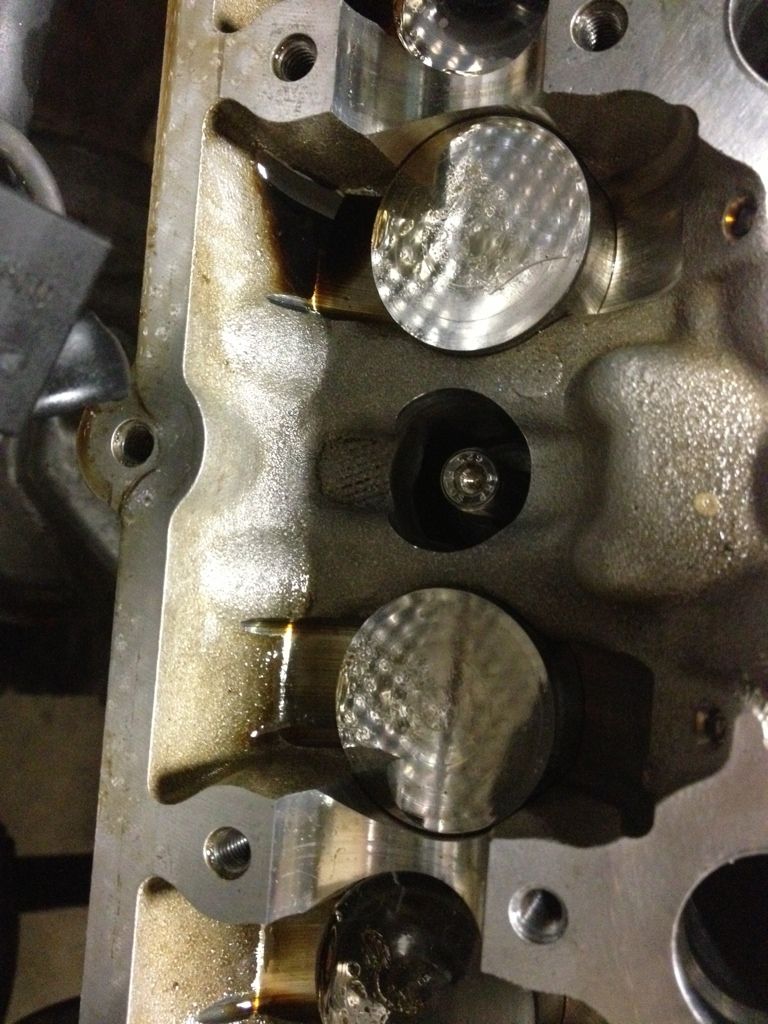
Not doing the tappets. They look good.
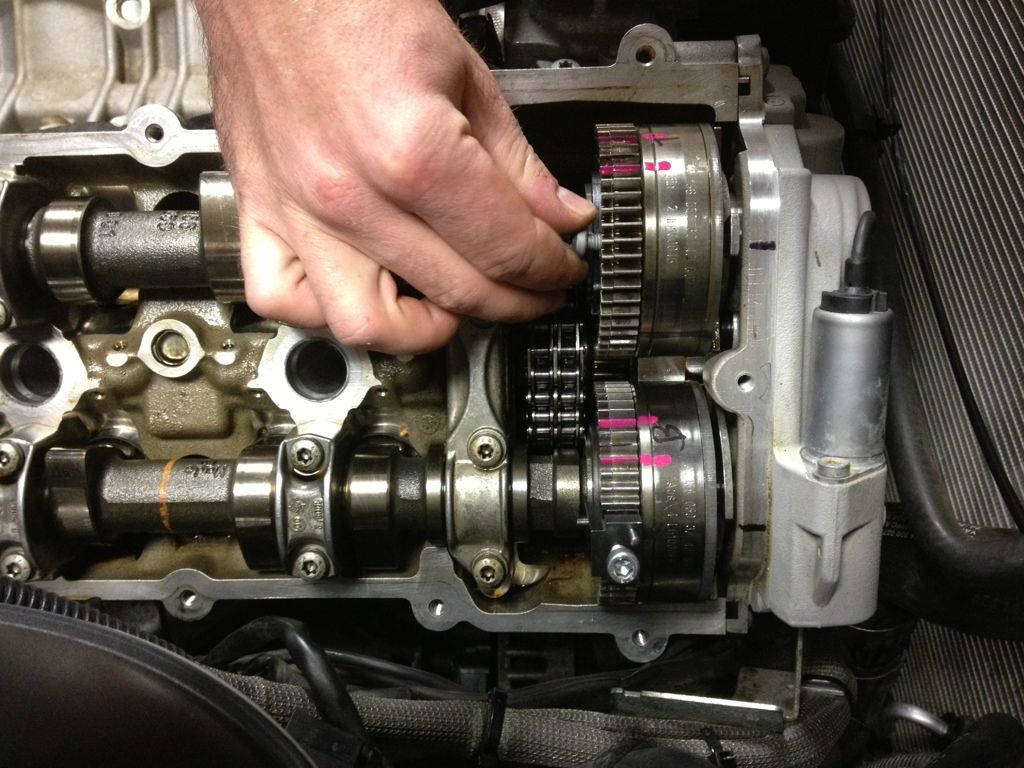
Passenger bank has the studs in. Bolting cams back in now and onto the next side.
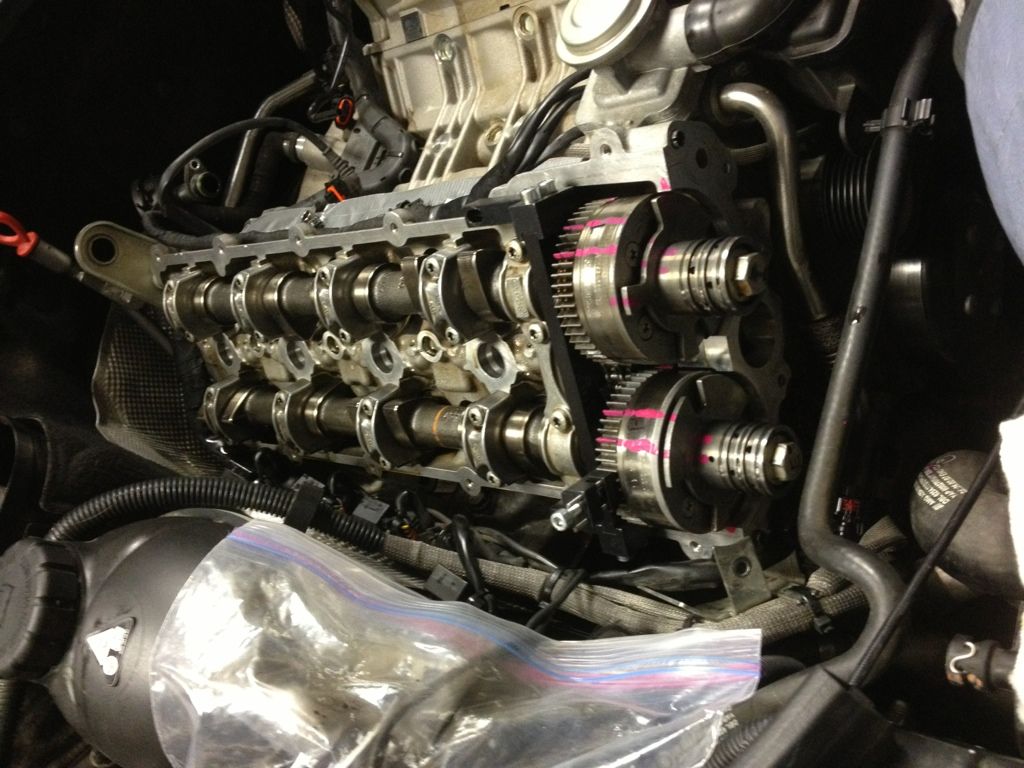
We made marks to know where the cams go back into position.
Reading George's build thread was helpful. We pulled out the pink nail polish too.
Passenger bank has the studs in. Bolting cams back in now and onto the next side.
We made marks to know where the cams go back into position.
Reading George's build thread was helpful. We pulled out the pink nail polish too.
03-30-2013, 08:12 PM
#38
MBWorld Fanatic!
Join Date: Nov 2009
Location: Relocated
Posts: 4,418
Received 381 Likes
on
237 Posts
2010 Irridium Silver MB C63 AMG Sedan
Unbelievable work and excellent documentation.....wow you are going to be one happy camper once all is done and you are driving with confidence!

 03-31-2013, 11:09 AM
#41
MBWorld Fanatic!
Thread Starter
This car is a 2010, with 60,000km. Expect older cars to be worse and get worse.
Metallurgy deficit I'd say.
03-31-2013, 11:21 AM
#42
MBWorld Fanatic!
Thread Starter
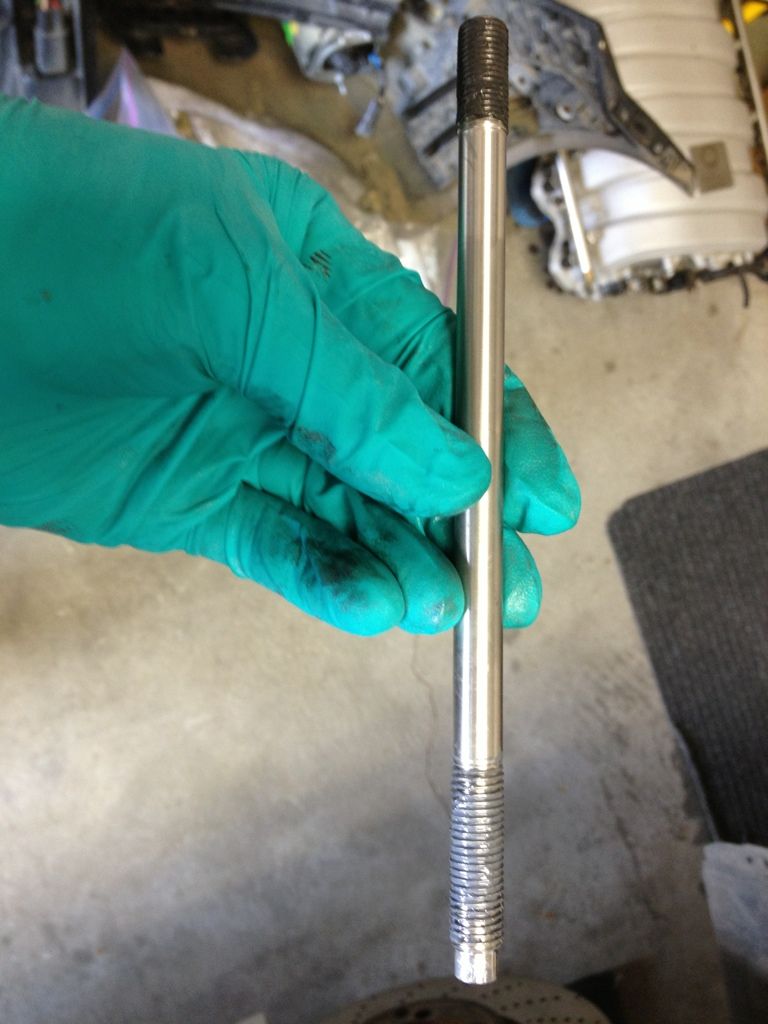
ARP 625 head stud from Weistec:
Moly on end in the block, 500f silicone on threads in the head.
Studs are all in and torqued to 110ft lbs. cams are back in and lined up perfectly with our set marks.
Moly on end in the block, 500f silicone on threads in the head.
Studs are all in and torqued to 110ft lbs. cams are back in and lined up perfectly with our set marks.
 03-31-2013, 11:37 AM
#44
MBWorld Fanatic!
Thread Starter
I'm going to put the headers on today or tomr. Tuesday, we will do the studs on the driver side bank.
After the studs are done, we will start doing the blower install. Hopefully around that time, the ECU/tcu are back from tuning, we can finish up and fire her up.
After the studs are done, we will start doing the blower install. Hopefully around that time, the ECU/tcu are back from tuning, we can finish up and fire her up.
 04-01-2013, 07:46 PM
#49
MBWorld Fanatic!
Thread Starter
You rotate the engine so that the 40degree mark on the crank pulley lines up with the mark on the block above the crank pulley.
You need one Mercedes cam adjuster locking tool and a 4mm bolt to lock both cams.
We made marks on the cams and referenced them with the head to know where the cam went back in. The teeth on the pulley are big enough that if you were off a tooth tour marks won't line up close.
Once marks are made, you have your merc tool locking the exhaust cam and the 4mm bolt locking the intake cam adjuster, you unbolt the cams one at a time. Slowly and equally removing the bolts as there is valve spring tension pushing on the cam.
You need the cam locking tool to put the cams back in other wise it's nearly impossible to press the valves down to get the cam bearing/holder brackets on without the cam flopping side to side and coming off your set marks.
It looks complicated but once you take the cams out you quickly realize how simple and easy it is. Main thing is marking the adjuster/cam in reference to the head so it goes back down exactly where it came out.
Last edited by Merc63; 04-01-2013 at 07:49 PM.
04-01-2013, 08:27 PM
#50
Member

Join Date: Apr 2012
Posts: 156
Likes: 0
Received 0 Likes
on
0 Posts
c63amg
You rotate the engine so that the 40degree mark on the crank pulley lines up with the mark on the block above the crank pulley.
You need one Mercedes cam adjuster locking tool and a 4mm bolt to lock both cams.
We made marks on the cams and referenced them with the head to know where the cam went back in. The teeth on the pulley are big enough that if you were off a tooth tour marks won't line up close.
Once marks are made, you have your merc tool locking the exhaust cam and the 4mm bolt locking the intake cam adjuster, you unbolt the cams one at a time. Slowly and equally removing the bolts as there is valve spring tension pushing on the cam.
You need the cam locking tool to put the cams back in other wise it's nearly impossible to press the valves down to get the cam bearing/holder brackets on without the cam flopping side to side and coming off your set marks.
It looks complicated but once you take the cams out you quickly realize how simple and easy it is. Main thing is marking the adjuster/cam in reference to the head so it goes back down exactly where it came out.
You need one Mercedes cam adjuster locking tool and a 4mm bolt to lock both cams.
We made marks on the cams and referenced them with the head to know where the cam went back in. The teeth on the pulley are big enough that if you were off a tooth tour marks won't line up close.
Once marks are made, you have your merc tool locking the exhaust cam and the 4mm bolt locking the intake cam adjuster, you unbolt the cams one at a time. Slowly and equally removing the bolts as there is valve spring tension pushing on the cam.
You need the cam locking tool to put the cams back in other wise it's nearly impossible to press the valves down to get the cam bearing/holder brackets on without the cam flopping side to side and coming off your set marks.
It looks complicated but once you take the cams out you quickly realize how simple and easy it is. Main thing is marking the adjuster/cam in reference to the head so it goes back down exactly where it came out.


