


 but guess it works just fine.

fix for the god awful eyebrow lights

Thread Starter
Super Member


Joined: Nov 2013
Posts: 825
Likes: 114
From: Eufaula, Al/Georgetown, GA
W213 E63S Wagon, W204 C63 P30(RIP), WK1 Grand Cherokee SRT8(RIP)
fix for the god awful eyebrow lights
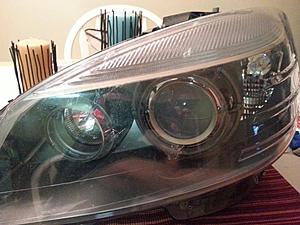
ok, so the eyebrow lights are HIDEOUS on our cars...even when you change out to LEDs it doesnt get much better, just 2 little patches of pretty white light in a foot long housing...well there is a reason it looks like this and fortunately there is an inexpensive fix that is not TOO labor intensive...
tools needed:
flat head screwdriver
oven
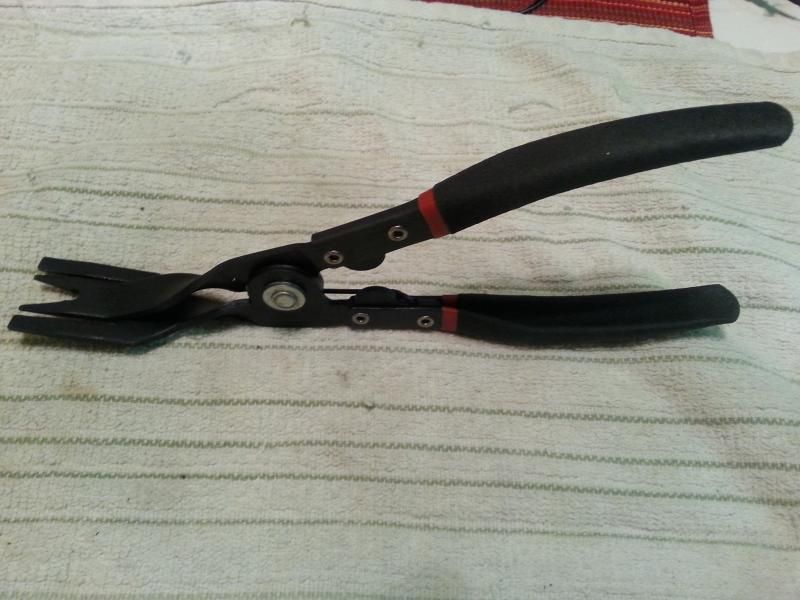
panel popping tool(very important-$9 at Harbor Freight)
parts needed:
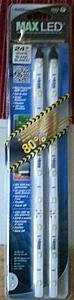
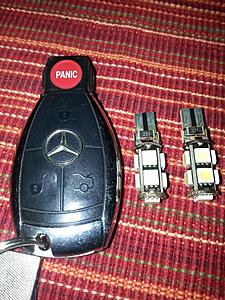
Alpena Max white LEDs(about $30-Autozone)
Process:
not going through the light removal process, been covered and Spyder has a great video on YouTube...
(This video is good as well but REMEMBER TO LIFT THE LIGHT JUST SLIGHTLY AND REMOVE THE LAMP WASHER BEFORE YOU TAKE THEM OUT...if you dont they WILL break every time)
http://youtube.com/watch?v=Yz3u0CDm0PU
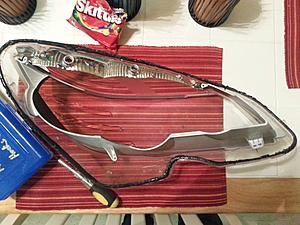
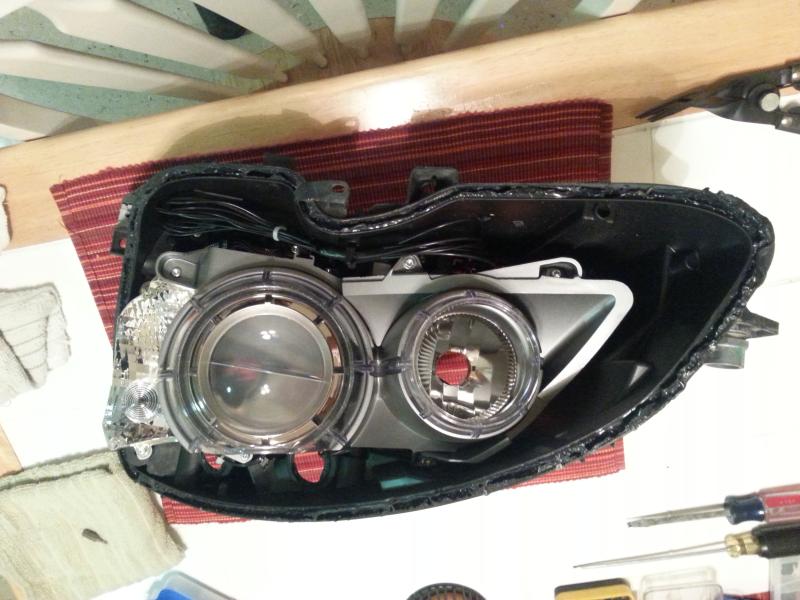
Once lights are out take out all the bulbs, then take out the eyebrow plugs, ballast, anything that is removable from the housing....also pop off the 4 metal clips that hold the lens to the housing
fortunately for us these lights are SUPER easy to open up....pre heat oven to 210F...put light in oven...wait 10min...take out....place on towel on flat surface without the lens being face down...insert panel popping tool into gap between light housing and lens and slowly open tool until lens seperates...once its open about 1" remove tool and grab open edge of lens and pull apart in a smooth motion without stopping(this will keep the adhesive from getting on the light...this adhesive is soft enough that once you open the light you can roll the adhesive back into position and use it again...awesomeness!!!!
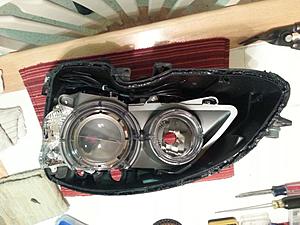
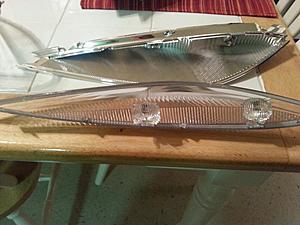
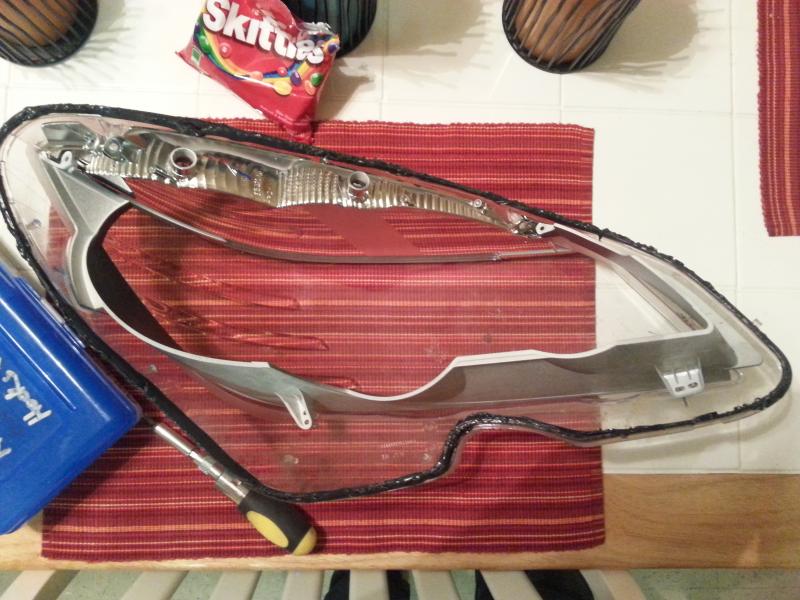
now at this point you will need to remove several small torx screws that hold the bezel inside the lens....once the torx screws are out you will have 2 seperate pieces, the eyebrow housing and the lo/hi beauty panel(if you want to paint match to body color now is the time)...
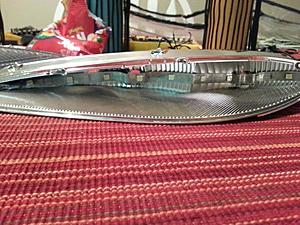
open the eyebrows and you will find the reason you have the 2 patches of light inside....in front of each of the bulb sockets there is a bowl shaped reflector like an eyewash kit that refracts the light like a disco ball...break that crap off!!!!!!!
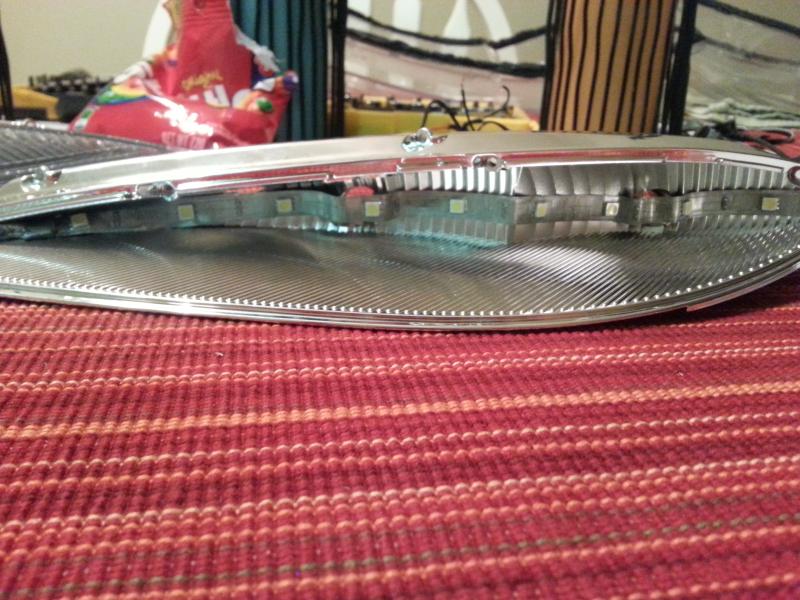
now, affix the MAX BRIGHT LED strip to the rear of the eyebrow reflector...i tried it about 5 different ways and this method by far looks the best...once you have the strip in place run the wire out of the socket hole and out....
to reseal them just put them back together on the table and then pop them back in the oven for 10min, remove and press back together and reinstall metal clips as you go....thats it
now you have to decide how you want to wire them...personally i do NOT trust the wiring inside the housing because if yours is anything like mine ALL of the insulation has deteriorated off and its just too damned iffy....what i did was run the wire out of the square hole behind the rubber cover in the very upper rear corner of each light...this gets the wiring out of sight and in line to drop down to tie into the side marker wiring...the side marker works with the eyebrows(except for that standing function) so i didnt feel like i was losing any functionality...simple wiring hookup
(if you decide to do it this way then there is a trick to not having the parking light out warning on the dash...sacrifice 4 of these style LEDs with the built in resistors by desoldering or breaking off the LEDS and simply inserting the remaing 194 based resistor in the socket...computer thinks there is a light buning now as it sees amperage consumption)
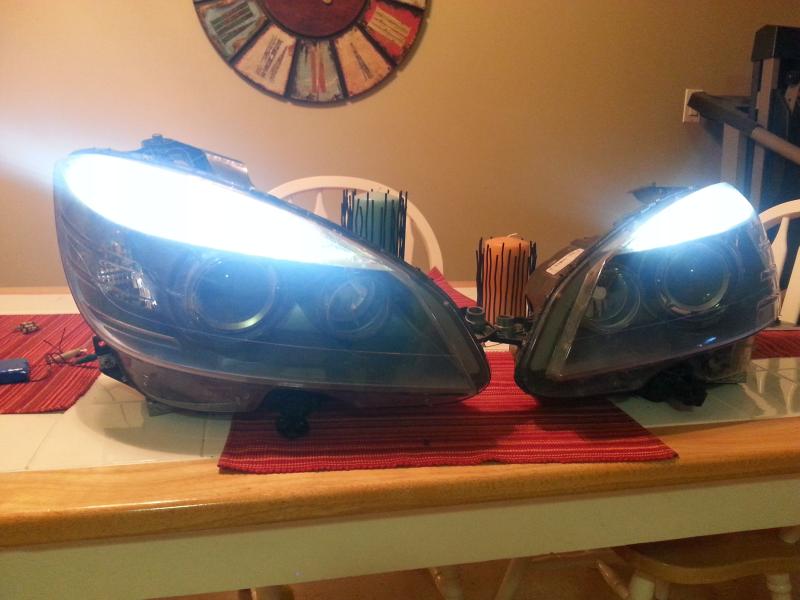
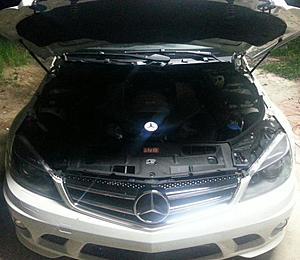
and now what youve been waiting for, powering them up and seeing what youve got....
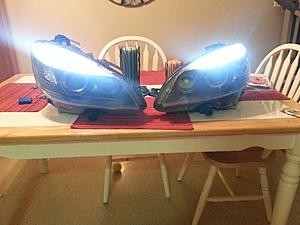
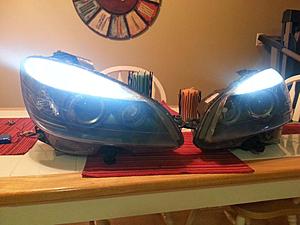
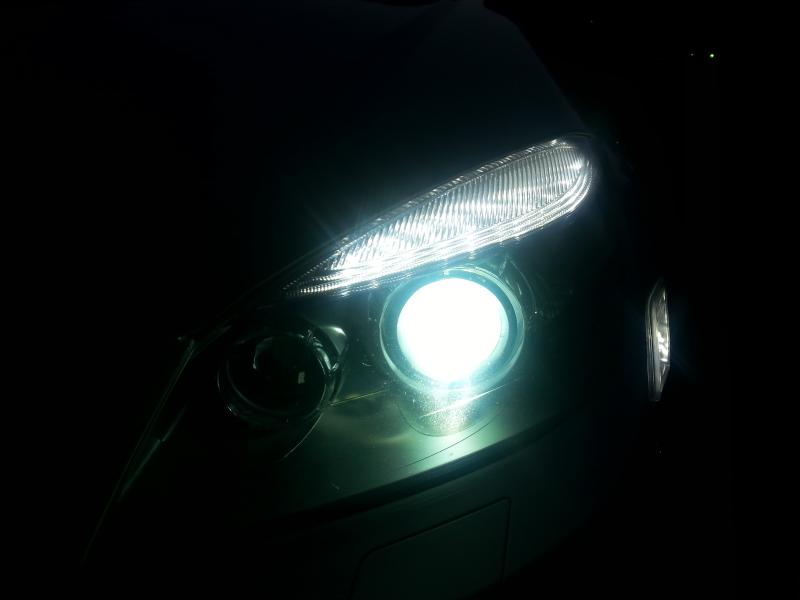
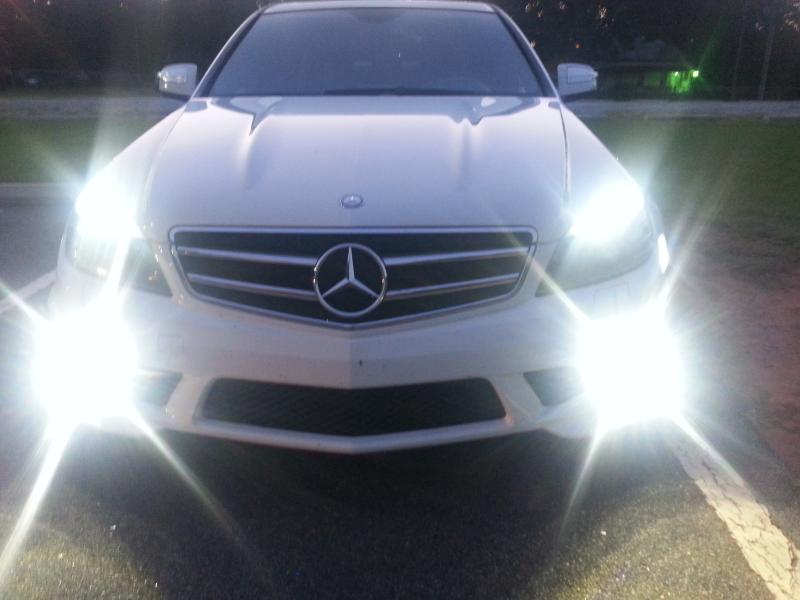
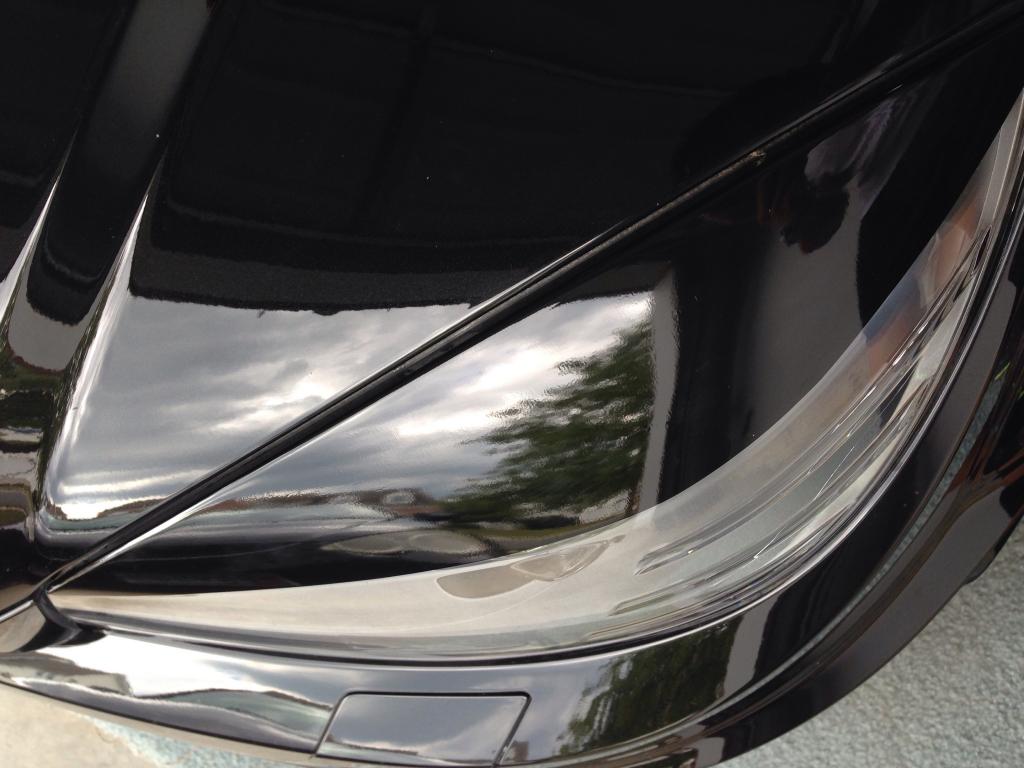
and some installed shots
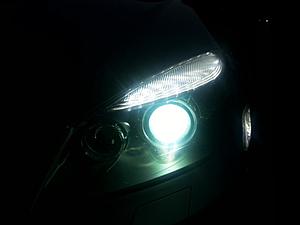
this is eyebrows only...the way they SHOULD have looked from the factory....

it has totally changed the way the front of the car looks, im very satisfied and the cost was next to nothing!!!!
tools needed:
flat head screwdriver
oven
panel popping tool(very important-$9 at Harbor Freight)

parts needed:
Alpena Max white LEDs(about $30-Autozone)

Process:
not going through the light removal process, been covered and Spyder has a great video on YouTube...
(This video is good as well but REMEMBER TO LIFT THE LIGHT JUST SLIGHTLY AND REMOVE THE LAMP WASHER BEFORE YOU TAKE THEM OUT...if you dont they WILL break every time)
http://youtube.com/watch?v=Yz3u0CDm0PU
Once lights are out take out all the bulbs, then take out the eyebrow plugs, ballast, anything that is removable from the housing....also pop off the 4 metal clips that hold the lens to the housing

fortunately for us these lights are SUPER easy to open up....pre heat oven to 210F...put light in oven...wait 10min...take out....place on towel on flat surface without the lens being face down...insert panel popping tool into gap between light housing and lens and slowly open tool until lens seperates...once its open about 1" remove tool and grab open edge of lens and pull apart in a smooth motion without stopping(this will keep the adhesive from getting on the light...this adhesive is soft enough that once you open the light you can roll the adhesive back into position and use it again...awesomeness!!!!
now at this point you will need to remove several small torx screws that hold the bezel inside the lens....once the torx screws are out you will have 2 seperate pieces, the eyebrow housing and the lo/hi beauty panel(if you want to paint match to body color now is the time)...
open the eyebrows and you will find the reason you have the 2 patches of light inside....in front of each of the bulb sockets there is a bowl shaped reflector like an eyewash kit that refracts the light like a disco ball...break that crap off!!!!!!!

now, affix the MAX BRIGHT LED strip to the rear of the eyebrow reflector...i tried it about 5 different ways and this method by far looks the best...once you have the strip in place run the wire out of the socket hole and out....
to reseal them just put them back together on the table and then pop them back in the oven for 10min, remove and press back together and reinstall metal clips as you go....thats it
now you have to decide how you want to wire them...personally i do NOT trust the wiring inside the housing because if yours is anything like mine ALL of the insulation has deteriorated off and its just too damned iffy....what i did was run the wire out of the square hole behind the rubber cover in the very upper rear corner of each light...this gets the wiring out of sight and in line to drop down to tie into the side marker wiring...the side marker works with the eyebrows(except for that standing function) so i didnt feel like i was losing any functionality...simple wiring hookup
(if you decide to do it this way then there is a trick to not having the parking light out warning on the dash...sacrifice 4 of these style LEDs with the built in resistors by desoldering or breaking off the LEDS and simply inserting the remaing 194 based resistor in the socket...computer thinks there is a light buning now as it sees amperage consumption)

and now what youve been waiting for, powering them up and seeing what youve got....

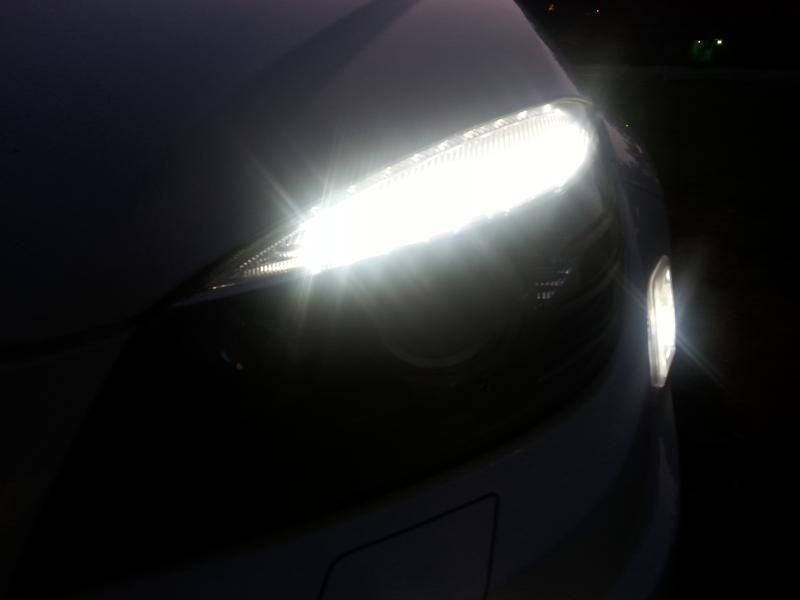
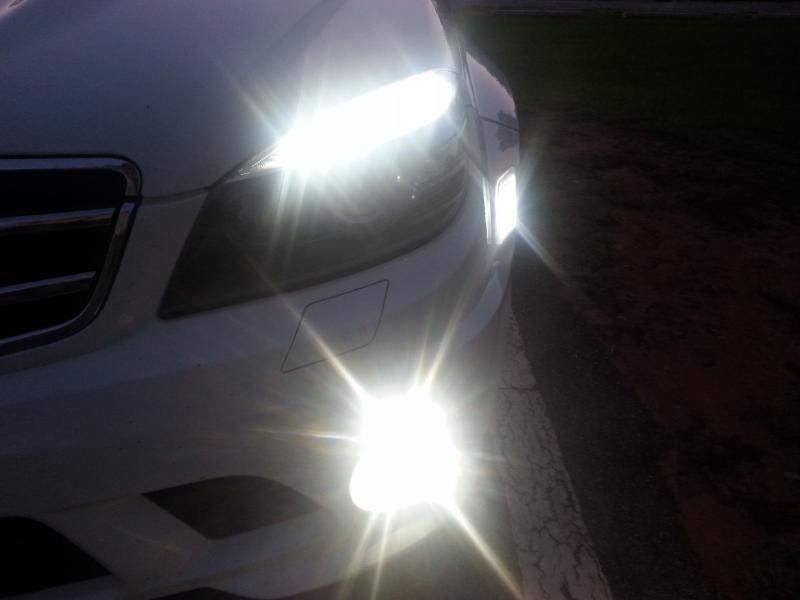
and some installed shots


this is eyebrows only...the way they SHOULD have looked from the factory....
it has totally changed the way the front of the car looks, im very satisfied and the cost was next to nothing!!!!
Last edited by jptaylor; Sep 24, 2014 at 05:58 PM.
Thread Starter
Super Member
Joined: Nov 2013
Posts: 825
Likes: 114
From: Eufaula, Al/Georgetown, GA
W213 E63S Wagon, W204 C63 P30(RIP), WK1 Grand Cherokee SRT8(RIP)
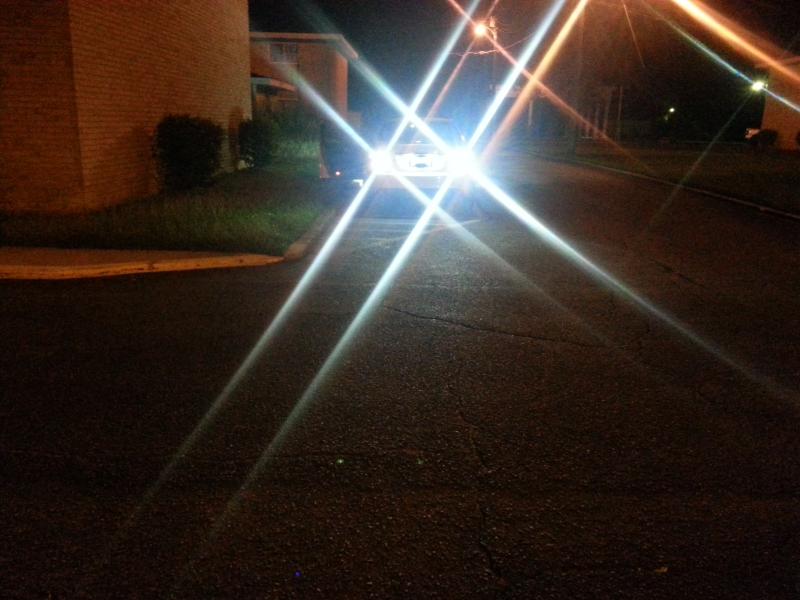
Oh no...the alignment on the lamps is perfect....the way the prism on the lens is made doesnt allow a spot or driving style beam to be projected fwd...it is much more like a very diffused flood light where a lot of light escapes through the top of the lens, that is why they are SO bright from this angle
Trending Topics
MB World Stories
The Best of Mercedes & AMG

Manual Mercedes? 6 Times Sindelfingen Let Drivers Have All The Fun
Verdad Gallardo
Mercedes SLR McLaren 722 S Is Extremely Rare Example Modified by McLaren
Verdad Gallardo
8 Classic Boxy Mercedes Designs That Have Aged Like Fine Wine
Verdad Gallardo
Flawlessly Restored Mercedes 190E Evo II Heads to Auction
Verdad Gallardo
Electric Mercedes C-Class Unveiled: 11 Things You Need to Know
Verdad Gallardo
Mercedes EQS Gets A Major Update: Everything You Need to Know
Verdad Gallardo
5 Underrated Mercedes-Benz Models That Don't Get the Love They Deserve
Verdad Gallardo
Mercedes 300D Has Pushed Well Past 1 Million Miles and It Ain't Stopping
Verdad Gallardo
10 Most Reliable Mercedes-Benz Models You Can Buy Used
Verdad Gallardo
Thread Starter
Super Member
Joined: Nov 2013
Posts: 825
Likes: 114
From: Eufaula, Al/Georgetown, GA
W213 E63S Wagon, W204 C63 P30(RIP), WK1 Grand Cherokee SRT8(RIP)
Believe it or not I had them on the list of tools needed but didnt want to offend any diabetics.....
MBWorld Fanatic!
Joined: Jun 2012
Posts: 1,744
Likes: 8
From: Sydney, Australia
2010 C63 Estate
Nice write up
I like the install too. Looks good.
I did a similar thing with my ML63.
This is something i would def do. I am going to look into this futher.
Thanks for the motivation
I like the install too. Looks good.
I did a similar thing with my ML63.
This is something i would def do. I am going to look into this futher.
Thanks for the motivation
Thread Starter
Super Member
Joined: Nov 2013
Posts: 825
Likes: 114
From: Eufaula, Al/Georgetown, GA
W213 E63S Wagon, W204 C63 P30(RIP), WK1 Grand Cherokee SRT8(RIP)
Granted ive done this multiple times but this job(excluding removal/install time) should take a complete novice no more than 1-1.5hr tops...
to me the factory setup just looked half-assed and that was unacceptable
Thread Starter
Super Member
Joined: Nov 2013
Posts: 825
Likes: 114
From: Eufaula, Al/Georgetown, GA
W213 E63S Wagon, W204 C63 P30(RIP), WK1 Grand Cherokee SRT8(RIP)


MBW Editor
Joined: Jul 2014
Posts: 303
Likes: 0
How to Make Your C-Class's Eyebrows Pop

Some people like putting weird crap on their cars like mustaches, tails, teeth, and eyebrows. Then there are manufacturers that don't take a step back to take stock in the look of the car before it's done.
And in those rare instances, you get something like the Mercedes eyebrow lights, or the happy clown steering wheel in the new S-Class. Thankfully, forum member jptaylor has a fix for at least one of them, and all you need is a flathead screwdriver, a panel popping tool and access to an oven.
Read the rest on the MBWorld homepage. >>
Super Member
Joined: Sep 2013
Posts: 532
Likes: 5
R8, C63, C300
I wouldn't mind doing this. Hate the look of 2 LEDs in mine, plus they keep burning out.
Thread Starter
Super Member
Joined: Nov 2013
Posts: 825
Likes: 114
From: Eufaula, Al/Georgetown, GA
W213 E63S Wagon, W204 C63 P30(RIP), WK1 Grand Cherokee SRT8(RIP)
Man you guys are great!!!! And as you can tell I detail the crap out of everything so that I can share the knowledge, good and bad
Senior Member
Joined: Jan 2012
Posts: 381
Likes: 0
From: Toronto
09 C63, 11 Cayenne S
Great job brother, i'll be doing this same thing before winter hits. I've always looked at the lights with disgust, but after seeing what you came up with, i'll be all over this. Great DIY...thanks
Super Member
Joined: Mar 2012
Posts: 521
Likes: 3
From: North East
2011 C63 AW
Whoa, those are so bright I had to squint at my monitor. Looks good.
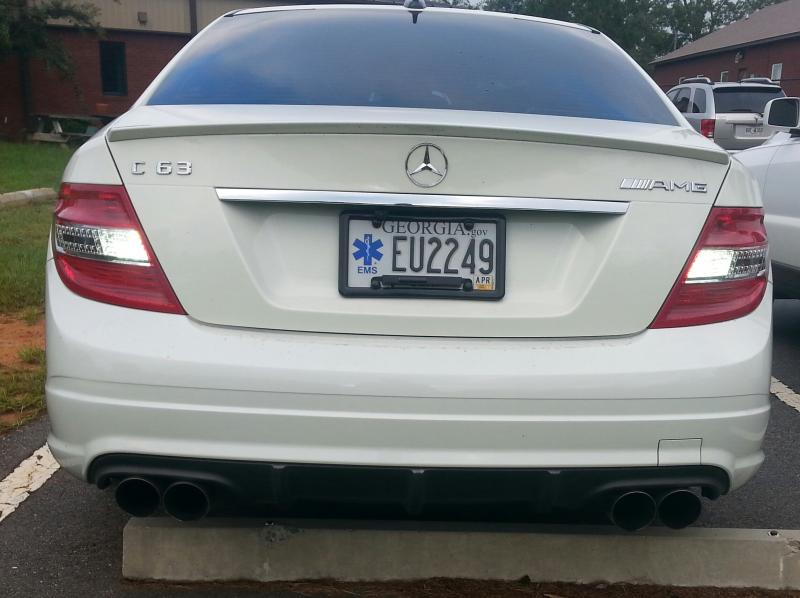
Definitly menacing when seeing them coming in the rear view. Props for the guts to perform surgery on ridiculously expensive headlights.
Definitly menacing when seeing them coming in the rear view. Props for the guts to perform surgery on ridiculously expensive headlights.

Thread Starter
Super Member
Joined: Nov 2013
Posts: 825
Likes: 114
From: Eufaula, Al/Georgetown, GA
W213 E63S Wagon, W204 C63 P30(RIP), WK1 Grand Cherokee SRT8(RIP)


Thread Starter
Super Member
Joined: Nov 2013
Posts: 825
Likes: 114
From: Eufaula, Al/Georgetown, GA
W213 E63S Wagon, W204 C63 P30(RIP), WK1 Grand Cherokee SRT8(RIP)
Ok last tease before I put together the write ups.....
I want someone to tell me WHY a $70k car does NOT have an under hood light? Well, it needed one so it got one.....
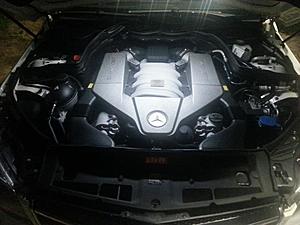
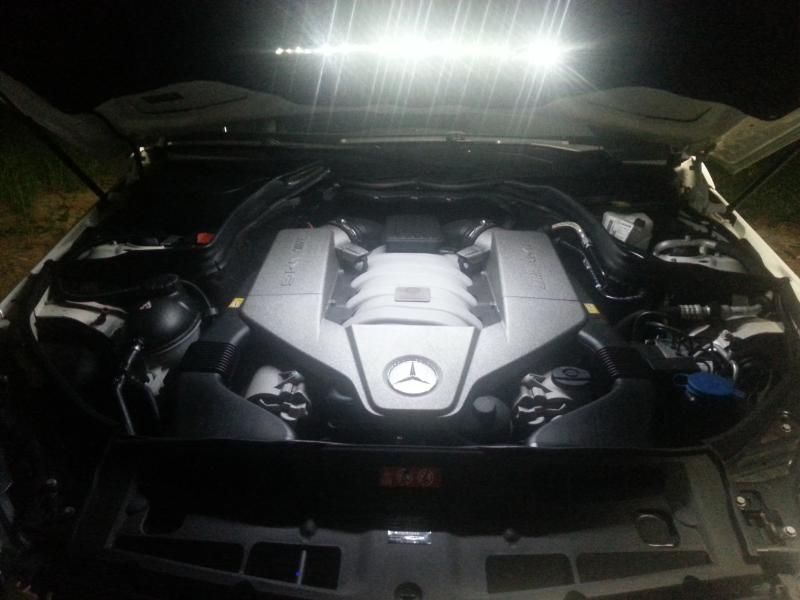
AND ....since I was here with tools in hand, AND, since it is always staring me in the face when I pop the hood, AND I thought I could do it without it looking cheap or ricer....
I want someone to tell me WHY a $70k car does NOT have an under hood light? Well, it needed one so it got one.....


AND ....since I was here with tools in hand, AND, since it is always staring me in the face when I pop the hood, AND I thought I could do it without it looking cheap or ricer....

Last edited by jptaylor; Sep 27, 2014 at 07:16 PM.


