


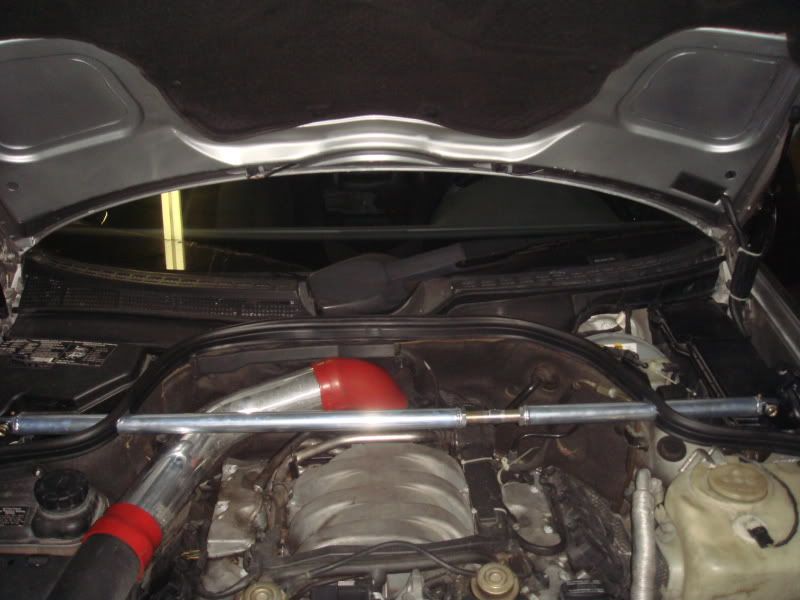
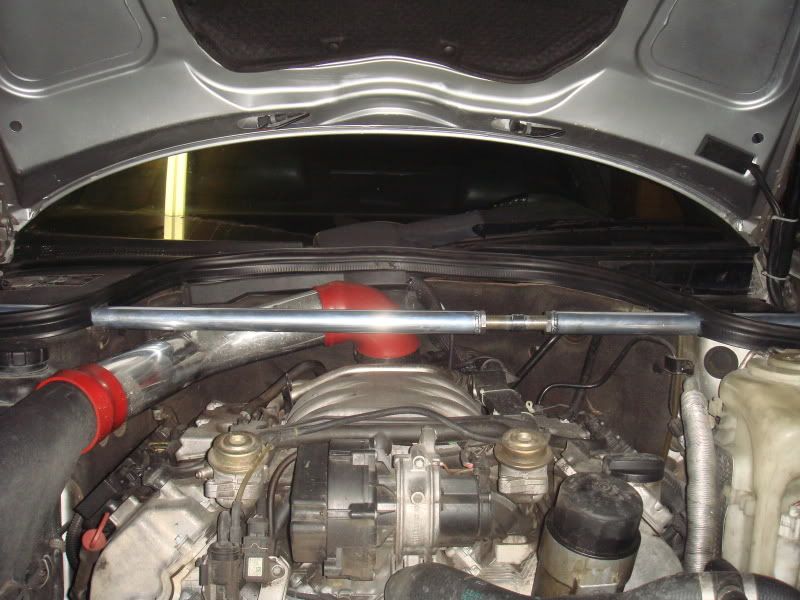
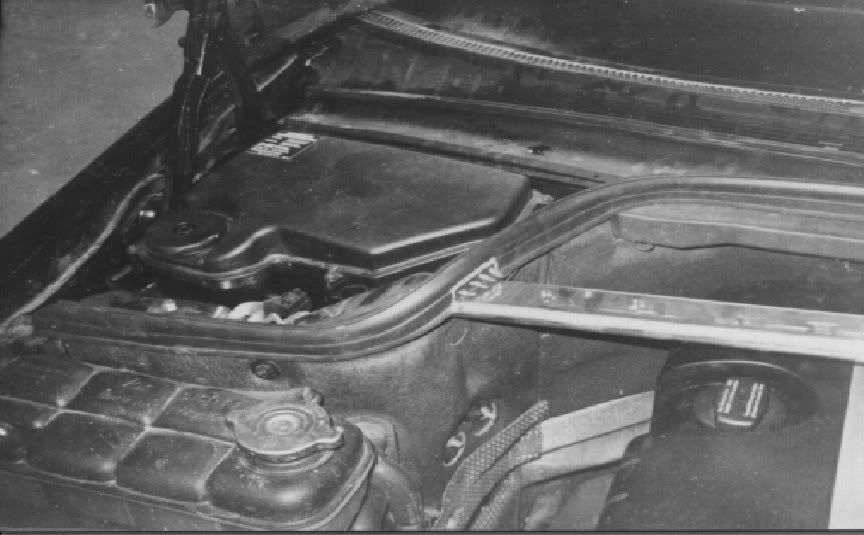
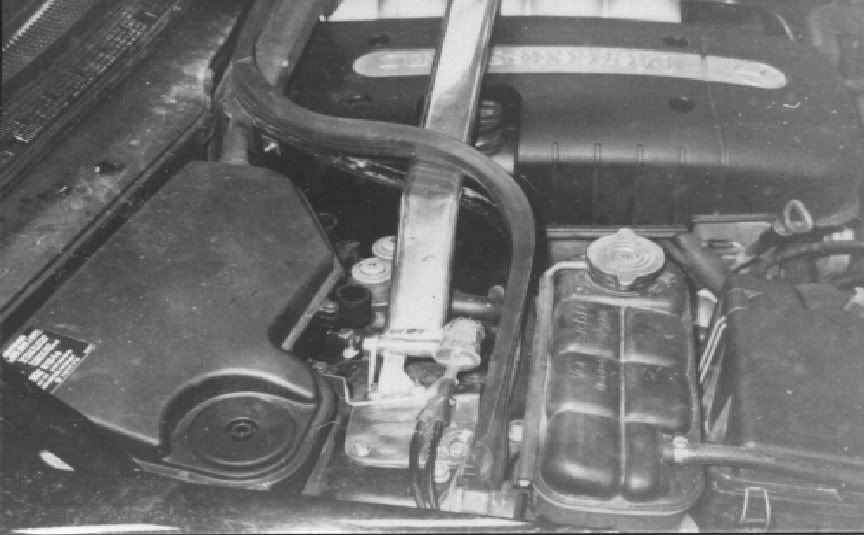
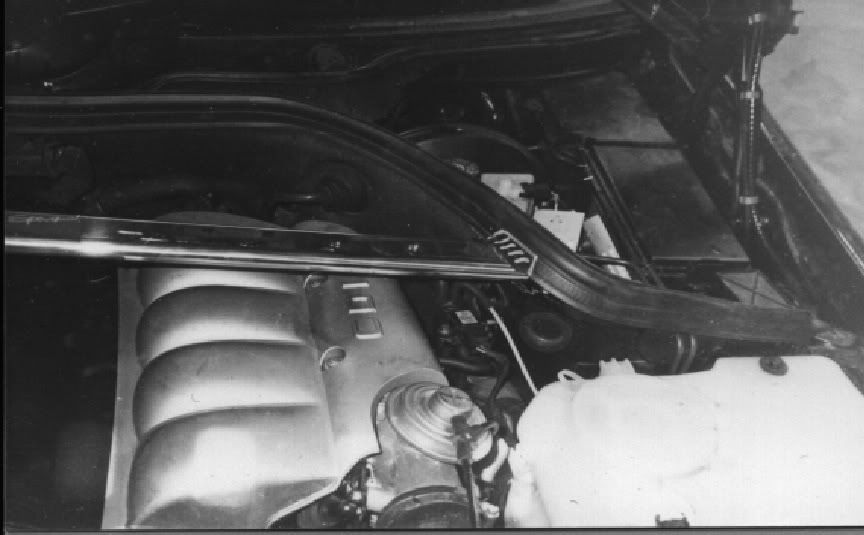
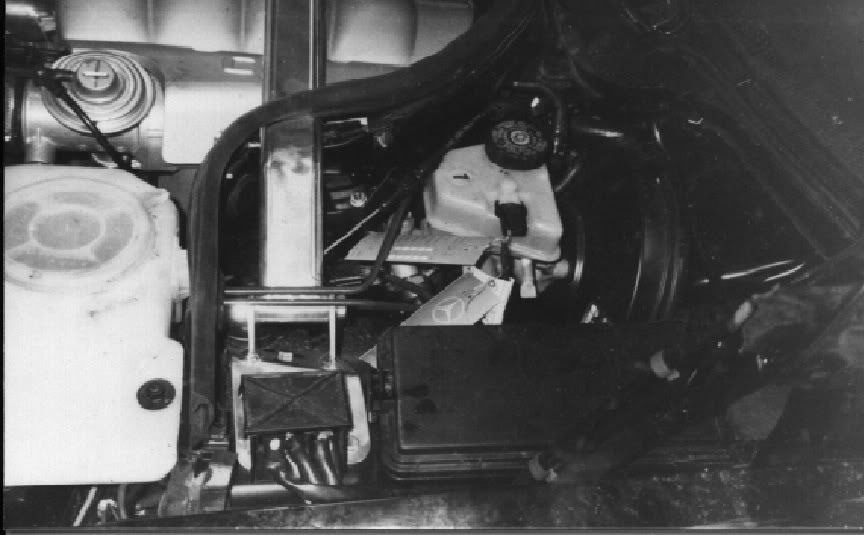
Front strut tie bars
MB World Stories
The Best of Mercedes & AMG

New Electric Mercedes-AMG GT 4-Door Coupe Unveiled: 10 Things You Need to Know
Verdad Gallardo
6 Mercedes Models That Did NOT Age Well (But Are Somehow Still Cool)
Verdad Gallardo
Manual Mercedes? 6 Times Sindelfingen Let Drivers Have All The Fun
Verdad Gallardo
Mercedes SLR McLaren 722 S Is Extremely Rare Example Modified by McLaren
Verdad Gallardo
8 Classic Boxy Mercedes Designs That Have Aged Like Fine Wine
Verdad Gallardo
Flawlessly Restored Mercedes 190E Evo II Heads to Auction
Verdad Gallardo
Electric Mercedes C-Class Unveiled: 11 Things You Need to Know
Verdad Gallardo
Mercedes EQS Gets A Major Update: Everything You Need to Know
Verdad Gallardo
5 Underrated Mercedes-Benz Models That Don't Get the Love They Deserve
Verdad Gallardo

Thread Starter
MBWorld Fanatic!
Joined: Apr 2005
Posts: 1,775
Likes: 7
From: Los Angeles
CLK W208
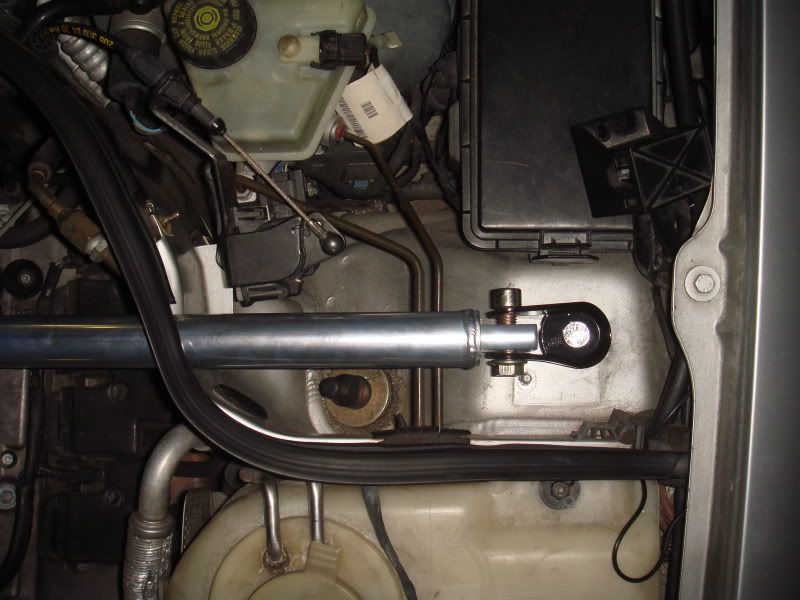
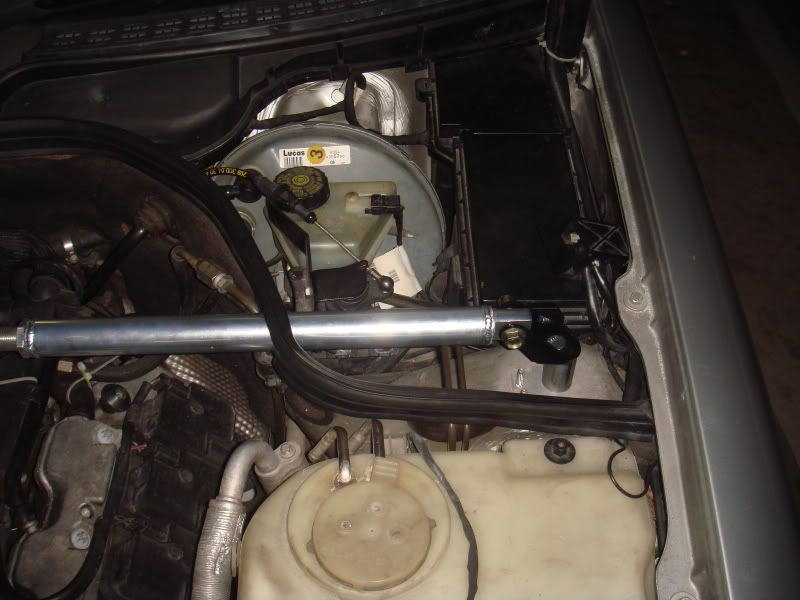
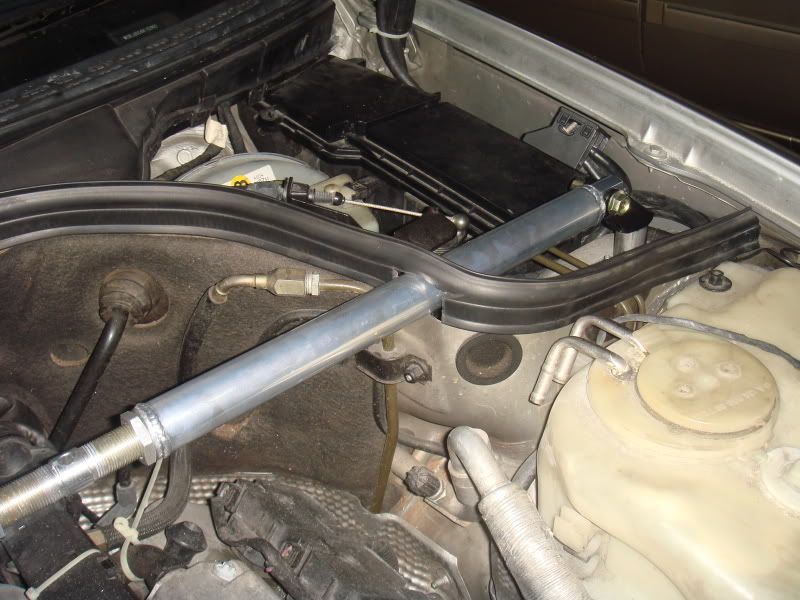
Ok here it is. this is what's involved in instalation:
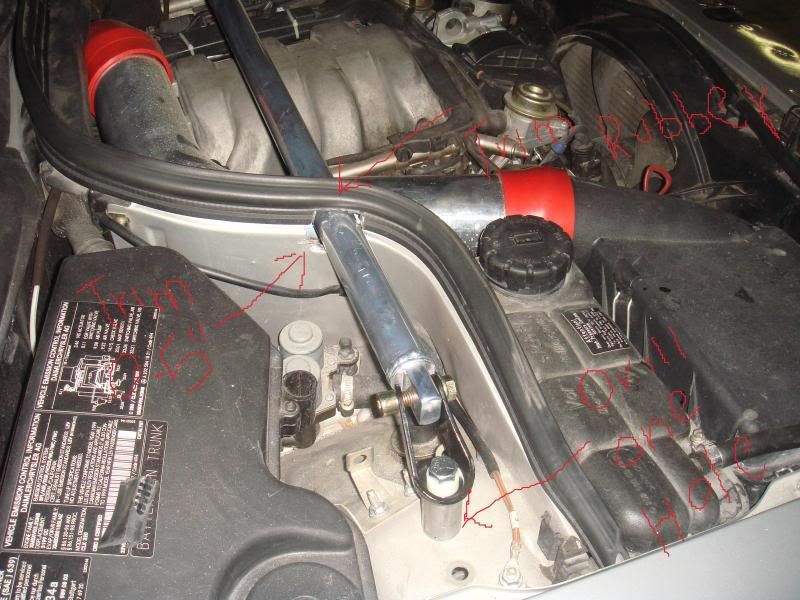
1. you have to trim the wall edge 1/2" done with a dremel or any shop can do it for under (15 minutes)
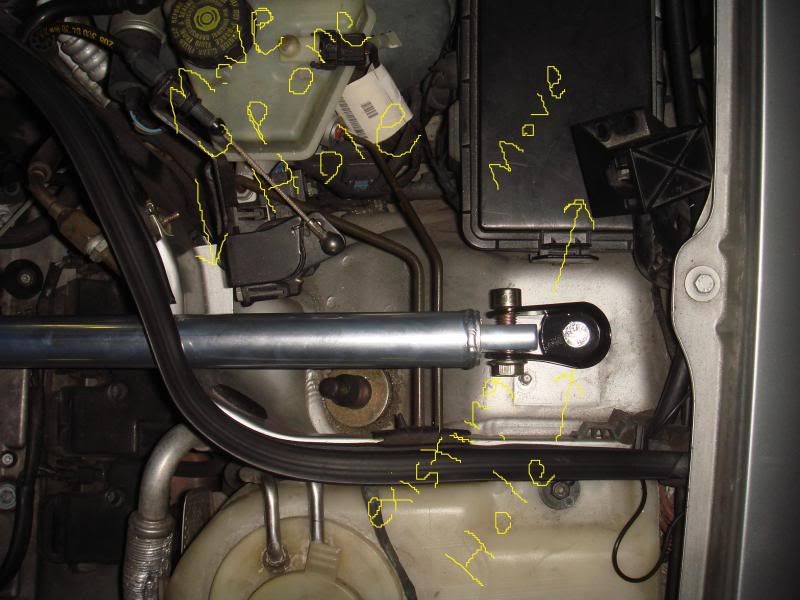
2. move the jumper terminal out of the way done with number 8 socket (1 minute) it can be left alone or moved to a preferred location.
3. move throttle sensor up one hole, done with a number 8 socket (1 minute)
4. drill one hole on the passenger side bit for 7/16 size bolt (3 minutes)
5. turn wheel outward and tie the knot from under the fender liner (6 minutes)
install time is about 25 minutes because you have to put the knott from under the fender liner to tie the bar to the body,very simple, you can do it by turning the wheel out wards. and minimal tools requires dremel, 11/16 socket, 11/16 wrench exacto knife to trim the rubber piece.
Price is $260 plus $15 shipping i accept payments via paypal at ashkanafrasiab@gmail.com and please choose PERSONAL PAYMENT, PAYMENT OWED as payment type. and please include your address on the notation part. thank you very much and keep in mind i only made 20 of them so first come fist serve.
There are still 2 rear ones available for the people that didn't get a chance to pickup a rear one the rears are $230 and i can combine shipping.

let the sale begin.
1. you have to trim the wall edge 1/2" done with a dremel or any shop can do it for under (15 minutes)
2. move the jumper terminal out of the way done with number 8 socket (1 minute) it can be left alone or moved to a preferred location.
3. move throttle sensor up one hole, done with a number 8 socket (1 minute)
4. drill one hole on the passenger side bit for 7/16 size bolt (3 minutes)
5. turn wheel outward and tie the knot from under the fender liner (6 minutes)
install time is about 25 minutes because you have to put the knott from under the fender liner to tie the bar to the body,very simple, you can do it by turning the wheel out wards. and minimal tools requires dremel, 11/16 socket, 11/16 wrench exacto knife to trim the rubber piece.
Price is $260 plus $15 shipping i accept payments via paypal at ashkanafrasiab@gmail.com and please choose PERSONAL PAYMENT, PAYMENT OWED as payment type. and please include your address on the notation part. thank you very much and keep in mind i only made 20 of them so first come fist serve.
There are still 2 rear ones available for the people that didn't get a chance to pickup a rear one the rears are $230 and i can combine shipping.
let the sale begin.
Last edited by VIPclk320; Dec 4, 2009 at 04:21 AM.
Thread Starter
MBWorld Fanatic!
Joined: Apr 2005
Posts: 1,775
Likes: 7
From: Los Angeles
CLK W208
it will work fine but i highly recomend the back too. personally i wouldn't sacrafise my handeling for sounds specially with that turbo on. i have a friend that jisut shaved off about 2 inches from the back of his box so the bar fitted fine and he got to keep his sound and the handeling. i still have two more rears available.

Thread Starter
MBWorld Fanatic!
Joined: Apr 2005
Posts: 1,775
Likes: 7
From: Los Angeles
CLK W208
Senior Member
Joined: Mar 2008
Posts: 436
Likes: 1
From: Surrey, England.
'00 Mercedes 430/55 clk cabriolet
Hi Ash looks nice and neat.
Question though, why didn't you use the suspension struts? How does this application work through the body? I know the strut bars are supposed to stop the body from twisting but can you please explain.
Ps Pm sent.
Question though, why didn't you use the suspension struts? How does this application work through the body? I know the strut bars are supposed to stop the body from twisting but can you please explain.
Ps Pm sent.
Thread Starter
MBWorld Fanatic!
Joined: Apr 2005
Posts: 1,775
Likes: 7
From: Los Angeles
CLK W208
I hope that answered your question. and thank you for your payment enjoy.
Super Member


Joined: Jan 2007
Posts: 744
Likes: 73
From: PNW Wa State
R230, C5 Corvette Convertible, Audi Allroad, Lexus RX350, AE86 Hachi Roku
Its A Good Start But Needs More Work
I see a good piece just not as good as should or could be. Please take this as healthy criticism.
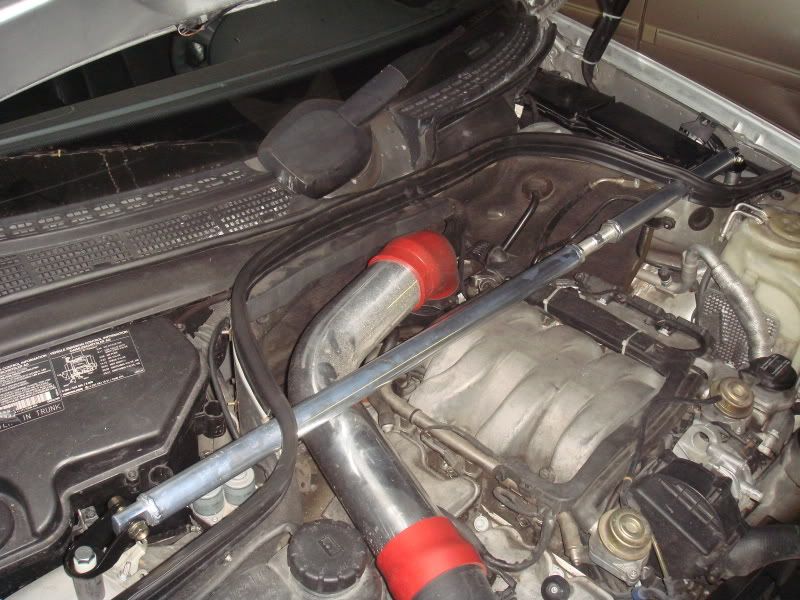
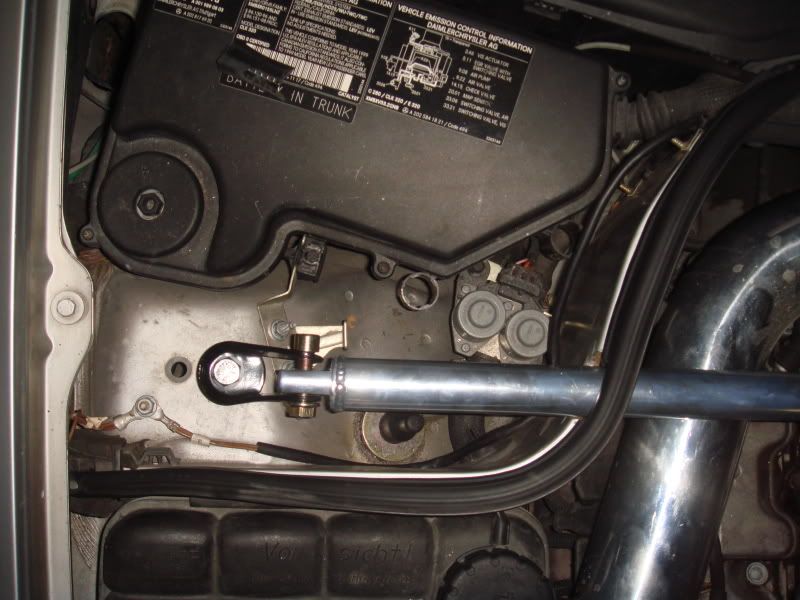
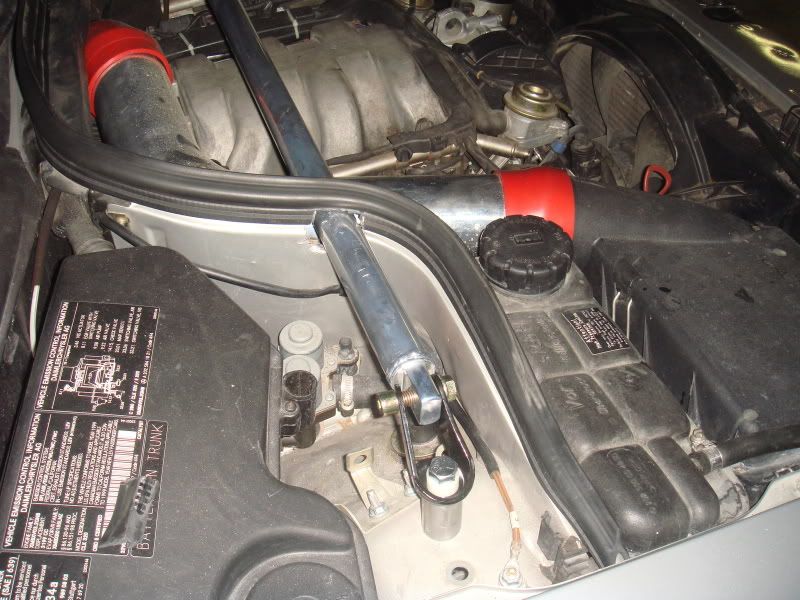
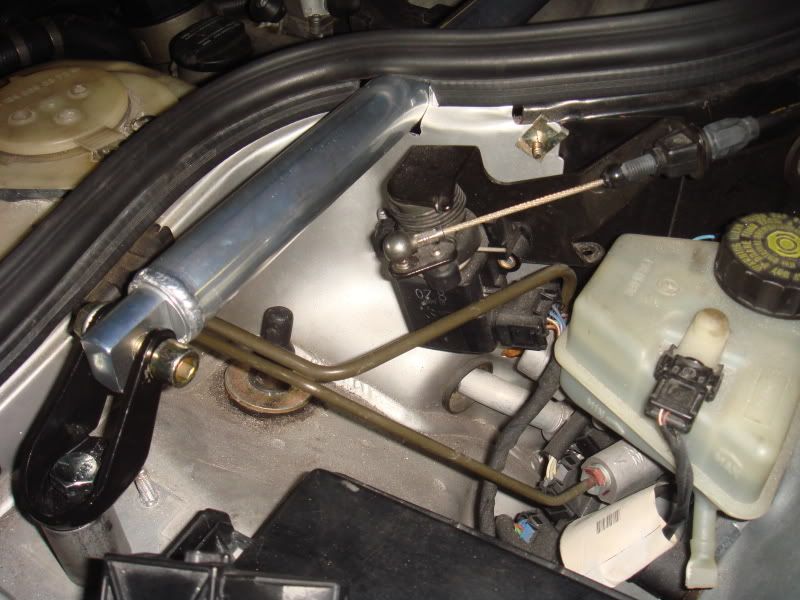
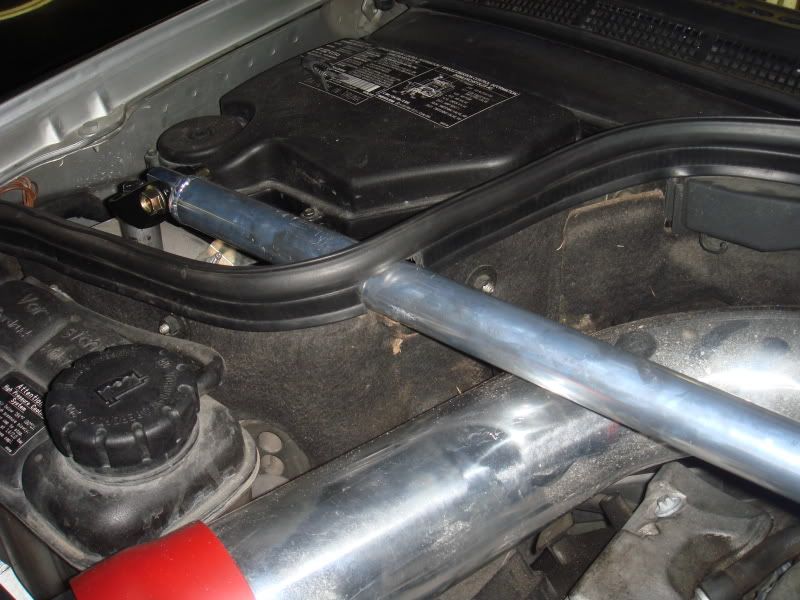
1. Mouting points should center on the strut or shock tower. Under stress or load they create flex. Its critical for the brace body mount to create a more solid suspension by tying into the shock/strut bolt. If the body mounts now aren't on the strut/shock bolt you're losing alot of the intended extra bracing.
2. The bolt attaching the body mount to the ends of the strut bar. If it has threads touching the bar without having a collar the exact size of the whole in the bar and the size of the bolt you have instant slop.
So I think its a nice piece as is but just for starters an easy upgrade would be add/replace the mounting bolt on the ends of the brace with a bolt that is solid inside the bar to control a better tolerance fit.
Hary Gahtoe

MBWorld Fanatic!
Joined: Feb 2003
Posts: 5,622
Likes: 1
From: Los Angeles, Ca
Sean's Sister--
all joke's aside and i'm not just saying it but i stopped by late last night to give ash a helping hand and did some tweaks and took the ride out for a spin and the car's handles so smooth!!!!! you guys need to hop on this front tie bar...i'm pushing for him to make a set for my e39...
Senior Member
Joined: Mar 2008
Posts: 436
Likes: 1
From: Surrey, England.
'00 Mercedes 430/55 clk cabriolet
So I think its a nice piece as is but just for starters an easy upgrade would be add/replace the mounting bolt on the ends of the brace with a bolt that is solid inside the bar to control a better tolerance fit.
Hary Gahtoe
Hary, I hear what you're saying!
What if the threaded bolt is a tight fit or has very marginal movement. Will you feel the slack effect?
I'm sure Ash has thought of everything. When He talks about smooth tightness maybe because with our chassis we can over do the stiffness and I know all chassis' need a certain degree of flex.
Ash also mentioned that he tried both configurations when bolting the bar on and found the body mount to work best.
Last edited by Pauljay; Dec 5, 2009 at 06:41 PM.
MBWorld Fanatic!

Joined: Mar 2007
Posts: 1,305
Likes: 50
From: Yokohama, Japan
2000 CLK 320
There are only 4 Choices...Period!!!
1. VIPCLK320's Design
2. Wiechers GmbH http://www.wiechers-sport.de/
3. Fabricate your own
4. None of the above
Wiechers GmbH Design
Wiechers GmbH Installation Instructions Translated from German courtesy of Google Translator
1. Disassemble the filter with support plate on the passenger side and the control on the driver's side.
2. The electronic throttle has to be lowered with the included adapter.
3. Peel off the seal of the injection wall.
4. The fixing bracket.
5. The splash wall has to be where it touches the folded or cut out of the brace.
6. Drill and attach the strut then with the screws provided.
7. Now, put the seal back on the injection wall. At the intersections of the strut, you cut the seal from below.
Original Text for those who read German.
1. Demontieren Sie den Filter mit Halteblech auf der Beifahrerseite sowie das Steuerger�t auf der Fahrerseite.
2. Das Elektronische Gaspedal mu� mit dem mitgelieferten Adapter tiefer gelegt werden.
3. Ziehen Sie die Dichtung der Spritzwand ab.
4. Fixieren Sie die Strebe.
5. Die Spritzwand mu� an den aufliegenden Stellen der Strebe ausgeschnitten bzw. umgelegt werden.
6. Bohren Sie, und befestigen Sie die Strebe anschlie�end mit den mitgelieferten Schrauben.
7. Stecken Sie nun die Dichtung wieder auf die Spritzwand auf. An den Ber�hrungspunkten der Strebe schneiden Sie die Dichtung von unten aus.
As you can see this is in the same location as with VIPCLK320's, the mounting points are not tied into the shock/strut bolt and this has been on the market for a while. Correct me if I am wrong but to my knowledge no other company has attempted to fabricate one for the W208 Frame.
I choose Option #1
Last edited by Williams707; Dec 5, 2009 at 08:48 PM.
Super Member
Joined: Jan 2007
Posts: 744
Likes: 73
From: PNW Wa State
R230, C5 Corvette Convertible, Audi Allroad, Lexus RX350, AE86 Hachi Roku
Look At Mounts On Weicher
This bar is OK but compared to the Weicher bar, just OK. A single long shaft bolt mounting plate is going to deflect stress and bend. That tall spacer is another area for lost rigidity. Like I said, this is a nice piece but has basic flaws. The bar shape would be stronger if wasn't round and straight. Also if it was bent like German bar you'd have better mounts, also have less flex.
And a mounting plate with 2/4 bolts much and stronger.
And a mounting plate with 2/4 bolts much and stronger.


