When you click on links to various merchants on this site and make a purchase, this can result in this site earning a commission. Affiliate programs and affiliations include, but are not limited to, the eBay Partner Network.
It finally same in the mail. Very well packaged I must say and much more structure to this one then my old one. They seem to have modified the skin it seems much tougher. Rough fit looks really good. My old one fit fine anyways. I will not be installing it yet...going to wait until spring as I have a few trips to the mountains planned soon and it would be a shame to destroy it.
Going with the yellow foglight look. I will post pics as I progress.
Can you take a picture of the back please? Is it straight bolt-on? These are things they never tell you in descriptions, and you never see any pics of the back of any kit. I want to know if all the back structure is there to bolt on.
Also, I believe this is the one that needs OEM fogs from a C-class, right? I like the look, and mine is starting to see a few small cracks. I'm just preparing for the inevitable future, I doubt I can get anyone to do a decent repair and paint job on it again.
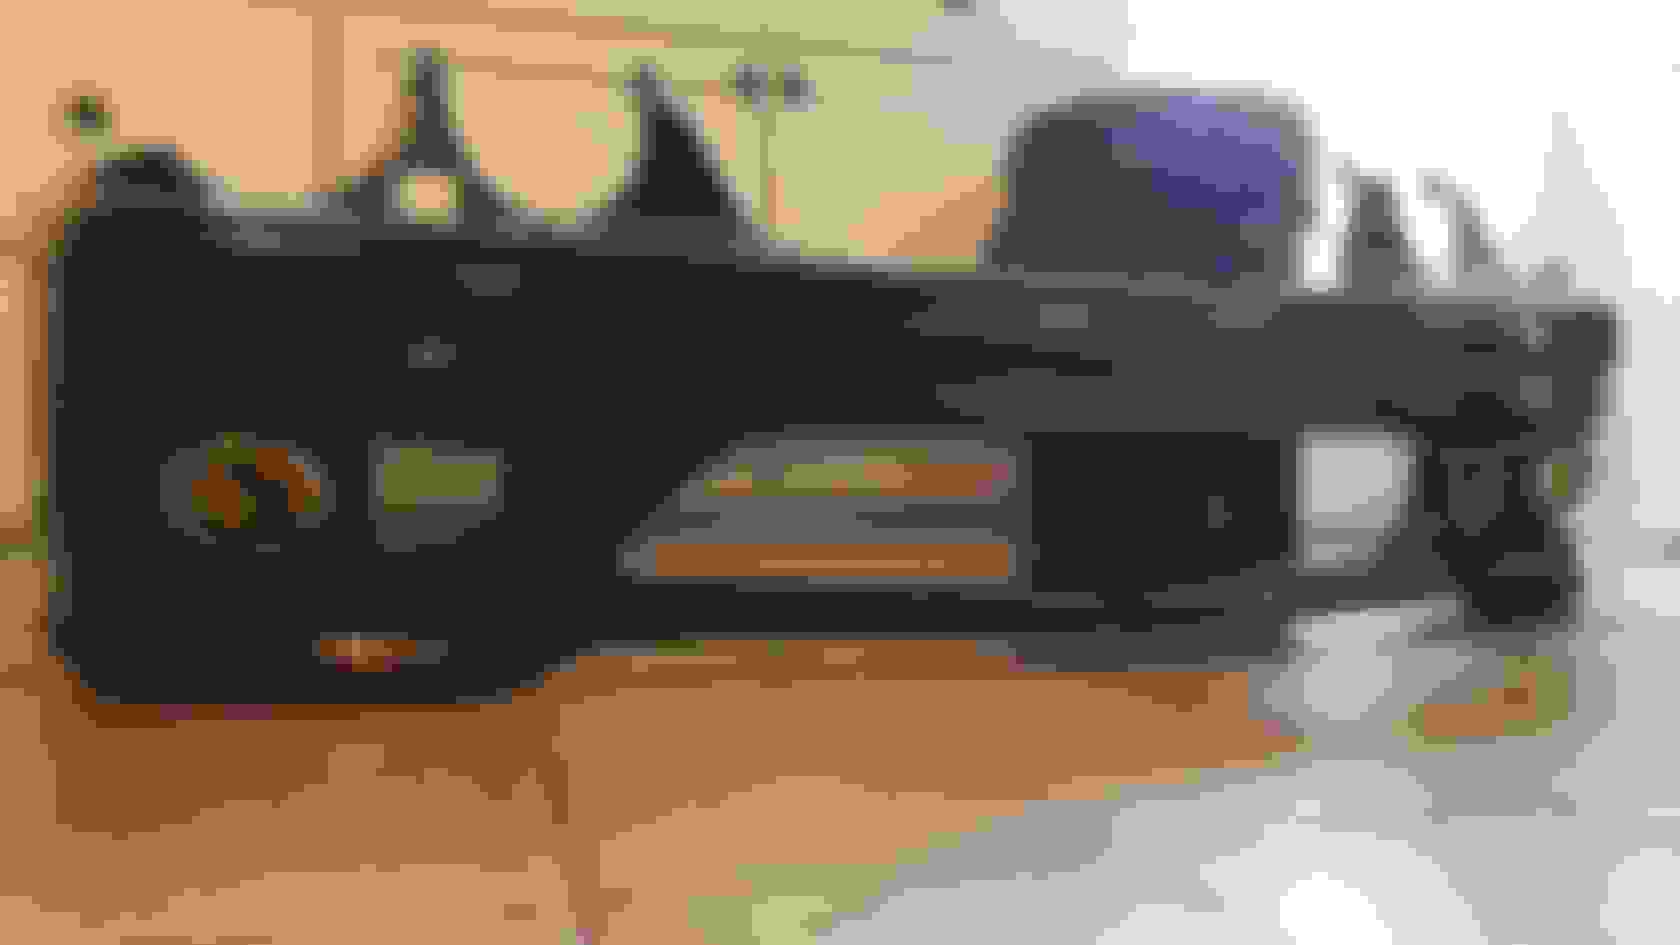
Here are some more pics...some of the rear and the C Class Fog Lights and grills I'm working on mounting. The 4300K HID and Yellow Laminex will look sharp in my opinion.
With warmer temperatures on the way...I'm hoping to have it painted and installed by the end of March.
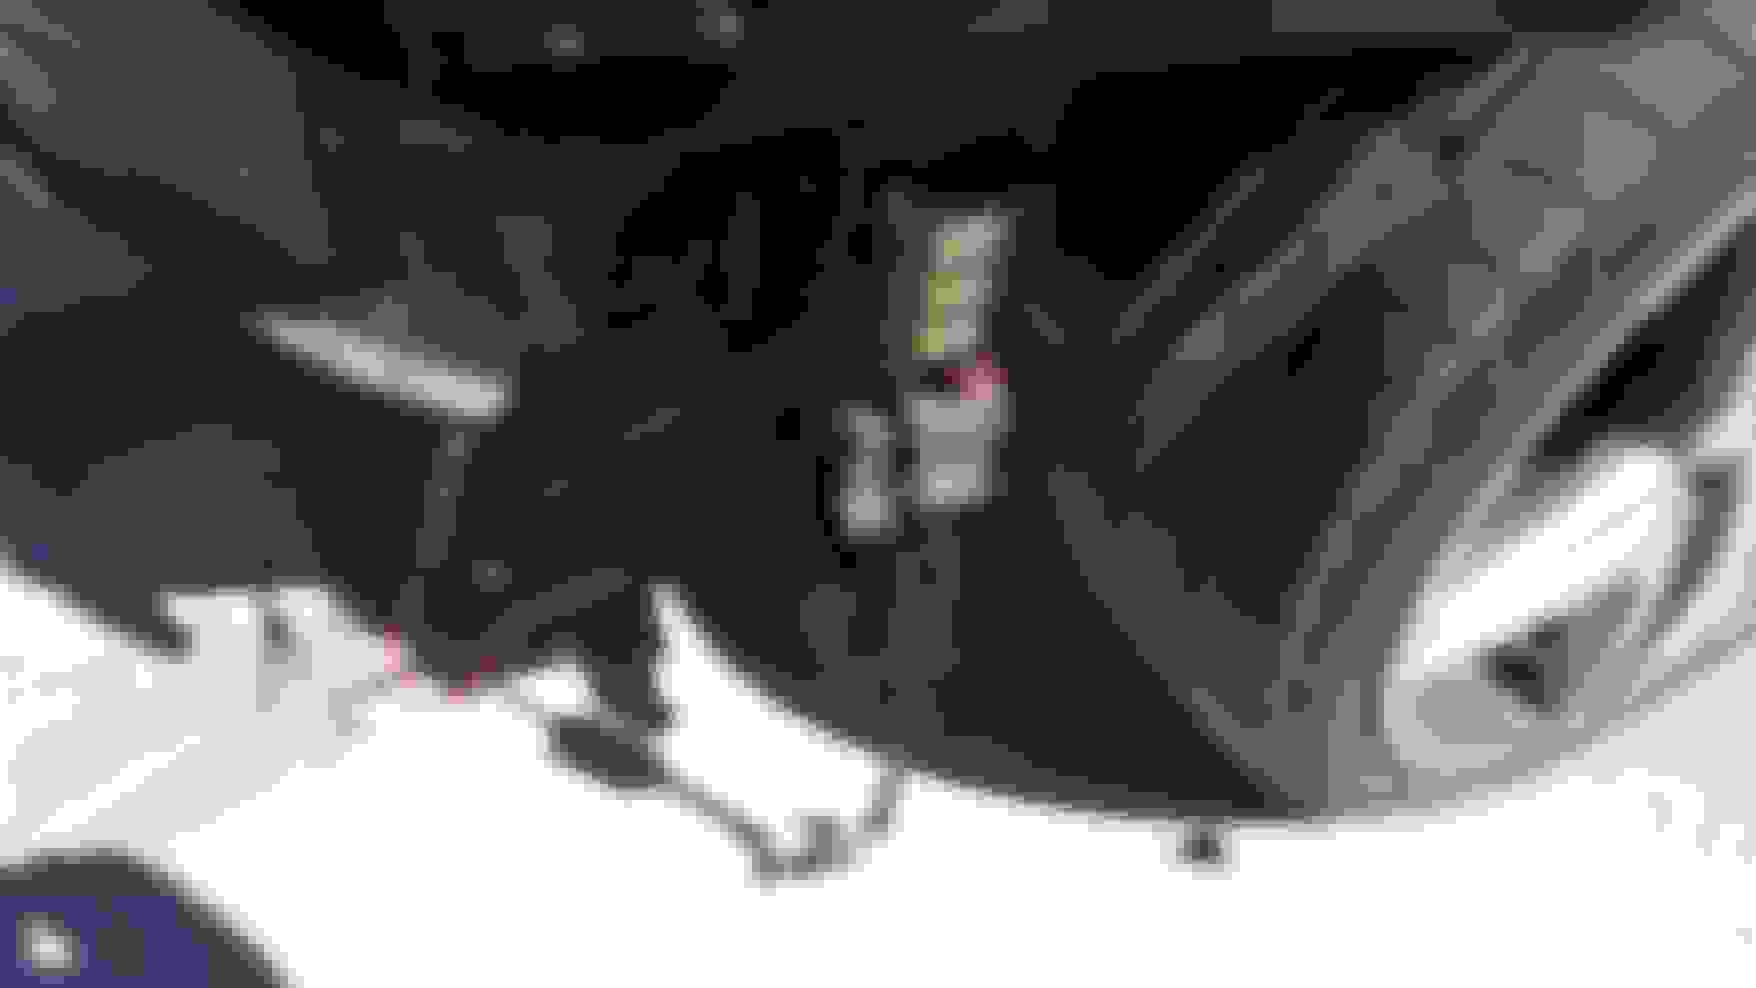
It's a little hard to see due to dim lighting and black parts, but It looks like this bumper does at least have the primary mounting bolts to bolt on the front. The sides might be a little questionable. Mine has some stand-off pieces molded behind the sides, kind of in the center, which bump up against the original side alignment brackets. I'm looking forward to the finished look, and to know of any challenges you may face in the mounting process.
It's a little hard to see due to dim lighting and black parts, but It looks like this bumper does at least have the primary mounting bolts to bolt on the front. The sides might be a little questionable. Mine has some stand-off pieces molded behind the sides, kind of in the center, which bump up against the original side alignment brackets. I'm looking forward to the finished look, and to know of any challenges you may face in the mounting process.
It definitely has the primary mounting bolts...and they mate up really well...no interference with any stock peices upon the original test fitment. The top holes on the sides mount up nicest too..however these are the first areas that broke on the old bumper...so I wanna make sure I get a firm hold at that location.
If you test fit it, then how are the gaps around the headlights? Mine has a somewhat significant gap around the base of the headlight circles. I closed it in by using some rubber tube-style weatherstrip around the bottom edges of the headlights. It doesn't look bad at all, unless you remove the bumper and see how rigged it really is.
I highly prefer this one, without the cheesy gills on the side, they just don't fit the car. Actually I don't even like them on the C63, a classic example of designers adding one more thing and pushing it over the top. Just keep it looking clean.
Foglight mounting holes on the bumper had to be trimmed to accommodate the C350 Fog Lights. Also had to trim the front impact foam piece a bit as it was really tight forcing the bumper to have a gap at the headlights. After it was trimmed it fit very nicely. All in all I don't think it looks too bad. I just need to get the washer nozzle covers and I'm set. I also installed 3000K HID foglights and covered the lenses with Laminex and Yellow Krylon Spray. They look really great at night.
Also got around to mounting the Pioneer Double Din as well. Oddly enough I did not have to use the PAC S-OEM and it retained the Bose quality sound. This unit must have a balanced signal output or something.
It looks really nice finished. I would like to see a couple of angles. Are those the fogs that are specified to fit with the bumper? I would recommend using some stainless wire rather than zip ties. In my experience, the zip ties will get brittle and fail at some point, but the wire does not.
Good tip. I'll take a few more tonight after the car wash. She needs a really good clean. Actually this weekend I'm pulling out the clay bar and the wax.
Looks good. Yeah, use wire ties vs zip ties. Also are you weather/dust sealing the back of the fogs? Additionally, I'm sure there's a splash guard at the base, but might be worth rigging up a diverter by the front grille that would be open to water spraying in from rain or car washes.
Yes that is on the list as well...I have the splash guards just need to rig them up somehow. There is a rubber gasket between the HID bulb and the fog light housing that should also help prevent water from getting inside...although you know how well those can work sometimes...