
Scored some OEM projectors! Time to mod!
 11-12-2014, 11:49 PM
#1
Super Member
Thread Starter
So I found some 2004 clk55AMG headlights on ebay... asked around and was told they fit a 2005 clk320 fine. Figured they would go up in price so I wasn't really paying much attention to it until the last 20 seconds... I ended up getting both for $108.50 shipped. OEM MB with bulbs/ballasts..etc. Everything works on them too!
Only this is there is some hazing on the lenses which isn't a big deal cause I will sand and polish them. You can see in the last picture in the upper part of the plastic lense. But if I can't get it completely out then I will swap my lenses from my halogen headlights and move them to the new ones. I can't decide if I should paint the entire housing black and leave the projector chrome like in this picture:
I think it's an awesome look honestly, and would probably look sweet on a black car...
But I'll update as I go through.
Here are what they look like, sorry for crappy cell pics.
-Nigel
 11-12-2014, 11:49 PM
#2
Super Member
Thread Starter
UPDATE:
Welp took the passenger headlight apart since the lens was the worst out of the two.
Easy as hell to get these lights apart! Much easier than my Daytona's or subie's that's for sure! Bake in the oven for 265 degrees at 12 minutes and you can pull them apart in about two minutes.
Washed the lens a little, wet sanded with 800,1000,1500, then 2000 sandpaper.
Then enhanced it using compound and then finished it with an orange 3" pad with polish.
So far so good!
-Nigel
11-14-2014, 02:30 PM
#4
Newbie

Join Date: Nov 2014
Posts: 12
Likes: 0
Received 0 Likes
on
0 Posts
CLK 320
I am actually jealous that you found those so cheap. Ive been looking around and all i could find them for is 350+. any idea other model headlights that could fit a W209? time to go deal hunting on ebay!
11-16-2014, 07:25 PM
#6
Super Member
Thread Starter
Welp, took them COMPLETELY apart..lol
They need a good cleaning and the one side looks like the ballast was changed and it looks like the MB dealer just cut the wires inside and attached a new ballast with a different end cap on the driver side.. No worries, I will just attach it back via the stock location and put a normal cap on the back, no biggie.
They need a cleaning so I am going to clean the inside, tons of dust and crap in it. Already started to strip the chrome/chrome paint off the bezels of the headlights. I should have a picture hopefully of that in the next day or two. Gloss black should look really nice compared to the chrome. I am keeping the chrome reflector of the high beam and the chrome projector shroud as is.
I kept reading that people were not happy with the stock hella projector, I can see why. It uses a Fresnel lens, which means there are tiny rings on it to help diffuse the light. This is great for majority of people as it's very hard to make out what is above a nice clean cut off line made by a projector. I don't like this personally, you can see in the attached picture it screws wit the cut off and there is some slight yellow instead of a nice blue/purple band. I ordered a set of ZKW-R clear lenses from TRS. These should make for a really nice cutoff and color. I am not going to space the lens at all since these don't like spacers, but once I get them Tuesday I will update with a new cutoff picture.
These are going to turn out nice once I'm all done with them!
-Nigel
11-17-2014, 07:41 PM
#7
Super Member
Thread Starter
Welp go the ZKW-R lenses in. Only real difference is that there is no notch at the top of the lens where it would "sit" inside the projector housing... NOT really an issues honestly because of the snap ring and you have to push the tabs in to seat it. Once all tabs are bent back holding the snap retention ring the lens doesn't move at all. Nice and tight! It's perfectly clear compared to the diffused look of the Fresnel stock lens.
Just for kicks I spray painted the rubber paint on the chrome headlight housings to make sure that I didn't like a matte black look of the headlights. It looks cool but it looks too "plastic/toy" like so no harm done since you can just peel it off... WELP Here to tell you DON'T spray it on because it WILL take the chrome paint right off the headlight shroud/housing. I don't care because I'm painting them in a few days but be warned... this isn't something you will go back on. See pictures below and next post for peeling! It's a cool affect honestly. I wish I could capture it but it's like a swirl pattern in some places then shiny gloss black plastic. It's neat. If you had a silver car it would probably look pretty cool honestly.
Last I took pictures of the cut off pattern, with the stock lenses you can see more yellow and it's just not sharp. I am only capturing the cutoff with my camera phone so the pictures though I can tell a difference don't really capture how much nicer it really is.
I took 4 pictures. Two for each projector. First one is before, second is after installing the lens and slightly "tweaking" the cut off shield. 3rd picture is before, 4th picture is with clear lens and did not require any tweaking.
Overall the output is MUCH cleaner and for $40 for A stock lenses you can't go wrong from TRS! If you get the B class lenses which I believe my have blemishes they are like $15 bucks!
See pictures!
-Nigel
Trending Topics
11-17-2014, 07:46 PM
#8
Super Member
Thread Starter
Pictures of the cut off.
1st picture is of stock projector Fresnel's lens.
2nd picture is of the same projector but with the clear ZKW-R lens and slight tweak of the cutoff shield.
3rd picture is of stock projector with Fresnel lens.
4th picture is of clear ZKW-R lens with no tweaking necessary.
You can see there is more color to the cut off and it's sharp. How it should be!
Overall I am very pleased with this mod so far and it should look really good once I paint everything the gloss black.
Thanks,
-Nigel
 11-20-2014, 07:10 PM
#10
Super Member
Thread Starter
I was going to use normal butyl tape but honestly MB used so much of it I don't think I need to add anymore.
I am simply going to re-heat both halves, push them back together then put them back in the oven for about 10 minutes and then squeeze them more. Should be more than enough to keep them together and not have any leaks.
I sprayed them now for priming. Did two coats, and then I will wet sand over the weekend and then spray the color on. Probably about 4 coats of color then wet sand again then clear.
-Nigel
12-02-2014, 12:12 AM
#11
Super Member
Thread Starter
Figured I'd update. So far so good!
I painted and polished the shrouds. Chrome never looked right to me so I painted them like the first picture. Turned out really really good in my opinion.
Got the car apart and taking the headlights off. Funny tidbit of info the projector light uses a different turn signal bulb than the halogen. However the halogen turn signal casing fits right inside the projector housing and vise versa... I thought I'd have to buy new turn signals but nope, I can use the led ones I have.
Anyways.. They aren't all back together yet, will probably do that tomorrow. Still have to wet sand and polish the other lens. I want to make sure they are nice since the entire housing is nice.
Here's what it looks like thus far.
Total cost so far:
$100 for the headlights with bulbs (mainly just wanted the d2s bulbs)
$40 for clear ZKW-R lenses
$20 in paint
Couple hours of work...lol
:-)
Next just gotta get them on the car and I'll snap new pics.
-Nigel
12-16-2014, 03:13 PM
#12
Super Member
Thread Starter
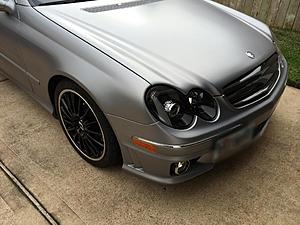
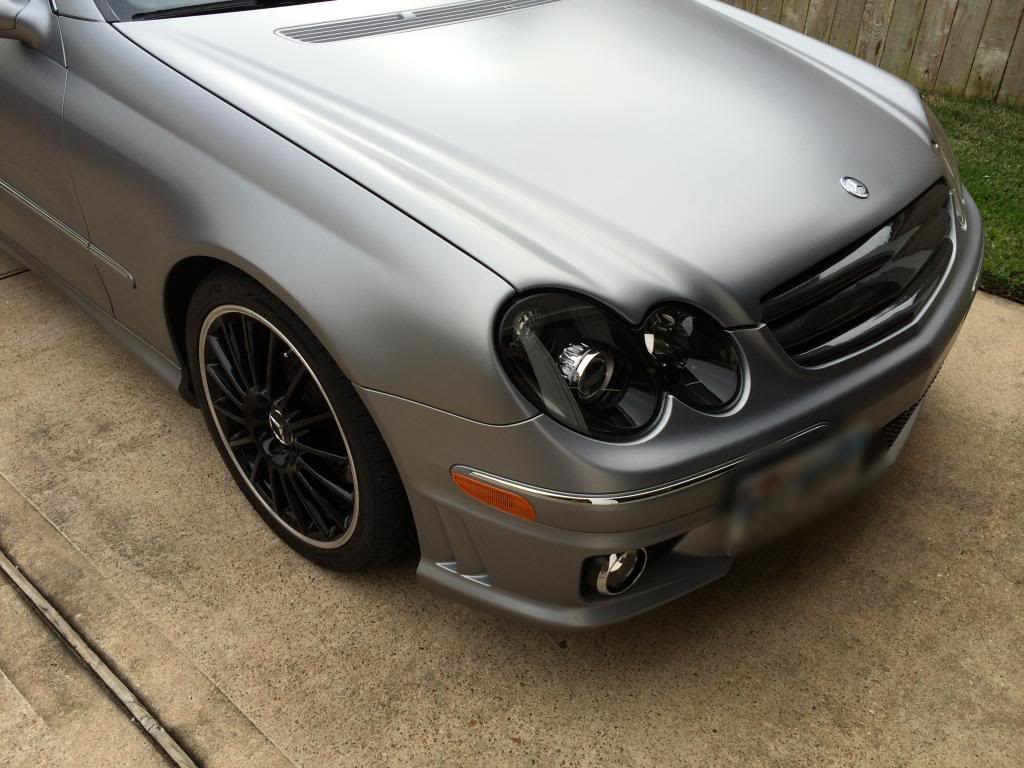
All done.
This was fun. Looks really good and is subtle mod. Projectors look sweet. Cut off is great compared to OEM with the new lenses and no flickering.
Took one picture of painted oem projectors, stock chrome projectors, and stock halogen reflector.
I'll try and get pics of it outside once it stops raining this week.
-Nigel


