When you click on links to various merchants on this site and make a purchase, this can result in this site earning a commission. Affiliate programs and affiliations include, but are not limited to, the eBay Partner Network.
I bought this 2005 CLK320 with 170K mile at auction and have been doing all the baseline maintenance under the assumption that all maintenance was deferred. I've been playing with cars as a hobby for the last ~35yrs. Started with watercooled Volkswagens (Early Jetta GLI, 16V Scirocco), then enjoyed a 94 Saab 9000 Aero 5MT for about 120K miles, also did a full bare metal + nut and bolt restoration and Nissan SR20 engine conversion on a 1991 custom orange Miata, followed by my current First Mercedes purchase - a 2008 GL320 CDI. Current active stable of cars: 1991 BRG Miata SR20, 2002 Mazda Protege5, 2003.5 MazdaSpeed Protege, 2008 GL320, and now this 2005 CLK 320.
The Proteges are supposed to be for my kids, but neither the 16yr old nor the 19yr old seem to be interested in driving. My GF's daughter is 16 and I made the mistake of telling her that a Mercedes or a Mazda would cost the same to get running since the parts are relatively equal in cost. Oh brother.
I've got a local car auction site that I follow pretty religiously for purchasing defunct Mazdas and now I'm suddenly searching for old defunct Mercedes. My girlfriend may have gotten caught up in the bidding war and we blew past my $2K limit to the hammer at $2,500
I'll document my trials and tribulations here. This car will be for my 16yr old's primary use so I am going to bring it up to reliability spec as a minimum. I don't need calls from a stranded teenager in the middle of the night.
Current Mandatory Action list:
Replace blown Rear shocks
Replace blown Front struts
Replace windshield
Replace Front control arms
Replace exhaust bushings
Drain, flush transmission
Engine oil flush + filter
All Filters
Replace Battery
Replace all turn signal bulbs
Diagnose non-op Driver headlight (suspect ballast)
Replace 3rd brake light
Diagnose trunk weatherstrip leak
Replace wheels
New tires
Secondary Items:
Drain, refill rear differential
Replace front / rear Giubo
Take to DEQ Emissions - assess O2 sensor and catalytic convertorFix Driver motorized headrest
Replace missing center console lid
New brake discs/pads/brake fluid
Replace motor mounts
Inspect / Replace spark plugs
Remove both door panels and inspect for leaks
This is supposed to be a simple project to get a clean running car for our youngest as she earns her driver's license. One of my top concerns for any (new-to-me) car is fresh rubber. Skins. Tires of course. A simple procedure - order new tires. Yet, I abhor the ghetto fabulous wheels (with mismatched bald tires of course) on this car. Besides that, they are really large - staggered 18x8.5 and 18x9.5. So, off to FB Marketplace to shop. I very quickly see there are few factory 17" options available, so I quickly shift to searching for OEM C63 wheels. Completely needless for a first car for a 16yr old girl, but since this is ultimately my car, the decision has been made. OEM+ upgrade.
This set also has mis matched tires, but they are 85% tread Continentals on the Driver side and 85% tread (something else) on the passenger side. They should be fine for a few months so I can fill up the bank account and put a few hundred shakedown miles on before our daughter gets behind the wheel.
The difference in width of the rear wheel/tire combo was actually shocking. I had to play Amazon Prime tuner for a week or so to get the correct blend of spacers and lug nuts, but I am EXTREMELY happy with the current stance and profile. I usedc 10mm spacers up front and 20mm spacers on the rear. Factory C63 wheels are 18x8 front and 18x9 rear.
This is less a "how to replace the front suspension" post and more of a "let me pass on my hard lessons learned" post.
I can be quite stubborn. I've been this way since Elementary school. As such, I will take up projects, against great odds, merely because my brain is triggered when someone says "you can't do that".
So that's why this is a picture of my snow covered street with my snow covered CLK320 on jack stands in the middle of a full suspension change and transmission flush while I wait for several different Mercedes specific tools.
STEP ONE - If you have familiarity working on your cars and various suspension, don't listen to all the snobs that say you shouldn't do this project. However, I will say, if you don't have the following tools, it's going to be impossible.
MANDATORY TOOLS
I am basically sponsored by Amazon Prime Racing, so all tools are readily available from them and within 8hrs to 72hrs away. $15 - the Mercedes specific strut nut socket - NOTE: this only works AFTER you have relieved the full spring tension from the front spring to the strut bearing. The lock nut, which is not my favorite design at all, is almost hand tight inside the rubber bearing.
$110 - Clamp style McPherson strut spring compressor - Don't be like me and think you can get this job done with the free rental spring compressors from Autozone. You can't even do it with the double clamp Pittsburgh Spring compressor. This tool was so safe and effective, the 2nd strut took me 15mins to assemble with complete confidence.
$200 - Impact wrench - I'm using a cordless Dewalt that I picked up a few years back and I really recommend it. Besides, you will never get the upper strut nuts on or off without an impact wrench.
Overall, this was a humbling project to say the least. Literally NOTHING worked as the online videos showed.
I purchased the front suspension kit from FCP Euro - it was about $900. This kit includes all hardware, control arms, sway bar endlinks, and Bilstein B4 struts (non-sport).
There are a ton of videos on line with great step-by-step information. I really liked the one from
- even though it was a CLK500 with sport suspension. I could have upgraded to Sport suspension components here since I was replacing the control arms and sway bar mounts as well as struts, but I just didn't want that hassle. Again, this car isn't for me, it's for my 16yr old daughter.
I started by renting (for free) this Spring compressor from Autozone and I learned quickly why this tool will not work. The short spring just doesn't have enough room for these to work.
Then, upon the advice I saw from @91_Ser I went to Harbor Freight Racing and purchased this Pittsburgh twin arm spring compressor.
It functions very well and I like it as a tool, but this did not compress the springs enough - EVEN when I paired it with one of the suicide sticks from AutoZone. I also discovered that the factory strut housing will allow for the arms to grab onto the strut housing and I thought that would help, but nothing.
There's a tremendous amount of stress in this job because car springs contain so much dangerous energy. I finally reached my limit of failure + stress and gave up. Admitted defeat. With hat in hand, I called about 5 Indie shops locally, fell on my sword and asked if they'd do the assembly if I brought in the parts. 4 declined and 1 shop said they would do it (this is Tuesday before Christmas). The Service Advisor (maybe owner?) said he estimated they'd charge 1.5hrs to 3hrs shop rate at $165/hr. I assumed he meant 3hrs, since that's how these things went and I am out of options. Did I mention, Portland also had a snow storm coming up? To make a long story short, got a call the day of the snowstorm - Thursday - and the SA said they weren't able to do the job. I put the phone down and went to Amazon Prime Racing and ordered a clamp style strut compressor. At $110, the cost of this tool was less than half the cash deal I negotiated with the shop.
When the spring compressor arrived, to say that I was excited is an understatement. New tool day is always fun, but this is a really awesome unit. It took 45mins to learn using the tool to assemble my first strut. The 2nd one took about 20mins. No drama. No foul language, just stress free performance. SO, if you are in the Portland Metro area and want to rent this tool, hit me up.
Lastly, you have to wait to fully tighten and torque all of the control arms until the suspension is loaded. You can do this with the front wheels on the car and sitting on ramps, but I found it far easier to compress using a floor jack.
For the rear shocks, while it is super simple, comparatively to replace the shock, I will say DO NOT REMOVE THE REAR CONTROL ARM. I saw this tip on one video and it literally added 3 days to my work. The shocks compress much easier than you think. If you are having issues with installing the new one, just slowly compress them and they slip into place. I did use grease on the lower mounting point.
Spent the last few days driving the car and happy to report that everything works and there are no clunks or odd noises.
I'd love to get this thread side tracked and ask a lot more about the Miata!
I had a '95 NA in college and a '96 briefly as a toy after. In high school I had a Nissan 200sx with a JDM FWD SR20DET swapped into it. The two sound like a great combination!
I'd love to get this thread side tracked and ask a lot more about the Miata!
I had a '95 NA in college and a '96 briefly as a toy after. In high school I had a Nissan 200sx with a JDM FWD SR20DET swapped into it. The two sound like a great combination!
Ah, yes, then you'll appreciate this. My friend restores classic Datsun Roadster with late model SR20 engines. This was back in the 90's. At the time I had a Sunburst Miata that was bone stock and the thrill of the SR20 torque - with only 145WHP was addicting. We were always saying - with the Miata chassis, the top naturally aspirated SR20 would really scream. This BRG is V.2 SR20 Miata. The first one was the full restoration that was rolled when I hyrdoplaned. Incredible downer to lose everything that I poured my heart into, but since I didn't die or have a single injury, I figure it was a good trade. After the accident, we stripped all the parts and have updated our original design. The engine is an S15 SR20de Autech that makes 180WHP. This iteration will allow us to extract a little more since we're using a Haltec for tuning. I was in my 30's when we did the first conversion, but now that I'm in my 50's we're including AC.
I've done the full flush on my 722.9 in my GL320 so I thought this would be no problem. I bought the items from FCP euro - the new pan gasket, filter, crush washer, transmission connector, and Pentosin 134 and ultimately got stuck doing the project on jack stands in my cul de sac because I was already elbows deep in replacing the complete front suspension and rear shocks, so I figured, what's a few more days? I was mainly looking to avoid lifting it off the ground for a long time, so I was being greedy.
There are so many 722.6 videos online and that made a very straightforward procedure. I was really dragging my heals on wasting ~4Q of $20 Pentosin 134 ATF to do the flush, but the black muck that drained out of the pan was convincing. I used my oil extractor to pull 2Q from the ATF fill tube each time. I scared myself after starting the engine and driving thinking I put the car into limp mode, but it turns out I didn't get the trans up to temp enough (80*) and there wasn't enough oil so it wouldn't let me out of 1st gear. Finally plugged in my iCarsoft MBII and went into the TCU menu to monitor the trans temp and added enough fluid. Now it is shifting like a dream. There is a slight shudder/vibration in 2nd and 3rd gear sometimes, so I think I will replace both the driveshaft Giubo and also drain and refill the differential.
THINGS I LEARNED: The trans connector socket replacement was a HUGE pain for me. I just could not get it lined up to slide in. Don't forget I am laying on my back on the street and it's pouring down rain with temperatures in the low 40*'s, so my patience level *may* have been low already. After watching a dozen videos, one guy mentioned there is a "tab" in the casting at about 7 o'clock where you line up the tab on the connector slide ring into its fixed position on the connector. Sure enough, this ended up being tremendously helpful for alignment. All it needed was for me to get it lined properly and then push a little harder than you think you'll need to push. Also, I'd compare the O-ring quality between the new and old parts just to make sure everything matches and be positive that you get two O-rings when you remove the old connector.
PAY ATTENTION when refilling - it's pretty easy to confuse the oil dipstick tube and the ATF fill tube if you are rushed or not focused. Initially, I was using a fluid transfer pump to fill, but I didn't have the correct hose diameter to properly fit into the dipstick tube and ended up losing almost a quart to the asphalt gods before I switched to a flexible funnel that was donated from our kitchen.
Bottom line - this is a very simple and straightforward procedure. It only seems complicated because you are removing the transmission oil pan and you'll need a torque wrench to set the drain plug and pan bolts.
The best and literally BEST way to refill the trans properly is from underneath because the overflow plug is set and you can tell perfectly it is filled enough.
The best and literally BEST way to refill the trans properly is from underneath because the overflow plug is set and you can tell perfectly it is filled enough.
True for the 722.9 trans which came on later W209 or (I think) V8 CLK, but this earlier 6cyl car has the 722.6 does not utilize the overflow tube, the overflow method at temperature is not viable.
That�s fair you learn something new everyday. I was told to never put it down the tube because it doesn�t go in the right places it needs to but yes I have the 722.9.
Water Intrusion. Water leaks. Trunk Pond - whatever you want to call it, living here in the Pacific Northwest, I absolutely hate when cars leak water inside. After several weeks of rain - and limited driving since the car was on jackstands in my street getting the suspension replaced and transmission pan dropped and drained, once back on the ground, I noticed the telltale sign of foggy windows.
The trunk is the most common place for leaks with cars of all makes and models. 90% of the time, your trunk leak is from a poorly fitted (or missing) gasket for one or both tail lights. Other times, it's a faulty trunk weatherstrip or rusted rain tray.
Since the trunk interior was completely obscured by the trim panels, my first pass at this part of the project was evaluating the rear window and trunk rain gutter area and inspecting the weather seal.
First I noticed a heavy paste of moss, algae, pine needles, & mud at the lower edges of the rear windshield and partly in the trunk rain gutter area. I used a plastic trim remover tool and and a shop towel to clear that much out. Then I noticed in the trunk gutter area, there is a plastic trim piece affixed with plastic tabs that extends from the rear glass all the way down to cover the tail light extension and below the bumper. So I pulled that trim piece off as much as possible and noticed two things - 1) more of the moss, algae, pine needle mud paste 2) the plastic trim has a subtle built-in channel on the underside that is supposed to direct the water flow from the rear window and away from the weatherstrip gasket. Since this channel was basically blocked off, it makes sense how water was getting by the trunk weather seal.
Next, I used a trick I learned from my Miata crowd (which they learned from the Honda S2000 crowd) and applied a healthy amount of Honda Silicone / Shin Etsu grease to the foam rubber weather seal around the trunk. This is expensive, but very useful grease. Not only is it perfect for properly lubricating power window tracks, it is tremendous for bringing new life to aging foam rubber gaskets. Without overselling it, I firmly believe it absorbs into the foam to plump up the gaskets and provide a better seal. I use it on all my cars for the door gaskets, trunk gasket, tail light gaskets, and power window tracks. This is the kind of thing your kids will be using long after you are gone. For good measure - and to reduce my cleanup - I kept a large, flat bin in the trunk to test for water.
More rain, and more water in the trunk, but less of it in my container. So now I pulled all of the interior trim. I need to replace the 3rd brake light anyway, so now is as good a time as any to pull all of it.
I did notice that the passenger tail light had a streak of water coming from one of the bolts, so I set to work pulling that lens out. Just 3 bolts and unplug the light harness. More of the algae pine needle mud so I cleaned the entire area on the body, then totally cleaned the lens, then applied Shin Etsu to the foam gasket. As I was inspecting the inside of the trunk, I noticed there was a small water trail from another screw that wasn't part of the lens, but rather, it was helping to secure bumper trim. Upon further investigation, there are two "T-bolts" that attach to the bumper trim and the bolt portrudes into the trunk. One was dripping water (and there was a rust trail to show for it) and the other bolt was missing completely, so the water from the tail light was running down the body and into that hole!! Well, I didn't have any T-bolts and I'm trying to spend as little money on this as possible since it's a High School kids car, so after wasting 20mins trying to fit a rubber gasket into the small crevice, I finally used some industrial rubber tape to block off that hole.
This seems to have stopped the majority of the intrusion; mainly because I used to have to leave a bin in the trunk and it would have 8-12oz of water collected after all day of rain and now none collects in the bin. However, water still gets in because when you open the trunk, a lot of water drips off the trunk lid and directly into the trunk unless you wipe it with a chamois. Oh well, better than before.
Scope creep: as a project continues in time and as more tasks are completed, one finds comfort in adding more tasks to the original project because it "just makes sense". AKA - while I'm in there.
It's been a few enjoyable months driving Project CLK320 - or more accurately, my fiancee has put it into daily service. My grade sheet is that if she can drive the car and feel comfortable with everyday driving demands, then our 16yr daughter should be just fine.
So, there are a handful of niggling problems that are low priority - replace windshield, replace 3rd brake light, driver seat headrest is stuck again, a subwoofer and amplifier would be nice to add to the stereo, etc.
However, there is a check engine light for an issue with ignition. Also, the low beam is still non-op, so I ordered a replacement ballast and removed the headlight for installation. And that did not fix the problem. The only thing left is to replace the igniter that is tucked inside the headlight. I ordered a replacement of those as well and then set on how to install it. The main issue is the 3-wire plug that connects the igniter to the headlamp wiring harness is essentially locked in place due to how the igniter is bolted to the housing. I wasn't going to order a $12 wire harness, so I just decided to break the mounting tab on the housing that holds the igniter. I will find out if the igniter is the fix or if there is a short to ground somewhere in the wiring or a fault at the SAM. HOWEVER, since I have the one headlamp removed from the car, I'm really just a hop, skip, and a jump from happily upgrading to the Morimoto Evo XR. And, I might as well upgrade the high beam to a Morimoto Mini H1. I just did this upgrade on my GL320 and have been quite happy with the performance increase in lighting. Not only do the factory bi-xenons of this vintage degrade output over time, they ultimately get cloudy and output suffers even further. So stay tuned for this.
While I had the headlight out for repair, I decided to change out the spark plugs to see if that affected my CEL. WOW. I had no Idea Mercedes used twin plug ignition. That's very cool. Expensive, but very cool. Pulling the plugs is very straightforward - - in fact, here is the Remove Spark Plugs DIY that helped me understand all the variables involved. My VCG was not leaking, so those were no changed.
Step one is limited to spark plug replacement. This was an auction car with 170K miles and my position from the beginning has been "there is at least 70K miles of deferred maintenance" and this drives my decision making. At times an entire system needs to be replaced at once, as I did with the suspension control arms and bushings. Other times, start with a simple maintenance change. Changing the spark plugs allows me to inspect all the other components. Holy cow! these must have been the original Bosch plugs. The correct gap is supposed to by 0.39-0.40 and the majority were at 0.52 and one was at 0.61! Every single plug looked disgusting so it was quite satisfying to replace them. I also noticed that one of the plug wires was damaged inside at the copper isolator and corresponded with a damaged terminal on the plug. I could replace the single wire, but it makes sense to baseline the car with plugs and wires. I'm purposely avoiding the coils as from my reading, they work until they don't. If there is a way to test their output or life expectancy, please post below. Since the car has been driven a few weeks on this compromised plug and plug wire (or maybe for the last 50K miles - who knows?!), I decided to go for a quick test drive and the car idles and drives much smoother.
I have an order in place for the projector and high beam upgrades and a set of plug wires, so the car will be non-pop for another week or so.
I just installed the full set of plug wires. They were $110 from FCP Euro. It's interesting to note that the VCG and the upper panel looked fine while changing the plugs, but now the driver side upper panel showed some fresh oil seepage. I decided to throw a T25 screwdriver on the bolts and HOLY CRAP! They were all barely finger tight. Assuming this will address that issue.
Remaining niggling issues:
Non-Op headlight as mentioned above. The Morimoto projectors have arrived and I need to set up my heat-gun powered oven to get that process rolling. I elected to skip the LED projectors. Just don't need it on this car.
Still have a CEL - not sure if it is O2 sensors now.
MINOR RANT - - - iCarSoft MBII - - you know, I'm irritated that I spent $150 for this thing so I can supposedly access Mercedes codes, however, I continue to pull codes that have ZERO MEANING and no definitive information on the forums. I'm getting pissed.
Here is the current list of codes. NOT A SINGLE ONE shows up anywhere on the forums. If they do show up, there is guaranteed an entry from someone saying "do you have DAS or STAR" or "You really should have DAS or STAR". Christ on a crutch.
P202c-000
P203d-000
B1003 component M13 (heating water circulation pump) - short
B1101 fault in CAN com w/ control unit ESP
B1112 fault in CAN com w/ control unit REAR SAM
B1115 fault in CAN com w/ control unit AAC
038 Component G3/6 RIGHT O2 sensor after kat not op 039 Component G3/5 LEFT O2 sensor after kat not op
RANT Over.
Driver low beam still non-op after replacing ballast, ignitor, and bulb. Now I have ordered a used Front SAM and that should arrive Monday. Much of the research I have done is the following: Probably the ignitor ($15). Or it could be the ballast ($50 + PITA to remove the headlight). If not, then it's the SAM ($120 used or $300 New). so with the $80/ea Morimoto "while you're in there" projector upgrade I'm up to $265 to get this headlight working.
In other news - the windshield will be $1000 to replace. Suddenly that got less urgent.
Ok, a pretty big update - running and driving with no check engine lights!!!
Looking back at my previous post, I was clearly frustrated. While some of that frustration still exists, I do want to thank all the stewards of the internet that are documenting their project failures and successes so the rest of us can benefit.
b]bApril Projects:
Replaced front SAM (due to a failure in troubleshooting process, I can't confirm if this was necessary)
Fully cleaned & polished both headlights
Removed old projectors and installed Morimoto EVO XR projectors (such a mega upgrade for only $130/pair)
Installed new D2S Bulbs
Reinstalled both headlights
Installed the replacement ballast and ignitor wire (funny note about this at the bottom)
Replaced thermostat/water neck
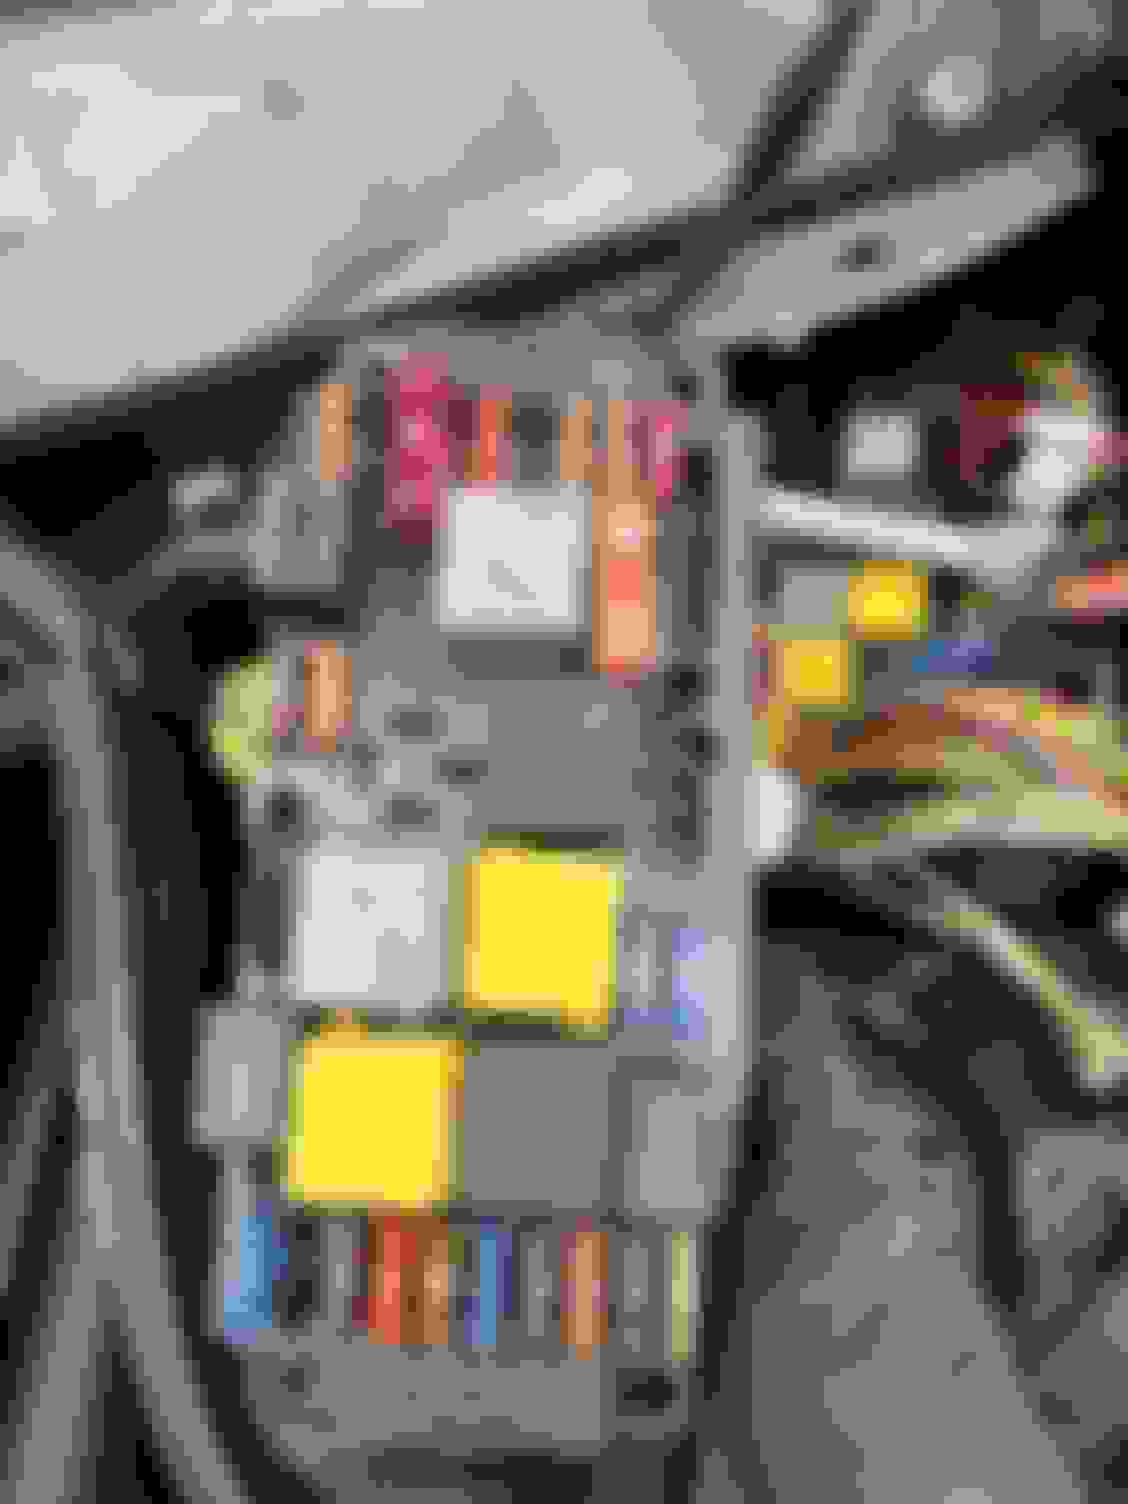
This work duration was really a factor of waiting out our rainy and freezing weather in Oregon. Luckily, my used Front SAM eBay order arrived so I could slam it in on a dry day - which I ended up doing. That's quite a daunting project. I think it's really pretty straightforward and echo all of the suggestions to take pictures as you go - especially of the entire box area - not just closeups. The harnesses on the bottom are really pretty unique and I think only one or two can be transposed. After installing the new front SAM I went to try the headlights, which were just connected with the harnesses and the drive low beam STILL wasn't working!!. On a lark, I swapped sides and realized the bulb had burned out (these were fresh bulbs a few months ago). Ordered a new set of Hella D2S 5000K bulbs and once installed, both low beams functioned perfectly. I can't rave enough about the Morimoto EVO projectors. The bi-xenons in Porsche, BMW, Audi, Mercedes of this vintage are over 25yr old technology. One look at the two projectors side by side tells the story - better glass optics and polished reflector where the old xenon housing was cloudy.
For my non-op low beam, I ended up replacing every single part in the system and I think it was a poor example of throwing parts at a problem. But my troubleshooting kept throwing roadblocks as I couldn't find a test or value to confirm defective components.
$50 - Ignitor from Amazon - Dorman 601-164 High Intensity Discharge (HID) Headlight Igniter
$50 - ballast from Amazon - Ballast for BMW, Mercedes, Audi, Land Rover Headlight Control Unit Module Replaces 307 329 074, 63127176068, 307 329 090, & others
$65 - Morimoto EVO XR Bi-Xenon from Lightwerkz.come
$20 - Hella D2S bulb from Amazon
$15 - 3M Headlight Lens Restoration System, 39008 (STUNNING results even if this were $50)
$120 - used Front SAM
TOTAL Cost = $305
I'm seeing used headlights on ebay for ~$250-$600, so overall, I'm happy I won't need to touch the driver side ever again. As I mentioned above, I had decided my ignitor was the issue, but purchased the ballast as well, just in case. The ignitor is bolted into the inside of the headlamp housing in a way that prevents removing the wiring harness from it. The idea being, if you can remove the wiring harness from the old ignitor box, you can just plug it into the new ignitor. But no. Hella did not design the housing that way. So, in a fit of impetuousness or ingenuity, I used a large chisel and chipped the old ignitor out of the assembly (at this point, I hadn't convinced myself to replace the projectors because this was supposed to be an inexpensive project). I ended up breaking one ear from the ignitor box (as planned), but also broke one mounting boss on the Hella housing (which I did not want). The good news is that after baking the headlight to remove the lens for the projector project, I was able to secure the new ignitor box to the lone mounting boss and all is well.
There is a rubber mounting ring for the headlight surround that was looking super crusty and falling apart. It looked terrible. I was surprised to find on an official Mercedes site that these parts are only $35/ea. Again, I dragged my feet because this is supposed to be a simple project, but in the end, I caved and ordered them through Peach Parts because the shipping time was more reliable. They really help the car look less like a hood rat and more like a nice German coupe that it is.
$35 - L Headlamp seal 2003-2009 Mercedes-Benz (209826019164)
$35 - R Headlamp seal 2003-2009 Mercedes-Benz (209826029164)
Nothing better than knocking out a ton of projects and being able to drive the car immediately. As soon as I started the car up (with the new thermostat + housing), the remaining CEL from my previous post is gone! Man I am pumped that I don't have to replace two banks of O2 sensors or a pair of catalytic convertors. Now I can get the car registered. Yes, I've been driving it with insurance only. Luckily, Oregon's bleeding heart legislators decided that getting registration was too much of a hardship on poor people and people of color that the police can no longer pull you over for license plate or registration sticker infractions. So I have no plates or registration while I was sorting out the CEL. Now I can finally go through the DEQ/registration process.
Videos that helped me above all the others: Replace front SAM
Nothing I love more than trouble free driving enjoyment and the Coupe has been doing just that. My daughter is loving this as her first car. I know lots of kids in High school are driving brand new cars, but this is such a classy and good looking car!
I finally traced a power drain issue to the Driver Seat controller. There must be a fault at the switch that verifies the seat position because the car checks and checks and checks seat position until the battery is dead. My simple fix was to identify the controller under the seat and then unplug it. I've seen another fix is to repin the plug so that the seat only has power when the key is on.
My other project for the car started as a simple "Hmm, the stereo stopped working" and things have escalated. Between the fiber optic, the crappy looking fadctory head unit, and a potentially failed amp, I am scrapping it all and doing a full stereo install. For the life of me, I could not find a double din radio fascia that would fit this coupe dash, so I ended up just making my own piece out of ABS and then I used a dremel to cut away the steel plate. The fit is perfect. I am using an ATOTO F7WE 9" Double Din and the size fits the dash well - although it is slightly larger. I'm not looking to enter any concourse or stereo competitions, so as long as the finish is clean, I can deal with some overlap.
Luckily, the PO had installed a power cable to the trunk already. However, I wasn't happy with some of the routing and so I needed to add a pair of RCA from the trunk, I ended up pulling out the rear window panel and most of the carpet so I could run things cleanly. At the moment, my hope is that I can just tap into the stereo wiring from where the factory amplifier was and use a Kenwood Amp to run things.
The bigger issue at the moment is apparently this type of stereo didn't use conventional Power, switch, ground at the dash harness, but rather using the COMAND it gets all that from the CAN-Bus. I guess it's no issue, I just need to be careful about finding power and switch - especially since the cigarette lighter isn't working. That's all for now.
I remember hitting a brick wall multiple times when it came to upgrading the annoying fiber optics sound system on these cars (2004 -> D2B fiber, 2005+ MOST).
2005+ cars with fiber have better aftermarket replacement options if you want to keep stock amp. I loved everything about my gracefully aging 04 CLK500 except for this part.
I looked at spending $$$ but came to the conclusion that it would be much cheaper to take out of the loop everything fiber optics related (amp/cd changer/headunit). I replaced the headunit with an 8" Samsung tablet. I bought and slightly modified a bezel from Crutchfield for a clean look (https://www.crutchfield.com/p_003MBK...Kit-Black.html)
I replaced the factory amp with a 4-channel aftermarket unit that was 2ohm stable. I kept all door speakers but replaced the factory sub. I used the existing physical wiring (saved huge amount of work). The only thing I ran from the front to the trunk is 12v remote to turn on-off the amp and a remote control knob because I wanted to be able to adjust volume without fumbling with touch controls on the tablet. I used a cheap 12v-to-5v voltage converter for tablet USB power/charging. I also installed Macrodroid app on android tablet to automate tablet deep sleep mode when car ignition is on or off. I occasionally plug in an external powerbank to top off the tablet battery once every 3-4months if I'm not driving the car that much (hello covid).
I've had this setup for 5 years and it works beautifully. Massive improvement over stock sound system.
The only post-upgrade issue I had was a mysterious battery drain. Culprit was the car's useless nokia/motorola integrated phone cradle. That system is part of the the fiber optics loop and since it was no longer in place the associated electronics were not going to sleep after turn off the car. I ended up pulling a fuse related to this and it solved the battery drain issue.
I looked at spending $$$ but came to the conclusion that it would be much cheaper to take out of the loop everything fiber optics related (amp/cd changer/headunit). I replaced the headunit with an 8" Samsung tablet. I bought and slightly modified a bezel from Crutchfield for a clean look (https://www.crutchfield.com/p_003MBK...Kit-Black.html)
Thanks for the info. Yes, that was the obvious solution - just run new cables and equipment. I haven't been in the car audio space for years. The amp I purchased is not 2ohm stable, so apparently, I'll have to purchase another.
It's been great to have no updates of problems and just enjoy a few months of having such a nice driver. I recently wrapped up a few lingering projects. Turns out it takes a long time to wrap up tasks when you mix a college class schedule, merging two work schedules, and the holidays when working on a tricky European car.
I am in the final stages with the stereo. Turns out the amp I bought is 2ohm stable so that was helpful. For Christmas our daughter got a powered subwoofer (that I think I like so far). I ran a pair of RCA cables from the trunk to the dash and that was not my favorite job. Required removing the rear passenger side panel. A few weeks later, I found myself doing a similar job again to run cables for a rear facing camera cable and subwoofer gain control module. I do have some interference in the system (fuzzy noise), but I'll have to wait on troubleshooting for warmer weather.
It was kind of a ***** to diagnose all the speaker wires from the loom in the trunk. I didn't have a solution I like for the center channel speaker, so that is idle for the moment. All 4 door speakers definitely sound great so far though. Very happy with the performance of the Atoto S8 8" head unit. everything was working fine during testing before I buttoned up the wiring, but sadly, when doing the final speaker sourcing and plugging in the amplifier while the music was playing, the display of the unit went dark. Fully plays music with volume control, but no response from the head unit. So now I'm troubleshooting that with the manufacturer.
I am not quite as proud of the end result for how I installed the Atoto into the car. I ended up scrapping the entire Mercedes unit and built my own faceplate out of 1/4" ABS black plastic. Used a heat gun to make it convex to match the dash. Then I cut a hole in the metal Head unit frame and aligned that with the head unit. So the end result is the ABS is slightly recessed and the head unit sits slightly in front of the dash. But hey, working stereo with GPS maps and Apple CarPlay in a first vehicle? I know when to celebrate my wins.
While I like the "DoHonest" backup camera from Amazon due to it's low profile shape and metal chassis, it required a significant teardown of the trunk to mount it where I felt it had to be. The license plate area is a plastic fascia that hides access to the trunk for mounting the camera "properly", so I needed to take a detour to remove that panel and see all the mud and muck inside. Yuck. But now the camera is mounted and I still cannot figure out how to do the wiring so it works. I'll call this a TBD on win/loss.
Final picture of the fascia installed with camera mounted and final view of the stereo installed in the dash coming soon.
Last edited by Diamond Dave; Jan 5, 2024 at 02:15 PM.
Probably the most impactful and noticeable upgrade happened just before our rainy season began in early November. As you recall, I replaced all control arms and front suspension bushings one year ago. The car was also still riding on mismatched tires for the last year like some kind of hobo hoopty. So I called my favorite tire and alignment shop in Portland - Trackside Motorsports - for a set of Continental DWS-06 tires + alignment. Been going to these guys for the last 20yrs. They do a ton of track support for the Porsche guys at PIR and they are really active in Vintage rally. Honestly, I couldn't tell you how much they charge to mount tires or do an alignments - I just don't care. They have ALWAYS done a perfect job. No complaints.
Purchase, mounting and alignment for the 18" tires was a little over $1000. But HOLY HECK! This car drives like a machine now. I finally get what the fuss is about. It is really amazing now. My tech just commented that "Hey, that alignment was totally off"
As an anecdotal side point, I now have these DWS-06 tires on the following cars:
2002 Protege5 - 16"
2003 MazdaSpeed Protege - 17"
2005 CLK320 - 18"
2008 GL320 - 21"
And recently found a set of used set of AMG wheels for my GL320 from a seller in Bend, OR - guess what?! Continental DWS-06 tires with 90% tread!
Last edited by Diamond Dave; Jan 5, 2024 at 02:13 PM.
But HOLY HECK! This car drives like a machine now. I finally get what the fuss is about. It is really amazing now. My tech just commented that "Hey, that alignment was totally off"
Have to agree with you regarding tyres and alignment. I recently had the older than my children Pirellis swapped for brand new Pirelli Cinturato P7 MOs. It's made so much more of a difference than I thought it would. Tyres have been on my list since I got my CLK in May but only recently had the funds to spring for four. Though the old ones looked virtually unworn they must have had the flexibility of hard plastic.
Not much to update for the last 18mos. The car has been running great. My daughter loves driving it.
A few minor issues but nothing putting it in the shop. She was involved in a rear end collision and the other insurance accepted 100% so we are working w/ them on minor repairs (bumper cover and bumpers support.
The horn has been non-op since I got the car back on the road. Worked for half a minute and then nothing. No fuses blown and both horns work w/ alt power. Obvious solution was a CLS63 steering wheel. Figured I would clean the contacts but that didn�t help.
Is it possible to purchase the horn contact mechanism the airbag separately?
2008 CLS63 steering wheel - direct fit. Def need two people or an impact to remove this bolt.
Mercedes SLR McLaren 722 S Is Extremely Rare Example Modified by McLaren
Slideshow: A one-of-one U.S.-spec Mercedes-Benz SLR McLaren Roadster became even rarer after a factory-backed transformation at McLaren's headquarters.