I haven't seen a DIY on a W208 CLK55 so I decided to do it while I was changing mine. We'll start with the driver side first. I have the W209 V.2 intake so ignore that. OEM Valve Cover Gasket Part #'s $16 each:
Passenger Side - A 113 016 02 21
Driver Side - A 113 016 03 21
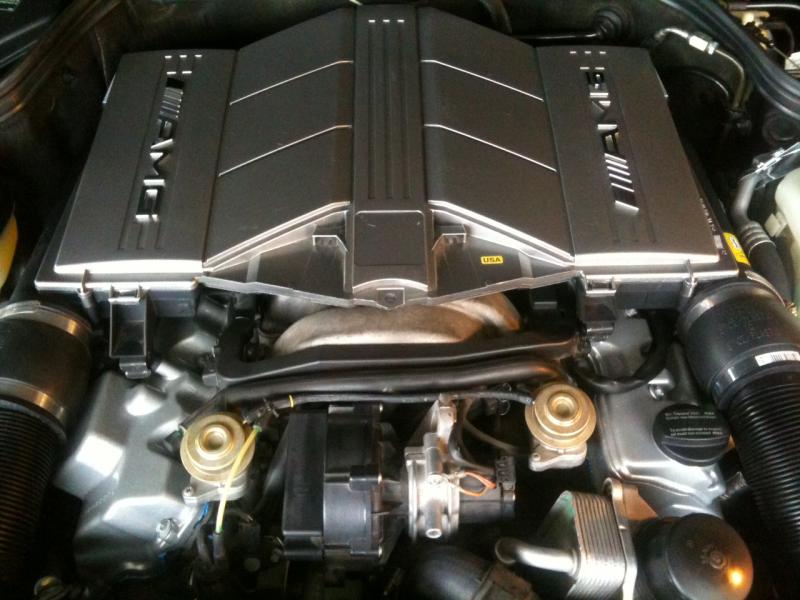
1st Picture - Pop hood and remove intake
2nd Picture - I taped my MAF so nothing would go inside of it. I used electrical tape.
3rd Picture- Take off Coil Packs. the coil pack closest to the bumper i left because you don't need to remove it you can just set it aside.
4th Picture - Removed coil packs off valve cover and i took a rag and wiped away some dirt so when the valve cover comes off it wont get inside.
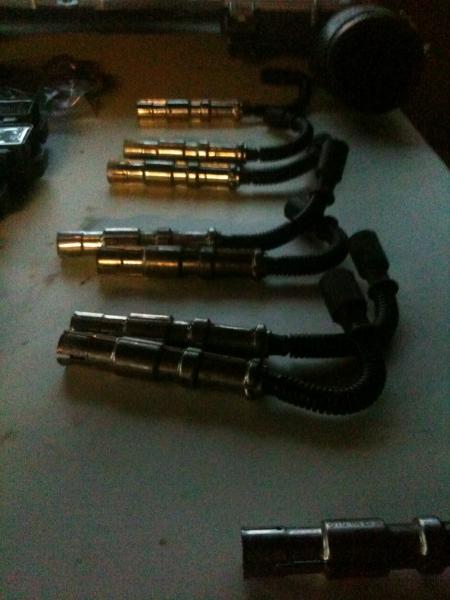
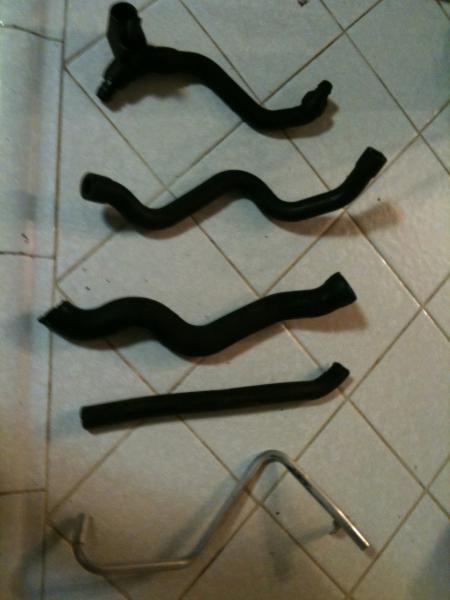
5th picture - You need to take off both rubber hoses on the driver side of the valve cover. There are only 2 rubber hoses that connect to the valve cover. Both hoses were very brittle and broke while taking them off. I suggest order new ones with the gaskets so you wont have to go the dealership like I did for new ones. Here are the 4 hose part #'s, although you only need to remove 3 of them (2 on driver side and 1 one passenger side), i just decided to replace all 4 since I was already at it (for pictures of these hoses refer to last picture on Post #3).
1. A 112 018 03 82 - This is the passenger side crank case rubber hose.
2. A 112 018 01 82 - This is the thin rubber crank hose on the driver side valve cover.
3. A 112 018 04 82 - This is the thick rubber hose on the driver side that connects to the boot under the MAF.
4. A 112 018 02 82 - This is the the rubber hose that connects the intake manifold vacuum hose to the hose fitting and rubber hose #2.
Each hose at the dealership was about $16. You can get them aftermarket for like $5 a piece but I didn't want to go cheap since they deal with the crank case and the valve train.
6th picture - Take off wires. I cleaned mine while I was at it. All of the checked good. Take your time. Some of my wires were on the plugs really good.
Passenger Side - A 113 016 02 21
Driver Side - A 113 016 03 21
1st Picture - Pop hood and remove intake
2nd Picture - I taped my MAF so nothing would go inside of it. I used electrical tape.
3rd Picture- Take off Coil Packs. the coil pack closest to the bumper i left because you don't need to remove it you can just set it aside.
4th Picture - Removed coil packs off valve cover and i took a rag and wiped away some dirt so when the valve cover comes off it wont get inside.
5th picture - You need to take off both rubber hoses on the driver side of the valve cover. There are only 2 rubber hoses that connect to the valve cover. Both hoses were very brittle and broke while taking them off. I suggest order new ones with the gaskets so you wont have to go the dealership like I did for new ones. Here are the 4 hose part #'s, although you only need to remove 3 of them (2 on driver side and 1 one passenger side), i just decided to replace all 4 since I was already at it (for pictures of these hoses refer to last picture on Post #3).
1. A 112 018 03 82 - This is the passenger side crank case rubber hose.
2. A 112 018 01 82 - This is the thin rubber crank hose on the driver side valve cover.
3. A 112 018 04 82 - This is the thick rubber hose on the driver side that connects to the boot under the MAF.
4. A 112 018 02 82 - This is the the rubber hose that connects the intake manifold vacuum hose to the hose fitting and rubber hose #2.
Each hose at the dealership was about $16. You can get them aftermarket for like $5 a piece but I didn't want to go cheap since they deal with the crank case and the valve train.
6th picture - Take off wires. I cleaned mine while I was at it. All of the checked good. Take your time. Some of my wires were on the plugs really good.


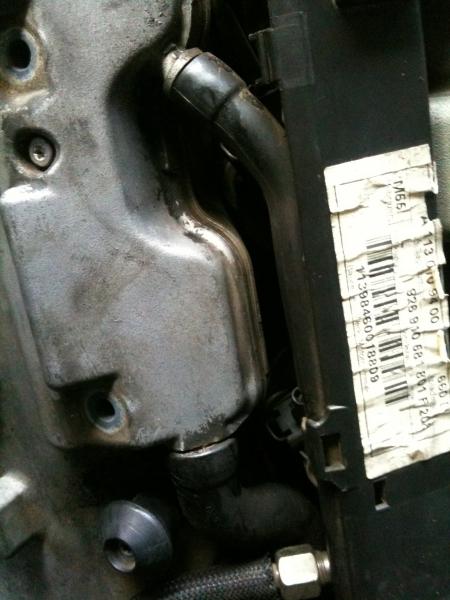
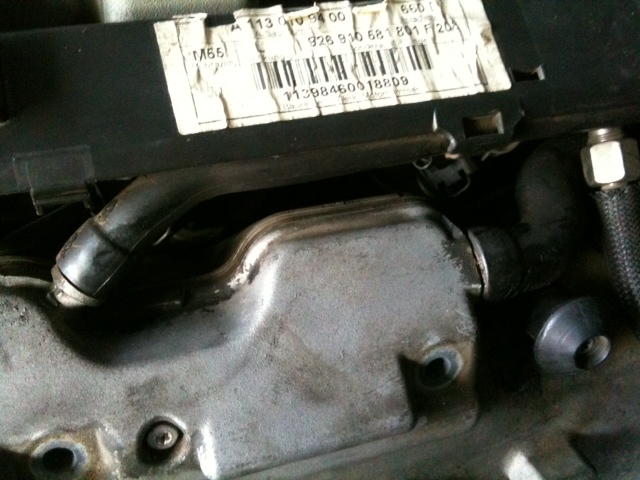
7th picture - Disconnect the vacuum house closest to the driver side (it has a L shaped boot) and disconnect the fuel line (both are in the picture). You MUST disconnect the fuel line in order to install the valve cover back. Its hard to remove the valve cover with the fuel line attached but its possible, you may get dirt in your engine though.
For the 7th picture / reference, after you take off that fuel hose it will pour out aprox. 1/2 cup of fuel. Just let it drain into a cup and make sure the fuel line is perched in a upwards position.
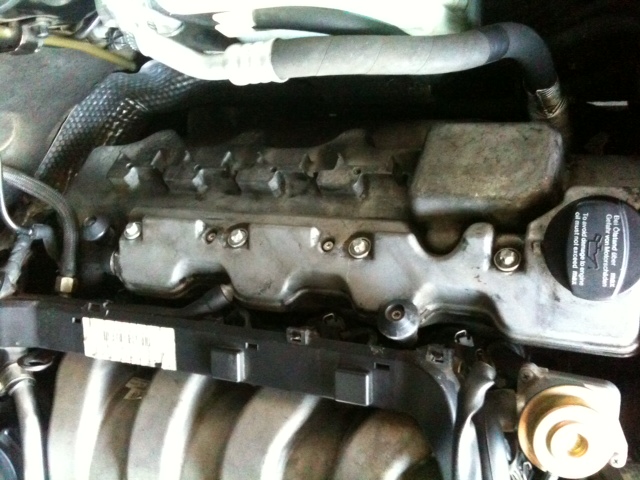
8th picture - Take off valve cover bolts. I soaked them in WD-40 to remove all the build up grime.
9th picture - Remove valve cover. Take your time and watch out for dirt falling into your rockers/springs/ect.
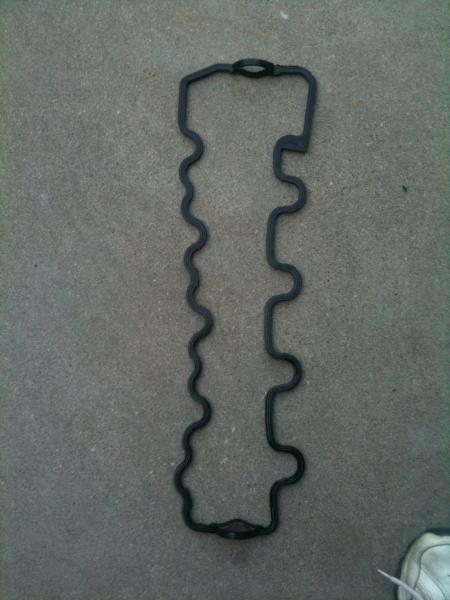
11th picture - Remove gasket from valve cover. It may come off while taking off the valve cover but try and keep it with the valve cover to avoid dirt ingestion.
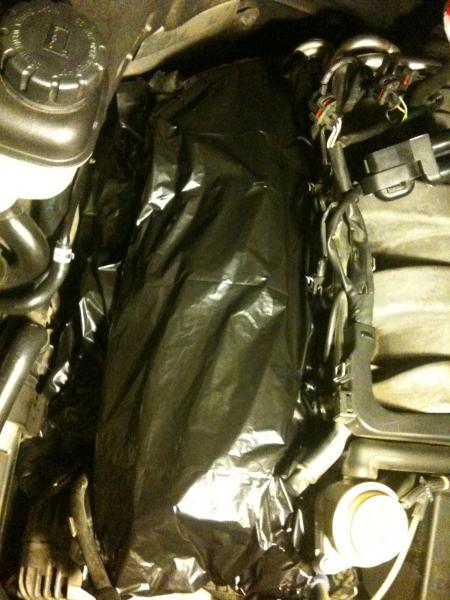
I'm taking my valve covers to get sand blasted/powder coated iridium silver on Monday. Installing should be the same but I'll write up the rest when I get the covers back. Also, while your cleaning various items I would suggest to cover up the head with plastic or something to keep the dust, dirt out as you will be working around it and bumping stuff.
For the 7th picture / reference, after you take off that fuel hose it will pour out aprox. 1/2 cup of fuel. Just let it drain into a cup and make sure the fuel line is perched in a upwards position.
8th picture - Take off valve cover bolts. I soaked them in WD-40 to remove all the build up grime.
9th picture - Remove valve cover. Take your time and watch out for dirt falling into your rockers/springs/ect.
11th picture - Remove gasket from valve cover. It may come off while taking off the valve cover but try and keep it with the valve cover to avoid dirt ingestion.
I'm taking my valve covers to get sand blasted/powder coated iridium silver on Monday. Installing should be the same but I'll write up the rest when I get the covers back. Also, while your cleaning various items I would suggest to cover up the head with plastic or something to keep the dust, dirt out as you will be working around it and bumping stuff.


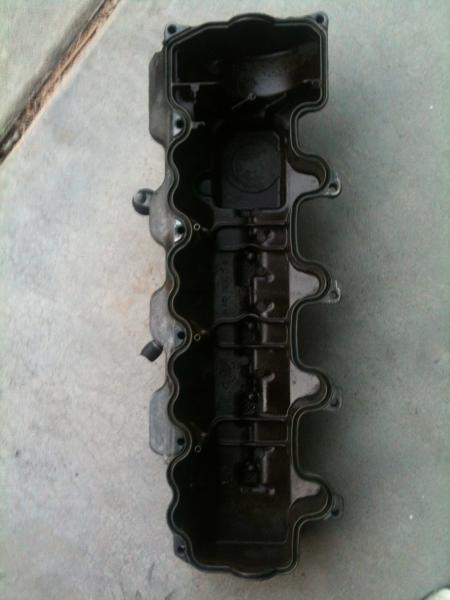
The 1st picture here shows where one of the bolts attaches the valve cover to the head. Make sure its nice and smooth for better adherence when you put on the gasket. Mine has some residual oil and dirt.
The passenger side is cake to take off and put on, it should be self explanatory. Similar to the driver side but way easier. Took me 20 minutes for the passenger side valve cover. There is only 1 rubber hose on the passenger side.
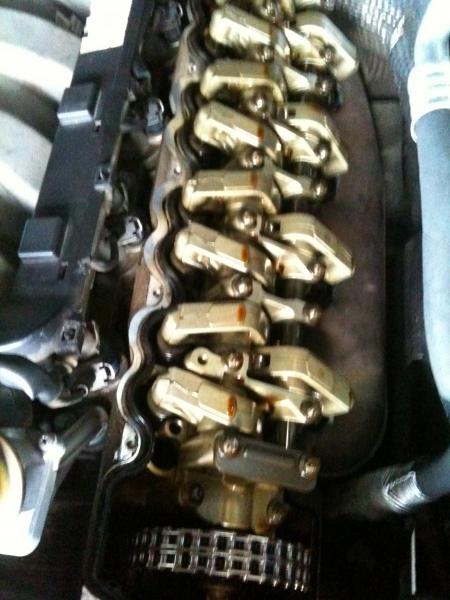
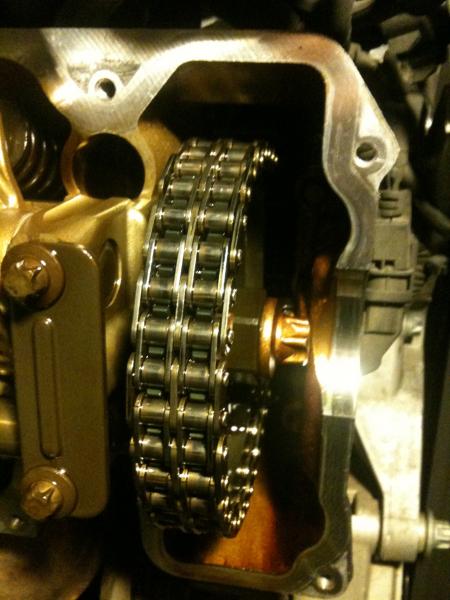
Here are some pics of my springs, rockers, ect.
Make sure to cover it up!
Last picture is the Hoses I suggest you replace. There are a total of 4 hoses but I need to go get the last one.
The passenger side is cake to take off and put on, it should be self explanatory. Similar to the driver side but way easier. Took me 20 minutes for the passenger side valve cover. There is only 1 rubber hose on the passenger side.
Here are some pics of my springs, rockers, ect.
Make sure to cover it up!
Last picture is the Hoses I suggest you replace. There are a total of 4 hoses but I need to go get the last one.


Here's a write up on the crank case. The crank case is the part that attaches to the top of the valve cover. I am told to use special sealant for this part and NOT the blue RTV. The special sealant can be found at the dealership for $20 which will be enough for both sides. Or you can try to use blue RTV. Its up to you:
http://www.benzworld.org/forums/w210...passenger.html
On the first post I gave you all the tubing part numbers if you want to replace all the crank case breathing tubing while your at the valve cover / crank case.
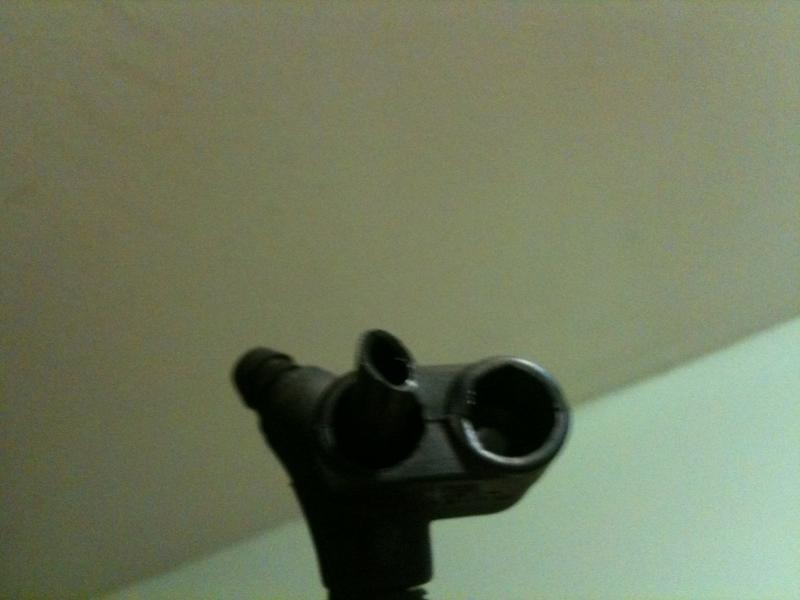
Here is another part to the crank case tubing you will need. It connects the tubing by the MAF.
Part# - A 112 018 00 09
There is also a plastic connecter between A 112 018 01 82 and A 112 018 02 82. I just washed it and reused it. On the driver side valve cover there is a metal tube that runs by the MAF. It doesn't have a part number but it is a part you can take of and clean. It connects to A 112 018 00 09 so I took it off and cleaned it as well.
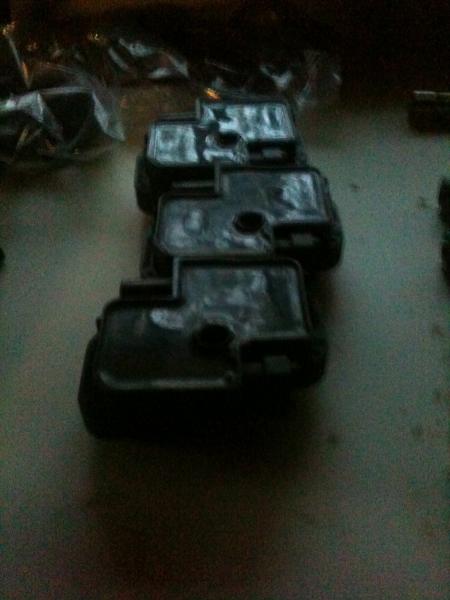
1st picture - All the tubing / connecters that are associated with the crank case's.
2nd Picture - This is a picture of A 112 018 00 09, the part that connects all the tubing by the MAF.
http://www.benzworld.org/forums/w210...passenger.html
On the first post I gave you all the tubing part numbers if you want to replace all the crank case breathing tubing while your at the valve cover / crank case.
Here is another part to the crank case tubing you will need. It connects the tubing by the MAF.
Part# - A 112 018 00 09
There is also a plastic connecter between A 112 018 01 82 and A 112 018 02 82. I just washed it and reused it. On the driver side valve cover there is a metal tube that runs by the MAF. It doesn't have a part number but it is a part you can take of and clean. It connects to A 112 018 00 09 so I took it off and cleaned it as well.
1st picture - All the tubing / connecters that are associated with the crank case's.
2nd Picture - This is a picture of A 112 018 00 09, the part that connects all the tubing by the MAF.
MBWorld Fanatic!
betrezra
MBWorld Fanatic!
close
Jul 1, 2020
- Join DateNov 2009
- LocationTexas
- Posts:3,589
-
iTrader Positive Feedback0
-
iTrader Feedback Score(0)
- Vehicle(s) I driveC63 507 AMG DA Car #19
-
Likes:113
-
Liked:68 Times in 44 Posts
great write up!
You're motor looks super clean inside.... no residue!
You're motor looks super clean inside.... no residue!
Thanks Betrezra!
Heres a few snaps of the valve cover. It came back today. Installation DIY soon to come! Stay posted!!
Heres a few snaps of the valve cover. It came back today. Installation DIY soon to come! Stay posted!!


MBWorld Fanatic!
Is that powder coating or paint on the valve covers? Whichever..I would not advise against any coating on the valve cover underside.
Powder Coating Silver...
I got some overspray on the underside. No big deal, I hope haha =D
I got some overspray on the underside. No big deal, I hope haha =D
MB World Stories
The Best of Mercedes & AMG
Explore

Manual Mercedes? 6 Times Sindelfingen Let Drivers Have All The Fun
Verdad Gallardo
Mercedes SLR McLaren 722 S Is Extremely Rare Example Modified by McLaren
Verdad Gallardo
8 Classic Boxy Mercedes Designs That Have Aged Like Fine Wine
Verdad Gallardo
Flawlessly Restored Mercedes 190E Evo II Heads to Auction
Verdad Gallardo
Electric Mercedes C-Class Unveiled: 11 Things You Need to Know
Verdad Gallardo
Mercedes EQS Gets A Major Update: Everything You Need to Know
Verdad Gallardo
5 Underrated Mercedes-Benz Models That Don't Get the Love They Deserve
Verdad Gallardo
Mercedes 300D Has Pushed Well Past 1 Million Miles and It Ain't Stopping
Verdad Gallardo
10 Most Reliable Mercedes-Benz Models You Can Buy Used
Verdad Gallardo
MBWorld Fanatic!
If the overspray on the underside scratches off with your fingernail, I would advise you against installing them. Think about the heat cycles and oil at 60+ psi hitting the underside of the valve covers over time, that paint will eventually come off.
I just went through this B.S with my own valve covers and there is no way I would jeopardize the engine long term and paint flakes inside the engine for a poorly done powder coating job.
I just went through this B.S with my own valve covers and there is no way I would jeopardize the engine long term and paint flakes inside the engine for a poorly done powder coating job.
Ya there was some overspray but it was minimal. Just some small amounts
of flakes. Like dust almost. Washed it off with water. Maybe some
residual left over after that. Not a big deal. It was heated to 500
degrees so im sure its gonna be ok.
Here is how to finish it off:
NOTE: Before you get started with the installation I would advise
trying to put the valve cover on a few times, avoiding contact with the
gasket and valve train.
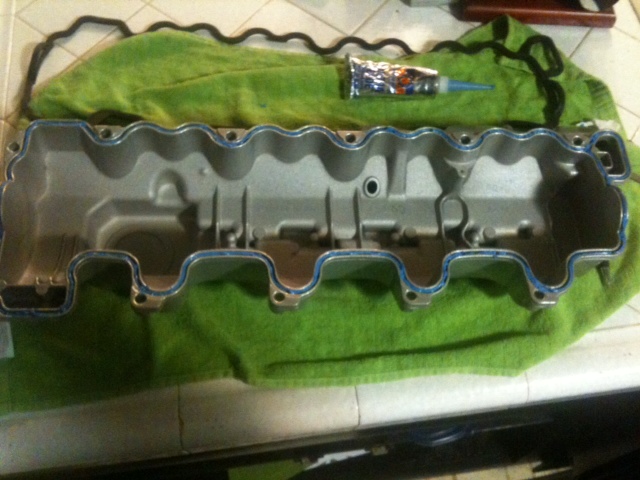
1st picture - The OEM gasket I removed from the valve covers didnt have
sealent. I used the blue kind. Its rated up to 400 degrees. New gasket in background...
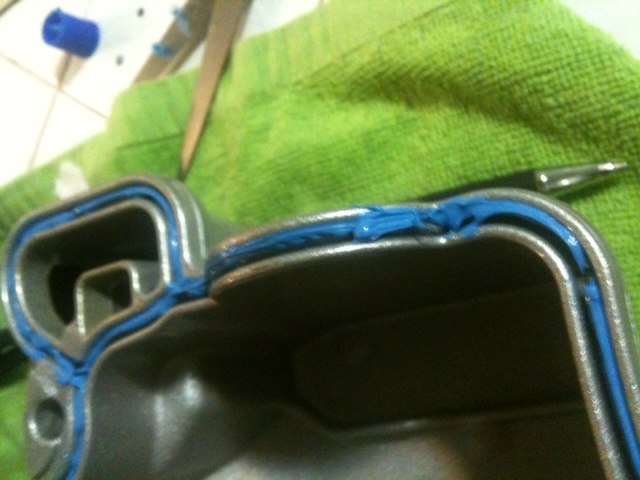
2nd picture - Make sure to get the sealent in the channels but dont
overflow them. Once you have the sealent in the channels, just press
the gasket into the valve cover but dont press to hard just enough to
seat it. Then put some sealent on top of the gasket.
3rd picture - Put the gasket on but be CAUTIOUS not to get sealent on the valve train. Its a little tricky on both sides. Then I hooked up my hoses I took off, replaced broken ones.
BOLT TORQUE: I followed the directions on the sealent. You HAND tighten the bolts. Then wait a hour and then I did ONE full turn after I let it dry for a hour. It doesnt leak after several hundred miles of driving. I looked up the OEM specs for these bolts. I think maybe a few were .01 off but the method I used was pretty accurate.
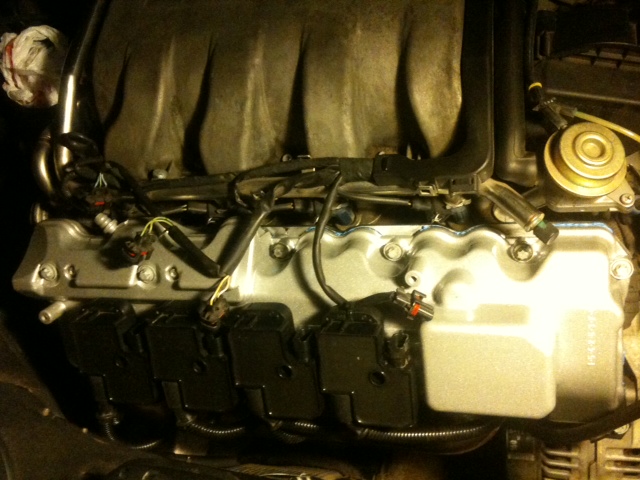
4th picture - Put the coil packs/wires back on. I noticed that my coil pack clips broke. I just used electrical glue, not that much, to hold them in place until i can fix it. I cleaned up the coil packs and wires.
5th picture - All done.
of flakes. Like dust almost. Washed it off with water. Maybe some
residual left over after that. Not a big deal. It was heated to 500
degrees so im sure its gonna be ok.
Here is how to finish it off:
NOTE: Before you get started with the installation I would advise
trying to put the valve cover on a few times, avoiding contact with the
gasket and valve train.
1st picture - The OEM gasket I removed from the valve covers didnt have
sealent. I used the blue kind. Its rated up to 400 degrees. New gasket in background...
2nd picture - Make sure to get the sealent in the channels but dont
overflow them. Once you have the sealent in the channels, just press
the gasket into the valve cover but dont press to hard just enough to
seat it. Then put some sealent on top of the gasket.
3rd picture - Put the gasket on but be CAUTIOUS not to get sealent on the valve train. Its a little tricky on both sides. Then I hooked up my hoses I took off, replaced broken ones.
BOLT TORQUE: I followed the directions on the sealent. You HAND tighten the bolts. Then wait a hour and then I did ONE full turn after I let it dry for a hour. It doesnt leak after several hundred miles of driving. I looked up the OEM specs for these bolts. I think maybe a few were .01 off but the method I used was pretty accurate.
4th picture - Put the coil packs/wires back on. I noticed that my coil pack clips broke. I just used electrical glue, not that much, to hold them in place until i can fix it. I cleaned up the coil packs and wires.
5th picture - All done.