


UGH, too many projects

Thread Starter
Member
Joined: Jun 2007
Posts: 83
Likes: 0
w212 E550
UGH, too many projects
Well all as some of you may remember I was basically given a cherry little 1989 300E with barely 100K on the clock about a 6 months ago.
she started out looking like this the day I brought her home

Well Ive been lurkin lately and finally decided to start doing some mods.
1st was a S600 style grill

Smoked Taillights

Started working on the new System, Kicker ZX 400.4 and ZX 500.1 amp Stinger Cap, all wired with 1/0 New Optima Yellow Top

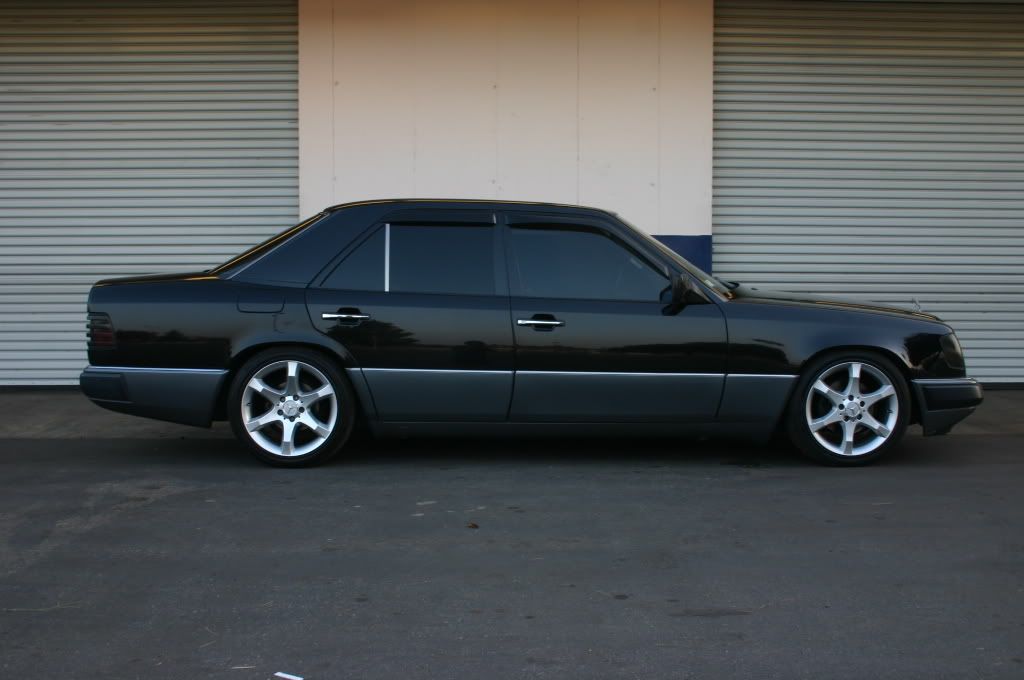
Temporary set of shiny wheels (putting on staggered 17" AMG's)

Well the interior of the car was very nice I mean short of perfect. except for one thing..
The Faded and Cracked finish on the wood, So having a woodworking background, I decided to tackle the feat of restoring all of the wood myself and I must say it came out BEAUTIFUL!! I actually lightened it up a tad, but check it out.
sitting in the garage COOKING with the stripper on it.

A little comparison of before and after.

And finally Installed! the grain came out so nice its almost 3d (of course after about 80 man hours of prep and spraying 30 coats of acryllic automotive clear and color sanding and buffing, ugh....

Next up on the list next week.
Cladding from a 91+ E class (when I finally get all the parts together)
Euro Headlights and Clear Corners (in the mail right now)
Wald V4 Kit (sitting in garage)
500E Swaybars (already installed)
Once all of that is done, NEW PAINT JOB (I am thinking same color with color matched handles and mirrors)
So progress continues... O.K. now Im going to take a NAP!!
she started out looking like this the day I brought her home
Well Ive been lurkin lately and finally decided to start doing some mods.
1st was a S600 style grill
Smoked Taillights
Started working on the new System, Kicker ZX 400.4 and ZX 500.1 amp Stinger Cap, all wired with 1/0 New Optima Yellow Top
Temporary set of shiny wheels (putting on staggered 17" AMG's)
Well the interior of the car was very nice I mean short of perfect. except for one thing..
The Faded and Cracked finish on the wood, So having a woodworking background, I decided to tackle the feat of restoring all of the wood myself and I must say it came out BEAUTIFUL!! I actually lightened it up a tad, but check it out.
sitting in the garage COOKING with the stripper on it.
A little comparison of before and after.
And finally Installed! the grain came out so nice its almost 3d (of course after about 80 man hours of prep and spraying 30 coats of acryllic automotive clear and color sanding and buffing, ugh....
Next up on the list next week.
Cladding from a 91+ E class (when I finally get all the parts together)
Euro Headlights and Clear Corners (in the mail right now)
Wald V4 Kit (sitting in garage)
500E Swaybars (already installed)
Once all of that is done, NEW PAINT JOB (I am thinking same color with color matched handles and mirrors)
So progress continues... O.K. now Im going to take a NAP!!
Thread Starter
Member
Joined: Jun 2007
Posts: 83
Likes: 0
w212 E550
new updates
Well, just finished up the rear license plate filler panel from a 94,
and installed the side cladding update.
next step after t-giving is fitting the Wald V4 Kit, then off to the paint shop.
Waiting on my 6 pin plug sockets so I can install the Euro HEadlights, which I will probably not do until after paint.
and installed the side cladding update.
next step after t-giving is fitting the Wald V4 Kit, then off to the paint shop.
Waiting on my 6 pin plug sockets so I can install the Euro HEadlights, which I will probably not do until after paint.
Last edited by papromike; Nov 26, 2008 at 07:53 PM. Reason: license
MBWorld Fanatic!
Joined: Dec 2006
Posts: 1,907
Likes: 2
From: So Cal
92 500e, 95 E34 525I Touring
Awh man you should have told me you needed 6 pins. They are the same sockets that the tail lights use, you could have picked them up at the junkyard too for like $0.50. Anyway, glad to see its making major progress. What color are you going for with paint?
Thread Starter
Member
Joined: Jun 2007
Posts: 83
Likes: 0
w212 E550
I Still havent decided yet on the color, may go same color, but I also like the color Smoked Silver..
at this point, I just havent made up my mind...
The next is wheels... just cant make up my mind either..
here are my choices.
Hammer Wheels

Mono blocks

something a little more modern with color matched centers.

at this point, I just havent made up my mind...
The next is wheels... just cant make up my mind either..
here are my choices.
Hammer Wheels
Mono blocks
something a little more modern with color matched centers.
Last edited by papromike; Nov 26, 2008 at 06:06 PM. Reason: adding
Trending Topics
MB World Stories
The Best of Mercedes & AMG

Dubai Tuner Gives the Mercedes G-Class An Entirely New Look
Verdad Gallardo
Six Gift Ideas Your AMG Loving Dad or Grad Will Cherish

7 Craziest Things AMG Gas Ever Built
Verdad Gallardo
New Electric Mercedes-AMG GT 4-Door Coupe Unveiled: 10 Things You Need to Know
Verdad Gallardo
6 Mercedes Models That Did NOT Age Well (But Are Somehow Still Cool)
Verdad Gallardo
Manual Mercedes? 6 Times Sindelfingen Let Drivers Have All The Fun
Verdad Gallardo
Mercedes SLR McLaren 722 S Is Extremely Rare Example Modified by McLaren
Verdad Gallardo
8 Classic Boxy Mercedes Designs That Have Aged Like Fine Wine
Verdad Gallardo
Flawlessly Restored Mercedes 190E Evo II Heads to Auction
Verdad GallardoMember
Joined: May 2005
Posts: 151
Likes: 3
From: Atlanta, Ga
'16 E350 �07 S550 �21 GLE580
Mono blocks 
Looks really good by the way. Are you going to update the bumpers so that they have the matching chrome strips?
Looks really good by the way. Are you going to update the bumpers so that they have the matching chrome strips?
Last edited by vanwiek; Nov 29, 2008 at 01:48 AM.
MBWorld Fanatic!
Joined: Dec 2006
Posts: 1,907
Likes: 2
From: So Cal
92 500e, 95 E34 525I Touring
Hammers all the way.
When I got my car, I had been set on a set of 2007 C350 sport wheels that I saw around a few times. Now that Ive had them for a while, I realized that these cars need something with more face to them.
Unless of course you have some big sexy brakes to show off.
I still think theyre really nice, classy/aggressive wheels, just not for our cars. Anyone mind chopping on some hammers for uhh, comparative reference?
Thread Starter
Member
Joined: Jun 2007
Posts: 83
Likes: 0
w212 E550
I have the updated bumpers, so the answer to that question is
I am installing a full body kit also though
It will all be a monochrome look.
Im going for this look.


Thread Starter
Member
Joined: Jun 2007
Posts: 83
Likes: 0
w212 E550
Got Em really (dirt) cheap, and they are the right offset with brand new tires on them
They will be de-chromed, My Buddy works for a machine shop/powdercoating place and they will be mildly media blasted, then silver powder coated in the centers..
No problemo...
MBWorld Fanatic!
Joined: Feb 2007
Posts: 1,297
Likes: 1
From: Connecticut, New Haven
95' AMG SeeThreeSix
or as Mark would say....... FTW!!! haha


MBWorld Fanatic!
Joined: Feb 2006
Posts: 1,325
Likes: 2
From: Seattle
1990 300ce
Excellent work on the console.
Can you please let me know what kind of stripper you used? This MIGHT be a project I'll undertake someday. Except if I do it, I'm so **** that I would probably want to do it on all of the pieces and put a moderate stain or dye on them to make sure they all match.
Anyway, yeah. If you could let me know what kind of stripper you used, that would be a big help.
Thread Starter
Member
Joined: Jun 2007
Posts: 83
Likes: 0
w212 E550
I stripped all of the pieces to make them all match.
the factory uses a neutral wood filler to fill in all the grain on the wood, but unfortunately the drawback to that is is takes away alot of the detail in the wood.
For everything I used the following
Jasco brand laquer stripper, its a gell like substance and you will have to re-apply it about 5x's on each piece.
Pour it on liberally and let it become white, then removed it with 0000 steel wool. Again, I did this about 5-6 times per piece.
Once the wood was completely clear of the old laquer, I then rubbed the wood down with 0000 steel wool again and then rubbed in 3-4 coats (again with the steel wool) of Dark Walnut Stain. I did a buddy of mines in Ebony stain and it also looked amazing.
Once that stain is dry I started laying down coats of automotive clear laquer.
I used Duplicolor Clear in a spray can, started with a light spray and then progressivly (over a period of about a week) laid on coats of the clear. Once about 5 good coats of clear were laid down, I Lightly sanded with 320 grit sandpaper to remove the fish eyes caused by the pourous wood.
After each of 2-3 coats I sanded again allowing approx 1-2 hours between coats.
Once I got to the desired thickness, I begain sanding with 600 grit between coats and then about another 2-3 coats.
Once all of that was dried (about 1-2 days) I buffed it with my bench buffer and meguiars show car glaze until shiny.
Overall this process took me about a full week to do, but the results were very nice and the wood turned out beautiful.
So here is what you need
0000 steel wool
Jasco Laquer Stripper
Stain ( your choice of color)
320, 600 grit sandpaper
Automotive grade Clear Laquer
patience
MBWorld Fanatic!
Joined: Feb 2006
Posts: 1,325
Likes: 2
From: Seattle
1990 300ce
Thread Starter
Member
Joined: Jun 2007
Posts: 83
Likes: 0
w212 E550
Installed my Euro Headlights this weekend, to check for fit..
Turned out pretty good, Now I get to pull it all apart next week for Paint.

Got all of the wood installed and a set of OE mercedes W124 Floor Mats with MB logos

Wood turned out really nice, the interior of the car looks Brand New.. I am very pleased with how it turned out, I cant wait to get the springs, wheels, new tires, body kit and paint on it..
Turned out pretty good, Now I get to pull it all apart next week for Paint.
Got all of the wood installed and a set of OE mercedes W124 Floor Mats with MB logos
Wood turned out really nice, the interior of the car looks Brand New.. I am very pleased with how it turned out, I cant wait to get the springs, wheels, new tires, body kit and paint on it..
Last edited by papromike; Dec 6, 2008 at 08:22 PM. Reason: add


