


DIY upper and lower Balljoints

Thread Starter
Super Member


Joined: Dec 2005
Posts: 806
Likes: 27
From: Rochester, NY
2009 S550 AMG sport pckg. 2014 Ford F-150 Lariat Supercrewcab
DIY upper and lower Balljoints
Pics soon to come
I had to replace the two upper balljoints on my 03 e320 and the lower ball joint so i figured i would change all four.
the required tools are:
13mm socket (deep and shallow)
17mm socket (deep and shallow)
2 21mm sockets
set of torx sockets and bits
3 foot breaker bar
2 1/2 foot breaker bar
long rachet
short rachet
air tools (not necessary but highly reccomended)
mercedes benz ball joint press (no choice if you don't have it, don't do it!!)
screw type ball joint separator (same as above)
Thread Starter
Super Member
Joined: Dec 2005
Posts: 806
Likes: 27
From: Rochester, NY
2009 S550 AMG sport pckg. 2014 Ford F-150 Lariat Supercrewcab
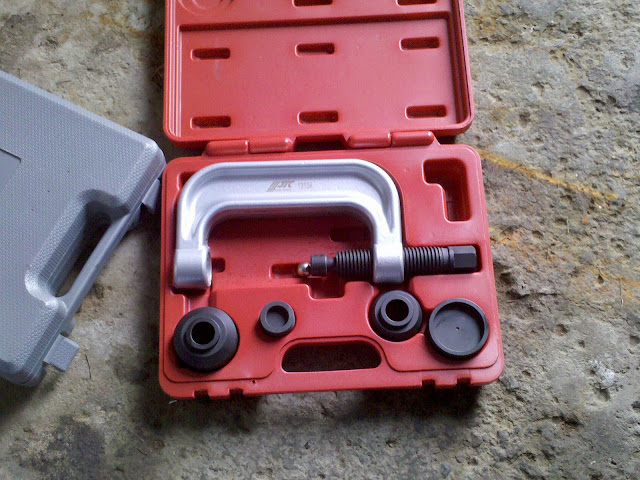
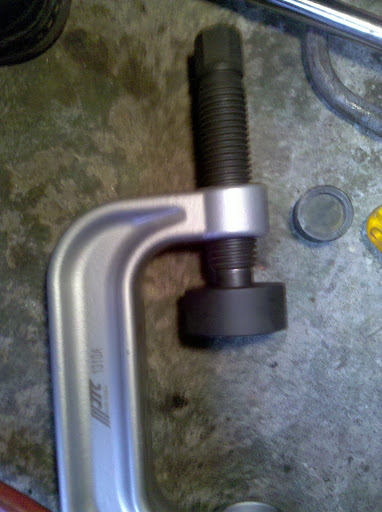
this is the press tool it is absolutely imperative you have this because the lower balljoints are pressed in and without it you'd need a shop press.
Thread Starter
Super Member
Joined: Dec 2005
Posts: 806
Likes: 27
From: Rochester, NY
2009 S550 AMG sport pckg. 2014 Ford F-150 Lariat Supercrewcab
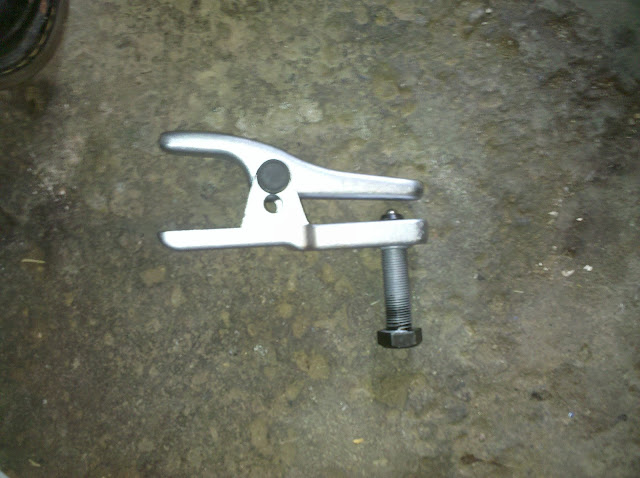
here's the ball joint separator, this one worked awesome!!!! It didn't damage a single boot and it got even the toughest ball joint out (warning though when a balljoint pops out it is violent almost like a gun shot!!)
Thread Starter
Super Member
Joined: Dec 2005
Posts: 806
Likes: 27
From: Rochester, NY
2009 S550 AMG sport pckg. 2014 Ford F-150 Lariat Supercrewcab
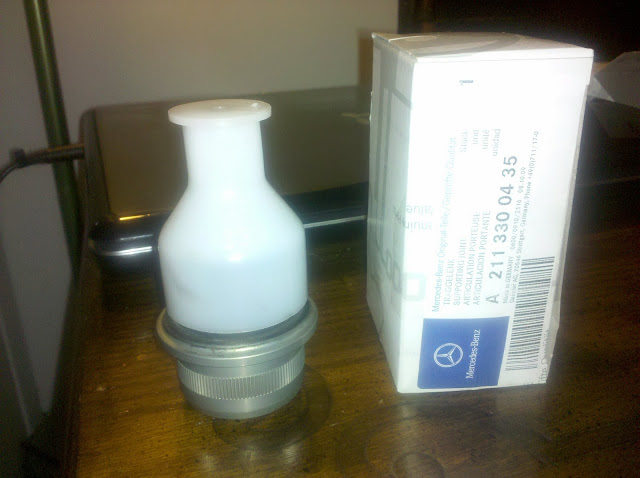
Parts:
My upper joints were replaced under warranty due to some TCB the dealer didn't give me detail about so i got away with the bolted upper joints. Some of you may have riveted joints. I am not sure if you can drill the rivets out but the dealer claims you need to replace the entire control arm, so those of you who have rivets i am not sure what to tell you.
part no.
Thread Starter
Super Member
Joined: Dec 2005
Posts: 806
Likes: 27
From: Rochester, NY
2009 S550 AMG sport pckg. 2014 Ford F-150 Lariat Supercrewcab
lower ball joints:
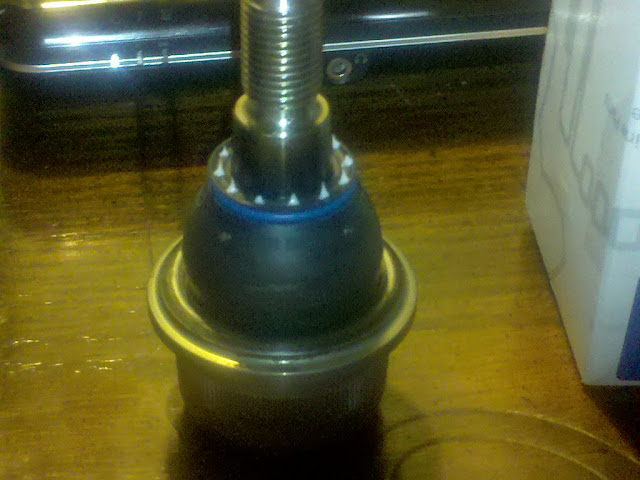
this gets press fitted into the steering knuckle which is why you need the press... I bought the press for 145 bucks from ebay, you could do it with a shop press but you still need the cups that come with the press and you have to take apart more links to get the steering knuckle completely out
this gets press fitted into the steering knuckle which is why you need the press... I bought the press for 145 bucks from ebay, you could do it with a shop press but you still need the cups that come with the press and you have to take apart more links to get the steering knuckle completely out
Thread Starter
Super Member
Joined: Dec 2005
Posts: 806
Likes: 27
From: Rochester, NY
2009 S550 AMG sport pckg. 2014 Ford F-150 Lariat Supercrewcab
Now onto the meat and potatoes: Before we start i'll just tell you that it wasn't too bad doing this and now the car feels waaaaay more responsive. I made two stupid mistakes that cost me time, but hindsight is 20/20, ill point out the mistakes in the procedure. It is tedious and you cannot make any mistakes so pay attention to detail or it'll take you a long time to do it. I started at 11am and got done at 7pm if i didn't make the two mistake i probably would have gotten it done before 5pm.
First turn on your emergency brake after parking the car in a good spot in yoyr garage.
Now pop the hood and open the windows all the way because you are going to be turning the SBC brakes on and off and cannot open the doors. if you forget anthing in the car that way you can just reach in and not open the door
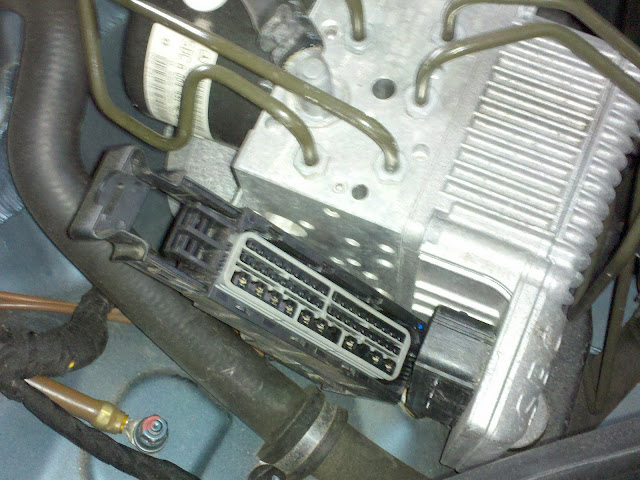
turn the car off and hide the key!! don't touch it wait til the instrument cluster turns off after you step out of the door, it may take a few minutes
after the instrument cluster turns off while you're peaking at it from outside of the car, go ahead and unplug the SBC unit
First turn on your emergency brake after parking the car in a good spot in yoyr garage.
Now pop the hood and open the windows all the way because you are going to be turning the SBC brakes on and off and cannot open the doors. if you forget anthing in the car that way you can just reach in and not open the door
turn the car off and hide the key!! don't touch it wait til the instrument cluster turns off after you step out of the door, it may take a few minutes
after the instrument cluster turns off while you're peaking at it from outside of the car, go ahead and unplug the SBC unit
Thread Starter
Super Member
Joined: Dec 2005
Posts: 806
Likes: 27
From: Rochester, NY
2009 S550 AMG sport pckg. 2014 Ford F-150 Lariat Supercrewcab
next break the lugnuts loose and jack the car up on jackstands
Take the tires off and it should look something like this
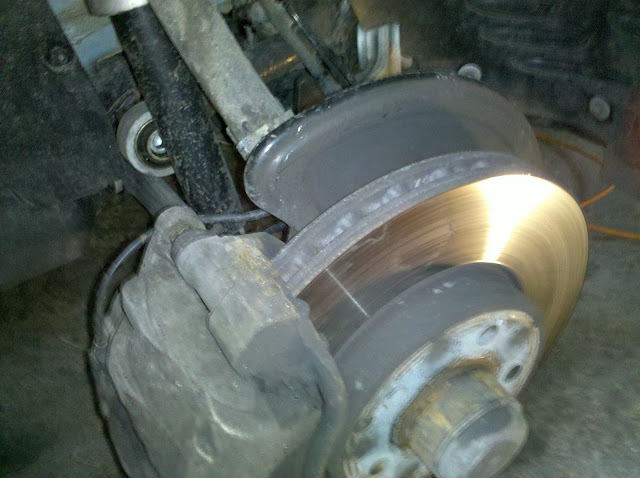
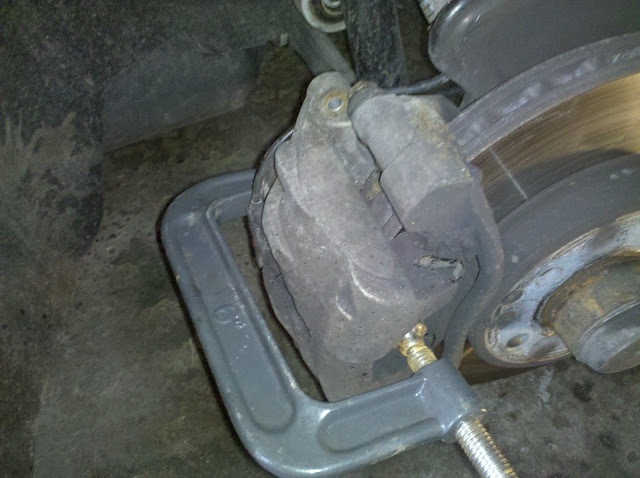
Now just compress the caliper just enough take it off and hang it to the side with your mercedes benz ceritified coat hanger (sarcasm)
Take the tires off and it should look something like this
Now just compress the caliper just enough take it off and hang it to the side with your mercedes benz ceritified coat hanger (sarcasm)
Trending Topics
Thread Starter
Super Member
Joined: Dec 2005
Posts: 806
Likes: 27
From: Rochester, NY
2009 S550 AMG sport pckg. 2014 Ford F-150 Lariat Supercrewcab
oh i forgot to mention that you need a 13mm socket to break the caliper bolts free!!! and leave the wheel straight
Now you should have the caliper out of the way. I didnt bother taking the rotors or the pads off cause the assembly hangs and it it'd be a pain in the nuts to get the brake bracket out so id suggest leaving it in there:
Now you should have the caliper out of the way. I didnt bother taking the rotors or the pads off cause the assembly hangs and it it'd be a pain in the nuts to get the brake bracket out so id suggest leaving it in there:
MB World Stories
The Best of Mercedes & AMG

8 Oddball Mercedes Ideas That Actually Made it to Production
Verdad Gallardo
Dubai Tuner Gives the Mercedes G-Class An Entirely New Look
Verdad Gallardo
Six Gift Ideas Your AMG Loving Dad or Grad Will Cherish

7 Craziest Things AMG Gas Ever Built
Verdad Gallardo
New Electric Mercedes-AMG GT 4-Door Coupe Unveiled: 10 Things You Need to Know
Verdad Gallardo
6 Mercedes Models That Did NOT Age Well (But Are Somehow Still Cool)
Verdad Gallardo
Manual Mercedes? 6 Times Sindelfingen Let Drivers Have All The Fun
Verdad Gallardo
Mercedes SLR McLaren 722 S Is Extremely Rare Example Modified by McLaren
Verdad Gallardo
8 Classic Boxy Mercedes Designs That Have Aged Like Fine Wine
Verdad Gallardo
Thread Starter
Super Member
Joined: Dec 2005
Posts: 806
Likes: 27
From: Rochester, NY
2009 S550 AMG sport pckg. 2014 Ford F-150 Lariat Supercrewcab
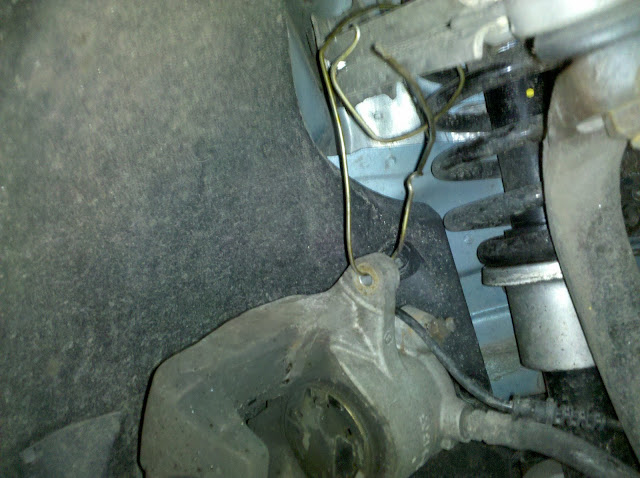
Actually i guess you can say i made three mistakes because i accidentally yanked out the brake pad wear sensors and will have to buy new ones tomorrow but no biggie, try to remember to pry it out of the brake pad
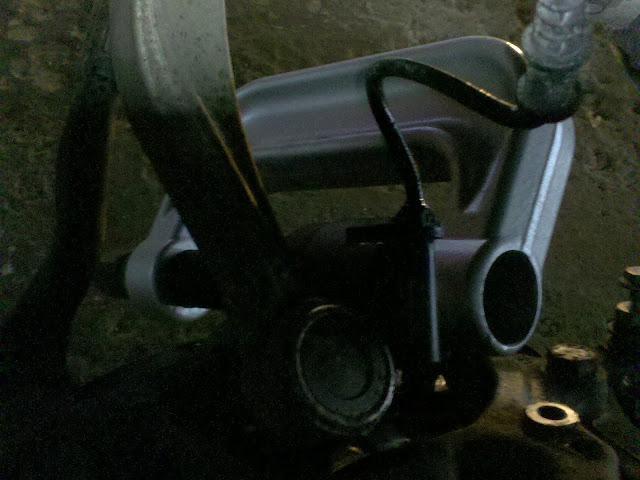
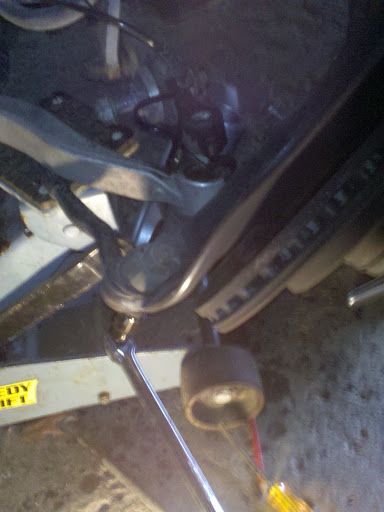
Next we have to get the wheel speed/abs sensor out so it does not stretch or ruin
It needs an allen wrench i'll post the size of the allen wrench later:
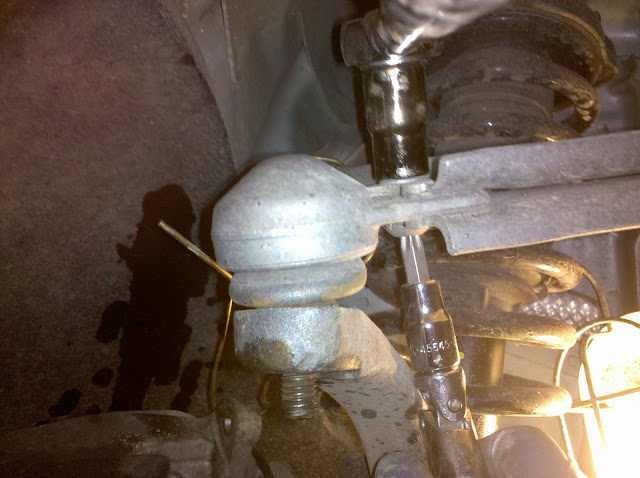
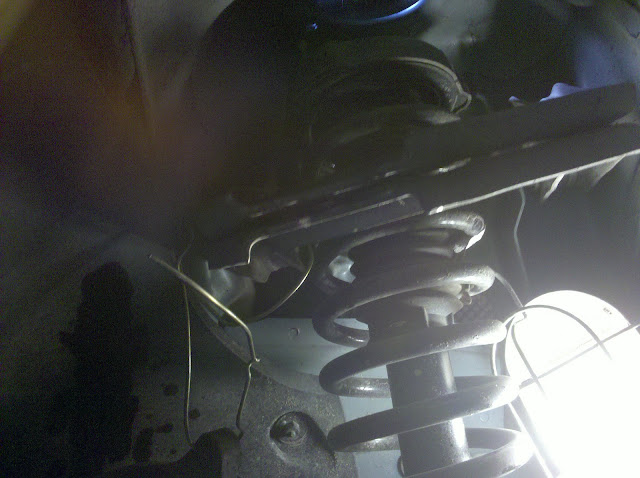
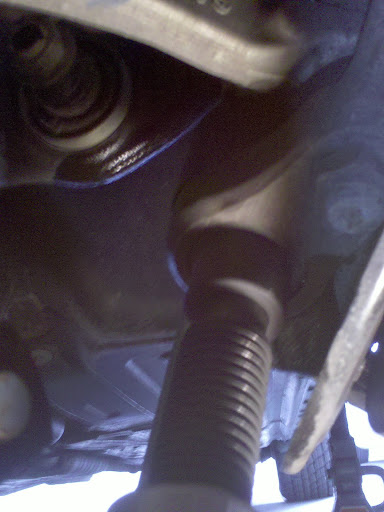
the bolt that is right by the wire is holding the sensor in, i just tapped it with a hammer and it broke loose, the bottom nut is holding the balljoint and the structure to the left is the torque strut which you do not need to touch.
Next you take off the protective plastic shield, the clip is such that you squeeze and pry up with a screwdriver and it pops off
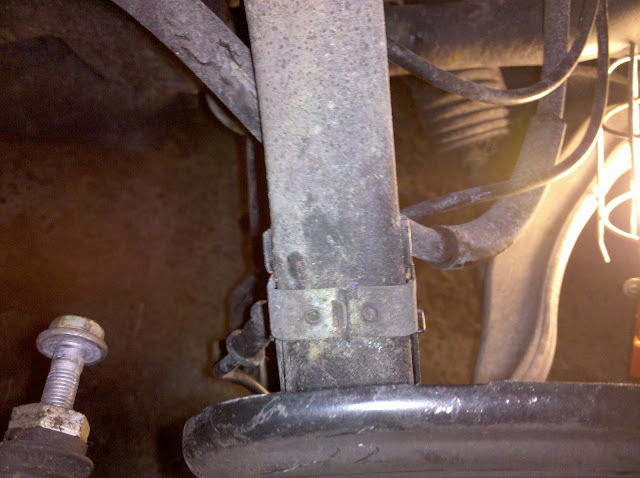
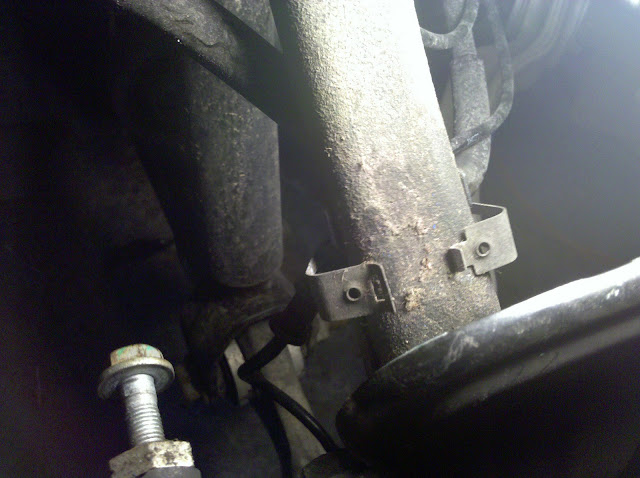
The sensor is in there good even after you loosen the bolt cause theres adhesive and dust caked in, i just worked it with my hand, do not pry on it with a tool because it is fragile
Next we have to get the wheel speed/abs sensor out so it does not stretch or ruin
It needs an allen wrench i'll post the size of the allen wrench later:
the bolt that is right by the wire is holding the sensor in, i just tapped it with a hammer and it broke loose, the bottom nut is holding the balljoint and the structure to the left is the torque strut which you do not need to touch.
Next you take off the protective plastic shield, the clip is such that you squeeze and pry up with a screwdriver and it pops off
The sensor is in there good even after you loosen the bolt cause theres adhesive and dust caked in, i just worked it with my hand, do not pry on it with a tool because it is fragile
Thread Starter
Super Member
Joined: Dec 2005
Posts: 806
Likes: 27
From: Rochester, NY
2009 S550 AMG sport pckg. 2014 Ford F-150 Lariat Supercrewcab
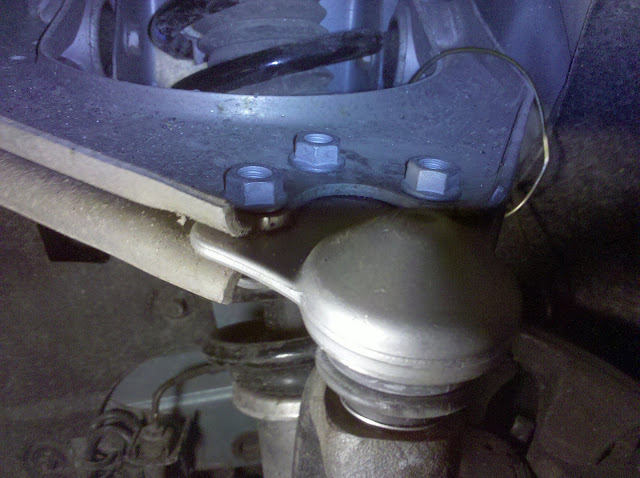
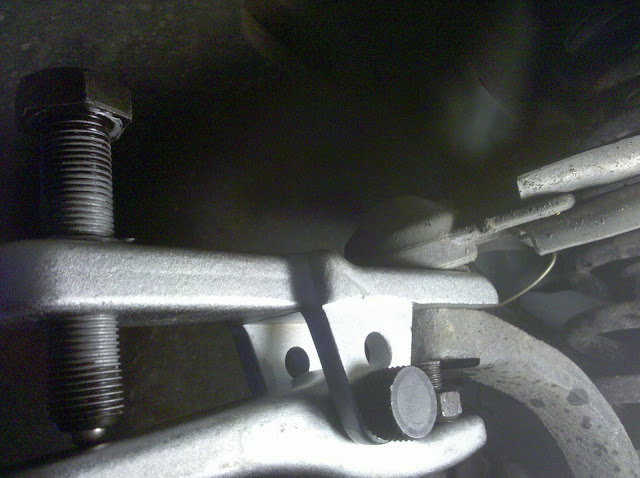
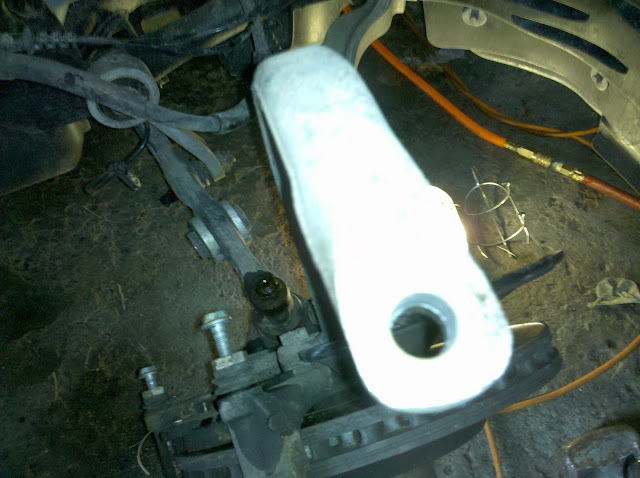
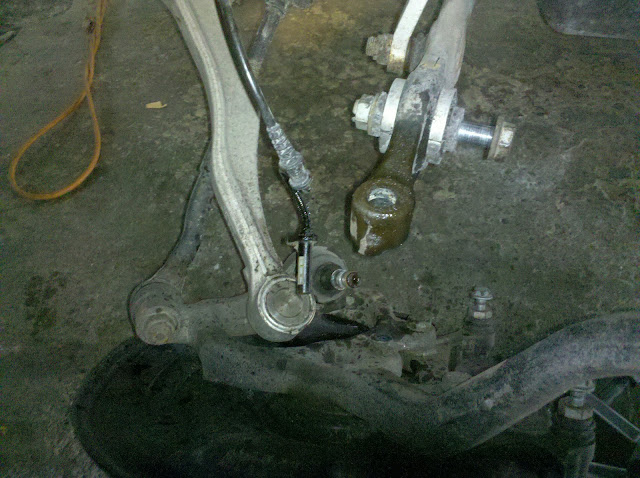
ok now the first step is to get the upper ball joint off so you can just let the steering knuckle flop down and then you will have access to the strut and the lower ball joint. The steering knuckle will hang on the tie rod and torque strut arm after the lower ball joint is free. If you want, put a jack under them to support it and not put all the stress on the joints... i just let it flop. Ok so to take off the upper ball joints you can either take the one nut on the joint off and pop it out, or you loosen the three bolts on the control arm. Either way you have to do both. I decided to loosen the bolts then pop the link out. First loosen the nut on the link with a 17mm socket. The bolts on the control arm are torx on one end and hex nuts on the other. Use a 13mm hex socket and a torx. it'll be a tight fit for one of the torx heads on the bottom, just use a u-joint
Last edited by Nickthegreek; Jan 19, 2010 at 10:48 PM.
Thread Starter
Super Member
Joined: Dec 2005
Posts: 806
Likes: 27
From: Rochester, NY
2009 S550 AMG sport pckg. 2014 Ford F-150 Lariat Supercrewcab
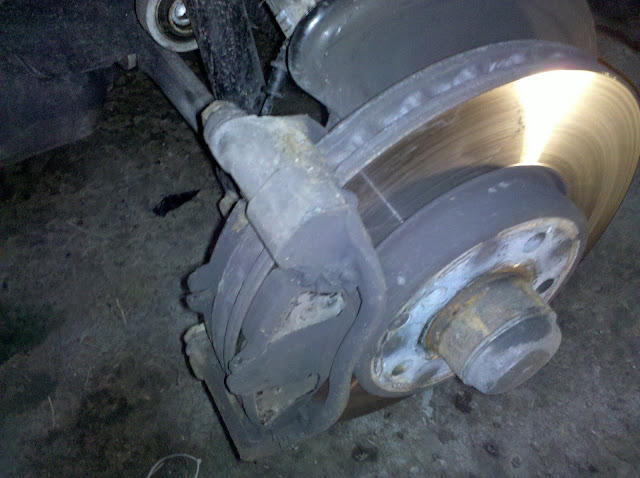
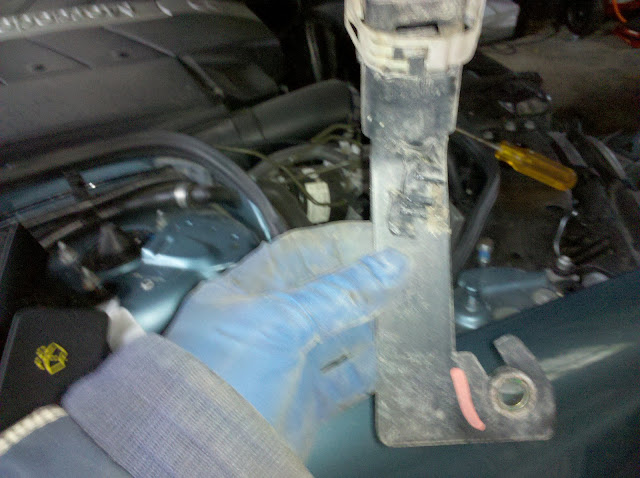
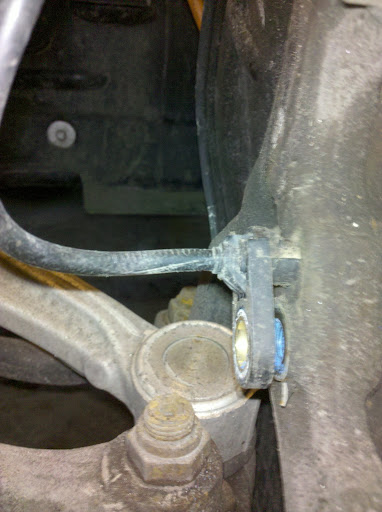
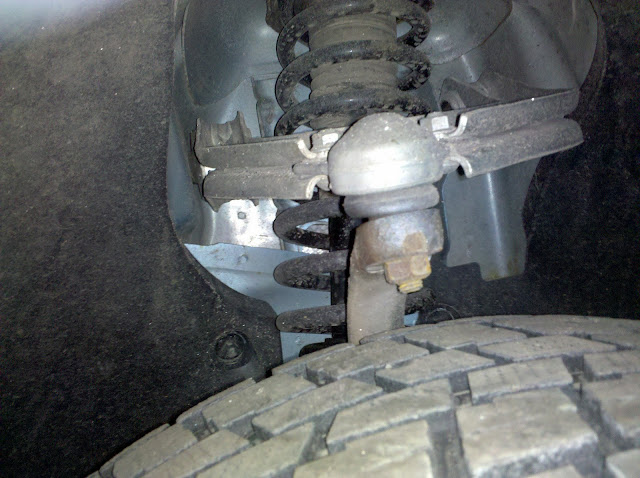
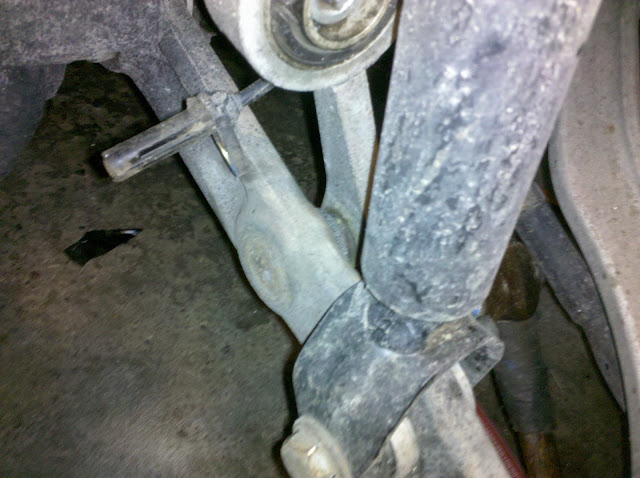
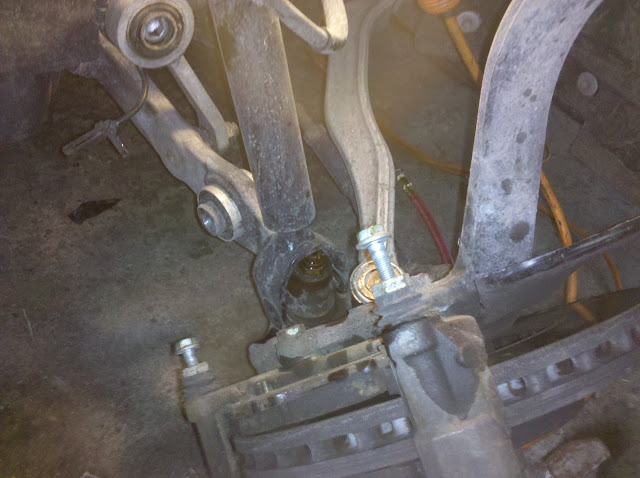
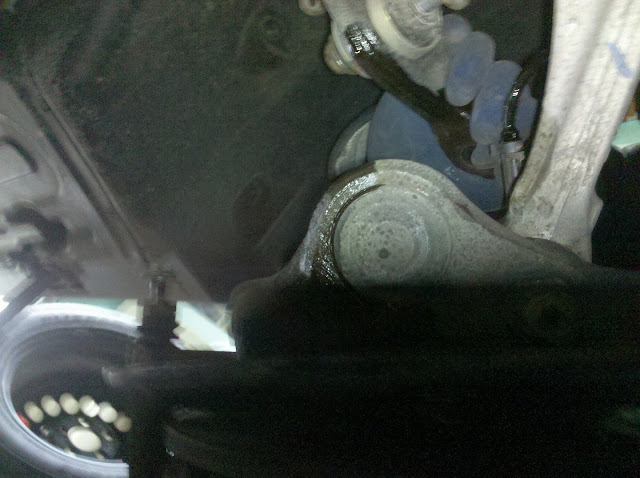
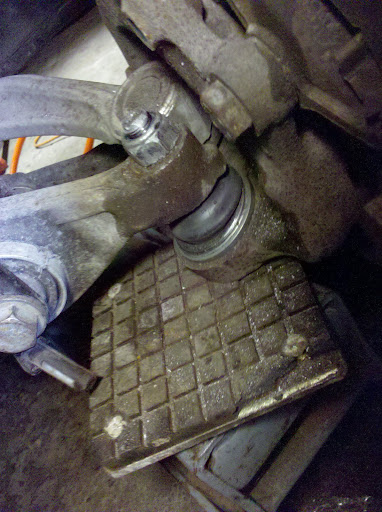
after you' ve loosened all the bolts the steering knuckle will flop down and reveal the parts
this is the bolt that holds the strut to the control arm
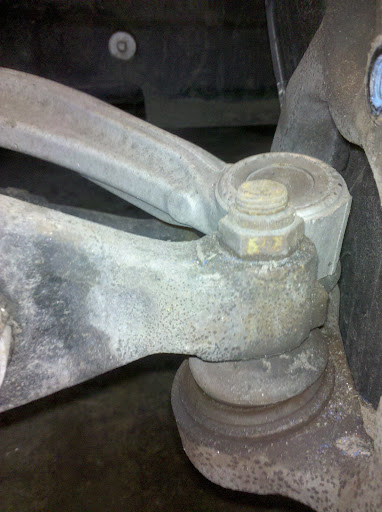
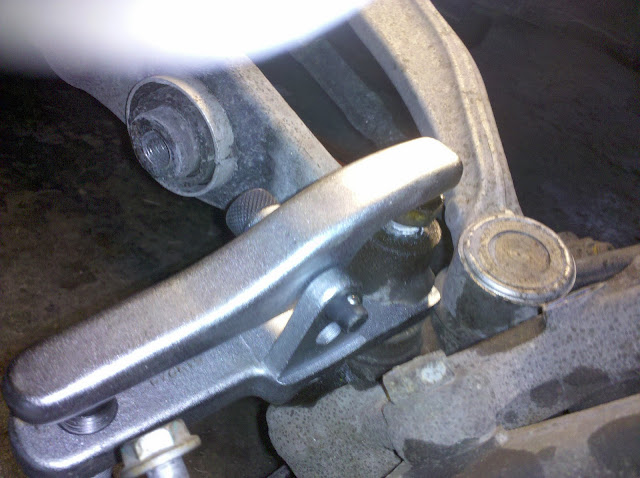
the nut holds the lower ball joint which is connected to the control arm
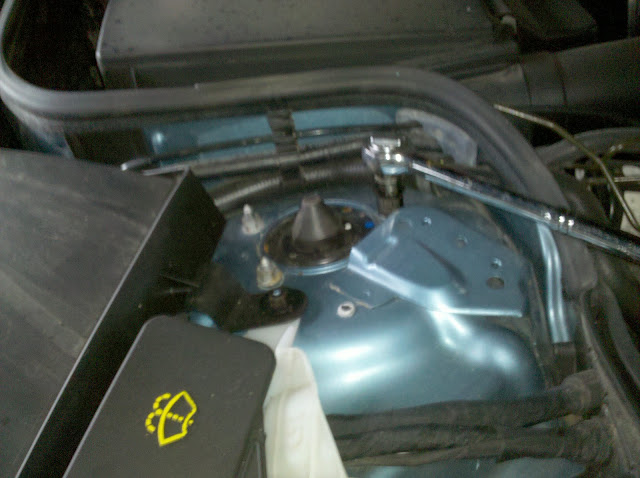
Next we need to remove the coil over strut. To do this we need to remove three nuts on top in the wheel well which is in the engine compartment, then we need to remove the bolt that holds the weight of the car. The top nuts are 13mm and the bottom bolt is 21mm. The bottom bolt is held on by a self locking nut on one side so you need a shallow socket 21mm to wedge a breaker bar and let it hang to the ground to hold the nut while you loosen the bolt. I started with an air gun to loosen without the breaker then once i started spinning then i put the breaker in. The air gun made quick work of it, if i didnt have it would've taken me forever to break it free!!!
this is the bolt that holds the strut to the control arm
the nut holds the lower ball joint which is connected to the control arm
Next we need to remove the coil over strut. To do this we need to remove three nuts on top in the wheel well which is in the engine compartment, then we need to remove the bolt that holds the weight of the car. The top nuts are 13mm and the bottom bolt is 21mm. The bottom bolt is held on by a self locking nut on one side so you need a shallow socket 21mm to wedge a breaker bar and let it hang to the ground to hold the nut while you loosen the bolt. I started with an air gun to loosen without the breaker then once i started spinning then i put the breaker in. The air gun made quick work of it, if i didnt have it would've taken me forever to break it free!!!
Last edited by Nickthegreek; Jan 19, 2010 at 11:14 PM.
Thread Starter
Super Member
Joined: Dec 2005
Posts: 806
Likes: 27
From: Rochester, NY
2009 S550 AMG sport pckg. 2014 Ford F-150 Lariat Supercrewcab
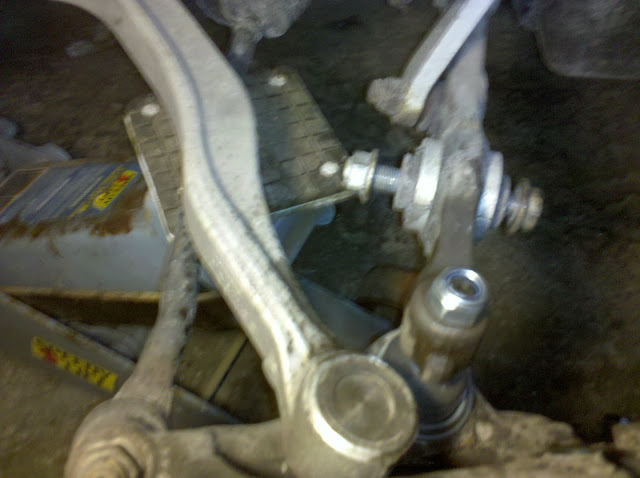
The large bolt will need some coersion to come out, use an extension and a hammer to bang it out. Now you should be able the finagle it out by pulling the bottom part towards the balljoint and it will slip right over the balljoint and out
Thread Starter
Super Member
Joined: Dec 2005
Posts: 806
Likes: 27
From: Rochester, NY
2009 S550 AMG sport pckg. 2014 Ford F-150 Lariat Supercrewcab
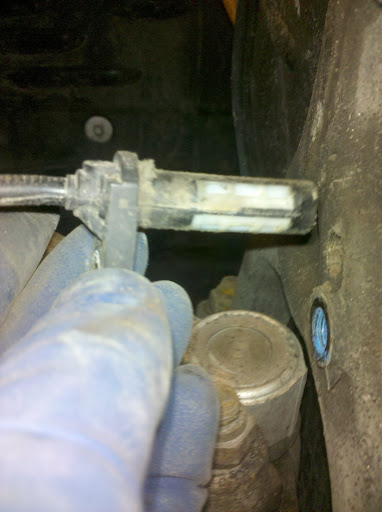
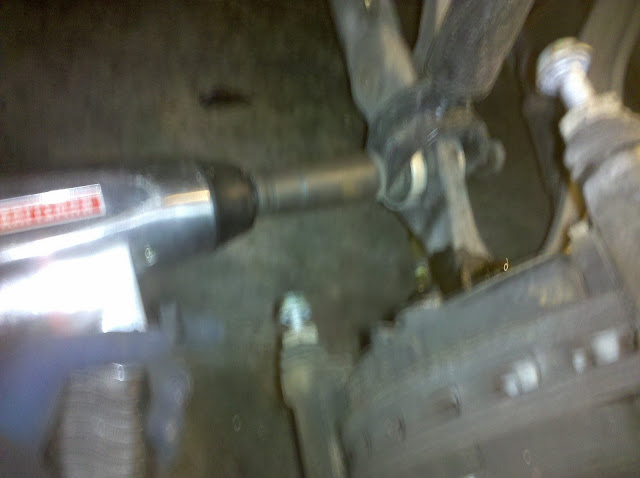
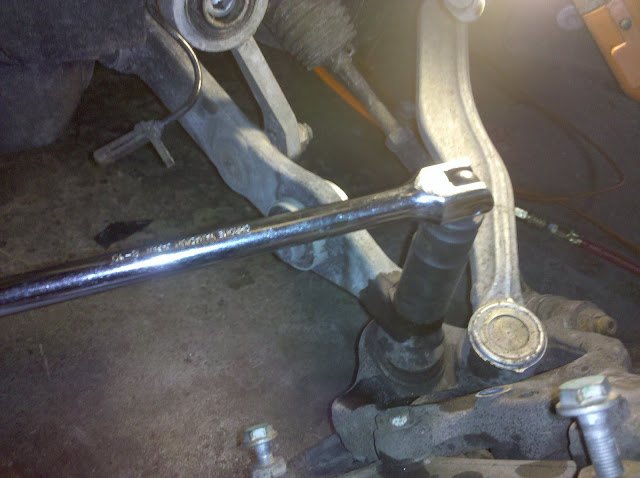
Next separate the upper joint link. The ball joint separator i got was awesome it didn't harm the boots at all like a pickle fork would and you can fit it in a tight spot unlike the jaws. you slide it under the boot as far as you can and then tighten it. I had to use a 24mm socket on a breaker bar and when it let go.... it let go!!! Be careful it sounds like a gunshot.
Thread Starter
Super Member
Joined: Dec 2005
Posts: 806
Likes: 27
From: Rochester, NY
2009 S550 AMG sport pckg. 2014 Ford F-150 Lariat Supercrewcab
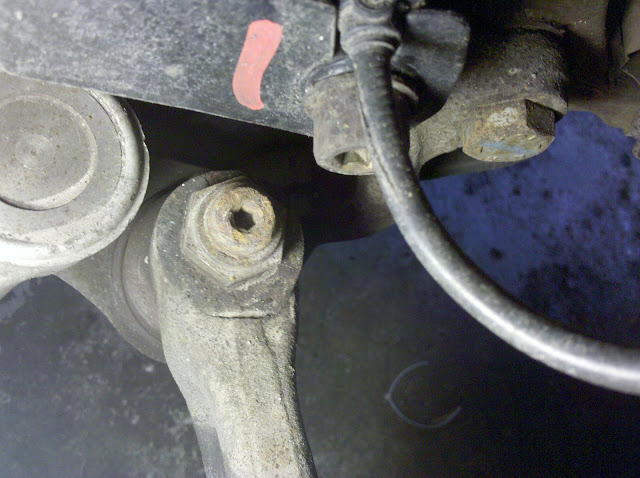
ok here's where i made my first major mistake. I had to get the lower balljoint apart but here you have to pay attention to details. What i did was loosen the nut alittle then press it out, but then the whole joint/nut kept spinning and there was no way to keep it still and it was tight!!! So i had to use a sawzall to get it off . First get the nut off. I used a airgun and it made short work of the other side. THEN i pressed it off. Then i jacked up the assembly so it didn't damage the tie rod end.
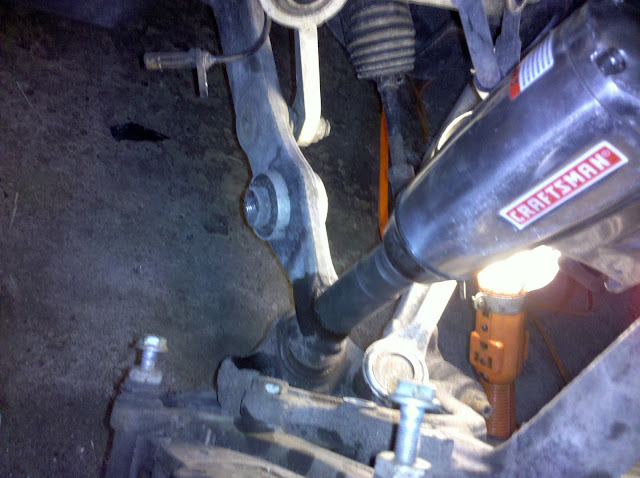
In this pic i had made the mistake of not taking the nut off... make sure it is comletely off!!!!!!
In this pic i had made the mistake of not taking the nut off... make sure it is comletely off!!!!!!
Last edited by Nickthegreek; Jan 20, 2010 at 07:57 AM.
Thread Starter
Super Member
Joined: Dec 2005
Posts: 806
Likes: 27
From: Rochester, NY
2009 S550 AMG sport pckg. 2014 Ford F-150 Lariat Supercrewcab
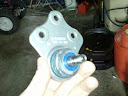
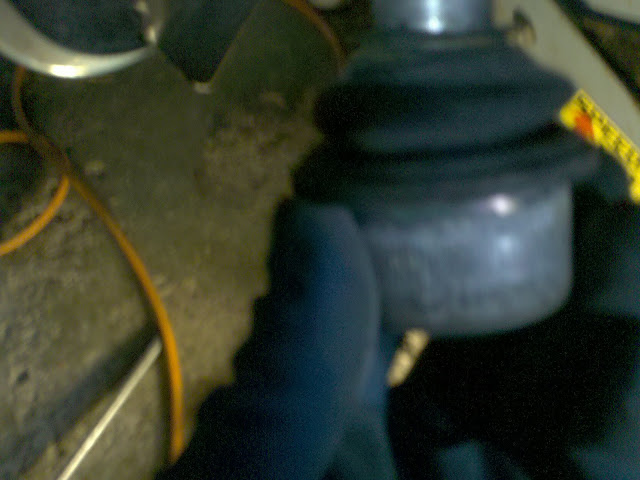
Next it's time to press the ball joint out of the steering knuckle.
The press comes with four cups. Two puck shaped and two cylinder shaped
The small puck will push the ball joint through and the large cylinder will let the joint go straight up because it is wider than the joint. When it comes time to press the joint in you take a smaller cylinder which hits the flange on the ball joint and a bigger puck which does not allow the end that pushed out the ball joint to go through the hole any more. You need to use the 3 foot breaker bar because it takes alot of initial tension to get it moving and once it gets moving it is easier
small puck vs big puck
hard to see, but the big cone or cylinder sits on top while the small puck drives the ball joint through
bottom of the ball joint
after pressing it out
the old joint
Last edited by Nickthegreek; Jan 20, 2010 at 08:17 AM.
Thread Starter
Super Member
Joined: Dec 2005
Posts: 806
Likes: 27
From: Rochester, NY
2009 S550 AMG sport pckg. 2014 Ford F-150 Lariat Supercrewcab
Then to press the new one in you take the smaller cone and the bigger puck and press it in... This takes the 3 foot breaker bar again!!! You NEED to make sure that the ball joint is pressed FLUSH with the steering knuckled surface or you will throw off the alignment. You can tell because it gets hard to almost impossible to turn it and do a visual inspection to make sure there is no gap
Ok now install.
First you get the lower ball joint link into the control arm and hand tighten the nut on... This is where i tihnk i made my first mistake. I decided to leave the nut loose and was going to assemble everything and then do the final tightening last but tightening it now i think would've made more sense cause there would have been less parts in the way. Either way to tighten the nut you must raise the steering knuckle with the jack and put all the weight of the car on it and then tighten it so it doesnt rotate as you try to tighten, otherwise you'll be tightening all day long and get nowhere quick
I used the german method to tighten it, the goodentite method, i tightened it like i was tightening lug nuts, the only problem was that because i waited until everytthing was installed i had little to no room to move the breaker bar so i had to turn the wheel everytime, but in order to do that i had to put the key in, and that would activate the SBC so i had to put the calipers on and then put the key in then turn it off, then take the calipers back off so i had room for the breaker bar, don't make that mistake lol. Once it was tightened, next was to install the coilover strut.
To install the Strut is straight forward. It is just opposite of the removal. Only thing to know is that you have to pry the suspension down a bit to get the bolt to mate into the hole, then tighten it down with the goodentite method and blast it with the airgun again >
Then tighten the top three nuts
Next install the protective cover back on the steering knuckle for the speed sensor
next install the speed sensor back
Now you're ready to install the upper balljoints. Take the link and put it into the hole and thread the nut. Again the goodentite method
Next align the holes into the upper control arm and tighten using the u joint and 13mm socket and use the goodentie method
Now install the caliper back on
Install the wheel back on
Repeat for the other side
When done with both sides shake the steering knuckle and pry around to see if there is any play... there was absolutely none
Then lower the car off the jacks and drive
if you notice any omissions or errors let me know i am hungry and tired and about to zonk out. I hope this helps you DIY mechnanics out there. I spent a total of $400 and the dealer wanted well over 1500 for it probably because it is labor intensive. It is possible but do not make the mistakes i made and you will probably do it faster than i did
Super Member
Joined: Jun 2006
Posts: 607
Likes: 1
From: 2 star town
R350
Great write up 
I just found out today that my passenger/front lower ball joint is toast when we were installing my AMG brakes. It made my little winter project even more expensive
Thankfully we had a replacement on hand.
I just found out today that my passenger/front lower ball joint is toast when we were installing my AMG brakes. It made my little winter project even more expensive
Thankfully we had a replacement on hand.

Super Member
Joined: Jan 2010
Posts: 563
Likes: 31
From: The Villages, Florida
2006 E320 CDI
Great great writeup. Unless you are a heavy DIY'er, I would let a independent shop do this type of work. At least the parts and labor would be less than the MB dealer. You really need the specialized tools to do this.
Mike T.
Mike T.
Thread Starter
Super Member
Joined: Dec 2005
Posts: 806
Likes: 27
From: Rochester, NY
2009 S550 AMG sport pckg. 2014 Ford F-150 Lariat Supercrewcab
thanks guys, when I found out i needed new upper and lower ball joints I had also needed new springs and struts because i saw my spring collapsed in the wheel well. The dealer wanted something to the tune of 3k to do the struts and the joints. I took it to another shop and they did the struts for 1400 and they wanted similar for the joints. So I did the joints for 400 and i saved 1200. If i had done the struts myself i probably would have only spent about 700 but hindsight is 20/20 and springs are one thing I leave to the pros. Better their head get chopped off than mine if the spring decompresses ")


