When you click on links to various merchants on this site and make a purchase, this can result in this site earning a commission. Affiliate programs and affiliations include, but are not limited to, the eBay Partner Network.
Hi i am having a problem with my suspension raising, mostly in left rear, but i have 2 codes 5300 and 5350. airmatic central resevoir open circuit and airmatic pressure release valve open circuit. can anyone tell me what this means exactly? where do i start?? new to this forum so any information would be extremely helpful. thanks.
Hi, almost a decade later I have a follow up question and hope someone can help me - I traced the error "5350 A9/1y1 (AIRmatic pressure release valve): Open Circuit." to broken wires at the airmatic compressor electrical connector. The wire has broken at the connector itself so there is no easy way to solder some pigtails. I was unable to find any youtubes explaining how to remove the pins on this specific connector (many others are available). It is Bosch A1685452928. Appreciate if someone can tell me how to depin this - I don't want to take a chance and break the pins etc.
Not decade later, original post was made just over a year ago
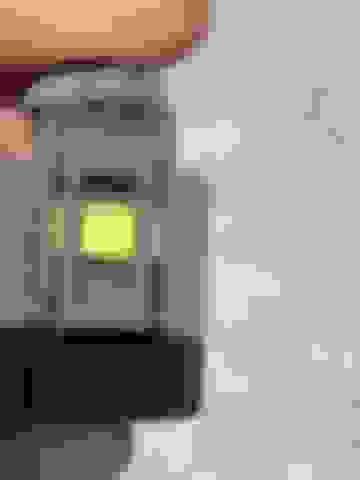
But depinning that connector. There's that yellow secondary lock inside the connector housing that you'll need to move just a click out with screw driver. But the primary locks are more difficult as they need a special tool. Or some ingenuity. 3rd picture, there are those slots on both sides of the terminal, there are primary locks deep inside that you'll need to push towards the terminal. But first you'll have to push terminal outwards from the wire end so the locks don't get stuck to the housing. Since the wires are broken you just can't pull the terminal out, so after you push the locks in, "just" push the terminal out.
"Just", because even with the correct tool that is pain to do if the terminal is mangled even the slightest.
So I suggest you to just buy the whole deal; housing, seals and terminals.
Some of that type of terminals have primary lock only on one side, so it makes depinning little easier w/o correct tool. But couldn't tell from the pictures I found, do those have one or two locks.
Hi Heguli, thank you very much for your reply. I meant to post it to another thread which had a longer discussion on the subject but was from 2013 - hence the "decade" reference. Yes I see the yellow thing ... wondering what it was and now I know that is the secondary lock. You likely are right ... may make sense to buy the parts for about $20 rather than struggle to add some pigtails to this one. But will give it a try first. Thanks again.
To follow up, it was much easier to buy the connector already wired with two pigtails and comes with two heat shrinkable butt connectors. The local O'Reilly Parts store had it for $19. The included butt connector was slightly larger (blue one) and I had to buy pink ones to get the smaller size needed.
Note that it is sold as a fuel injector connector for mercedes diesels rather than as an airmatic compressor connector. The online price for the OEM part was about $20 for the connector housing, two pins, and the wires. But I would have had to wait for several days and also learn how to connect the wires.
And yes, once connected the error did clear much to my relief! I tried to do this work without removing the tire and just steering to the right angle so I have access to the fender liner nuts. But resinstalling the liner this way was beyond my capability - so I ended up jacking up the car and removing the tire to finish the job.
glad i stumbled upon your thread as i'm going through the same issue with my e55. i did a quick fix for now with some butt connectors but doubtful it will hold permanently. was thinking i'd buy the genuine mercedes plug and pin it myself, but like you, i'd have to learn how to do all of that correctly so i'm leaning towards just buying the pre-wired piece. how are things holding up for you?
on a side note - i thought it was much easier to get to the connector from the bottom side as opposed to the wheel well. did you remove the compressor to get some more room to work with? it was definitely a little tricky getting the old wire stripped and connected.
I didn't remove the compressor as the electrical connector was closer to the front wheel than the pump itself. With the connector + pig tail set that I bought, the butt connector was a size larger and I needed to buy the smaller pink one. Was a bit annoying to heat shrink the butt connector as the hair-dryer technique didn't work. I used the side of a soldering iron tip and that worked much better. Rather than heat up the soldering iron first to a very high temperature, I used the cold tip and then switched it on - that way it warmed up just right to shrink but not melt. Did the same for the 2nd butt connector as well.
The original wires had cloth insulation tape and I wasn't sure what to use in place. O'Reilly parts didn't have the cloth tape and only had the usual PVC electrical tape. But ended up buying premium Scotch 35 electrical tape from Home Depot as it is good up to 260F.
Overall I am happy with the results as I haven't had that problem again.

 03-14-2022, 07:45 PM