When you click on links to various merchants on this site and make a purchase, this can result in this site earning a commission. Affiliate programs and affiliations include, but are not limited to, the eBay Partner Network.
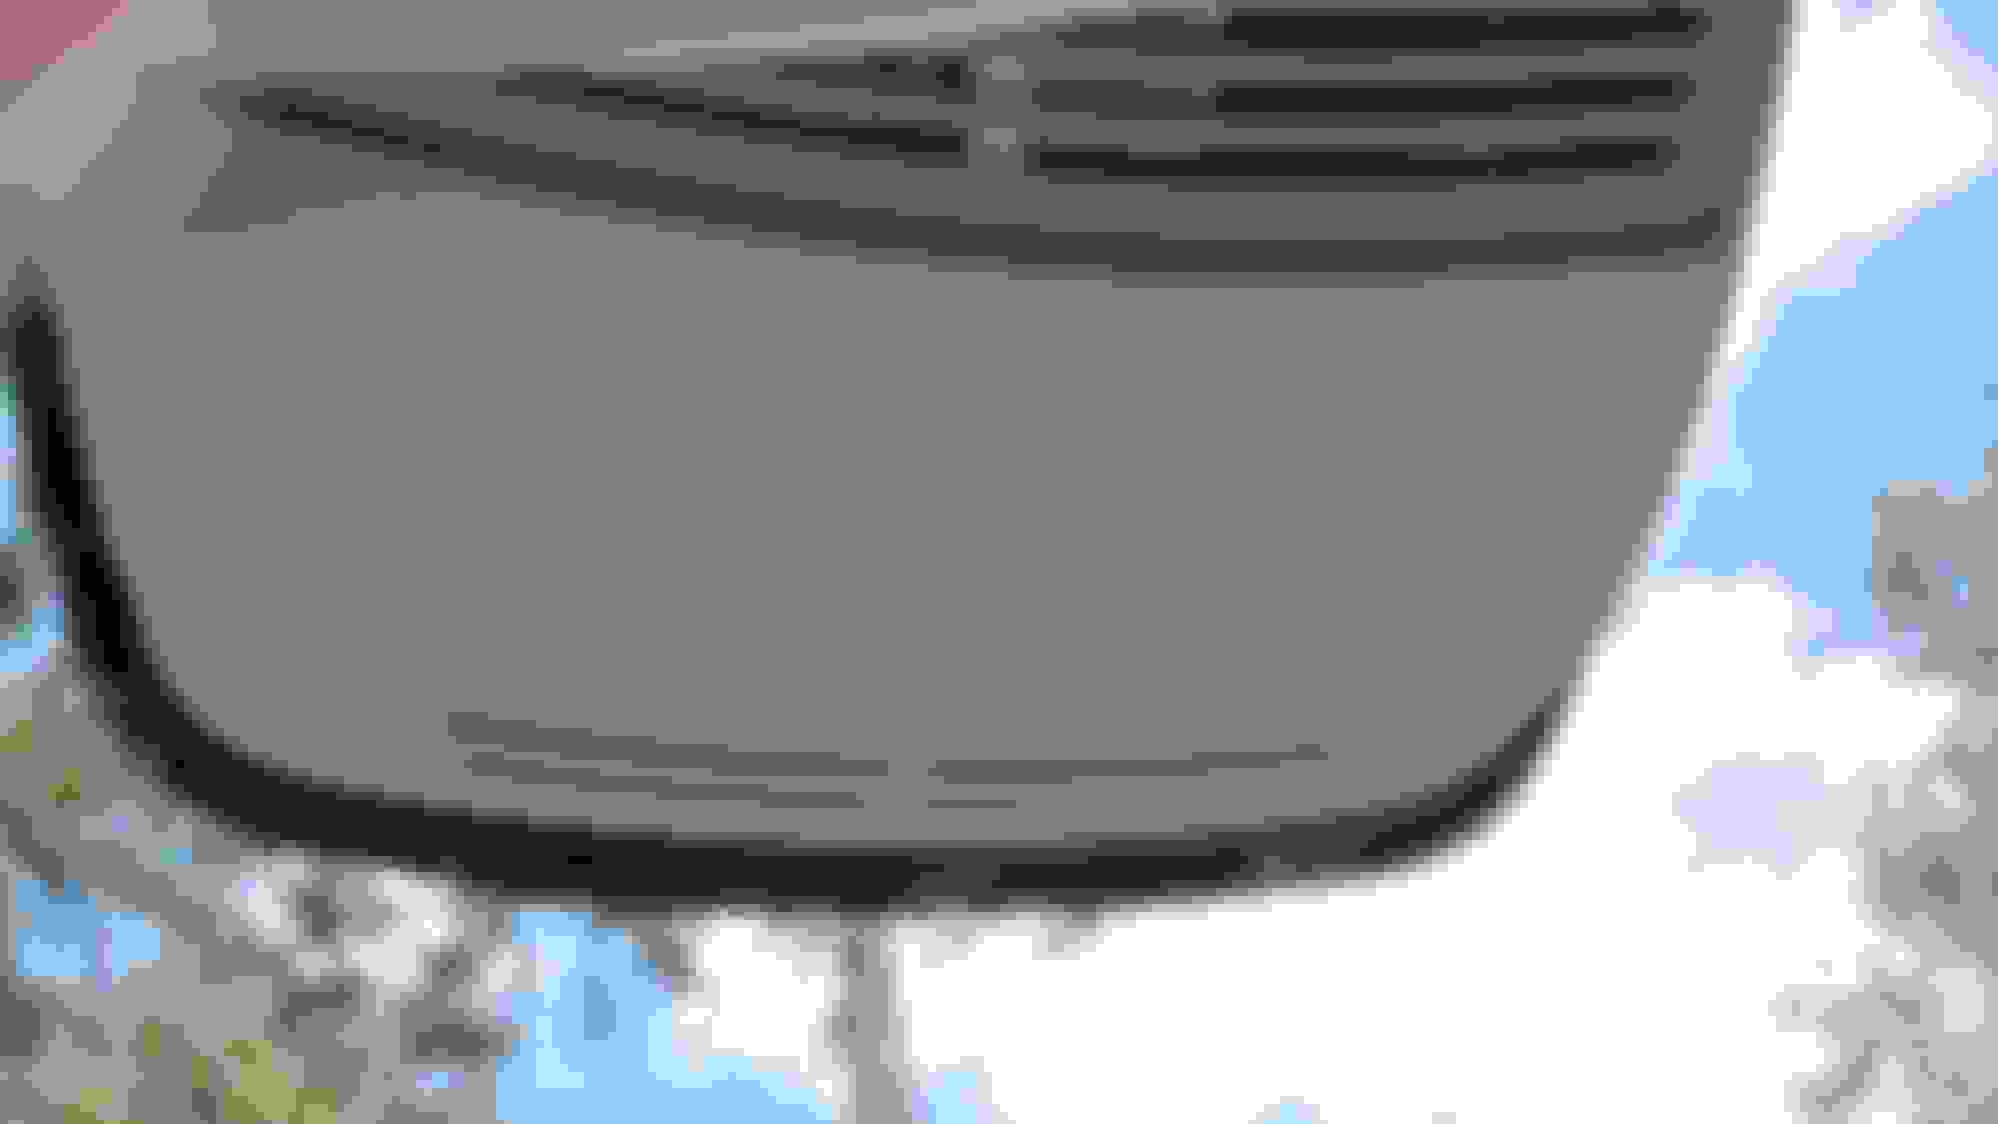
I was planning on installing a dash cam this weekend and was looking at potential mounting locations. The one I purchased comes with a 3m adhesive plate that the dash cam slides onto. So I was naturally looking at the upper windshield on the passenger side of the upper windshield sensor housing (see pic below). But then I started to think about the heat issue of having it attached directly to the windshield and started to wonder about attaching directly to the plastic housing in the upper center. That way it is still tucked behind the rear view mirror, but the housing would also provide a buffer for the sun hitting the dash cam (at least it would be partially in the shade). While the adhesive could damage the plastic when removed, that is not an area that is visible while in the car given the location behind the rear view mirror.
Has anyone tried attaching a dash cam to that housing or have other alternatives to the glass?
After a couple years I've not had any troubles with the 3M tape holding the bracket to the windshield. Still grips. I'd rather replace the tape once in a while than possibly mess up the plastic on that console. Since I use interior cleaner (Aerospace 303) a few times a year I don't think tape would stick to that plastic very well anyway.
Camera is located on upper windshield right up by passenger side of mirror.
I have my forward facing cam mounted to my windshield with 3m and my interior facing cam mounted to that plastic shroud using 3m. Both are solid. If you own the right cam, heat isn't an issue. I live in Texas, and I've been running cams for years.
I'm not sure the plastic housing is flat enough to mount a dash cam. I have my blackvue mounted to the driver side of that plastic housing, pretty much invisible to me when I have my visors open
Been using suction cups and they suck. They are OK for items you need occasionally like GPS, but when new cup with camera works for few months, once it start falling you have to reattach it with shorter and shorter intervals.
The advantage of dual-side tape is that you can apply it to windshield area with shade imprint, what most of the time is all you need.
When attaching go plastic housing, the only danger is plastic discoloration that might happen over the years. Probably not an issue when you plan to keep the camera there permanently.
Lately, having several vehicles I did not want to hardwire several of them and bought $49 camera with replacement mirror.
It is cheap camera, but easy to switch between vehicles, it doesn't need to be attached other than straps over the original mirror and you can easy turn it into any direction you want to record.
Good alternative if high resolution is not priority.
Blackvue 750s dual channel. Its suppose to be good in the heat up to 160 degrees and shuts down as it gets hotter. No problem so far with heat waves in the bay area. I second the 3M tape. I tried suction cups before and they had to be replaced between 2 month to 6 months. The 3M last longer and the longest I have on one is 3 years+, its also easier and cheaper to replace and remount.
Thanks for all the input. I left off one important reason why I was considering a location other than the glass - I have clear windshield tint. As I have found out with parking permits, any adhesive sticker on the inside of the glass could damage the tint if removed. Not a big deal in a spot that you won't see, but I was trying to avoid that. Maybe I will try attaching the cam to the plastic housing with some 3m command strips. Those supposedly come off clean when you remove them.
My back glass is tinted, my mounts originally came with adhesives that are stupid strong, I peeled it off and used some of those Scotch double sided mounting tape. I haven't had an issue with damaging the back glass tint upon removal of the mount.
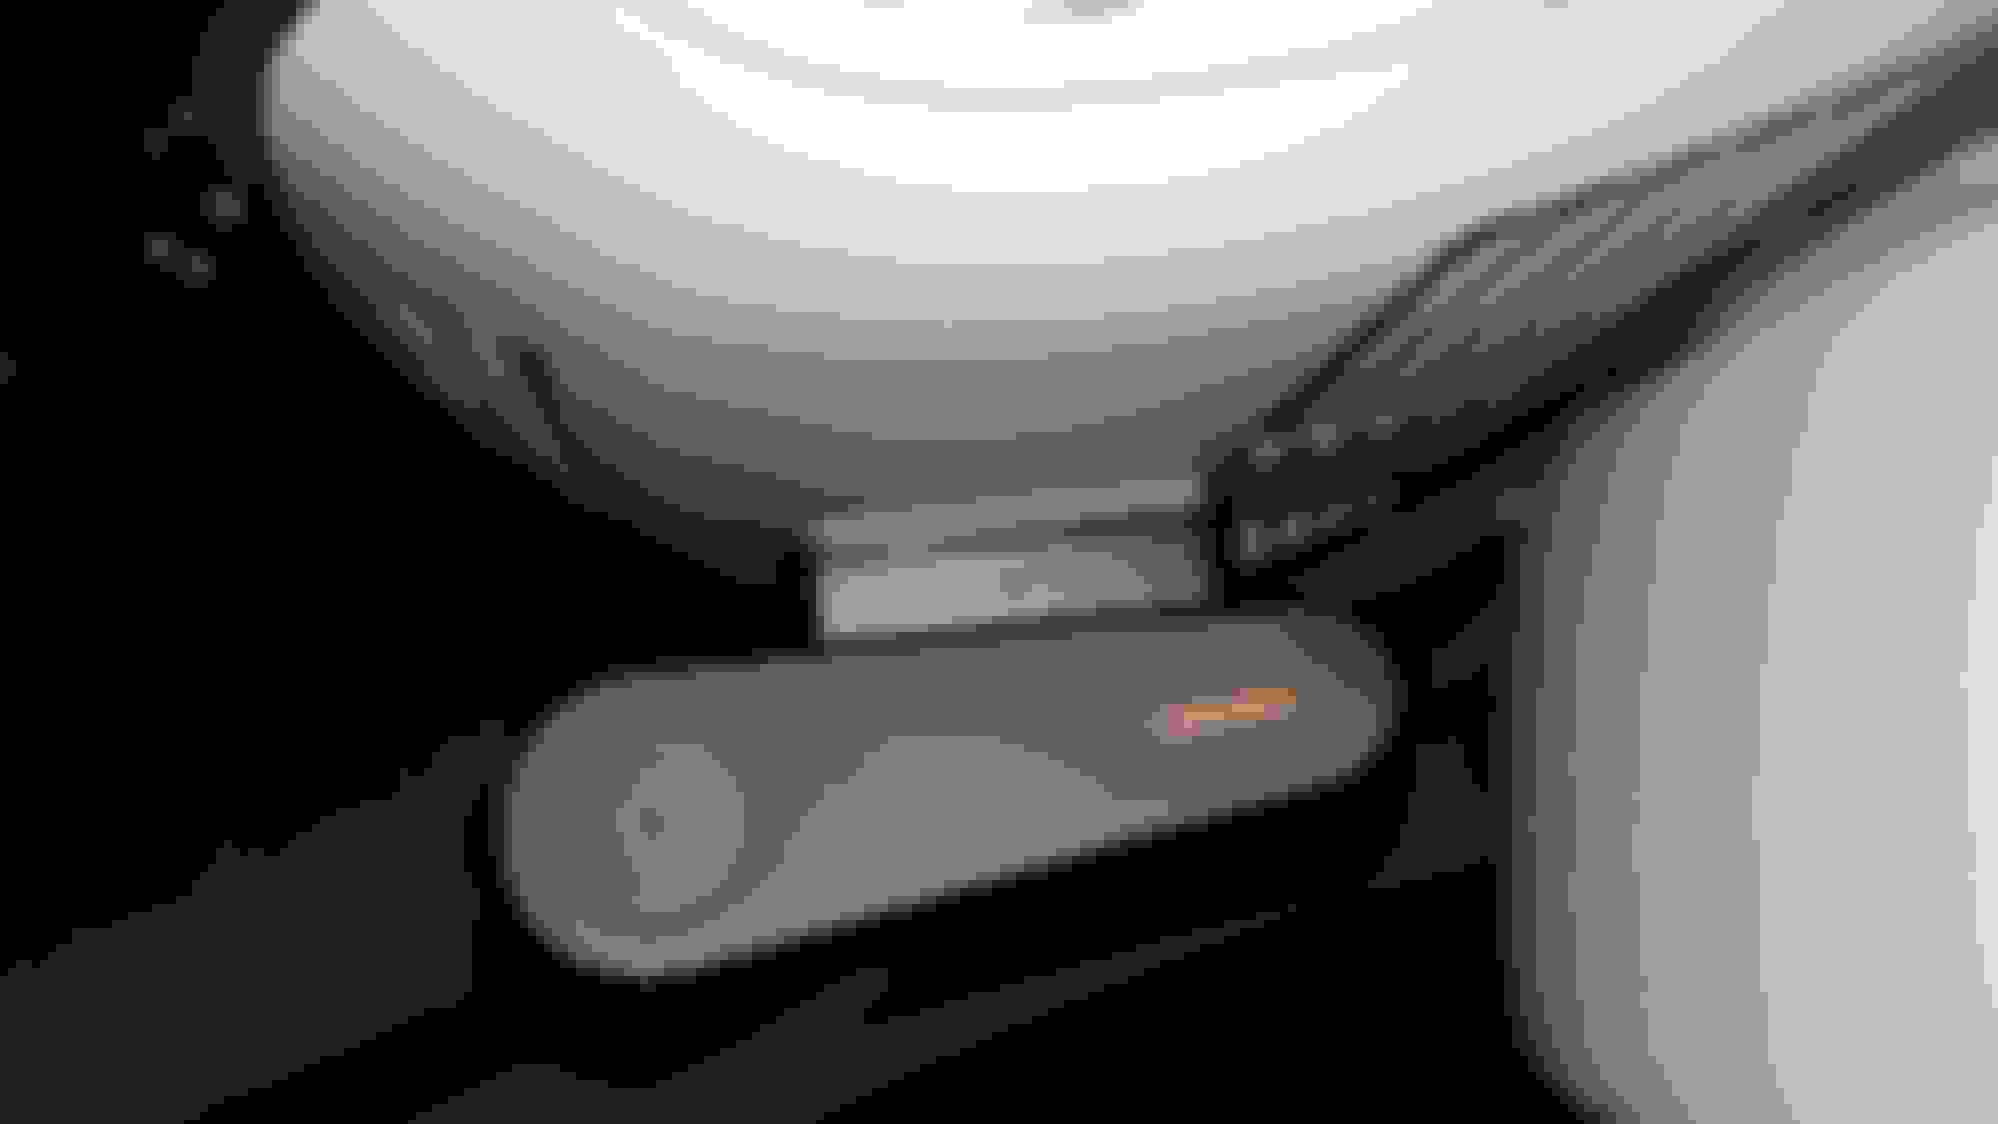
The only difference is his car has a different angle to the plastic cover than mine (since his car has a second camera up there, probably for distronic). The flatter angle of my plastic cover is a drawback, plus his mount seems fully adjustable up or down whereas mine is not (more on that below). Here are the pics of what I did:
Front view before cord hidden (used flashlight on dash for uplight otherwise to hard to see with glare)
Side view from driver side although not visible from normal seating position. Note the flat angle of install compared to if mounted on windshield.
Running along headliner was easy, but making the turn at the corner and slipping the cord behind this seam here took some effort with the trim wedge.
This was the trickiest part - getting the cord behind the black seal where it is tucked behind dashboard. Was able to finally work it in by first getting it under the dash (see next photo) and then applying some downward/pulling pressure to get it to slide behind black seal.
Pulled off side dash panel to tuck cord into dash where is meets the rubber seal.
There is a small opening at bottom of glove box so that cord doesn't get in the way to the tight closing glove box cover.
Excess cord is tucked under manuals. Finally have a use for the glove box 12v socket.
Now that it's done, the only drawback so far is the flatter angle of the plastic cover. The wedge style dash cam I have seems best suited for a steeper angle install (like on a windshield, duh) as the camera can only be adjusted only so far downwards. As a result, the viewing angle is a little higher than I'd like. My preference would be to have the road and horizon take up about 50-60% of the view from the bottom upwards. Right now it only takes up about 30% - even though I can still see the hood of the car and everything on the road as it is, the auto exposure gets thrown off by too much sky in the video. I might explore steepening the angle by adding some kind of wedge between the plastic cover and the cam (something with a steep angle like a binder clip). On the positive side, the plastic cover is providing shade to the camera - when I check it in the middle of the day or later in the afternoon parked outside in sunny FL, it doesn't seem to be hot at all. Hopefully that increases the longevity of the cam.
That looks good.
I agree about the angle, I fooled with the adjustability a bit (different camera) til I got the right blend of earth and sky so to speak.
wait is there a 12v socket in the glove box??? I didnt see one in my 14'. I have been plugging mine into the center console one and it looks so dumb and I am too worried to connect it to the safe box of the consuming battery.
do you mind take a photo of the location? If there is one you will be my saver
That looks good.
I agree about the angle, I fooled with the adjustability a bit (different camera) til I got the right blend of earth and sky so to speak.
Thanks, it's on my to do list to figure out a solution for the angle. It's still usable for the time being but trying to improve it if I can.
Originally Posted by choitwao
wait is there a 12v socket in the glove box??? I didnt see one in my 14'. I have been plugging mine into the center console one and it looks so dumb and I am too worried to connect it to the safe box of the consuming battery.
do you mind take a photo of the location? If there is one you will be my saver
Sorry to dash your hopes, but they moved the 12v socket from the glove box to the center console in 2012. There are hard wire options that involve additional switched power or always on power that you could pair with equipment to manage cam power draw. There is also a 12v socket in trunk that folks have power from. Check out the other dash cam threads.
Mercedes SLR McLaren 722 S Is Extremely Rare Example Modified by McLaren
Slideshow: A one-of-one U.S.-spec Mercedes-Benz SLR McLaren Roadster became even rarer after a factory-backed transformation at McLaren's headquarters.