When you click on links to various merchants on this site and make a purchase, this can result in this site earning a commission. Affiliate programs and affiliations include, but are not limited to, the eBay Partner Network.
2016 E350 Sport; Mom Wrecked the 2008 E350; sold the 2002 C320
ILS (Full LED) Headlight Retrofit on Facelift W212 DIY
After months of reading countless threads and web pages about upgrading from static LEDs to full LEDs and practically no definitive answers, let me tell you that yes, it can be done - I have achieved this upgrade and I will provide the answers for you here.
The purpose of this thread will be to provide a DIY guide on what is needed and how to get it done. It took me nearly a year from start to finish and I am hoping to help you do what took me months in only a day or two once you have all the necessary parts in hand.
Please know that I am no MB tech, shop or vendor. I am an average DIY layman sharing what I did for informational purposes. I am by no means endorsing any product or service and any information offered is for you to proceed at your own risk - especially with coding which can render your car useless so again, BEWARE - USE THIS INFO AT YOUR OWN RISK.
I'll be working on this thread in snippets as time allows, so please be patient with me. I will also be editing information as I see fit to better clarify, so you might want to re-read if I have edited since you last looked.
There's already a lot of valuable info on the LED Headlights thread here (link to LED Headlights) that will be useful for you and I will be repeating some of it here. In the thread provided there is also some info on aftermarket full LED options for those of you who want to consider a more cost-effective alternative. Given the cost of OEM components, it might be what's just right for you.
First thing you should know is that I am talking about the FACELIFT W212 (2014-2016) - mine is a 2016.
The procedure for the pre-facelift is significantly different and although I will be offering some info for those of you with pre-facelifts, I do not have all of the answers. What I can tell you based on my research is that besides the headlights, you need to change hood and fenders, and need a completely different wiring option which includes rewiring the front SAM. Those of you with a pre-facelift can check out this video:
For the E350 Coupe (C207), I don't know if it's the same or not, but there is info on the C207 forum in there somewhere for you. There is some info on this thread: C207 Conversion
The next thing to know is that you will need a STAR/DAS unit of you don't have access to one. It's going to take a pretty involved amount of coding to get this done but I'll provide info on who can do it for you but you need the STAR/DAS hardware/software so they can do it remotely. Specifically, the coding needs to be done via Xentry and Vediamo. I also saw the tech dip into Monaco or Caesar.
Ok let's get started...
Here's the before & after pictures: Static LED Headlights
Full LED Headlights
ILS DRL's
So you probably want to know right away what functionality you will achieve with this upgrade. Full ILS (Intelligent Lighting System) functionality? Well, it depends.
At a minimum, you get the full LED look, auto on at dusk, auto leveling and dynamic cornering. In conjunction with this issue, the jury is still out on whether I'll have the fog light feature.
For auto dimming and automatic high beams, you need to have the stereo camera option on your windshield. If you do not have it, you will need the camera, wiring and the compatible windshield.
PARTS NEEDED
I have done my best to confirm official EPC part numbers but I have found out that the components often have several part numbers although they are the same part, Some of these I found online advertised with different part numbers, so just confirm fitment/application before you buy. (I will try to add additional part number I find, as time allows).
Left Headlight Assembly: part# A 212 820 21 39
Right Headlight Assembly: part# A 212 820 22 39
2x LED Modules: part# A 218 900 73 06
2x Voltage Regulators: part# A 222 870 07 09
16x Pan Head Screw part# N 000000 002856
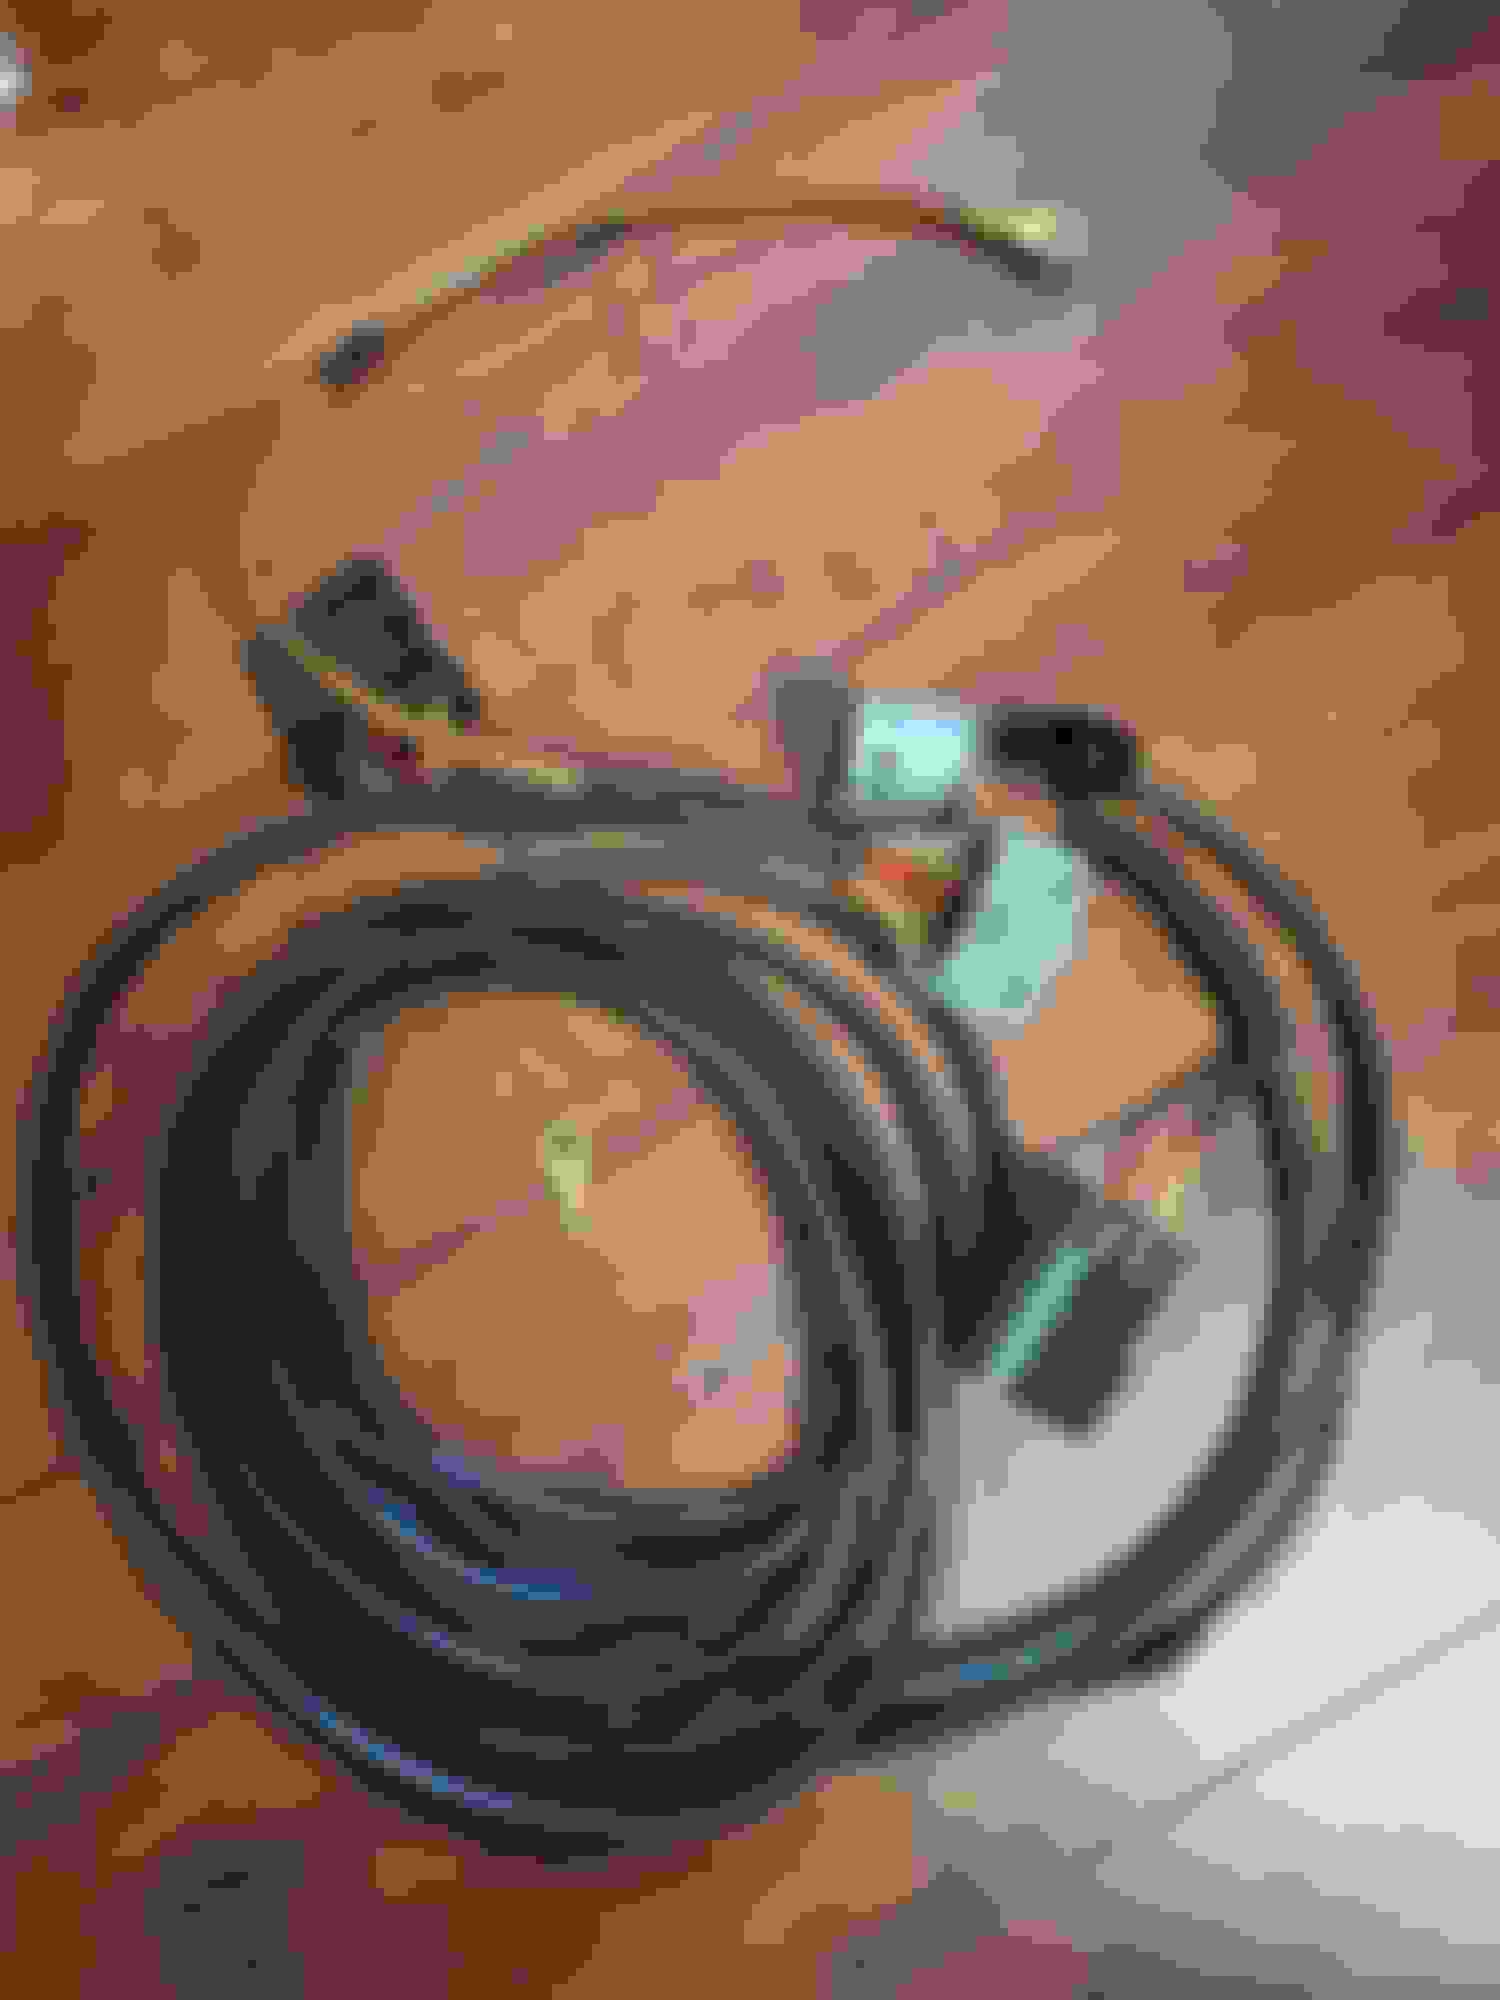
Cable Harness for Headlight Retrofit sourced here
2x M6 x 1.0 nuts to secure height level sensor
Front Height Level Sensor (you just need one - depends if your car is left or right hand drive)
Left Hand Drive: part# A 212 905 01 03 (I found it online under part# A 006 542 83 18 but MBZ doesn't recognize this part number)
Right Hand Drive: part# A 212 905 02 03
(Not needed of you have AirMatic. If you have 4Matic, it uses a different mounting bracket - see attached document, "height level sensor pics)
2x Voltage Regulator Gasket part# A 000 826 05 00
2x LED Module Gasket part# A 000 826 03 00
Rear Left Level Sensor part# A 212 905 29 02 (for LHD)
Bolt part# N000000 000715 (to mount rear level sensor)
Nut part# N 913023-005002 (to mount rear level sensor)
Nut part# N 913023-006001 (to mount rear level sensor)
Plastic Rivet part# A 124 990 04 92 (to mount rear level sensor)
Wire Harness part# A 212 540 27 05 (from rear level sensor to inside of exterior wheel well liner)
Connector Plug part# A 002 545 64 40 (from wheel well inside the car to real level sensor wiring - wherever MackHack ran the wiring to)
The wiring that runs from the wheel well inside the car to the front of the car was provided to me by CKM, who originally sourced the retrofit harness for me. I believe he had it sent by Kabeldaviko. They provided no info on how to wire the sensor, so MackHack did this for me.
I scored the front level sensor and the headlight housings on ebay in pristine shape. All the rest of the parts I purchased directly from a Mercedes dealership. The conversion harness is from Kabeldaviko (they also offer harnesses for pre-facelift and the C207). I purchased through CKM Car Design from which I originally got the modules and voltage regulators but those turned out to be aftermarkets which did not work - I ended up buying another set from Mercedes directly. As for the conversion harness, it did not come wired for the rear level sensor. They eventually sent me the wiring for it, but no instructions on how to add it to the harness, so proceed at your own risk. MackHack ended up wiring it for me.
That being said, I strongly recommend you stick with genuine Mercedes parts - particularly the control modules and voltage regulators. My project time and expense was significantly increased because I was sold aftermarket modules and voltage regulators (although I was told they were originals) and it took a lot of trial and error to identify that they were not properly communicating with whatever they need to communicate with because they need to be programmed to the headlights. I replaced them with genuine Mercedes parts and problem solved.
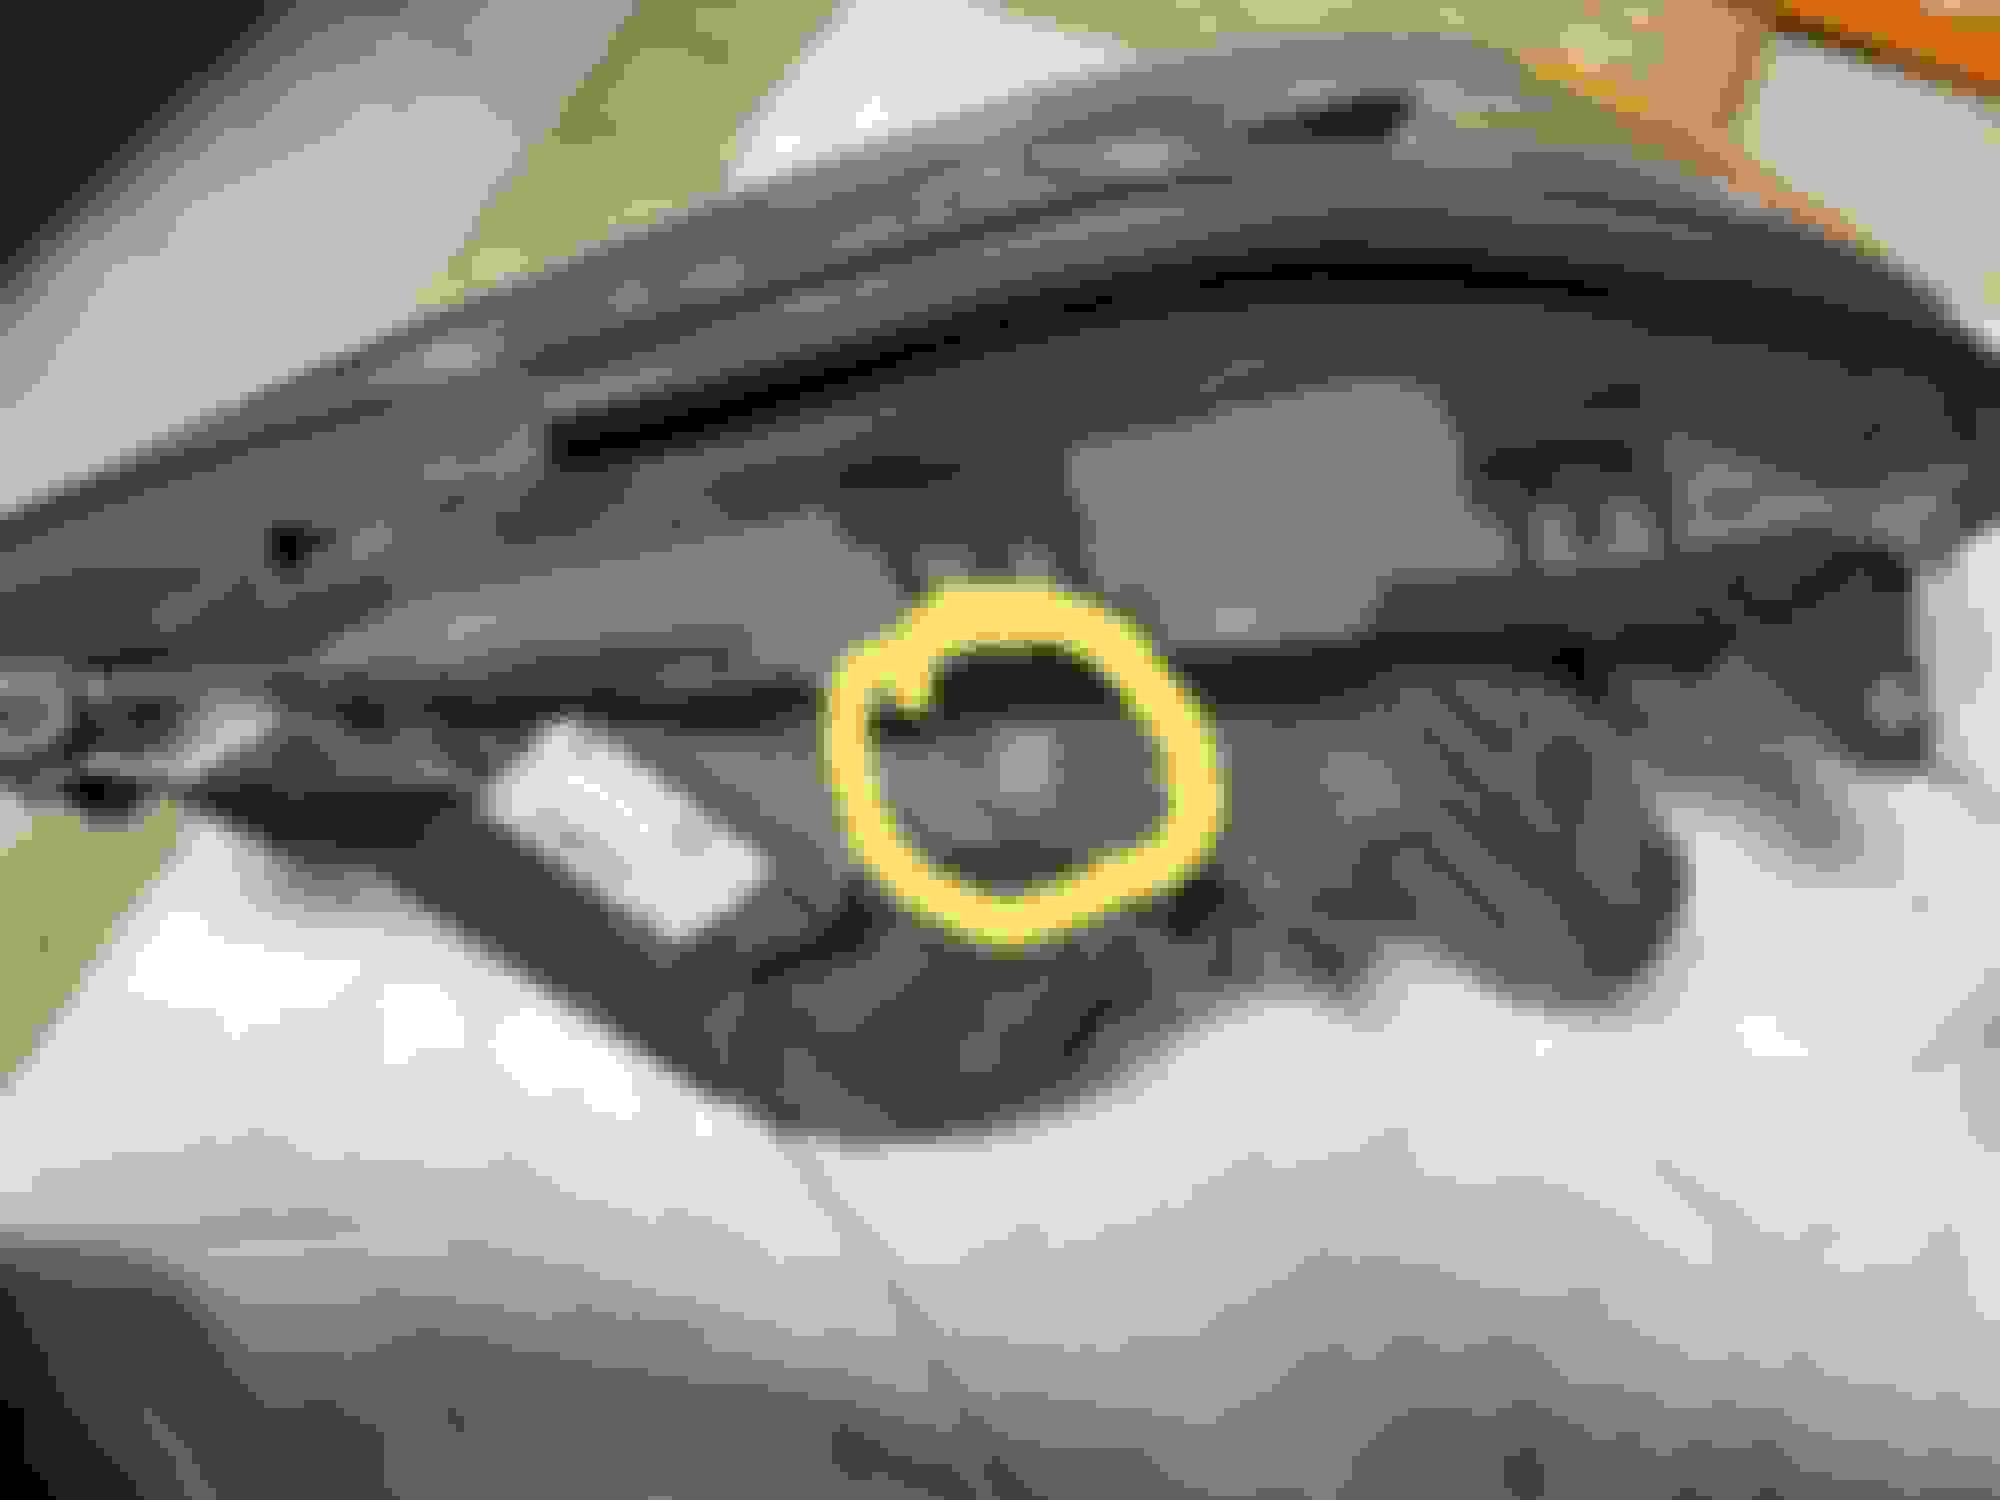
After you source your ILS headlights and you finish admiring them, do yourself a favor and get a good, clear picture of the QR code on each one, and keep track of which is left and right. The headlights need to be coded to the car with these codes and if you install them without having these codes on hand, you're going to have to do the work twice, as they are not accessible after installation (ask me how I know).
Here's the codes I'm referring to (circled). All 3 of the QR (data matrix) codes need to be scanned.
The LED modules also need to be coded to the car, but there's nothing you need to record off of them beforehand.
INSTALLATION
REMOVE THE FRONT BUMPER
[I attached the WIS instructions for bumper removal and fender liner removal but there is no need to completely remove the fender liners]
This is much simpler than it appears and once you gain some confidence, you can drop it in as little as 15 minutes. It can definitely be done without raising the car- just turn the wheel to one extreme or the other and you'll have enough room to work. There are 3 push pin connectors in the corner of each fender well (2 in the lower forward part inside the fender well and 1 from underneath, near the corner (It's hidden behind the bumper trim lip) that secure the fender liner. Remove all 3 on each side.
Now pull back on the black fender liner, near where the bumper meets the fender (you'll see a slit in the fender liner). Look in there and there's 2x T27 Torx screws that attach the bumper to the fender. Remove both, then pull down slightly on the edge of the bumper to dislodge the aligning dowel/nub - repeat procedure on the other side of the car.
Next remove the 8mm sheet metal screw in the bottom center of the bumper, underneath the car, attached to the splash pan
Up inside the hood, near the edges of the grille (between the grille and the headlights), remove the 2 10mm bolts that are right behind the bumper cover. It helps to have a magnet to pull them out.
Now on top, right next to and almost underneath the middle weather seal, there are 3x black T27 screws. These each secure a strap that adjusts the spacing of the bumper/grille assembly and the hood. Each strap secures near the top radiator brace.
Before you loosen these screws, you may want to mark the position of the straps so that when you reinstall the bumper, you will know the proper spacing (otherwise you will either have an ugly gap at the edge of the hood, or the hood is going to hit there and possibly ruin your paint). I put a piece of blue painter's tape on the rear portion of each strap.
The bumper is now completely detached but before you go yanking it off though, reach in behind the left fender liner and disconnect the temperature sensor from the bumper. There is another electrical connector on the driver's side.
It helps to have a second person to help you pull the bumper forward but if you're working solo, just do one side at a time or center yourself well. Pull straight out and keep an eye on the corners that they do not catch on the fenders or otherwise scrape against the body. Note the alignment dowels near the bottom on the inside of the bumper, which you will need to align when reinstalling it. Careful - they break off easily.
REMOVE HEADLIGHT HOUSINGS
[See attached WIS document, "Remove install lamp unit" for details]
There are three 8mm bolts that secure the headlights to the car.
One is on top, accessible from behind the fender liner (can be loosened from the top with an E4 socket - just remember to use a tightening motion from the top)
One is on the outer edge of the bumper brace, accessible from below (bolts from the bottom up)
The last one is right behind where you removed the 10mm bolts between the grille and headlights.
Pull out the inner end of the headlight, using a slightly skewed upward motion to clear the outer corner and weather stripping of the upper outer edge.
Find the harness wiring connector behind the headlight. Lift the retaining clip and pull to disconnect.
Repeat on other side.
INSTALL ILS HEADLIGHTS
Make sure the headlight housings have the gaskets for both the LED control modules and voltage regulators on the bottom. If you need to buy them, see document "Headlight Module Gaskets" for the part numbers.
In the document, different part numbers are offered for the LED modules ("Headlamp Range Adjustment Control Unit") - I highlighted the correct part numbers. I suspect the other part number is for the pre-facelift xenon headlights.
Connect both connectors for the headlight modules and voltage regulators - on each, 1 is a straight push/clip and the other has a locking lever. Make sure the lever is in the full open position, insert the connector plug from the headlight housing, Then swing the lever down to finish pulling the plug in and make sure the lever locks in place.
Use the 16 pan bolts to secure the control modules & voltage regulators.
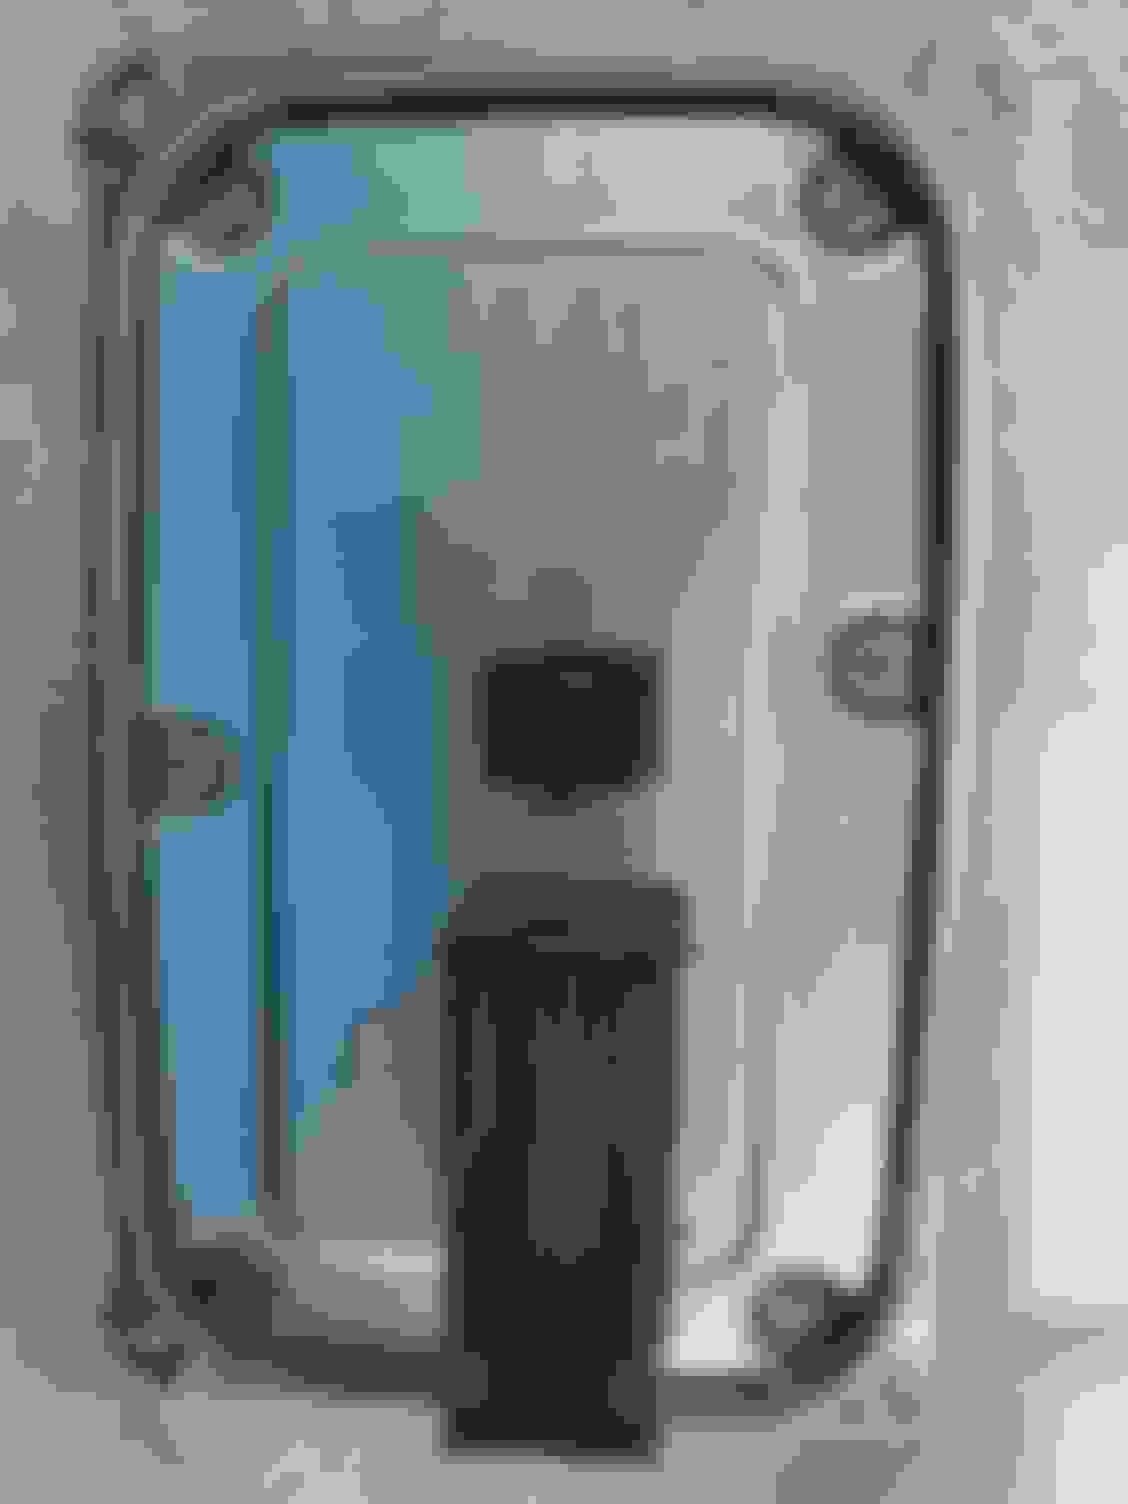
Aftermarket Headlight Module/Control Unit - Genuine module will say Continental, have a Mercedes logo and a QR code.
Aftermarket Voltage Regulator: See how it says Continent? I never noticed at first.
Originals say Continental, have a Mercedes logo and a QR code.
To install, follow the procedure for headlight removal in reverse.
Before you tighten down the headlight housings (and definitely before attaching the bumper), close the hood and make sure the headlights are not keeping it from closing all the way or that you have an excessive gap between the headlights/hood/fenders. I didn't think about this until after everything was buttoned up and had to take the bumper off again.
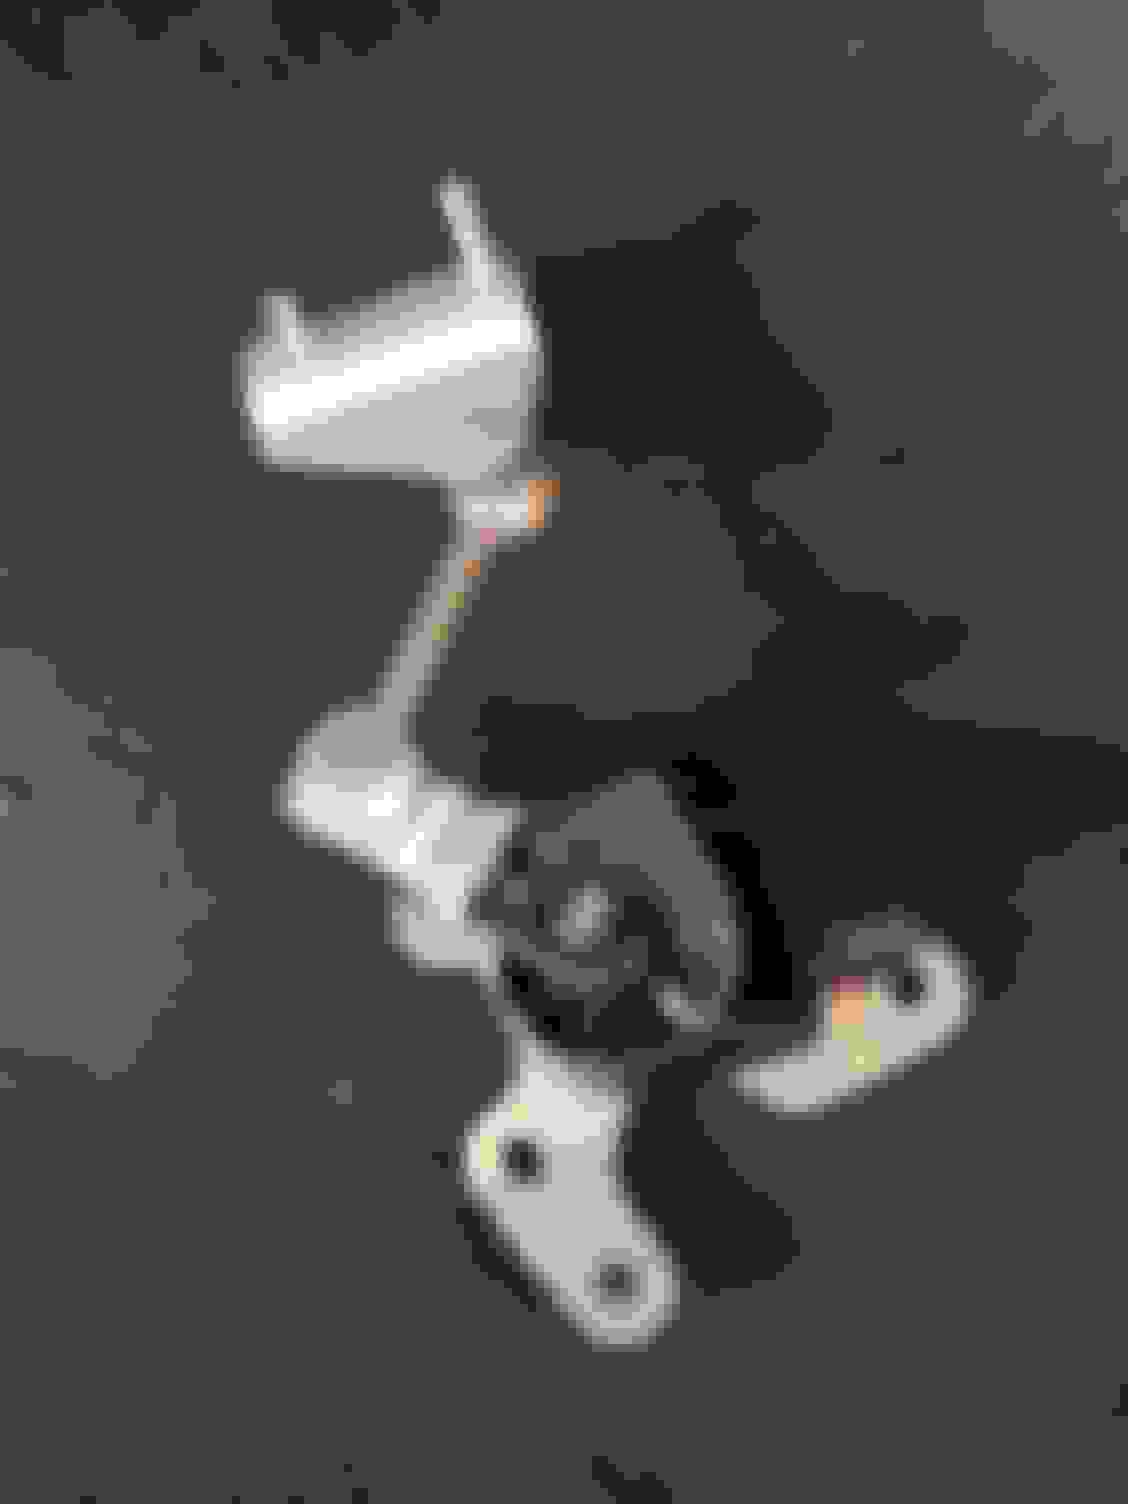
For this one, you will need to remove the front wheel (left or right, depending on which side you drive). There are already 2 threaded posts where the sensor bracket goes, so you'll only need to source 2 nuts (M6x1.0) to secure it.
Make sure that the sensor is positioned towards the inside, facing the engine compartment.
The arm and linkage should be towards the rear. Attach the securing bracket to the suspension control arm
Do not reinstall your wheel until you connect the cable harness to the height level sensor.
INSTALL REAR LEVEL SENSOR
You need to jack up the car and remove the left rear wheel. Connect the harness to the sensor. Then install the sensor with the bolt, nut and plastic rivet. finally, attach the arm bracket to the suspension arm with the other nut
This is the rear level sensor
Harness to sensor. The other end goes inside the wheel well behind the felt liner. You need to remove the snaps and pull the liner from the front (nearest the door). You will see 4 plastic plugs. IIRC, the plug will only fit into one of the slots.
Here you can see the rear level sensor installed. It's PITA - be patient.
INSTALL CABLE HARNESS
Find out which end of the harness has the height level sensor connector - use that end of the harness on the left side of the car (or the right if you are Right Hand Drive)
Connect the plug on the left side to the headlight connector on the car's harness
Connect the other plug to the headlight
Connect the plug to the height level sensor - I routed the plug and wire through where the ABS brake lines go down into the fender well. (I'll post a pic later)
Secure the ground wire to a good grounding point
Route the harness wiring towards the right side of the car (I routed it alongside the hood cable and zip-tied it along the way)
Repeat connections on right side.
A word on the harness: Although I was ultimately able to make it work, it did not include the wiring for the rear level sensor. The harness maker was completely uncooperative in providing any information on how to add the wiring for the rear sensor. I had to have the rear sensor wired separately by someone else. Unfortunately, I was out of town that work got done, so I have not idea how/where it was wired.
This is the wiring I was sent for the rear level sensor
Next will be some limited information on coding. I had it done remotely from Germany but what I can tell you is that it is a head-spinning, complicated process with many steps and half of it takes place in German. You need a STAR/DAS with C4 or C5 multiplexer with activated Xentry and Vediamo on the laptop. The laptop needs a Wi-Fi connection (the ethernet port is used for the multiplexer) and remote access software. In my case, I had to install Anydesk. Have your car battery fully charged and set aside a couple of hours to get this done. I'd strongly suggest keeping your laptop plugged in on AC power. I bought a complete Chinese system and after a couple of sessions, the software locked up (license expired). I had to pay the tech in Germany to re-install it for me.
The coding was done for my by Alexander Hallenberg in Germany - he can be found on Skype. I'm planning on having my VeDoc card updated this week and my understanding is that once the option code is changed from 632 (static LED) to 642 (ILS), everything will be scanned and coded again. So if you plan to update your VeDoc, it might be worth it to wait and avoid paying twice. Just know that your lights will be unusable (and the fans will run non-stop) until everything is programmed. Helpful to make your appointment ahead of time.
Another thing to keep in mind is that your chances of having a dealer do this are nil to none. I'm having it done by an independent. Apparently there are people on other forums that offer to do this remotely.
Since I have been working with different people, I have received conflicting information as to what should vs. can be done. I'll spare you the pains of the details but the most important thing I can filter for you is that some suggest not all capabilities can be activated without updating VeDoc. I'll confirm that soon. Lastly, I'm in no way endorsing any of the people/providers I have mentioned. I have had my scuffles with each of them and I know they have beefs among themselves but all in conjunction managed to help me complete my project.
At the start, the headlights will not work and will be doing all sorts of crazy things.
The first step is that the QR codes on the headlights need to be scanned. I've read that some use the ScanLife app to read the codes. I just took pictures and uploaded them on Skype and let the tech decode them.
Once the headlight information is extracted, the headlights are SCN coded to the car. Next the control modules need to be programmed to the headlights. From there, it was screen after screen of coding to activate all functions, add the proper ILS coding to the car and finally, some initial calibrating takes place for the level sensors and for aiming the headlights.
When all that is done, voila! welcome to ILS...
Last edited by EuroDriverSD; Oct 20, 2020 at 09:25 PM.
Great writeup of headlight retrofit, I�m also in a DIY project converting my prefacelift w212 to facelife with ILS full LED system. You mentioned in your thread that SAM need to be wire for prefacelift version. Do you have any information about this or any website you could redirect share with? I have been researching for this but I could not find it. Some says a new Sam is needed.
besides do you have any luck with the programming part?
cheers
So what is the rear height sensor is for then on mine ? Curious.
My car has the dyamic headlight and has front and rear height sensor and I dont have air suspension and mine is a RWD.
MackHack is also doing the same retrofit for dynamic LED and asking for rear sensor height location https://mbworld.org/forums/e-class-w...ht-sensor.html
2016 E350 Sport; Mom Wrecked the 2008 E350; sold the 2002 C320
UPDATE:
After nearly a year to the date working on this project, I can finally say with confidence that this 100% works.
I ran into a lot of issues working with different people that only knew how to do part of the work. I did need to install the rear level sensor and wire the car for it. Another problem that I ran into was that I was sold aftermarket control modules and voltage regulators that added an entire new set of errors and confusion. I ended up having to do and pay for a lot of work twice because of this. Finally this morning, I had the car re-coded one more time and everything is working, all the error codes are gone.
Final step is later this I will be taking the car in to have VeDoc updated. Hopefully that will be the last thing to complete the project. Although I do not believe it is necessary, I'm going to get it done.
In the next few days I will be updating the original post to include the remainder of the parts list and procedures.
2016 E350 Sport; Mom Wrecked the 2008 E350; sold the 2002 C320
Originally Posted by S-Prihadi
Sweet !!!! EuroSD , thank u.
So what is the rear height sensor is for then on mine ? Curious.
My car has the dyamic headlight and has front and rear height sensor and I dont have air suspension and mine is a RWD.
MackHack is also doing the same retrofit for dynamic LED and asking for rear sensor height location https://mbworld.org/forums/e-class-w...ht-sensor.html
I'm pretty sure he was asking about this for my car - he did some of the wiring for me
This is so cool you figured it out and are willing to share. I'm looking forward to your revised DIY steps. Hopefully you can go into where you got the parts.
2016 E350 Sport; Mom Wrecked the 2008 E350; sold the 2002 C320
Originally Posted by chongkkmy
Good Day EurodriverSd,
Great writeup of headlight retrofit, I�m also in a DIY project converting my prefacelift w212 to facelife with ILS full LED system. You mentioned in your thread that SAM need to be wire for prefacelift version. Do you have any information about this or any website you could redirect share with? I have been researching for this but I could not find it. Some says a new Sam is needed.
besides do you have any luck with the programming part?
cheers
Hi Chongkkmy,
I do not have any experience with the pre-facelift model but my understanding is that the SAM does not need to be replaced. Check out this video:
2016 E350 Sport; Mom Wrecked the 2008 E350; sold the 2002 C320
Originally Posted by NewShockerGuy
Awesome read! Quite a bit different and more involved than the w211 platform ehh...lol!
Wonderful contribution!
-Nigel
Oh yeah! Gone are the days of purely true DIY on a reasonable budget. Although my creaking body is appreciating the change, I truly miss the old-school stuff.
2016 E350 Sport; Mom Wrecked the 2008 E350; sold the 2002 C320
Write-up is now complete!
I will be adding some minor details after I have my VeDoc card updated but everything you need is now posted for anyone who dares embark on this venture.
Final thoughts - this turned out to be way more expensive than I ever imagined. Granted, being the guinea pig - I spent a lot more money than was necessary because I had to do several things twice (thanks to incomplete harness, coding several times over, and having to buy modules & voltage regulators twice). To me, this was an OCD-laced labor of love but it would definitely me more cost effective to buy a car with the ILS option factory-included.
Now if you still want to go for it, I'd love to hear your experience.
Last edited by EuroDriverSD; Oct 20, 2020 at 09:47 PM.
hello, today i changed control module of right led headlight, but daylight makes a mistake and when a start the engine it get off. I coded it but without QR code. Is it possible to do this /not to shine in startet engine/ because of not coded with QR code of the headlight ?There is a message "bad comunication"or somethin else.
I will be adding some minor details after I have my VeDoc card updated but everything you need is now posted for anyone who dares embark on this venture.
Final thoughts - this turned out to be way more expensive than I ever imagined. Granted, being the guinea pig - I spent a lot more money than was necessary because I had to do several things twice (thanks to incomplete harness, coding several times over, and having to buy modules & voltage regulators twice). To me, this was an OCD-laced labor of love but it would definitely me more cost effective to buy a car with the ILS option factory-included.
Now if you still want to go for it, I'd love to hear your experience.
This kind of write up is why I'm on the forum - thank you for the level of effort and details that you shared.
In fact, I have a 2018 C190 AMG GTC Roadster and I want to update the headlights to the more recent design. If I am reading your extensive work, a lot had to do with adding adaptive features along with the coding etc. The GT has had the same lighting options across earlier models (self leveling LEDs, auto high beams etc) - the form factor is the same and the plugs etc, much like what you have done. Would it be your guess that in the case of what I am trying to do, it would be a matter of the QR codes for the lighting to get the headlights SCN alpha numeric coded to the car and then mapping the control modules to the headlight functions?
Like you, I am purchasing everything from Mercedes to ensure OEM, but I am using a refreshed headlight that went through an esthetic design change in 2020 (it remains functionally the same).
It would be great to leverage any of your learnings for my retrofit if thats possible!
現在,如果您仍然想要這樣做,我很想听聽您的經驗。[/ QUOTE] Hello, my w212 was also changed to iL in the early days, but I did not install the level sensor and programmed it. The headlights are normal, but after driving for a few hours, I stopped the car and turned it on again. The headlights did not light up. It took a few hours before they turned on again.
Last edited by Tommy Wong; Jan 17, 2021 at 10:24 PM.
2016 E350 Sport; Mom Wrecked the 2008 E350; sold the 2002 C320
@Skilly - I can't tell you whether in your case it would simply be a matter of coding. In my case, there was rewiring that also had to be done.
@kenneyd - I did not do the coding myself - I had it done remotely from Germany. The local guy who did my wiring monkeyed with it afterwards and I ended up having to pay twice for the coding
I got it working - it was done via Mercedes Engineering Software and @emre952 worked complete magic. On top of that, I was able to get my local Mercedes dealership provide me wiring diagrams for added ground and power leads for the updated lighting.
I did the complete facelift conversion now on a W212 MY10 E63 AMG. The conversion is a really big job and need huge knowledge. But at the end the car is done and all functions are working even high beam assist and traffic sign recognition. PM me for details and help! I can support this conversion and much more in Germany; Elckridge, Maryland and Campbell, California.
I did the complete facelift conversion now on a W212 MY10 E63 AMG. The conversion is a really big job and need huge knowledge. But at the end the car is done and all functions are working even high beam assist and traffic sign recognition. PM me for details and help! I can support this conversion and much more in Germany; Elckridge, Maryland and Campbell, California.
Hi I just sent a message to you, trying to do the same, and having communication issues with headlight modules. If you can help please contact me. Thank You
I am very happy and admire a great deal to see how hard working you guys are in this conversion
I feel ya boys.
Me too is trying to do a headlight project, but since I already have the 641 ILS LED, my goal is to get the CAN BUS message for Low Beam and High Beam, so that I can add extra driving lights
I have contacted 3 suppliers who specialized in selling a module where a High Beam command on the CAN BUS is intercepted and translated to a relay output to turn on extra driving lights.
Big names they are the canM8 is well known in UK, when I asked and explained that I have the fancy 641 ILS LED, they never dared/bother to reply back even after twice I emailed them.... LOL bloodiey hell, I feel so sad.
01. https://www.canm8.com/can-bus-interf...-highbeam.html
02. https://shop.speedsignal.de/en/signa...edes-2706.html
03. https://www.safiery.com/canbus-trigger
That made me wanna learn of CAN sniffing..... its going to take a lot of time and extra $$ compared to buying a ready to use module, but I guess it will be the pleasure when and if I can ever sniff the correct command.
I tried the Arduino + CAN-Bus shield V2 sniffer, but I guess it is not powerful enough. 103 to 107 messages at all times at CAN E2 where the headlight CAN BUS is at... none of them messages show changes towards
the high beam activation. Very busy data at CAN E2.
Hi I just sent a message to you, trying to do the same, and having communication issues with headlight modules. If you can help please contact me. Thank You
I am doing the same, can someone help me a bit with what's needed. I have a 2011 E550 with intelligent headlight and want to retrofit it on 2013-2015 ILH headlights.
Mercedes SLR McLaren 722 S Is Extremely Rare Example Modified by McLaren
Slideshow: A one-of-one U.S.-spec Mercedes-Benz SLR McLaren Roadster became even rarer after a factory-backed transformation at McLaren's headquarters.