When you click on links to various merchants on this site and make a purchase, this can result in this site earning a commission. Affiliate programs and affiliations include, but are not limited to, the eBay Partner Network.
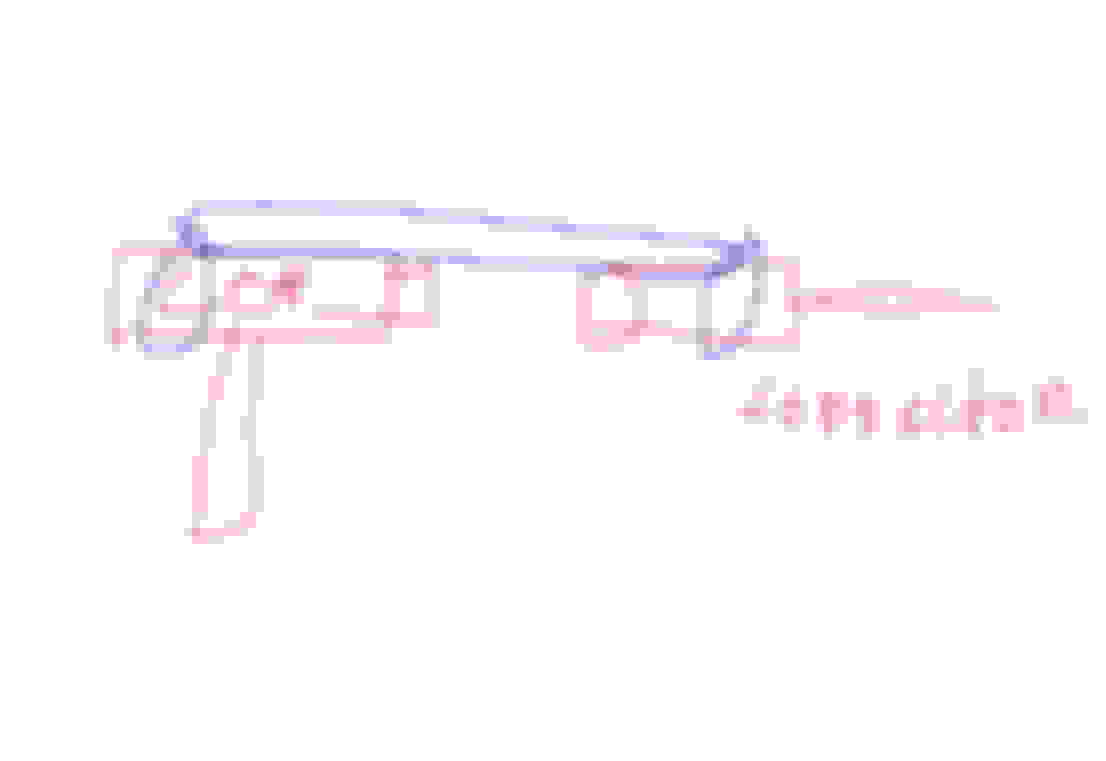
Well that grey lock is a seconday lock to the 1st black latch/lock.
Grey prevent black from being able to lift up and release the connector from COP.
Use cable tie, 3 pcs. Make 1 loop at COP and make 1 loop at connector.
These 2 cable tie is then looped by a third cable ttie. So movement not possible.
very ugly drawing...sorry
I use this method often as added security for some application.
I finally figured this out. Turns out there's a secondary lock for each terminal that needs to be lifted in addition to the primary lock on top and bottom of each terminal.
Hopefully you can see the secondary lock lifted in this picture. I marked in red where you'd need to insert the single blade to lift that secondary lock.
Sweet !! Good info , thank you.
So the connector housing itself has a lock, not only the 2 metal tounge of the terminal.
Such a unique 3 prong tool. I may need to get one...he he he he.
I bought 200 MLK 1.2 terminals male & female from Deytrade Jan of 2022.
Their price is very good.
Via German Post, slow but okey.
AMG GLC43, Audi A4, Ferrari 360, MG MGA, Ferrari F355CH
Hi guys, I had this issue with replacing my coil packs and two of the black pieces flew out before I figured out how to use the toothpick trick. With the toothpick and a tiny amount of teflon lube spray before unlatching the remaining connectors came out by hand with no effort.
But for the 2 that are now latching back in but not really holding tight is there a possibility to replace the inner black piece inside the connector without touching/altering the harness and swapping the *entire* connector?
Thank you all!
U mean the 2 black pieces I marked in green below ?
If they are the ones you meant, you must buy new connector assy. No other way.
That is a very important secondary lock.
ohh ....that is the main lock for connector to be able to stay good and secure to the COP side connector . That one if damage/broken, you must buy new connector .
You can buy from MB direct. The MB P/N should be there, it is made by KOSTAL.
Or buy from here : https://www.ecstuning.com/b-genuine-...ng/0005458912/
AMG GLC43, Audi A4, Ferrari 360, MG MGA, Ferrari F355CH
Thank you so is it just a matter of pushing back the pins from the old connector and swapping in the new one?
What is the best tool to use to push back the pins, is there a definite link? I do not want to screw up the harness or need to re-crimp/re-solder pins...
I found this -- is there anything simpler/cheaper that works good?
The SLK 2.8 terminal locking ear or latch, or whatever it is called, is wide. That is the problem for the removal tool, as it is not an easy shape to make cheap or from a single piece metal.
You seems to have not read the link I given you at last post, I too gave up trying to get a low cost version : https://mbworld.org/forums/e-class-w...ning-tool.html
You best also get something low cost from China as general push tool, example to pry that 4 small plastic latches-lock at each female terminal cavity,
See post #54 for its general useful-ness https://mbworld.org/forums/e-class-w...ml#post8840108
Yes, I have those low cost multi shaped de-pinning tools. They break and bent easy.
They are decently useful on certain connectors but it can not be used with confidence as primary tool
Last edited by S-Prihadi; Oct 3, 2023 at 07:55 PM.
please share what the tooth pick trick is. I have 4 of 6 off. Seems like I am spending about an hour on each to get connector off coil pack.
Originally Posted by dantm2000
Hi guys, I had this issue with replacing my coil packs and two of the black pieces flew out before I figured out how to use the toothpick trick. With the toothpick and a tiny amount of teflon lube spray before unlatching the remaining connectors came out by hand with no effort.
But for the 2 that are now latching back in but not really holding tight is there a possibility to replace the inner black piece inside the connector without touching/altering the harness and swapping the *entire* connector?
I broke the black plastic tab on one of the connectors while changing out the coils/spark plugs on my GLC43 M276 engine. Bought a new connector listed above, along with the cheap pin removal tool listed above from Amazon.
After 15min trying to use the Amazon tools, I couldn't get the wires out. They cheap tool didn't fit inside the connector, and the tool isn't wide enough to press down the retention pins compared to the expensive German tool. Also, there's 3 pins holding the inside (two on the top and bottom near the tip of the connector, and one that latches onto the larger tab shown in above posts), and I couldn't depress them all at the same time.
So to get the job done without ordering and waiting for the proper tool, I just cut the plastic around the connector carefully with some small wire cutters. Once the large plastic tab is lifted, broken off, and a little more plastic cut away, the wires easily come come out. I pushed them into the new connector and everything is fixed. Took less time than trying to figure out how to depress all 3 pins. Use this method at your own risk.
Two of the wires already taken out and put into new connector. The remaining outer circular housing of connector cut off to get access to the other two wires. Large tabs lifted up.
Large tabs broken away but just continuing to lift them up, they break off easily.
A little more plastic bits that holds the locking tab for the wires carefully cut away. There's enough room now to lift the wire up slightly and free the tab on the other side, and the wires easily slide out.
Wires removed and ready to push into new connector. (Pic was taken after the first two wires were removed.) The scratches in the connector at the tip of the red wire are from attempts to get the wire out using the cheap Amazon tool
Good work. If you ever need the terminal disconnect tool again you can borrow mine lol. I would be too scared to cut it open knowning I might mess up and cut the wire.
Mercedes SLR McLaren 722 S Is Extremely Rare Example Modified by McLaren
Slideshow: A one-of-one U.S.-spec Mercedes-Benz SLR McLaren Roadster became even rarer after a factory-backed transformation at McLaren's headquarters.